![Digimon UP Tier List [Supports, Buddies, and Partners]](/wp-content/uploads/2026/07/digimon-up-tier-list.jpg "Digimon UP Tier List [Supports, Buddies, and Partners]")
Digimon UP Tier List [Supports, Buddies, and Partners]
These Digimon will get you UP the leaderboard.


![Haze Seas Boss Drops [Chances, Locations, and How to Spawn]](/wp-content/uploads/2026/07/haze-seas-boss-drops.jpg "Haze Seas Boss Drops [Chances, Locations, and How to Spawn]")

Welcome to the Haunted Past: Realm of Ghosts Collector’s Edition walkthrough on Gamezebo. Haunted Past: Realm of Ghosts Collector’s Edition is a Hidden Object Game played on the PC created by Gogii Games. This walkthrough includes tips and tricks, helpful hints and a strategy guide on how to complete Haunted Past: Realm of Ghosts Collector’s Edition.
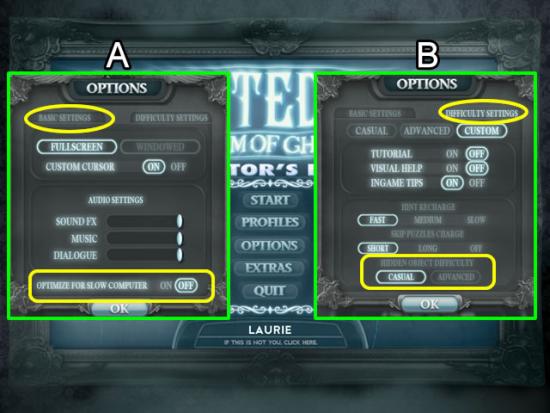
Welcome to the Haunted Past: Realm of Ghosts Collector’s Edition walkthrough on Gamezebo. Haunted Past: Realm of Ghosts Collector’s Edition is a Hidden Object Game played on the PC created by Gogii Games. This walkthrough includes tips and tricks, helpful hints and a strategy guide on how to complete Haunted Past: Realm of Ghosts Collector’s Edition.
This hidden object game requires visiting several locations and using inventory items to advance play.

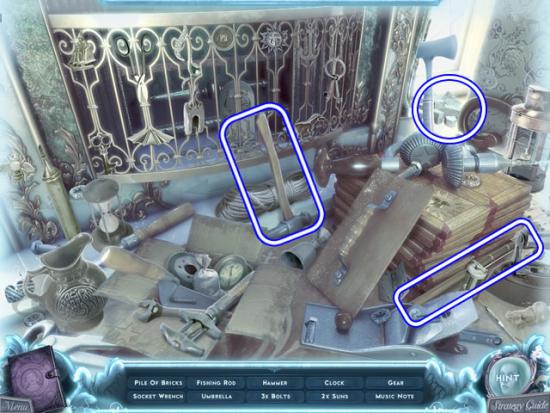
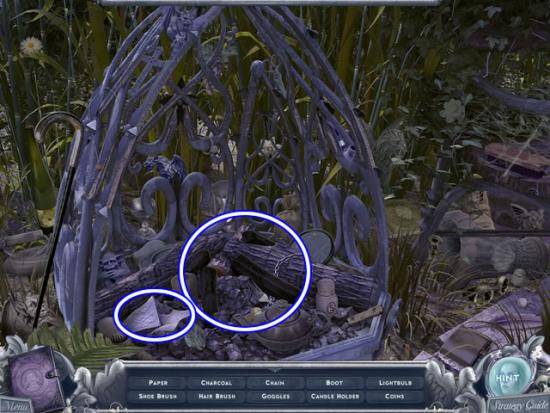
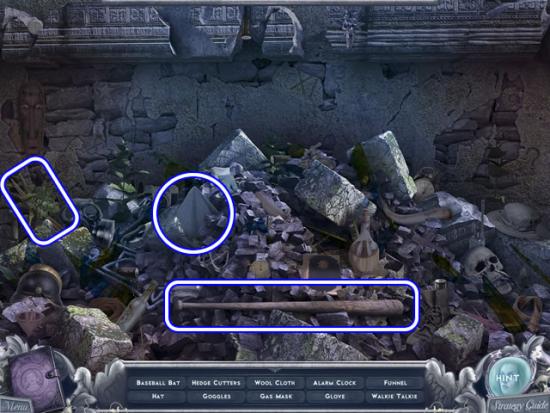
The Carriage
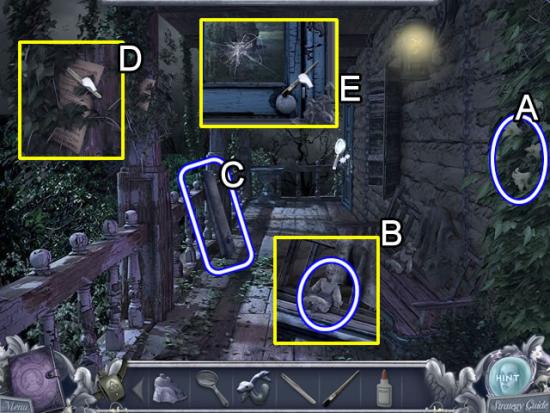
Front Walkway
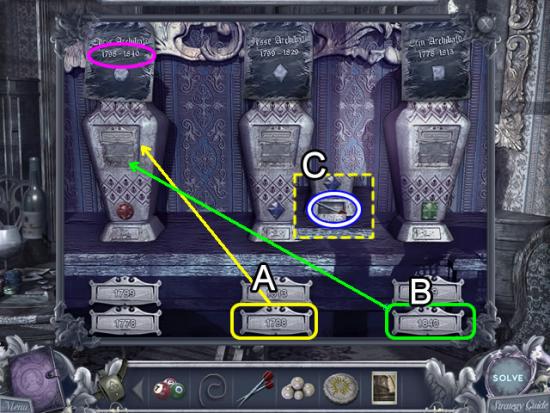
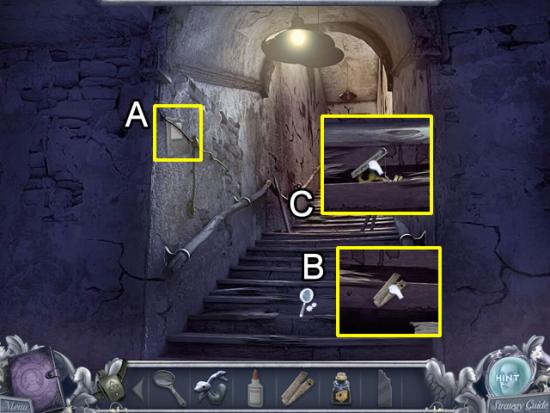
Main Entrance
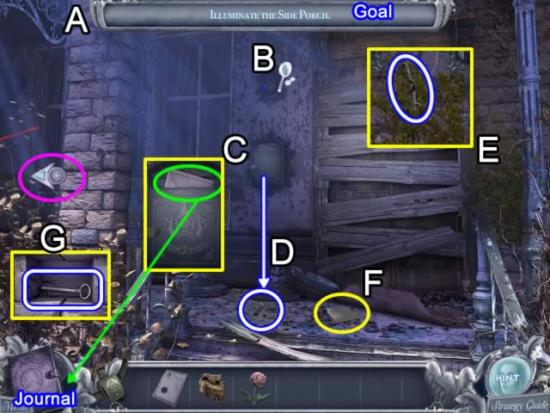
Side Porch
Front Walkway
Side Porch
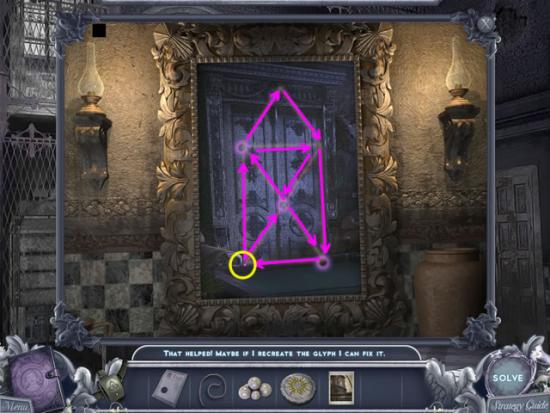
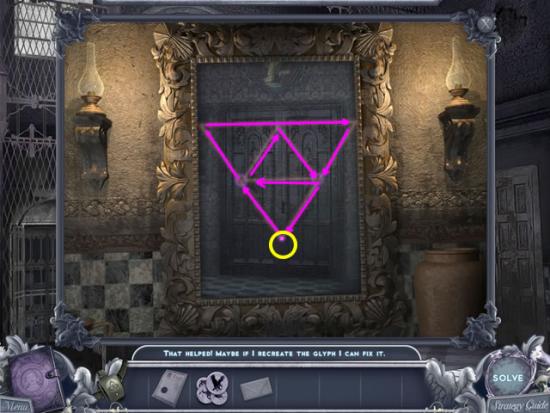
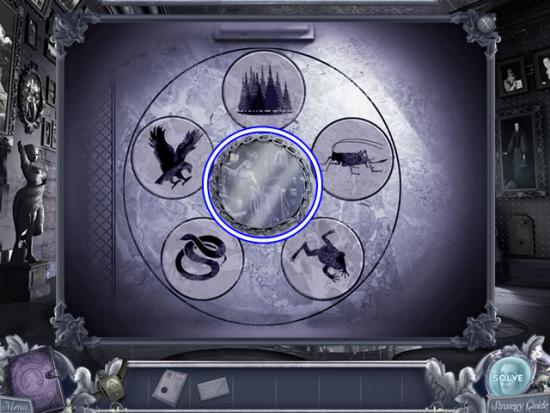
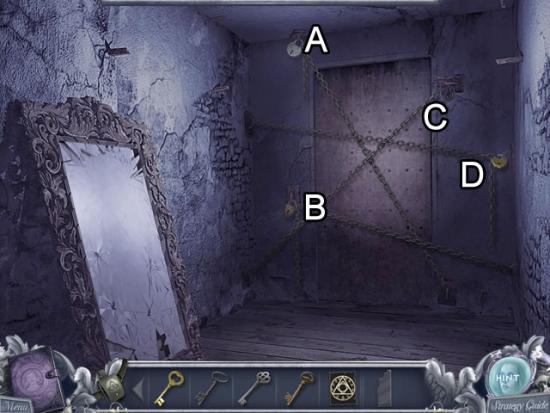
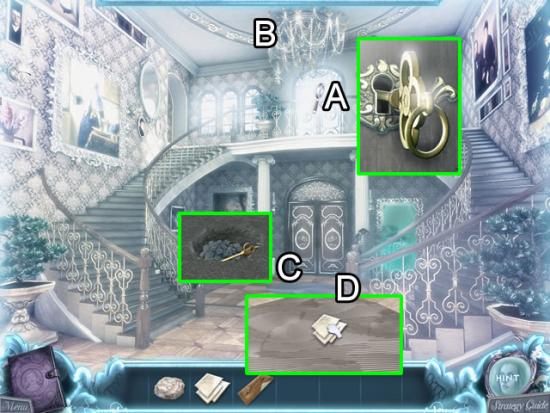
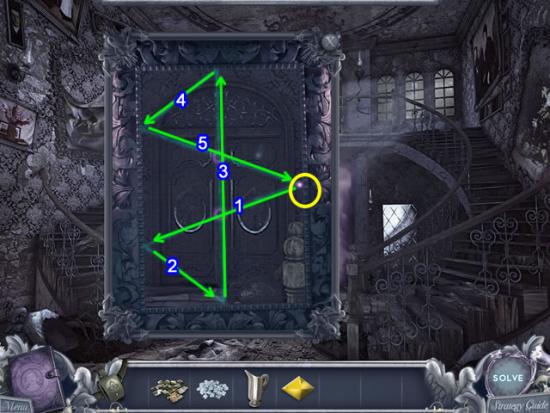
Entrance Hall
Entrance Hall – Ghost Realm
Entrance Hall
Side Porch
Front Walkway
Entrance Hall
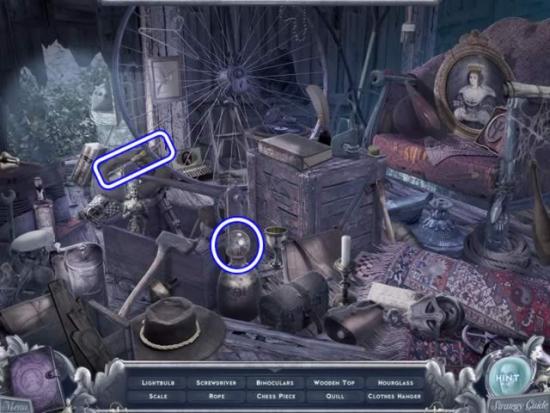
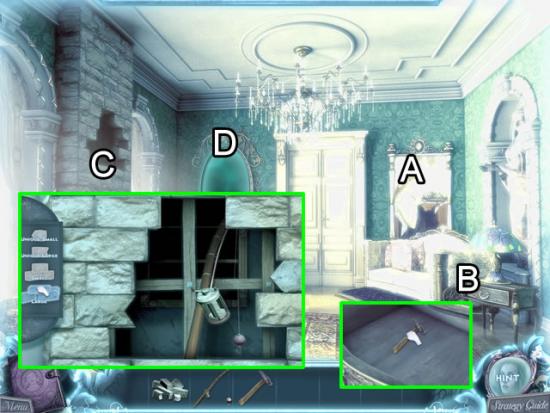
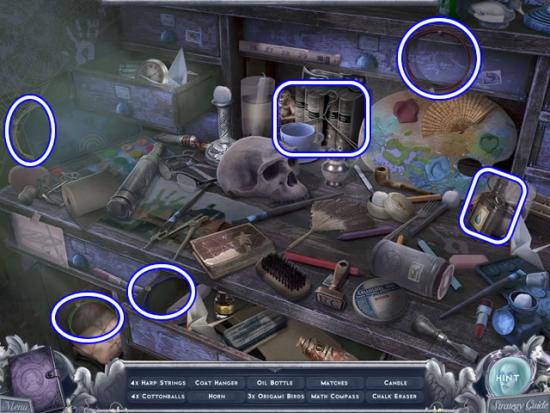
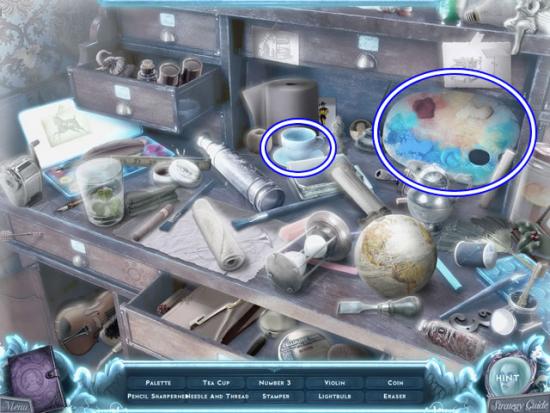
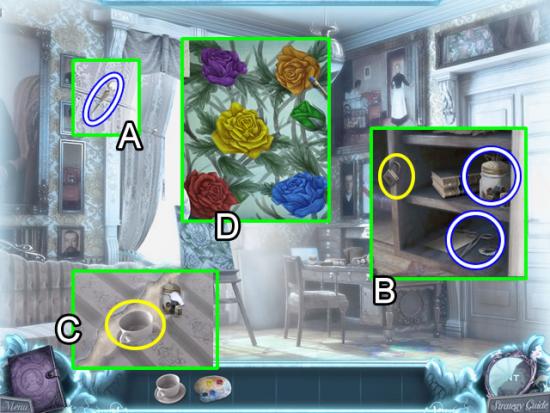
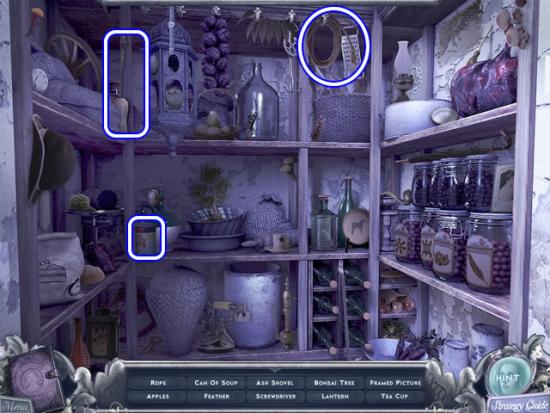
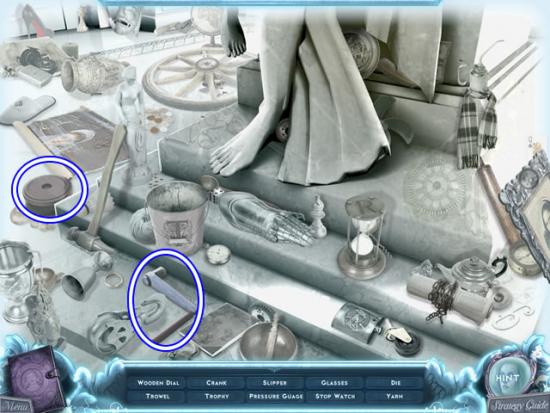
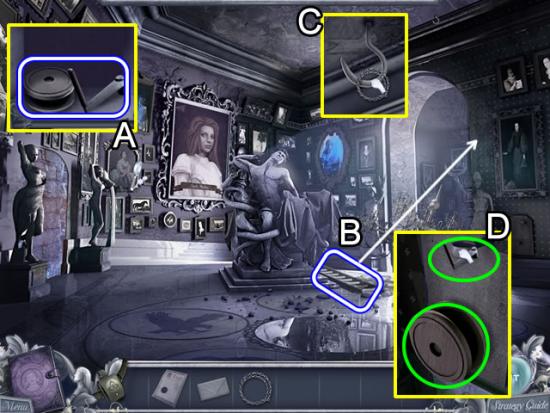
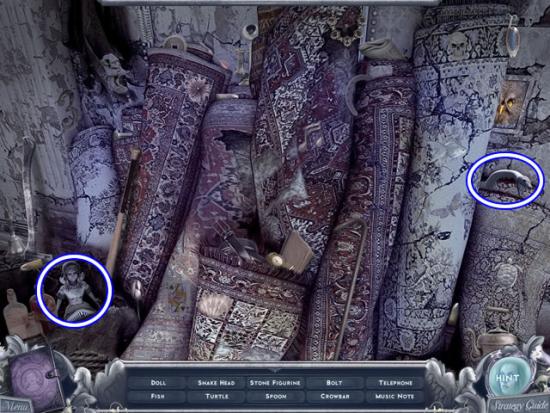
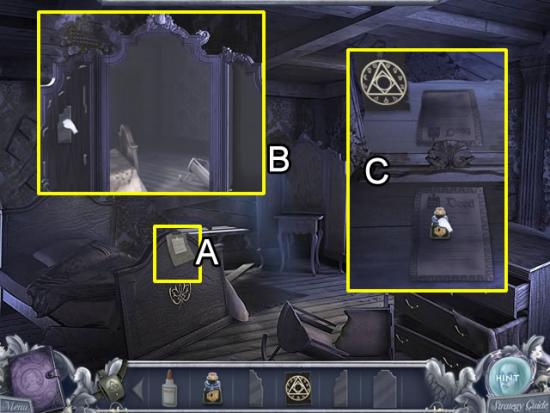
Art Studio
Side Porch
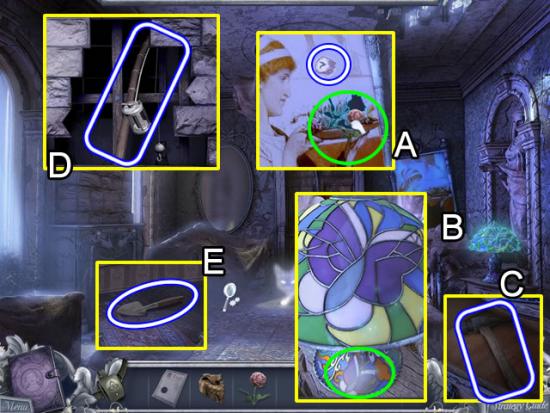
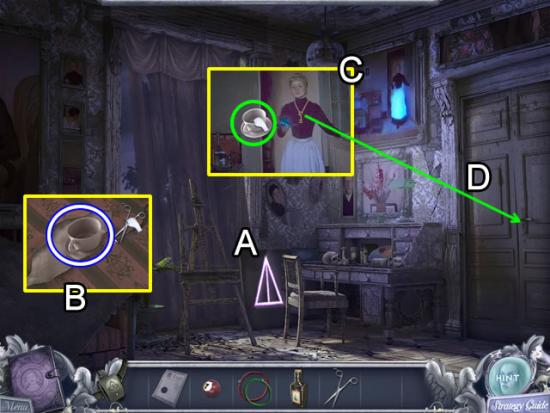
Art Studio
Art Studio – Ghost Realm
Art Studio
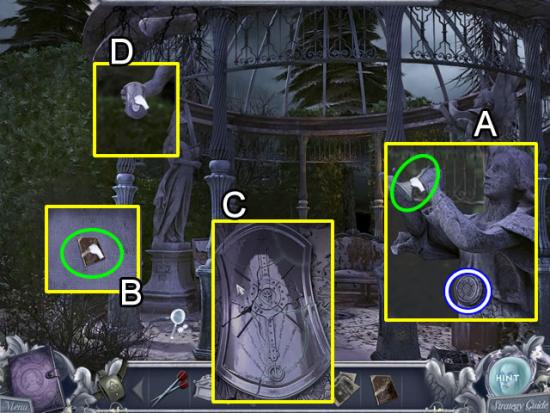
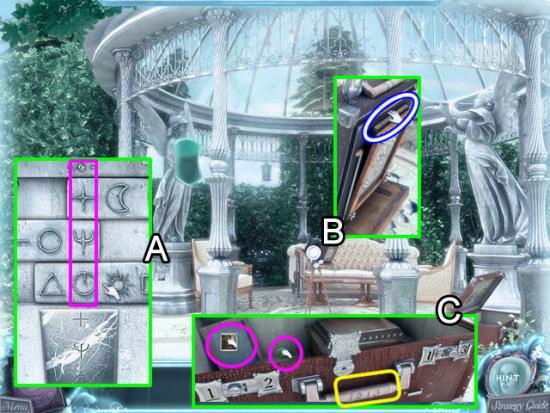
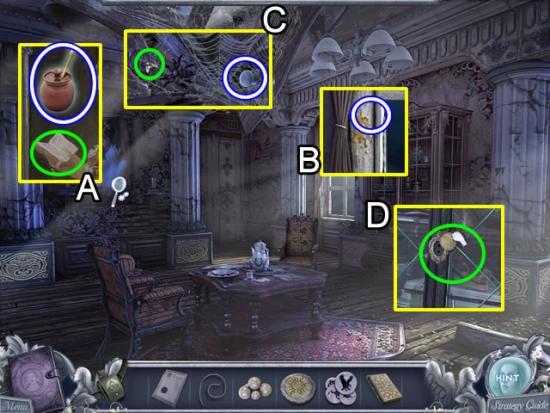
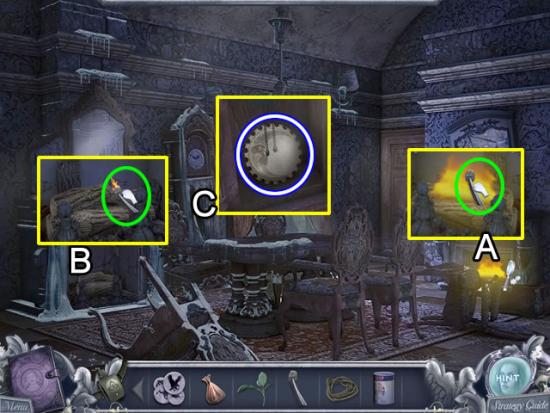
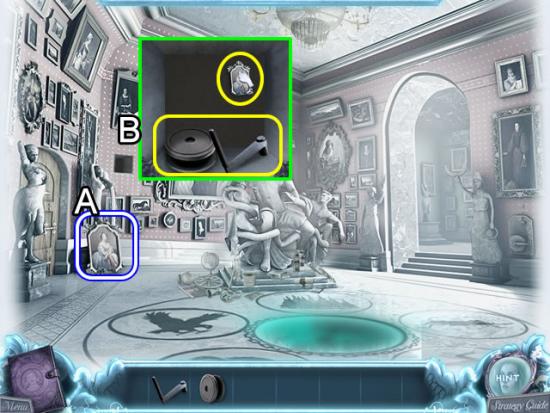
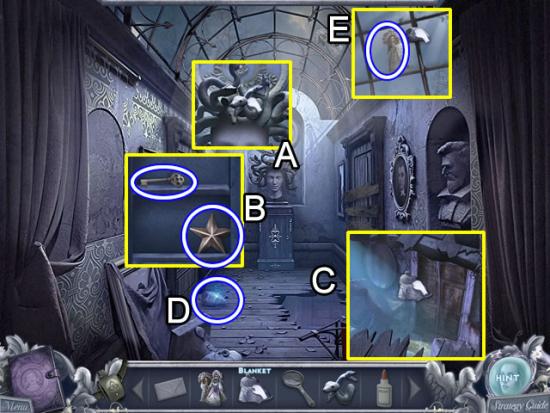
Atrium
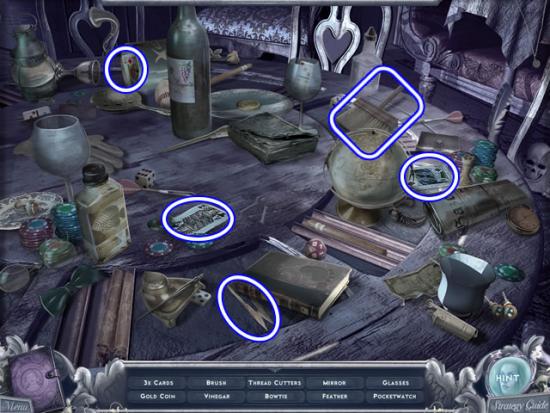
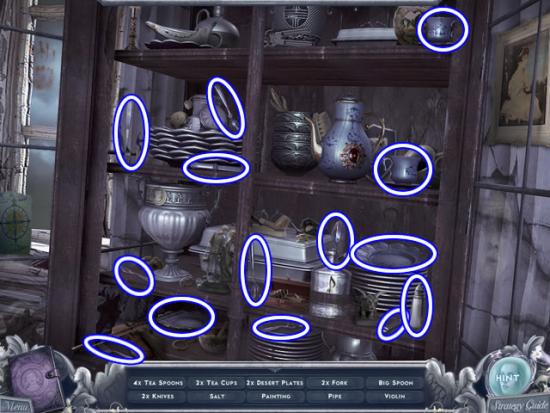
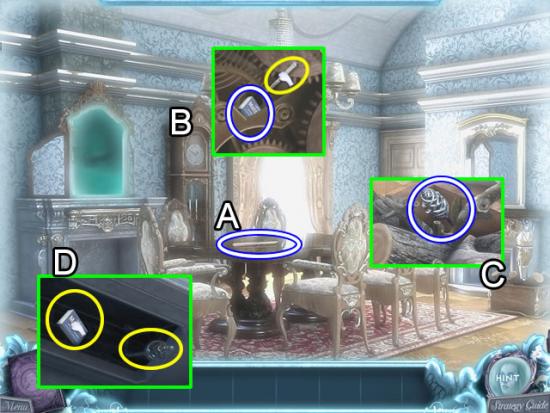
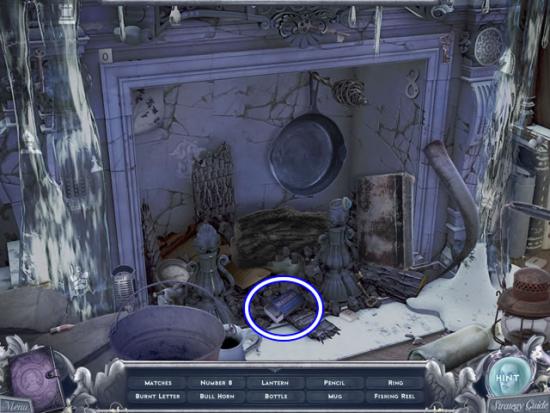
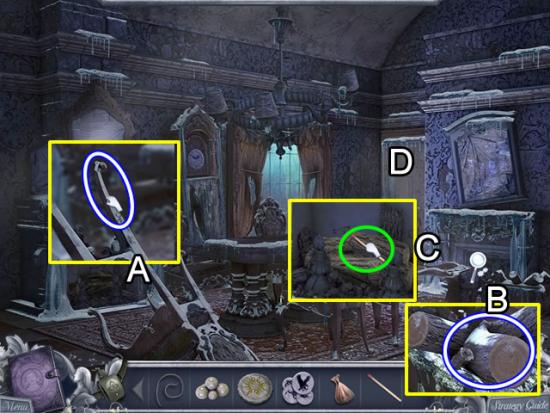
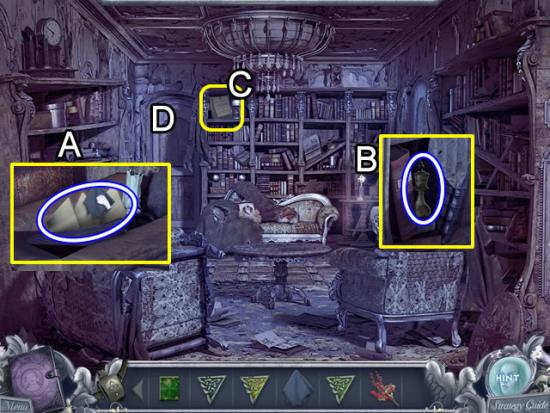
Parlor
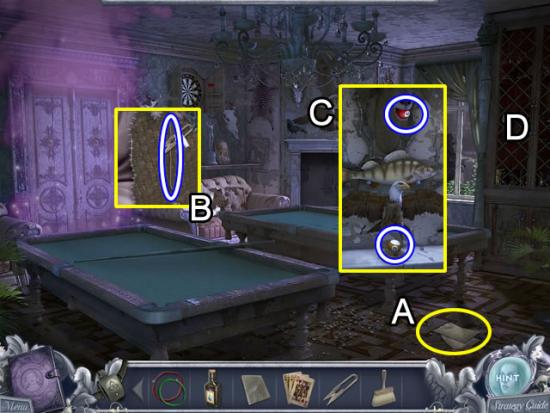
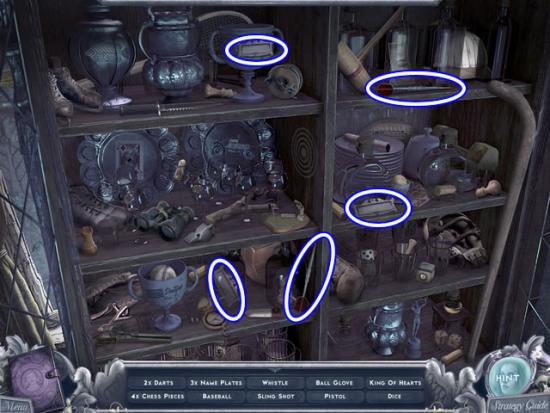
Billiard Room
Parlor
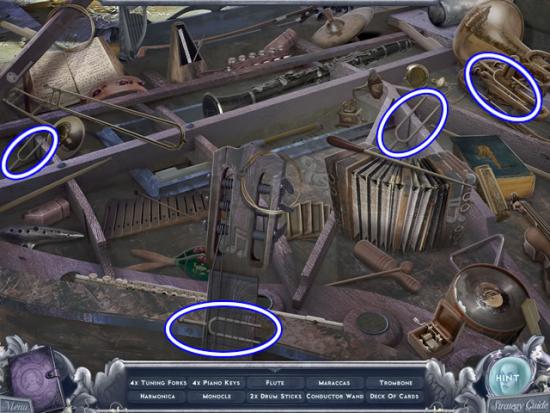
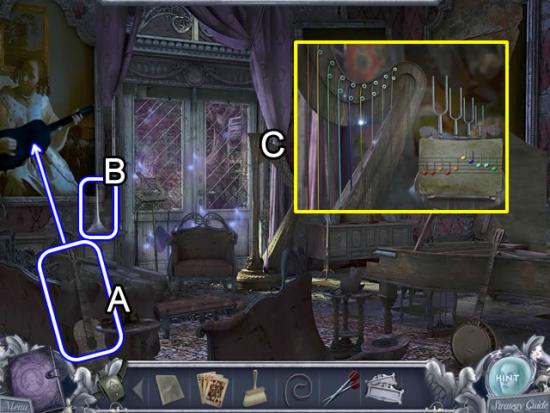
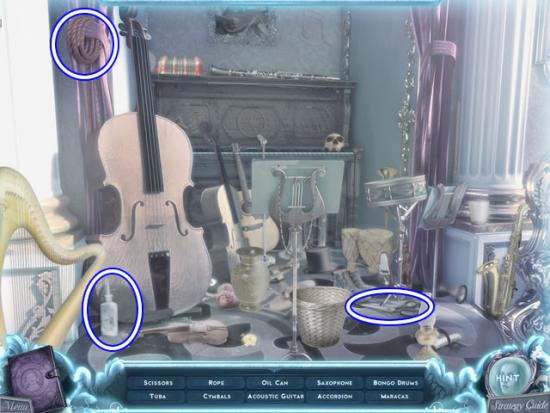
Music Room
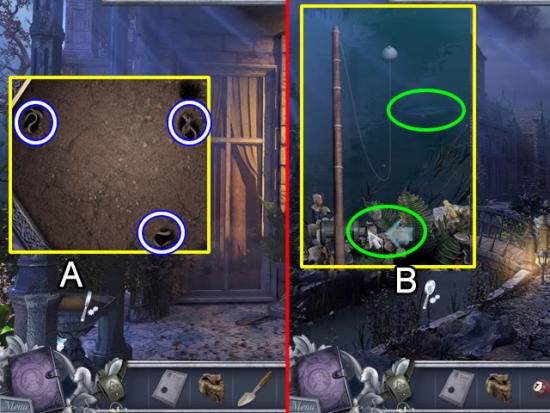
Courtyard
Courtyard – Ghost Realm
Courtyard
Garden Path
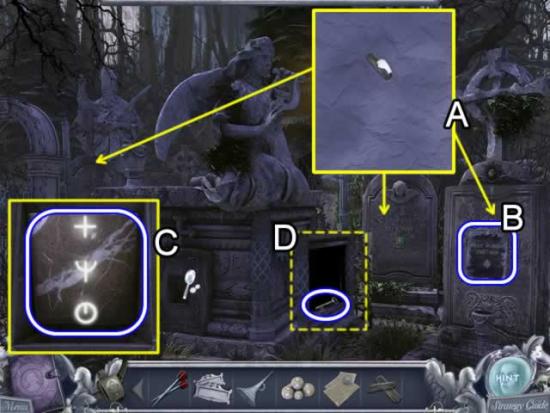
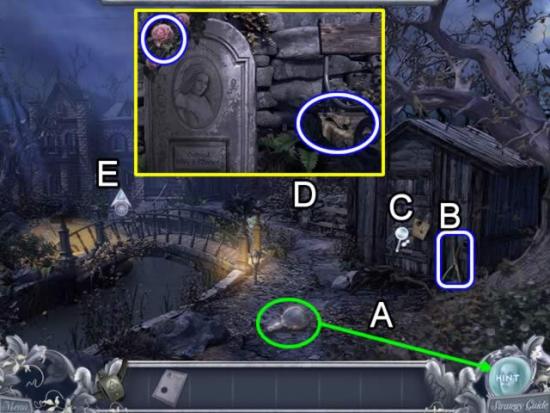
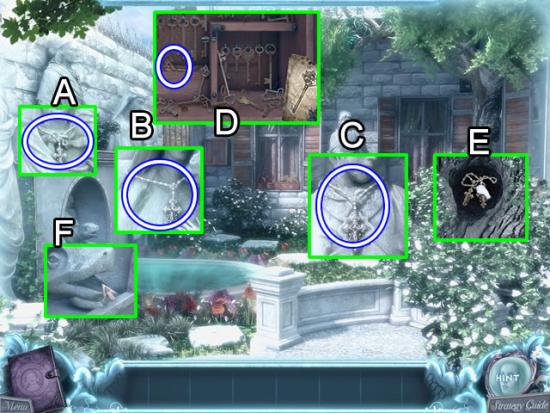
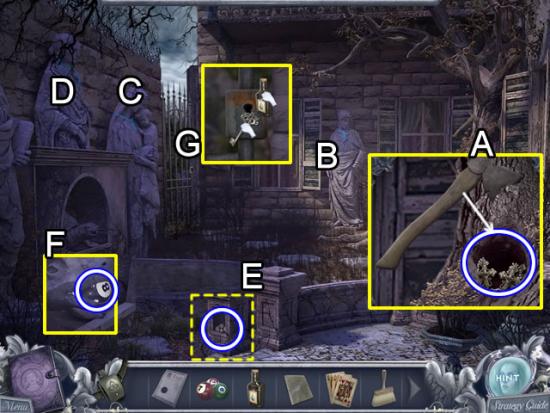
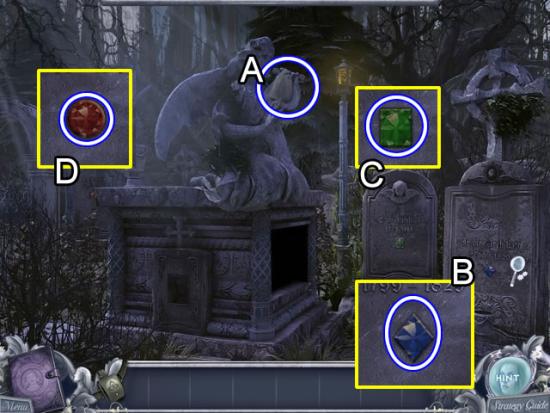
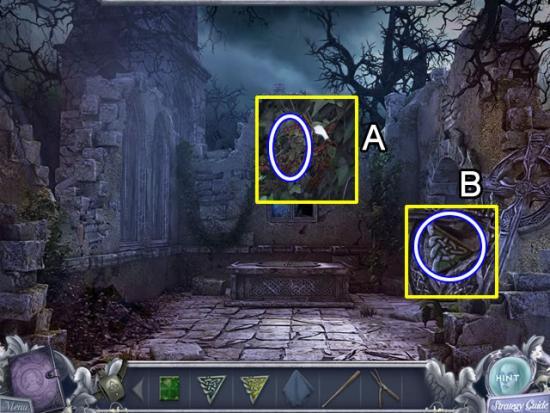
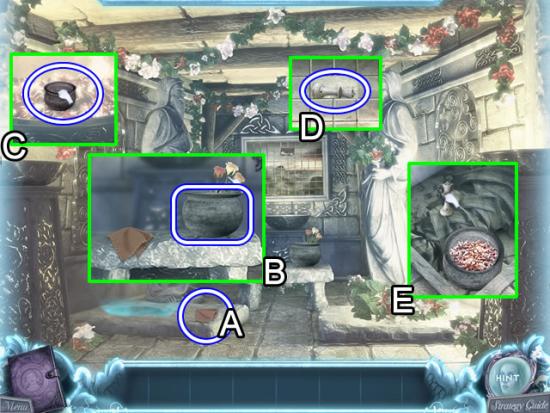
Family Cemetery
Garden Path
Hedge Maze
Hedge Maze Center
Hedge Maze Center – Ghost Realm
Hedge Maze Center
Parlor
Billiard Room
Atrium
Tea Room
Tea Room
Dining Room
Dining Room – Ghost Realm
Dining Room
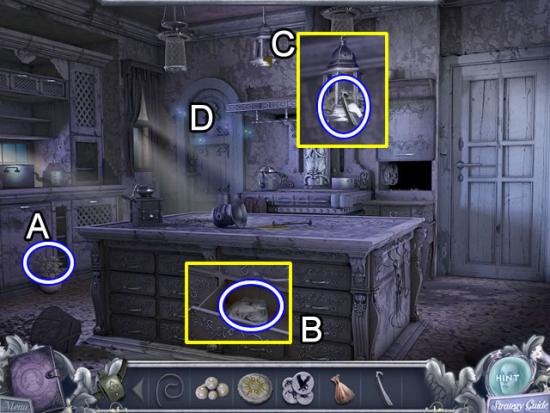
Kitchen
Dining Room
Servant’s Stairs
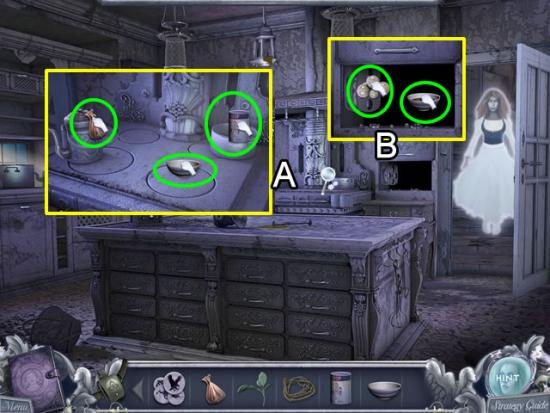
Kitchen
Servant’s Living Room
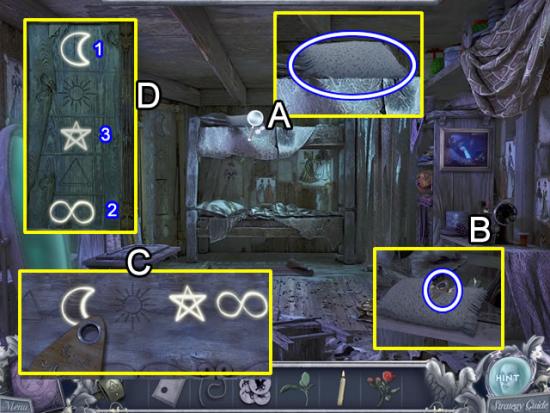
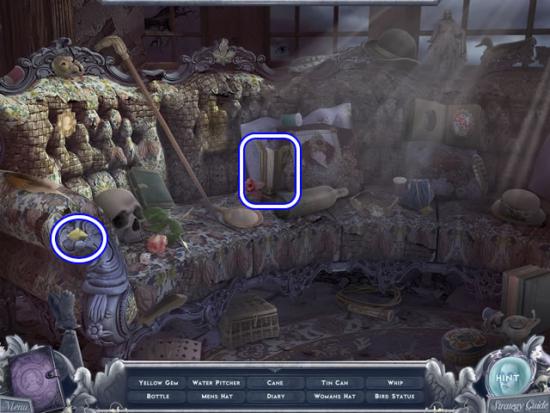
Servant’s Bedroom

Servant’s Bedroom – Ghost Realm
Servant’s Bedroom
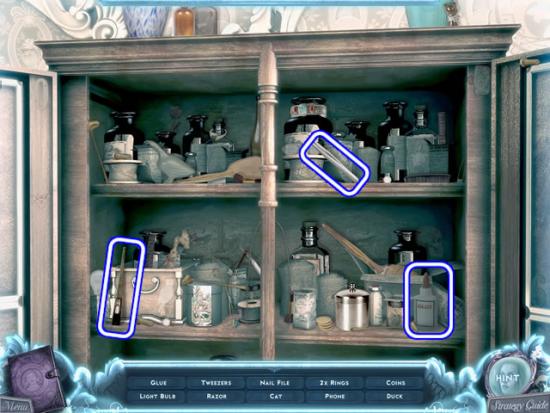
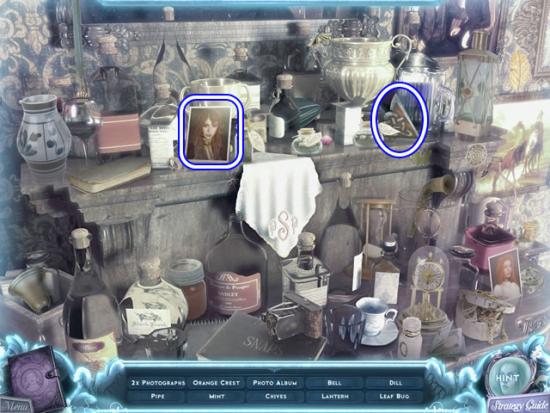
Darkroom
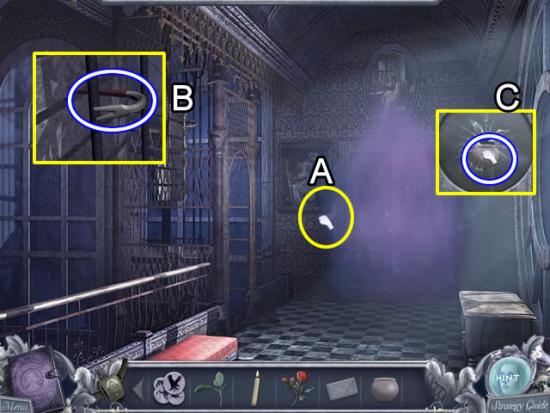
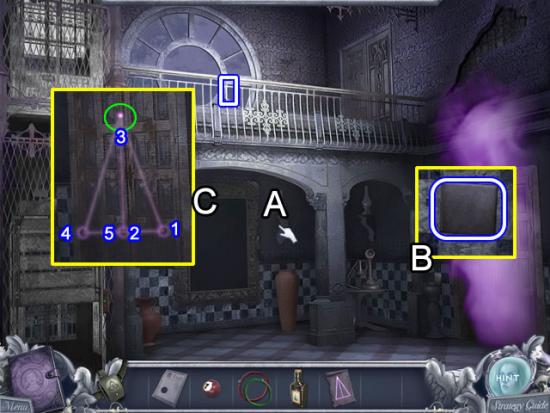
Atrium Balcony
Servant’s Bedroom
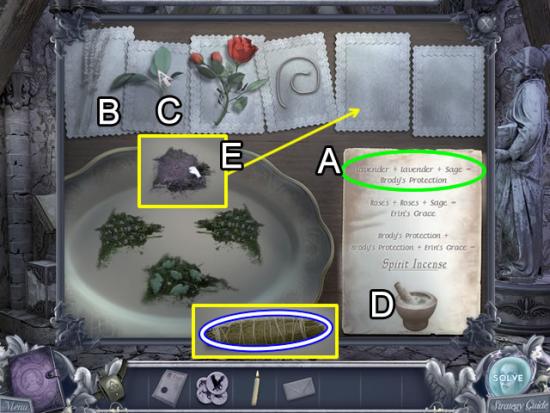
Darkroom
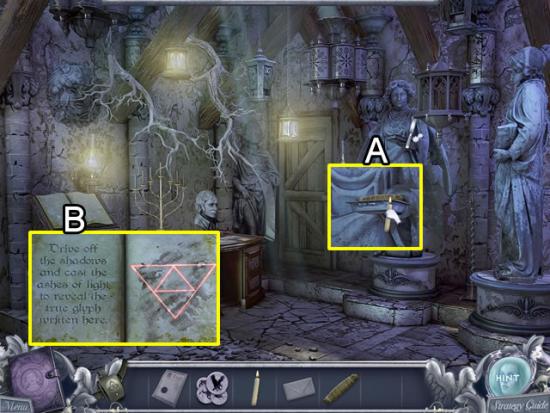
Atrium
Art Gallery
Art Gallery – Ghost Realm
Art Gallery
Hallway
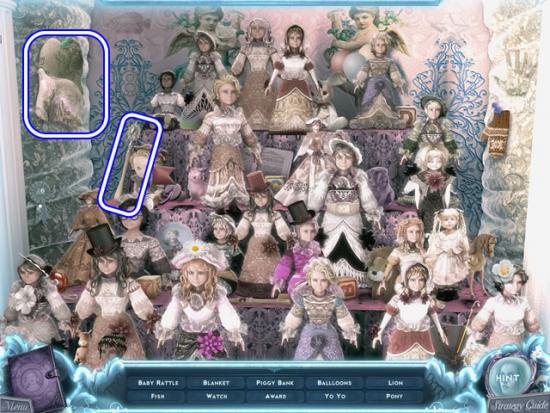
Nursery
Bathroom
Nursery
Nursery – Ghost Realm
Nursery
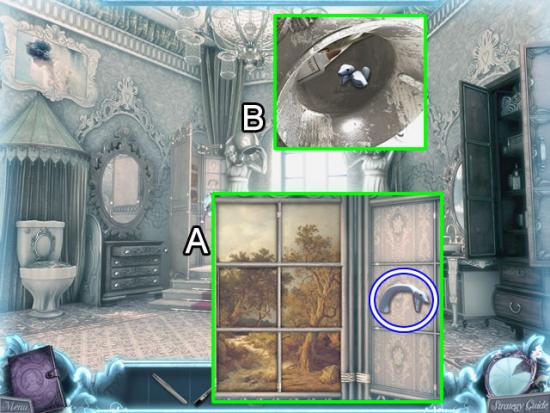
Bathroom
Bathroom – Ghost Realm
Bathroom
Nursery
Porch
Master Bedroom
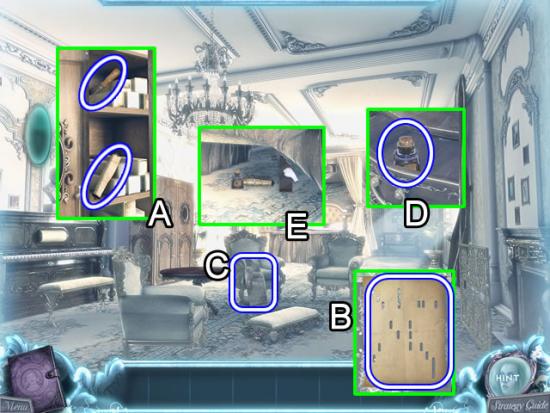
Master Bedroom – Ghost Realm
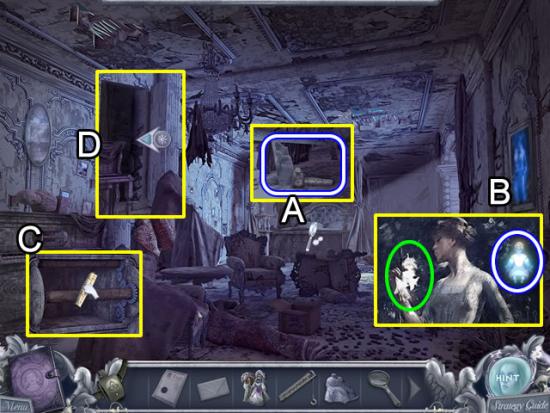
Master Bedroom
Secret Stairway
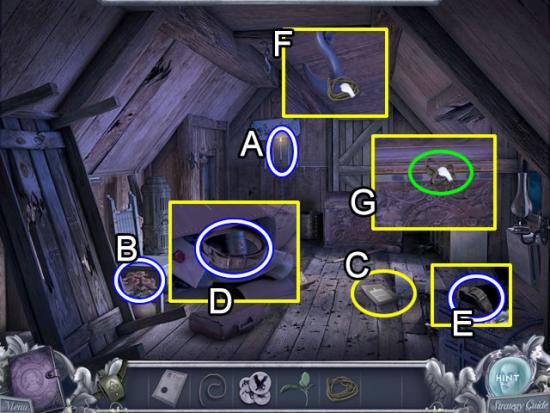
Attic Entry
Hallway
Nursery
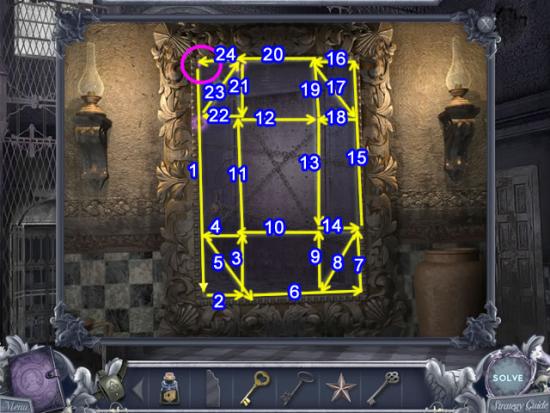
Atrium
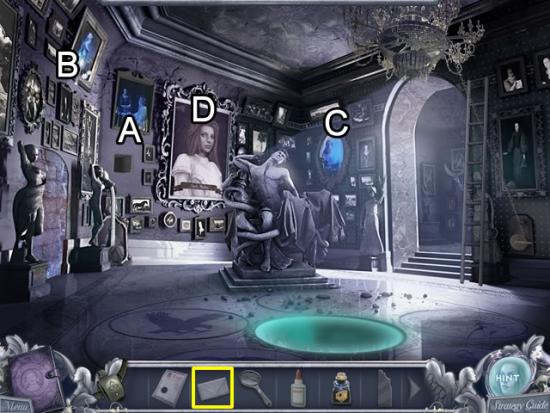
Art Gallery
Porch
Secret Stairway
Attic Entry
Tower
Congratulations! You have finished playing Haunted Past: Realm of Ghosts Collector’s Edition. Additional material and bonus play are now available from the Extras tab on the main menu.
Family Graveyard
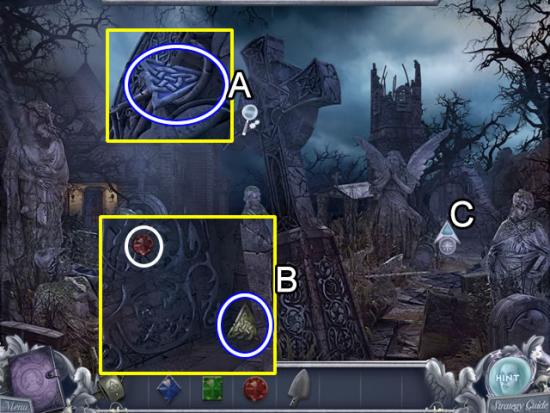
Statue Garden
Chapel
Statue Garden
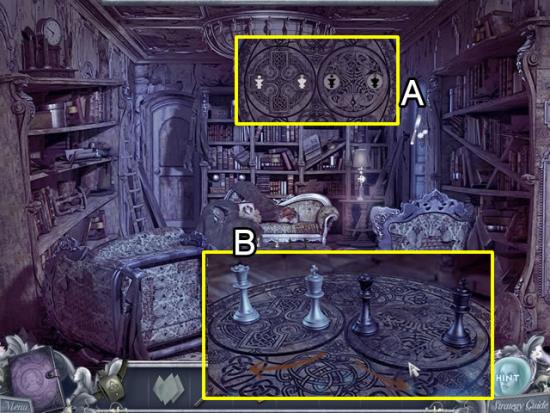
Library
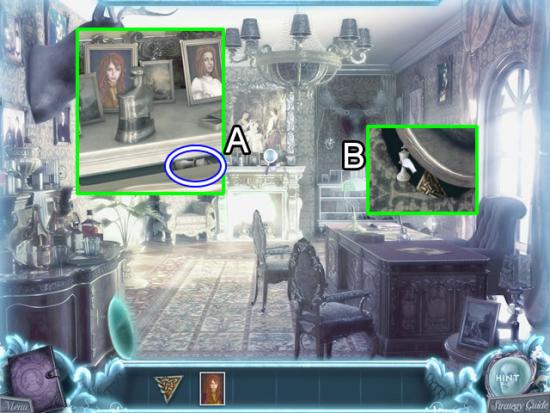
Study
Study – Ghost Realm
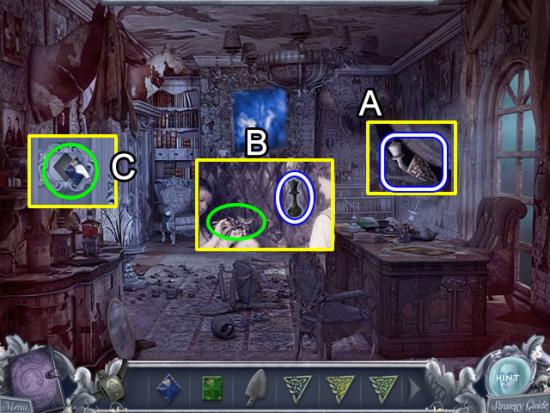
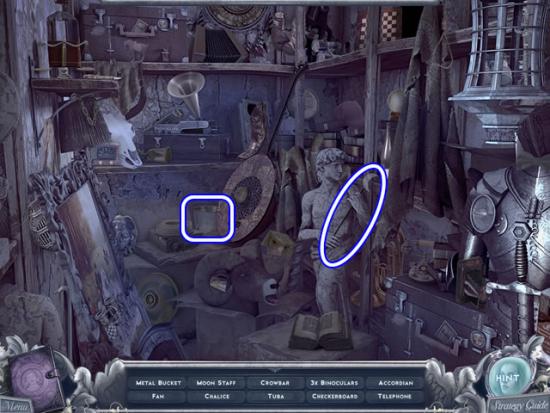
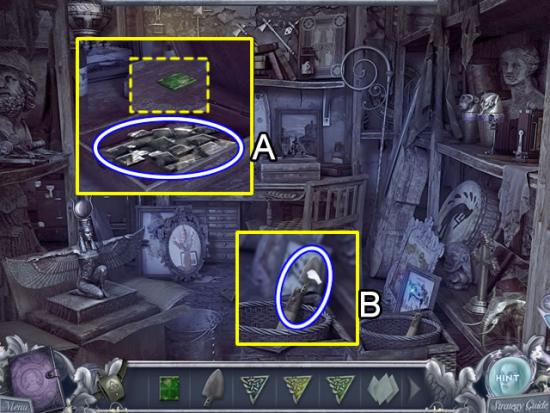
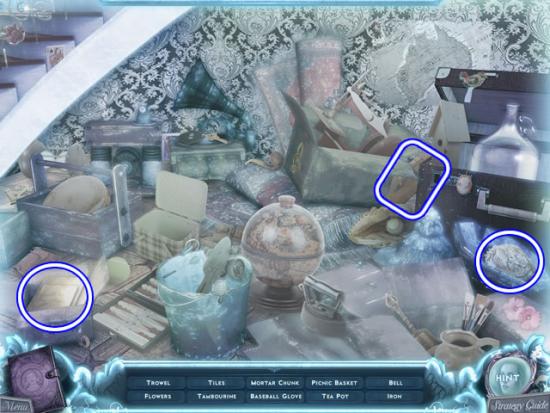
Storage
Statue Garden
Chapel
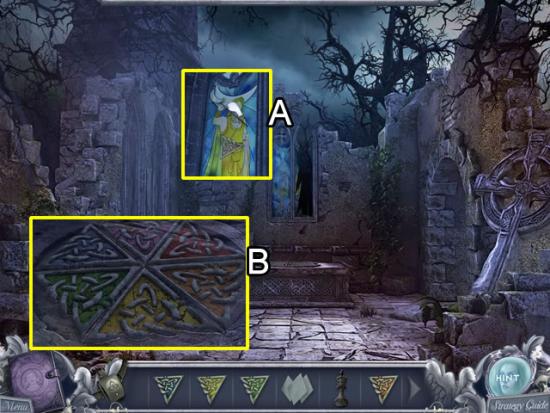
Tomb
Tomb – Ghost Realm
Tomb
Library
Foyer
Foyer – Ghost Realm
Foyer
Sun Room
Foyer
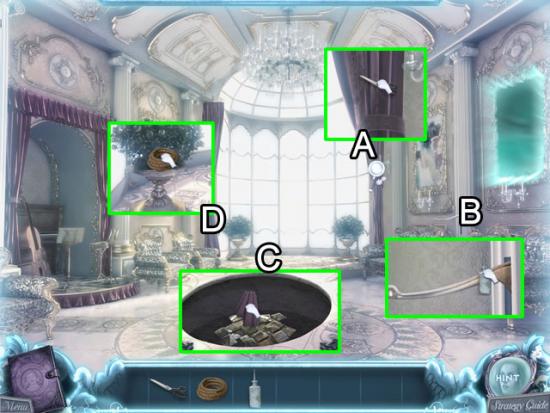
Ballroom
Ballroom – Ghost Realm
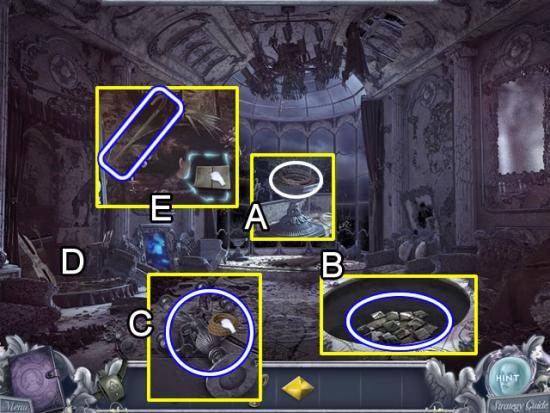
Ballroom
Sun Room
Ballroom
Sun Room
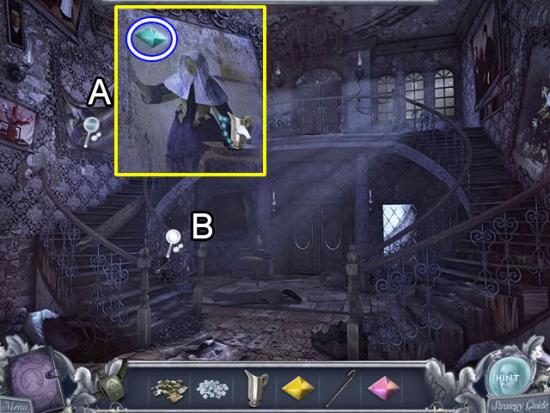
Foyer
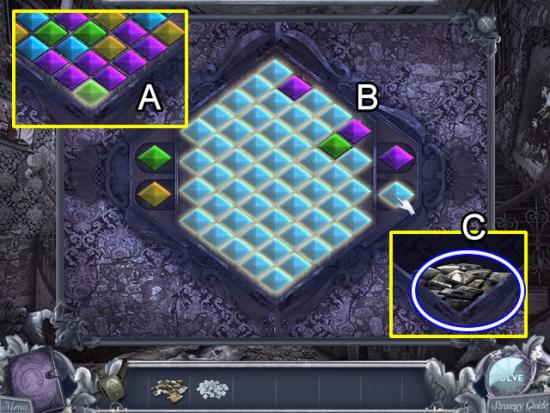
Tomb
Congratulations! You have completed playing the bonus chapter of Haunted Past: Realm of Ghosts Collector’s Edition.
