![Digimon UP Tier List [Supports, Buddies, and Partners]](/wp-content/uploads/2026/07/digimon-up-tier-list.jpg "Digimon UP Tier List [Supports, Buddies, and Partners]")
Digimon UP Tier List [Supports, Buddies, and Partners]
These Digimon will get you UP the leaderboard.

![Haze Seas Boss Drops [Chances, Locations, and How to Spawn]](/wp-content/uploads/2026/07/haze-seas-boss-drops.jpg "Haze Seas Boss Drops [Chances, Locations, and How to Spawn]")

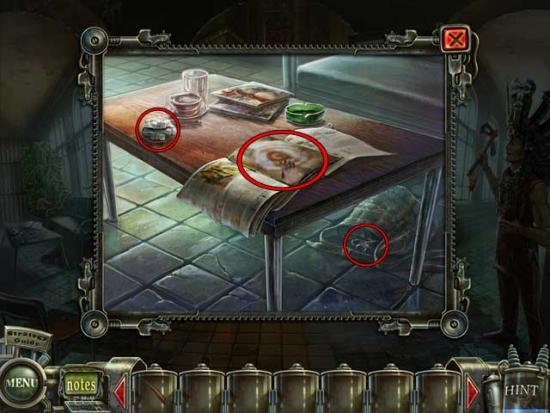
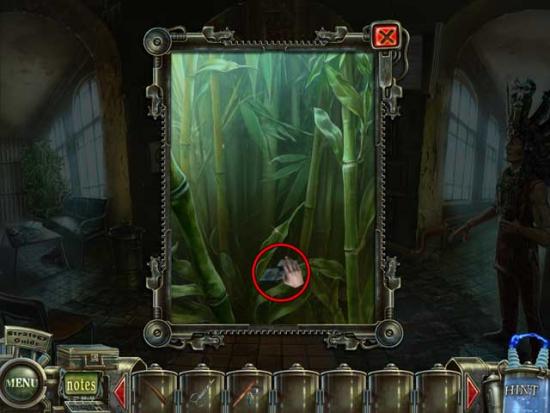
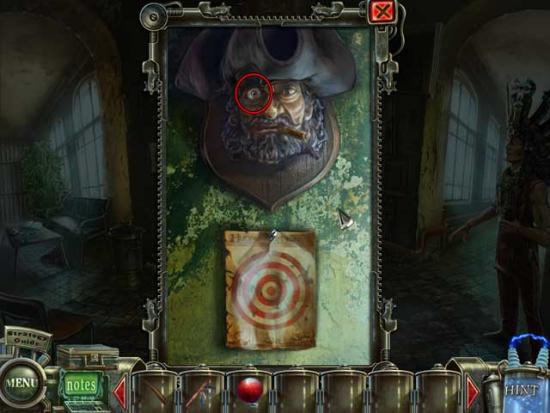
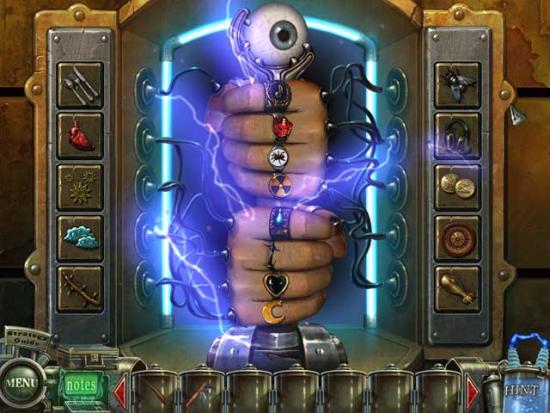
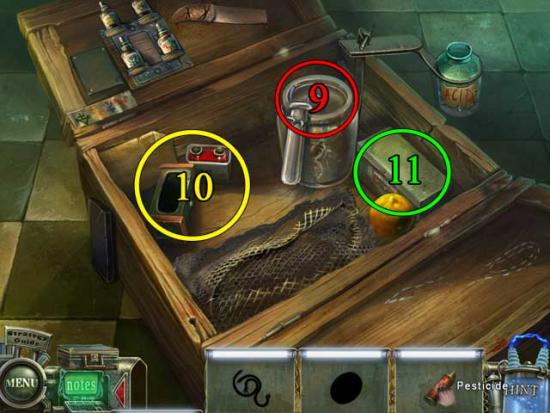
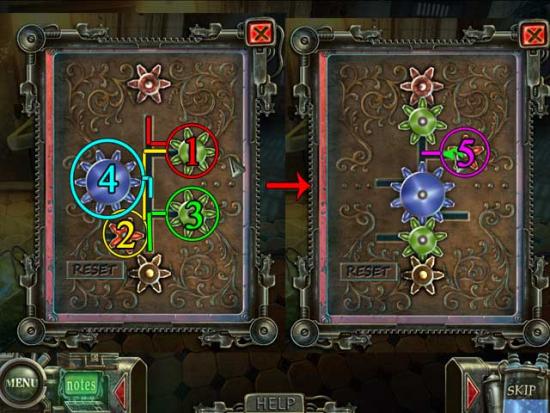
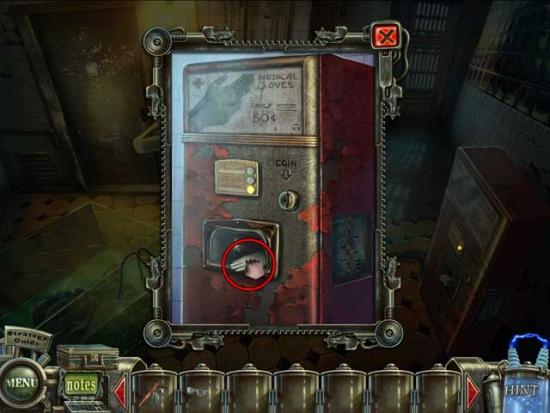
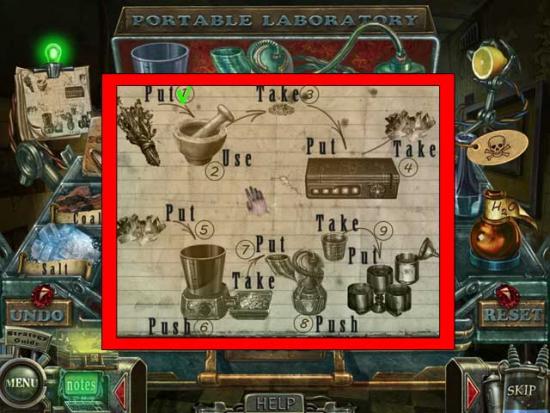
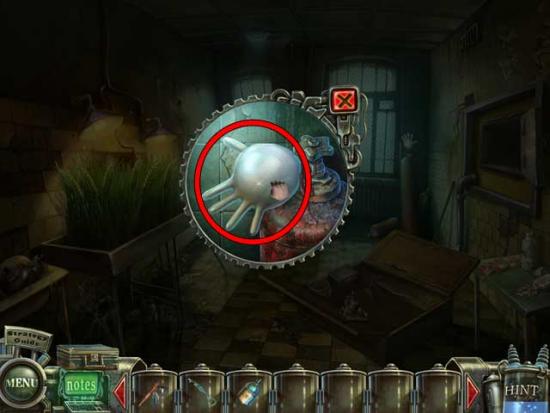
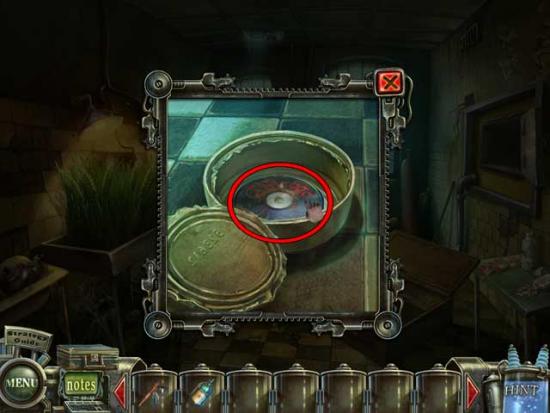
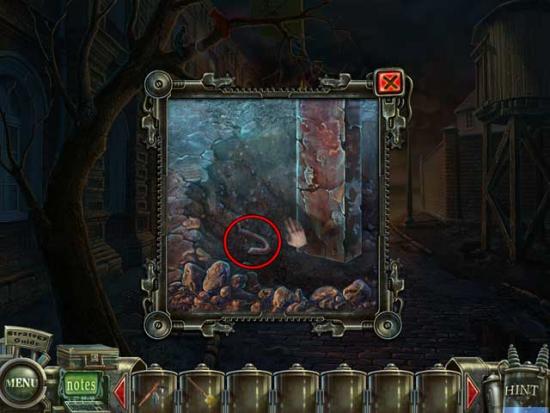
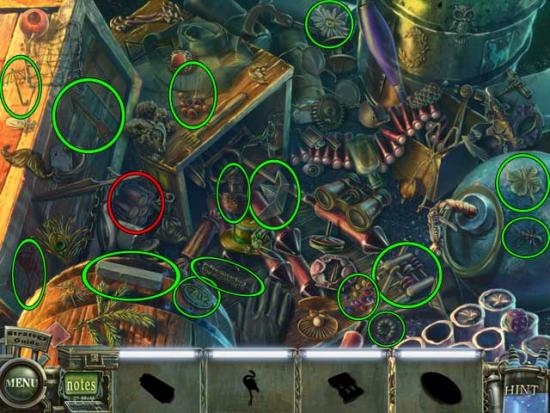
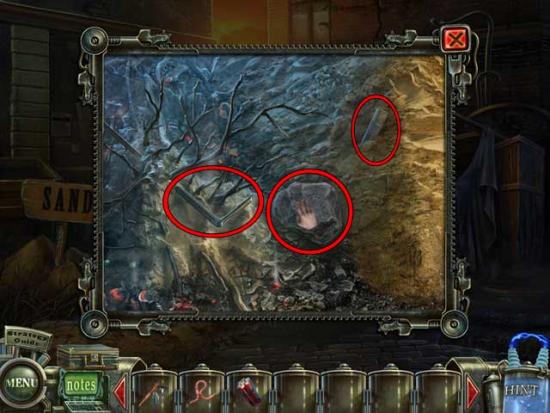
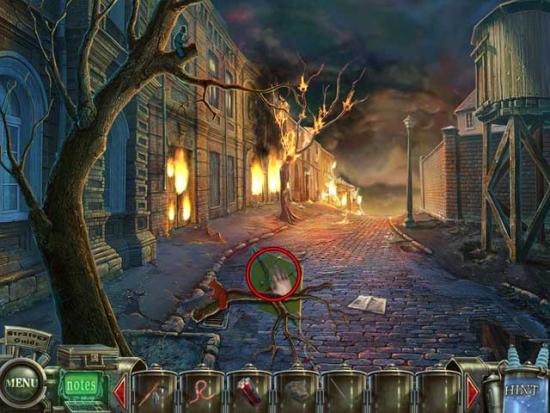
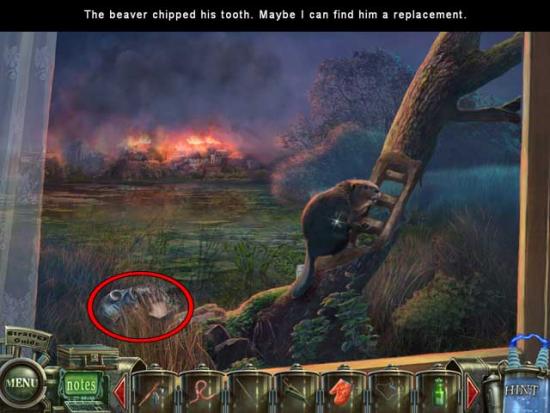
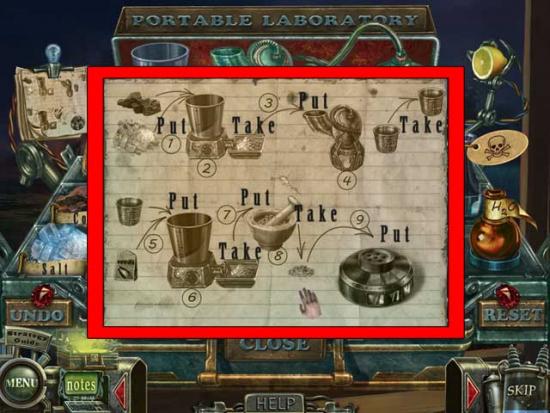
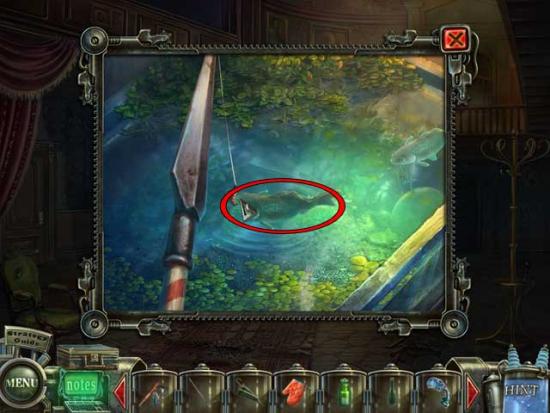
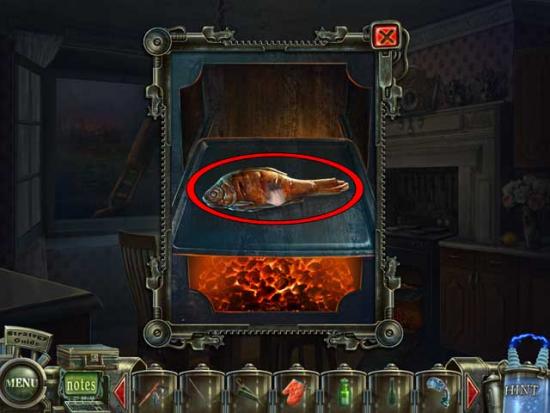
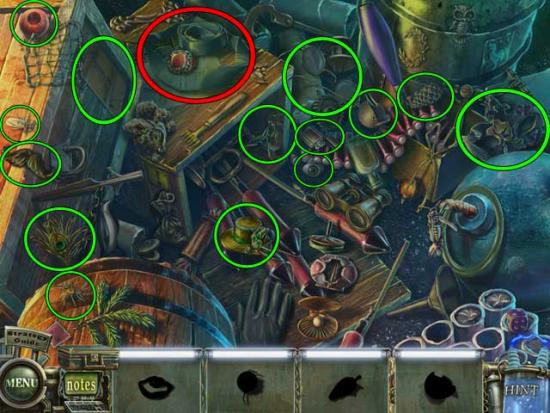
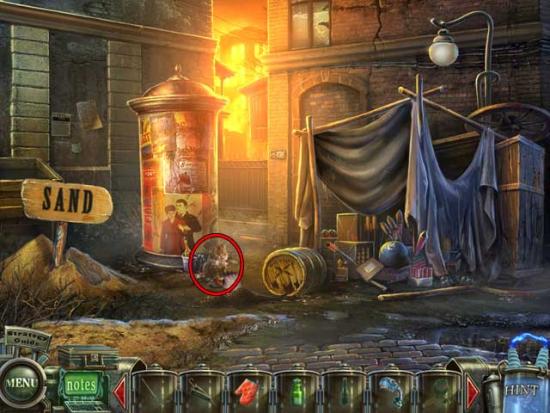
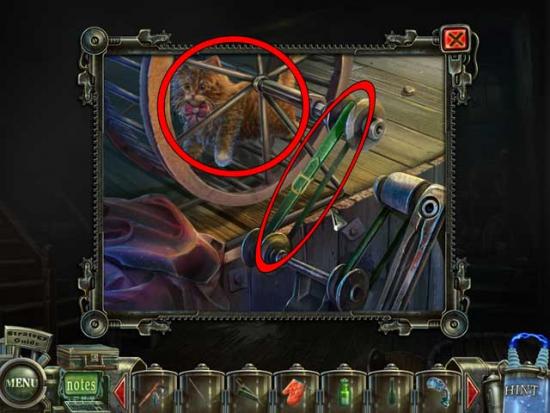
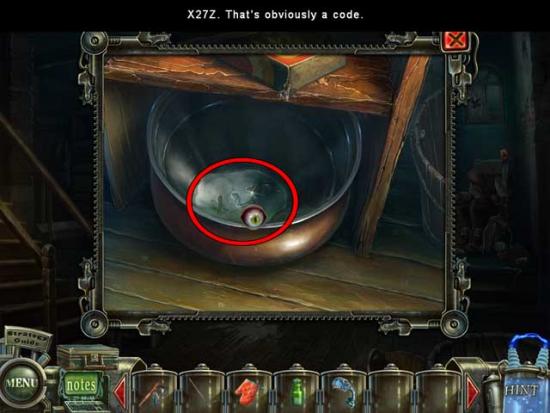
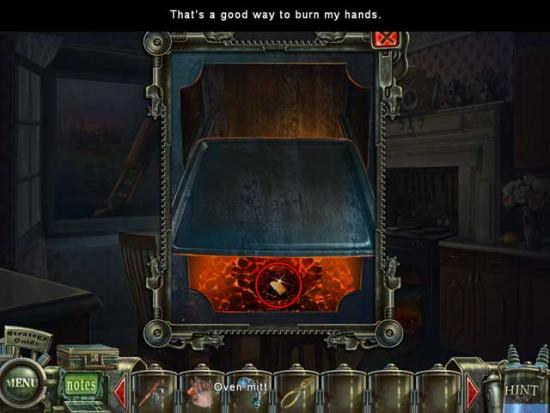
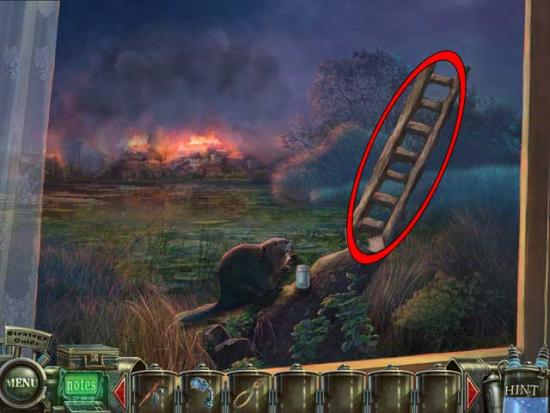
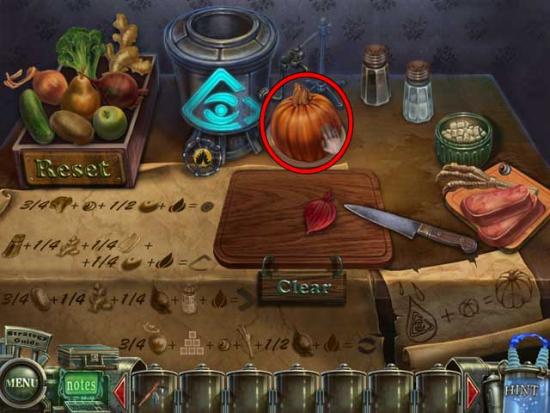
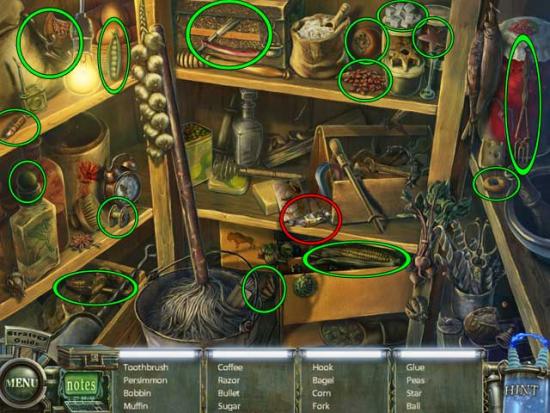
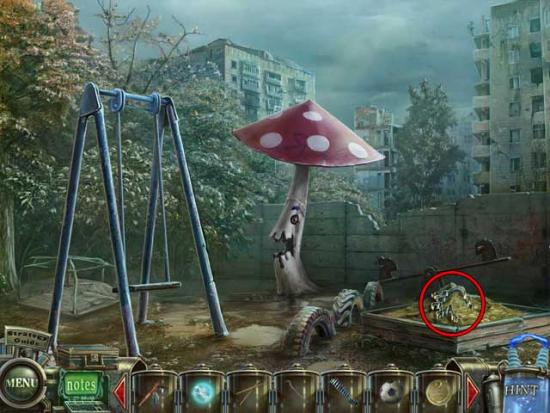
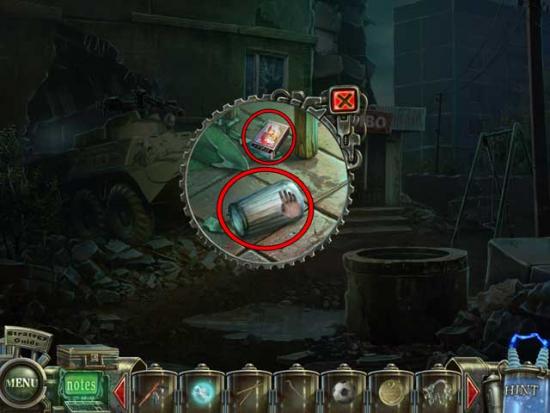
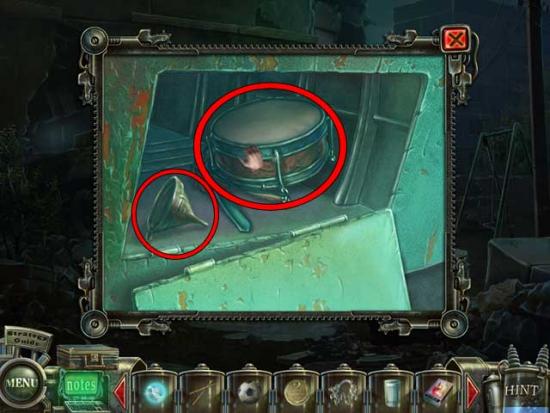
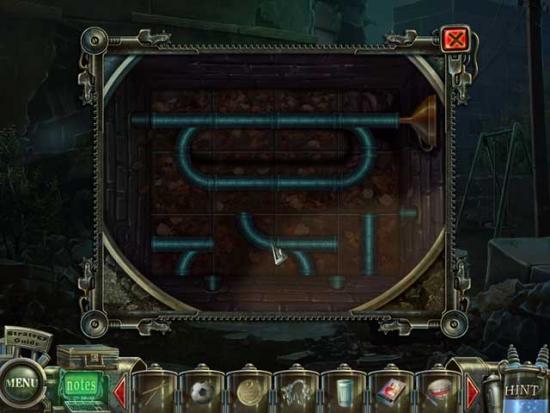
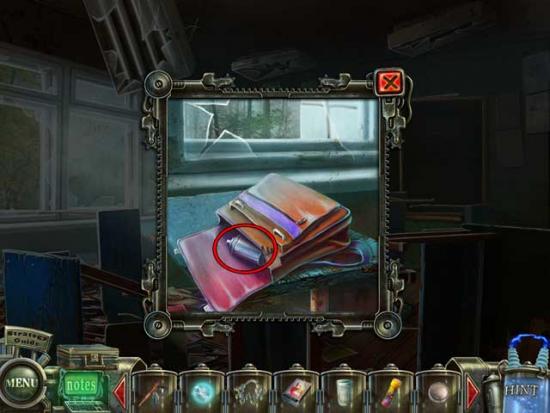
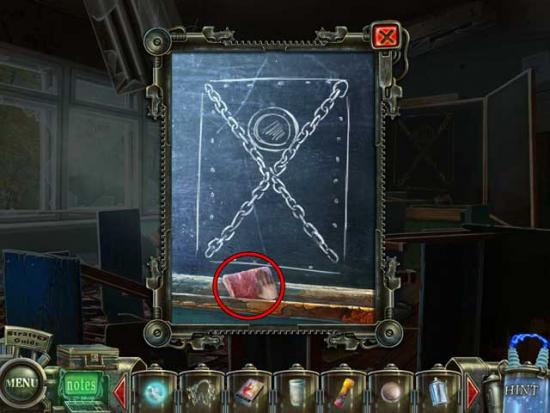
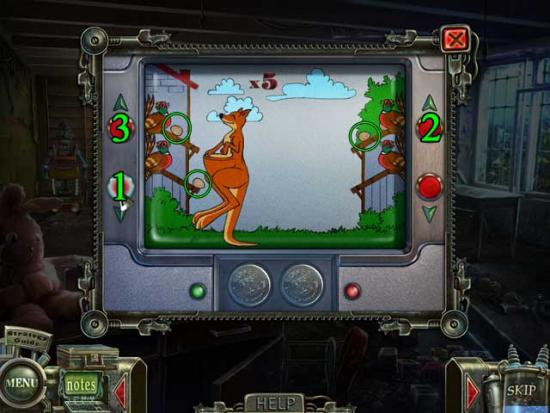
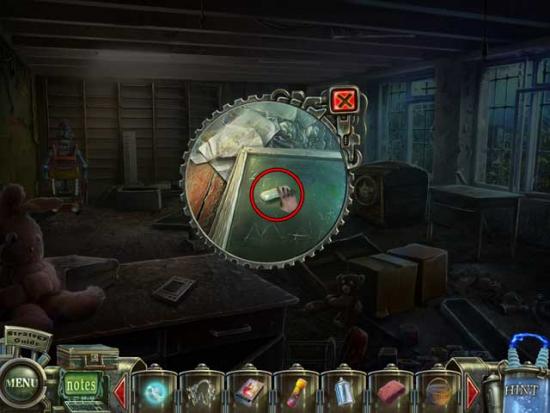
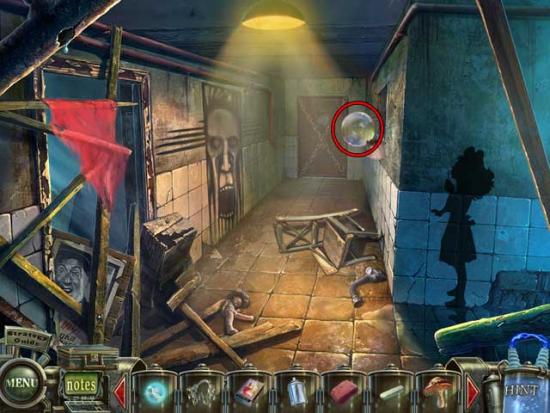
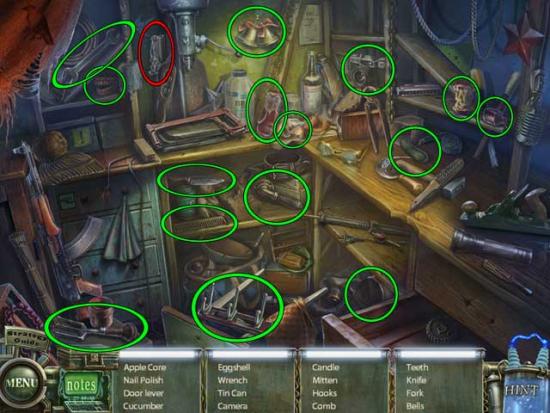
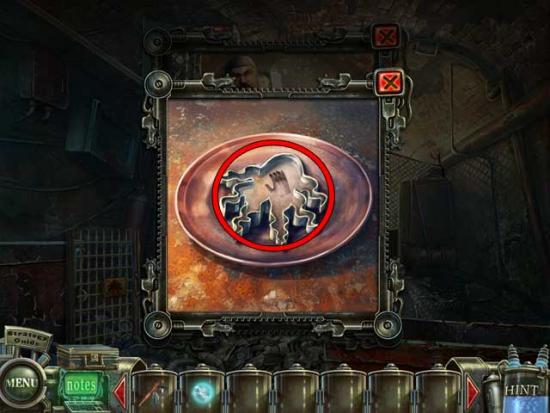
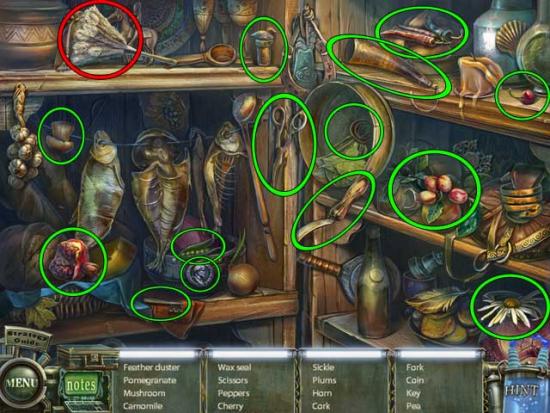
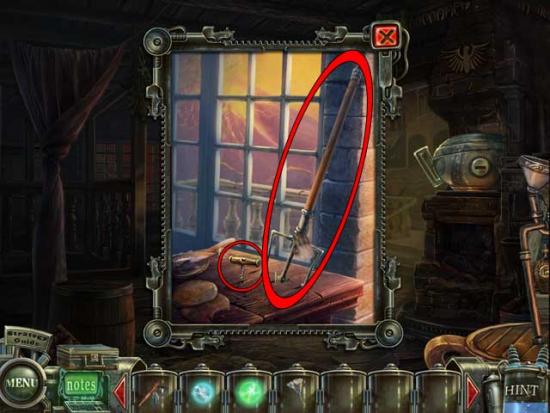
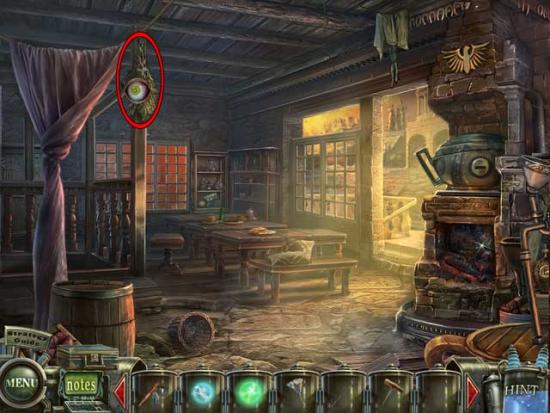
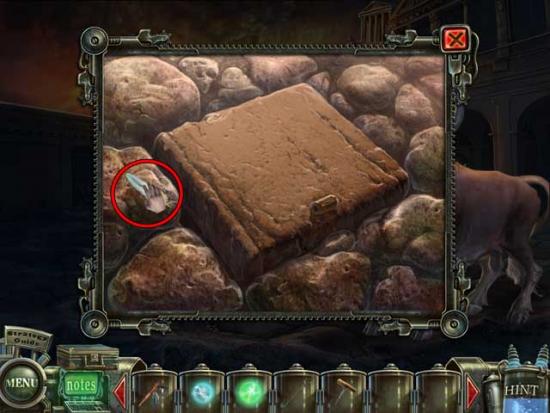
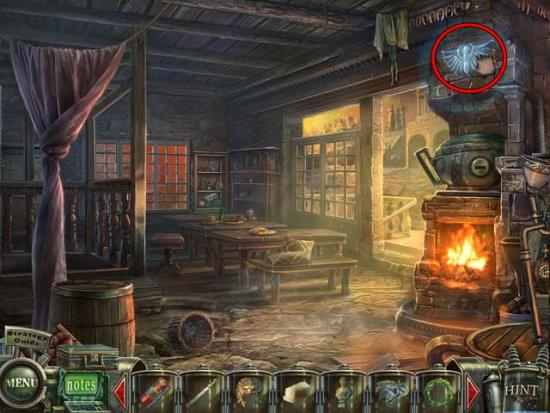
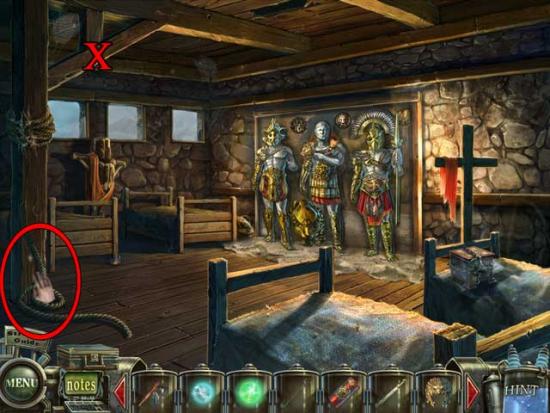
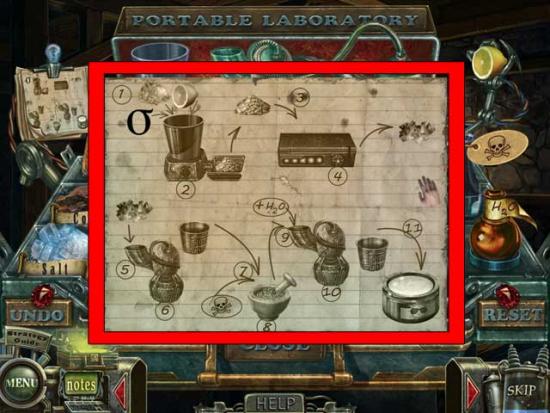
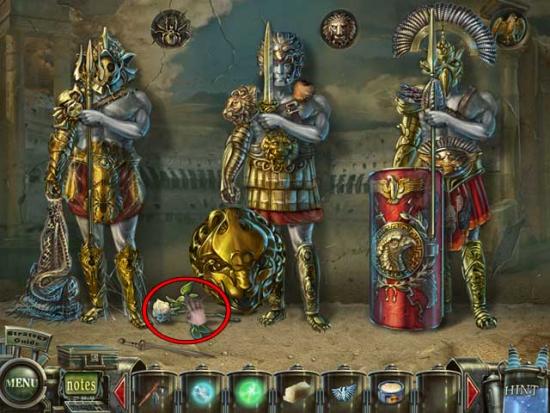
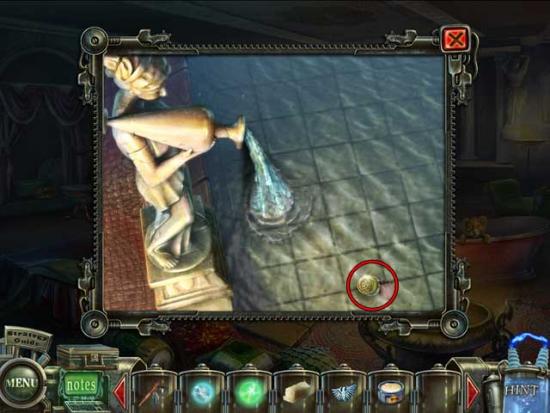
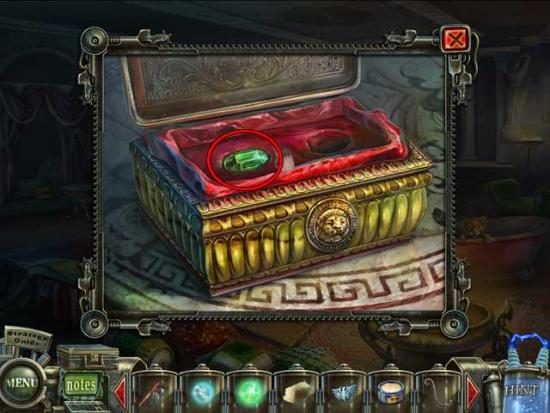
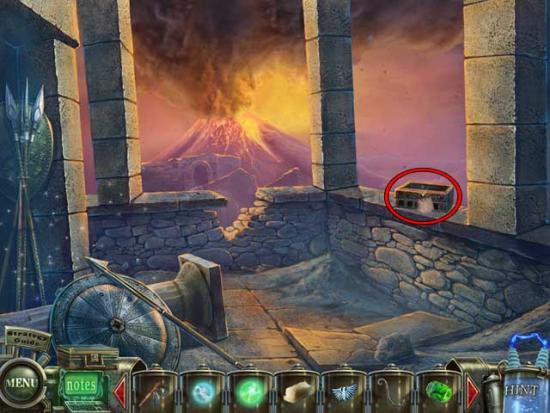
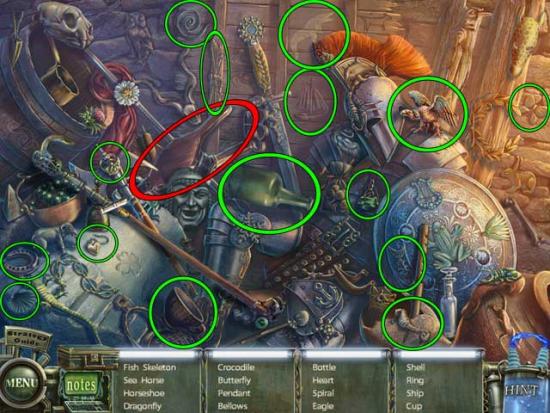
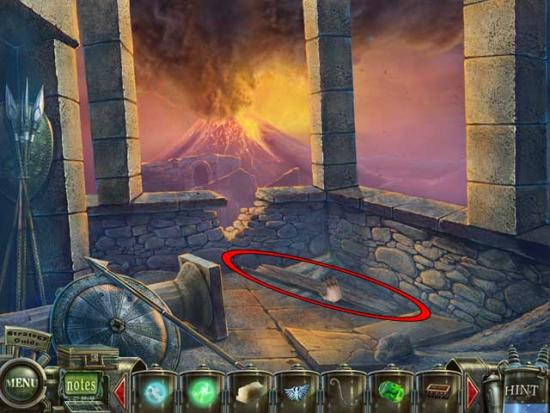
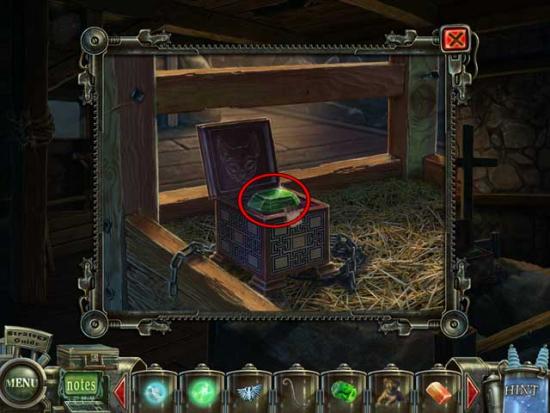
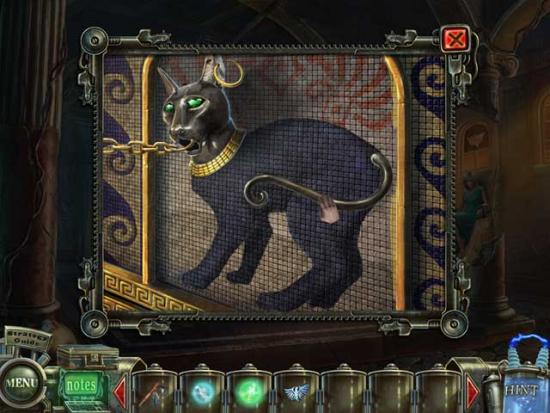
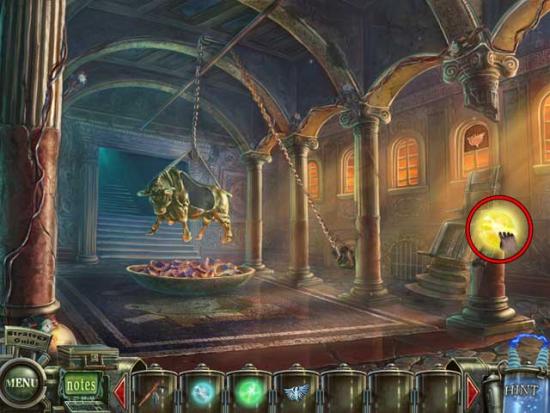
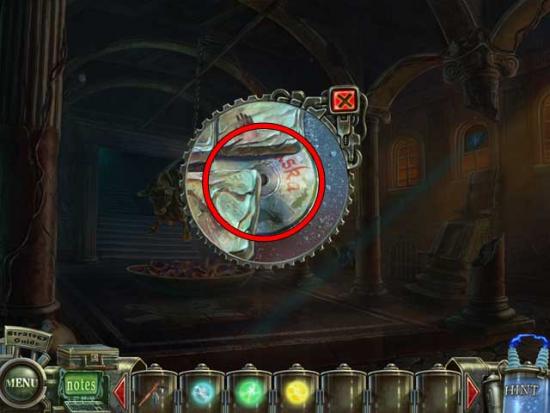
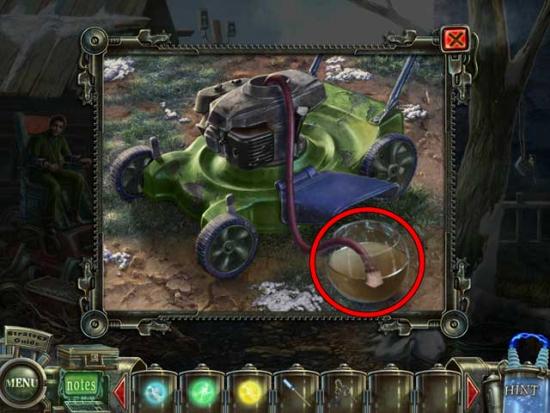
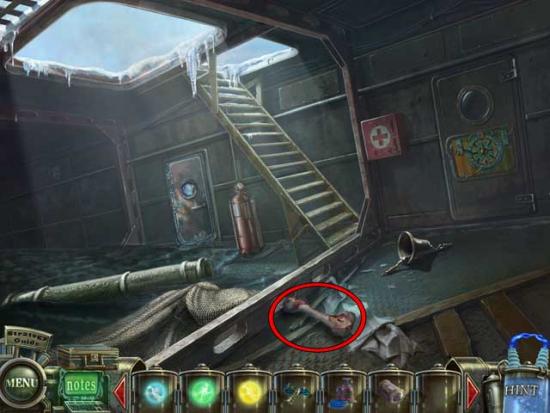
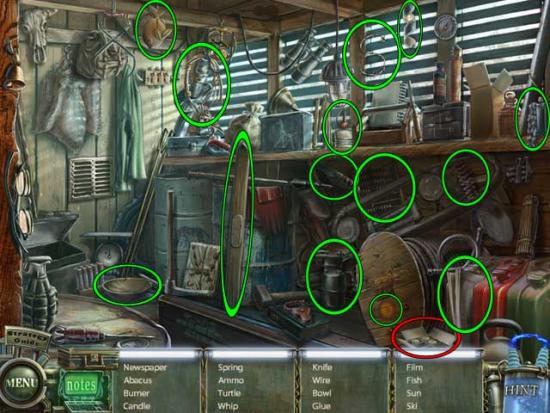
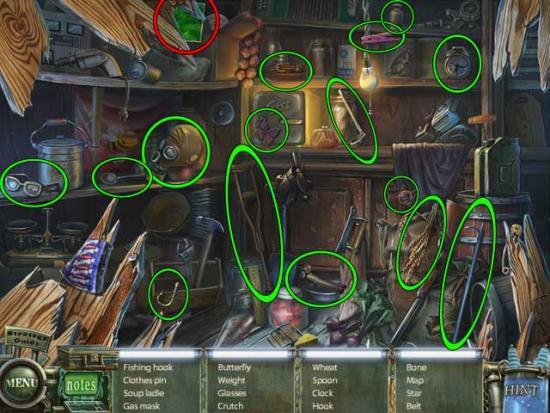
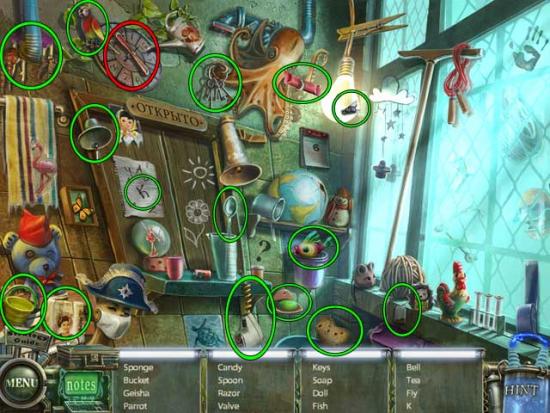
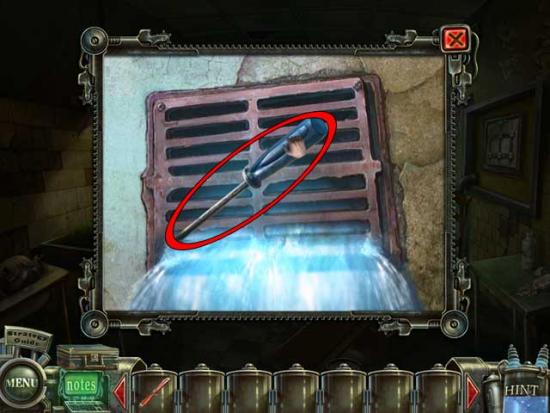
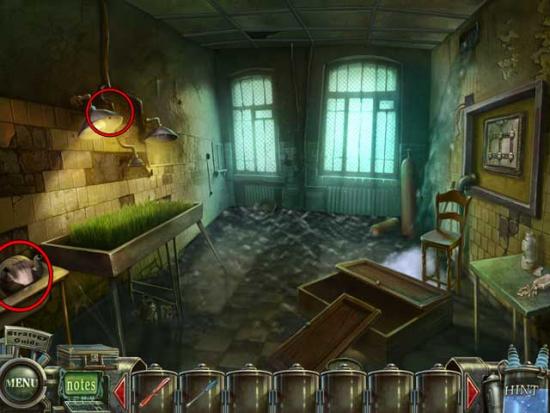
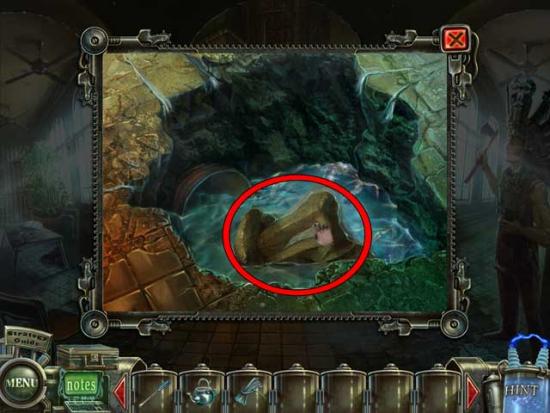
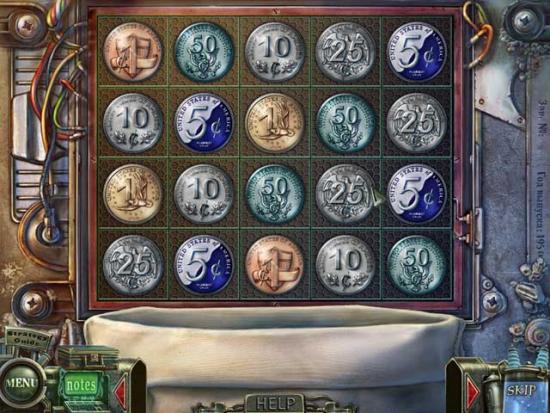
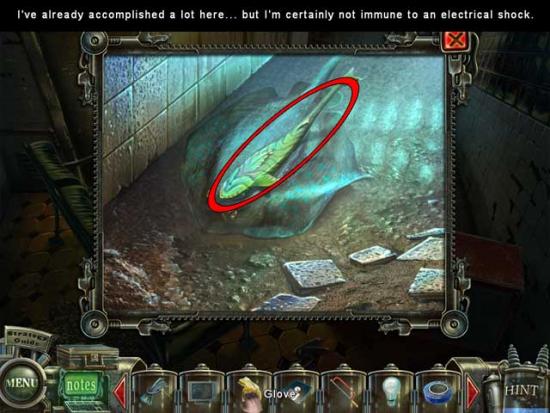
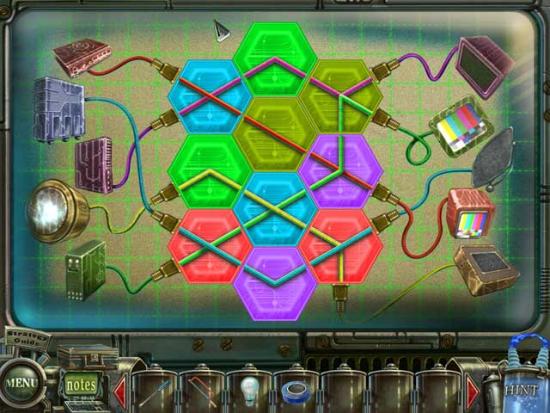
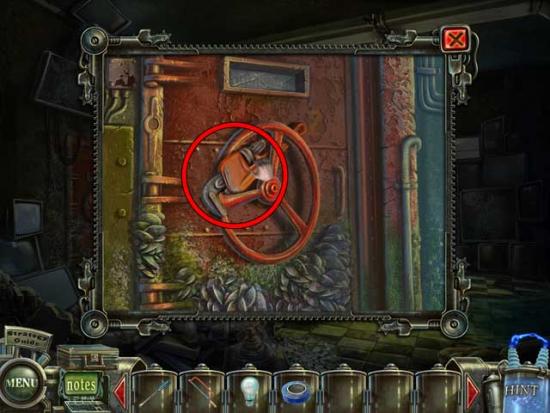
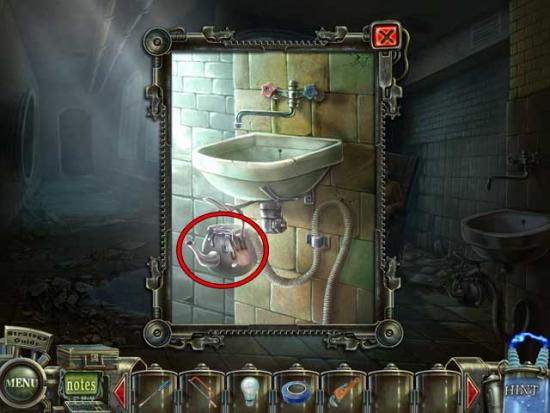
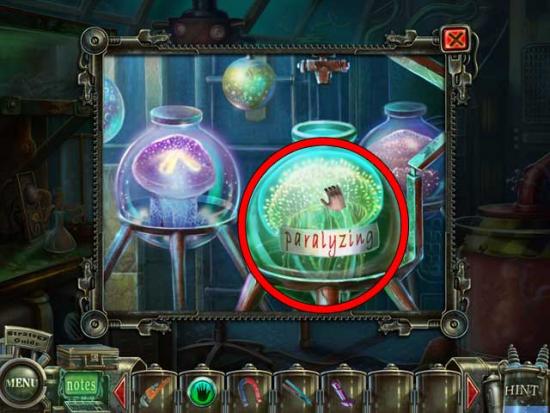
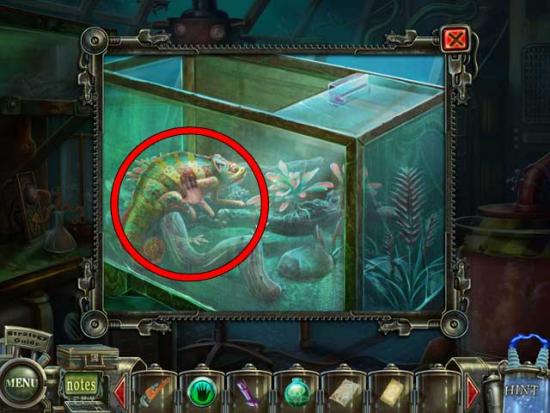
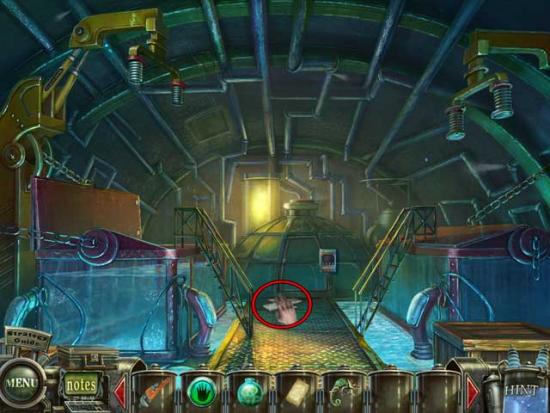
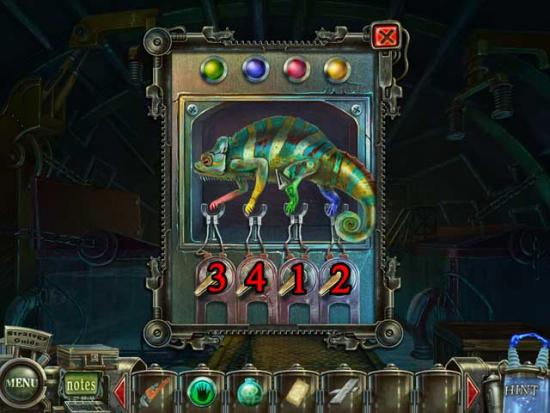
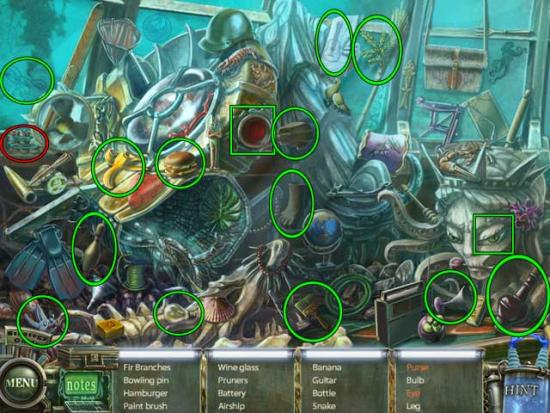
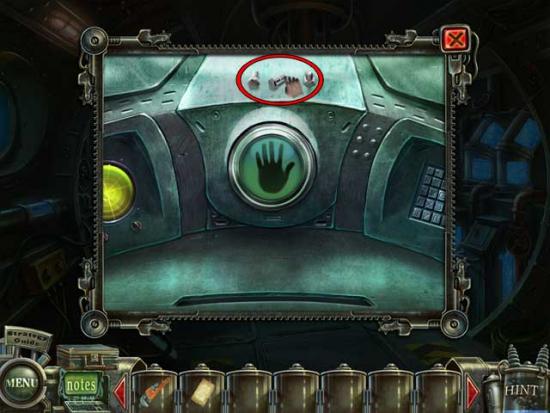
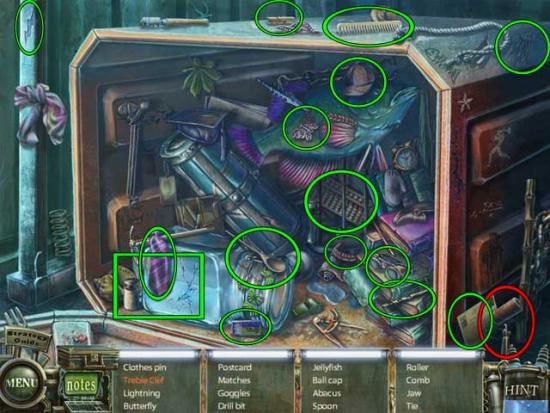
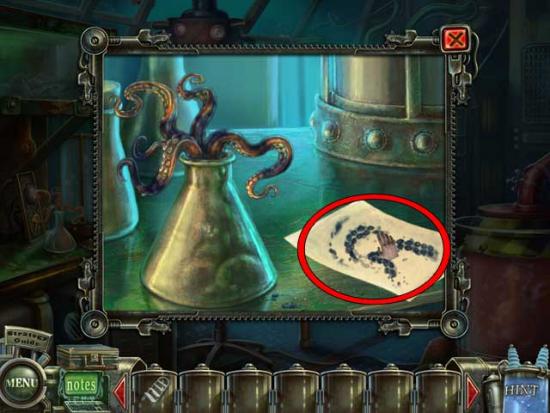
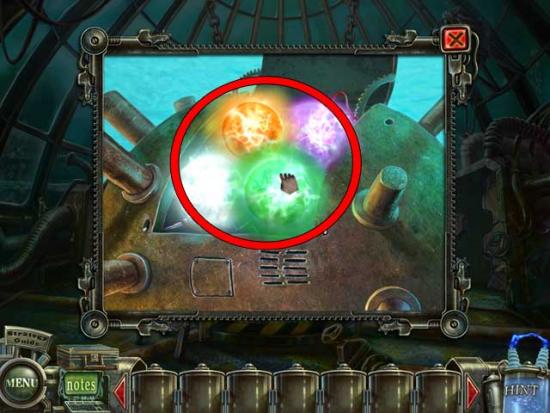
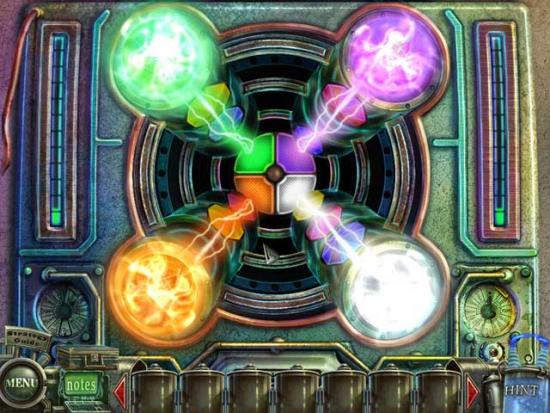
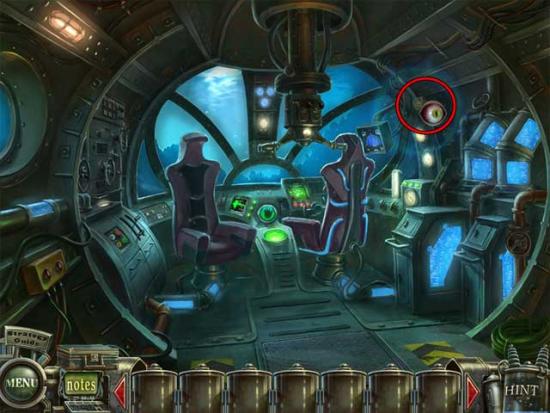
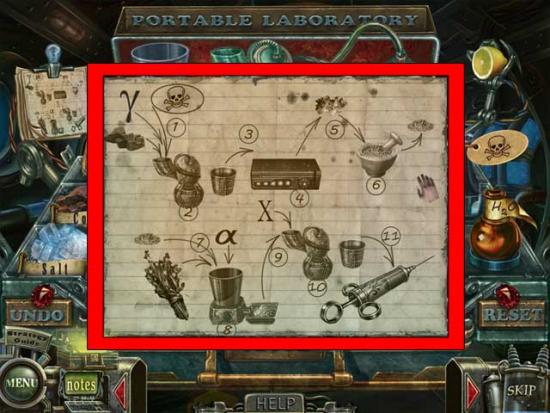
Welcome to the Haunted Halls: Revenge of Doctor Blackmore walkthrough on Gamezebo. Haunted Halls: Revenge of Doctor Blackmore is a hidden object adventure game created by ERS Game Studios. Make your way through various times and locations in history, all in an attempt to save the victims of Dr. Blackmore’s vengeful plot, including your fiancé! Gamezebo’s walkthrough will provide you with detailed images, tips, information, and hints on how to play your best game.
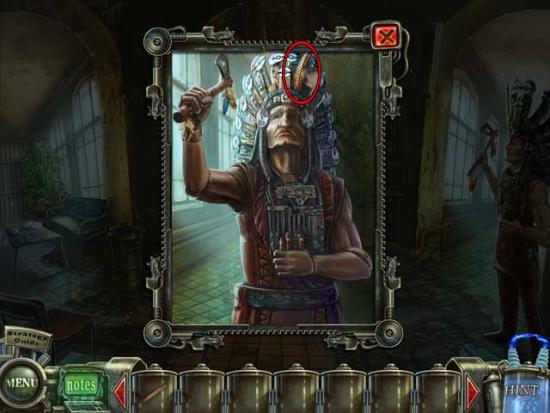
Welcome to the Haunted Halls: Revenge of Doctor Blackmore walkthrough on Gamezebo. Haunted Halls: Revenge of Doctor Blackmore is a hidden object adventure game created by ERS Game Studios. Make your way through various times and locations in history, all in an attempt to save the victims of Dr. Blackmore’s vengeful plot, including your fiancé! Gamezebo’s walkthrough will provide you with detailed images, tips, information, and hints on how to play your best game.
Difficulty
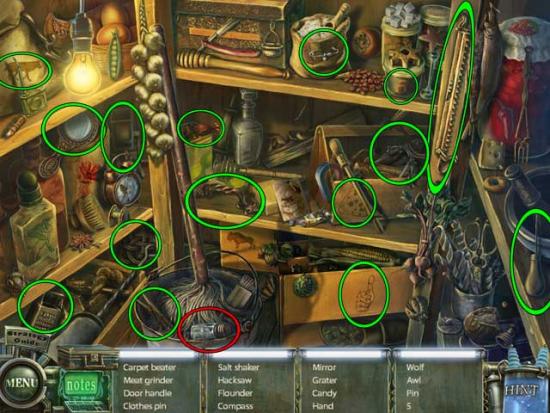
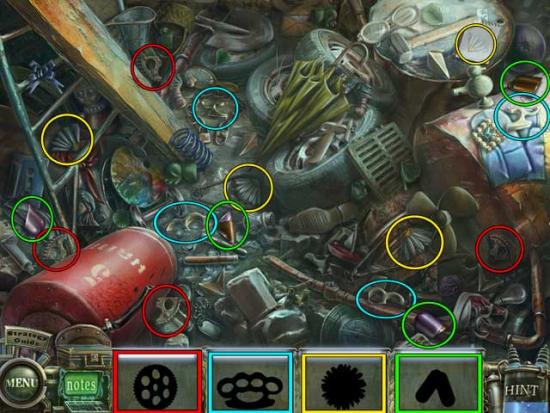
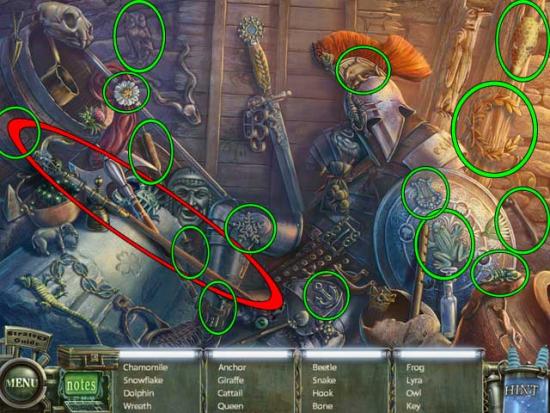
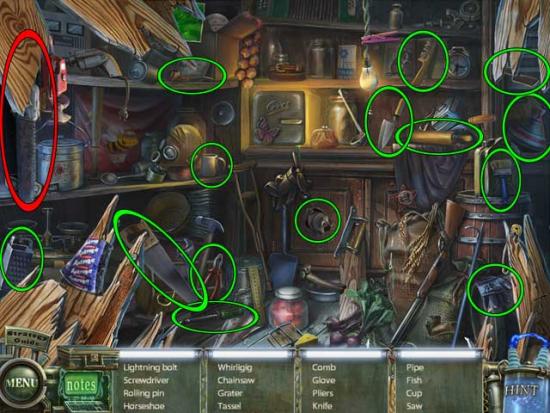
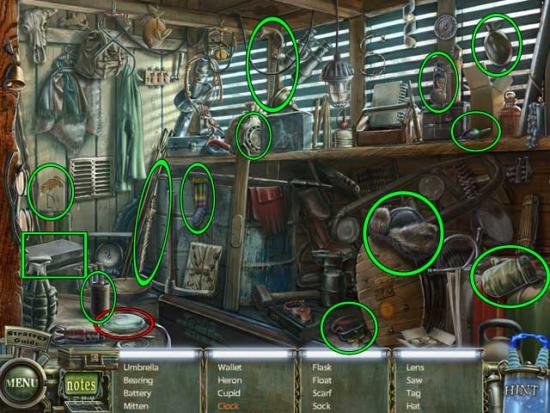
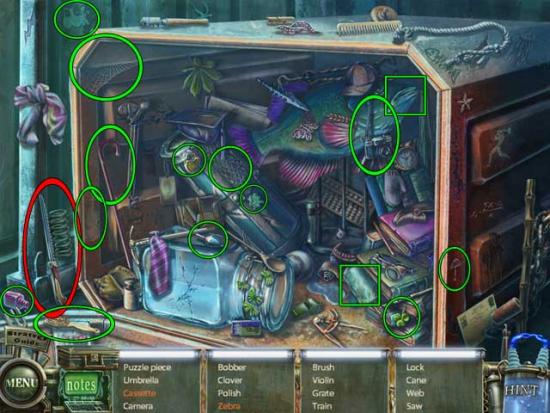
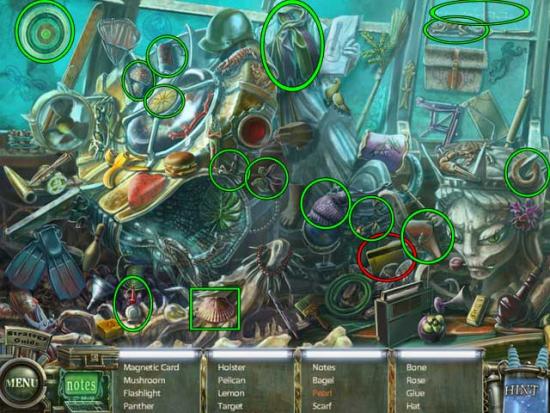
Hidden Object Scenes
General Layout
Cursors
Collector’s Edition
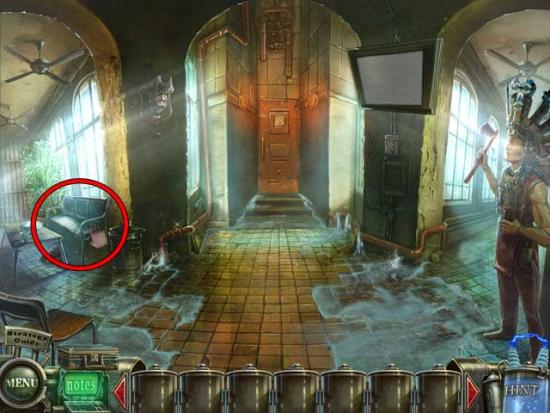
Entry Hall

Corner Hall
Test Chamber
Corner Hall
Corner Ward
Corner Hall
Test Chamber

Corner Ward
Monitor Room
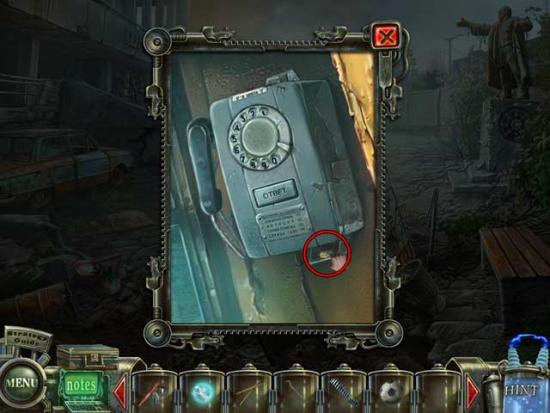
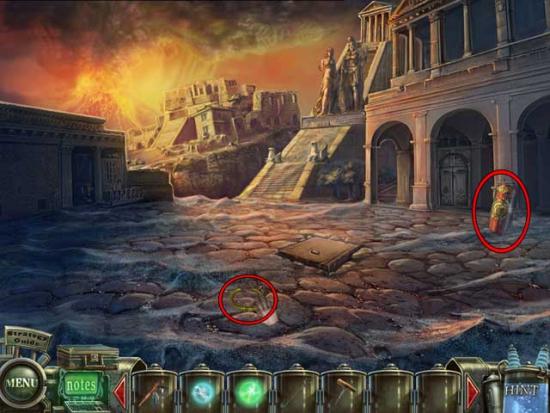
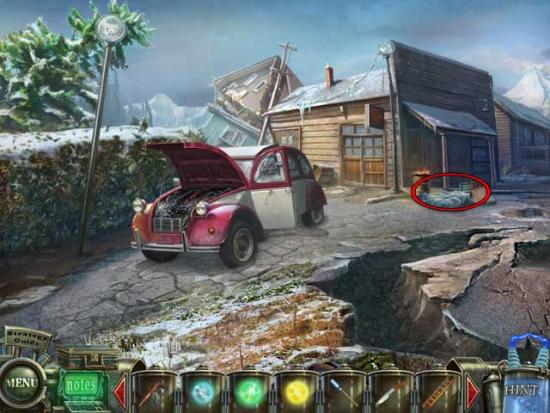
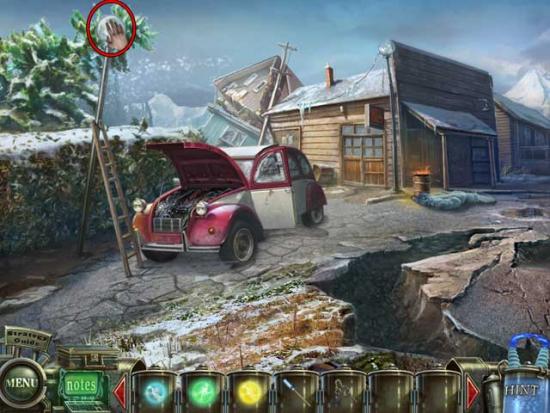
Street
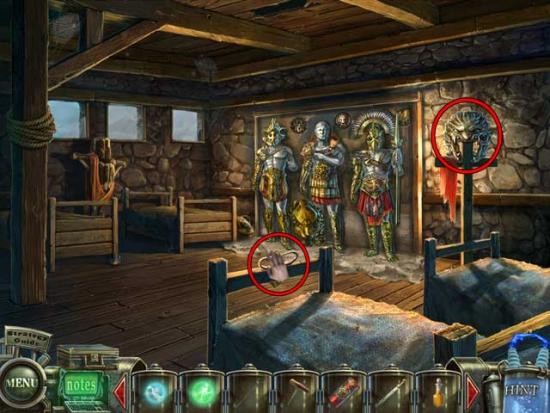
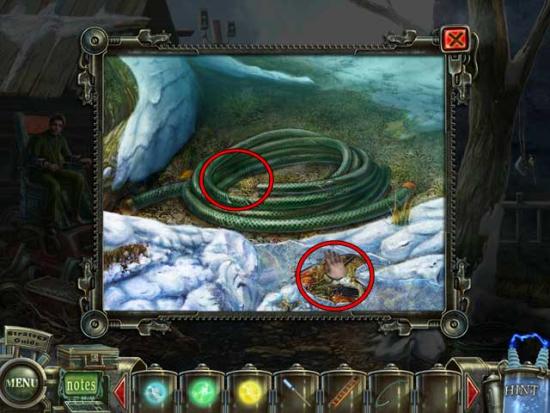
Shack
Street
Shack
Street
Foyer
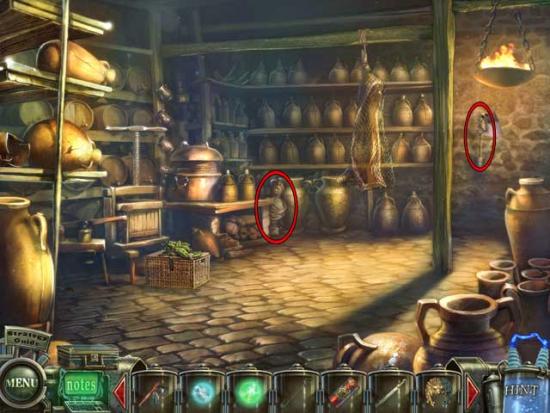
Storeroom
Foyer
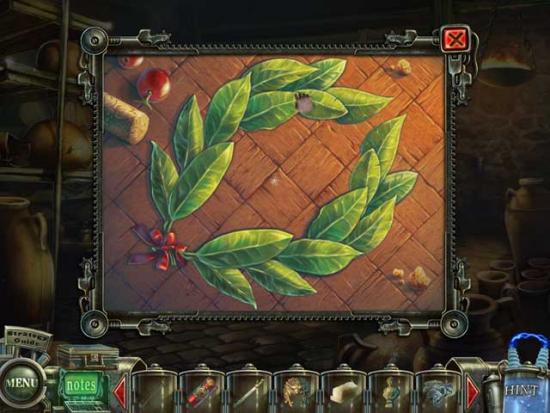
Kitchen

Foyer
Kitchen
Shack
Storeroom
Kitchen
Foyer
Upstairs Hallway
Study
Kitchen
Study
Foyer
Study
Storeroom
Upstairs Hallway
Study
Monitor Room
Plaza
Lobby
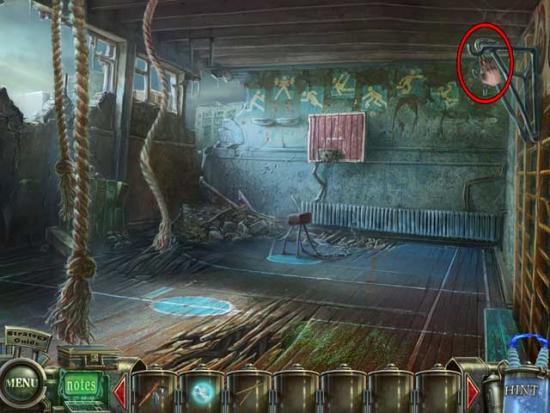
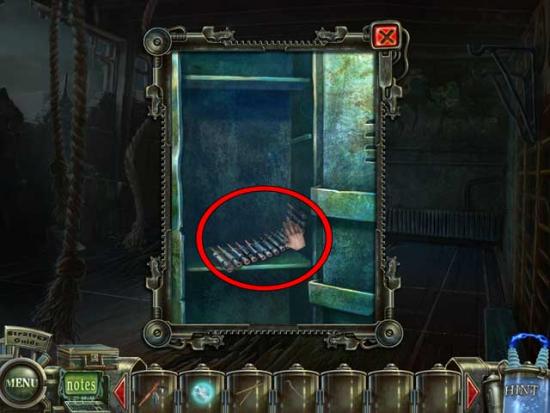
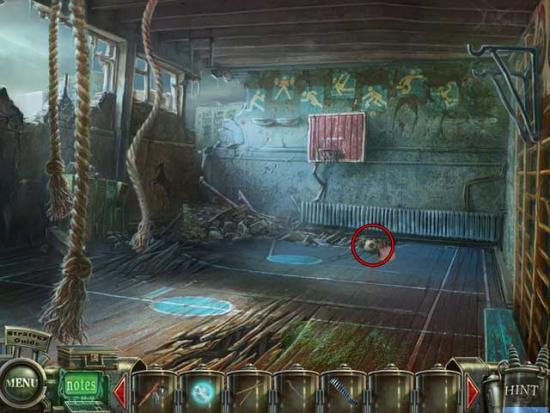
Gym
Plaza
Well
Lobby

School Hall
Plaza
School Hall
Classroom 2-A

School Hall
Classroom 2-B
School Hall

Basement Hall
Well
Basement Hall
Classroom 2-B
Basement Hall
Basement
Basement Hall
Plaza
Classroom 2-B
Basement
Classroom 2-B

Monitor Room
Courtyard
Dining Area
Courtyard

Hostel
Dining Area
Cellar
Dining Area

Cellar
Dining Area
Courtyard
Hostel

Cellar
Courtyard
Hall of Pillars

Baths

Balcony
Baths
Balcony
Cellar
Dining Area
Hostel
Baths
Hall of Pillars

Monitor Room
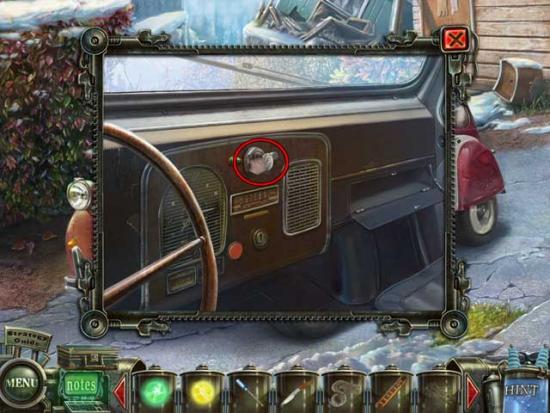
Car
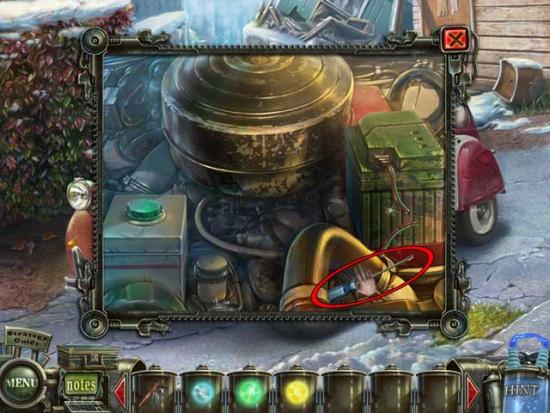
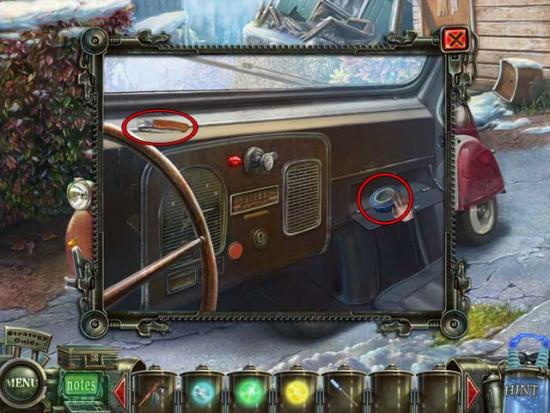
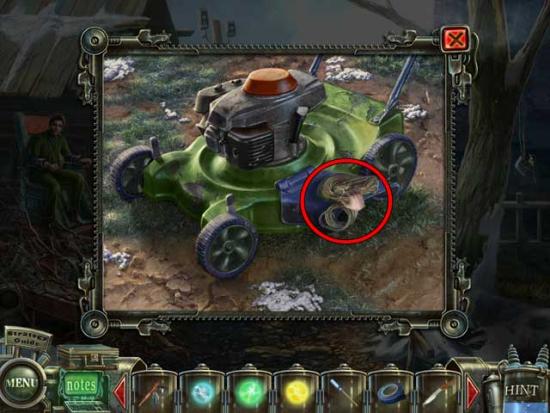
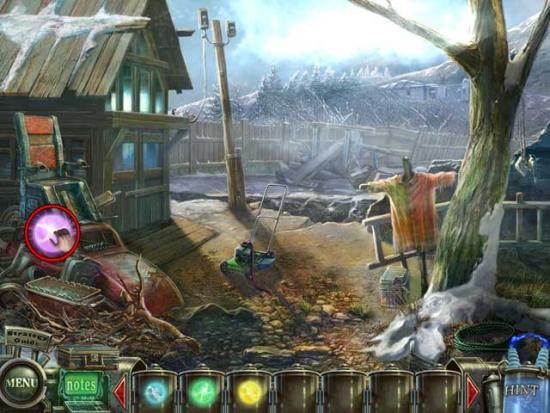
Garden
Car
Garden
Car
Garden
Car
Clearing
Hold
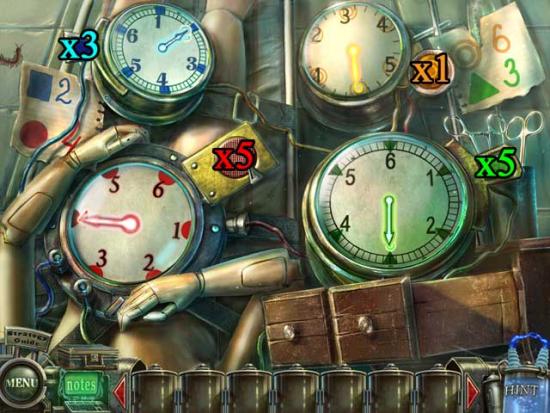
Wheelhouse
Hold
Deck
Clearing
Deck
Hold
Wheelhouse
Deck
Car
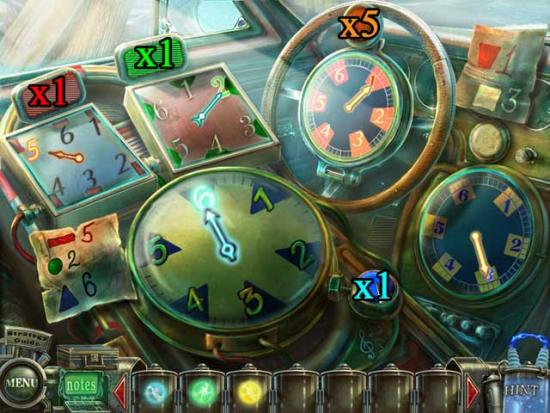
Wheelhouse
Garden
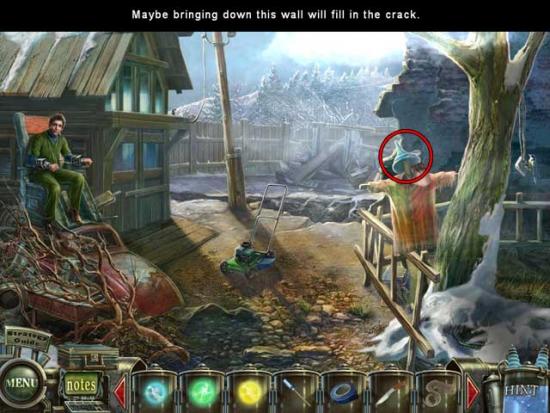
Construction Site
Garden
Monitor Room
Corner Ward

Congratulations! You’ve completed the main portion of the game! Now go to the Extras portion of the Main Menu and select “Play” to access additional gameplay!
Entry Hall
Corner Hall
Test Chamber
Entry Hall
Corner Hall
Test Chamber
Corner Hall
Corner Ward

Test Chamber
Corner Hall
Corner Ward
Monitor Room
Corner Ward
Monitor Room
Corridor
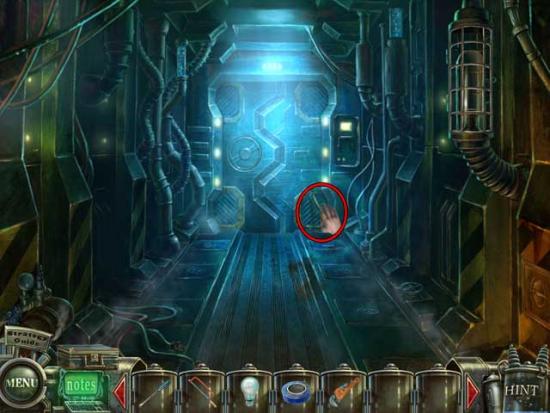
Bomb Bay
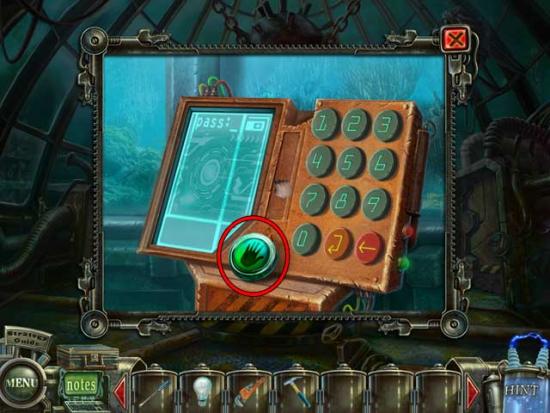
Storage Area
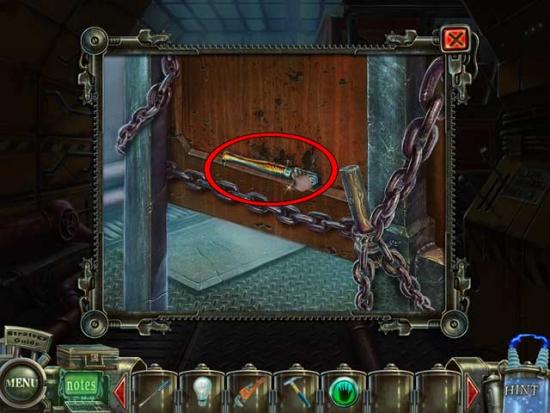

Corridor
Bomb Bay
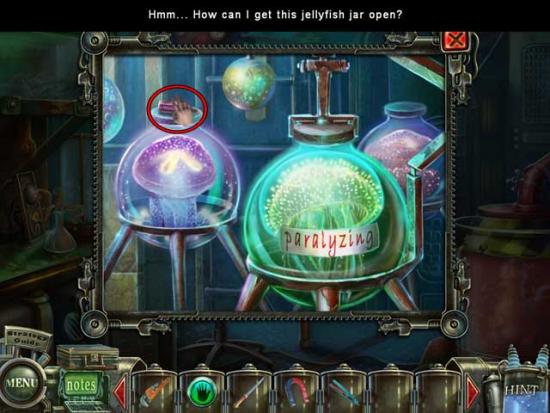
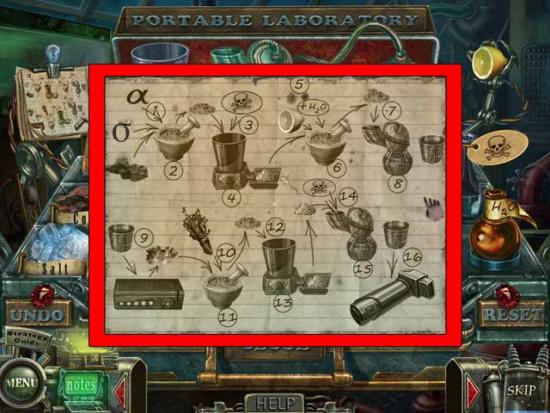
Laboratory
Storage Area
Laboratory
Bomb Bay
Docking Bay
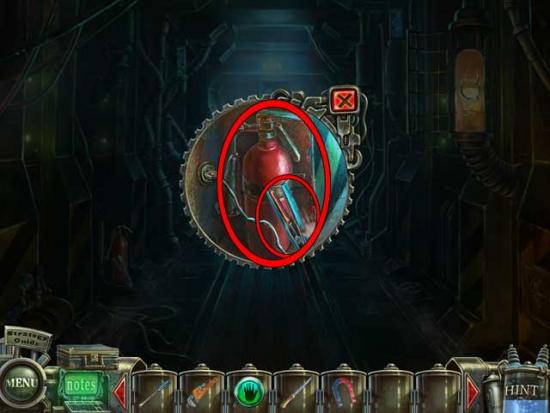
Observation Sphere
Docking Bay
Bomb Bay
Storage Area
Docking Bay
Bathysphere
Storage Area
Laboratory
Bomb Bay
Bathysphere
Corner Ward
Bathysphere
Congratulations!
You have completed Gamezebo’s walkthrough for Haunted Halls: Revenge of Dr. Blackmore. Be sure to check back often for game updates, staff and user reviews, user tips, forums comments and
much more here at Gamezebo!
