![Hololive Dreams Tier List [Best Cards]](/wp-content/uploads/2026/07/hololive-dreams-tier-list.jpg "Hololive Dreams Tier List [Best Cards]")
Hololive Dreams Tier List [Best Cards]
The best cards for the best performances.


![Iron Soul Dungeon Weapon Tier List [Best Weapons]](/wp-content/uploads/2026/07/iron-soul-dungeon-weapon-tier-list.jpg "Iron Soul Dungeon Weapon Tier List [Best Weapons]")

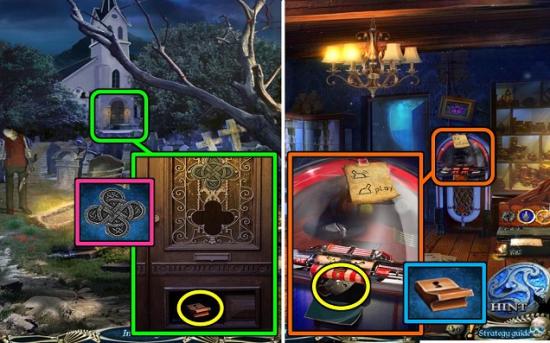
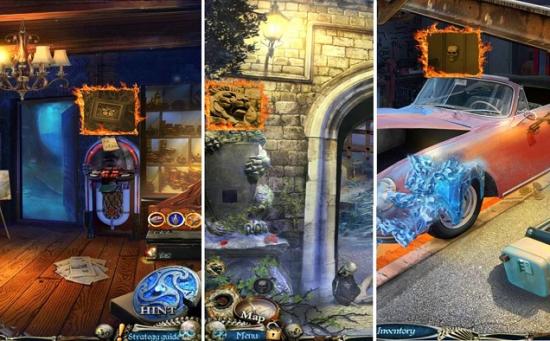
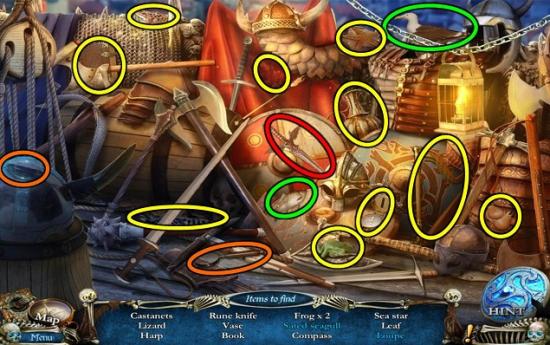
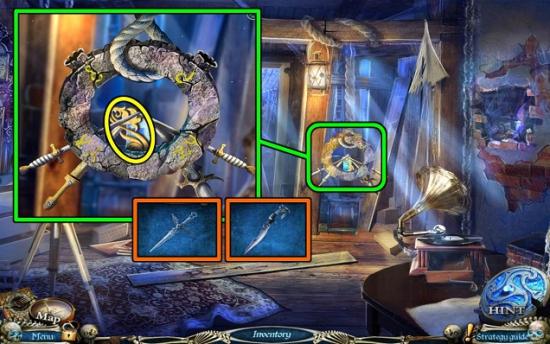
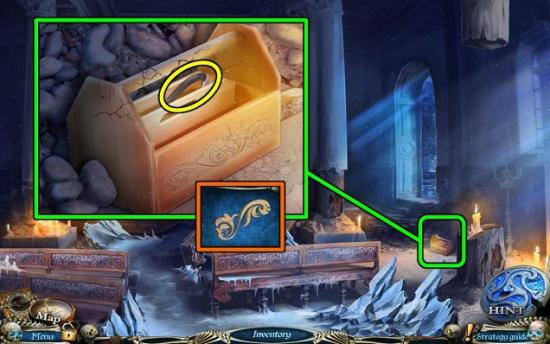
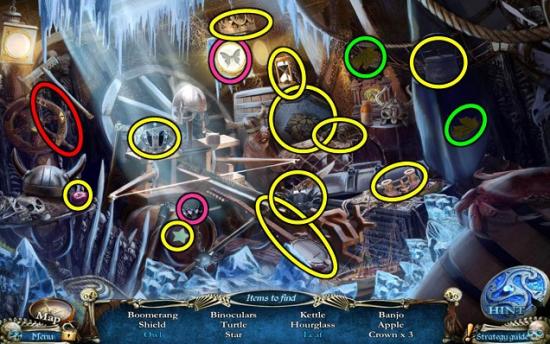
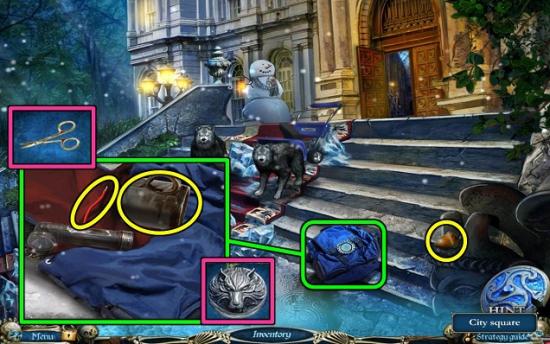
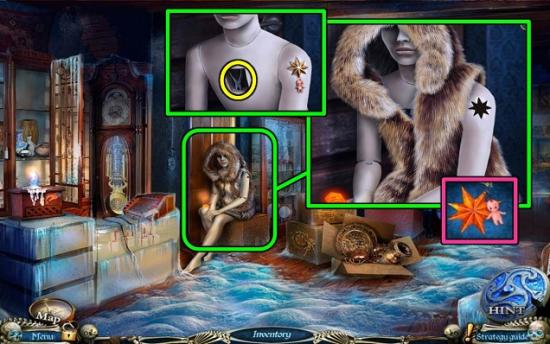
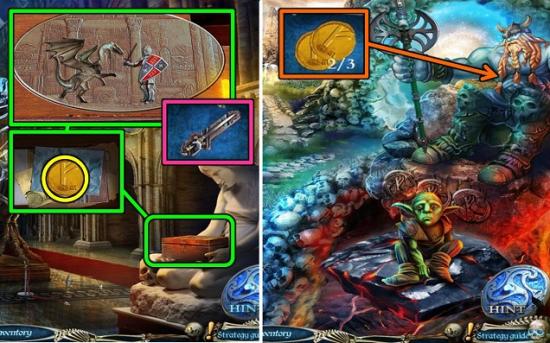
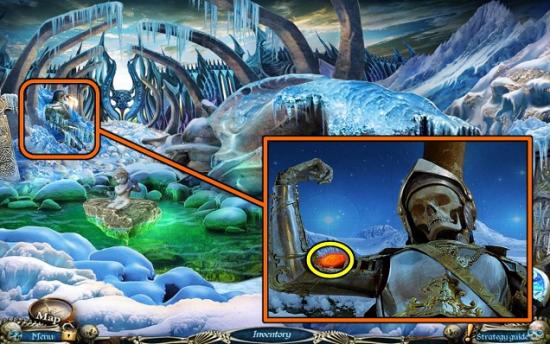
Welcometo the Hallowed Legends: Ship of Bones walkthrough on Gamezebo. Hallowed Legends: Ship of Bones is a Hidden Object Adventure game created by Elephant Games. Solve the mystery of the woman in white and rescue the city of Erlenbourg from its curse. Gamezebo’s walkthrough will provide you with detailed images, tips, information, and hints on how to play your best game.
Welcometo the Hallowed Legends: Ship of Bones walkthrough on Gamezebo. Hallowed Legends: Ship of Bones is a Hidden Object Adventure game created by Elephant Games. Solve the mystery of the woman in white and rescue the city of Erlenbourg from its curse. Gamezebo’s walkthrough will provide you with detailed images, tips, information, and hints on how to play your best game.
Difficulty Levels
Cursors
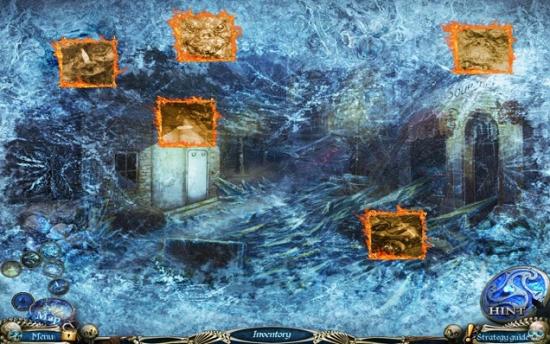
Map
Inventory, Hints and Objective
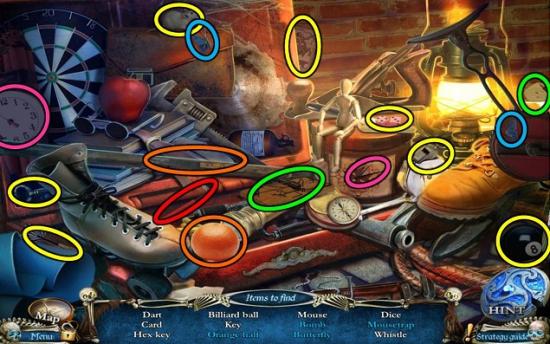
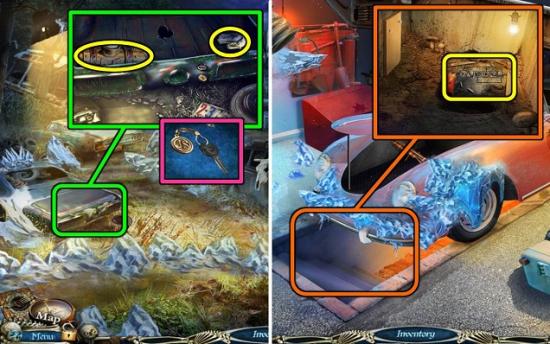
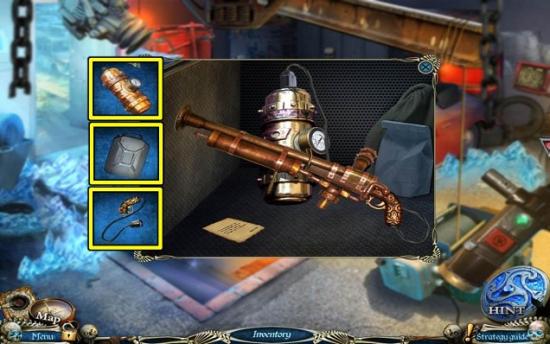
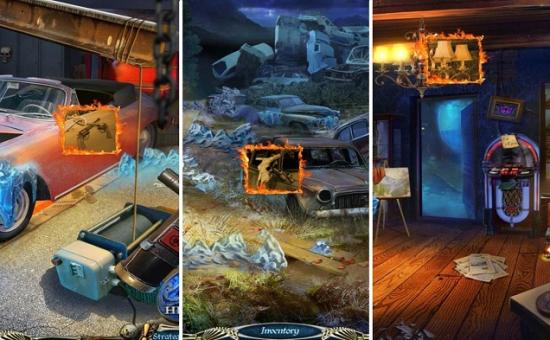
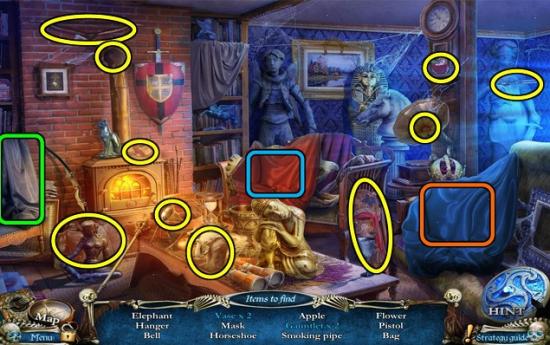
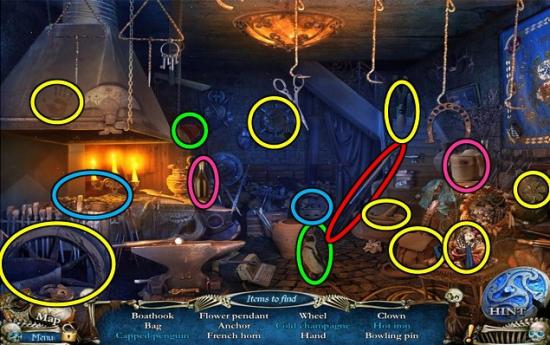
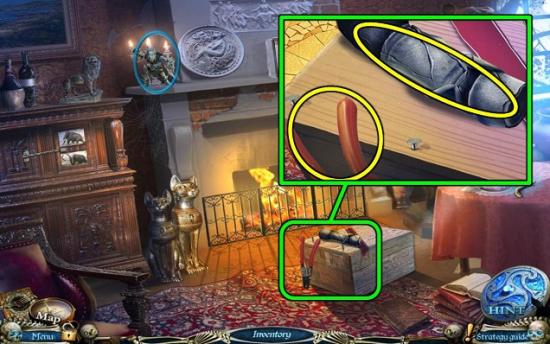
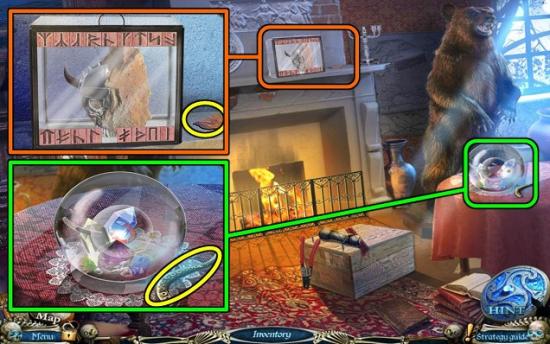
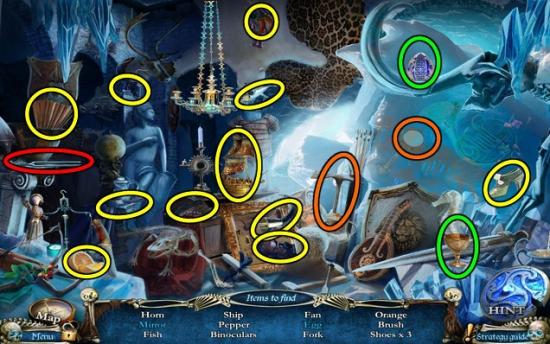
Hidden Object Scenes
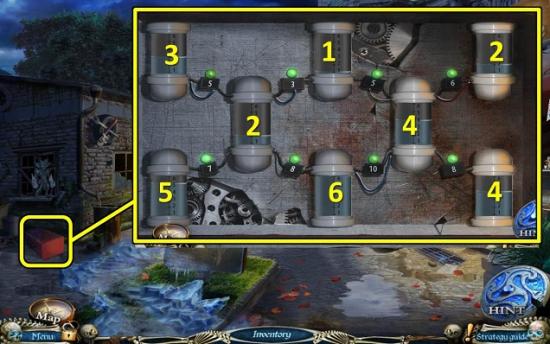
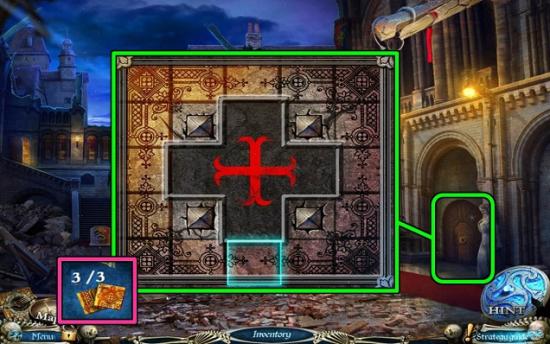
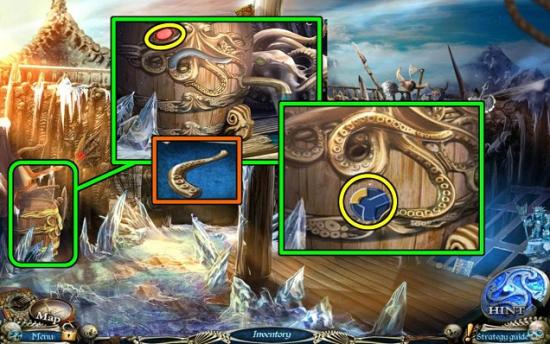
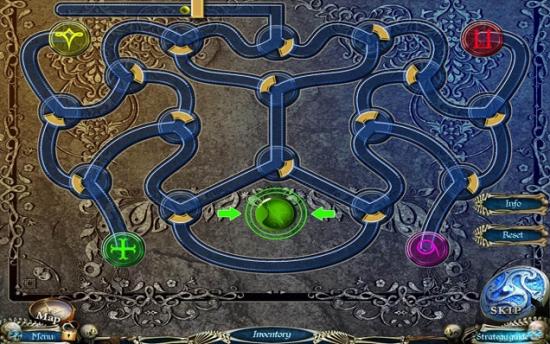
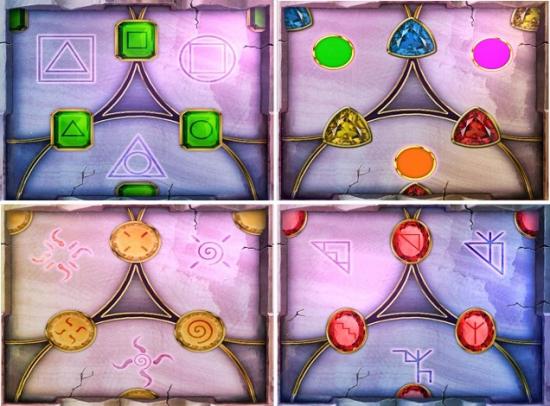
Mini Games
The Raven and Book of Fire
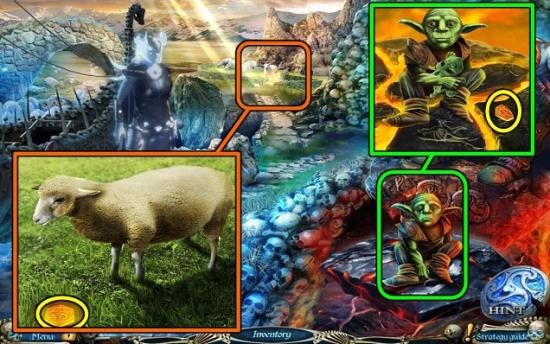
Goblins
Achievements
Collector’s Edition Bonus Features

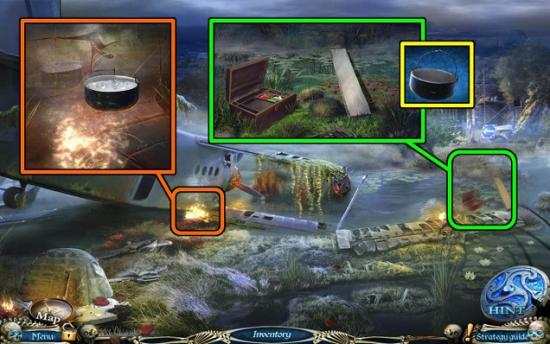


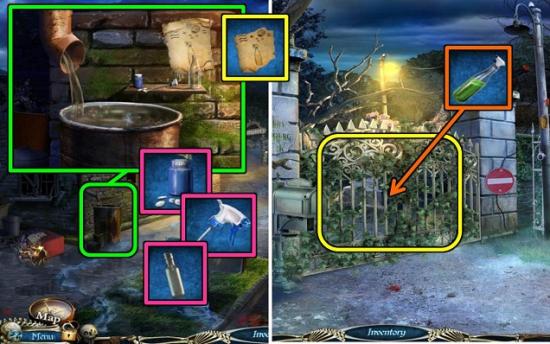
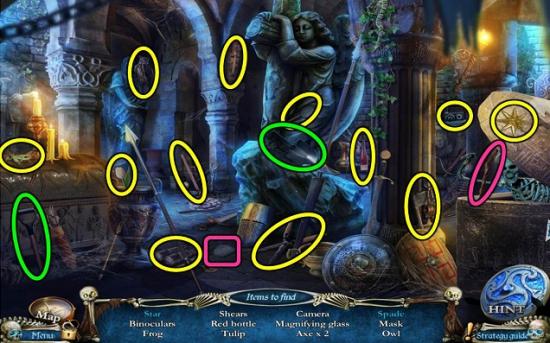


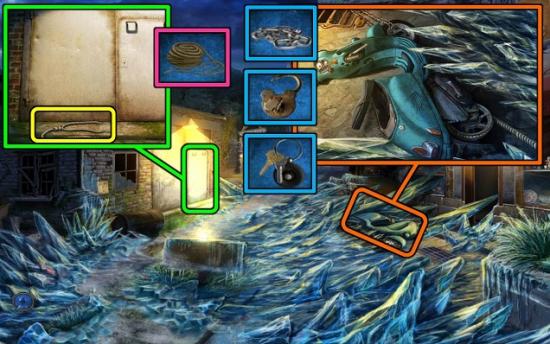
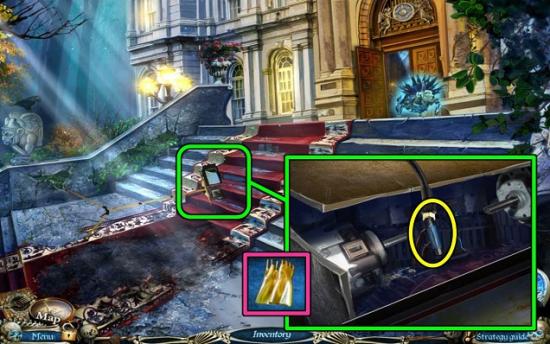

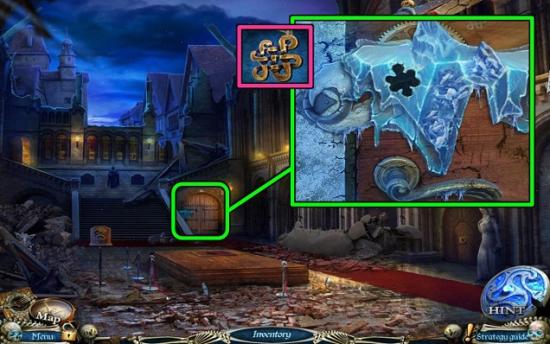

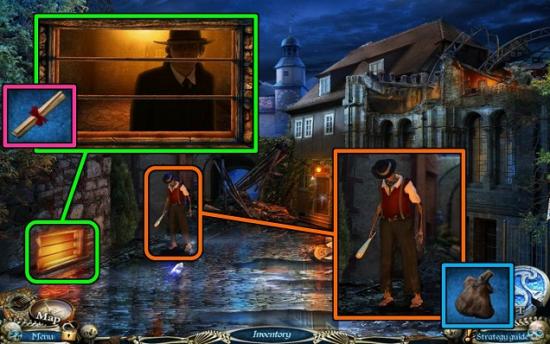

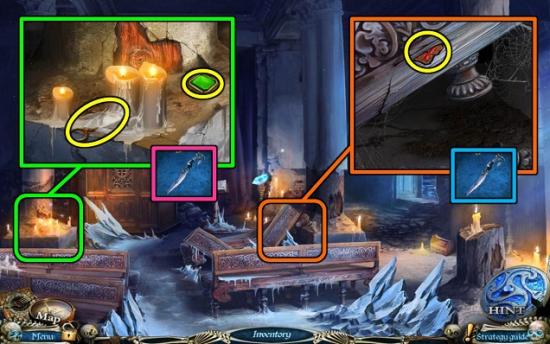
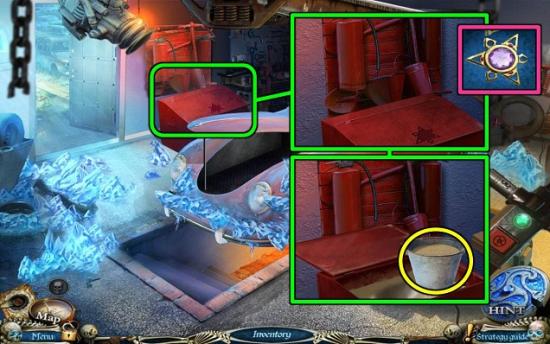
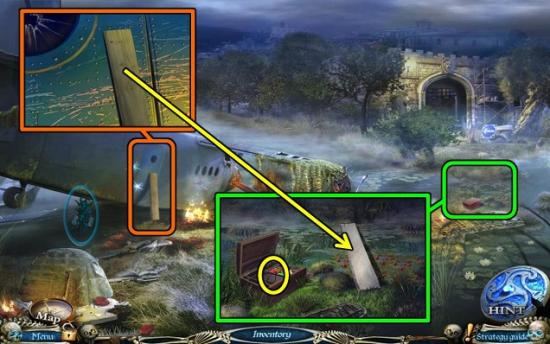
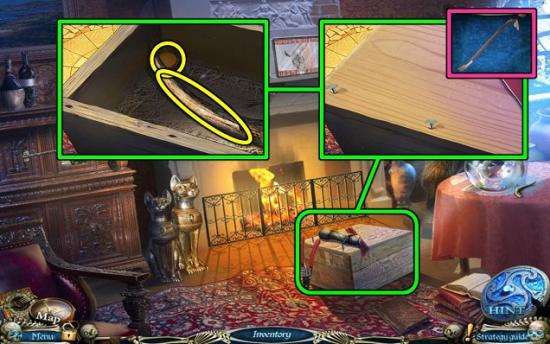
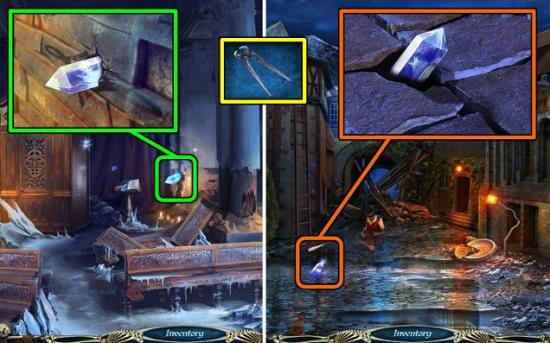
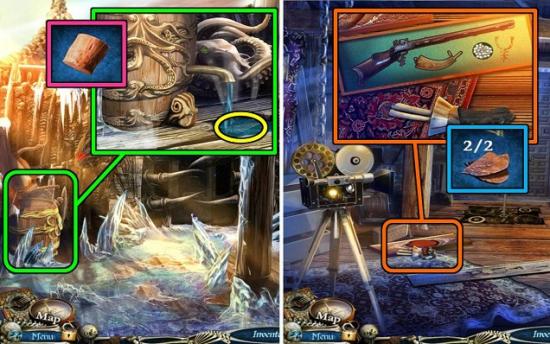
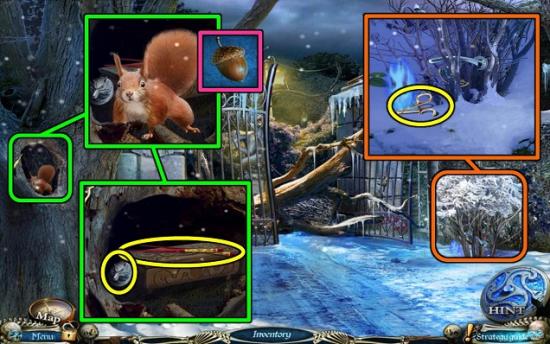
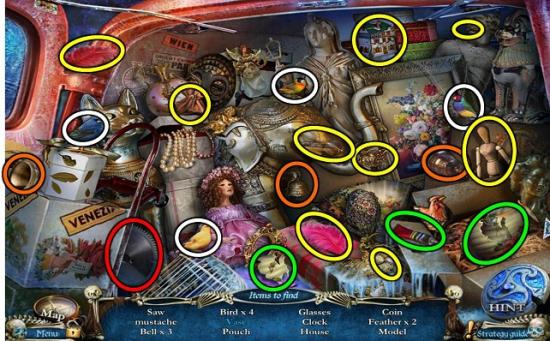
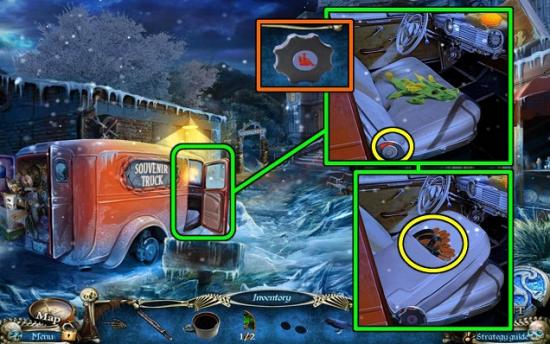
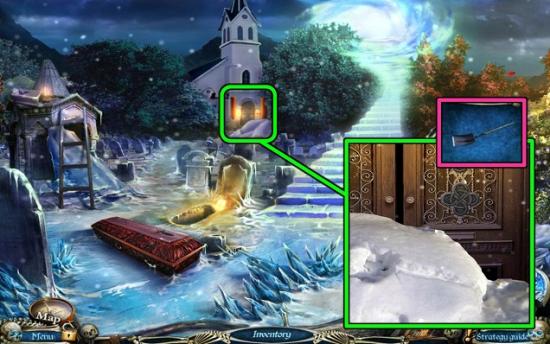
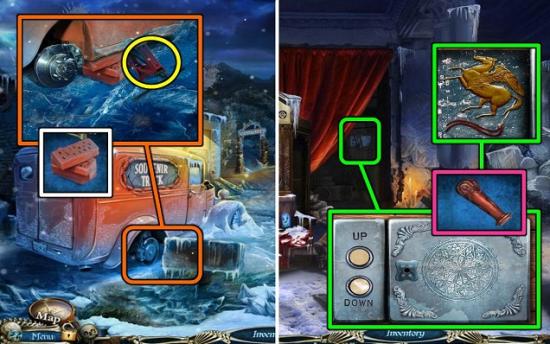
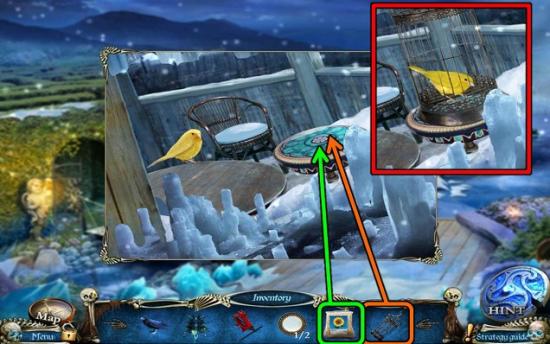
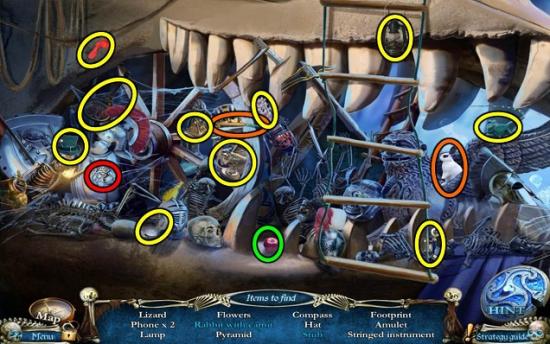
Take the BUCKET WITH SAND.
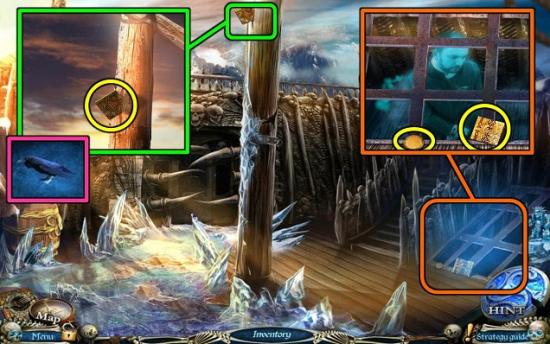


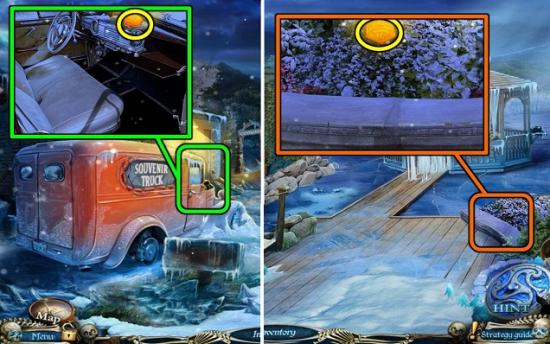
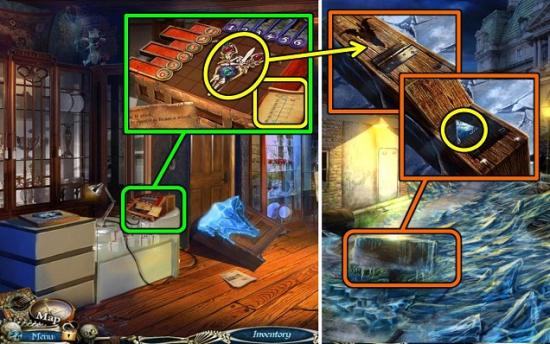
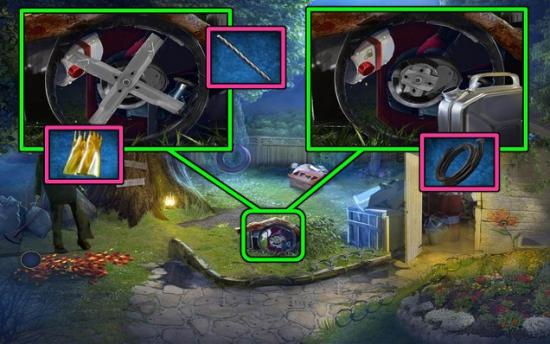
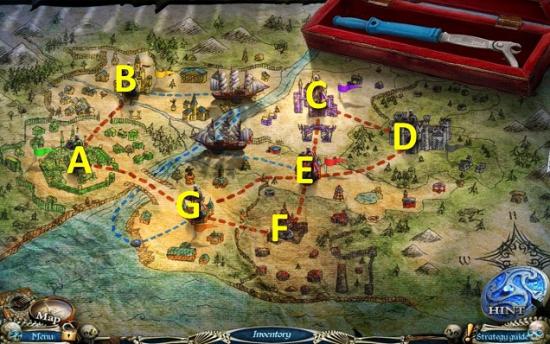
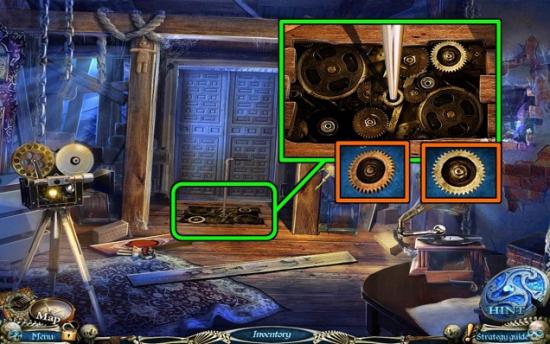
1: Plane – Under plane.
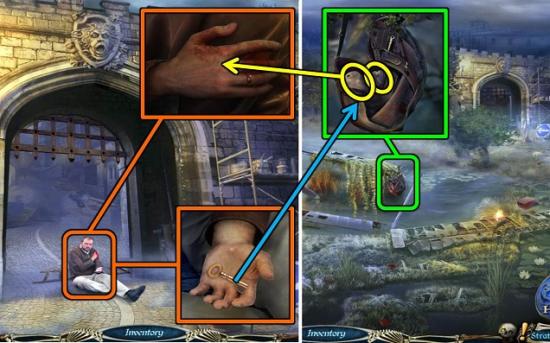
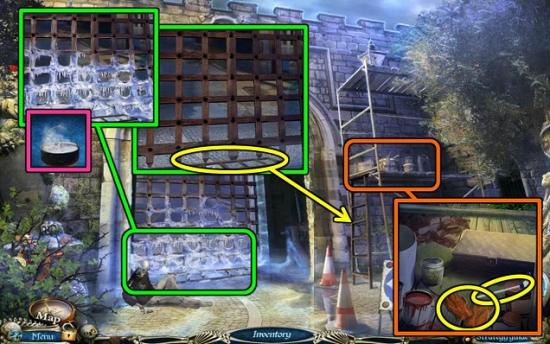
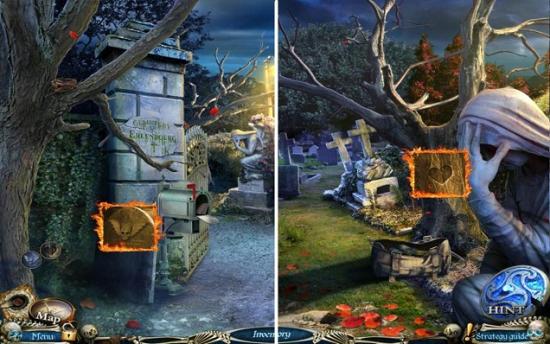
2: City Gates – Top right on the wall.
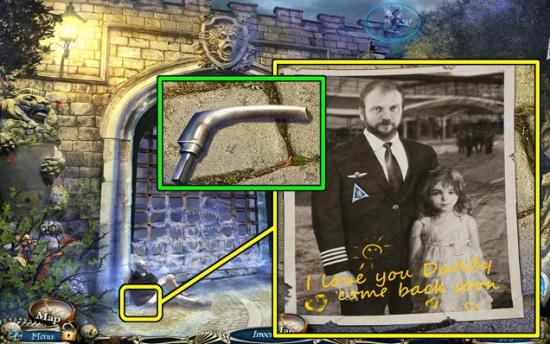
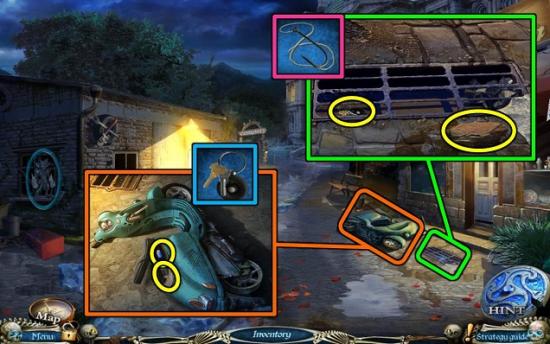
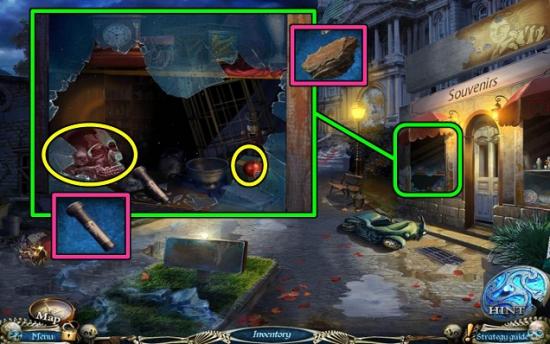
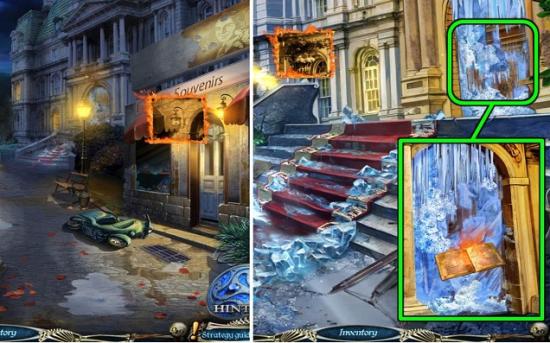
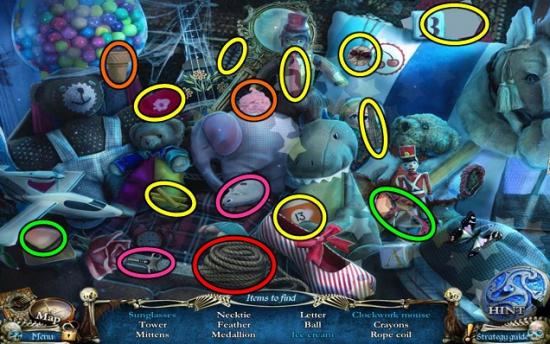
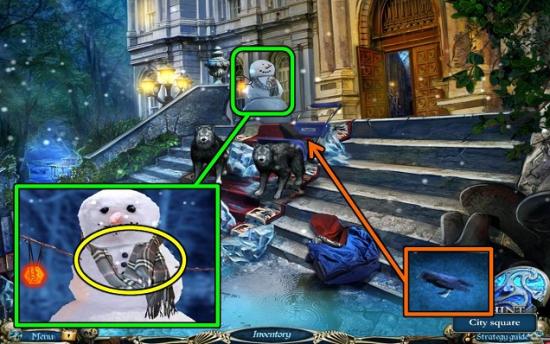
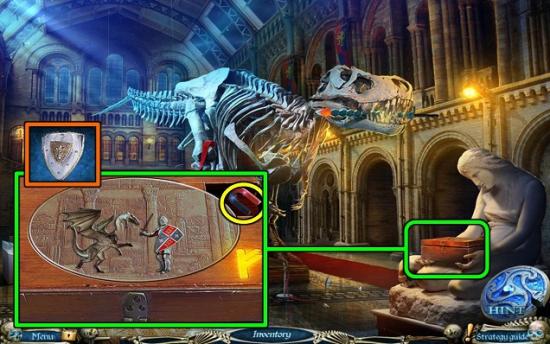
3: City Square – In garage window.
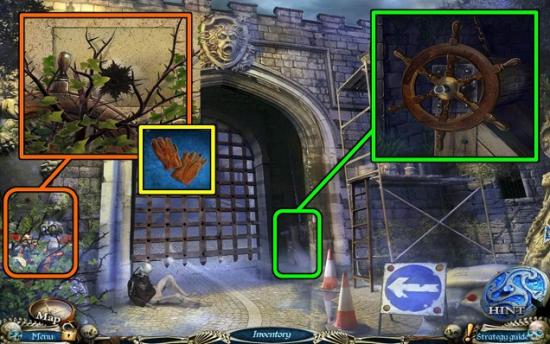
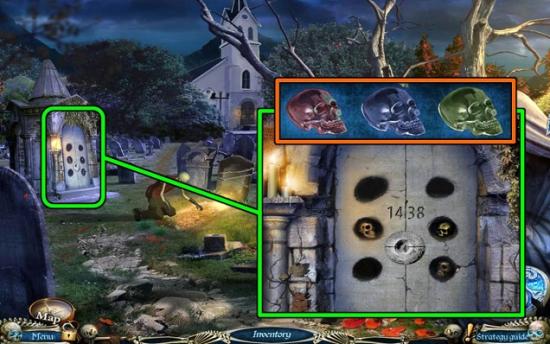
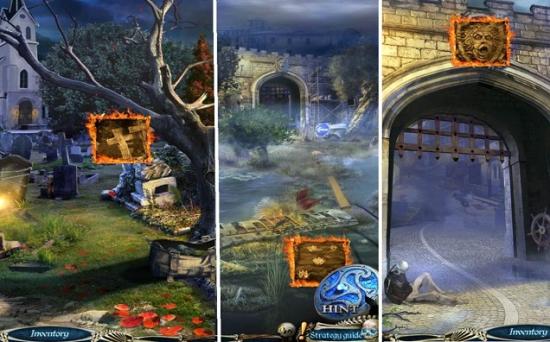
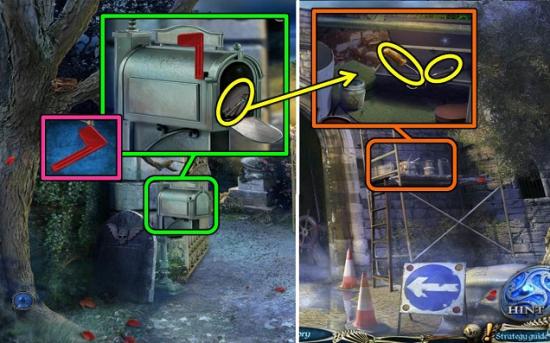
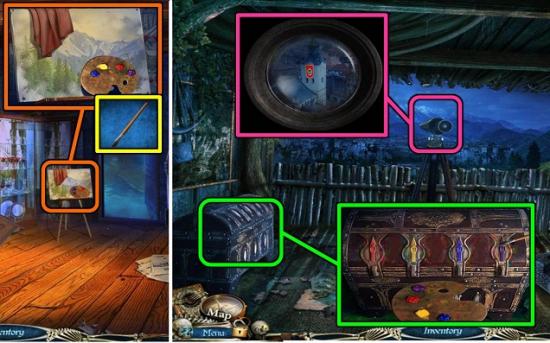
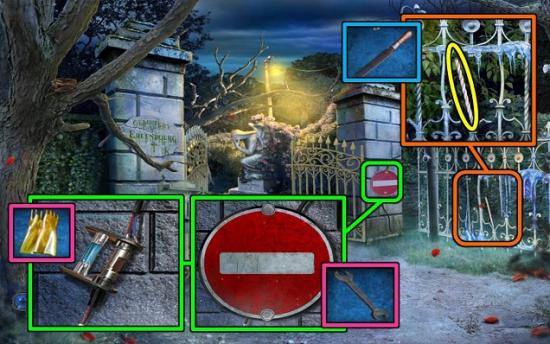
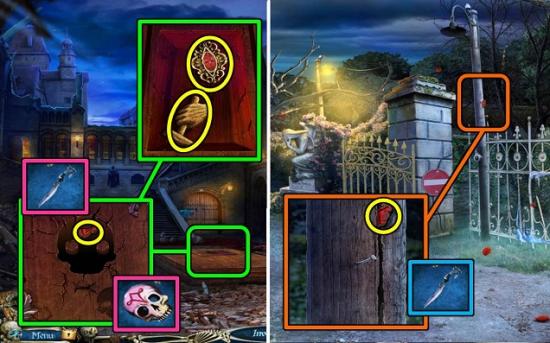
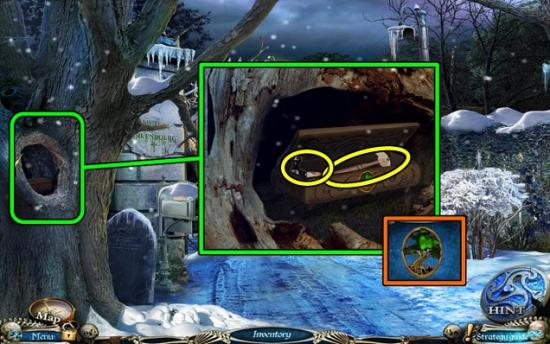
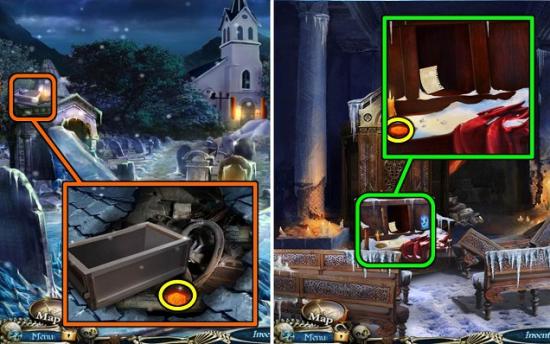
4: Cemetery Entrance – In ivy under the tree.
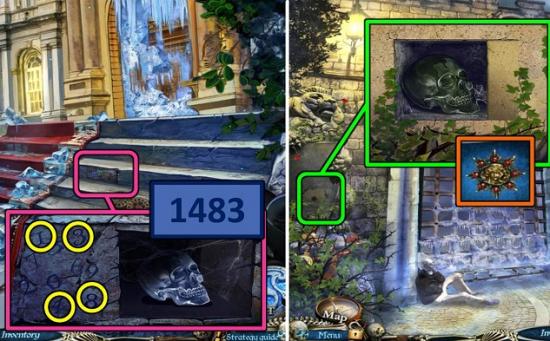
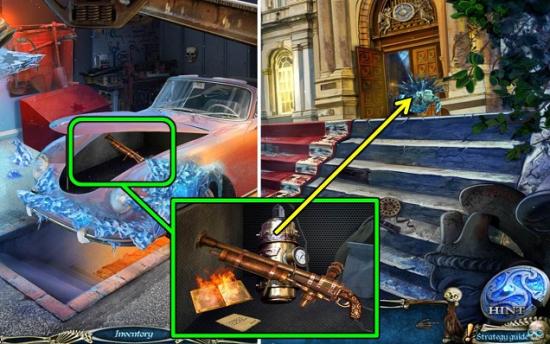
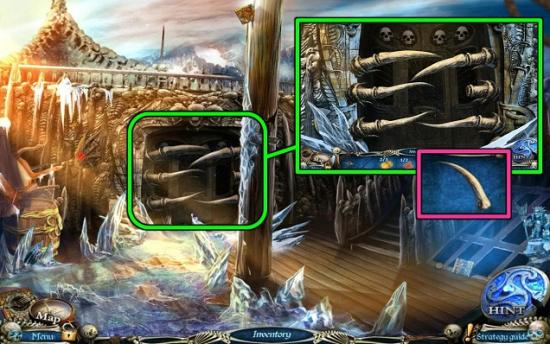
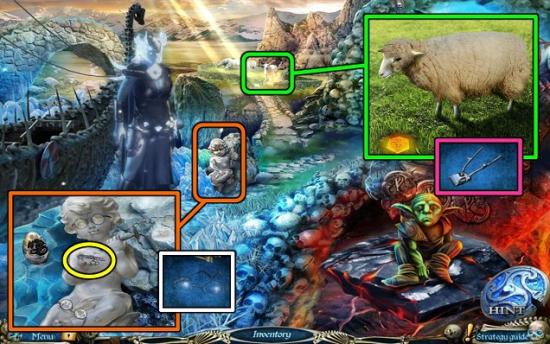
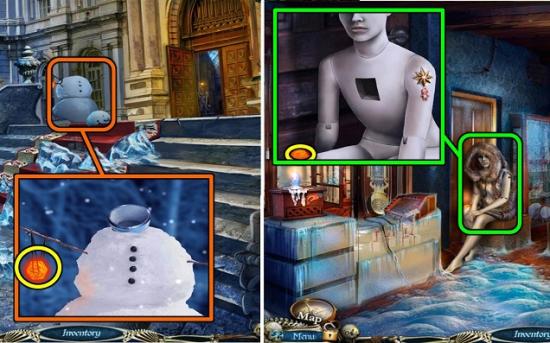
5: Museum Entrance – Behind gargoyle on steps.
6: Cemetery – To the right of the bag.
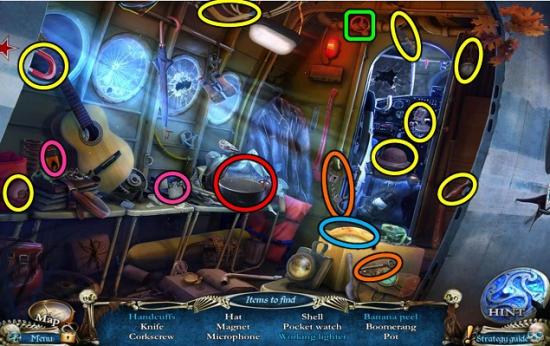
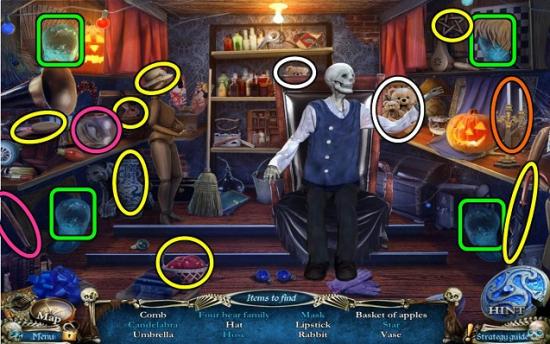
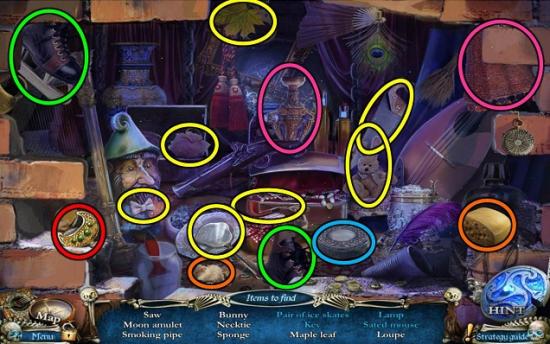
7: Souvenir Shop – Top left shelf.
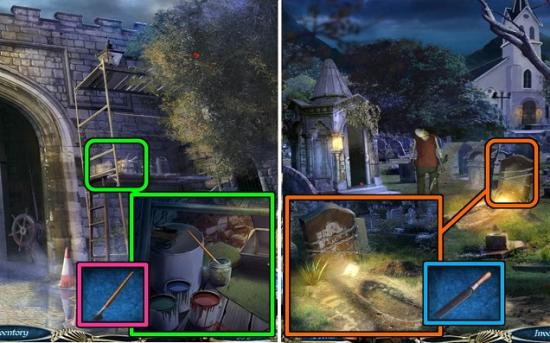
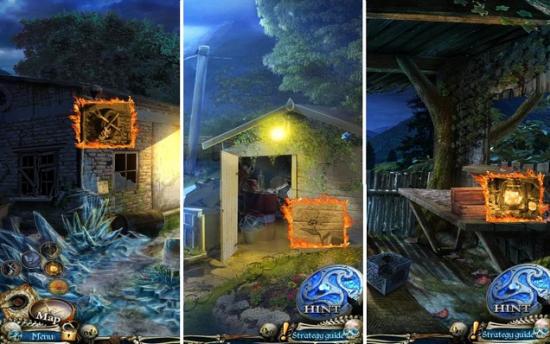
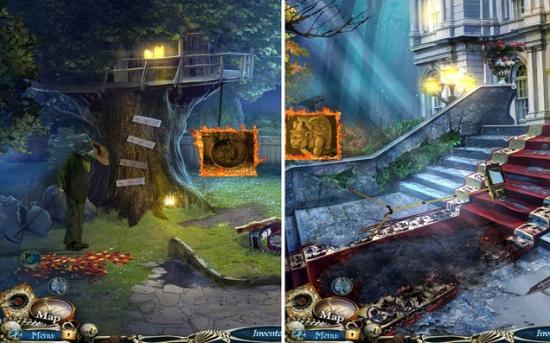
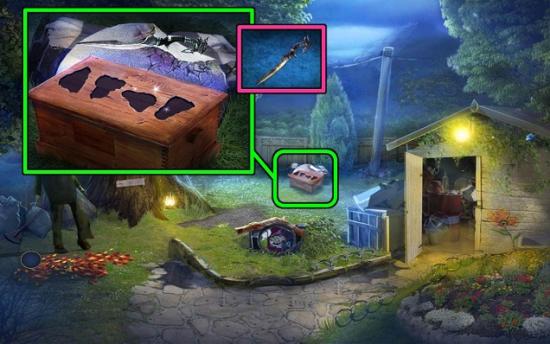
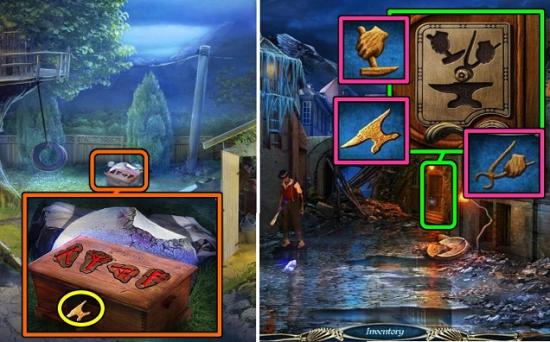
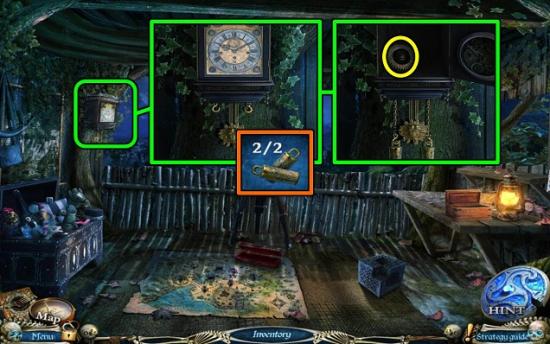
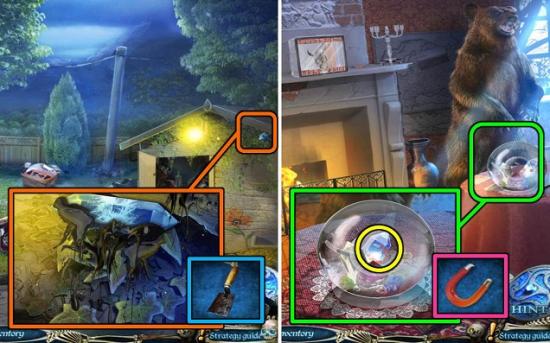
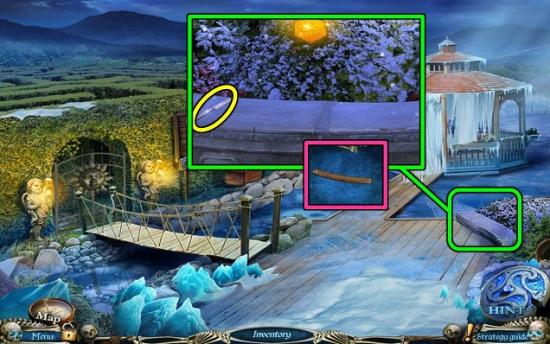
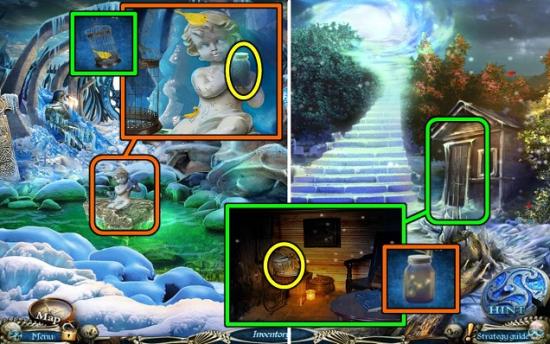
8: Backyard – On ledge to the left of the tree house.
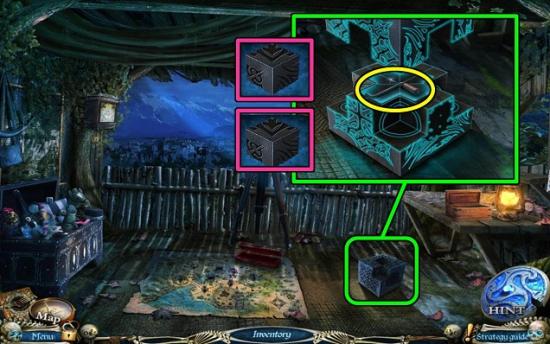
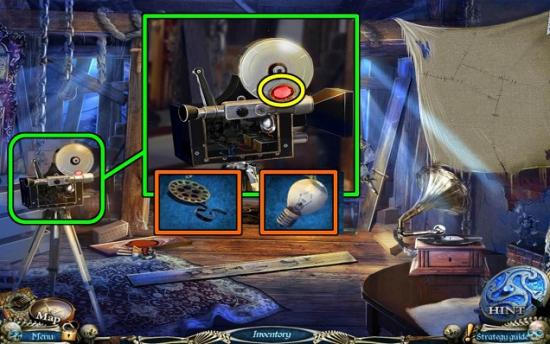
9: Tree House – Below the lantern on the table.
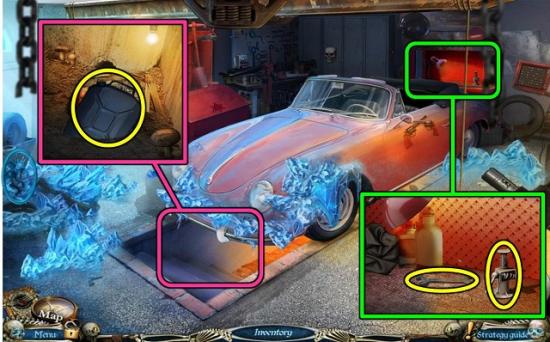
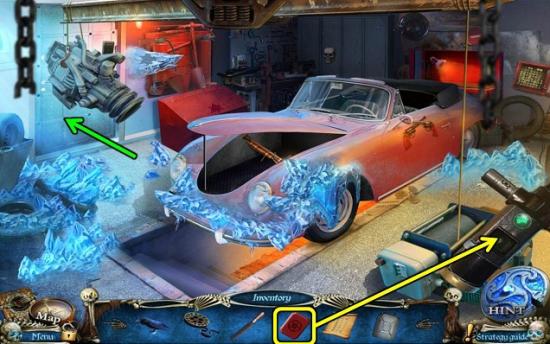
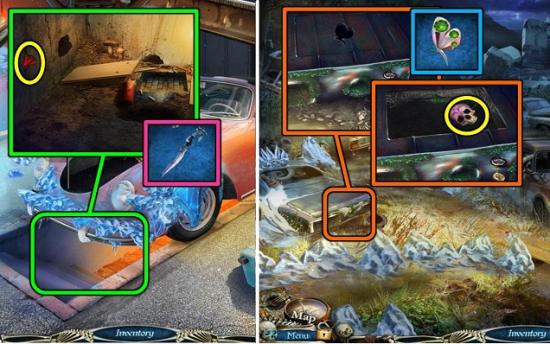
10: Garage – In the ice under the spare wheel (left edge of the screen).
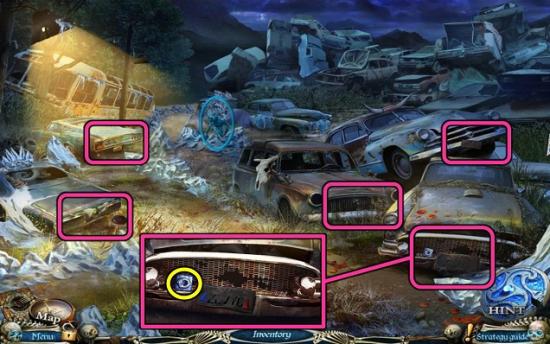
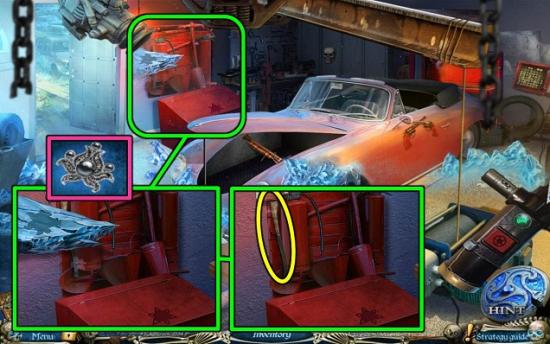
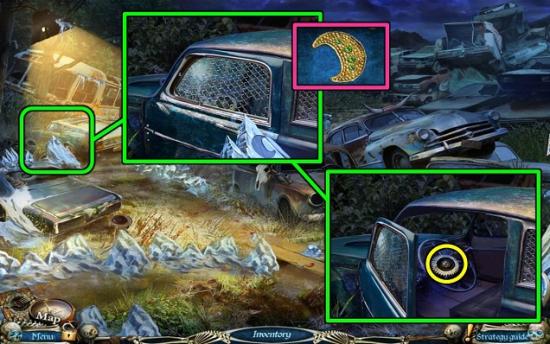
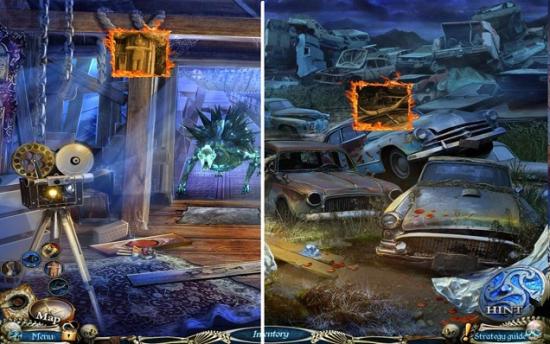
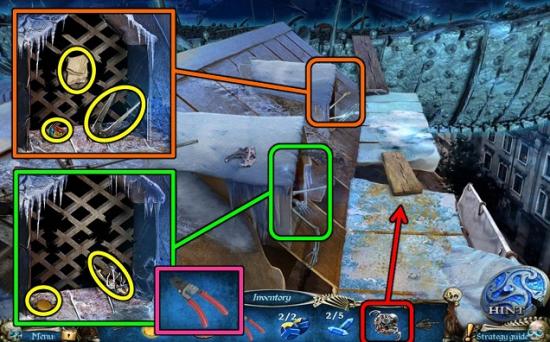
11: Junkyard – In ice above center car.
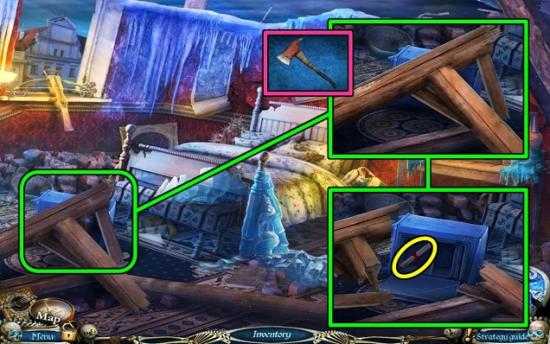
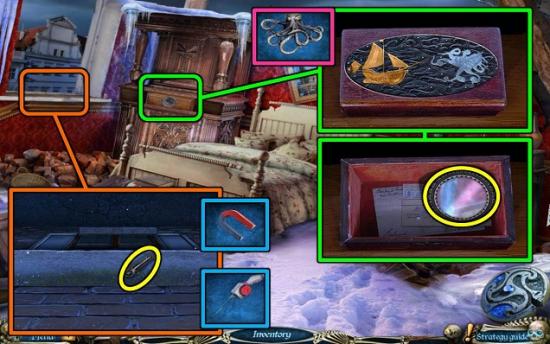
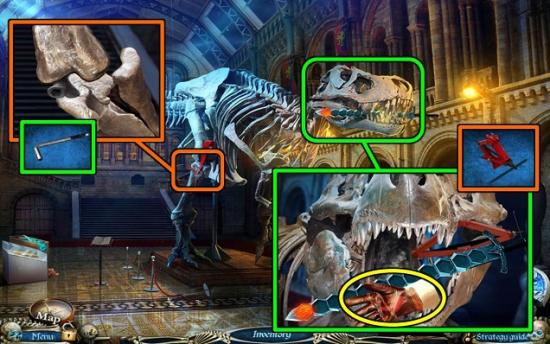
12: Museum – Behind fallen beam on the left.
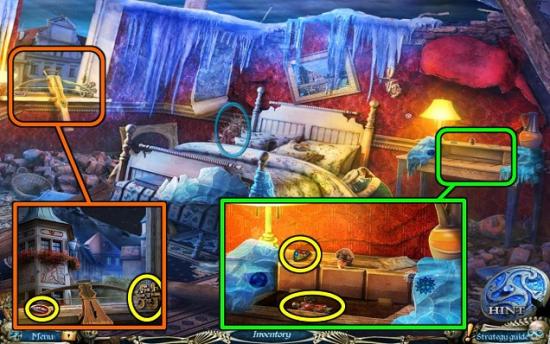
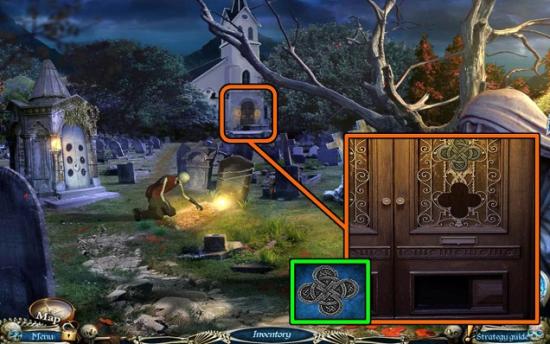
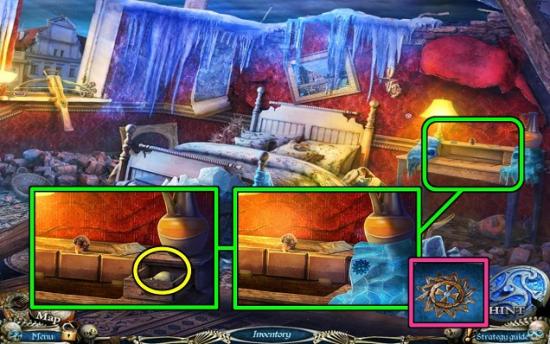
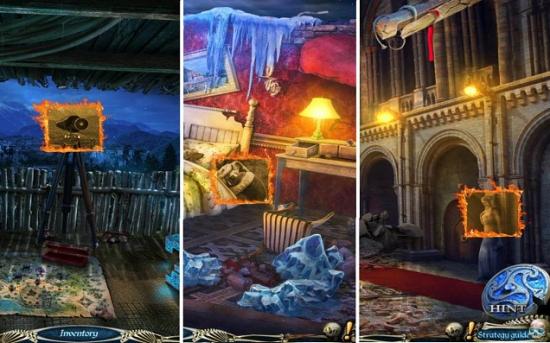
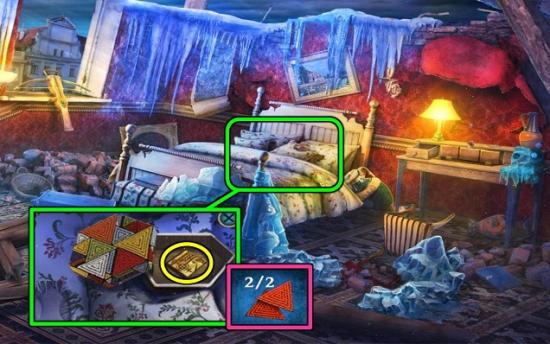
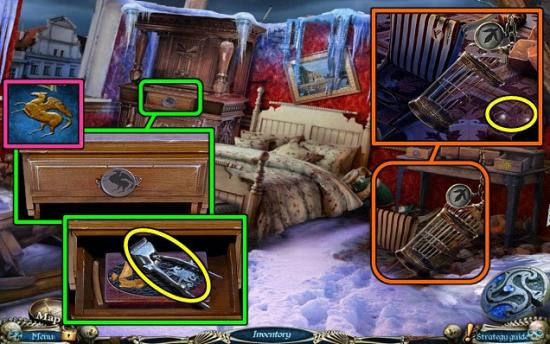
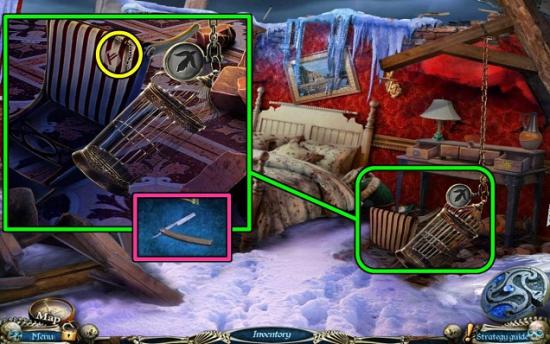
13: Second Floor Room – Left side of the bed.
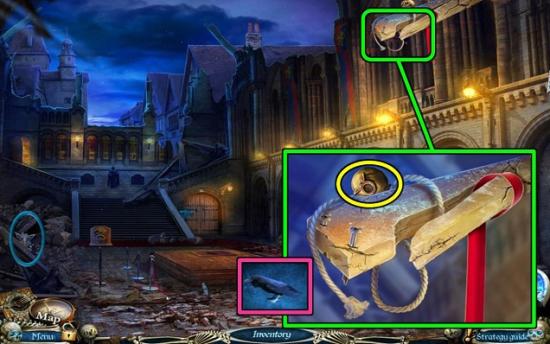
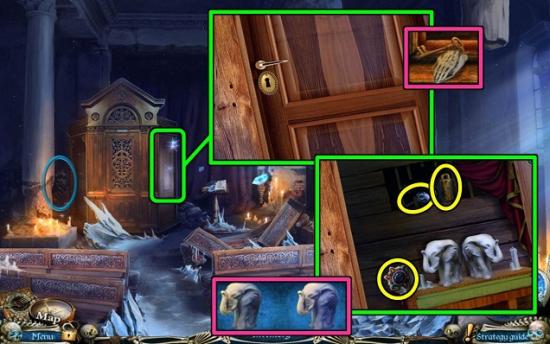
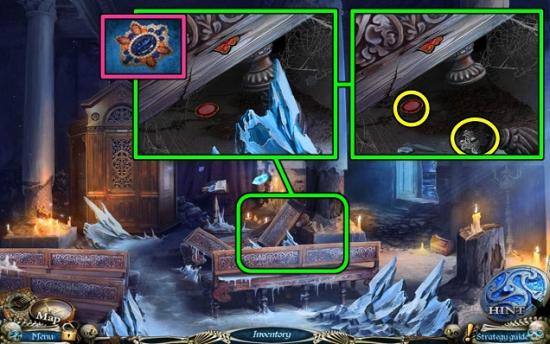
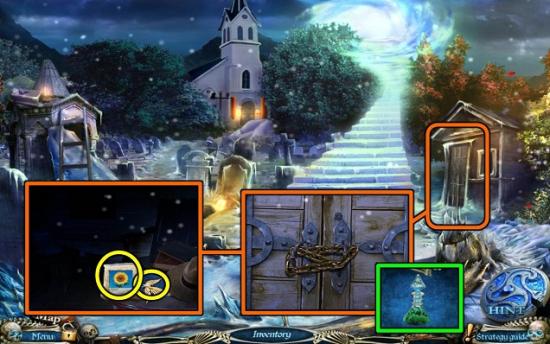
14: Chapel – Behind pillar on the left.
15: Chapel Yard – On the roof on the right.
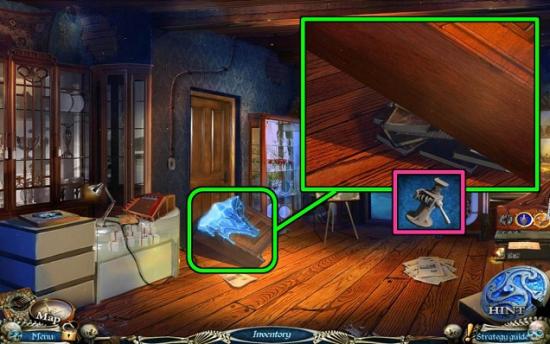
16: Attic – Below the sheet.
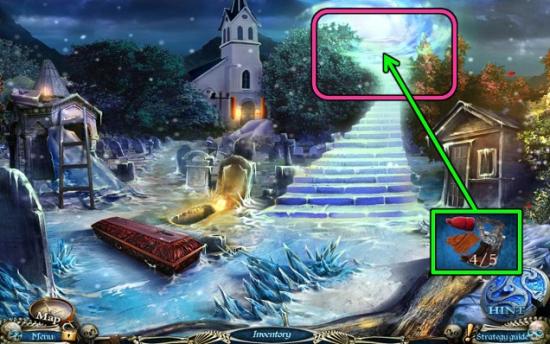
17: Roof – Above the hint button.
18: Deck – Above the hint button.
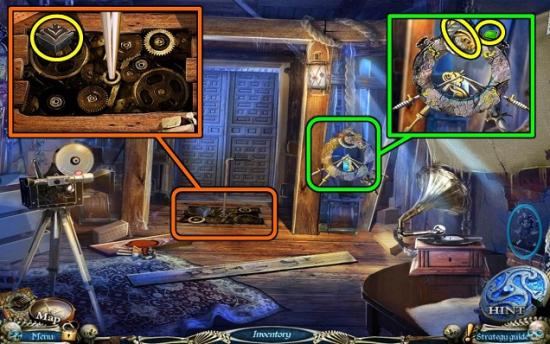
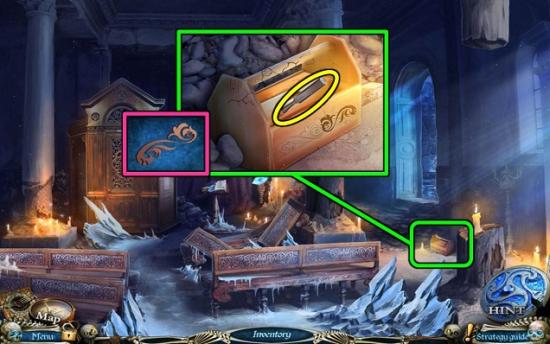
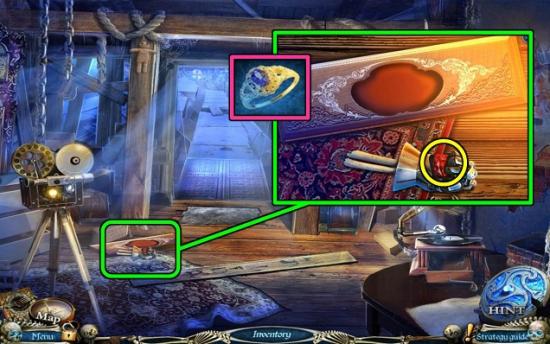
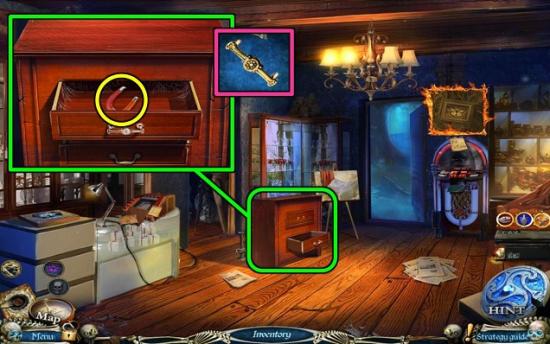
19: Office – On mantelpiece.
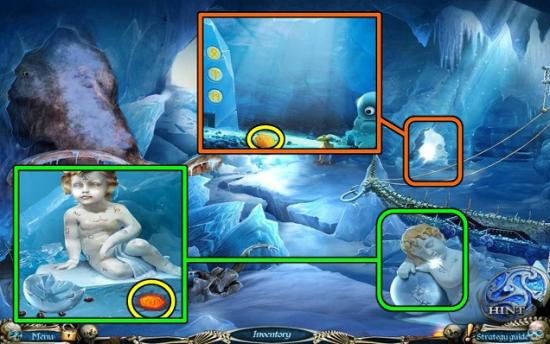
20: Cabin – In ice above the hint button.
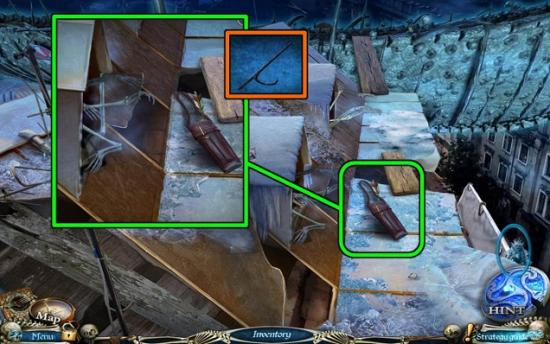
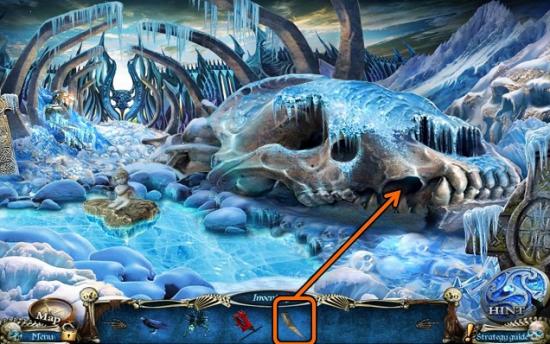
21: Bridge – In the pile of skulls on the right.
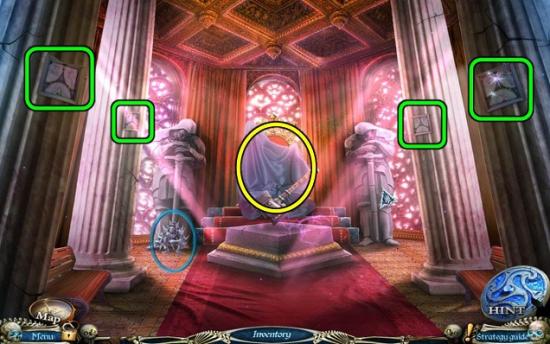
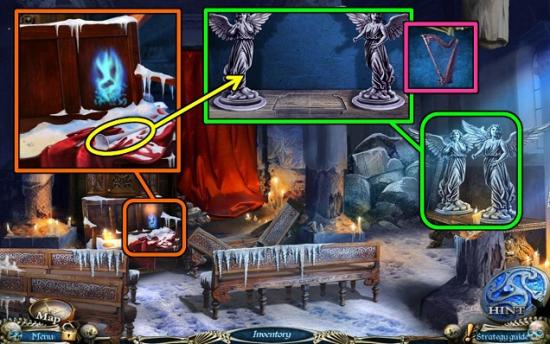
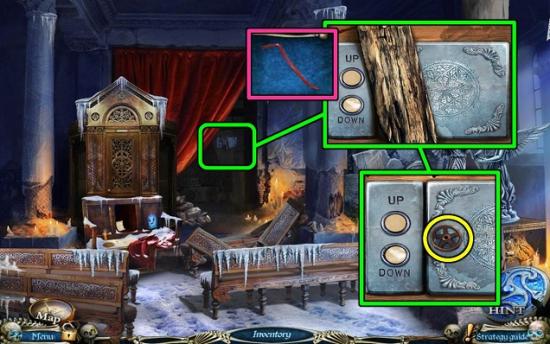
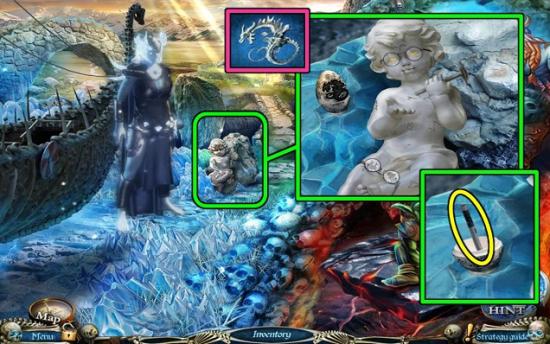
22: Throne Room – In front of left statue.

