![Digimon UP Tier List [Supports, Buddies, and Partners]](/wp-content/uploads/2026/07/digimon-up-tier-list.jpg "Digimon UP Tier List [Supports, Buddies, and Partners]")
Digimon UP Tier List [Supports, Buddies, and Partners]
These Digimon will get you UP the leaderboard.

![Haze Seas Boss Drops [Chances, Locations, and How to Spawn]](/wp-content/uploads/2026/07/haze-seas-boss-drops.jpg "Haze Seas Boss Drops [Chances, Locations, and How to Spawn]")

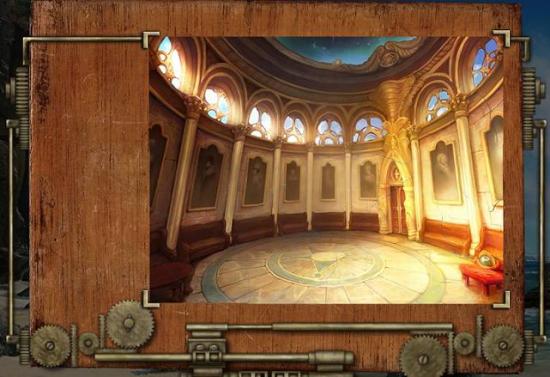
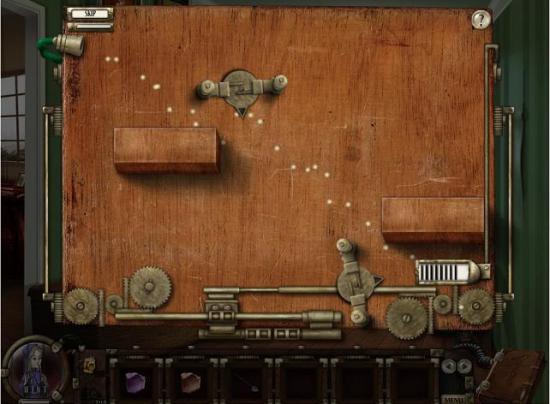
Welcome the Guardians of Magic: Amanda’s Awakening walkthrough on Gamezebo. Guardians of Magic: Amanda’s Awakening is an adventure game played on PC created by GameHouse. This walkthrough includes tips and tricks, helpful hints, and a strategy guide to how to complete Guardians of Magic: Amanda’s Awakening.
Welcome the Guardians of Magic: Amanda’s Awakening walkthrough on Gamezebo. Guardians of Magic: Amanda’s Awakening is an adventure game played on PC created by GameHouse. This walkthrough includes tips and tricks, helpful hints, and a strategy guide to how to complete Guardians of Magic: Amanda’s Awakening.
In this game you need to help Amanda find out what happened between her magician grandfather and her scientist mentor. To do this you need to navigate various scenes by finding items and solving puzzles.
You can find out what to do in any given scene by scanning the scene with your cursor. The cursor will change into the following icons when you can interact with something:
Sometimes you get little scenes of dialogue. You need to hit the ‘continue’ or ‘next’ button to get to the next line of dialogue. You can skip the entire scene by hitting the ‘skip’ button.
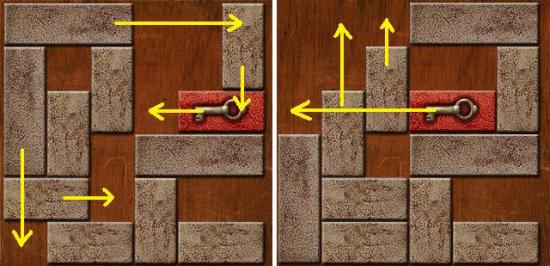
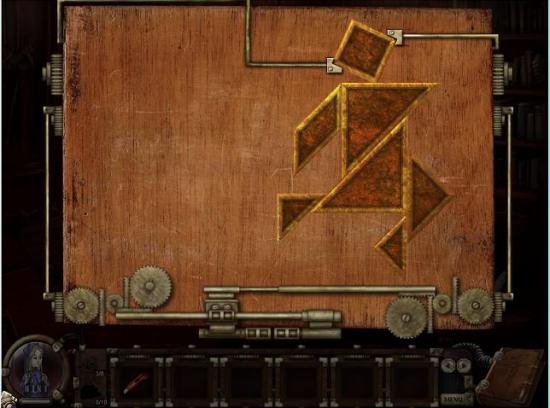
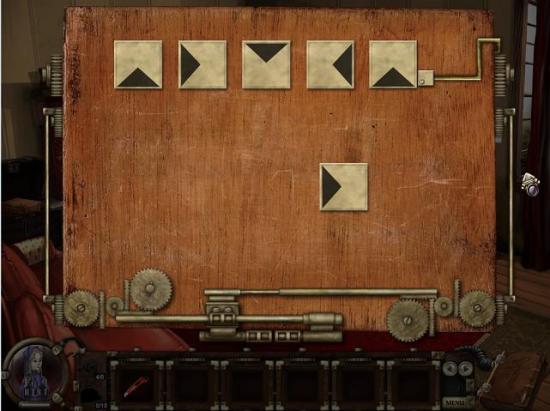
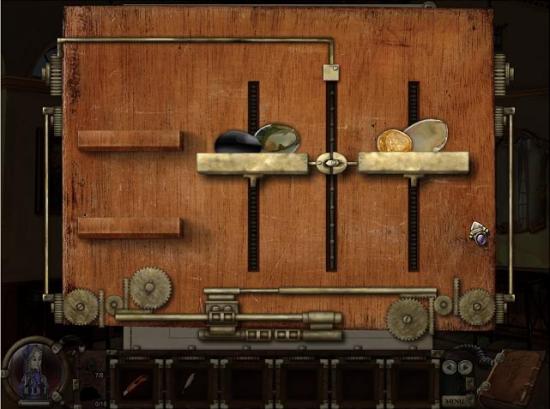
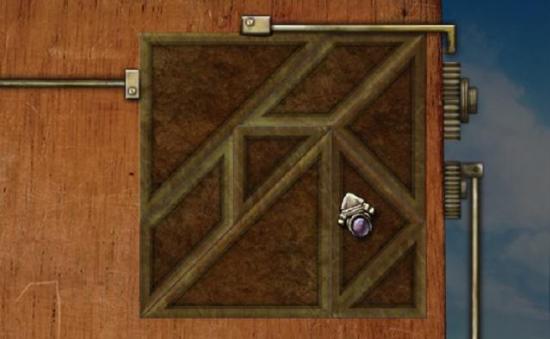
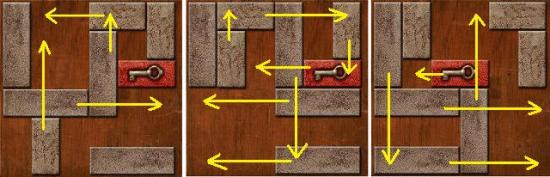
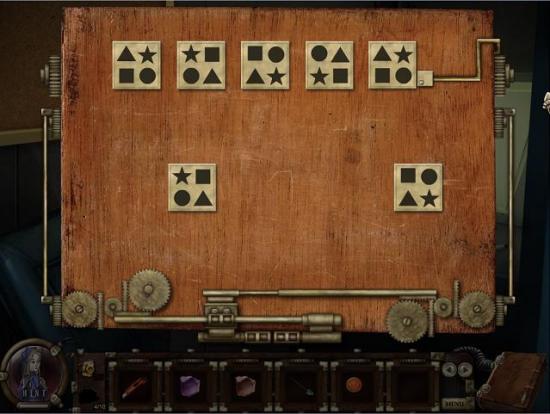
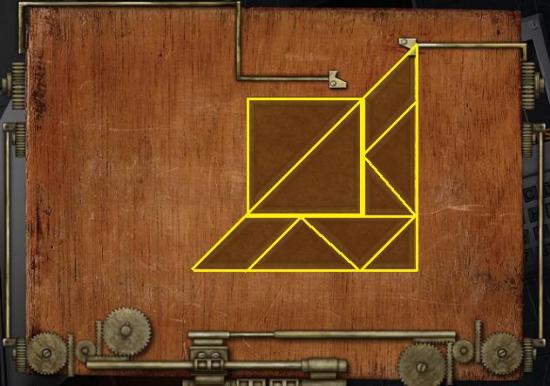
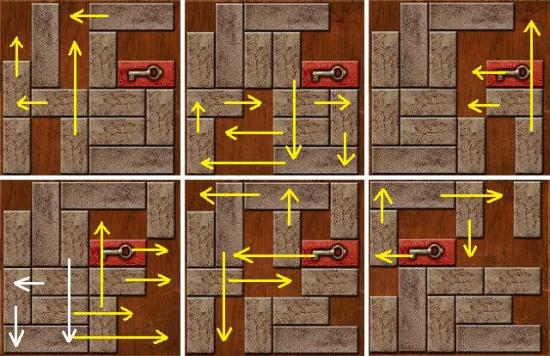
On the way you will find a number of puzzle boxes to solve. Each puzzle has a ‘reset’ button at the top right to start the puzzle over. After the little timer next to the reset button fills up, a ‘skip’ button will be activated, allowing you to skip the puzzle.
In the bottom left of the screen is a ‘hint’ button for when you get stuck. However, the answer you’re most likely to get is “maybe I should look around a little bit more”, which means that you haven’t yet found the item that triggers the next step in the game. In that case all you can do is go back through all the scenes and scan them carefully with your cursor to see if you’ve missed an action. Each time you’ve used a hint you need to wait a few minutes for it to recharge before you can use another one.
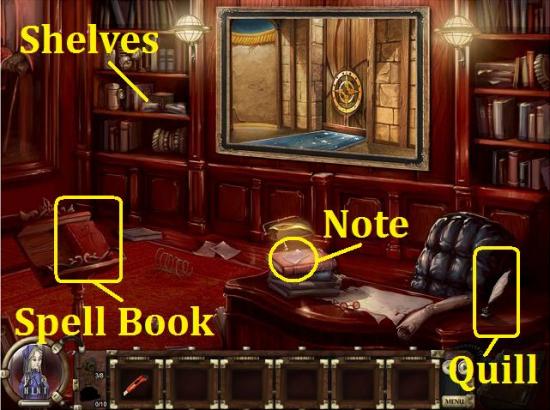
In the bottom right of your screen you will find your spell book. You won’t be able to actually access the spell book until you’ve found the book in the hidden library. The spell book has four sections:
Find a Way into the House

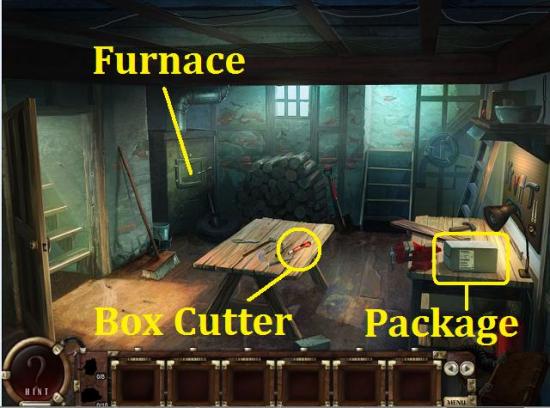
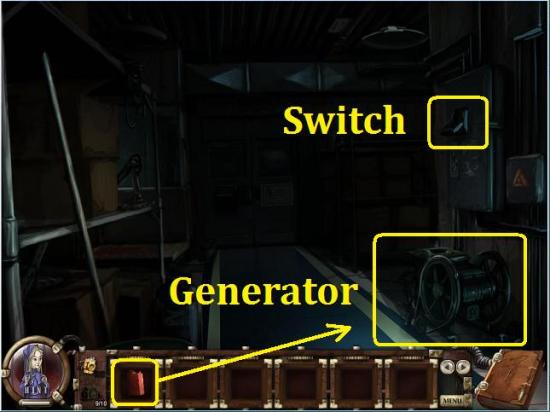
Basement
Hallway
Living Room

Find the Library

Living Room Contd.
Library
Through the Painting

Ritual Hall

Corvus – the Fairy Woods

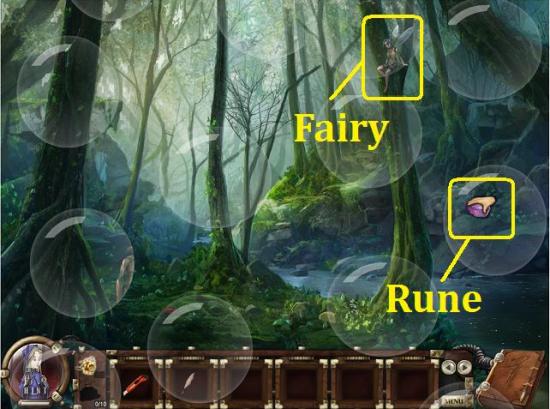
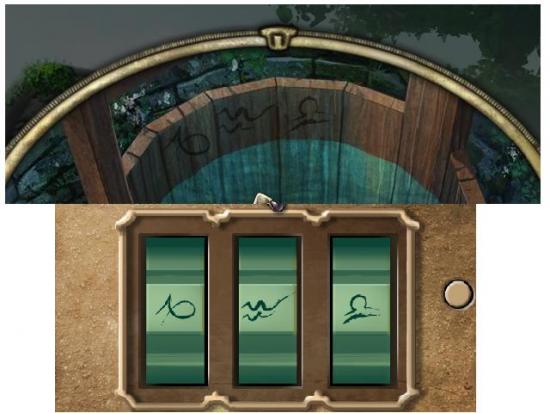
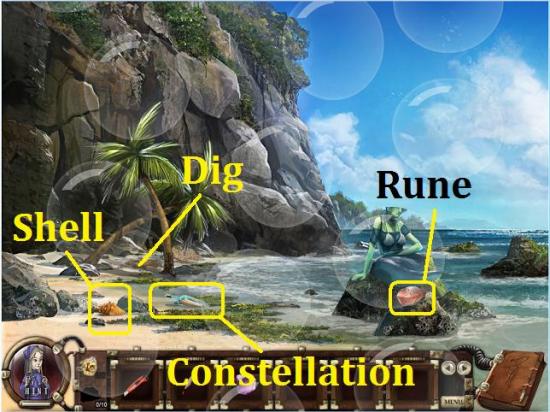
Give me the sound of the sea
Bring me a coin to buy glee
& a weapon mightier than a sword
Then I shall redeem my word
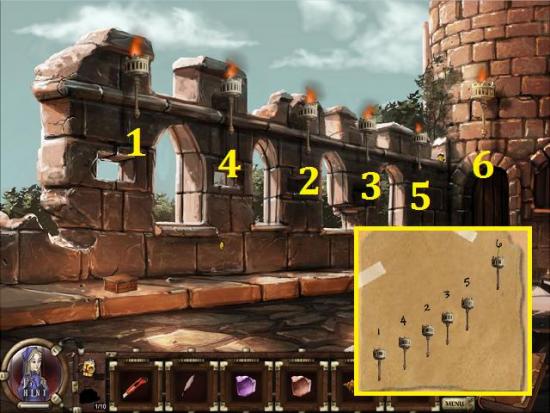
Delphinus and Monocerus – the Castle

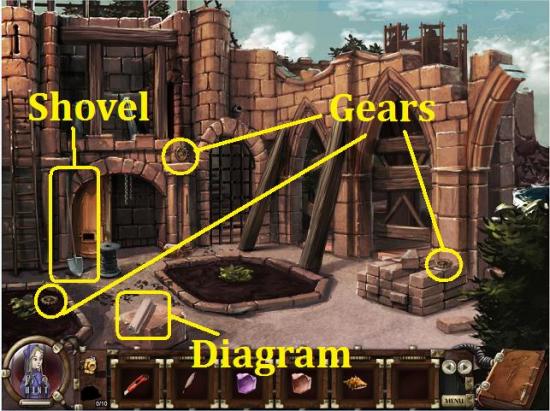
Castle Parapet and Tower
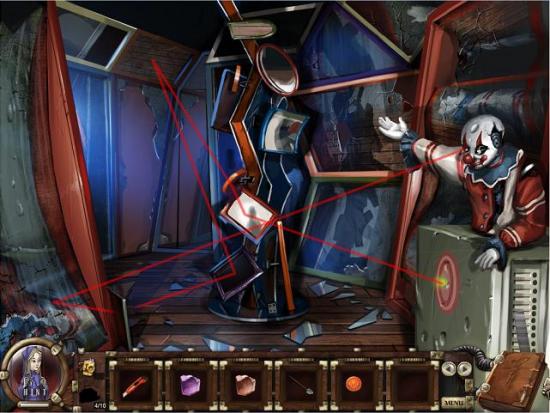
Pegasus – the Circus
The Three Presents
Capricornus – the Stone Circle
Find Mera
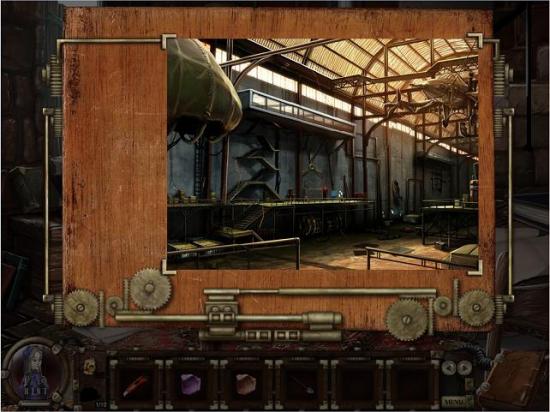
Storage Room
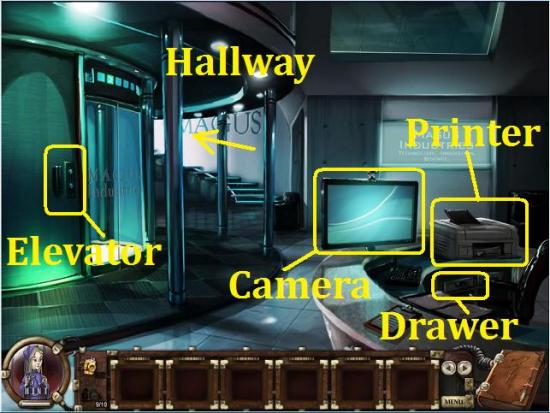
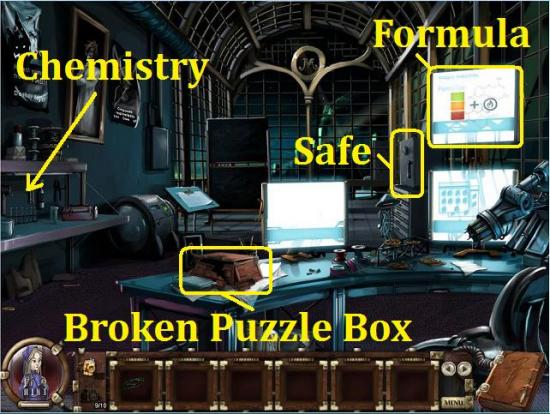
Offices
Final Confrontation
