- Wondering how to get Monopoly GO! free rolls? Well, you’ve come to the right place. In this guide, we provide you with a bunch of tips and tricks to get some free rolls for the hit new mobile game. We’ll …
Best Roblox Horror Games to Play Right Now – Updated Weekly
By Adele Wilson
Our Best Roblox Horror Games guide features the scariest and most creative experiences to play right now on the platform!The BEST Roblox Games of The Week – Games You Need To Play!
By Sho Roberts
Our feature shares our pick for the Best Roblox Games of the week! With our feature, we guarantee you'll find something new to play!Type Soul Clan Rarity Guide – All Legendary And Common Clans Listed!
By Nathan Ball
Wondering what your odds of rolling a particular Clan are? Wonder no more, with my handy Type Soul Clan Rarity guide.
Guardians of Beyond: Witchville Walkthrough
Welcome to the Guardians of Beyond: Witchville walkthrough on Gamezebo. Guardians of Beyond: Witchville is a Hidden Object/Adventure game played on PC created by Vogat Interactive. This walkthrough includes tips and tricks, helpful hints, and a strategy guide on how to complete Guardians of Beyond: Witchville.
Guardians of Beyond: Witchville – Game Introduction
Welcome to the Guardians of Beyond: Witchville walkthrough on Gamezebo. Guardians of Beyond: Witchville is a Hidden Object/Adventure game played on PC created by Vogat Interactive. This walkthrough includes tips and tricks, helpful hints, and a strategy guide on how to complete Guardians of Beyond: Witchville.
General Information
This game can be played in three difficulty modes:
- Casual: Optional tutorial; zones of interest are indicated with sparkles; skip and hint buttons recharge faster
- Advanced: Optional tutorial; zones of interest are not indicated; hint and skip buttons recharge slower
- Expert: No tutorial; zones of interest are not indicated; no hint and skip buttons
To play the game you need to explore various scenes to find items and solve puzzles. You can find out what to do in any given scene by scanning the scene with your cursor. The cursor has the shape of an arrow when you’re scanning, but will change into the following icons when you can interact with something:
- Eye: zoom in on an object
- Hand: grab or move an object
- Gears: use an inventory item on an object
- Large arrow: move on to the next scene. With a few exceptions, a downward arrow at the bottom of the screen will take you back to the previous scene
Menu Bars
At the bottom of your screen is your inventory, which holds all items you have found. The inventory will be minimized throughout the game, but you can make it pop up by moving your cursor to the bottom edge of the screen.
Inventory items need to be used on objects in the scene. When you’ve used an item, it will disappear from your inventory – provided there is no further use for it. Occasionally you need to combine two or more items in the inventory to create a new one. If this is the case, you can find out which items to combine by hovering your cursor over one of them – the item it needs to be combined with will start to wiggle slightly.
In the bottom left of the screen is your notebook. Hover your cursor over it to get a pop-up of all your current objectives. Click on the notes to open your notebook. The notebook contains all the information you have found, including screen shots of codes you will need to use later.
If you’re playing the Collector’s Edition, the bottom left of the screen also has a button to a complete, detailed strategy guide with screen shots.
In the bottom right of the screen is the Hint button. This button is inactive when you’re playing Expert mode. In Casual and Advanced modes you can use this button to get hints. If there is an action to complete in the current scene, the hint button will zoom in on that action. If there are no actions in the current scene, you will get a pop up message at the top of the screen with instructions. Make sure you read the message before you click on anything else, because if you do, the message will disappear and the hint button will have to recharge. The hint button can also be used to find items in the hidden object scenes.
Puzzles and Hidden Object Scenes
If you’re playing Casual mode, hidden object scenes (HOS) are indicated with sparkles. In Advanced and Expert modes you will have to find them yourself. Other than regular objects to find, the HOS instructions also have items listed in green. To find these items you have to find and combine two objects (fortunately, they are indicated by hand and gear cursors), or you have to move something to uncover the green item.
In Casual and Advanced modes you can also use the hint button to find objects that are hard to find. In Expert mode you’re on your own!
HOS can’t be skipped and need to be played to a finish to find an item required for the next step of the game. However, puzzles can be skipped once the skip button is filled up. Note that all puzzles do have a skip button, usually in the bottom right, but it can be hard to see!
Walkthrough
This walkthrough doesn’t contain endless images of items to find. In general, items are not hard to see when you’re in the right place. Therefore, only places you can zoom in on are highlighted in yellow on the screenshots. Only items that may be hard to spot in a zoomed image are highlighted.
Chapter 1: The Restaurant
The Car

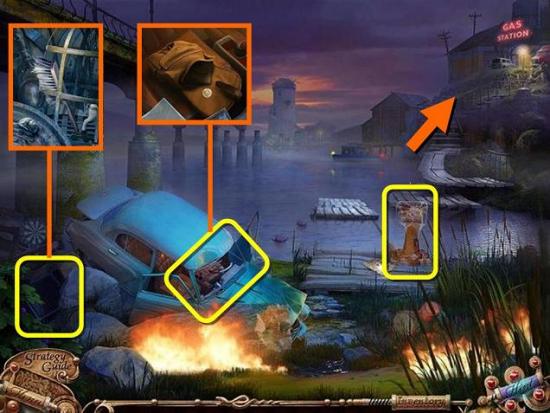
- Zoom in on the crate to the left of the car and take the BRUSH
- Zoom in on the car window and pick up the case file. Under the file is a COIN
- Zoom in on the operating mechanism and use the BRUSH to wipe off the cobwebs and release the butterfly. Use the brush twice to clear the mechanism entirely
- Put the COIN in the slot and then turn the wheel to retrieve the raft
- Get on the raft to go to the next scene
The Gas Station
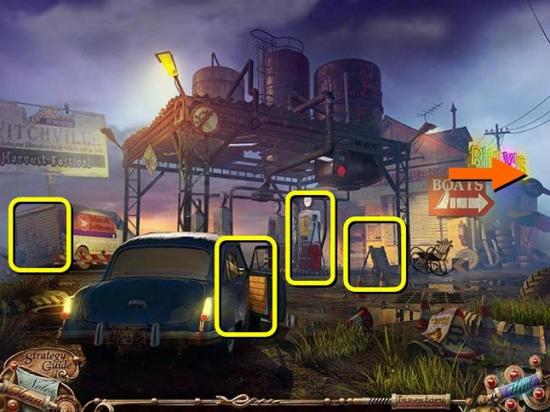
- Click on the car door and click on the glove compartment to get to a hidden object scene
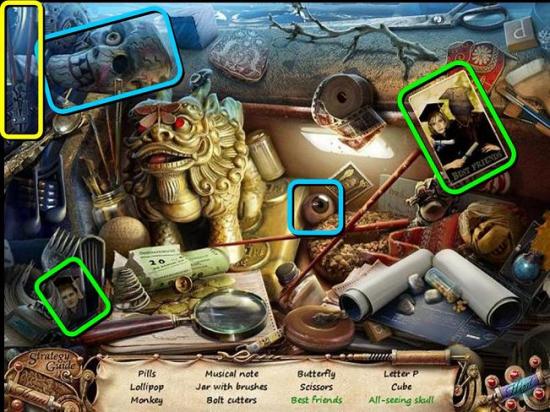
- For the Best Friends, select the picture of Ethan’s face and put it on the best friends picture (green)
- For the All Seeing Skull, pick up the glass eye and put it on the skull mask in the top left corner (blue)
- Finish the rest of the HOS to get the BOLT CUTTERS (yellow)
- Inside the car, also listen to the radio and review the case file on the seat
- The car trunk is locked and needs a key
- The mail truck door is also locked
- Zoom in on the gas pump and pick up the LEAKY GAS CAN
- Zoom in on the notice board outside the door to the station and use the BOLT CUTTERS on all four wires around the board to get the BOARD
- Pick up the DOOR HANDLE that was behind the board and read the flyer by the door
- Move to the right to the front door of Billy’s
Outside Billy’s Back Door
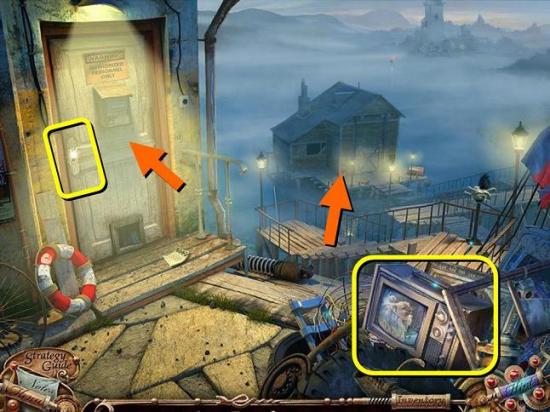
- Click on the pile of junk for a HOS
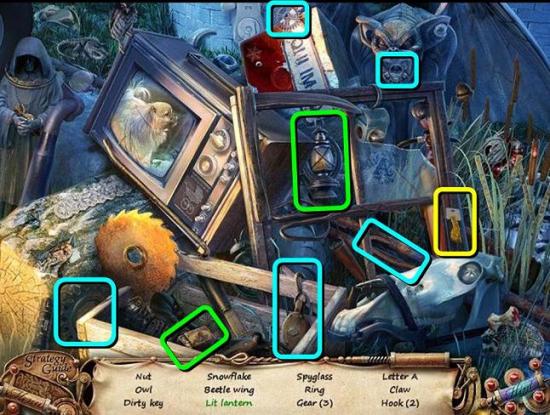
- For the Lit Lantern, pick up the matches and light the lantern (green)
- Complete the rest of the HOS to get the DIRTY TRUNK KEY (yellow)
- The 3 gears and 2 hooks are outlined in blue
- Click on the door (where the handle should be) and put the DOOR HANDLE on the door
- Enter Billy’s
Billy’s
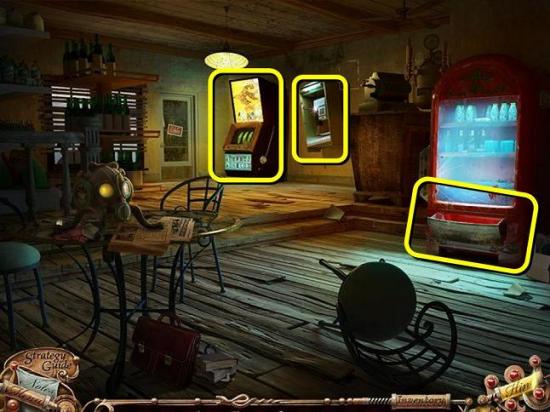
- Click on the slot machine and play the game. You need to create a row of 7’s to win. Receive a COIN
- Zoom in on the vending machine. Pick up the NAIL POLISH REMOVER. Use the COIN on one of the slots and pick up the BATTERY
- Zoom in on the payphone. Move the papers around to find the MAIL TRUCK KEYS
Back to Gas Station
- Go back outside and back to the gas station. Inside the inventory, use the NAIL POLISH REMOVER on the DIRTY TRUNK KEY to get the TRUNK KEY
- Zoom in on the trunk of the car and use the TRUNK KEY to open it. Inside is a HOS
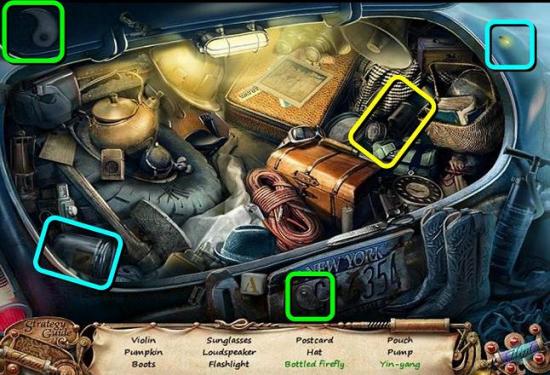
- Use the black half of the Yin and Yang sign on the white half to get Yin-Yang (green)
- Use the glass bottle on the firefly to get the Bottled Firefly (blue)
- Finish the rest of the HOS to get the EMPTY FLASHLIGHT (yellow)
- In the inventory, put the BATTERY in the EMPTY FLASHLIGHT to get the FLASHLIGHT
- Now zoom in on the truck and open the padlock with the MAIL TRUCK KEYS
- Use the FLASHLIGHT on the gap under the door for another HOS. For this one, you have to scan the scene with the light to find the items. Find the HANDLE
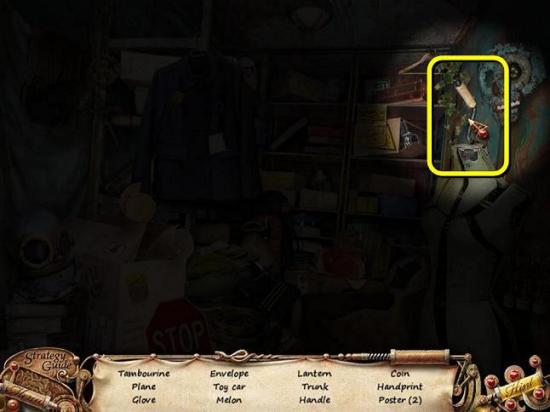
Boat House
- Go back past Billy’s and down the stairs to the boat house
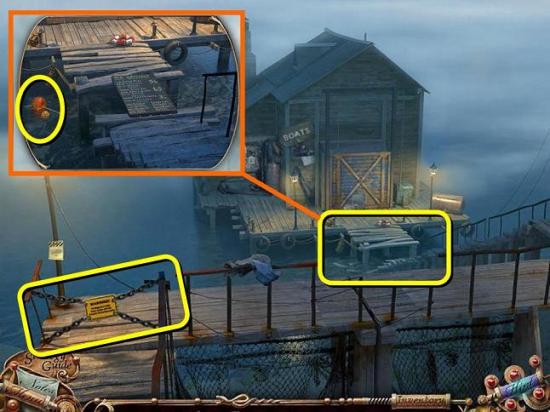
- Cut down the chains with the BOLT CUTTERS
- Zoom in on the broken boardwalk and place the BOARD over the gap
- Also note the key floating in the water. Remember for later
- Move down to the outside of the boat house
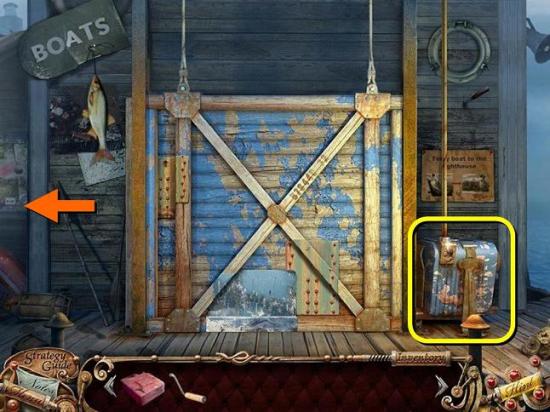
- Zoom in on the door mechanism and take the FISHING LINE
- Put the HANDLE on the mechanism to open the door
- Before entering the boat house, first go to the screen on the left
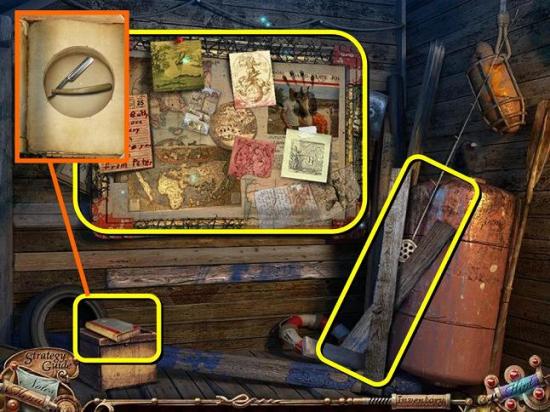
- Zoom in on the wood, and click on them to move them. Find the ROD
- Zoom in on the book and turn the page to find the RAZOR
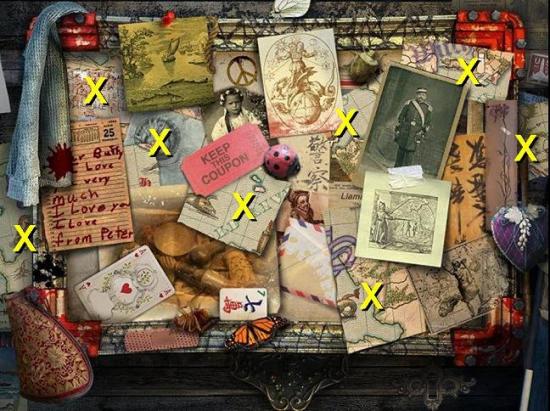
- Click on the notice board for a HOS. Use the paintbrush with black paint on the red bug to get the Spotted Ladybug. Find all 8 map parts to get the MAP PIECES (yellow X)
- Go back one screen and enter the boat house
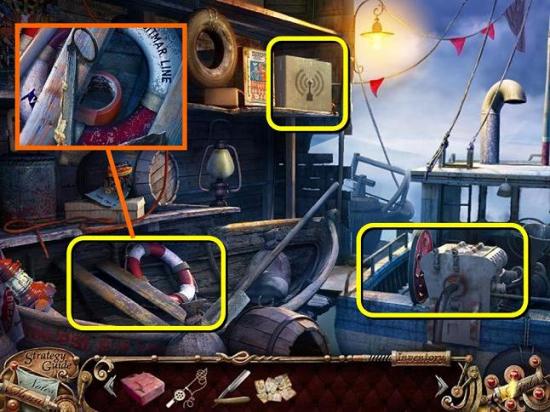
- Zoom in on the box on the shelf and use the RAZOR to cut it open. Talk on the radio, then take the FISHING HOOK
- Zoom in on the rowboat and find the STICKY TAPE
- Leave the boathouse and go back two screens to the broken boardwalk
- Put the FISHING HOOK together with the ROD and the FISHING LINE to get a FISHING ROD
- Use the FISHING ROD to get the BOAT KEY from the water
- Go back two screens to the gas station and zoom in on the pump
- Put the sticky tape on the LEAKY GAS CAN to get a PATCHED GAS CAN
- Fill the PATCHED GAS CAN with gas to get a FULL GAS CAN
- Go back to the boat house and zoom in on the boat
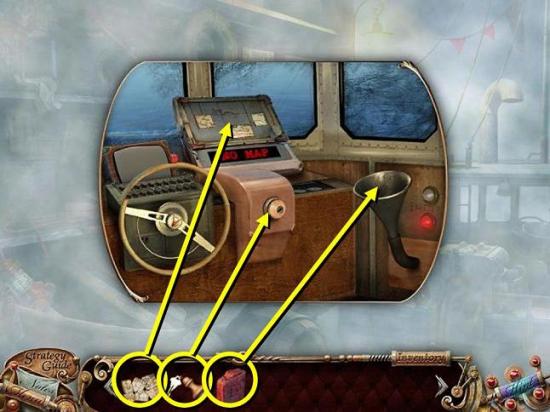
- Put the FULL GAS CAN on the fuel hose to fill the tank
- Put the BOAT KEY in the ignition
- Put the MAP PIECES on the map reader for a jigsaw puzzle
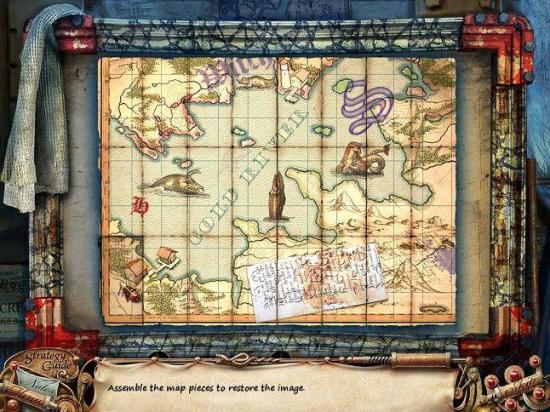
- Now you need to navigate around the islands by finding the buttons showing the symbol on the screen. Click sets of two buttons to find matching pairs of symbols that also match the symbol on the screen
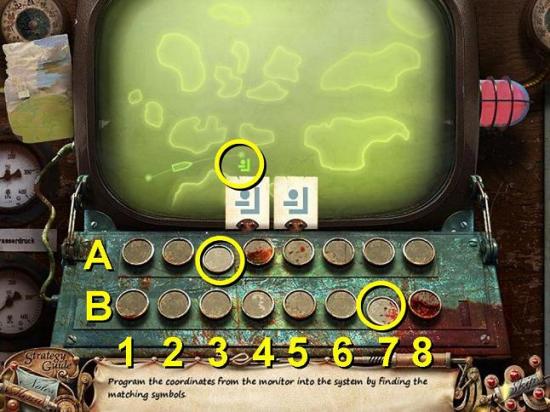
- The combinations are: A3 and B7
A5 and B8
A1 and B2
B3 and B4
B1 and B6
A2 and A6
A4 and A7
A8 and B5
Chapter 2: The Lighthouse
- First zoom in on the lighthouse lower entrance
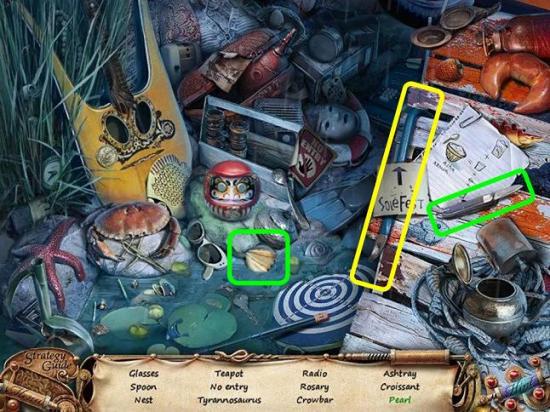
- Click left of the door for a HOS. For the Pearl, use the knife on the oyster (green). Complete the HOS to get the CROWBAR (yellow)
- Now go to the ship. You can either do this by going right from the lighthouse door or by reversing out and then walking down the pier
- Zoom in on the utility shed and break the door open with the CROW BAR (use it on the two planks and the padlock)
- Open the door and find the OIL CAN
- Go back to the lighthouse and zoom in on the door
- Use the OIL CAN on both rusted hinges, then slide the latch and enter
Inside the Lighthouse
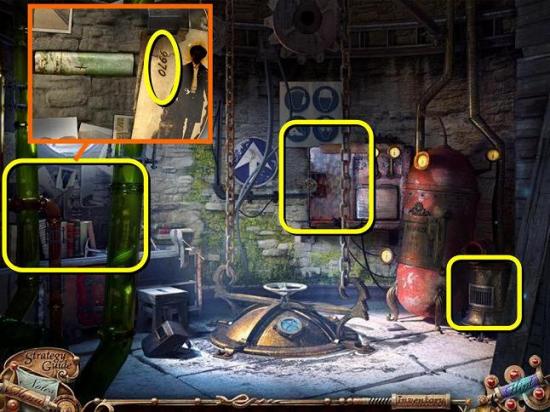
- Click on the wall behind the pipes. Click on the photo to move it. Behind it is a LIBRARY BOOK. On the photo is the code 9970
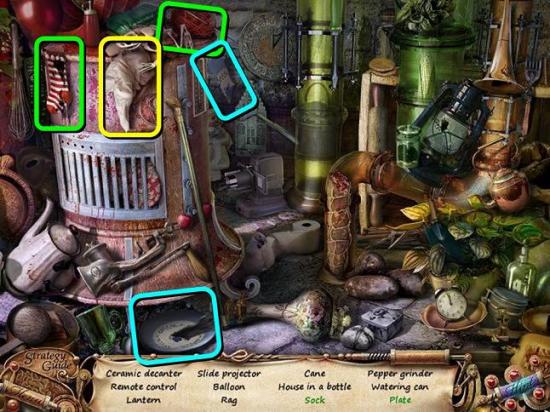
- Click on the furnace for a HOS. For the sock, use the red wool and knitting needles on the torn striped sock (green). For the plate, use the plate fragment on the broken plate (blue). Complete the HOS to get the RAG (yellow)
- Back out one screen and go up the stairs.
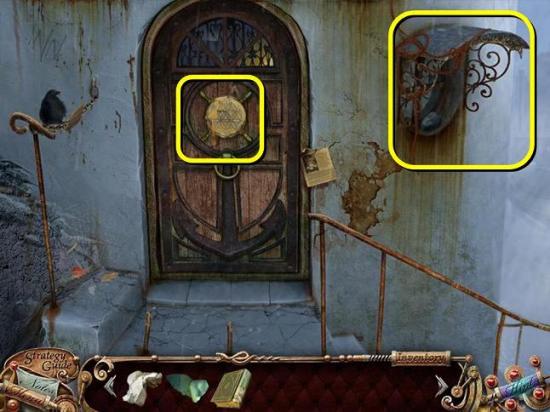
- Zoom in on the window to get the ROPE and the STATUE’S HEAD
The Boat and the Gate
- Go back to the boat and zoom in on the control panel
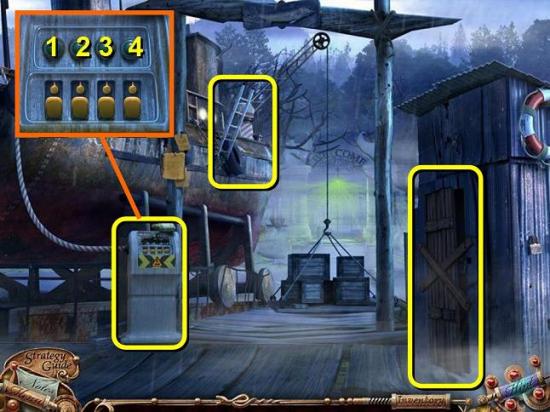
- Clean the control panel with the RAG (you need to use it several times)
- Push the buttons until all four lights are green: 3, 4, 1, 2
- Walk down the pier to the gate and watch the scene
- After the scene, go back to the boat and click on the shed for another HOS. Find the OVEN MITT
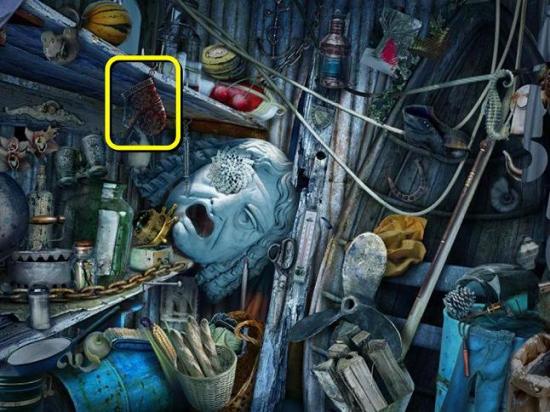
- Go back one screen and zoom in on the light.
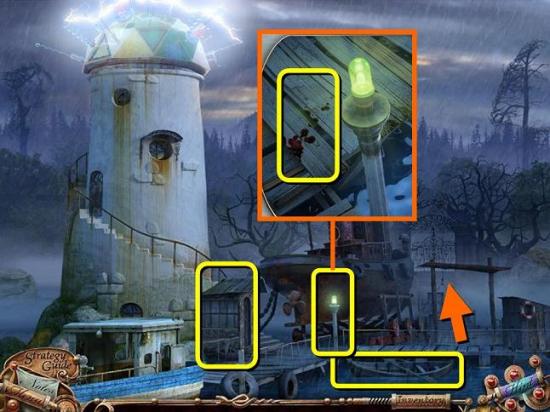
- Use the OVEN MITT to get a LIGHT BULB. Move the stained planks to find the STATUE’S WINGS
- Go back past the boat to the gate and zoom in on the lamp above the gate. Put the LIGHT BULB on the lamp
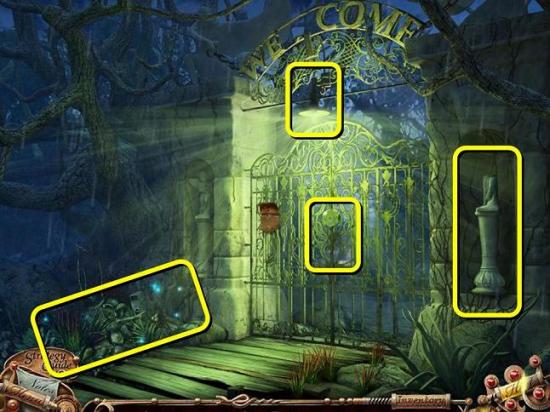
- Zoom in on the gate’s lock and pick up the HOOK. You can also get a (rather useless) map
- Click to the left of the gate for a HOS. Get the WHEEL HANDLE
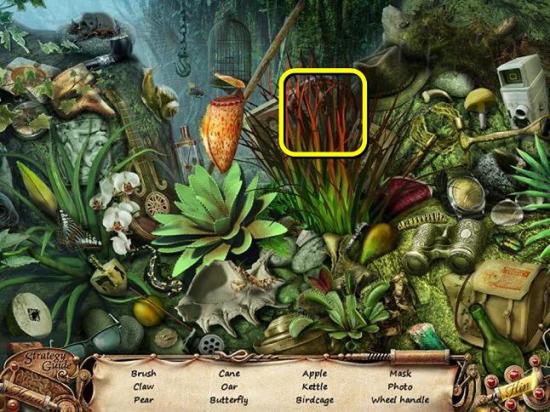
- Go back to the boat. Combine the HOOK with the ROPE to get a HOOK WITH ROPE
- Zoom in on the ladder and use the HOOK WITH ROPE to pull it down
- Climb onto the boat
On the Boat
- There is nothing you can do on deck right now, so go into the cabin
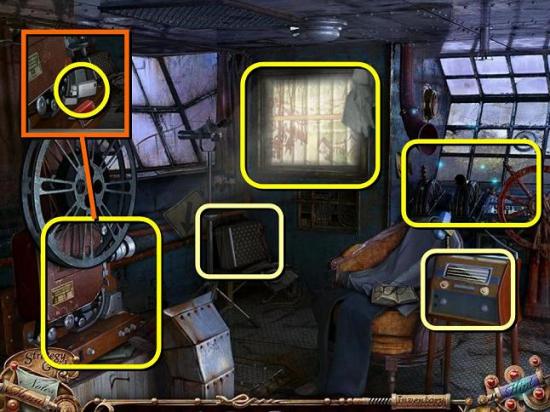
- Zoom in on the projector and find a LIGHTER
- Zoom in on the projected image on the wall and get a PUZZLE LOCK PART. There’s also a note with a puzzle solution
- Note the locked briefcase on the stool in the corner
- Click on the ship’s controls on the right for a HOS. Find the SWITCH
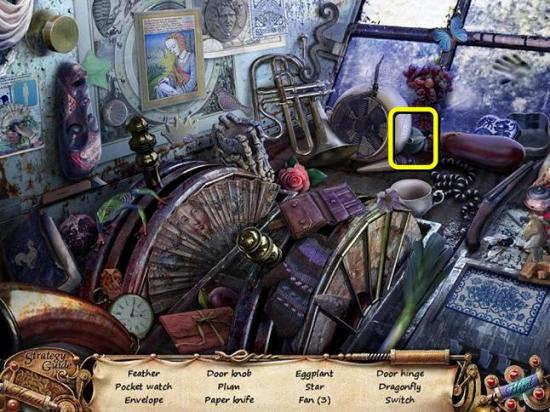
- Go back three screens and go into the lighthouse lower entrance
Lighthouse lower entrance
- Zoom in on the machine on the back wall and place the WHEEL HANDLE
- A set of weights drops down from the ceiling. Zoom in on them for a puzzle. You need to spread the weights among the chains so that they’re all balanced. You can only move one weight at a time
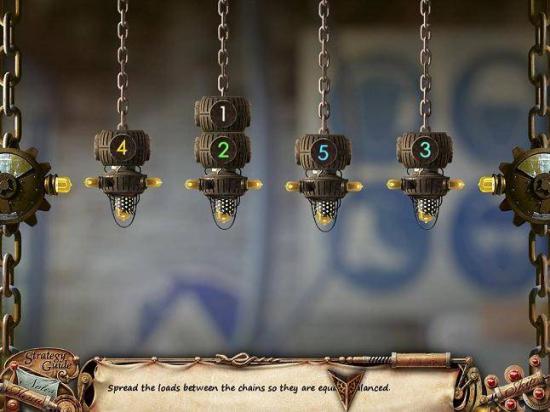
- After the diving suit has popped up, zoom back in on the machine on the wall and place the SWITCH on the arm lock release. Turn the switch
- Zoom in on the box that the diving suit is holding and take out another LIBRARY BOOK
- Go back out and up the stairs to the top entrance
Lighthouse Top Entrance
- Zoom in on the door and melt the wax with the LIGHTER
- Place the PUZZLE LOCK PART and solve the puzzle by rotating the three discs to move the colored pieces. You can rotate them by pulling on the outside edges. Fortunately, all you need to do is to position the three purple pieces in the center of the puzzle around the triangle with the circle in it, and the yellow and white pieces will just flip into place
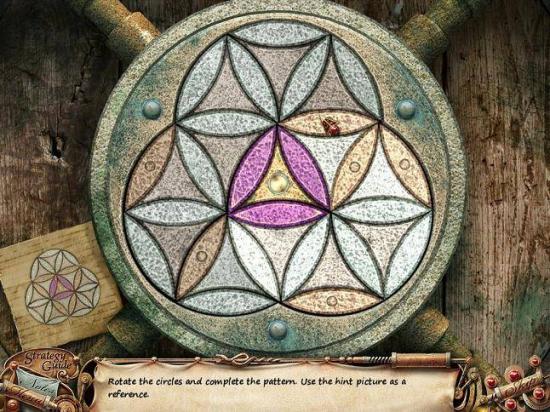
- Enter the second floor of the lighthouse
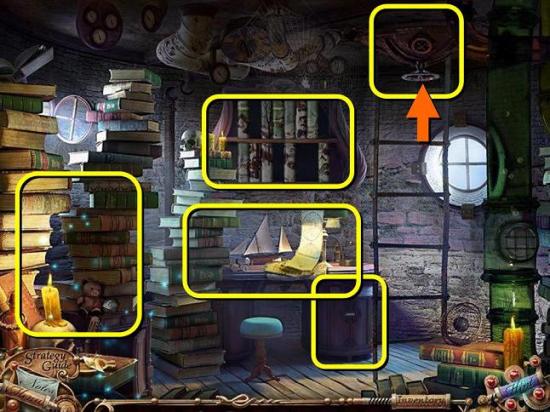
- Zoom in on the desk cabinet and enter the code you found on the picture earlier: 9970
- Look inside the cabinet and take out the GLUE and the third LIBRARY BOOK
- Click on the stack of books on the left for a HOS. Find the STATUE’S HANDS
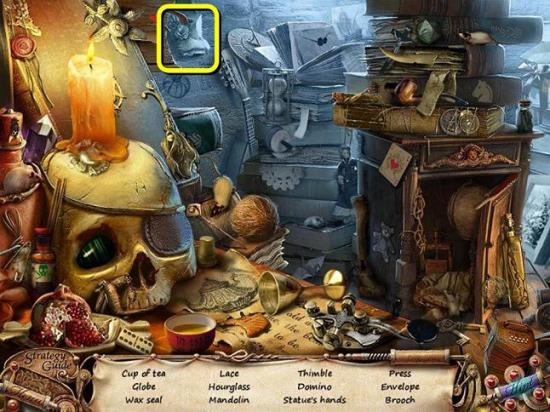
- Zoom in on the top of the desk and move the papers to find the GRYPHON KEY
- Zoom in on the valve in the ceiling and place the GRYPHON KEY
- Turn the handle and make your way to the third floor
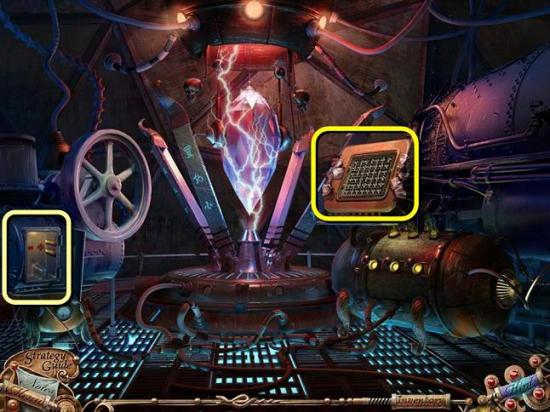
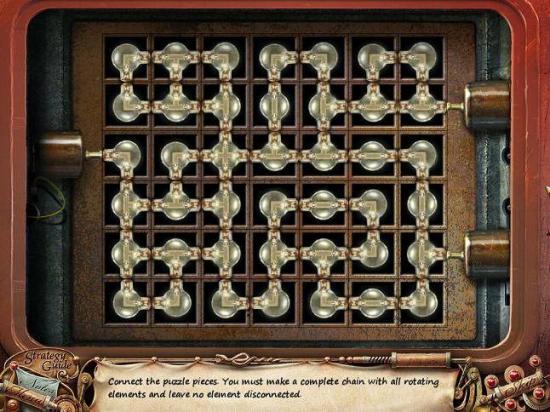
- Click on the square panel to the right of the device for a “make a circuit” puzzle. All the lights have to be connected to make a closed circuit. The easiest way to do this is to start around the edges, as those pieces can often only go one way
- Take out the fourth LIBRARY BOOK
- Now go all the way back out and back to the gate
- Zoom in on the statue on the right and put the GLUE on it
- Then place the STATUE’S HANDS, the STATUE’S WING and the STATUE’S HEAD
- Zoom in on the compartment that opens and take out the fifth LIBRARY BOOK
- Now go back to the top entrance of the lighthouse and place all five LIBRARY BOOKS on the shelf above the desk
- Swap the books around to make a picture
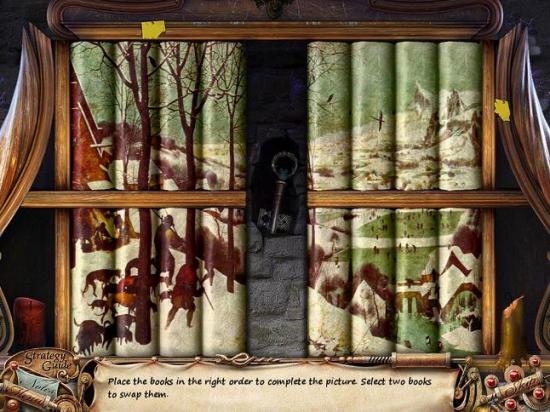
- Take out the GATE KEY
- Go back to the gate, zoom in on the lock and open with the GATE KEY
- Go through the gate
Chapter 3: New City
Writer’s Restaurant
- First go left into the Writer’s restaurant
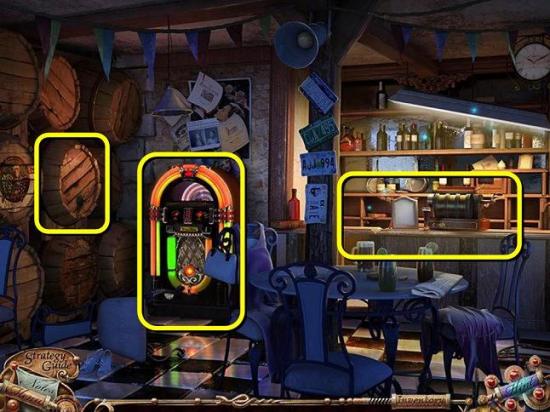
- Zoom in on the middle barrel on the left and pick up the SCREW
- Zoom in on the jukebox and pick up the CANDLE
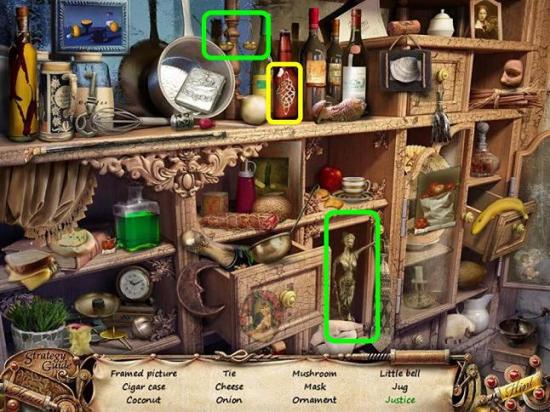
- Click on the bar for a HOS. For Justice, put the scales on the justice statuette (green). Finish the HOS to get the ORNAMENT (yellow)
- Exit and go into house #18
Number 18
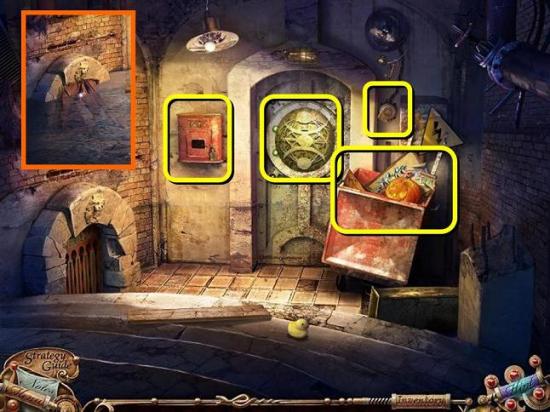
- Zoom in on the drain on the left, remove the boards, pick up the SPADE BLADE and open the drain
- Zoom in on the mailbox and put the ORNAMENT on the lock
- Open the mailbox and take out the PICTURE and the DOORBELL
- Zoom in on the broken doorbell to the right of the door and put the DOORBELL on it
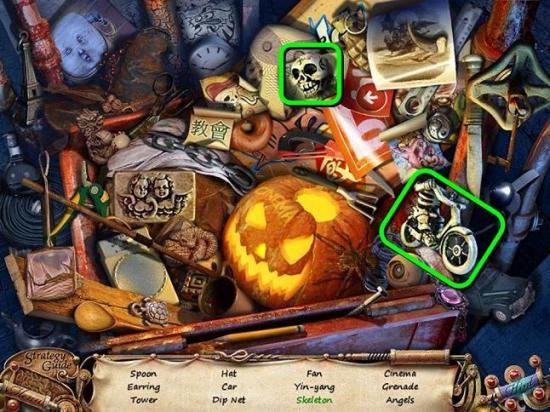
- When the bell rings, a key falls out and a new HOS appears in the trash can under the bell. For the skeleton, place the skeleton’s head on the skeleton on the bike (green). Complete the HOS to get the TOY SHOP KEY (not part of HOS)
- Exit and now go into the street between the restaurant and #18
Toy Shop
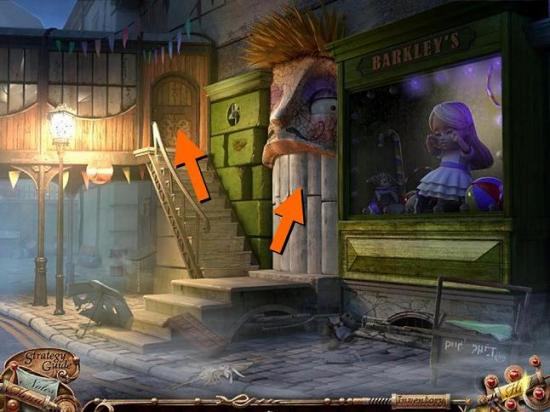
- First go upstairs
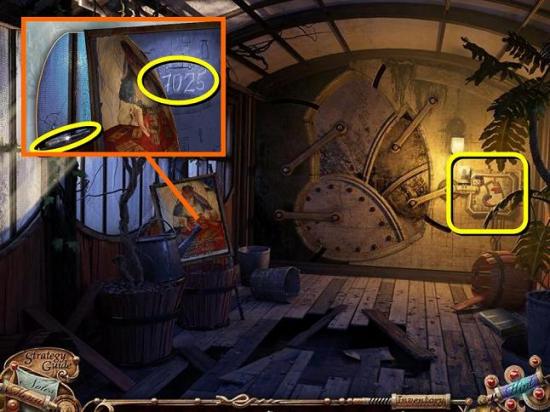
- Zoom in on the poster, remove the poster and find the code 7025
- Also find the SCREWDRIVER
- You can open the big door right now if you like, but there’s nothing to do back there at this moment, so first go back out to the street
- Click on the toy shop door (the one under the big mask) and open it with the TOY SHOP KEY
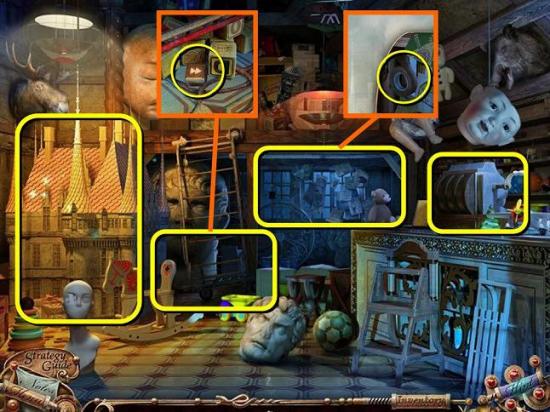
- Inside the toy shop, zoom in on the windows in the back wall to find the DUCT TAPE
- Zoom in on the broken ladder to find the SKIP BUTTON
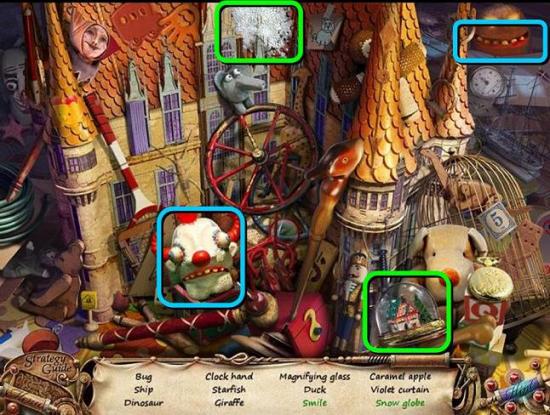
- Click on the castle to play another HOS. For the Smile, pick up the smile on the pumpkin head and put it on the clown head (blue). For the snow globe, put the snow in the empty globe (green). Finish the HOS to find WOODEN TOYS (not part of HOS)
- Zoom in on the register and enter 7025
- Take out the WHETSTONE and a LENS
- Go back to Writer’s, zoom in on the jukebox and place the SKIP BUTTON
- Hit the button and take another LENS
- Go back to the house above the toy shop
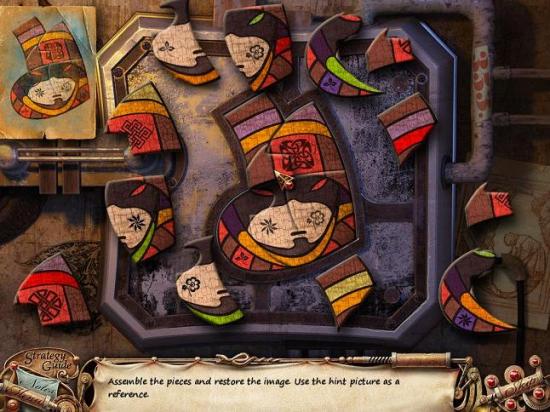
- Click on the mechanism by the door and put the PICTURE in the top left corner. Now recreate the image in the picture, paying attention to the colors and the shapes of the eyes and the symbol above the face
- Go into the graveyard
The Graveyard
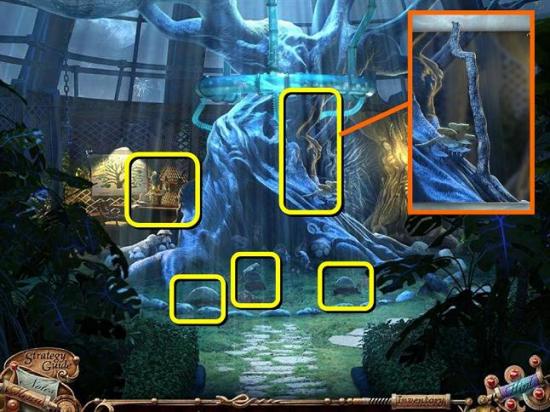
- Zoom in on the middle grave and pick up the AXE
- Sharpen the AXE with the WHETSTONE
- Zoom in on the right side of the tree and chop off the branch with the SHARPENED AXE to get the SPADE HANDLE
- Put the SPADE HANDLE on the SPADE BLADE to get a SPADE
- Zoom in on and dig up all three graves with the SPADE. Move the levers inside the graves
- Go through the door that opens up behind the tree and watch the scene
- Go back to the graveyard and watch the scene
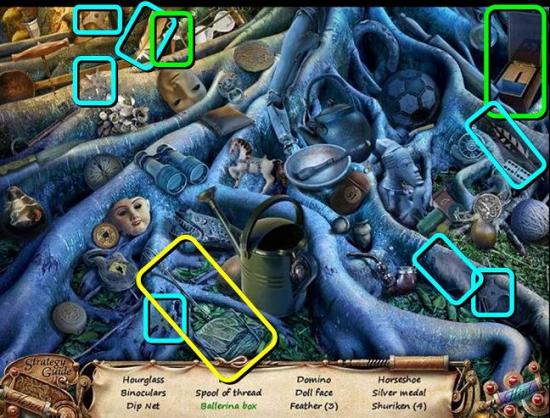
- Play the new HOS that appears under the tree. The 4 shuriken and 3 feathers are blue. For the Ballerina Box, put the ballerina on the music box (green). Find the DIP NET (yellow)
- Go back to the room behind the tree, zoom in on the magic pool and use the DIP NET to take out the SPECIAL KEY
Number 18, continued
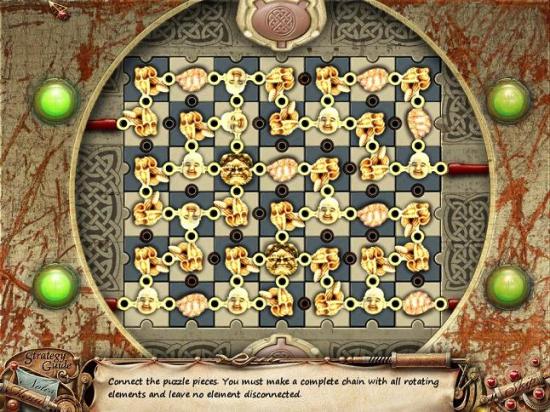
- Return to #18, zoom in on the door and place the SPECIAL KEY to get another circuit puzzle
- Go through the door and fix the broken wires on the left with the DUCT TAPE to switch on the light
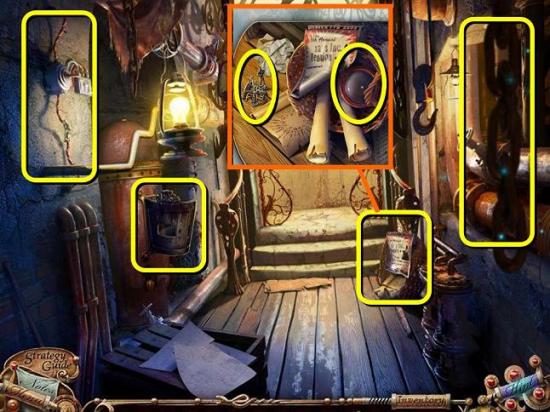
- Zoom in on the basket on the floor, move the papers to get another LENS and find the TIN SOLDIERS
- Zoom in on the furnace to find an EMPTY FLASK
- Click on the right of the screen for a HOS. Find the WHEEL
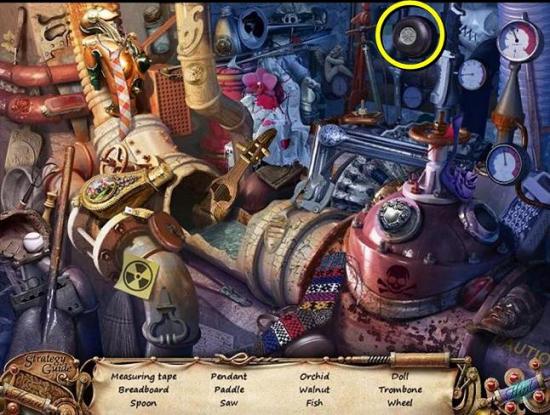
- Back out and go back to the toy shop
- Zoom in on the broken ladder, place the WHEEL, put the SCREW on it and tighten it with a SCREWDRIVER
- Play the new HOS that appears at the top of the ladder and find the BARREL TAP
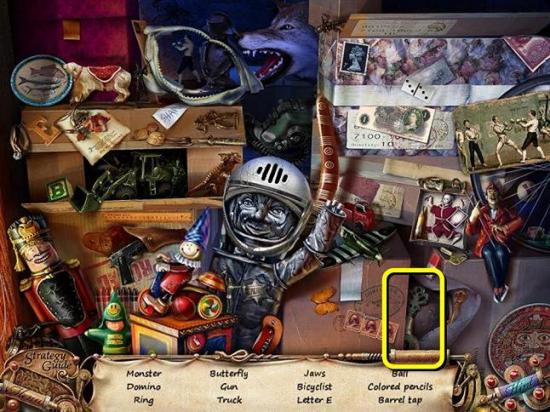
- Go back to Writer’s and place the BARREL TAP on the barrel on the wall, place the EMPTY FLASK under it and turn the tap to get a FULL FLASK
- Go back to the graveyard above the toy shop (isn’t that just the most unusual place to have a graveyard?) and zoom in on the microscope
- Place the three LENSES and the CANDLE
- To fix the microscope, you need to pivot the lenses around until they are lined up in the center. You can move the lenses by rotating the eyes to empty pins. Other than the pin an eye just came from, there is usually only one other option, so it shouldn’t be too hard to do. Pick up the LIT CANDLE when you’re done
- Back out and go back to the back room of #18. Zoom in on the furnace, put in the WOODEN TOYS, pour over the booze from the FULL FLASK and light with the CANDLE
- Melt the TIN SOLDIERS and take out the MOLTEN TIN
- Zoom in on the broken pipes above the furnace and use the MOLTEN TIN to fix the holes and activate the lift
- Enter the lift and arrive at another one of Light’s devices
- Zoom in on the panel for another circuit puzzle
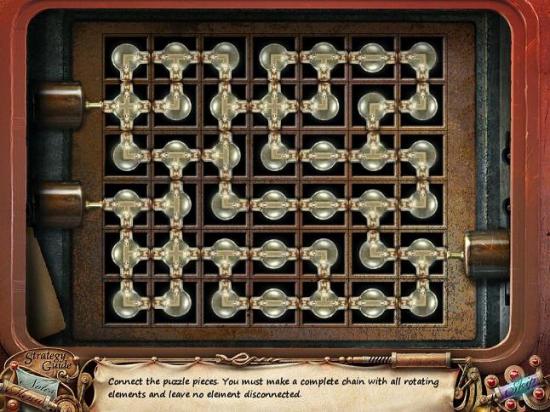
- Take out the FUSE
- Back out to the street, zoom in on the fuse box beside #18 and place the fuse
- Now walk up the right street to chapter 4, yay!
Chapter 4: The Fair
The Garage
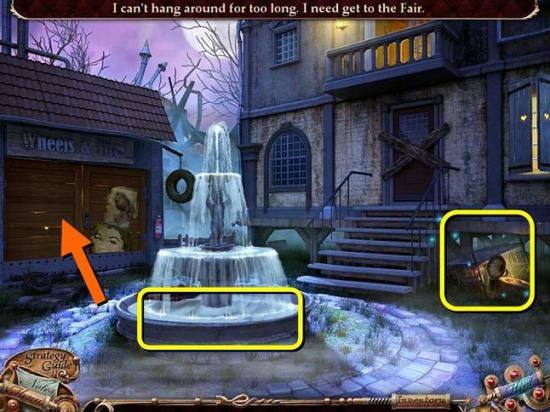
- First go left to the hotel and play the HOS to the right of the stairs to find the PLIERS
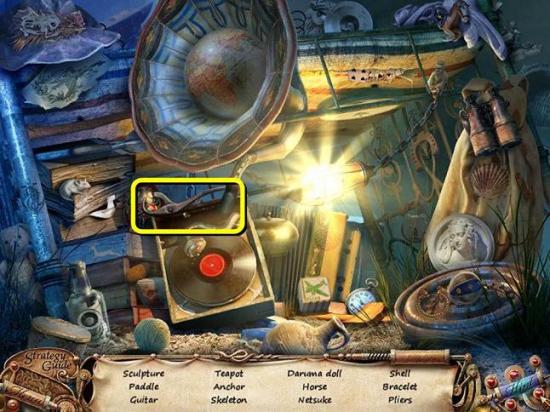
- Zoom in on the garage to get the ROPE WITH HOOK
- Back out and throw the ROPE WITH HOOK to the balcony
- Enter the hotel
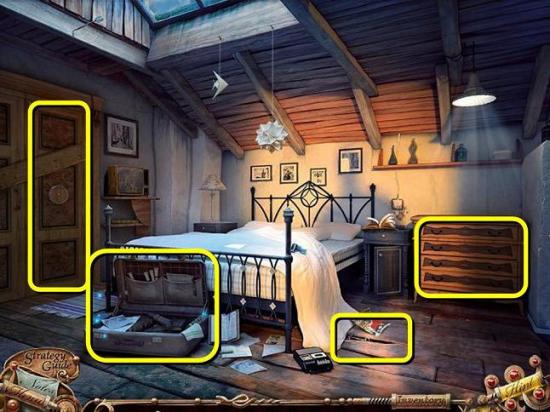
- Zoom in on the wardrobe and take out the nails with the PLIERS
- Inside is a WRENCH
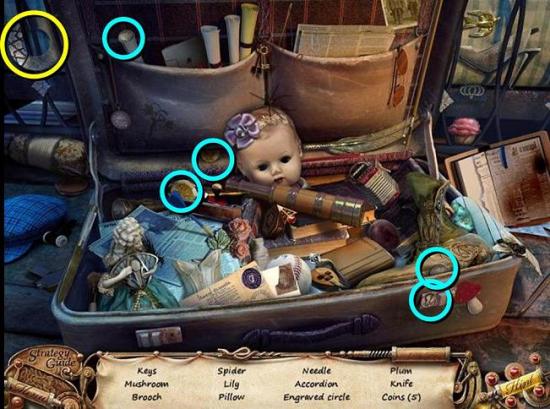
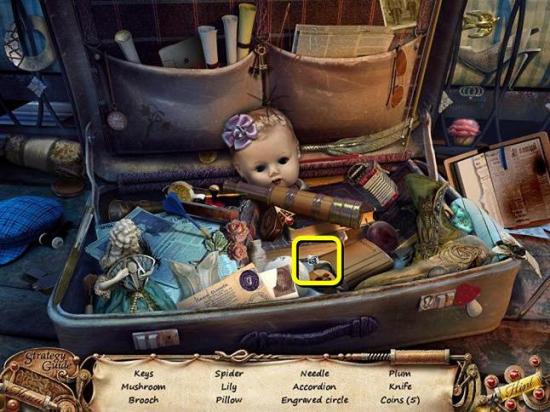
- Play the HOS in the suitcase to find the ENGRAVED CIRCLE (yellow). The 5 coins are blue
- Go back to the garage, zoom in on the cage and remove the bolts with the WRENCH
- Turn the valve to shut down the fountain
- Go back to the fountain, zoom in and take out the HANDLE
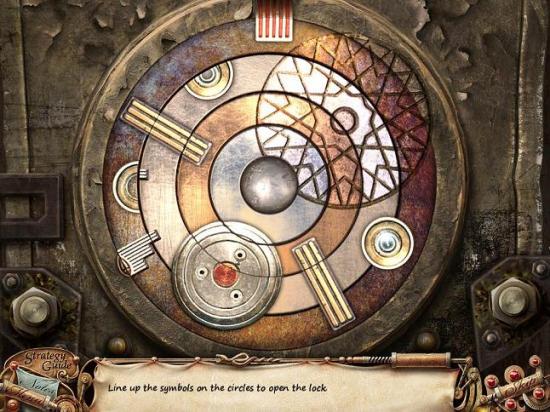
- Go back to the garage, zoom in on the padlock and place the ENGRAVED CIRCLE on the padlock
- Solve the puzzle by rotating the discs. Start with the center circle, then the other silver one, the smaller copper one, the outside one
- Enter the garage
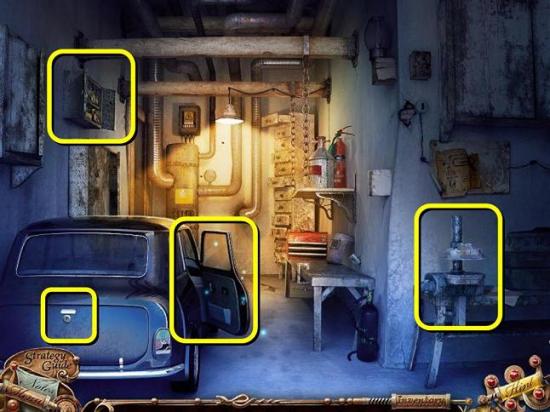
- Zoom in on the wall cabinet and move the bottles around until you find the HAMMER
- Click on the car door for a HOS. Find the BENT CAR KEY
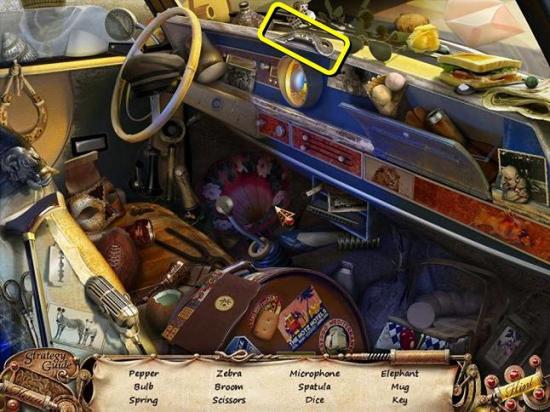
- Zoom in on the vice, place the BENT CAR KEY on it and put the HANDLE in the hole
- Pull the handle and pick up the CAR KEY
- Zoom in on the trunk of the car and open it with the CAR KEY
- Take out the LIQUID NITROGEN
- Back out three screens and zoom in on the archive door
- Freeze the lock with the LIQUID NITROGEN and smash it with the HAMMER
- Enter the City Archives
- Zoom in on the computer and pick up the MAGNET
- Go back to the hotel room, zoom in on the broken floor boards and use the MAGNET to get the KEY
- Zoom in on the drawer unit and use the KEY to open it
- Take out the FUNFAIR TICKET
- Play the new HOS in the suitcase to find the DIAMOND RING
- Back out two screens and zoom in on the TV to take the SPECIAL KEY
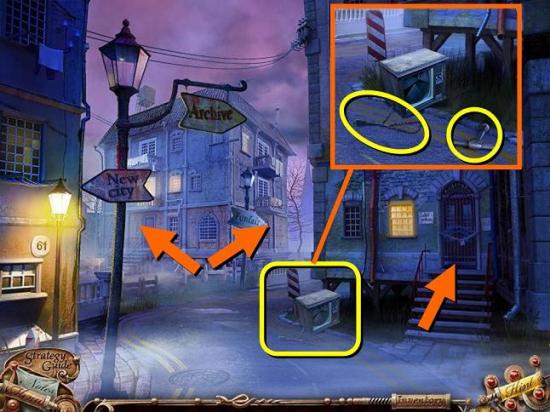
- Move towards the funfair
The Fair
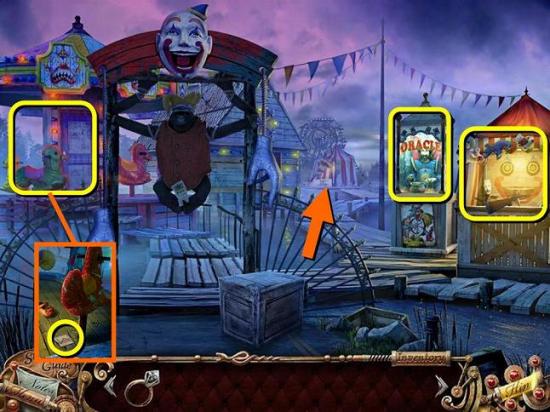
- Give the FUNFAIR TICKET to the monkey
- Zoom in on the oracle and cut the glass with the DIAMOND RING
- Take out the EMPTY POT
- Open the chest with the SPECIAL KEY and take out the WIRE
- Zoom in on the shooting tent and take out the CANDLES and SYMBOL
- Zoom in on the carousel and find another SYMBOL
- Move on to the fair
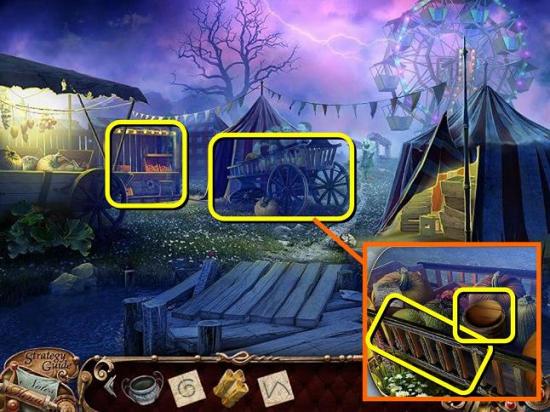
- Zoom in on the stand in the background and take the SAW and the third SYMBOL
- Zoom in on the cart in the center and use the SAW to find a LADDER PART
- Also move the pumpkins around and lift the lid of the barrel
- Put the EMPTY POT on the barrel to get a FULL POT
- Move on to the Stonehenge in the back of the fair
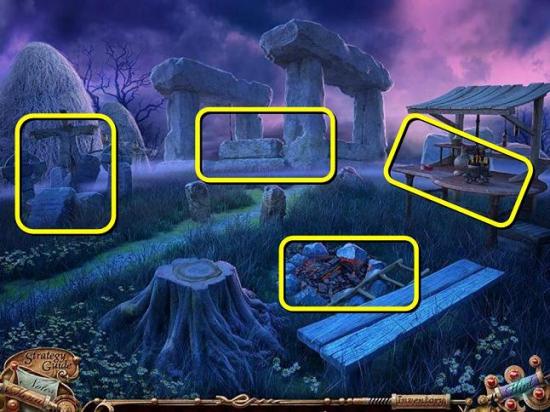
- Zoom in on the stone structure in the back and pick up all the PIECES OF CANDLE
- Now zoom in on the burning embers and click twice on the can
- Put the PIECES OF CANDLE in the can and take out the CANDLE
- Also pick up the other LADDER PART
- Zoom in on the sparkles for a HOS. For the Pumpkin Head take the knife out of the head of the scarecrow and use it on the pumpkin in the basket (green). Finish playing to get the LAMP (yellow)
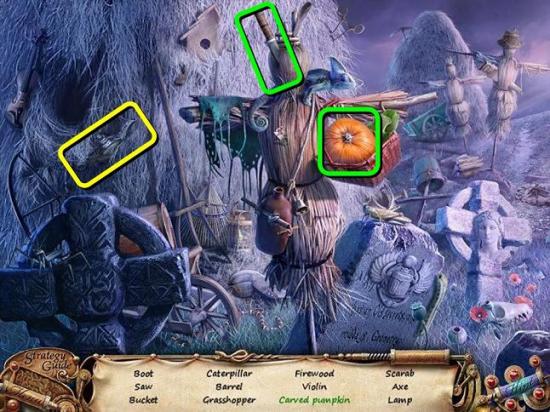
- Back out a screen and play the new HOS that’s appeared in the left cart. For the Working Pipe, light the pipe with the matches (green). Find the UNLIT TORCH (yellow)
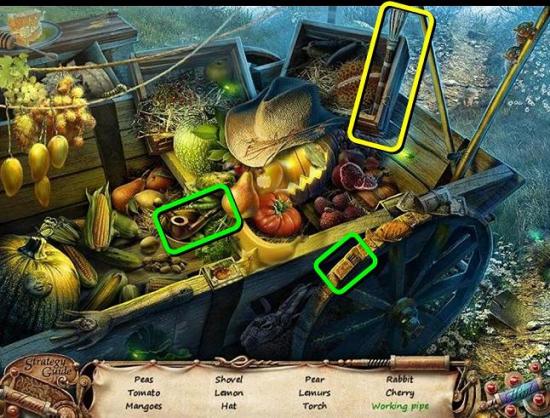
- Place the UNLIT TORCH in the holder beside the tent and pick up another SYMBOL
- Combine the two LADDER PARTS and place the LADDER against the pole
- Put the WIRE on the torch and pick up the LIT TORCH
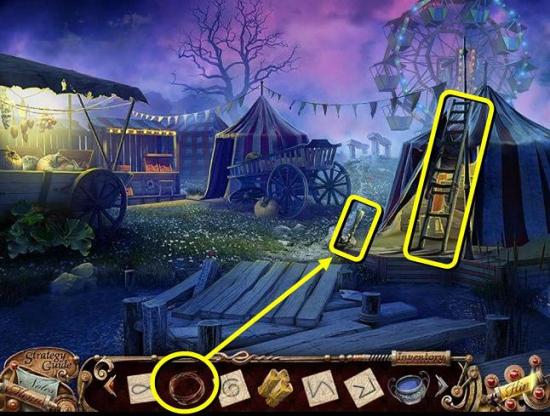
- Go back to the Stonehenge and zoom in on the table
- Light the burner with the LIT TORCH and place the FULL POT on top
- Now go back to the fair and play the HOS again to get INGREDIENTS (not in scene)
- Put the INGREDIENTS in the pot
- Use the LAMP on the potion to get the MAGIC POTION
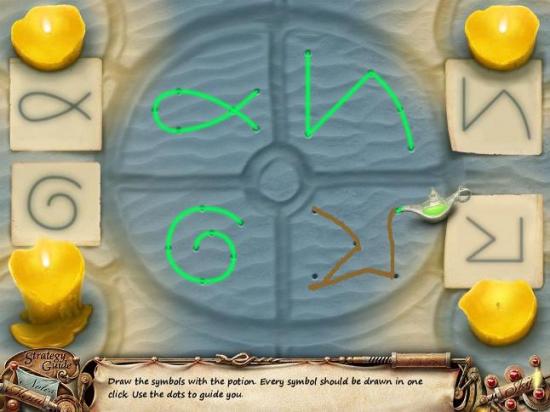
- Zoom in on the stone structure again and place the four SYMBOLS and all your CANDLES
- Put down the MAGIC POTION to get a puzzle. For the puzzle, draw the symbols in the sand using the potion, following the dots. You don’t need to be too precise
The Archive
- Back out to the start of the fair and take the BRUSH and SCISSORS out of the crate
- Go back to the broken TV outside the archives and use the SCISSORS to cut off the CORD
- Go back to the fountain by the garage and use the BRUSH on the paint stain on the fountain to get the code 9990
- Go back to the archives and put the CORD on the computer. Memorize the route on the screen: forward, right, forward, left, forward, left, forward, right
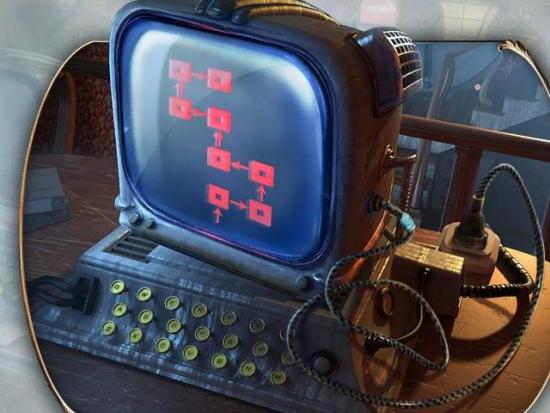
- Click on the vault door and enter 9990
- Inside the vault, follow the route on the computer:
Go forward to section A
Turn right to section D
Go forward
Go left to section E
Go forward to another part of section E
Go left to section F
Go forward to another part of section F
Go right to a dead end - Open the cabinet at the dead end of the vault and take out the papers
Chapter 5: The Underwater Lab
The Ship’s Cabin
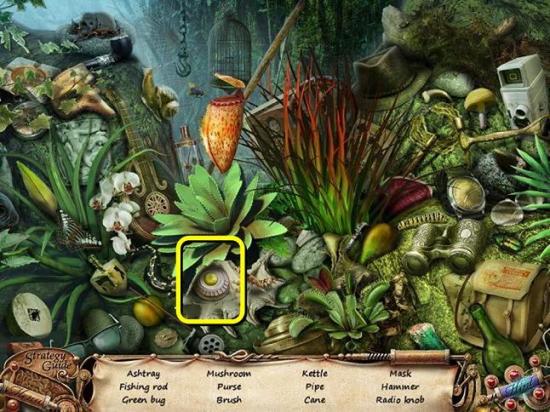
- Play the HOS in the tree by the gate and find the RADIO KNOB
- Back out two scenes, zoom in on the rowboat, move the rag and get the HOSE
- Go back to the boat, climb on to the boat and go into the cabin
- Zoom in on the radio and place the RADIO KNOB
- Turn both knobs until the red blocks click in place
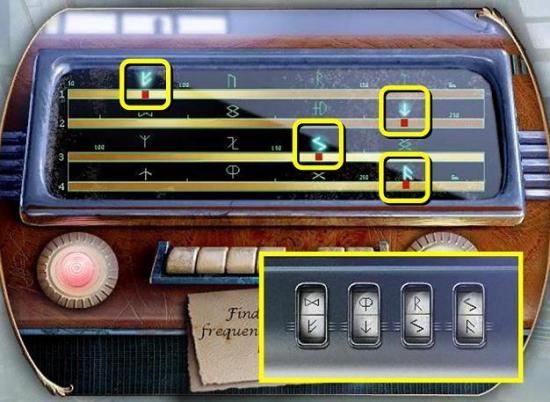
- Memorize the runes on the radio frequency
- Zoom in on the locked briefcase in the corner and enter the rune code from the radio
- Zoom in on the open briefcase and take the WRENCH and OCTOPUS KEY
- Back out one screen, zoom in on the hatch and place the OCTOPUS KEY
- Go down the hatch
The Diving Suit
- Zoom in on the green oxygen tank
- Use the WRENCH to take out the broken pipe, place the HOSE and use the WRENCH again to fit the hose in place
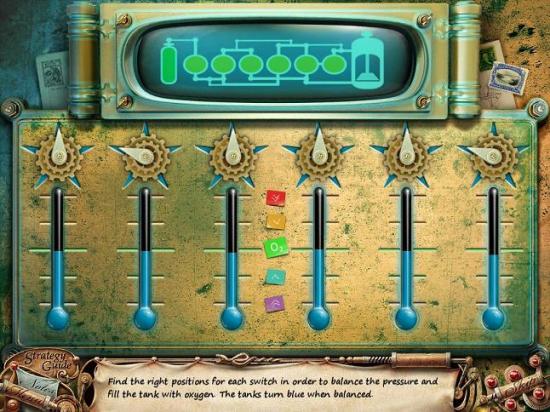
- Set the dials on the device so all tanks are green and get the OXYGEN TANK
- Zoom in on the desk and get the EMPTY BATTERY
- Go back out and make your way to the top floor of the lighthouse, where Light’s strange device is
- Zoom in on the battery charger, place the battery, wait until it is fully charged and take out the CHARGED BATTERY
- Go to the ground floor of the lighthouse and in the lower door
- Zoom in on the diving suit and place the CHARGED BATTERY and the OXYGEN TANK
Under Water
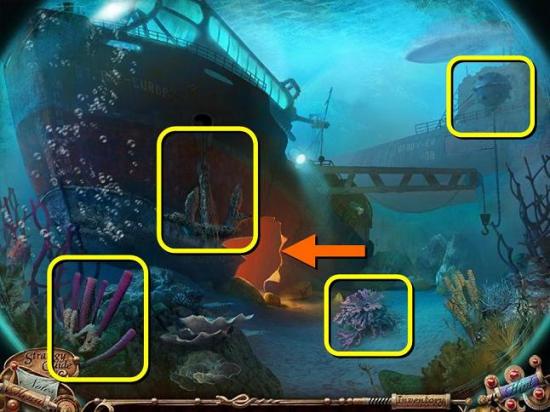
- Zoom in on the coral, move the rocks and pick up the ANCIENT KEY
- Zoom in on the anchor and get the GUARDIAN KEY
- Enter the ship through the hole
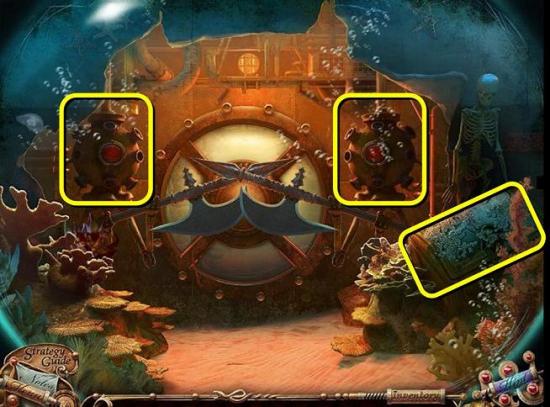
- Zoom in on the treasure chest and open it with the ANCIENT KEY
- Take out another GUARDIAN KEY
- Zoom in on the guardian on the right and take the ARROW
- Open its front cover and place the second GUARDIAN KEY you found (it matches the symbol on the guardian)
- Zoom in on the guardian on the left, open the cover and place the other GUARDIAN KEY
- Go through the hatch
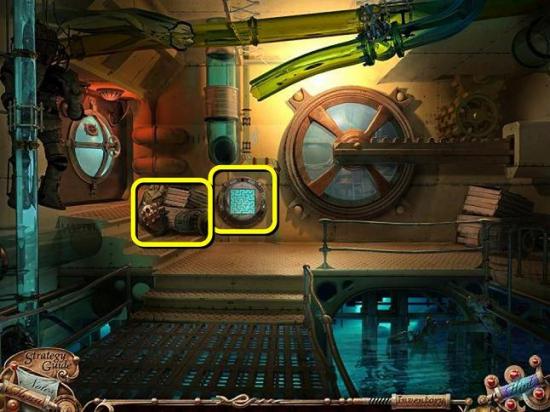
- Zoom in on the puzzle lock and take the EMPTY HARPOON GUN
- Back out two screens, combine the ARROW with the EMPTY HARPOON GUN and shoot the mine
- Play the new HOS that appears and find the KNIFE (not in scene)
- Zoom in on the purple coral in the middle, cut it back with the KNIFE and also use the KNIFE to open the oyster and get the PEARL
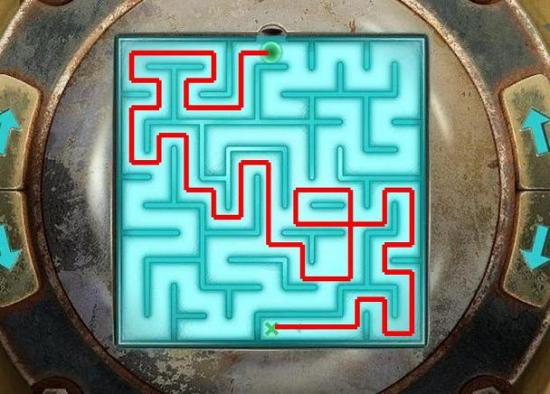
- Go back into the boat, zoom in on the puzzle lock and place the PEARL
- Now rotate the lock with the arrow keys so the pearl moves to the other side of the maze
- Play the new HOS that appears to the left of the puzzle lock to get the OIL CAN (not in HOS)
- Use the OIL CAN to grease the door mechanism and go through the door
The Underwater Lab
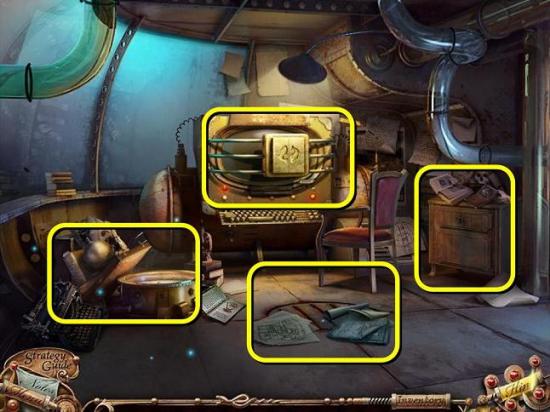
- Zoom in on the cabinet on the right, move the papers and get a HOOK
- Zoom in on the grate in the floor, move the items and use the HOOK on the grate to get the KEY
- Move the white papers by the grate to get a PUNCH CARD with the word Soul on it
- Go back to the desk and open it with the KEY
- Take a FISH KEY from the drawer
- Play the HOS on the left to get another FISH KEY
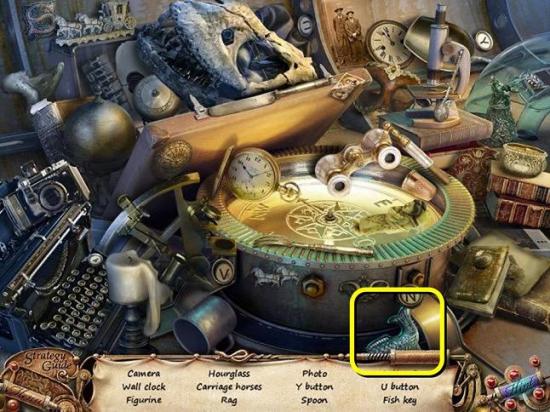
- Zoom in on the contraption by the chair and place both FISH KEYS
- Then enter the PUNCH CARD into the slot
- For level one you need to find the word “Soul” on the screen by placing the punch card over the letters. Use the coordinates in the top left corner of the card. Then hit the enter button on the device
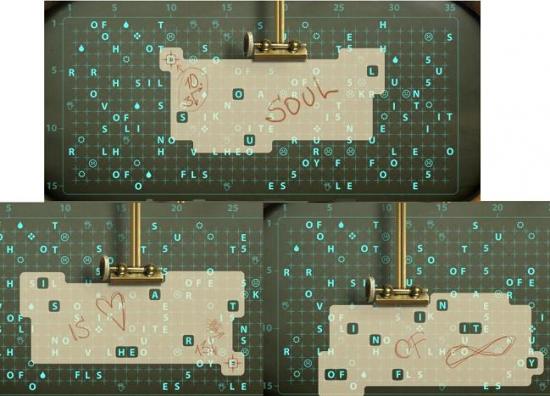
- For level two you need to find “Is heart”, but you only get the downward coordinate
- For level three you need to find “Of infinity”
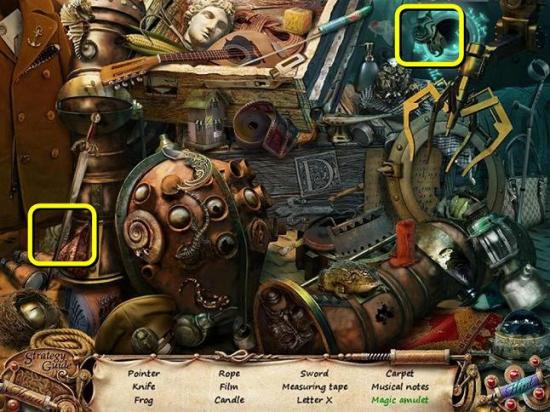
- Go back one screen and play the HOS to get the MAGIC AMULET (in two pieces)
The Final Stretch
- After the scene, click on the utility shed for another HOS and find the PLIERS (yellow). For the Fish in Bowl put the goldfish in the bowl (green); for the Lone Tree in Photo scratch out the person in the photo with a pencil (blue)
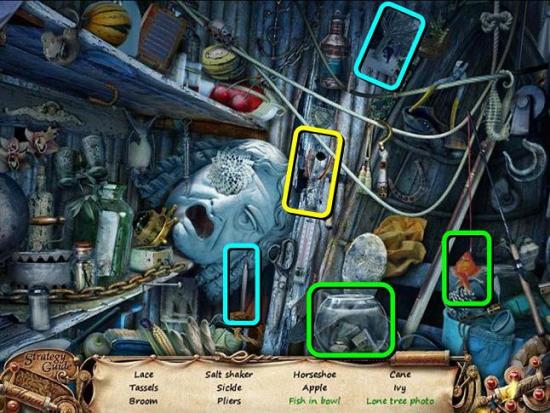
- Zoom in on the crates and use the PLIERS to take out the nails and get the SAW
- Click on the operating panel to raise the crane again and go back to the gate
- Cut the tree with the SAW until it is gone
- Go through the gate
- By the magic pond, find the three MAGIC BEETLES
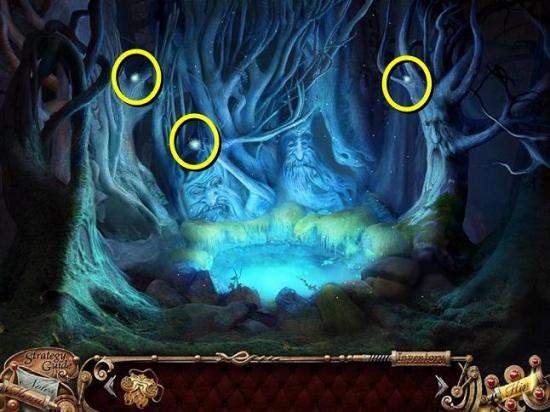
- Zoom in on the pond and put the MAGIC AMULET and MAGIC BEETLES in the pond
- Take the MAGIC AMULET out again
- Back out and give the MAGIC AMULET to Ethan fighting the witches
Bonus Chapter: Save Alice
The Pharmacy
- You’re back in New City, but now it’s all foggy
- Zoom in on Writer’s and get the CANDELABRUM
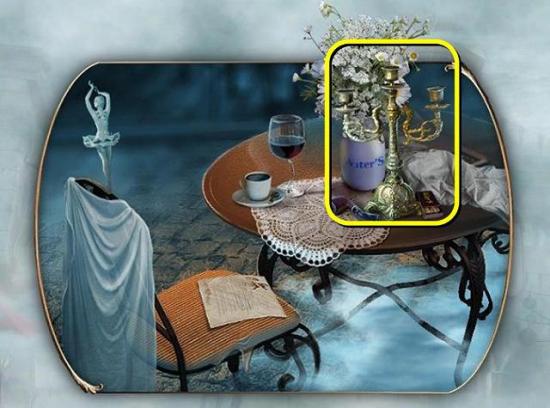
- Zoom in on the street lamp and smash it with the CANDELABRUM
- Go into the street between the houses and watch the scene
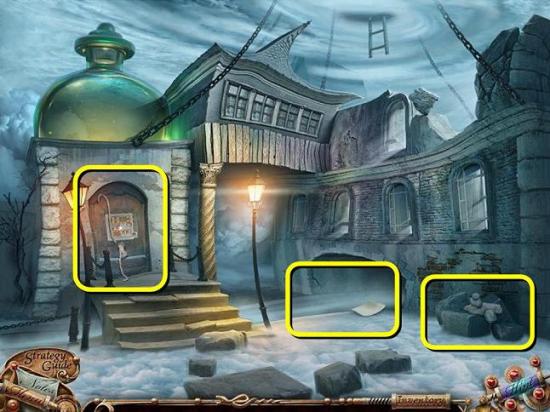
- Zoom in on the rocks, move the rocks and get the SWORD
- Zoom in on the canal, move the paper and pick up the PUZZLE PIECE
- Zoom in on the pharmacy door, take the ROPE and place the PUZZLE PIECE
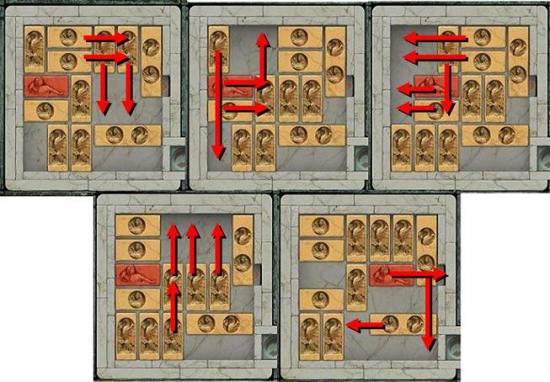
- Play the slide puzzle
- Enter the pharmacy
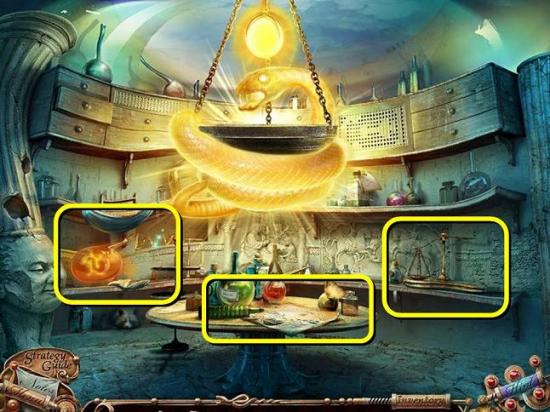
- Zoom in on the table to get the EMPTY MOUSE TRAP
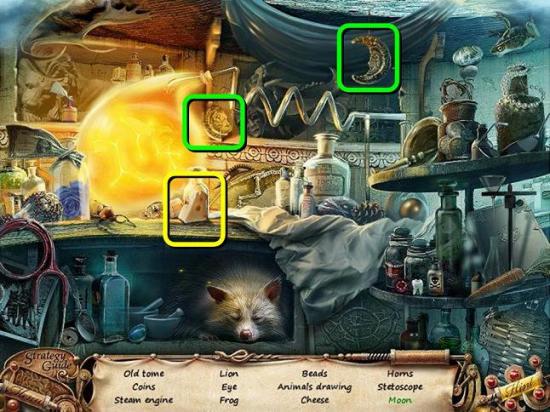
- Play the HOS on the left to find the CHEESE (yellow). For the Moon, combine the two moon pieces (green)
- Back out and zoom in on the canal
- Combine the EMPTY MOUSE TRAP with the CHEESE to get the MOUSE TRAP WITH CHEESE
- Place the MOUSE TRAP WITH CHEESE by the rat, wait until it closes and pick up the LIGHTER
- Light the candles in the canal with the LIGHTER
- Take the DOOR HANDLE from the water
The Altar
- Back out to the main square and zoom in on #18
- Place the DOOR HANDLE and go in
- Zoom in on the mailbox and take out the OLD DRESS
- Zoom in on the trash can, move the items around and take out the STRAW HAT
- Click on the street off to the right and light the lanterns with the LIGHTER
- Go down that street towards the altar
- Zoom in on the scarecrow and give him the OLD DRESS and the STRAW HAT
- Take the note with the code from his pocket
- Zoom in on the table to get the VALVE
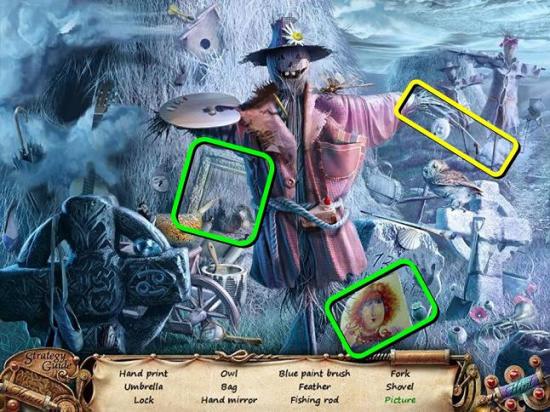
- The scarecrow now has a HOS. Find the FISHING ROD (yellow). For the Picture, put the drawing in the frame (green)
- Zoom in on the altar and play the match 2 puzzle until you get the STONE
Number 18 again
- Go back to #18 and zoom in on the broken pipes
- Put the valve on the pipes and turn it
- Take the MAGNET
- Go back to the altar, combine the MAGNET with the FISHING ROD to get a MAGNET ROD and use the MAGNET ROD to take the WRENCH from the water
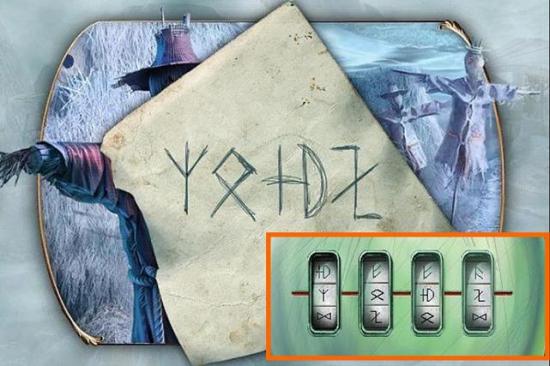
- Go back to #18, zoom in on the door and enter the code from the scarecrow
- Go through the door
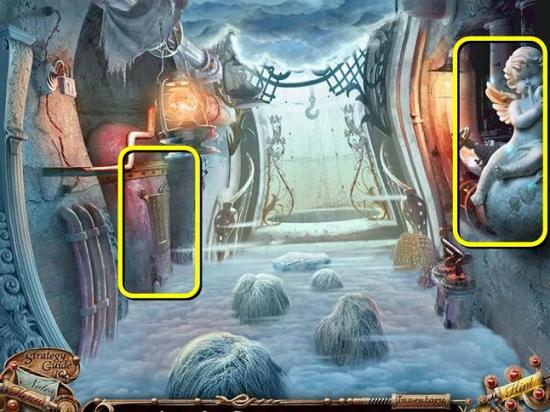
- Zoom in on the furnace and get the MATCHES
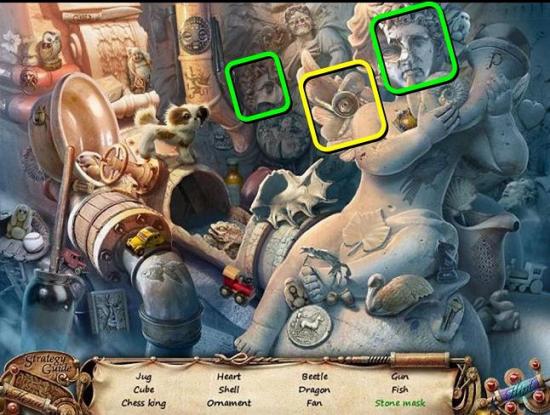
- Click on the angel statue for another HOS. Find the FAN (yellow). The Stone Mask is in two pieces that need to be combined (green)
- Go back one screen and zoom in on the broken fan on the right wall
- Take out the broken fan with the WRENCH and replace it with the FAN
- Go through the opened drain
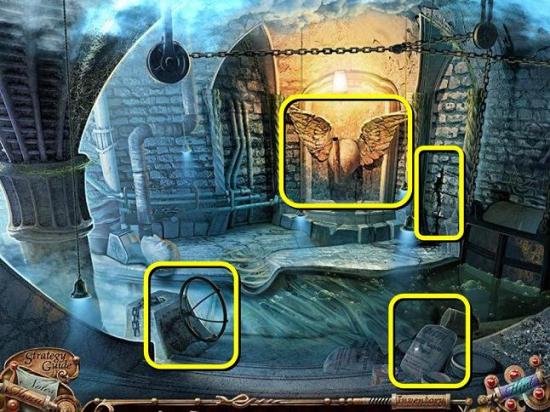
- Zoom in on the bags, move the glove, open the bucket and take out the SKULL
- Zoom in on the wheel and take the SCALES CUP
- Go back to the pharmacy, zoom in on the scales, place the SCALES CUP on it and take the SCALES
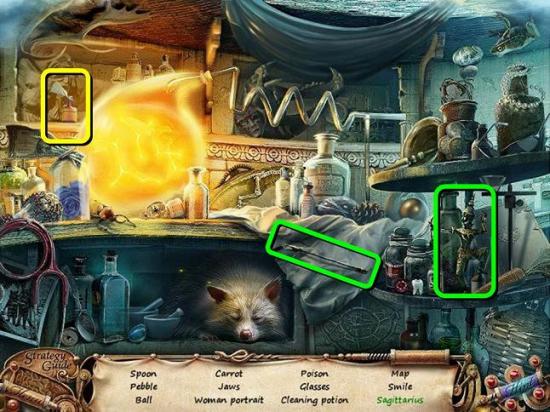
- Also play the new HOS in the pharmacy. For Sagittarius place the arrow on the statuette (green). Keep playing to find the CLEANING POTION (yellow)
- Go back to #18 and into the back alley
- Put the ROPE on the shaft and go down to the basement
- Break the window with the STONE
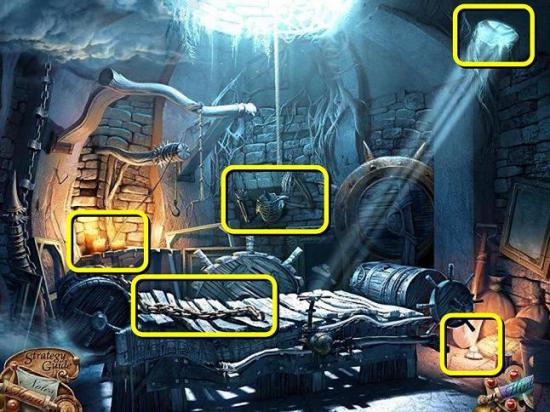
- Find the candles on the left and light them with the MATCHES
- Find the candle on the right and light it with the MATCHES
- Use the SWORD to cut open the sack by the candle and take out the TONGS
- Also use the SWORD to cut the CHAIN
- Zoom in on the skeleton on the back wall and give him the SKULL and the SCALES
- Take the SWAN HEAD
- Go back through the drain, zoom in on the wheel and place the CHAIN
- Turn the wheel to drain the water
- Zoom in on the fountain and place the SWAN HEAD
- Go back to the altar, zoom in on the embers and use the TONGS to get another KEY
- While you’re there, also put the CLEANING POTION in the pond by the altar
The Witches’ Lair
- Go back towards the pharmacy and go up the ladder that has appeared outside
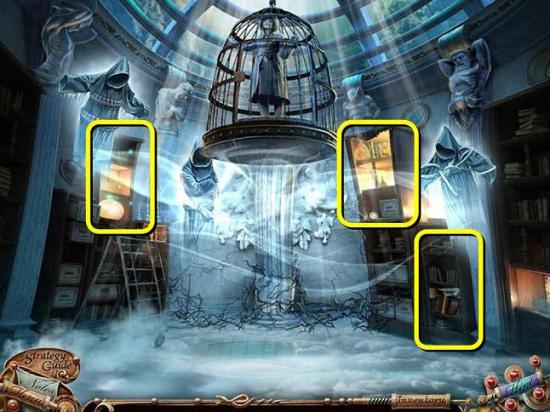
- Zoom in on the lower cabinet on the right and move the objects until you get a HAMMER
- Zoom in on the upper cabinet on the right, open the book and take the GLASS MOUSE from the top of the bottle
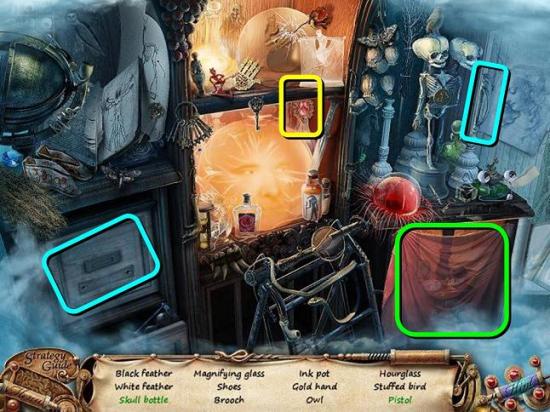
- Play the HOS. For the Skull Bottle, pull down the curtain (green). For the Pistol, put the drawer handle on the drawer and take out the pistol (blue). Find the BROOCH (yellow)
- Back out and enter the pharmacy. Give the GLASS MOUSE to the snake
- Zoom in on the chandelier, move the bones and find the GOLDEN COIN
- Go back to #18 and go down the drain
- Zoom in on the wall to the right of the fountain and smash it with the HAMMER
- Take out the OLD DOLL
- Back out and go into the back alley of #18
- Zoom in on the furnace and open it with the KEY
- Place the BROOCH on the box inside and take out the EARRINGS
- Go back to the witches’ lair
- Give the GOLDEN COIN to the witch on the right
- Give the OLD DOLL to the witch in the middle
- Give the EARRINGS to the witch on the left
- Take the three MAGIC VESSELS from the compartment that opens
- Go back out, zoom in on the canal and fill one of the MAGIC VESSELS with water from the canal
- Go back to the swan fountain down the drain at #18 and fill one of the MAGIC VESSELS with water from the fountain
- Go back to the altar and fill one of the MAGIC VESSELS with water from the altar
- Go back to the witches’ lair and put the FILLED VESSELS back in the wall compartment
- Zoom in on Alice
The End
More articles...
Monopoly GO! Free Rolls – Links For Free Dice
By Glen Fox
Wondering how to get Monopoly GO! free rolls? Well, you’ve come to the right place. In this guide, we provide you with a bunch of tips and tricks to get some free rolls for the hit new mobile game. We’ll …Best Roblox Horror Games to Play Right Now – Updated Weekly
By Adele Wilson
Our Best Roblox Horror Games guide features the scariest and most creative experiences to play right now on the platform!The BEST Roblox Games of The Week – Games You Need To Play!
By Sho Roberts
Our feature shares our pick for the Best Roblox Games of the week! With our feature, we guarantee you'll find something new to play!Type Soul Clan Rarity Guide – All Legendary And Common Clans Listed!
By Nathan Ball
Wondering what your odds of rolling a particular Clan are? Wonder no more, with my handy Type Soul Clan Rarity guide.


