- Wondering how to get Monopoly GO! free rolls? Well, you’ve come to the right place. In this guide, we provide you with a bunch of tips and tricks to get some free rolls for the hit new mobile game. We’ll …
Best Roblox Horror Games to Play Right Now – Updated Weekly
By Adele Wilson
Our Best Roblox Horror Games guide features the scariest and most creative experiences to play right now on the platform!The BEST Roblox Games of The Week – Games You Need To Play!
By Sho Roberts
Our feature shares our pick for the Best Roblox Games of the week! With our feature, we guarantee you'll find something new to play!Type Soul Clan Rarity Guide – All Legendary And Common Clans Listed!
By Nathan Ball
Wondering what your odds of rolling a particular Clan are? Wonder no more, with my handy Type Soul Clan Rarity guide.
Fiction Fixers: The Curse of Oz Walkthrough
Welcome to the Fictions Fixers: The Curse of Oz walkthrough on Gamezebo. Fictions Fixers: The Curse of Oz is a Hidden Object game played on PC created by Fugazo. This walkthrough includes tips and tricks, helpful hints, and a strategy guide to how to complete Fictions Fixers: The Curse of Oz.
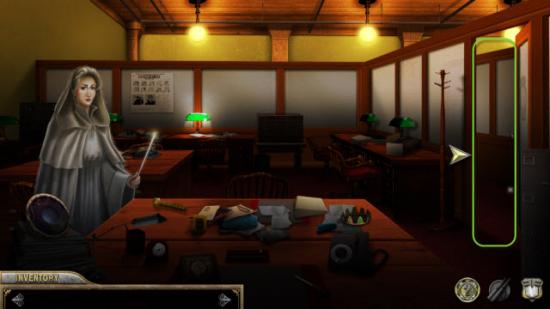
Fiction Fixers: The Curse of Oz – Game Introduction
Welcome to the Fictions Fixers: The Curse of Oz walkthrough on Gamezebo. Fictions Fixers: The Curse of Oz is a Hidden Object game played on PC created by Fugazo. This walkthrough includes tips and tricks, helpful hints, and a strategy guide to how to complete Fictions Fixers: The Curse of Oz.
General Tips and Guide Tips
General Tips
- Two Gameplay Options: Regular Mode and Expert mode
- Regular Mode features faster charging Skip and Hint Buttons. Active Zones and Construction Pieces are highlighted
- Hint and Skip Buttons take approximately one minute to refill on Regular Mode.
- Click on a Hidden Objects name on the list to use a Hint to find the hidden object.
- Cursor will change to a Magnifying Glass when find an interactive area or hidden object search area.
- Cursor will change into a Hand when find an object can pick up.
- Cursor will change into an Arrow to indicate where you can move from Area to Area.
- Cursor will change into a Chat Bubble when can talk to Characters.
- Several Characters will join you. Each one will have a unique ability.
Guide Tips
- Hidden Object lists are slightly different each time you play. The hidden objects are very similar each time you play.
- This guide will show the list that was received; your list may be slightly different.
- Puzzles, where possible, will show the correct sequence to solve.
- Other Puzzles will be provided with directions and tips.
- Interactive Areas are highlighted in Blue.
- Hidden Objects are highlighted in Yellow.
- Missing Items are highlighted in Red.
- Locations are highlighted in Green.
Walkthrough – Fiction Fixers Office / Dorothy’s Home

Leave Office and head over to the Lab.
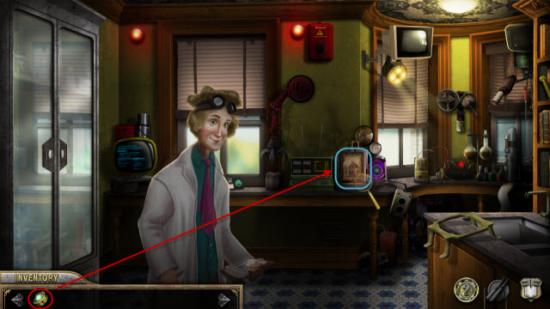
Click on Book highlighted in Blue.
Use the Fiction Fixer Device on the Book.
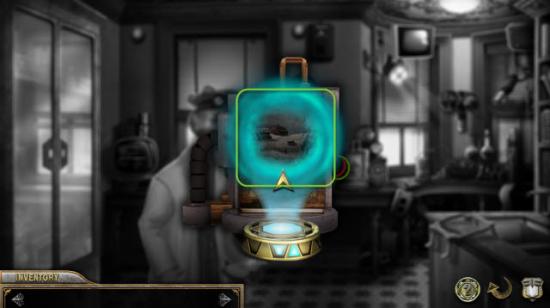
Click on the Portal to enter the Story.
Dorothy’s Home
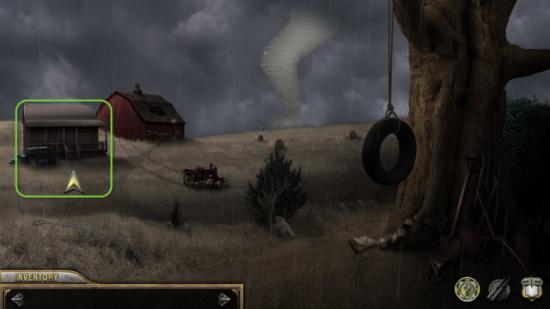
Move to the House highlighted in Green.
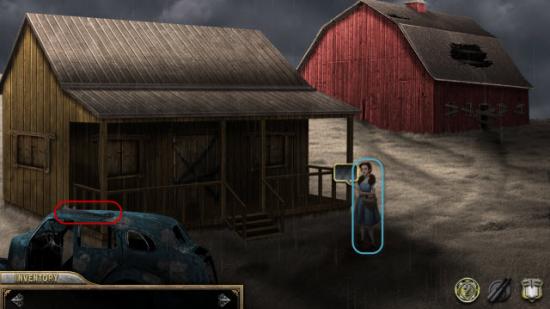
Talk to Dorothy highlighted in Blue.
Gather the Item highlighted in Red.
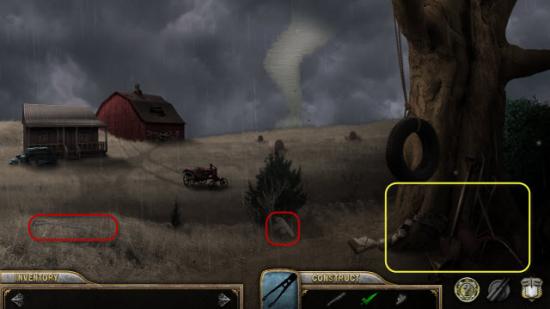
Return to the Field.
Gather the Items highlighted in Red.
Receive Bolt Cutters.
Click on the Area highlighted in Yellow.
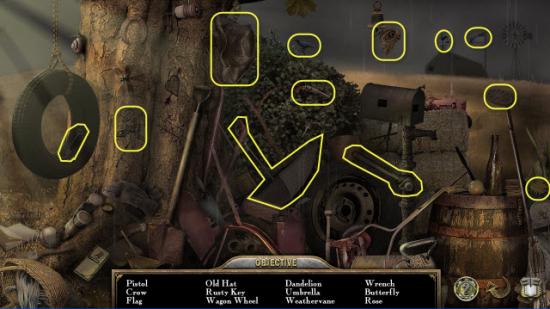
Gather the Hidden Objects highlighted in Yellow.
Receive Key.
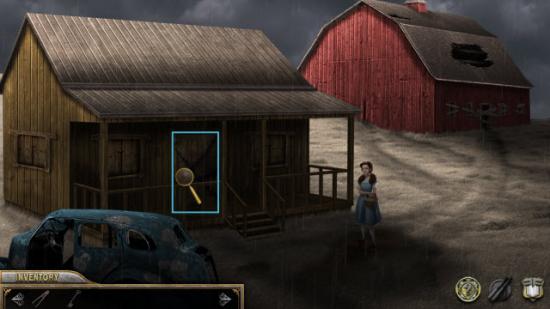
Return to House.
Click on Front Door highlighted in Blue.
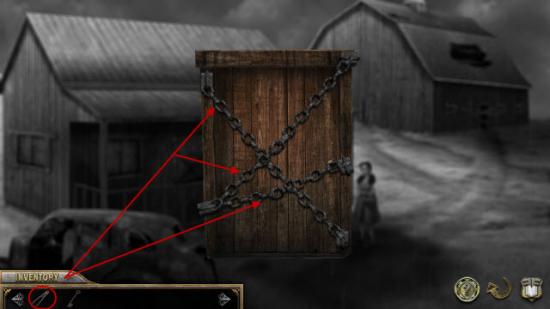
Use Bolt Cutters on each of the three Chains.

Slide the three Panels back.
Use the key on the Lock.
Turn the Key.
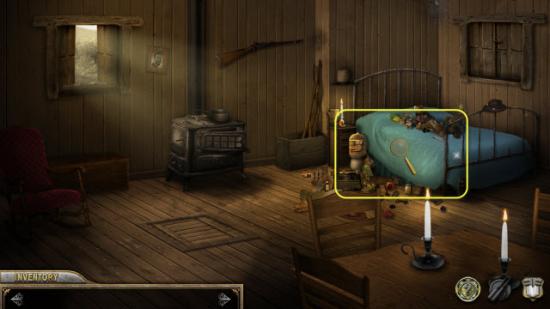
Enter the House.
Click on the Bed highlighted in Yellow.
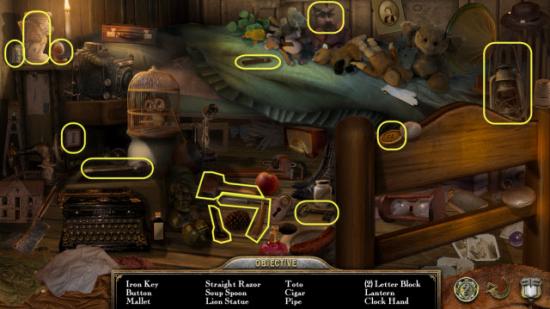
Gather the Hidden Objects highlighted in Yellow.
Receive Toto.
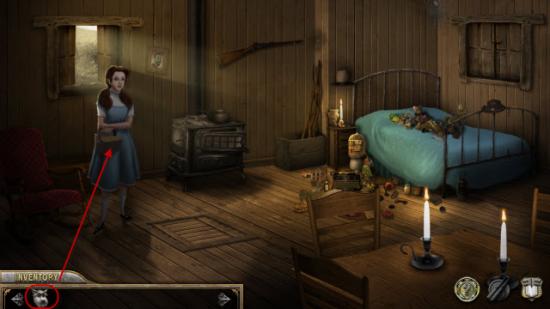
Give Toto to Dorothy.
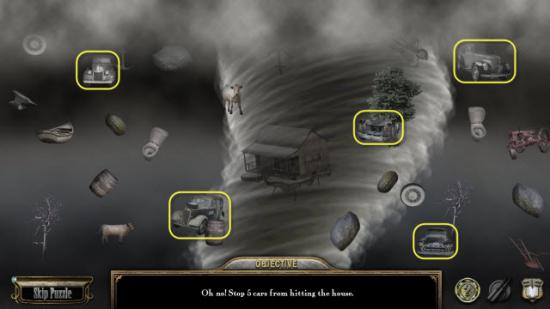
Find the 5 Cars highlighted in Yellow.
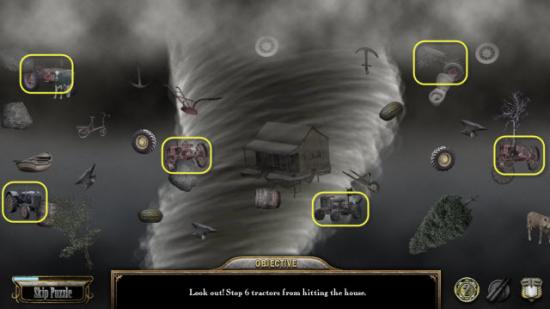
Find the 6 Tractors highlighted in Yellow.
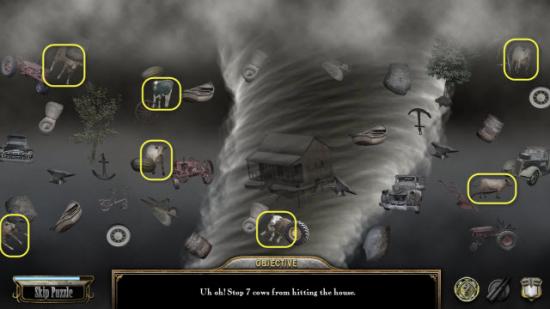
Find the 7 Cows highlighted in Yellow.
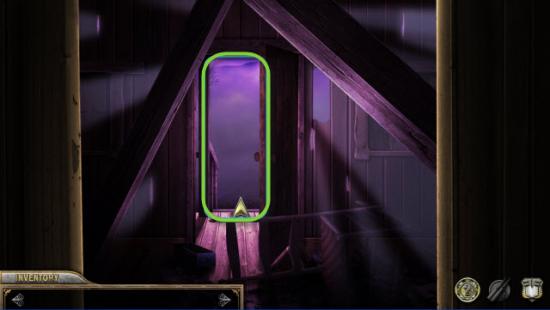
Exit the House.
House, Field, Barn, and Woods
Receive Kiss from Good Witch.
Dorothy joins group. Dorothy provides basic information on what to do next.
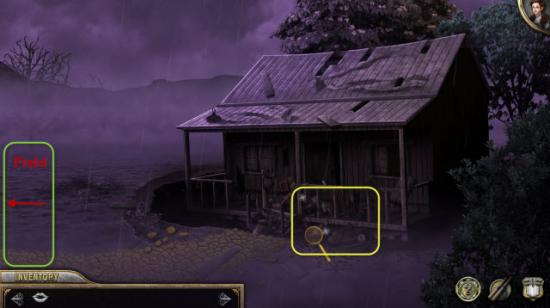
Click on the Area highlighted in Yellow.
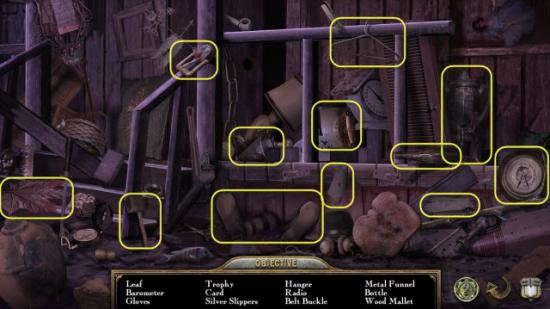
Gather the Hidden Objects highlighted in Yellow.
Receive Shoes and Funnel.
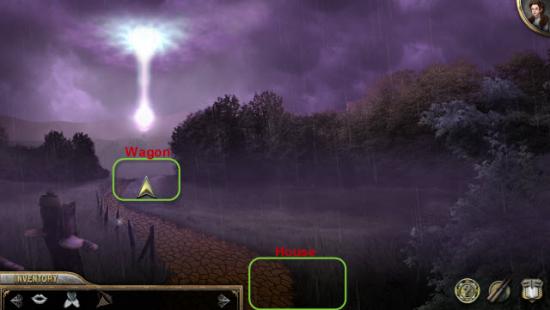
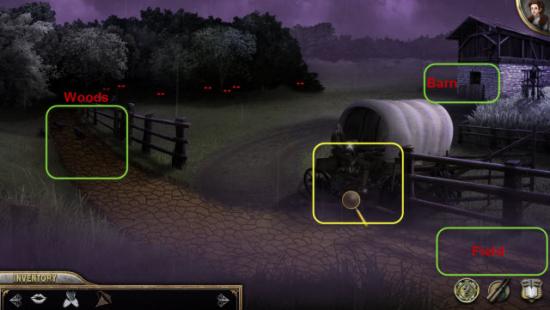
Go through Field, on to Wagon.
Click on Wagon highlighted in Yellow.
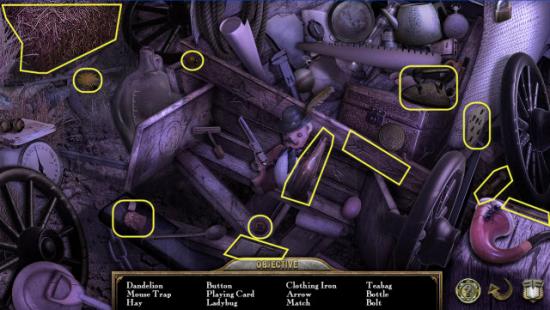
Gather Hidden Objects highlighted in Yellow.
Receive Hay.
Move to Barn.
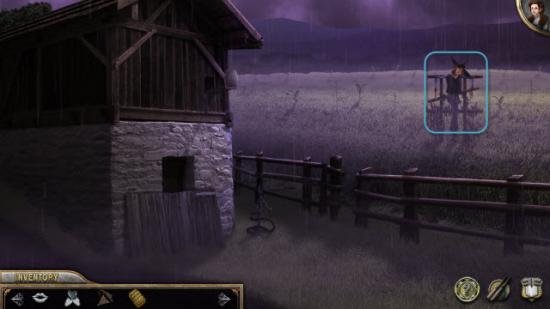
Talk to Scarecrow highlighted in Blue.
Return to House.
Search the earlier Highlighted Area, in Yellow, again.
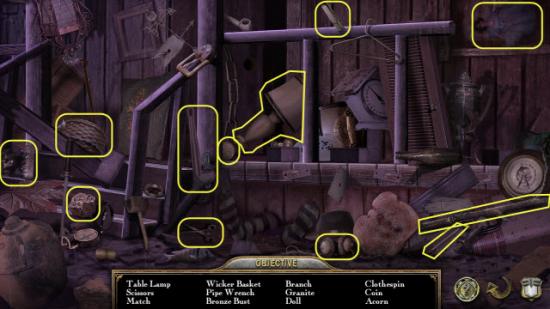
Gather the Hidden Objects highlighted in Yellow.
Receive Scissors.
Return to the Field.
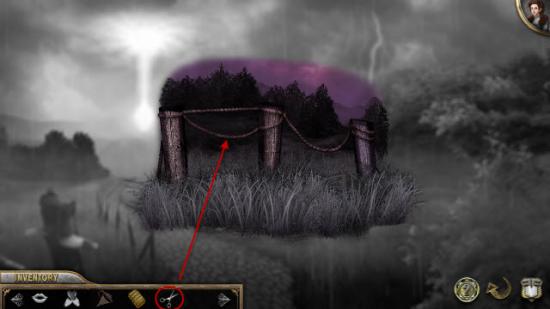
Click on the Fence Line.
Use the Scissors on the Rope.
Receive Twine.
Return to Barn.
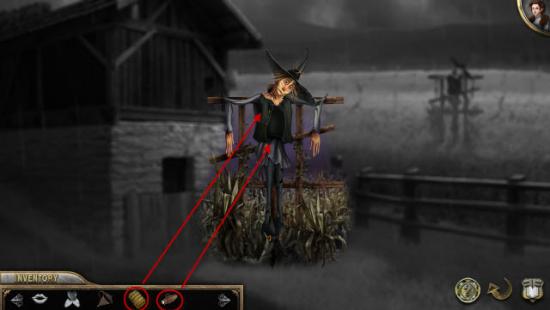
Click on the Scarecrow.
Use the Hay on Scarecrow.
Next use the Twine on Scarecrow.
Click Scarecrow to help him down.
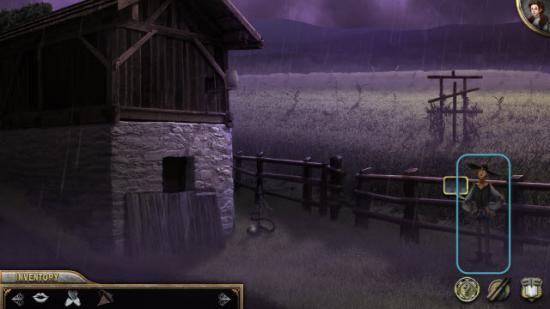
Talk to Scarecrow and he will join Group. Scarecrow can help scare of Crows.
Click on Scarecrows at entrance to Woods.
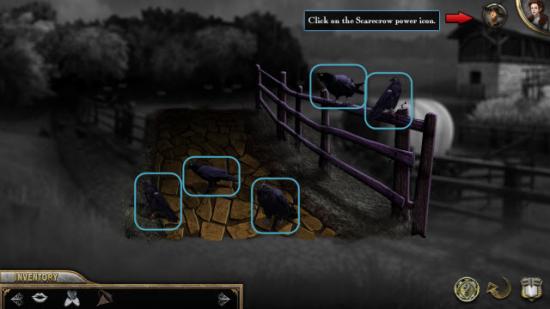
Use Scarecrow to scare off each Crow.
Click on Scarecrow and then each Crow individually.
Enter Woods
Click on Dark Woods.
Return to House.
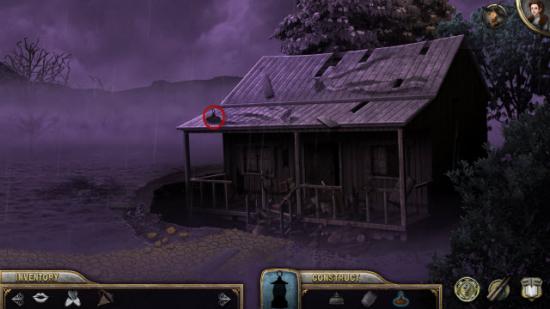
Gather Item highlighted in Red.
Return to the Field
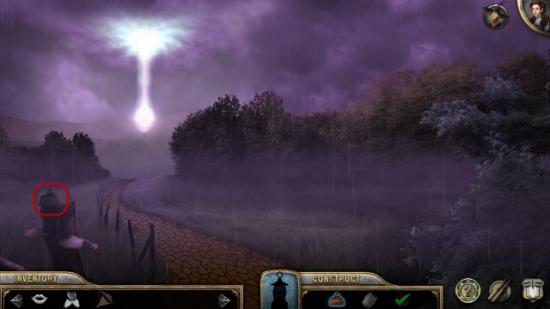
Gather the Item highlighted in Red.
Return to the Wagon
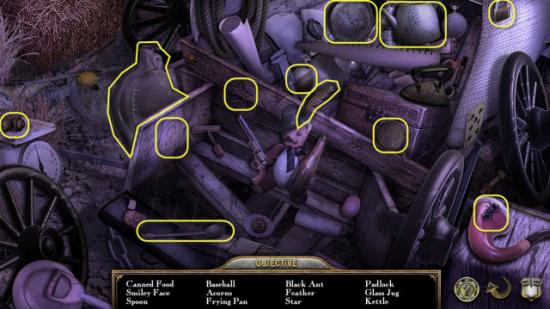
Click on the Wagon.
Gather the Hidden Objects highlighted in Yellow.
Return to the Barn.
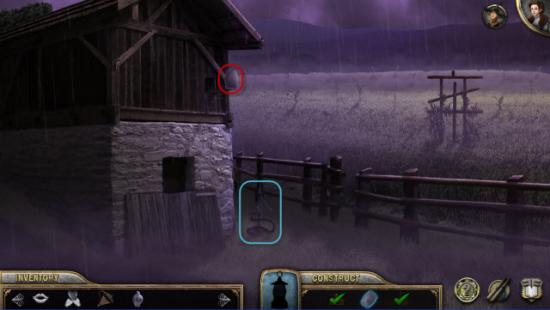
Gather the Item highlighted in Red.
Receive the Lantern.
Click on the Pump highlighted in Blue.
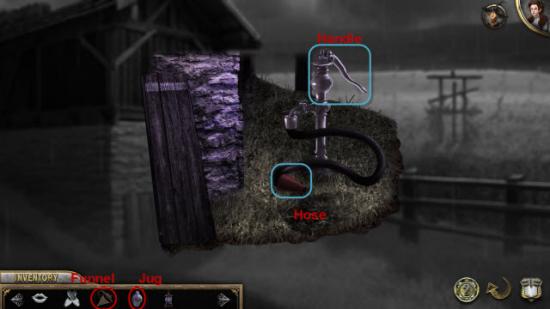
Use the Jug, highlighted in Red, on the Pump.
Next use the Funnel, highlighted in Red, on the Jug.
Next click on the Hose highlighted in Blue.
Finally pump the Pump Handle, highlighted in Blue, three times to fill the Jug.
Finally click to pick up the Filled Jug.
Return to the Woods.
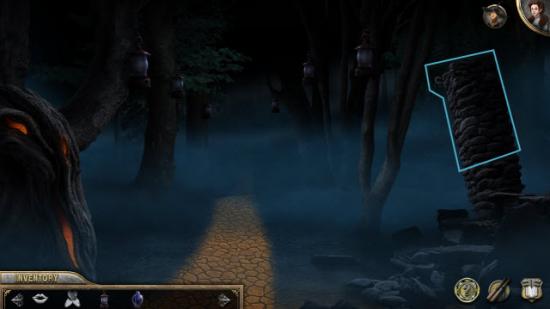
Click on the Stone Column highlighted in Blue.
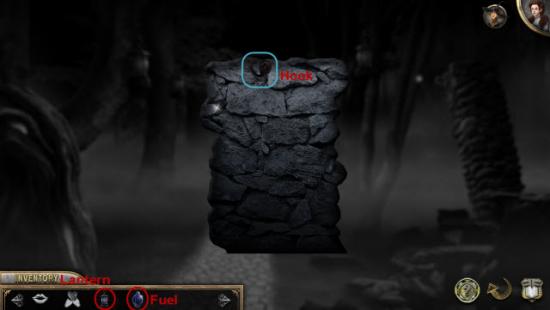
Use the Lantern, highlighted in Red, on the Hook, highlighted in Blue, on the Stone Column.
Next use the Jug of Fuel, highlighted in Red, on the Lantern.
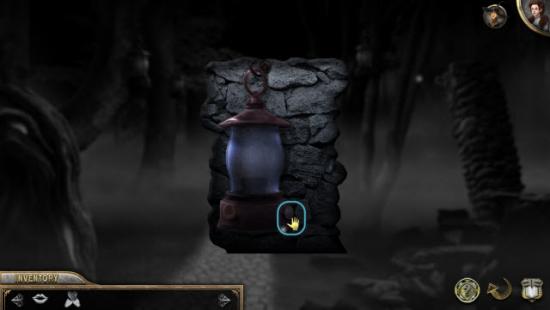
Click on the Dial, highlighted in Blue, to light the Lantern.
Next use the Lit Lantern and click on the Dark Woods to light the other Lanterns.
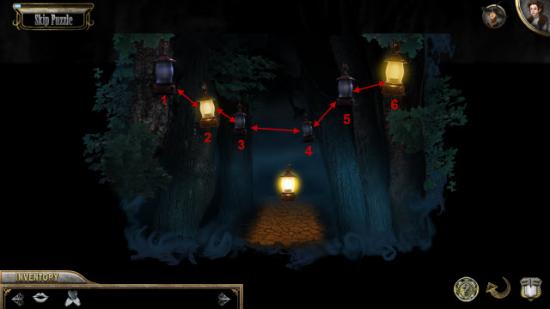
This is a Lights Out Puzzle. Except in this case you need to turn on all the Lights.
When you click on an unlit Lantern it will light up.
Adjacent Lanterns will switch from Off to On or vice versa.
The arrows show which Lamps are connected and affect each other.
Solution: Turn Lantern 2 Off, next turn Lantern 3 Off, next turn Lantern 4 Off, next turn Lantern 5 Off, and finally turn Lantern 6 On.
Now proceed through the Woods.
Cabin, Tower, and Chasm
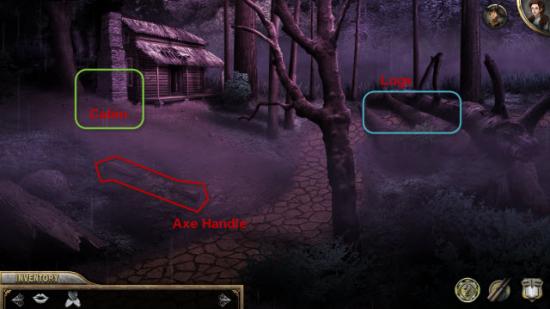
Move from the Clearing, to the Cabin.
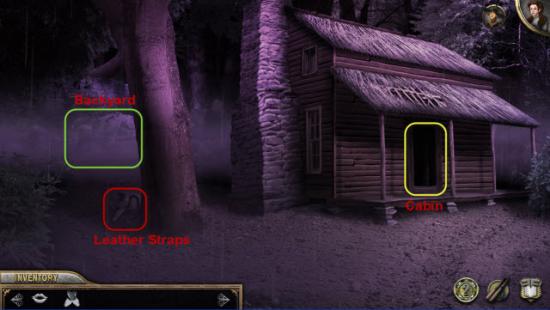
Move from Cabin, to Backyard.
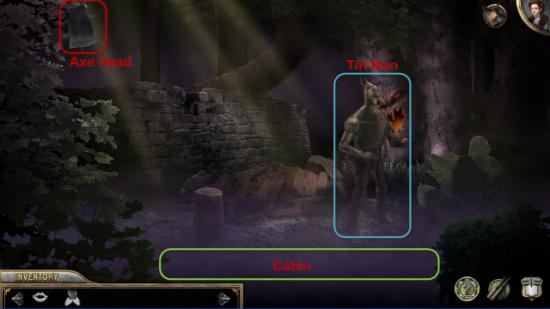
Talk to the Tin Man, highlighted in Blue.
Return to the Cabin and search the Cabin, highlighted in Yellow.
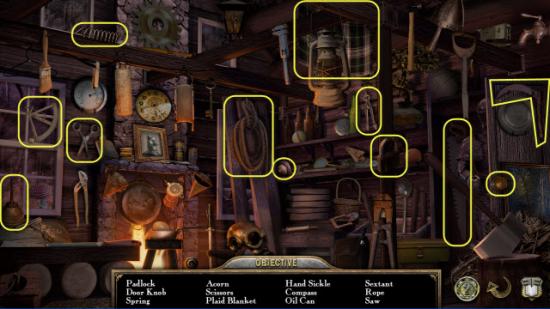
Find the Hidden Objects highlighted in Yellow.
Receive Oil Can
Return to the Tin Man in the Backyard.
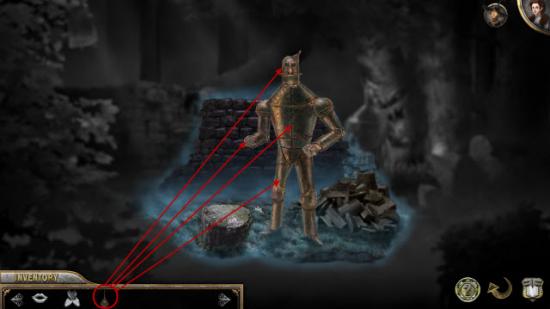
Click on the Tin Man.
Use the Oil Can, highlighted in Red, on the Tin Man.
Oil the Tin Mans, legs, arms, chest, and head.

Return to Clearing and get the Axe Handle highlighted in Red.

Return to Cabin and get the Leather Straps, highlighted in Red.

Return to Backyard.
Gather the Axe Head highlighted in Red.
Receive completed Axe.
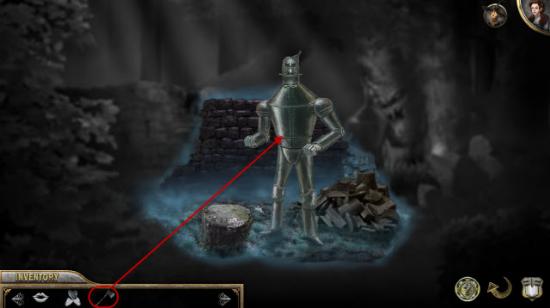
Click on the Tin Man and give him the Axe highlighted in Red.
Tin Man joins group.
Return to the Clearing.

Click on the Logs highlighted in Blue
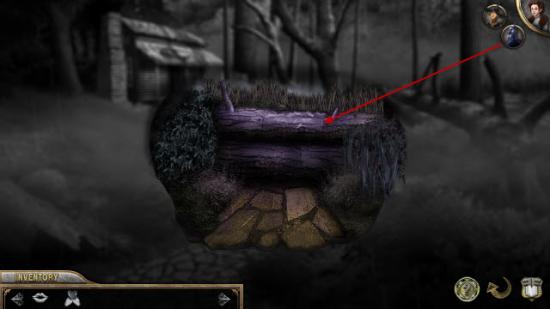
Use the Tin Man to chop the Logs.
Each Log requires three chops and there are three Logs.
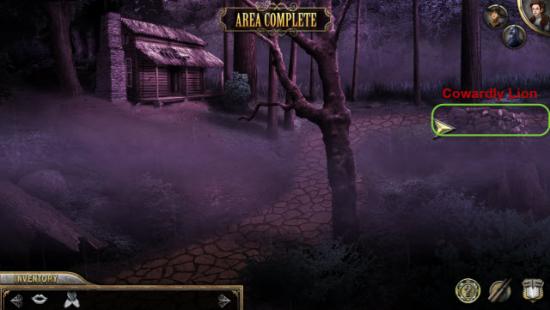
Next Area is now open.
Head on to the Cowardly Lion.
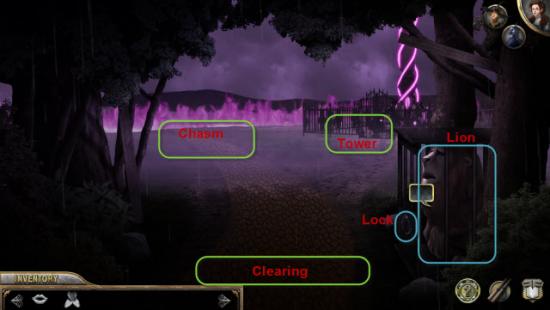
Talk to the Lion.
Head over to the Tower.
Head back to the Cabin.
Search the Cabin, highlighted in Yellow, again.
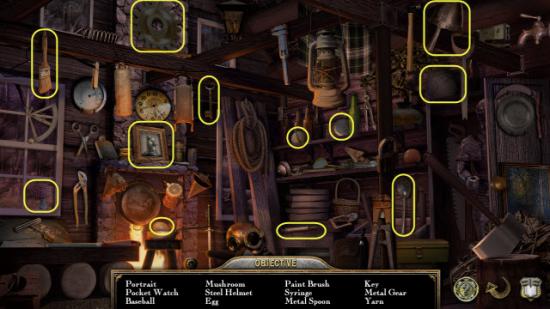
Find the Hidden Objects highlighted in Yellow.
Receive Key.
Return to Lion.
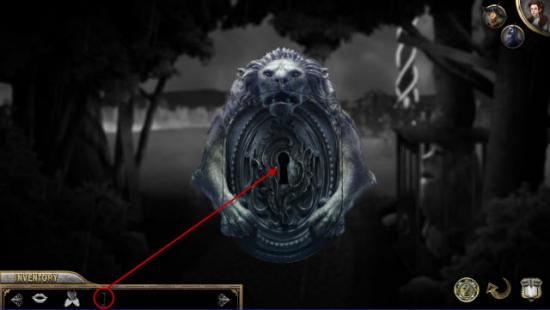
Click on Cage Lock and use Key, highlighted in Red, on the Lock.
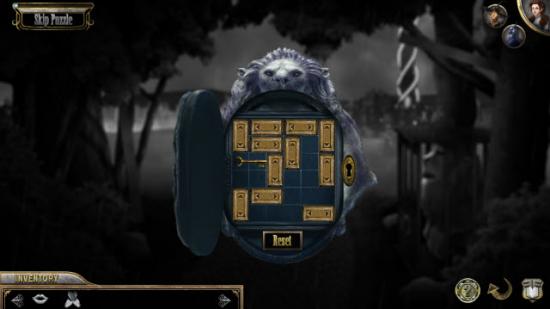
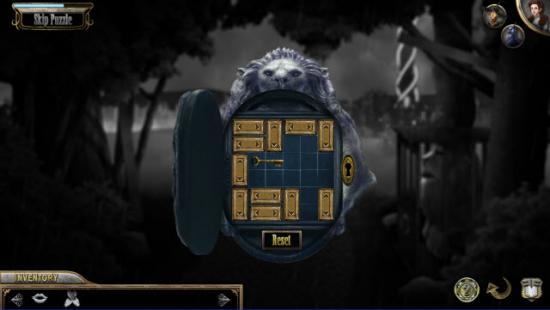
Solve the Puzzle.
This is a Traffic Jam type mini game. Need to slide blocks around to open path so can remove the key.
Lion will join the Group.
Head back to the Tower.
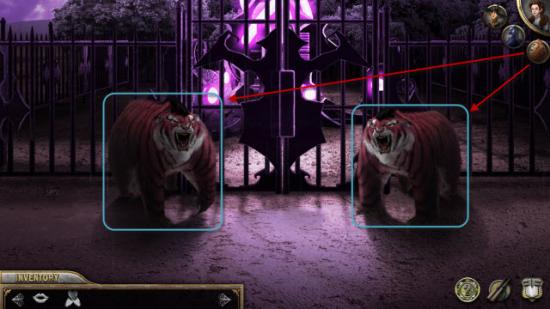
Use the Lion to scare of the two Creatures highlighted in Blue.
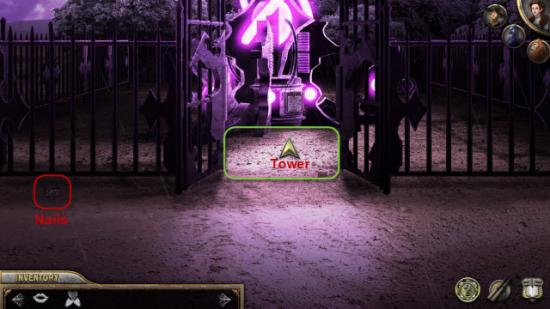
Open Gate and enter the Tower area.
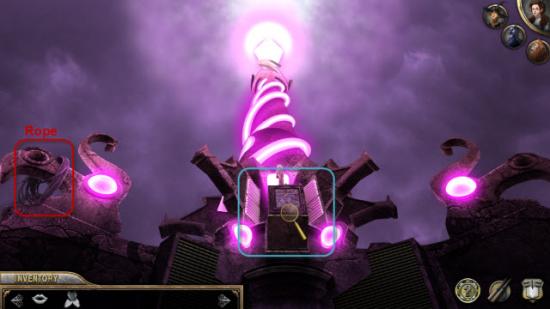
Click on the Tower highlighted in Blue.
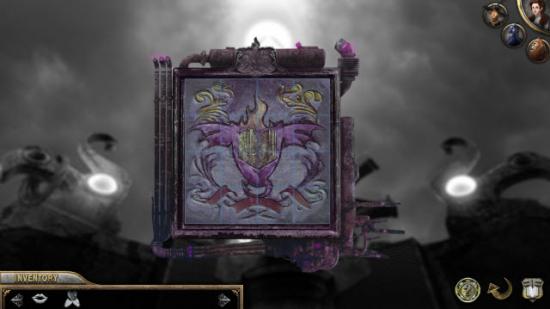
Solve the Puzzle.
This is a simple rotating pieces puzzle. Click on each piece to rotate it till all pieces align to form the correct image.
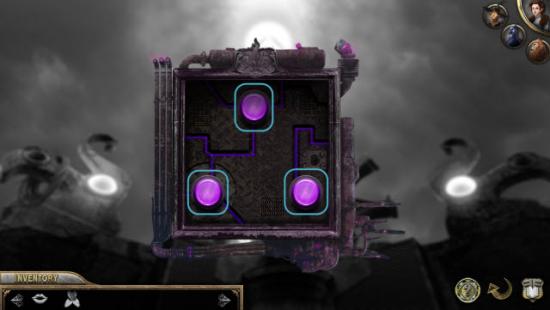
After solving the Puzzle, three Buttons will be revealed.
Click on each Button to turn off the Tower.
Now return to the Chasm.
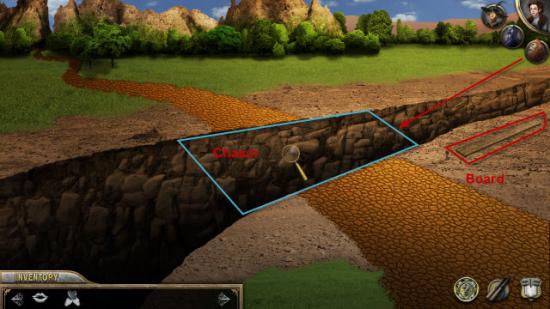
Use Lion to cross the Chasm.
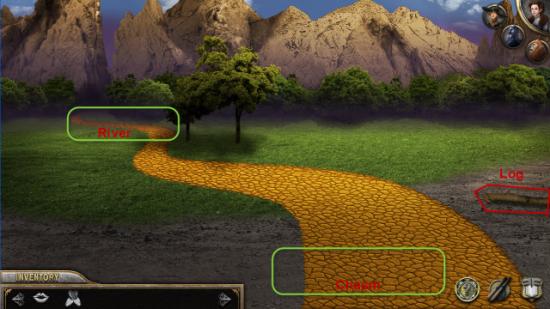
Go through Clearing on to River.
River, Flower Field and Cottage
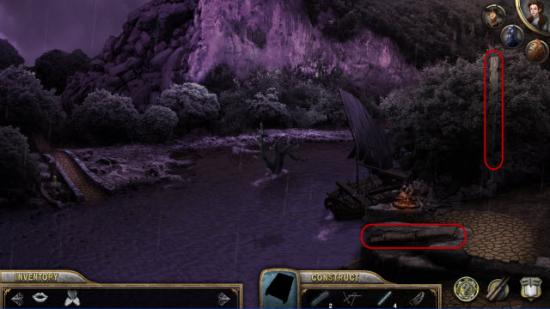
Gather the two Items highlighted in red.
Return to Lions Cage.
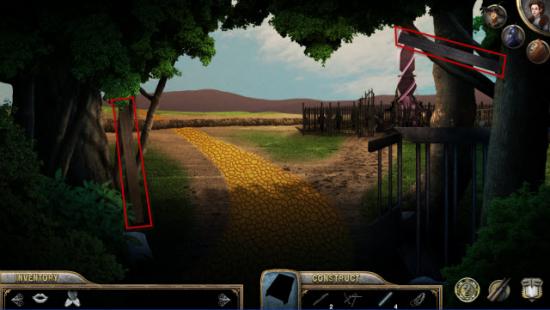
Gather the two Items highlighted in Red.
Return to Tower Gate.

Gather the Nails highlighted in Red.
Enter the Tower area.

Gather the Rope highlighted in Red.
Back to the Chasm.

Gather the Item highlighted in Red.
Move on to the Clearing.

Gather the Item highlighted in Red.
Receive the Raft,
Return to the River.
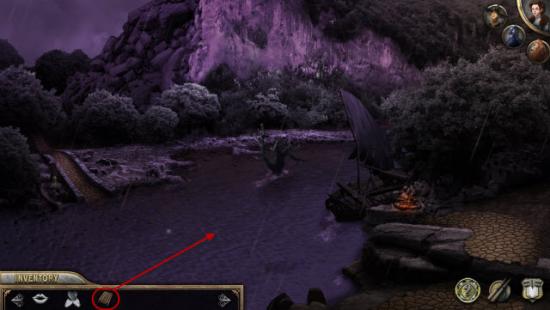
Use the Raft on the River.
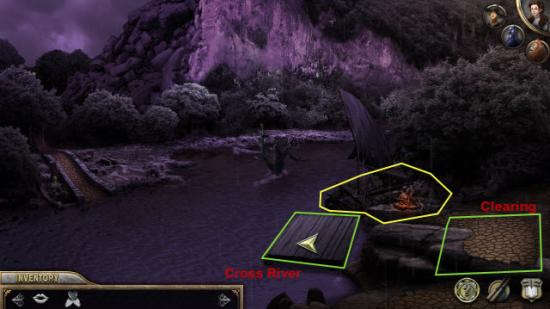
Click on the Raft and cross the River.
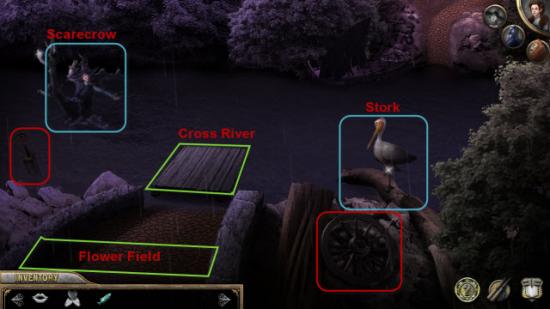
Click on the Raft and return back across the River.

Click on the Area highlighted in Yellow.
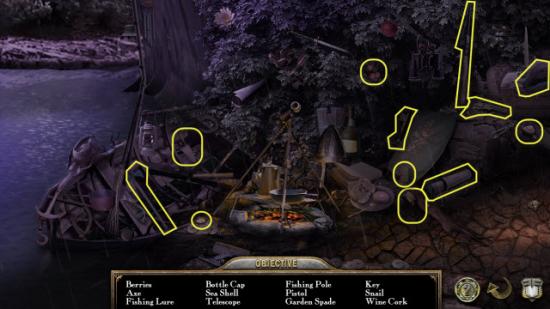
Gather the Hidden Objects highlighted in Yellow.
Receive Fishing Pole.
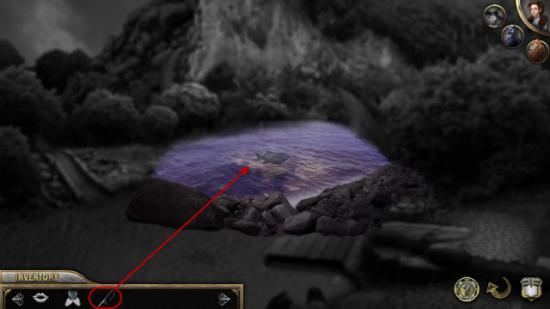
Click on the River.
Use the Fishing Pole on the River.
Click again to real in the Fish.
Receive Fish
Return back across the River.
Click on the Stork highlighted in Blue.
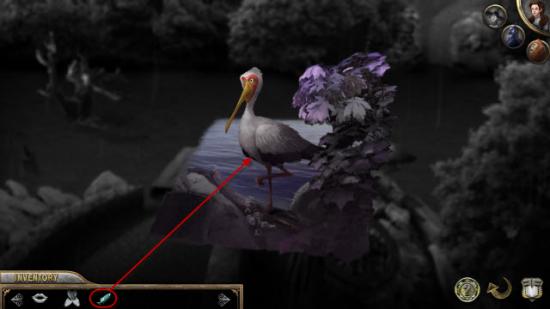
Give the Fish, highlighted in Red, to the Stork.
Click the Stork.
Receive the Stork.
Click on the Scarecrow highlighted in Blue.
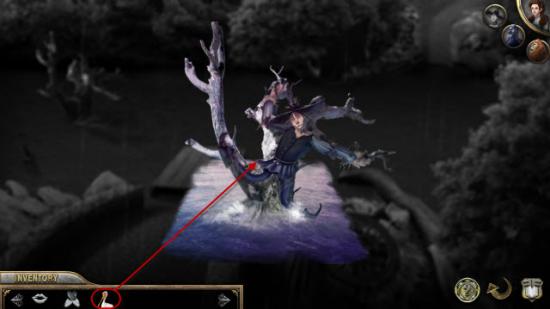
Use the Stork, highlighted in Red, to rescue the Scarecrow.
Move on to Flower Field.
Move on to the Cottage.
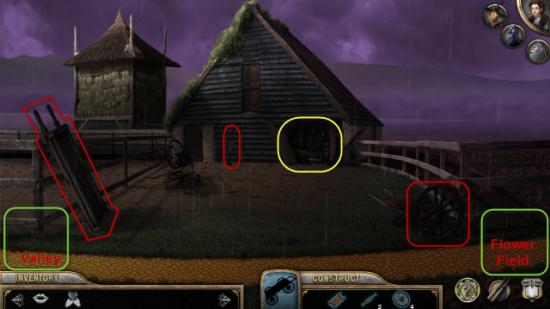
Gather the three Items highlighted in Red.
Return to River Side.

Gather the two Items highlighted in Red.
Return to the Flower Field.
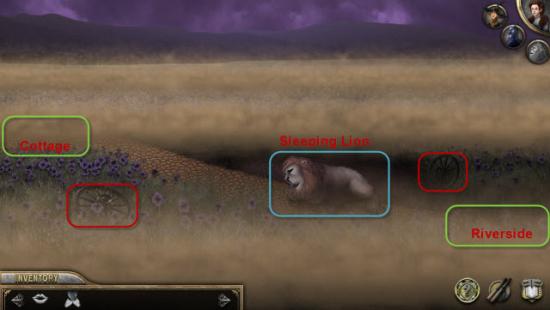
Gather the two Items highlighted in Red.
Receive Cart.
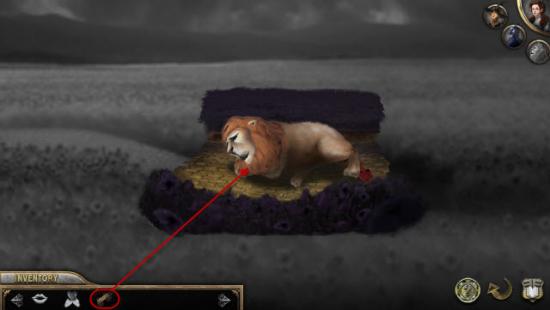
Use the Cart, highlighted in Red, on the Sleeping Lion.
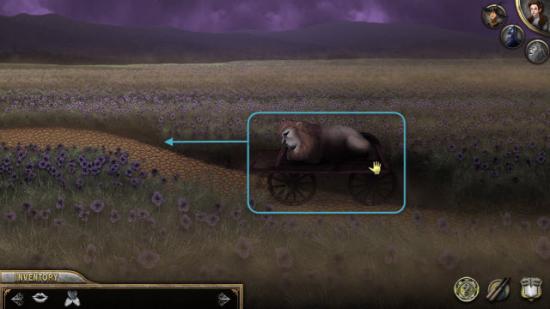
Click the Cart to move it to the Cottage.

Search the Area highlighted in Yellow.
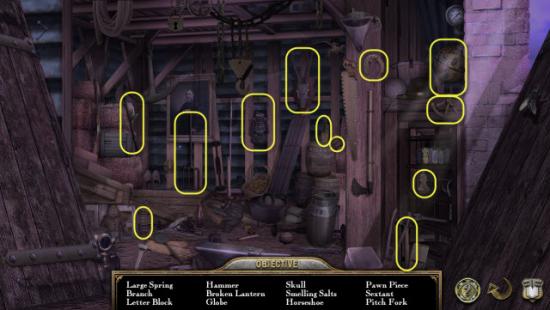
Gather the Hidden Objects highlighted in Yellow.
Receive Smelling Salts.
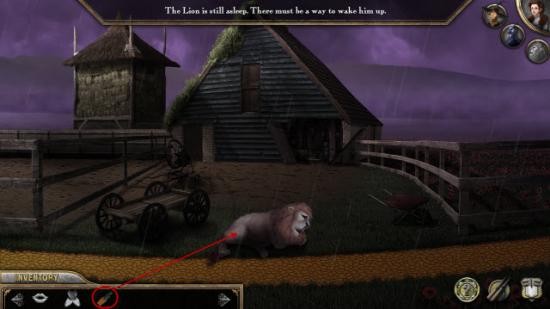
Use Smelling Salts, highlighted in Red, on the Sleeping Lion.
Move on to Valley.
Emerald City
Move onto Emerald City Gate.
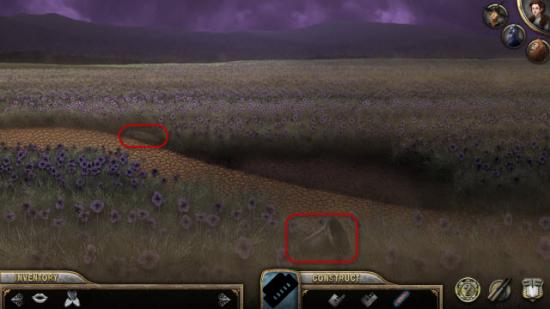
Return to the Flower Field.
Gather the Item and Bell highlighted in Red.
Return to the Cottage
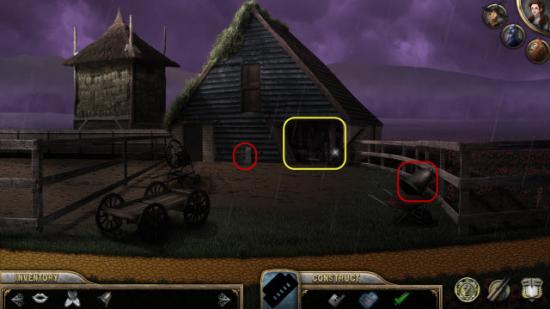
Gather the Item and Bell highlighted in Red.
Search the Area highlighted in Yellow.
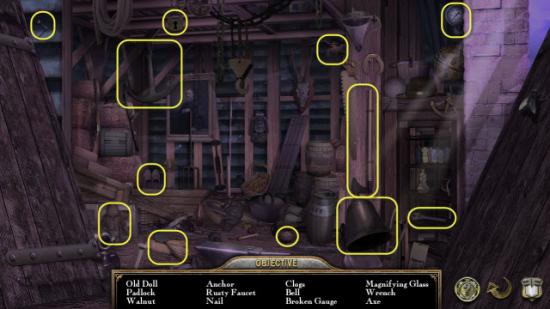
Gather the Hidden Objects highlighted in Yellow.
Receive Bell.
Return to the Valley
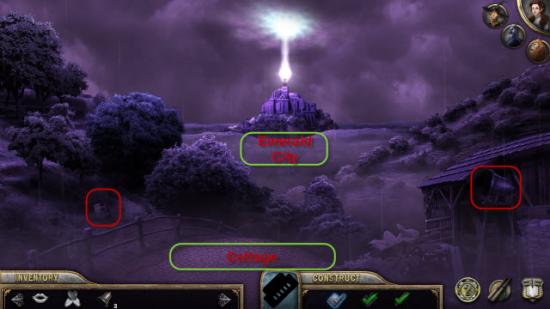
Gather the Item and Bell highlighted in Red.
Receive Doorbell.
Return to Emerald City Gate.
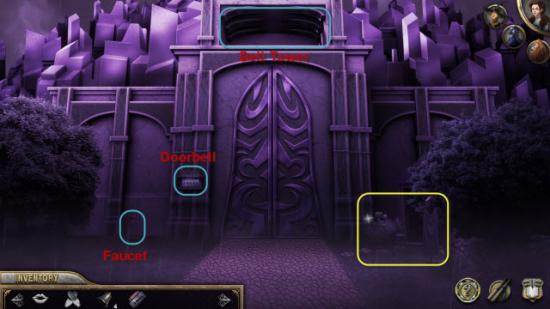
Search the Area highlighted in Yellow
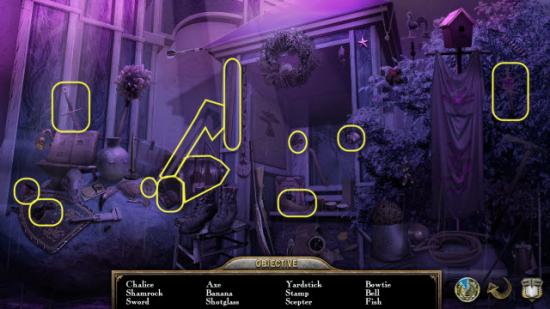
Gather the Hidden Objects highlighted in Yellow.
Receive Bell.
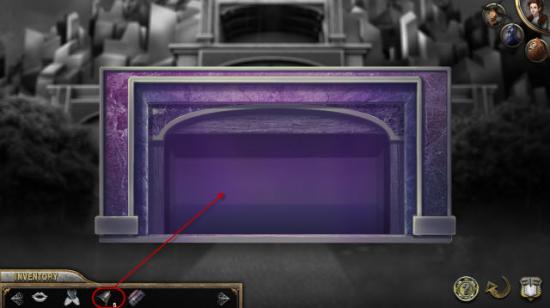
Click on Bell Tower.
Add the five Bells, highlighted in Red, to the Bell Tower
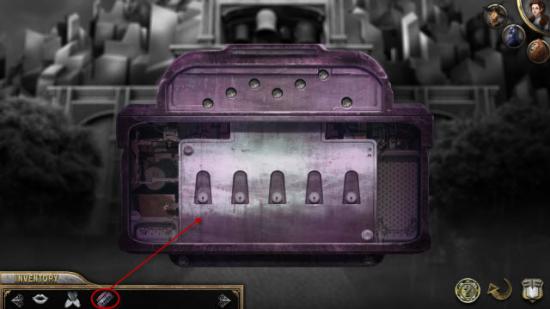
Click on the Doorbell.
Add the Doorbell Panel back.
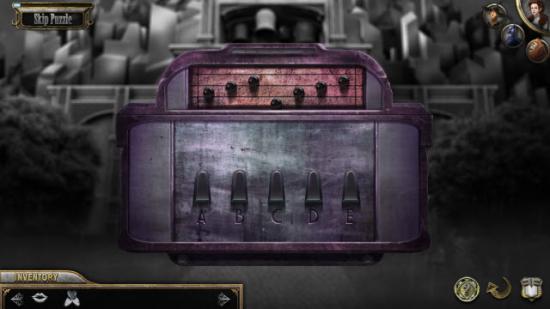
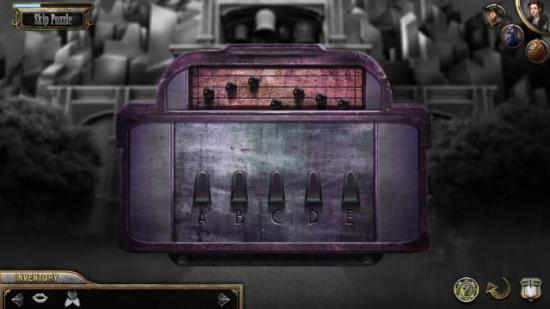
This is a Musical Puzzle.
The upper Black Knobs represent the Musical Notes with the corresponding Piano Keys on the bottom.
Key each corresponding Black Knobs equivalent Musical Note.
Solution: Puzzle #1 – CDE ACDE, Puzzle #2 – CDE ACBA
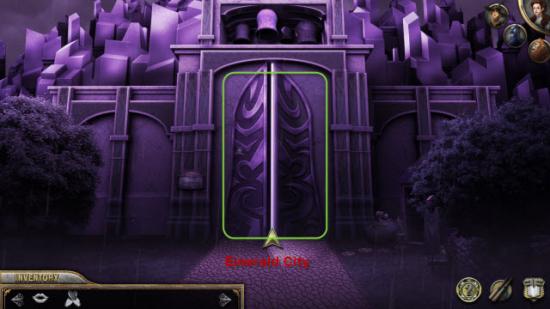
Enter Emerald City.
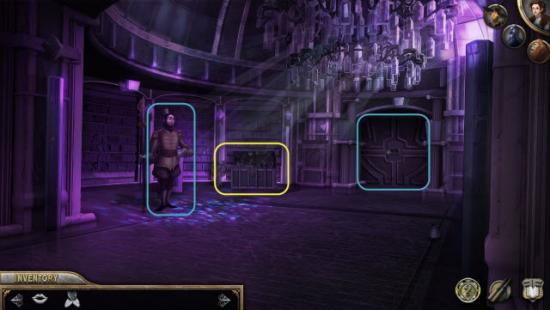
Talk to the Guard highlighted in Blue.
Search the Area highlighted in Yellow.
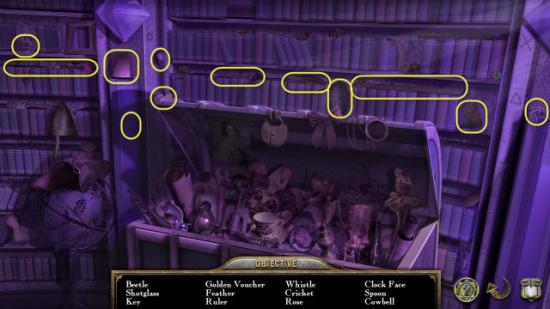
Gather the Hidden Objects highlighted in Yellow.
Receive Voucher.
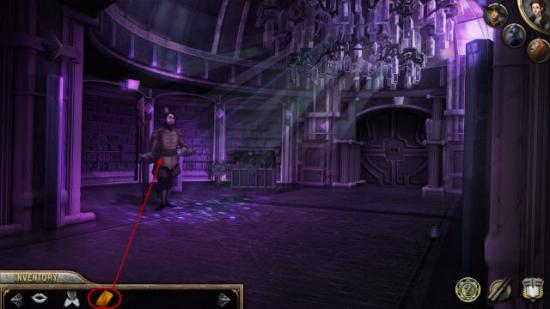
Give the Guard the Voucher, highlighted in Red.
Receive Goggles.
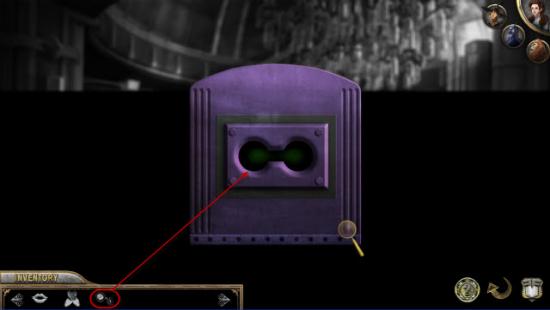
Click on the Door highlighted in Blue.
Use the Goggles, highlighted in Red, on the Door.
Enter Hallway.
Return to Gate.
Search the Area highlighted in Yellow.
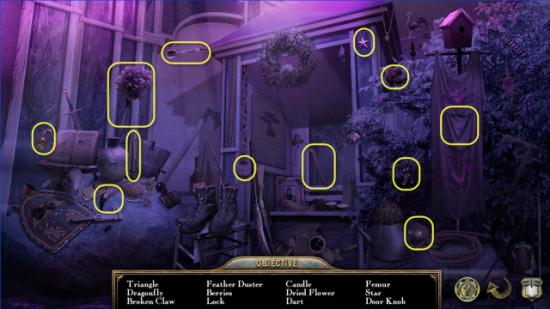
Gather the Hidden Objects highlighted in Yellow.
Receive a Dried Flower.
Return to Entrance area.
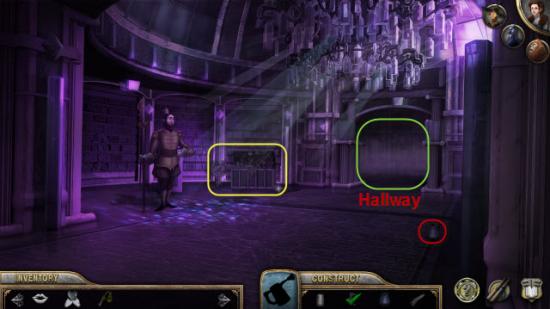
Gather the Item highlighted in Red.
Search the Area highlighted in Yellow.
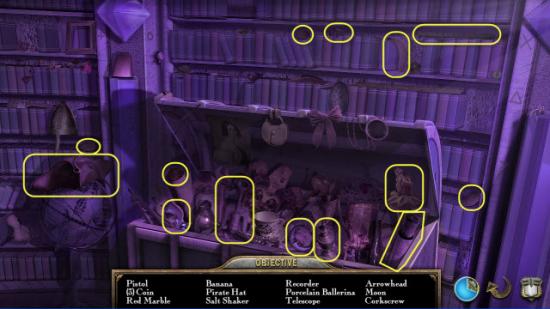
Gather the Hidden Objects highlighted in Yellow.
Receive Ballerina and Red Marble.
Return to Hallway.
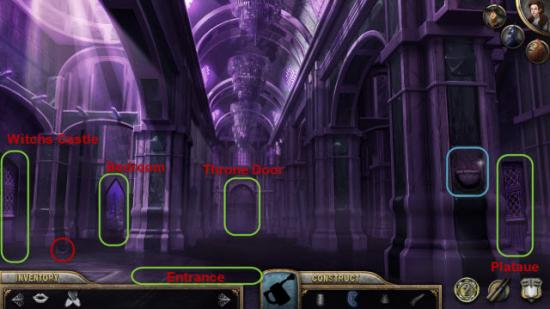
Gather the Item highlighted in Red.
Move to the Throne Door.
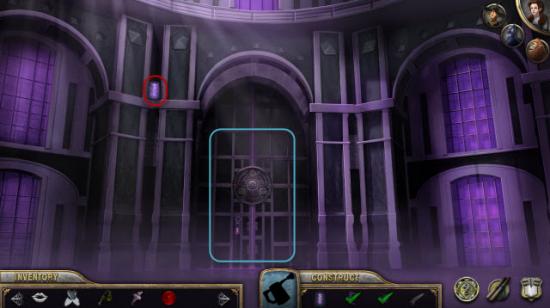
Gather the Item highlighted in Red.
Receive the Pitcher.
Return to the Hallway.
Enter the Bedroom
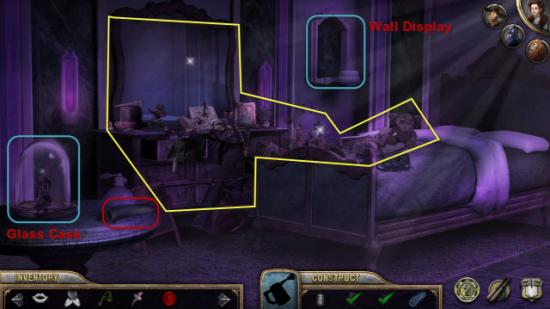
Gather the Item highlighted in Red.
Receive Pitcher.
Click on the Wall Display.
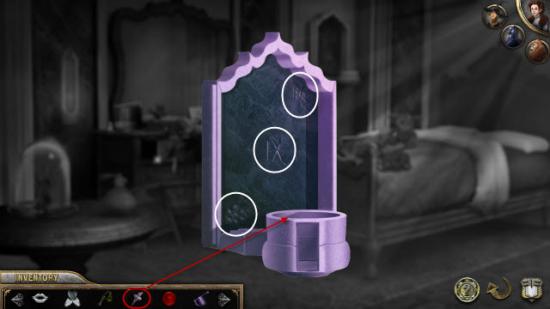
Use the Ballerina, highlighted in Red, on the Wall Display.
This will reveal a combination in the base of the Display.
The combination is written on the back splash of the Display.
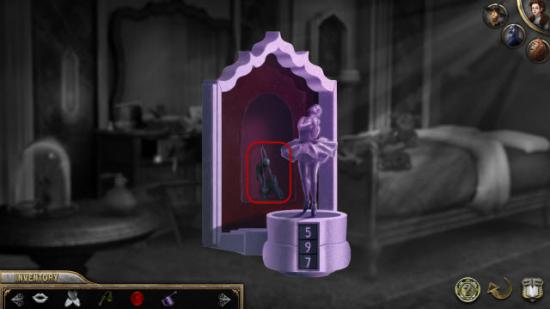
Gather the Dried Flower highlighted in Red.
Next search the Area highlighted in Yellow.
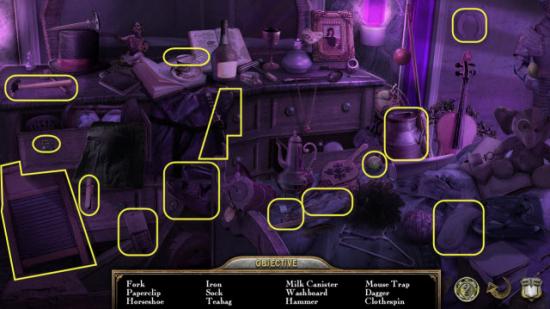
Find the Hidden Objects highlighted in Yellow.
Receive Hammer.
Click on the Glass Case.
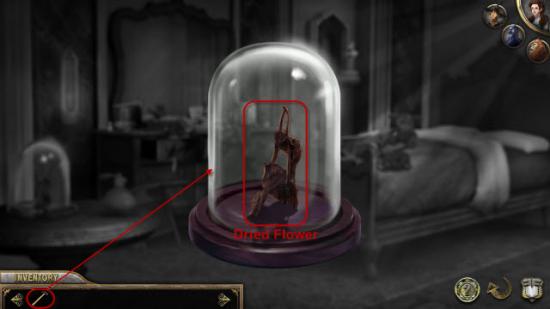
Use the Hammer, highlighted in Red, on the Case.
Hit the case three times to break the glass.
Gather the Dried Flower inside.
Return to Gate.
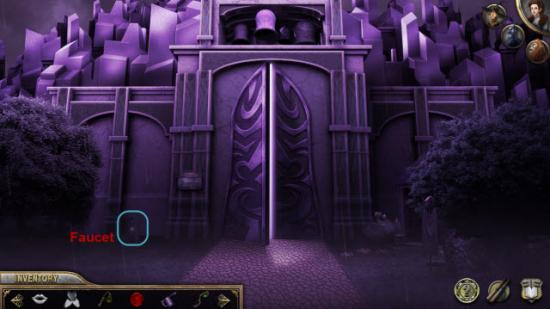
Click on Faucet.
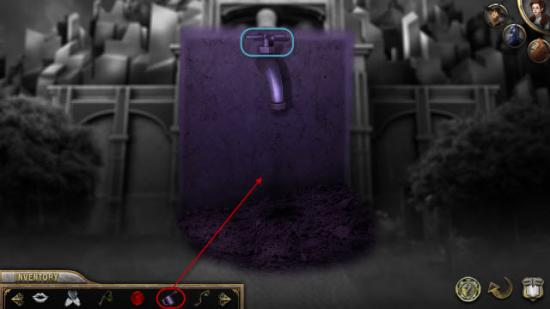
Use the Pitcher, highlighted in Red, on the Faucet.
Click the Handle, highlighted in Blue, to fill the Pitcher.
Click on the Pitcher to receive Filled Pitcher.
Return to Hallway.

Click on the Planter highlighted in Blue.
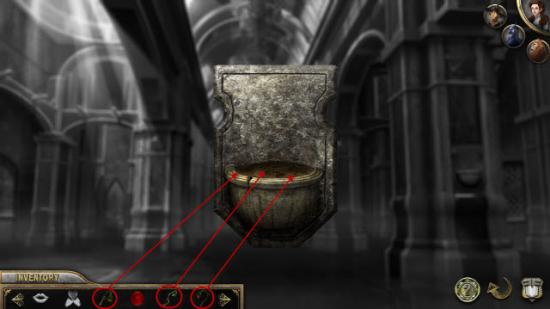
Add the three Dried Flowers, highlighted in Red, to the Planter.
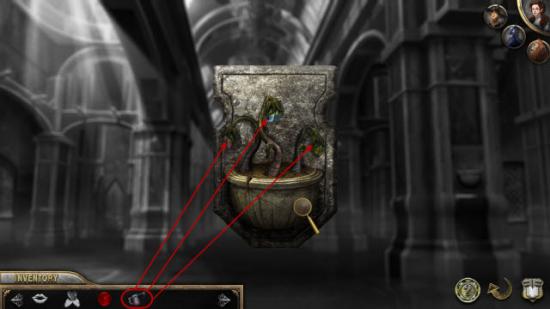
Use the Filled Pitcher, highlighted in Red, on each of the Dried Flowers.
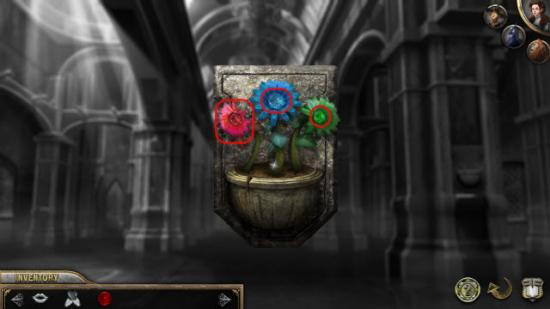
Gather the three Jewels, highlighted in Red, from the Dried Flowers.
Return to the Throne Door.
Click on the Throne Door.
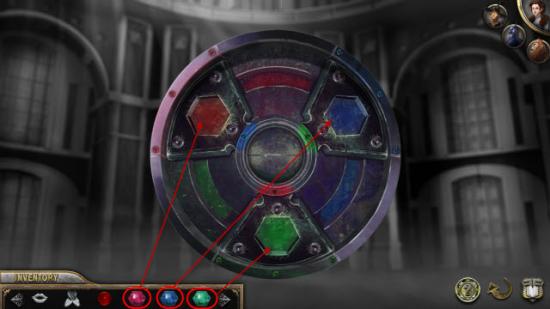
Add the three Jewels to the Lock in their corresponding color spots.
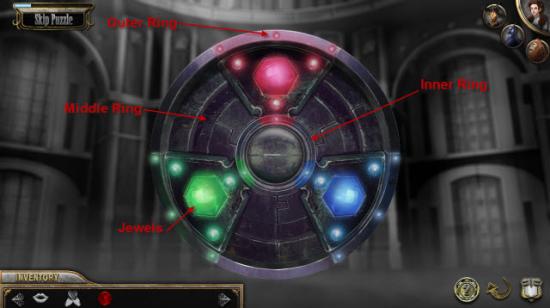
To solve this Puzzle align the Outer Ring, the Middle Ring, The Jewels, and the Center Ring to matching colors.
The Middle Ring is in a fixed position.
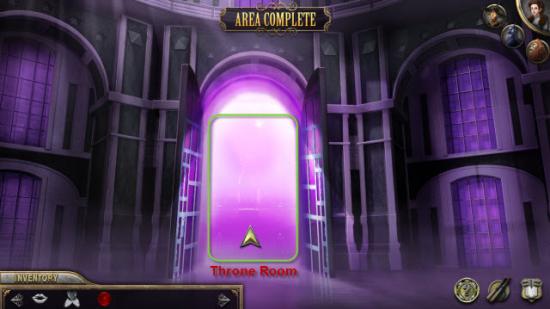
Enter the Throne Room.
Return to the Bedroom.
Search the Area highlighted in Yellow.
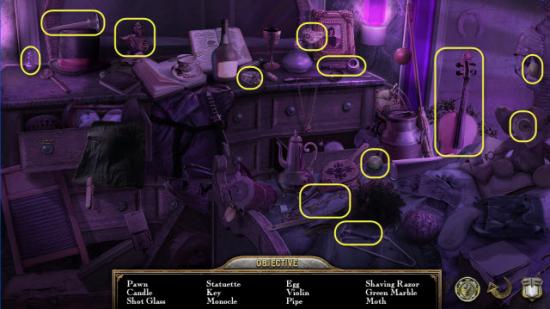
Gather the Hidden Objects highlighted in Yellow.
Receive the Green Marble.
Return to the Throne Room.
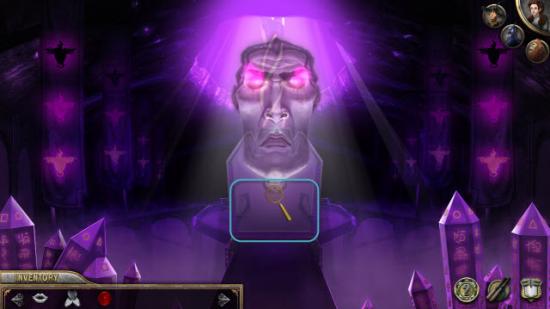
Click on the Throne highlighted in Blue.
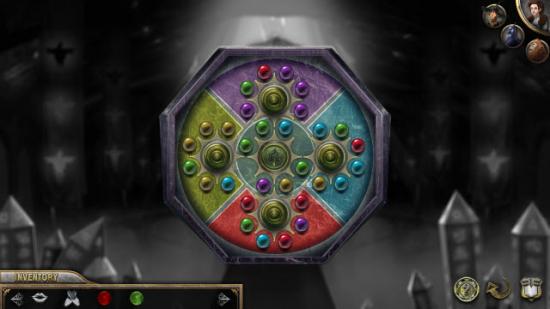
Place the Red Marble and the Green Marble, highlighted in Red, to the Puzzle.
To solve this Puzzle need to get each color Marble into its corresponding coloured area.
Green Marbles belong in the Inner Circle.
Clicking the Yellow Buttons will rotate the corresponding ring of Marbles one click clockwise.
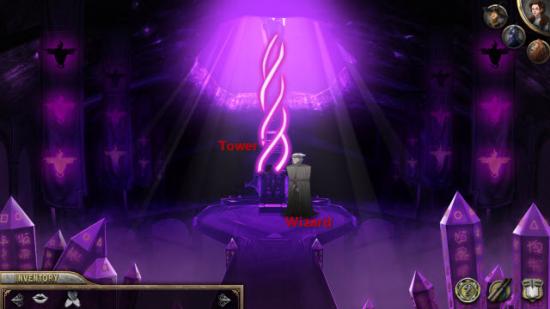
Talk to the Wizard.
Next click the Tower.
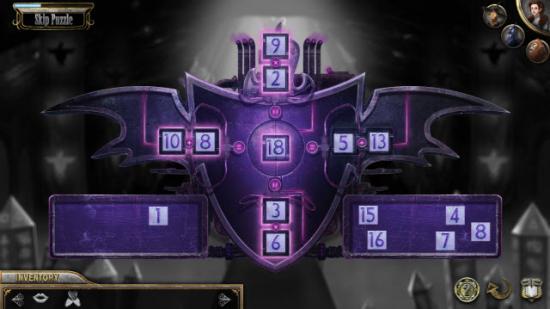
This Puzzle is a simple Math Problem.
Place numbers in each of the corresponding Squares so that all equations equal the same value.
Left and Right equations are simple addition.
Top and Bottom equations are multiplication.
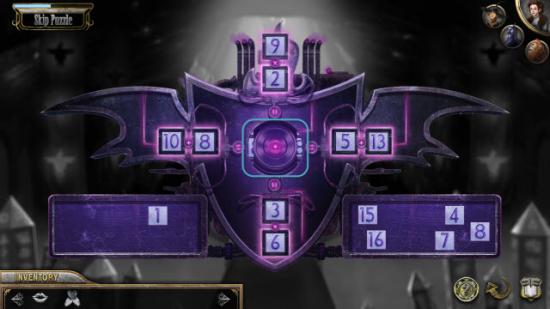
Once you have placed a correct solution, the Center circle will open revealing a Button.
Click the Button, highlighted in Blue, to turn the Tower off.
Return to the Hallway.
Evil Witch’s Castle

Click on the Door to head to the Witch’s Castle.
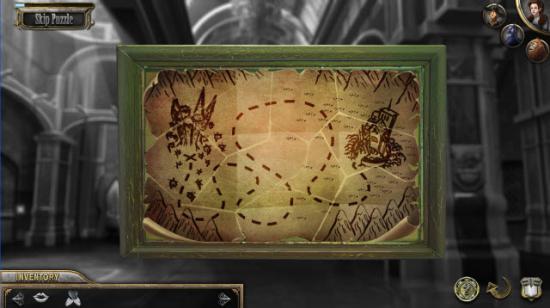
Reassemble the Map Pieces to reveal the Map.
Now head for the Witch’s Castle.
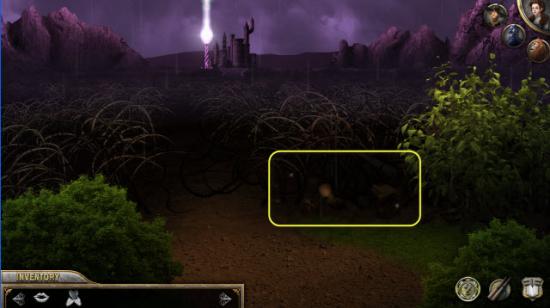
The way is blocked by a field of Thorns.
Search the Area highlighted in Yellow.
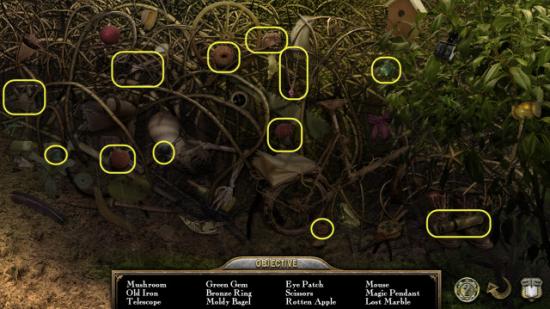
Gather the Hidden Objects highlighted in Yellow.
Receive the Necklace.
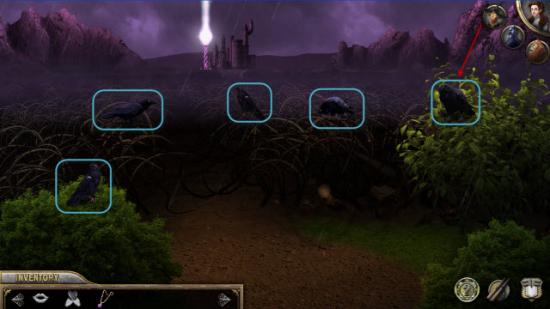
Have the Scarecrow scare off all five Crows highlighted in Blue.
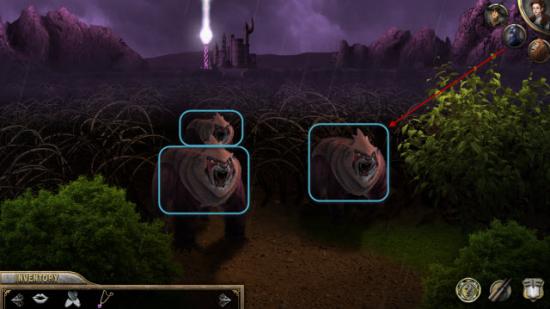
Have the Tin Man cut the Wooden Armour off the Beasts highlighted in Blue.
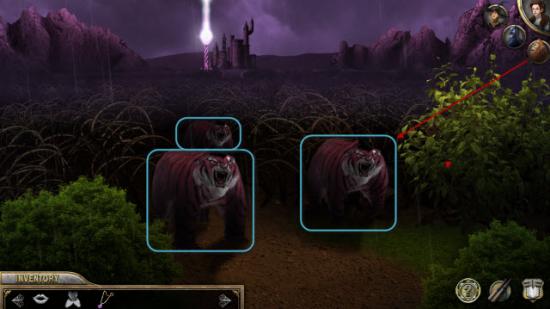
Have the Lion scare off the Beasts highlighted in Blue.
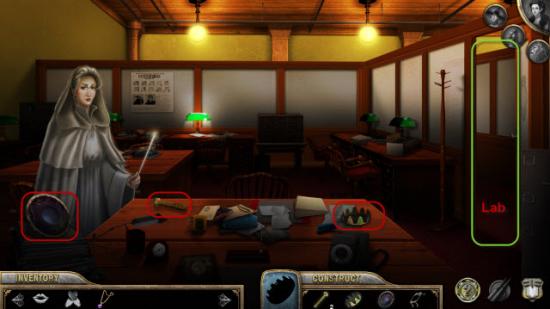
You will find yourself back in the Fiction Fixers Office.
Head over to the Lab.
Return to the Office.
Gather the three Items highlighted in Red.
Return to the Lab.
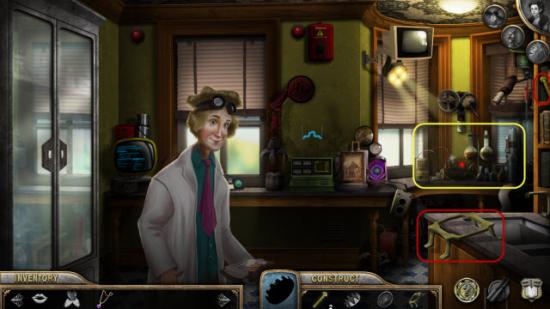
Gather the two Items highlighted in Red.
Receive Fictionizer Casing.
Search the Area highlighted in Yellow.
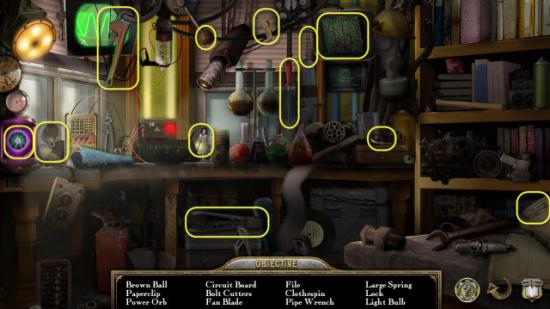
Gather the Hidden Objects highlighted in Yellow.
Receive Circuit Board and Power Orb.
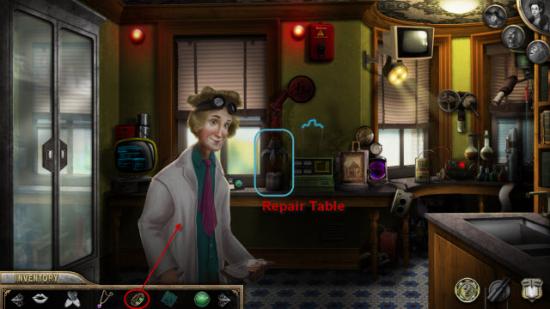
Give the Fictionizer Casing, highlighted in Red, to the Lab Tech.
Click on the Repair Table highlighted in Blue.
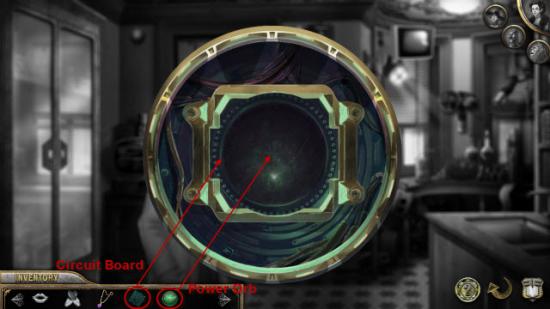
Use the Power Orb, highlighted in Red, on the Fictionizer Casing.
Use the Circuit Board, highlighted in Red, on the Fictionizer Casing.
Click on the Circuit Board in the Fictionizer Casing to start a new Puzzle.
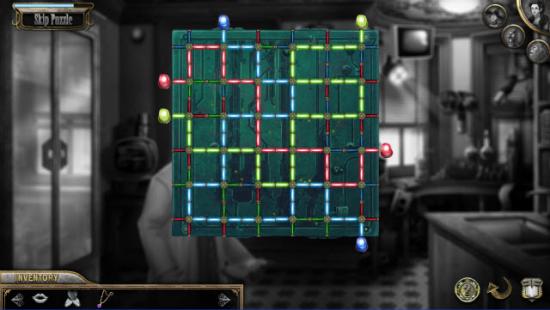
Rotate Sections to line up matching color lines from coloured light to matching unlit coloured light.
Receive fixed Fictionizer.
Click on the Book and use the Fictionizer to re-enter the story.
Re-enter at the entrance to Witch’s Castle.
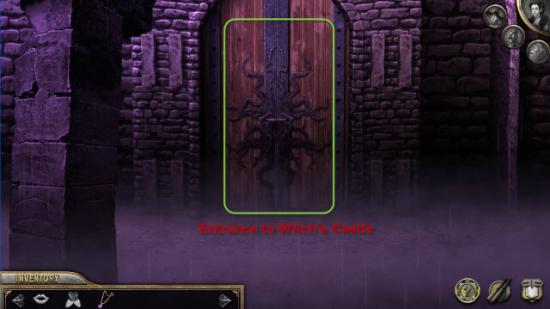
Click on the Door to Witch’s Castle.
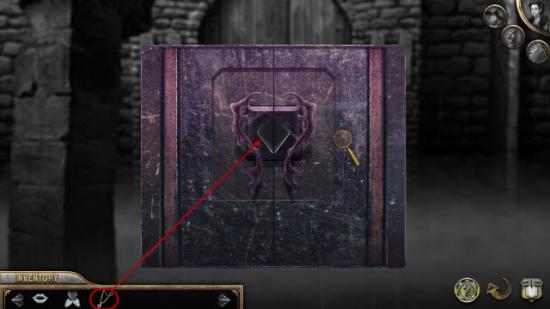
Use the Necklace, highlighted in red on the Door Lock.
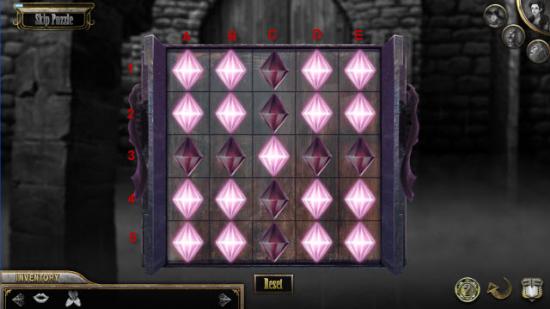
This is a more traditional take on the Lights Out Puzzle.
In this case you want to turn ON all Lights.
Turning a Light On or Off will affect all adjacent Lights. Switching On Lights, Off, and vice versa.
Solution: A3, C1, E3, C5, A2, B1, D1, E2, E4, D5, B5, A4
Enter Witch’s Castle.
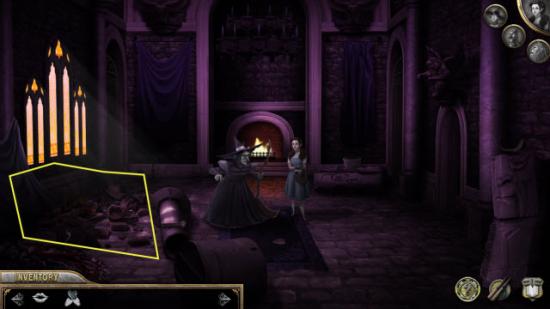
Search the Area highlighted in Yellow.
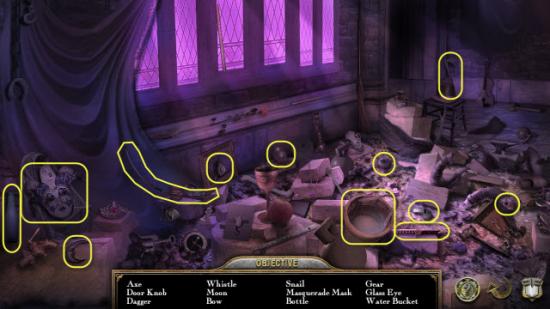
Gather the Hidden Objects highlighted in Yellow.
Receive Bucket of Water.
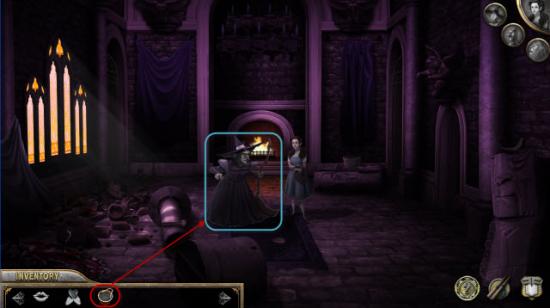
Use the Bucket of Water, highlighted in Red, on the Witch, highlighted in Blue.
Dorothy joins the Group.
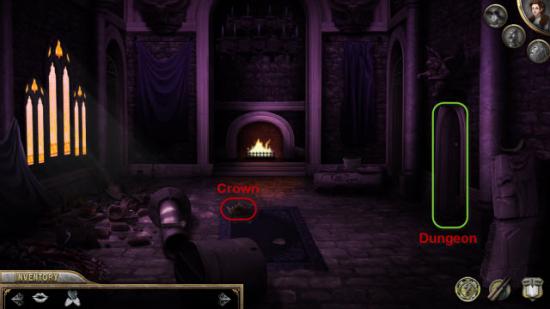
Gather the Crown highlighted in Red.
Head down to the Dungeon.
Return to Upstairs.
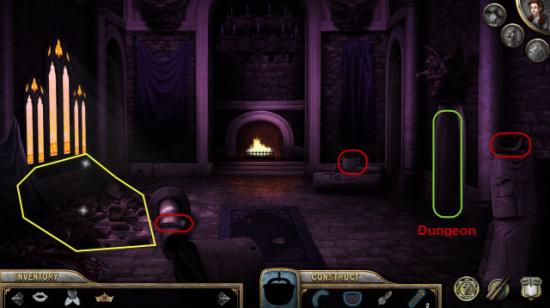
Gather the three Items highlighted in Red.
Search the Area highlighted in Yellow.
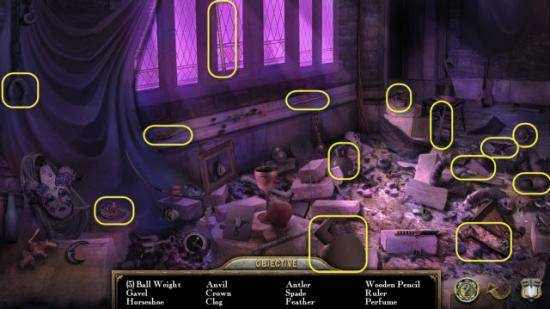
Gather the Hidden Objects highlighted in Yellow.
Receive 3 Dumbbells.
Return to the Dungeon.
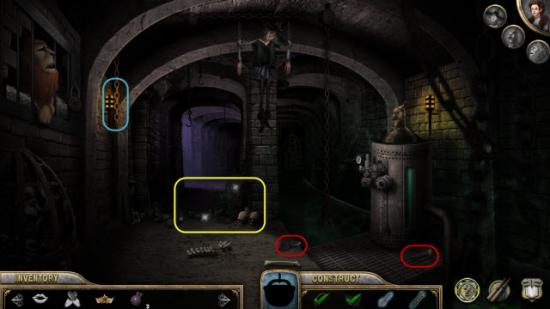
Gather the two Items highlighted in Red.
Receive Pot.
Search the Area highlighted in Yellow
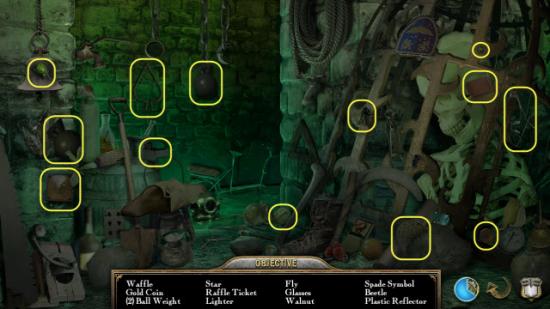
Gather the Hidden Objects highlighted in Yellow.
Receive two Dumbbells.

Click on the Chain highlighted in Blue.
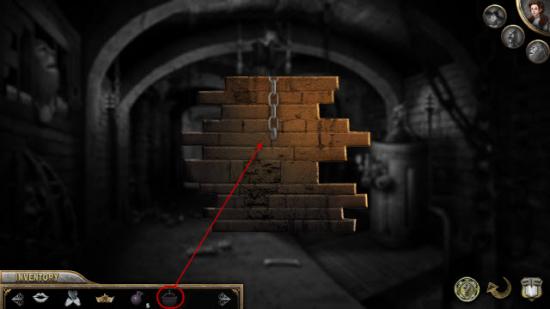
Attach the Pot, highlighted in Red, to the Chain.
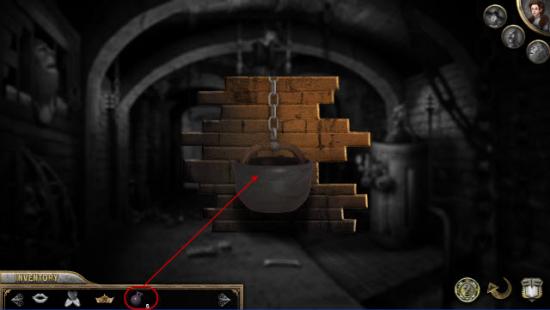
Add the five Dumbbells, highlighted in Red, to the Pot.
This will raise a Cage out of the water.
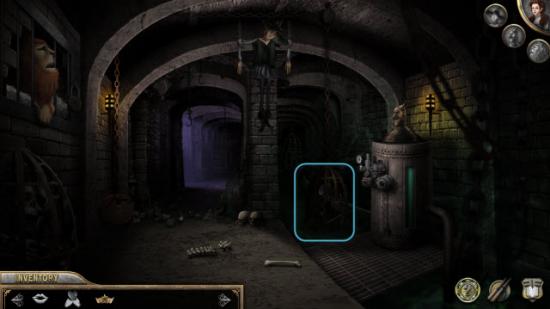
Click on the Cage highlighted in Blue.
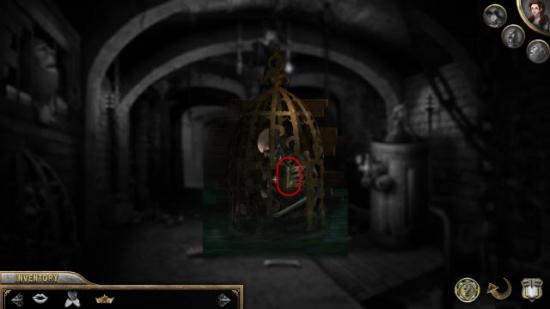
Gather the Key highlighted in Red.
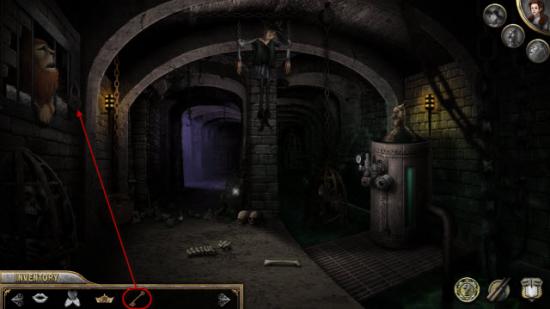
Use the Key, highlighted in Red, on the Padlock to the Lions Cage.
Lion joins group.
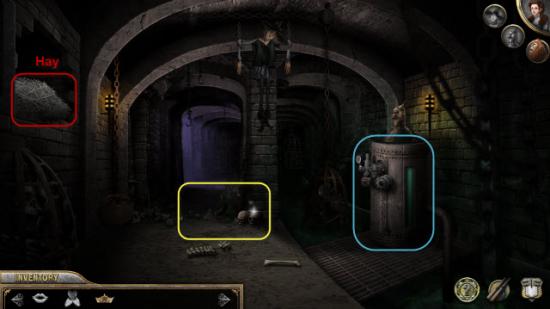
Gather the Hay from the Lions Cage.
Next search the Area highlighted in Yellow.
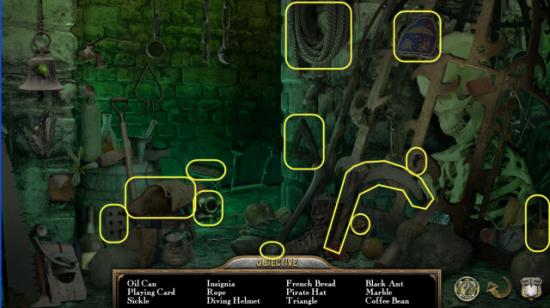
Gather the Hidden Objects highlighted in Yellow.
Receive Oil Can.
Click on the Metal Case, highlighted in Blue, surrounding the Tin Man.
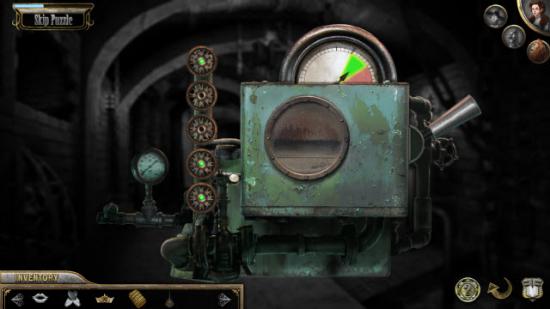
For this Puzzle you need to turn the correct set of Dials to raise the Pressure into the Green Zone without over pressuring into the Red Zone.
Solution: Turn the top Dial and the bottom two Dials.
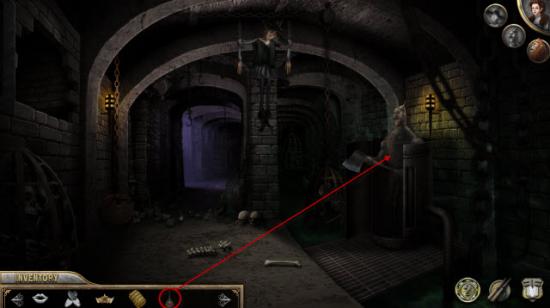
Use the Oil Can, highlighted in Red, on the Tin Man.
Tin Man joins group.
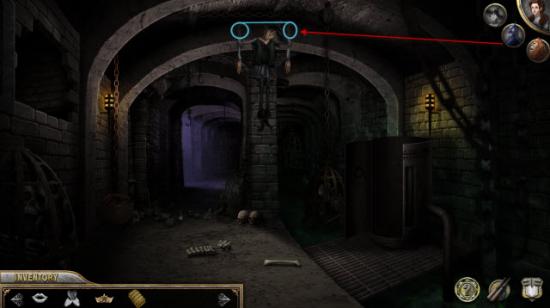
Use Tin Man to cut down the Scarecrow by chopping the Chains.
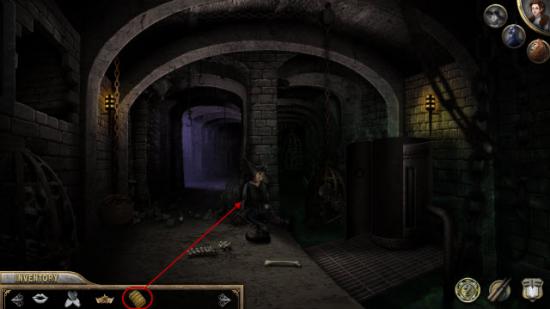
Use the Straw, highlighted in Red, on the Scarecrow.
Scarecrow joins the group.
Leave the Witch’s Castle.
Click on the Tower.
To solve the Puzzle need to connect each Dot and travel down each Path without recrossing any Paths already traveled.
Dots highlighted in Green are available moves from current position.
Starting from the Dot in the Lower Center highlighted in Blue.
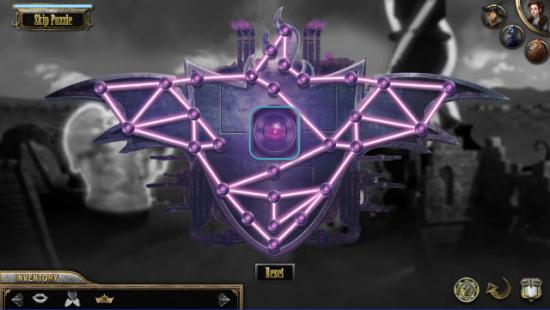
Completing the Puzzle will reveal a Button in the Center, highlighted in Blue.
Click the Button to turn the Tower off.
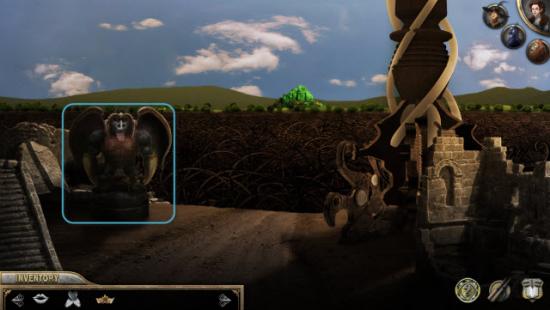
Click on the Monkey Statue highlighted in Blue.
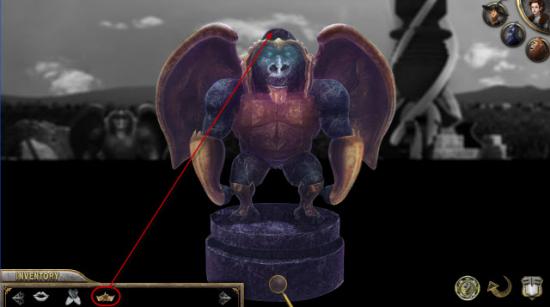
Place the Crown, highlighted in Red, on the Monkey Statue.
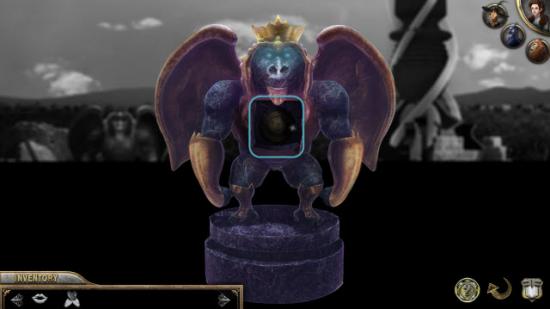
Click on the new opening in the Monkey Statues chest highlighted in Blue.
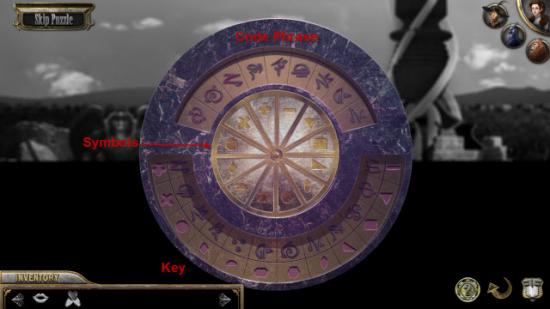
For this Puzzle the Code Phrase is on top.
The Key is located on the bottom.
Press the corresponding Symbols in the center that corresponds to the Symbols in the Code Phrase.
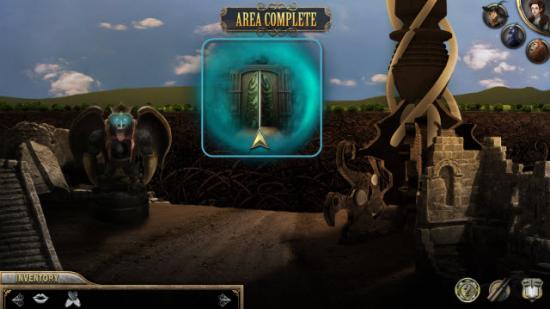
Return to the Emerald City highlighted in Blue.
Return to Emerald City and Cliff Wall
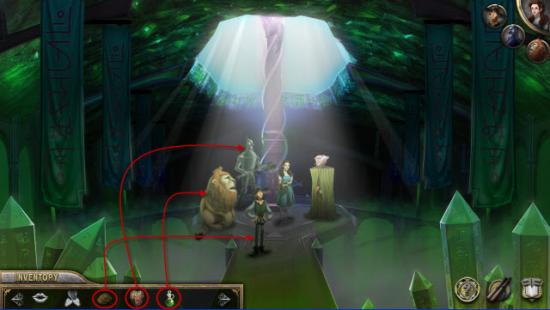
Return to the Throne Room.
Wizard will give you three Items.
Give each Item, highlighted in Red, to the corresponding companion.
Give Brain to the Scarecrow, Heart to the Tin Man and Courage to the Lion.
Return to Hallway.
Take the Door toward the Witch’s Castle.
Back to the Thorn Filed.
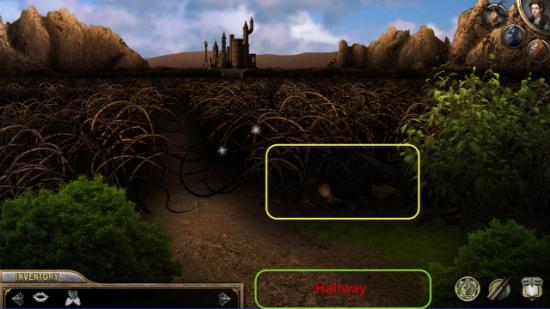
Search the Area highlighted in Yellow.
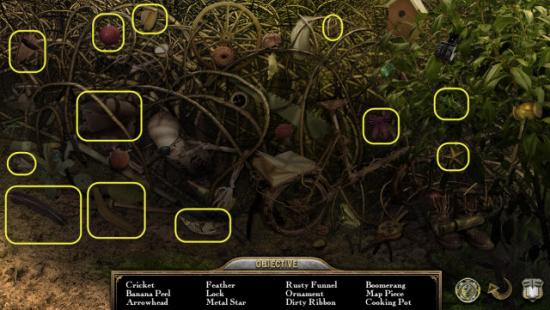
Gather the Hidden Objects highlighted in Yellow.
Receive the Map Piece.
Return to the Hallway.
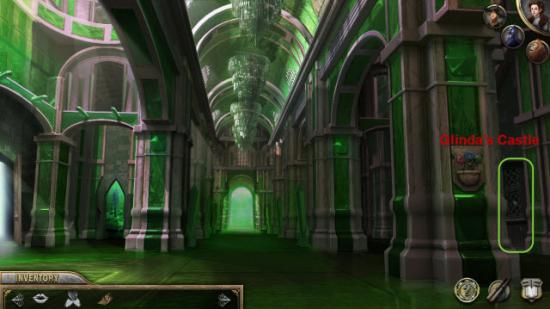
Click on the Door leading to Glinda’s Castle.
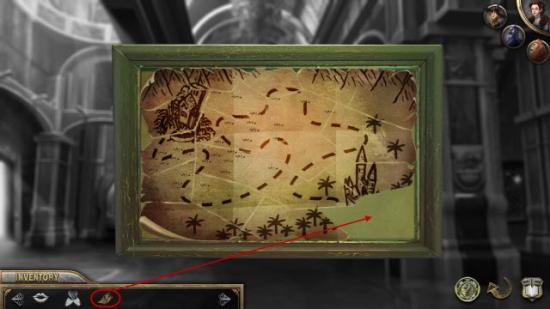
Solve the Map Puzzle to assemble the Map.
The last piece, highlighted in Red, finishes the Map.
Go through the now open Door.
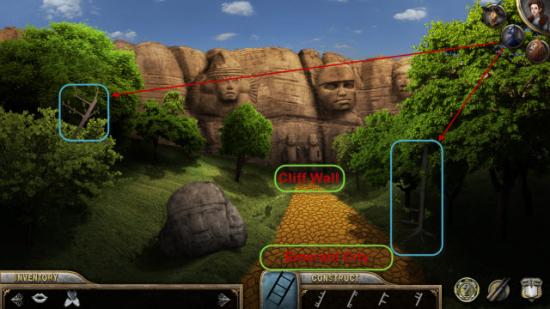
Move onto Cliff Wall.
Return to the Forest Path.
Use the Tin Man to cut down the two Trees highlighted in Blue.
Pick up the two Branches.
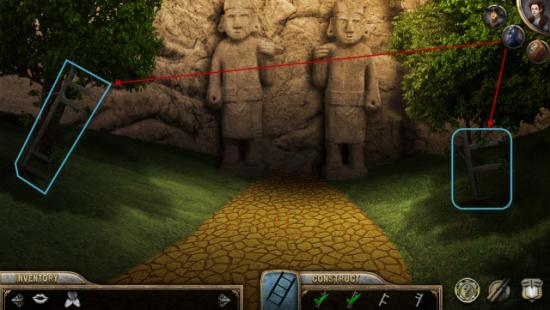
Move back to the Cliff Wall.
Have the Tin Man cut down the two Trees highlighted in Blue.
Pick up the two Branches.
Receive Ladder.
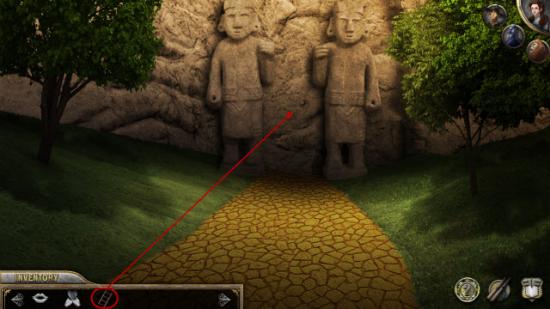
Use the Ladder, highlighted in Red, on the Cliff Face.
Climb the Ladder to reach the Jungle.
Jungle, Village, and Glinda’s Castle
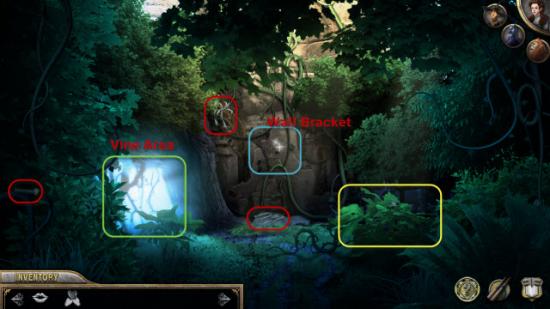
Move from Jungle to the Vine area highlighted in Green.
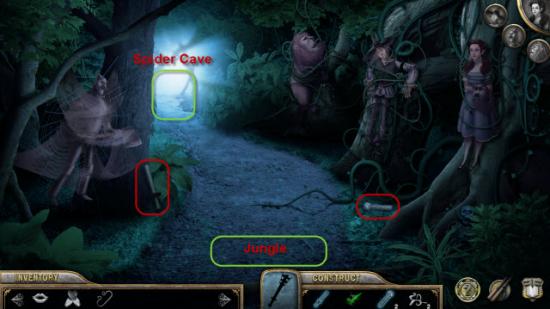
Move from the Vine area to the Spider Cave highlighted in Green.
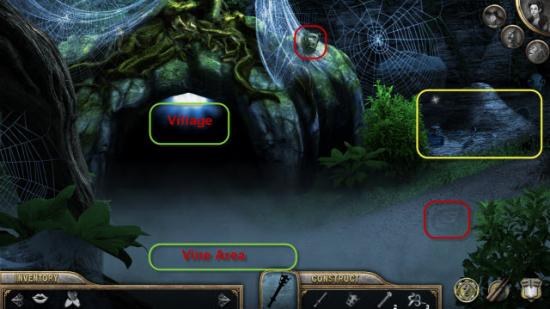
Gather the two Items highlighted in Red.
Search the Area highlighted in Yellow.
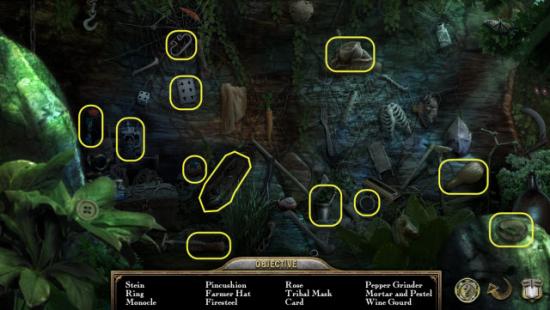
Gather the Hidden Objects highlighted in Yellow.
Receive Firesteel.
Return to Vine Area.

Gather the two Items highlighted in Red.
Return to Jungle.

Gather the three Items highlighted in Red.
Receive Torch.
Search the Area highlighted in Yellow.
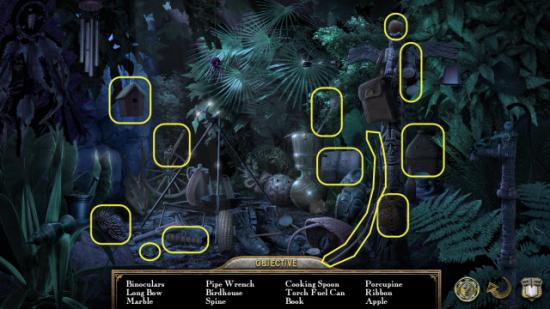
Gather the Hidden Objects highlighted in Yellow.
Receive Torch Oil.

Click on the Wall Bracket highlighted in Blue.
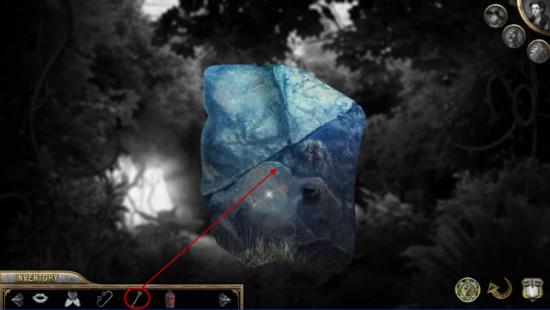
Use the Torch, highlighted in Red, on the Wall Mount.
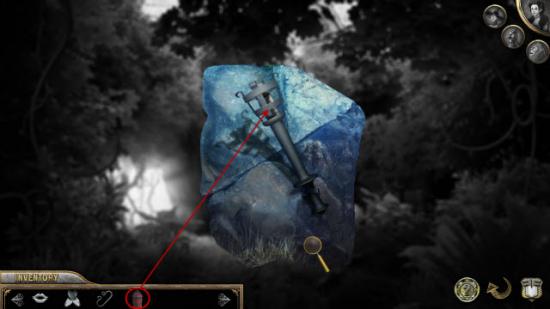
Next use the Torch Oil, highlighted in Red, on the Torch.
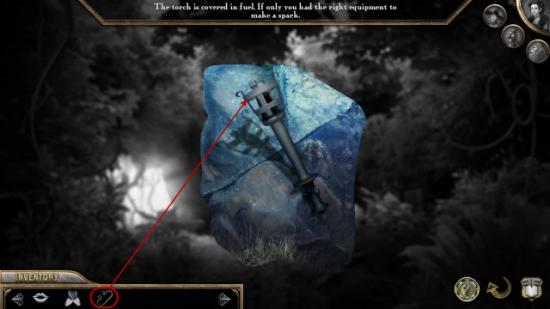
Next use the Firesteel, highlighted in Red, on the Torch.
Return to the Jungle.
Search the Area highlighted in Yellow
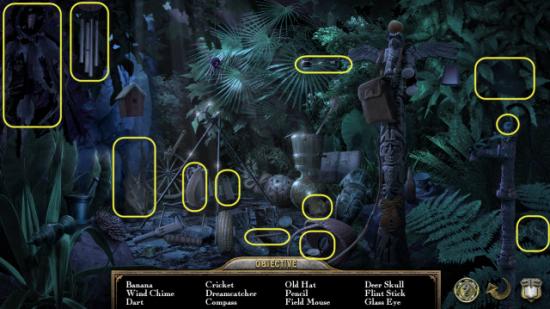
Gather the Hidden Objects highlighted in Yellow.
Receive Flint.
Click on the Wall Mount, highlighted in Blue, once again.
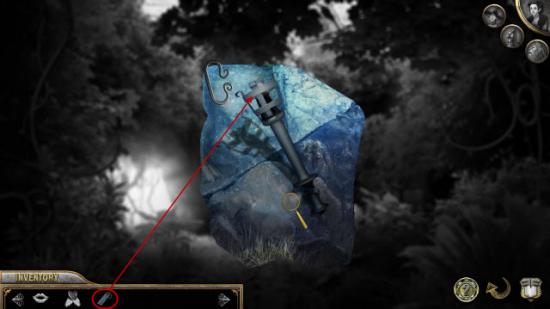
Use the Flint, highlighted in Red, on the Torch.
Receive Lit Torch.
Return to Vine Area.
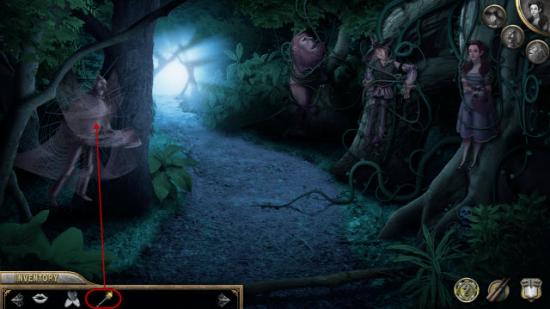
Use the Lit Torch, highlighted in Red, on the Spider Web entangling the Tin Man to free him.
The Tin Man joins the group.
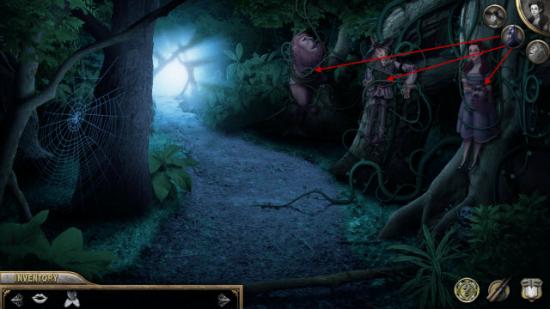
Use the Tin Man to chop the Vines on each of the other three Companions.
Lion, Scarecrow, and Dorothy join the Group.
Return to the Spider Cave.
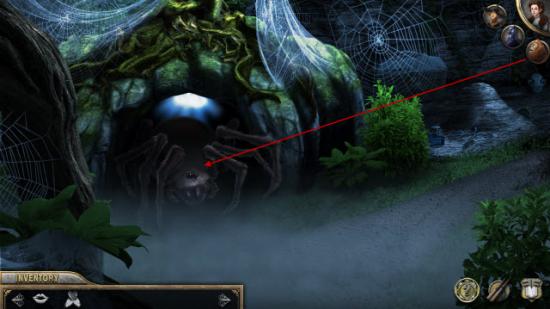
Use Lion to scare off the Spider blocking your path.
Continue through Cave to the Village.
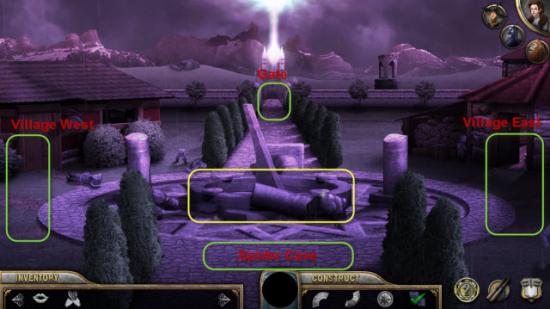
Continue through Village up to the Gates of Glenda’s Castle.
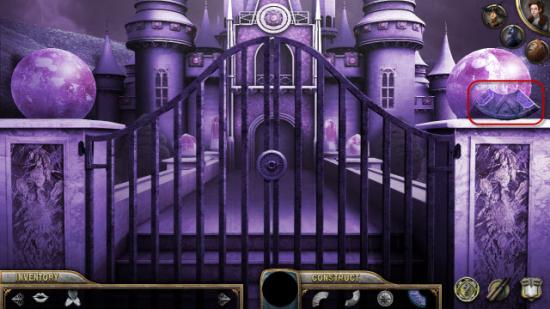
Gather the Item highlighted in Red.
Return to the Spider Cave.
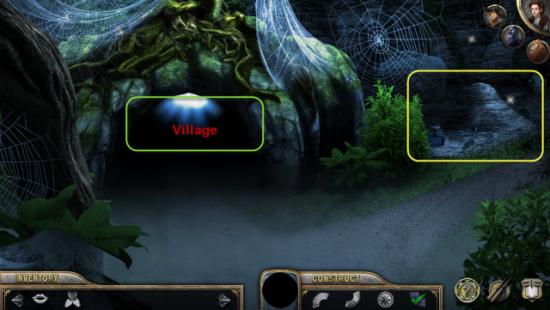
Search the Area highlighted in Yellow.
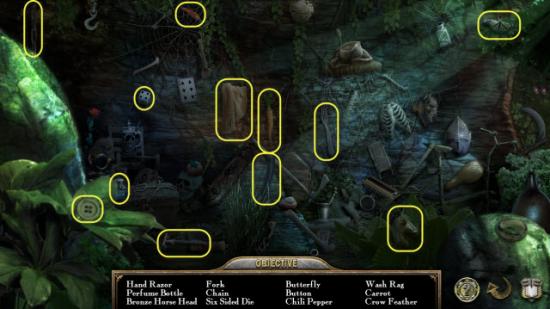
Gather the Items highlighted in Yellow.
Receive Dish Rag.
Return to the Village.

Search the Area highlighted in Yellow.
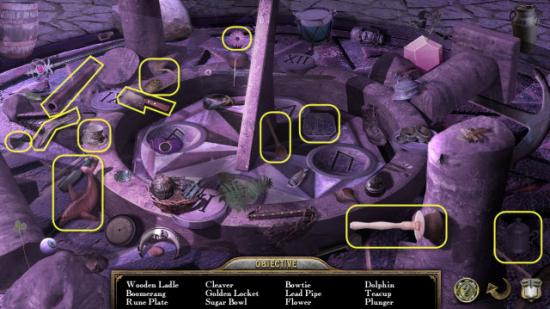
Gather the Hidden Objects highlighted in Yellow.
Receive Lead Pipe and Rune Tablet.
Head to Village East.
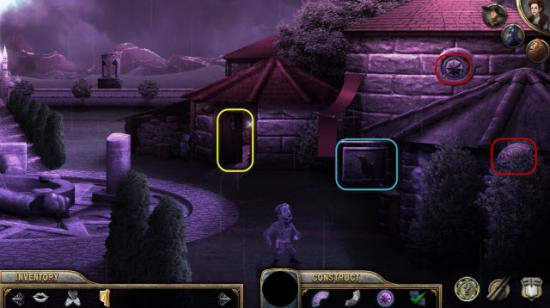
Gather the two Items highlighted in Red.
Search the Area highlighted in Yellow.
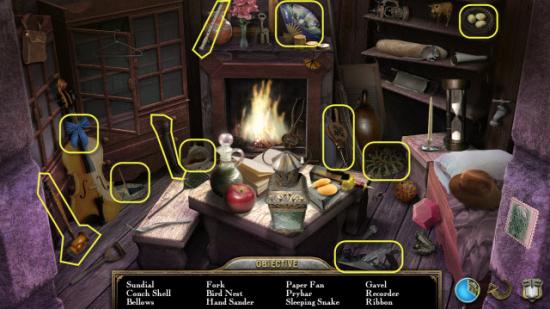
Gather the Hidden Objects highlighted in Yellow.
Receive the Crow Bar.
Click on the Sign highlighted in Blue.
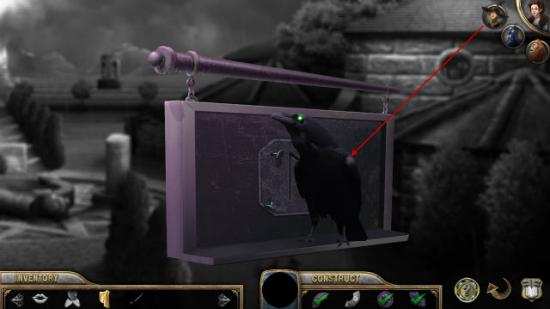
Use the Scarecrow to scare off the Crow.
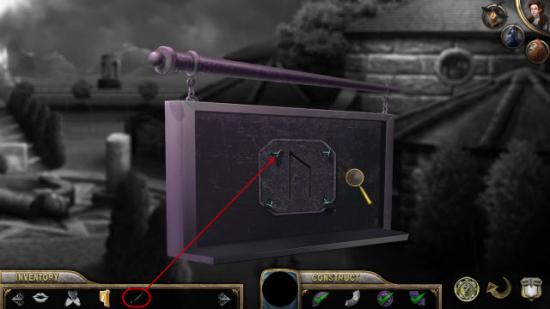
Use the Pry Bar, highlighted in Red, on the Nails.
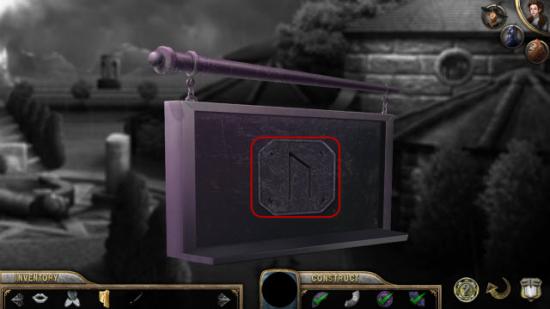
Gather the Rune highlighted in Red.
Move on to Village West.
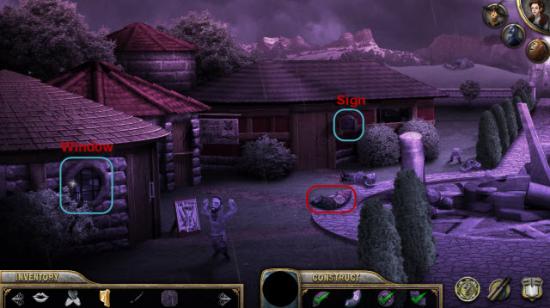
Gather the Item in Red.
Receive the gate Panel.
Click on the Sign highlighted in Blue.
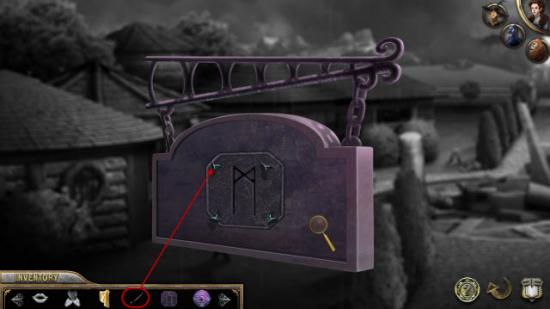
Use the Crowbar, highlighted in Red, on the Nails.
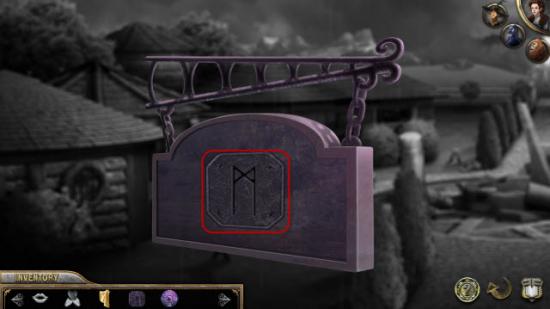
Gather the Rune highlighted in Red.
Click on the Window highlighted in Blue.
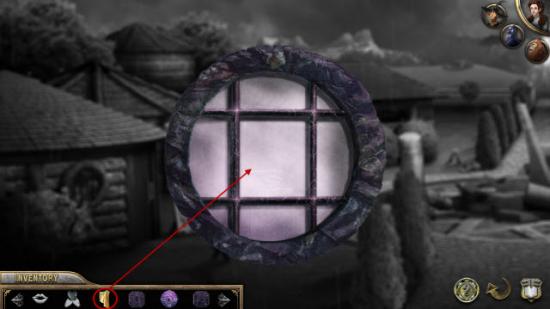
Use the Wash Rag, highlighted in Red, to clean the Window.
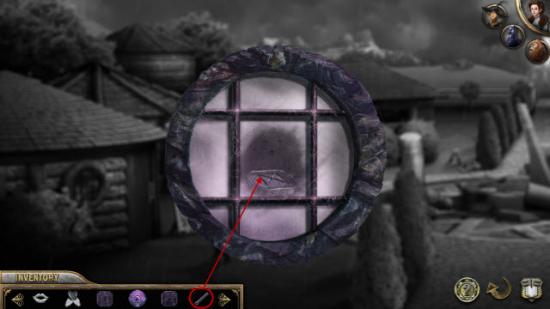
Use the Lead Pipe, highlighted in Red to break the Window.
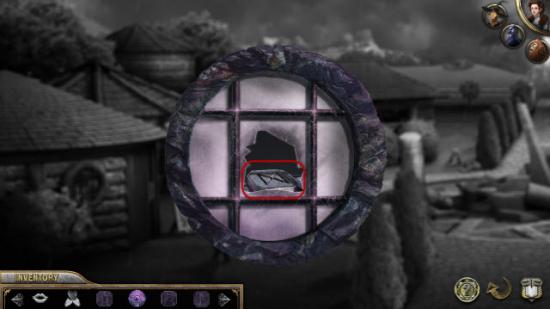
Gather the Ruin highlighted in Red.
Return to the Village Center.
Click on the Monument in the center of the Village.
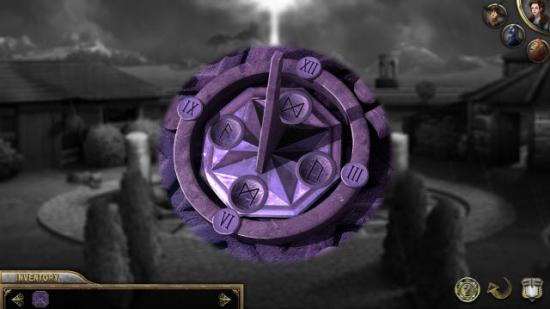
Make note of the Ruins and the corresponding Numerical Symbols.
Return to the Gate to Glinda’s Castle.
Click on the Gate.
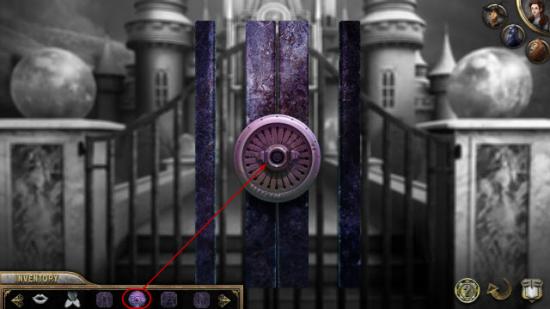
Use the Gate Panel, highlighted in Red, on the Gate.
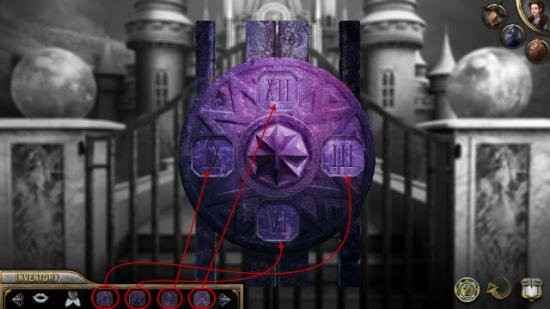
Place the Runes you have gathered and put them in the Gate Panel into the corresponding Symbols.
Return to Village East.
Search the Area highlighted in Yellow.
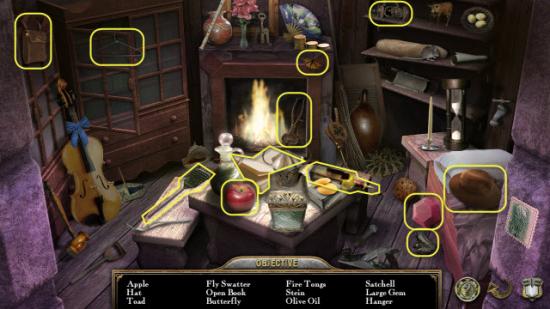
Gather the Hidden Objects highlighted in Yellow.
Receive Large Gem.
Return to Village Center.
Search the Area highlighted in Yellow.
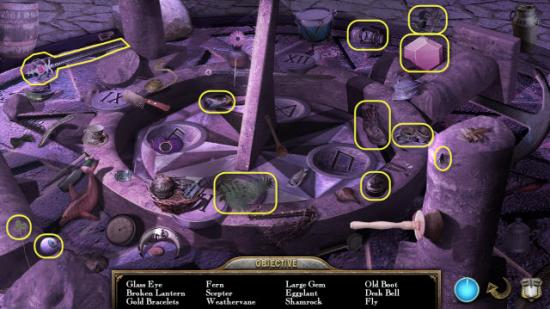
Gather the Hidden Objects highlighted in Yellow.
Receive Large Gem.
Return to the Gate to Glinda’s Castle.
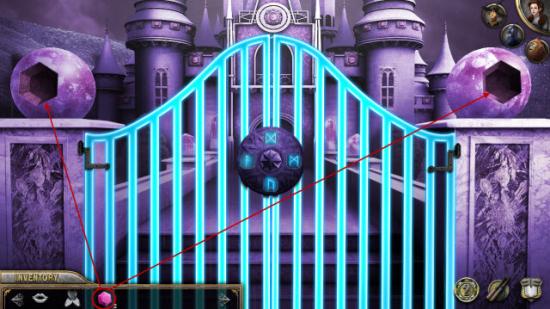
Place the two Large Gems, highlighted in Red, on the two Posts.
Now click on the Gate to open it.
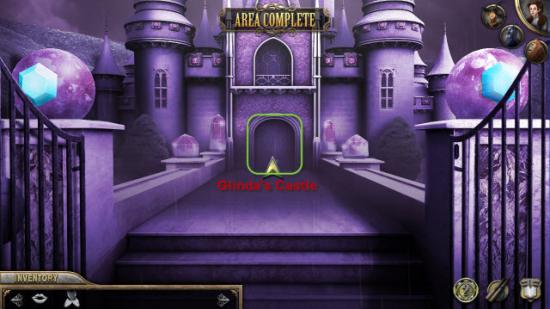
Now enter Glinda’s Castle highlighted in Green.
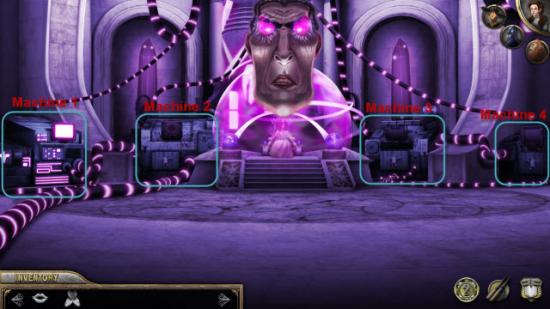
Click on Machine #1 for the first Puzzle.
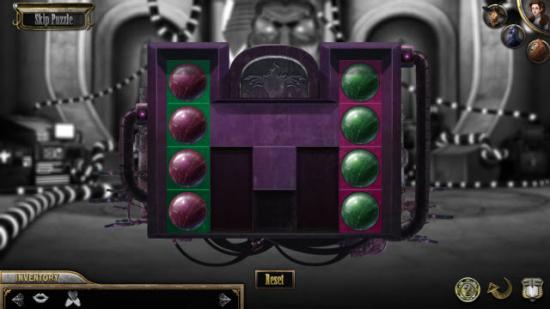
For this Puzzle you need to shift the coloured Balls around so that all the Red Balls are on the Red Squares and all the Green Balls are on the Green Squares.
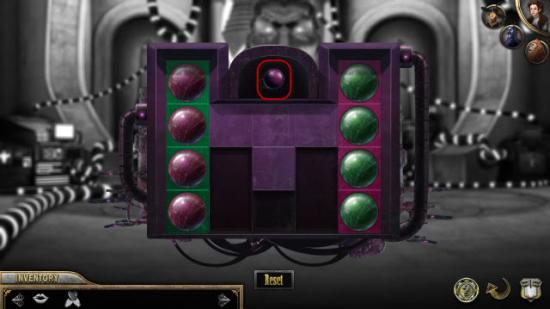
Click on the Node that is revealed, highlighted in Red.
Receive Node.

Click on Machine #4 for next puzzle.
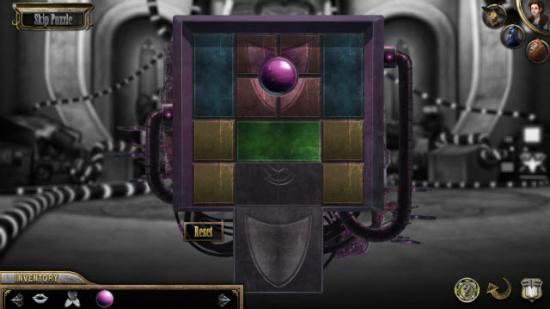
This Puzzle is a variation on the Traffic Jam puzzle type.
You need to get the whole Square, surrounding the Node, to the bottom Area.
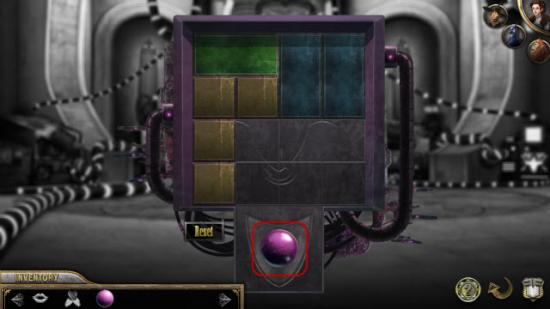
Gather the Node highlighted in Red.

Click on Machine #3 for third puzzle.
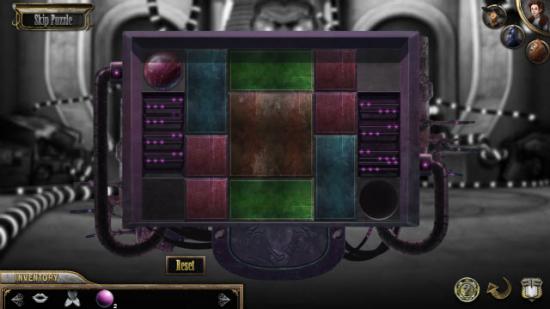
This is another variation on the Traffic Jam Puzzle.
Need to move the Red Ball from the starting area to the Hole in the lower right corner.
Revealing the third Node.
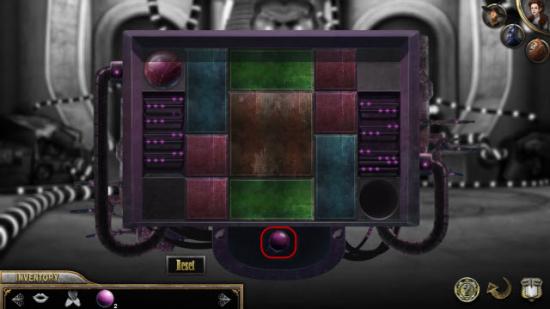
Gather the Node highlighted in Red.

Click on Machine #2.
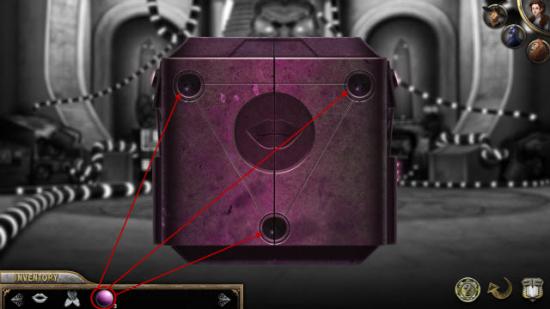
Place the Nodes, highlighted in Red, in the three Depressions.
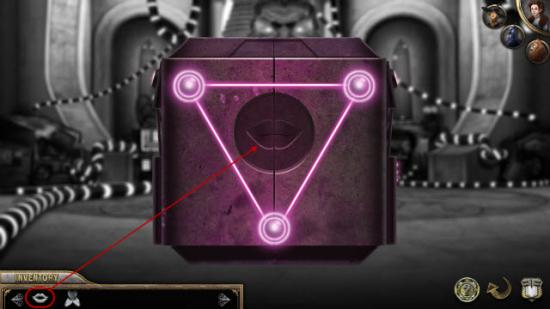
Use the Kiss, highlighted in Red, on the Lips in the center.
Revealing the final Puzzle.
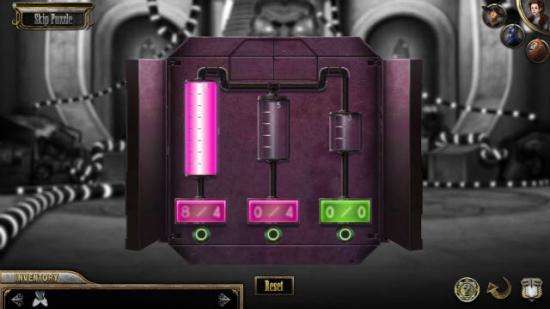
For this Puzzle you need to redistribute the liquid, so that there is 4 liquid in the first Vial, 4 liquid in the second Vial, and None in the third Vial.
Solution: Move fluid from Vail 1 to Vail 3. From Vial 3 to Vial 2. From Vial 1 to Vial 3. From Vial 3 to Vial 2. From Vial 2 to Vial 1. From Vial 3 to Vial 2. From Vial 1 to Vial 2. Finally, from Vial 3 to Vial 2.
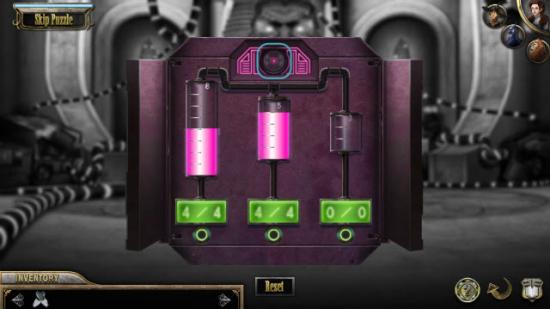
Click on the Button revealed, highlighted in Blue.
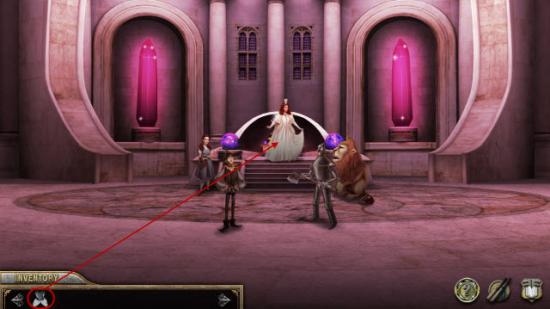
Give the Slippers, highlighted in Red, to Glinda highlighted in Blue.
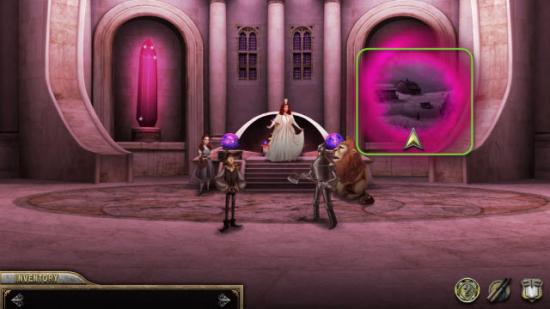
Click on the Portal highlighted in Green to return Dorothy Home.
Congratulations you have saved the World of Oz.
More articles...
Monopoly GO! Free Rolls – Links For Free Dice
By Glen Fox
Wondering how to get Monopoly GO! free rolls? Well, you’ve come to the right place. In this guide, we provide you with a bunch of tips and tricks to get some free rolls for the hit new mobile game. We’ll …Best Roblox Horror Games to Play Right Now – Updated Weekly
By Adele Wilson
Our Best Roblox Horror Games guide features the scariest and most creative experiences to play right now on the platform!The BEST Roblox Games of The Week – Games You Need To Play!
By Sho Roberts
Our feature shares our pick for the Best Roblox Games of the week! With our feature, we guarantee you'll find something new to play!Type Soul Clan Rarity Guide – All Legendary And Common Clans Listed!
By Nathan Ball
Wondering what your odds of rolling a particular Clan are? Wonder no more, with my handy Type Soul Clan Rarity guide.


