![Digimon UP Tier List [Supports, Buddies, and Partners]](/wp-content/uploads/2026/07/digimon-up-tier-list.jpg "Digimon UP Tier List [Supports, Buddies, and Partners]")
Digimon UP Tier List [Supports, Buddies, and Partners]
These Digimon will get you UP the leaderboard.

![Haze Seas Boss Drops [Chances, Locations, and How to Spawn]](/wp-content/uploads/2026/07/haze-seas-boss-drops.jpg "Haze Seas Boss Drops [Chances, Locations, and How to Spawn]")

Welcome to the Fear for Sale: Sunnyvale Story Collector’s Edition walkthrough on Gamezebo. Fear for Sale: Sunnyvale Story Collector’s Edition is a Hidden Object Game played on the PC created by EleFun Games. This walkthrough includes tips and tricks, helpful hints and a strategy guide on how to complete Fear for Sale: Sunnyvale Story Collector’s Edition.
Welcome to theFear for Sale: Sunnyvale Story Collector’s Edition walkthrough on Gamezebo.Fear for Sale: Sunnyvale Story Collector’s Editionis a Hidden Object Game played on the PC created by EleFun Games. This walkthrough includes tips and tricks, helpful hints and a strategy guide on how to completeFear for Sale: Sunnyvale Story Collector’s Edition.
This hidden object game requires visiting several locations and using inventory items to advance play.

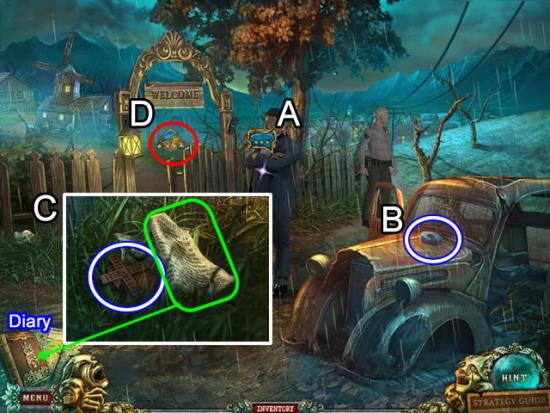
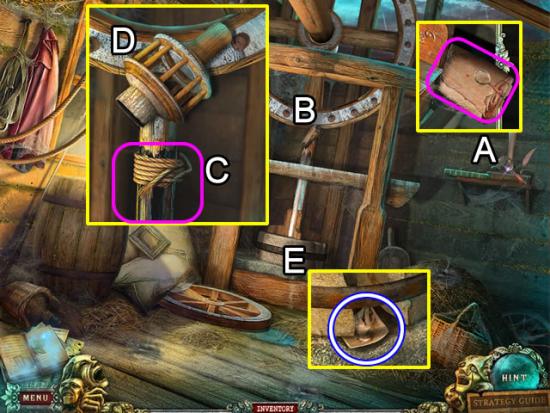
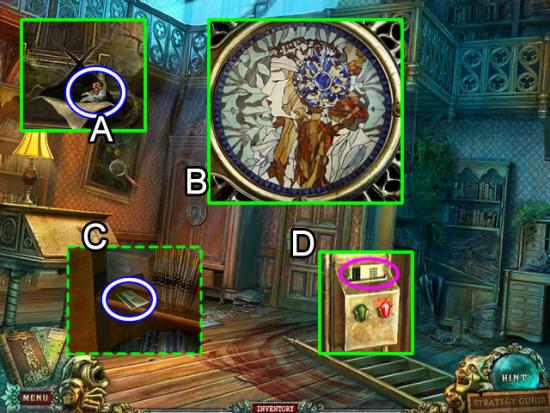
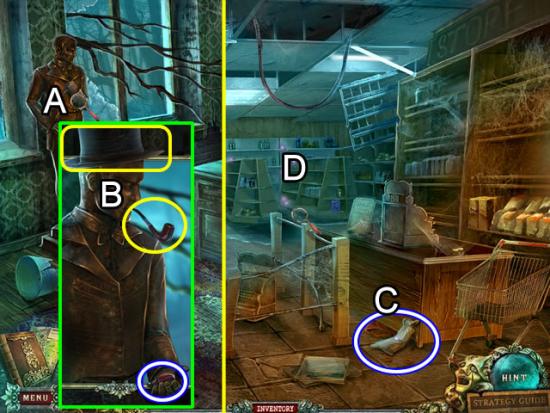
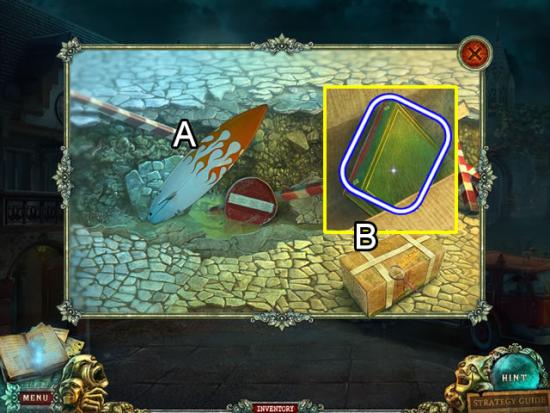
Mill Gate
Outside the Mill
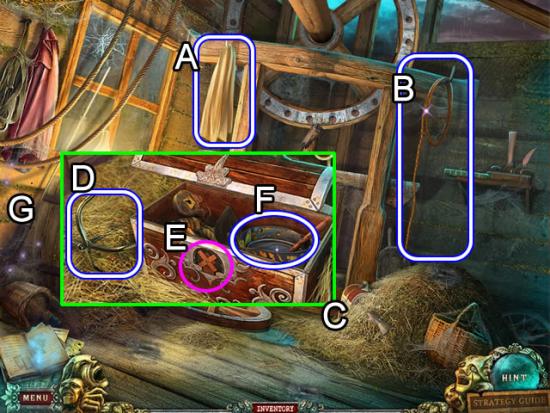
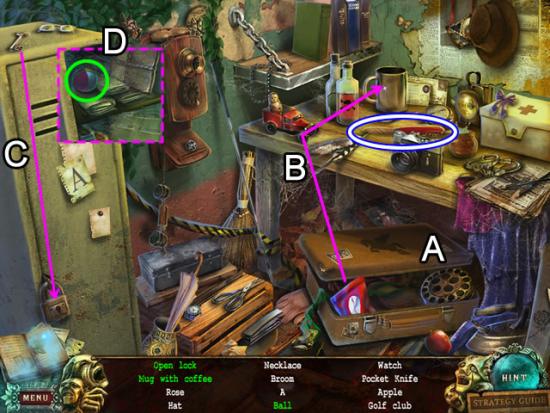
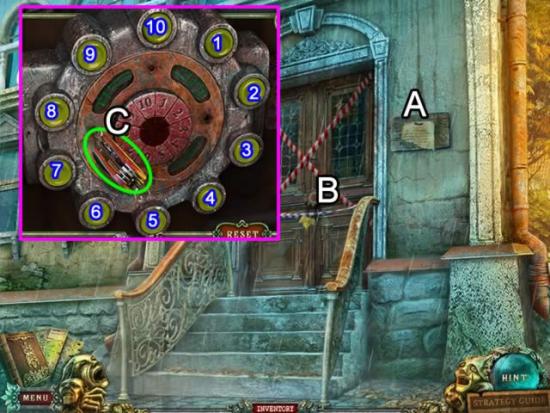
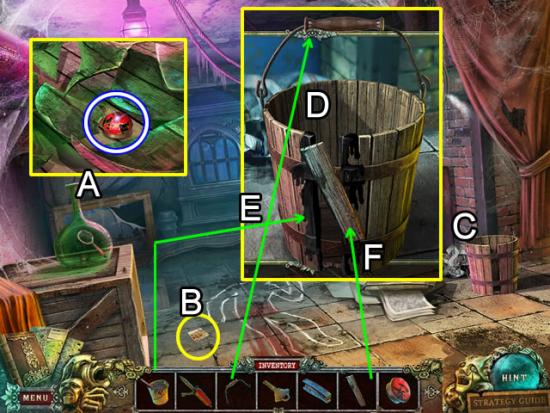
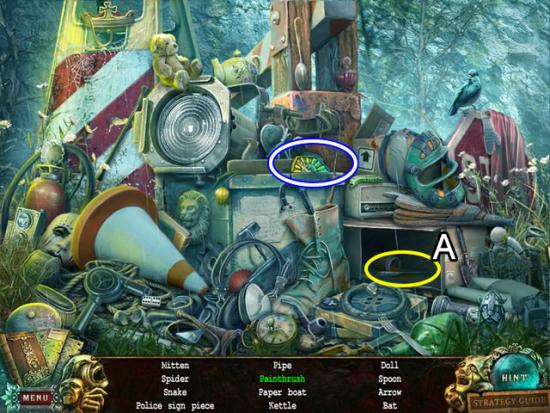
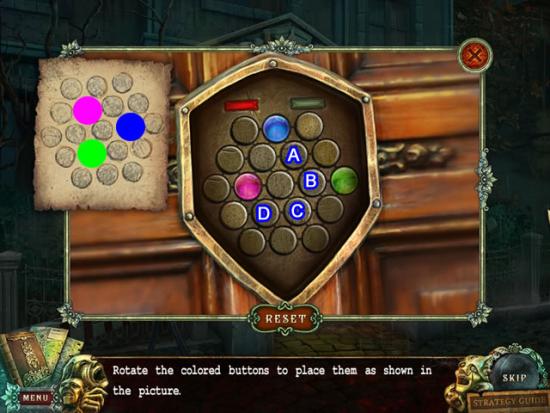
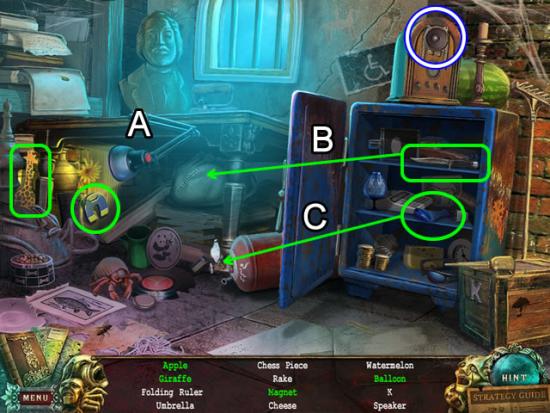
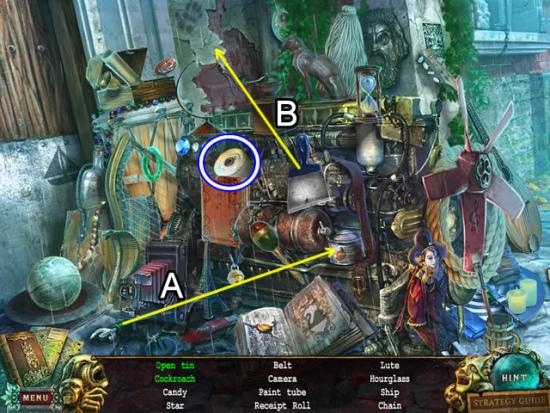
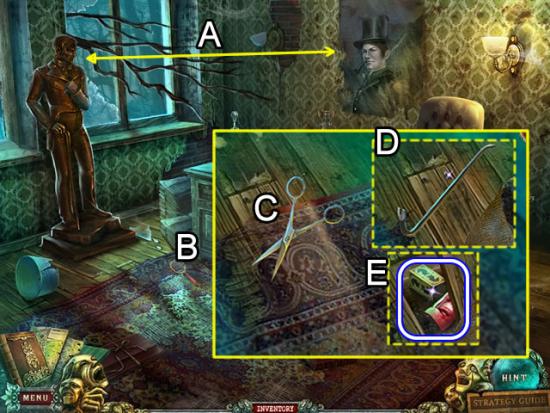
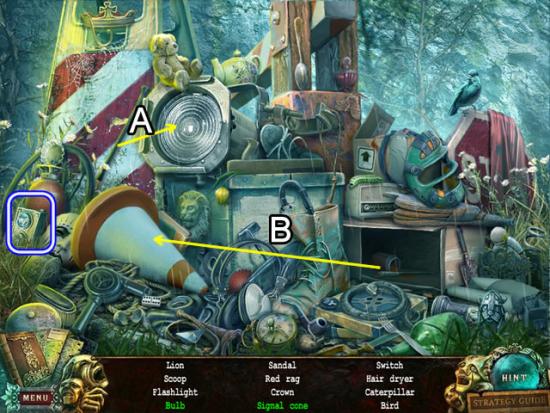
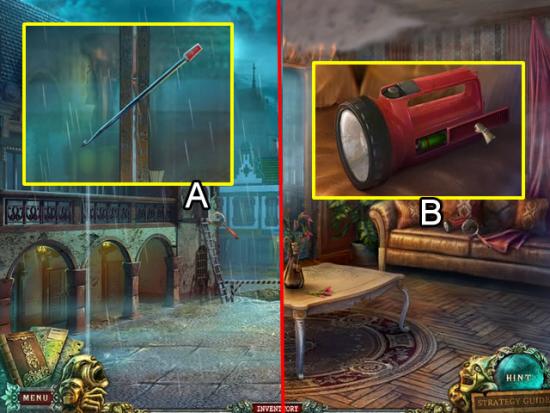
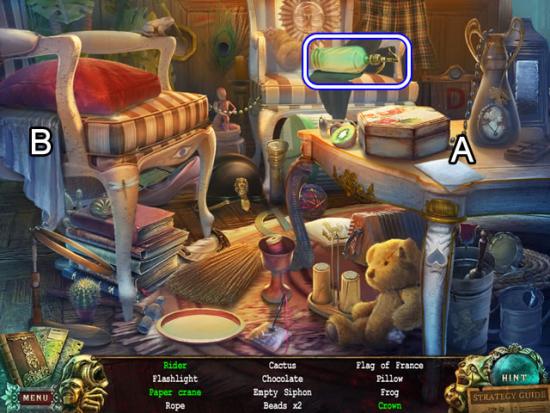
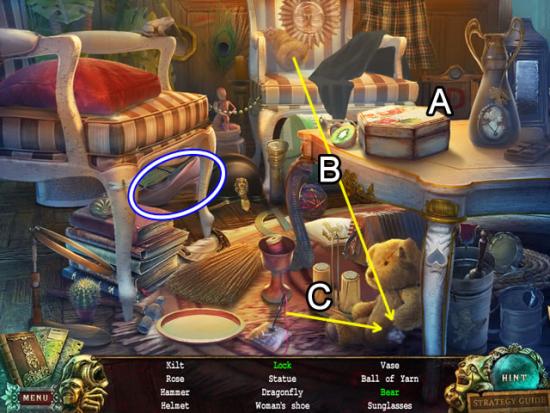
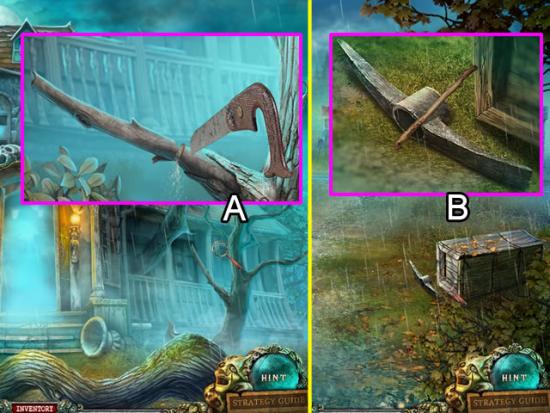
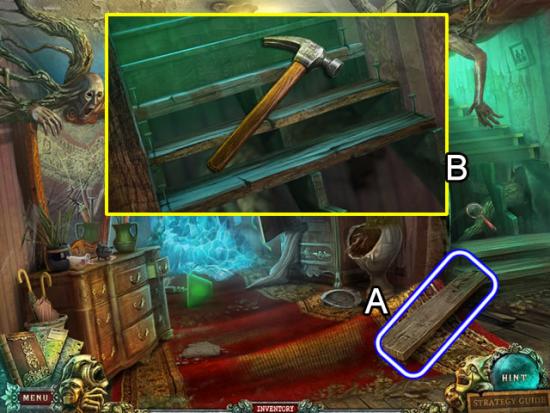
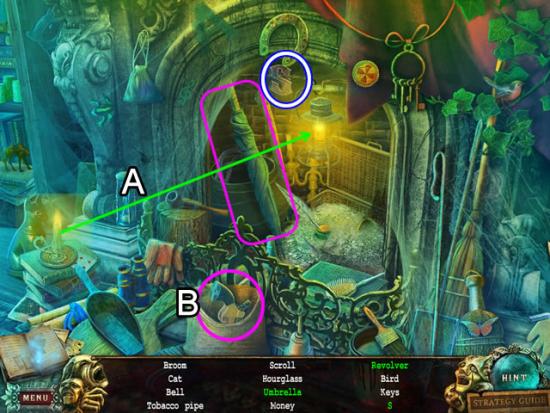
Mill Interior
Outside the Mill
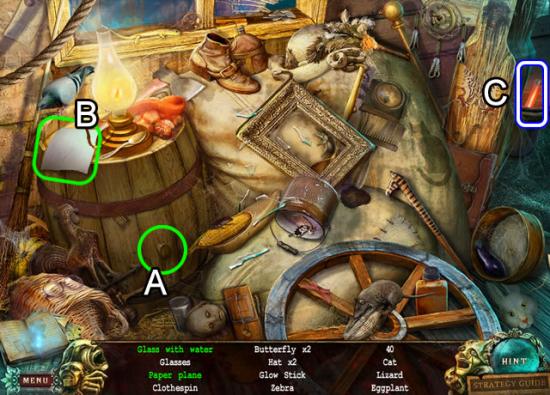
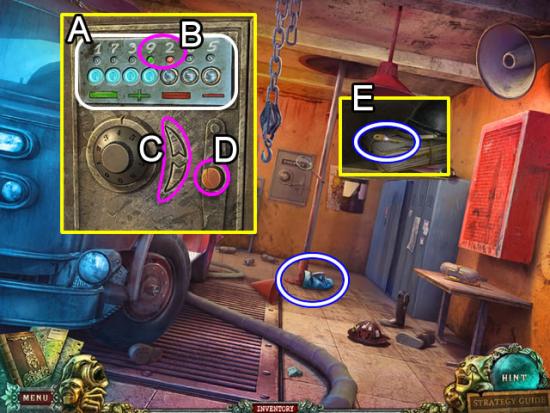
Mill Interior
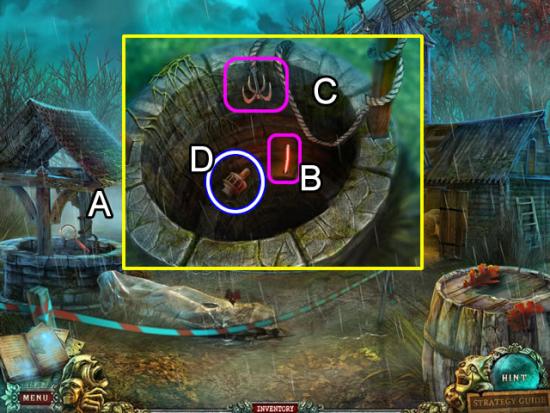
Mill Gate
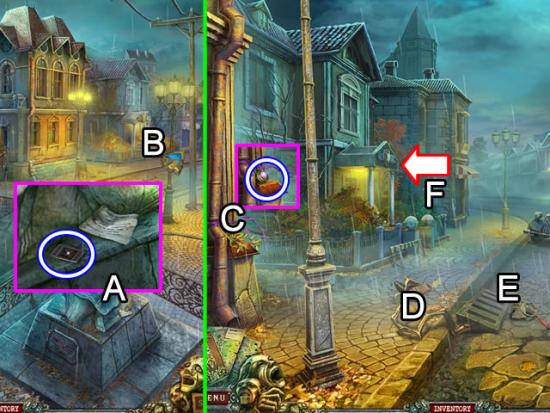
Town Square
Right Street
Police Station
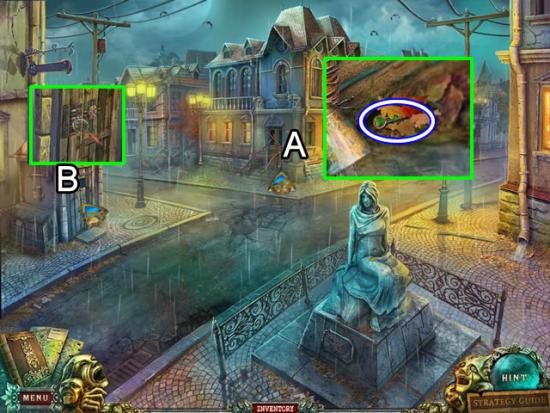
Town Square
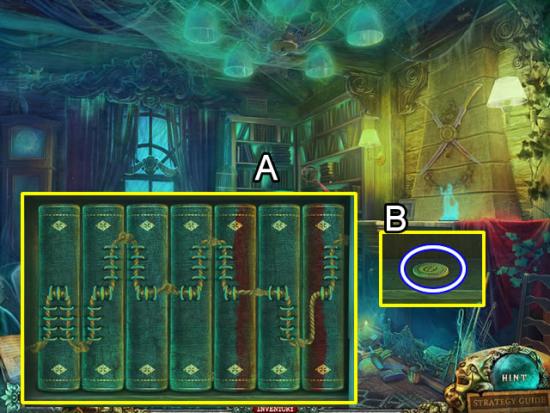
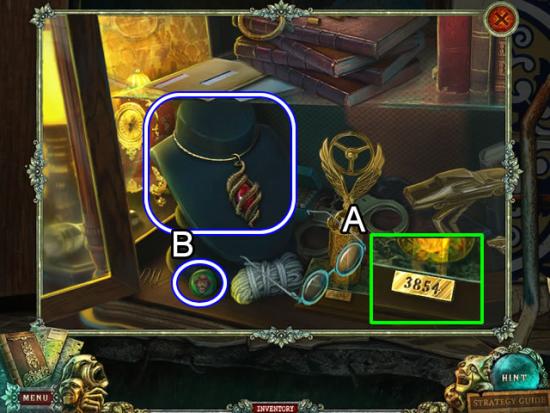
Archives Entrance
Archives Lobby
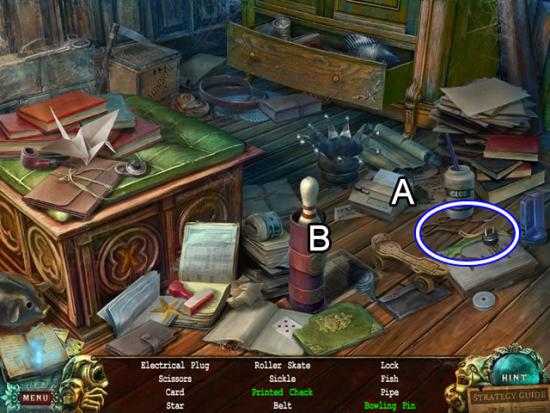
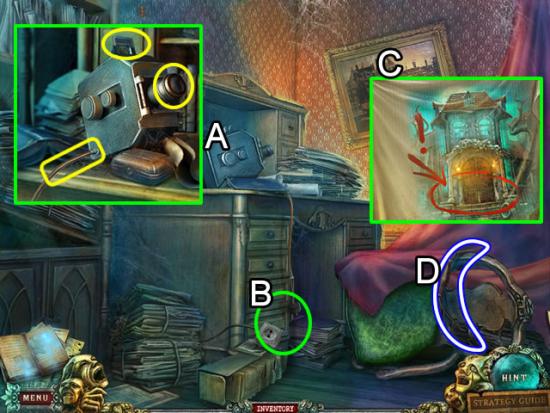
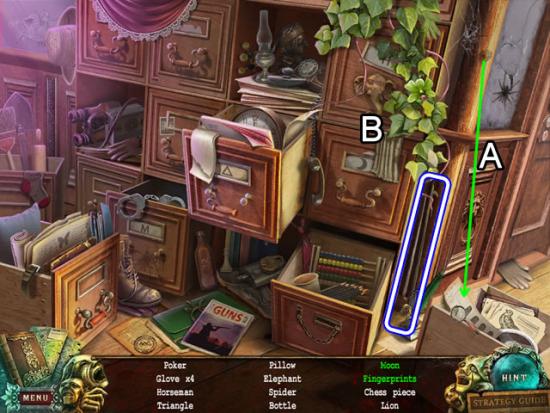
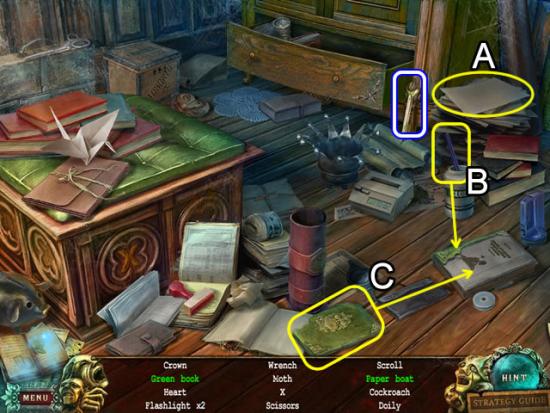
Archives Office
Archives Lobby
Mill Interior
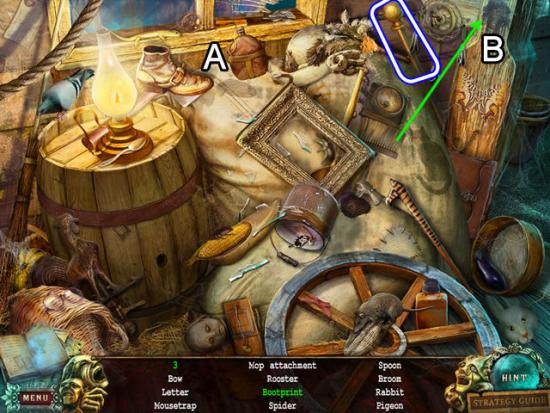
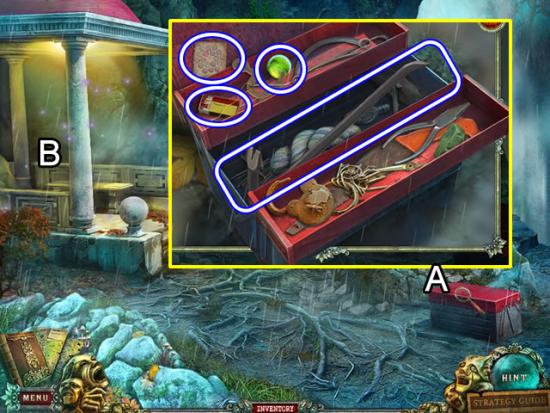
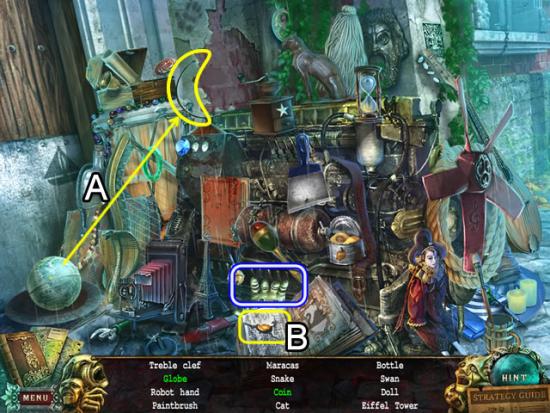
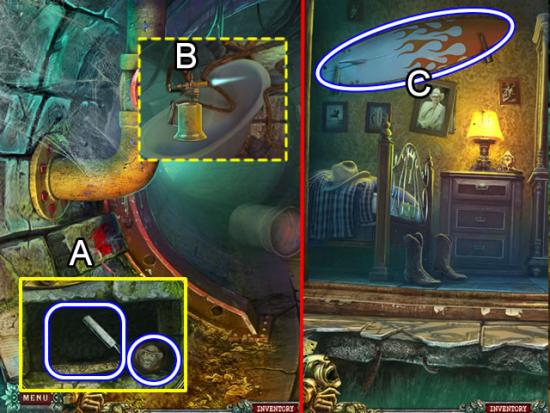
Emergency Hut
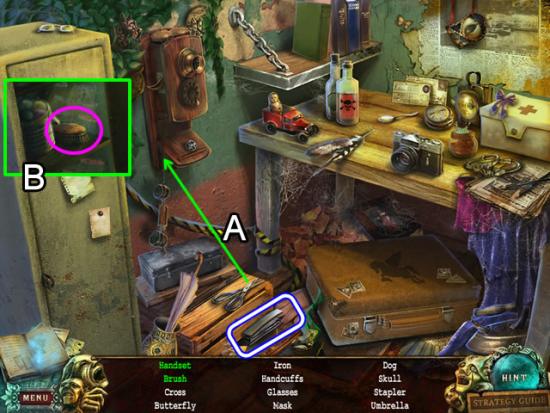
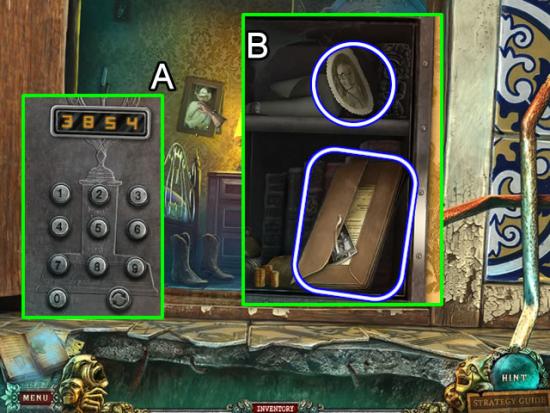
Archives Basement Entrance
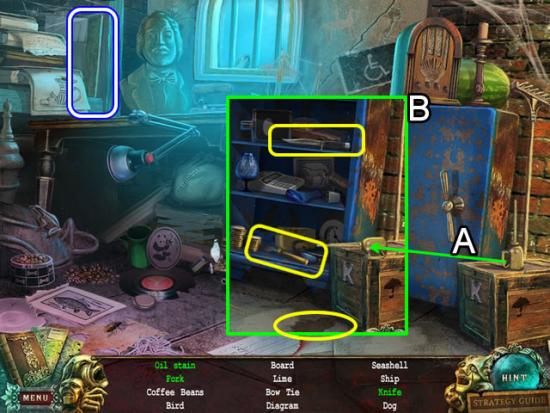
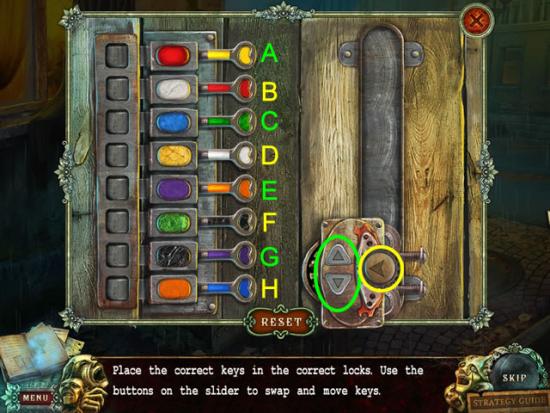
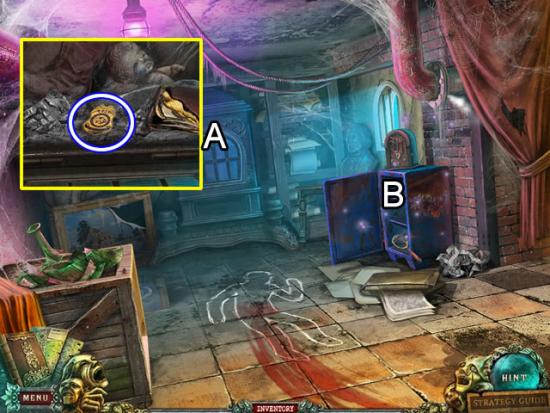
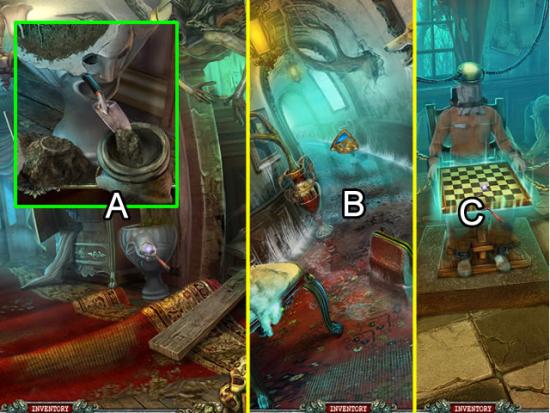
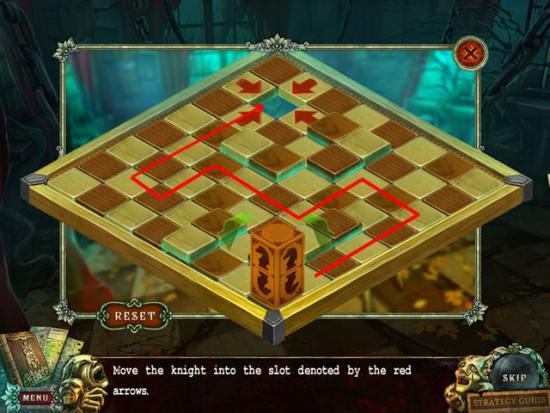
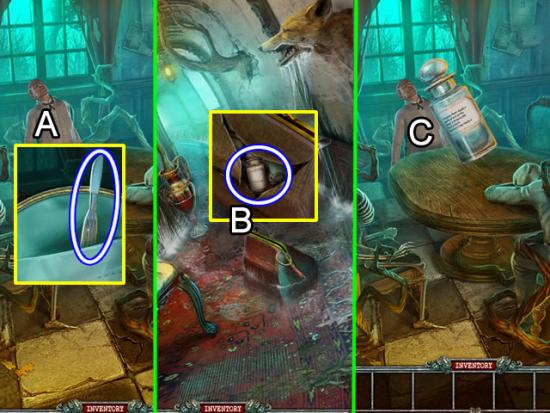
Archives Basement
Archives Exterior
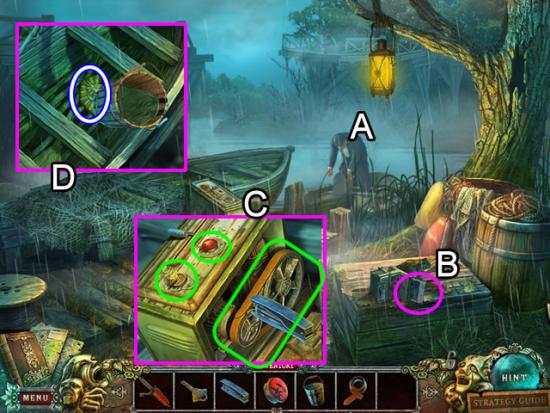
Boat Dock
Boat Landing
Tunnel Entrance
Boat Landing
Tunnel Entrance
Turnpike Barricade
Police Station Entrance
Police Station Reception
Archives Basement
Archives Lobby
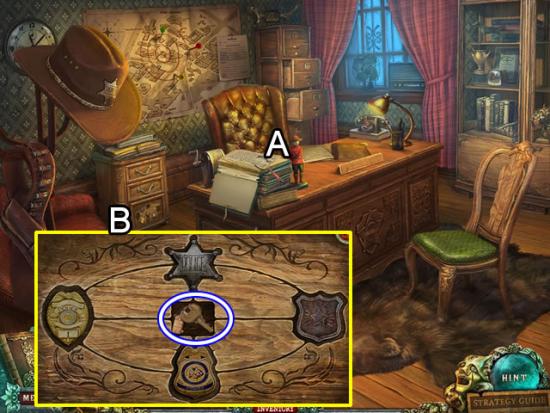
Police Station Office
Boat Landing
Tunnel Entrance
Turnpike Barricade
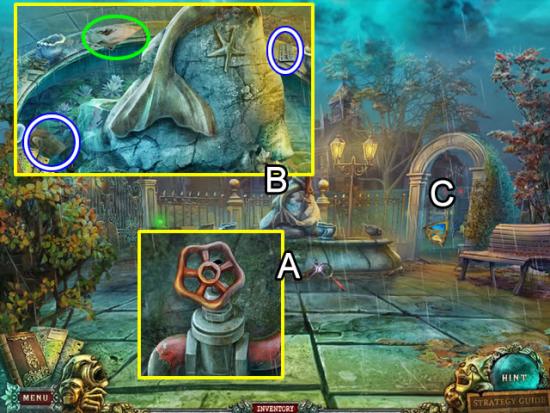
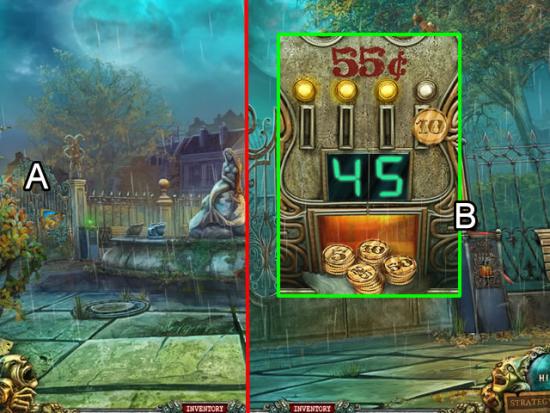
The Fountain
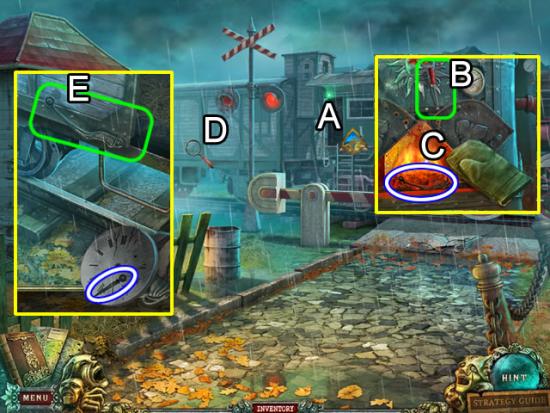
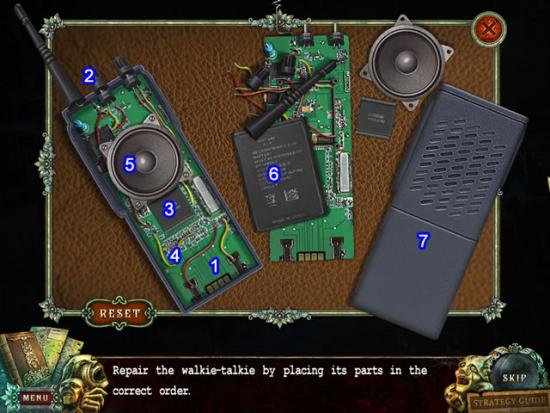
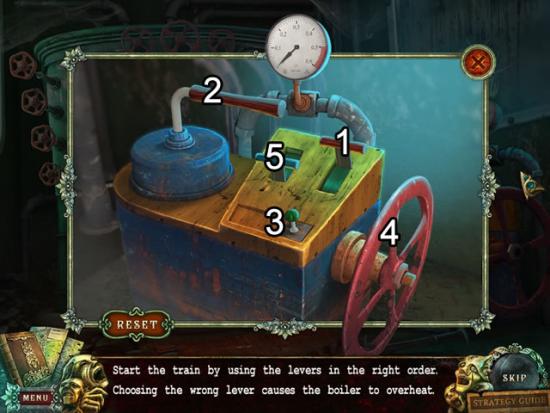
The Train
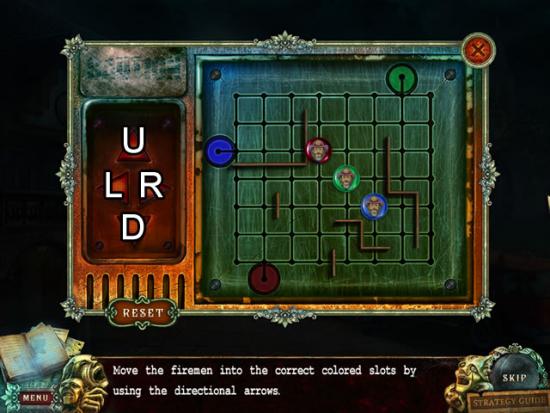
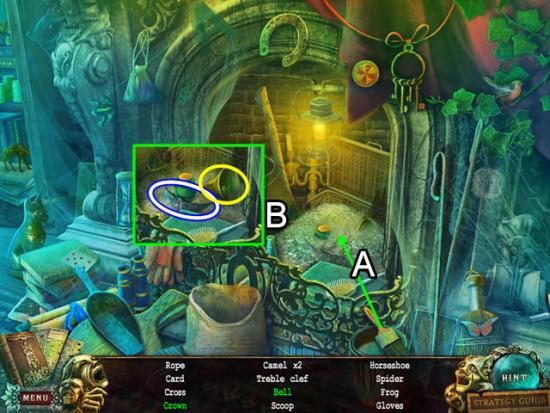
Fire Station Exterior
Path to Supermarket
Fire Station Exterior
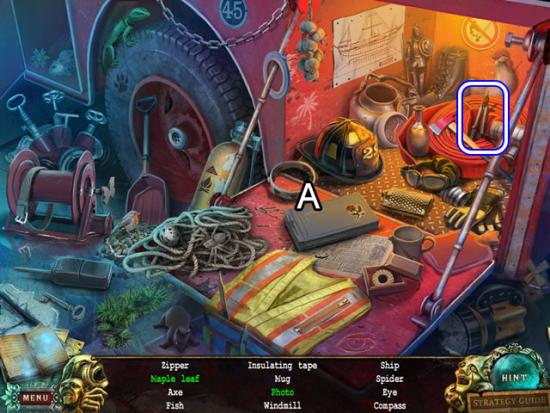
Fire Station Interior
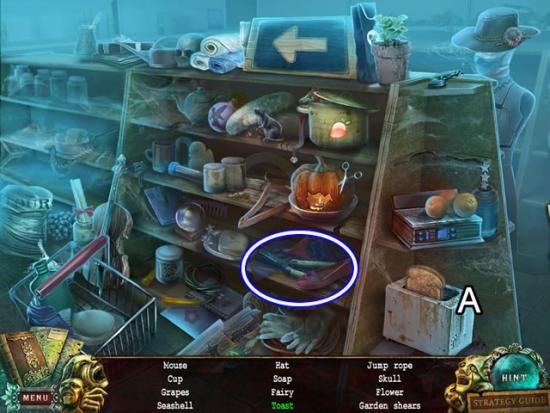
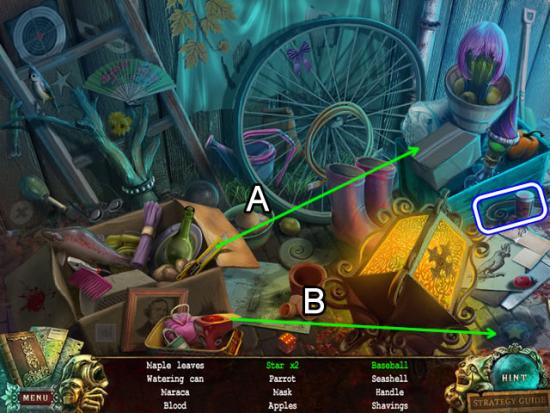
Supermarket Exterior
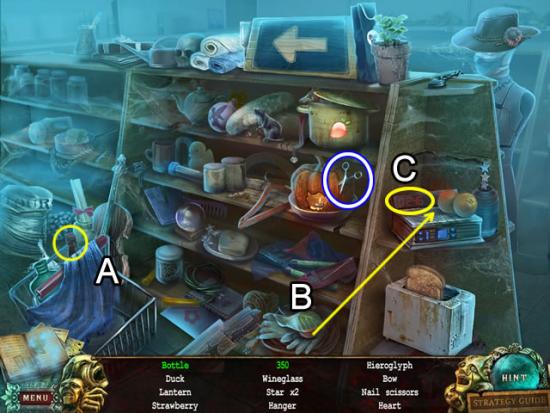
Supermarket Interior
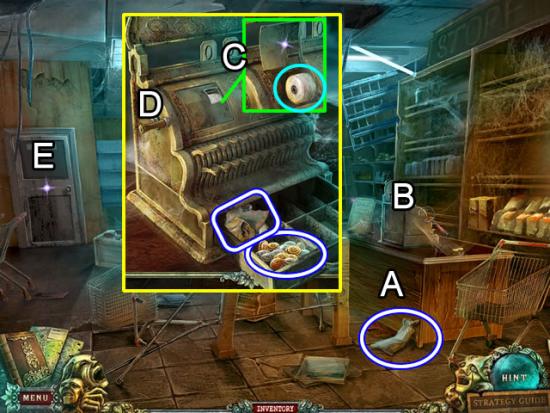
Manager’s Office
Fire Station Exterior
Park Entrance
Turnpike Barricade
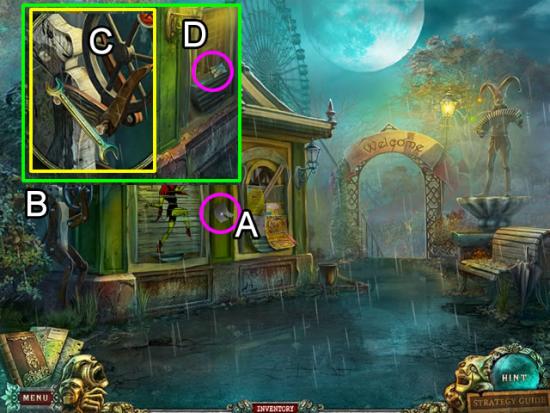
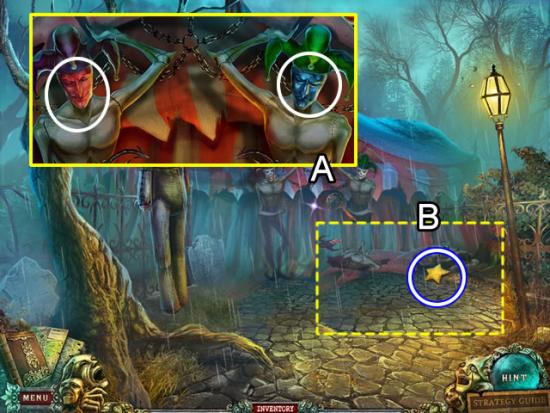
Attraction Entrance
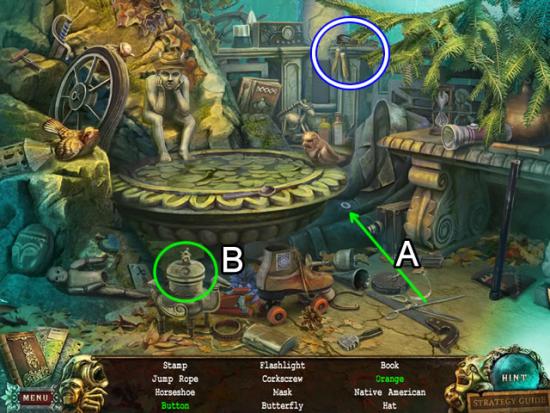
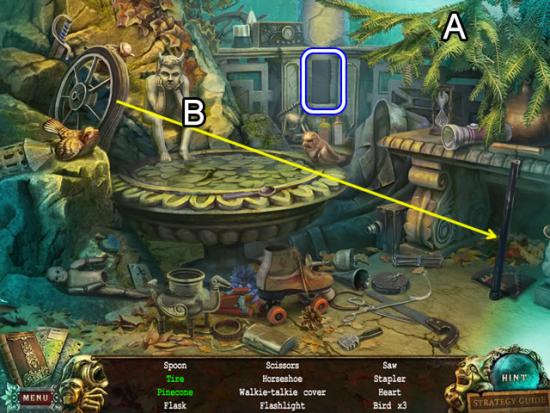
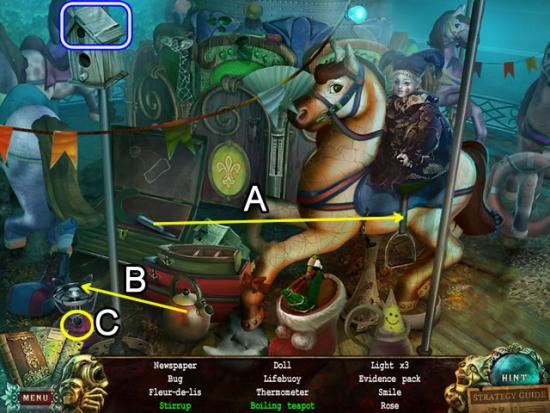
Carrousel
Park Gates
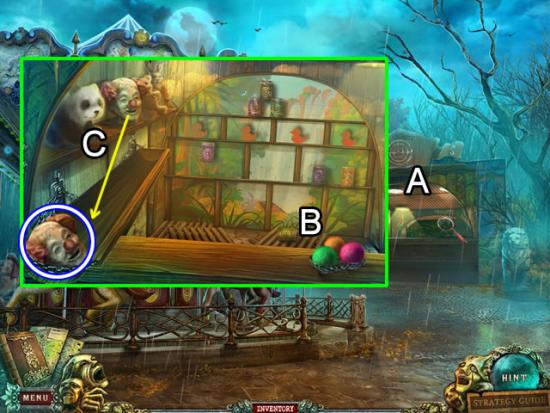
Carrousel
Attraction Entrance
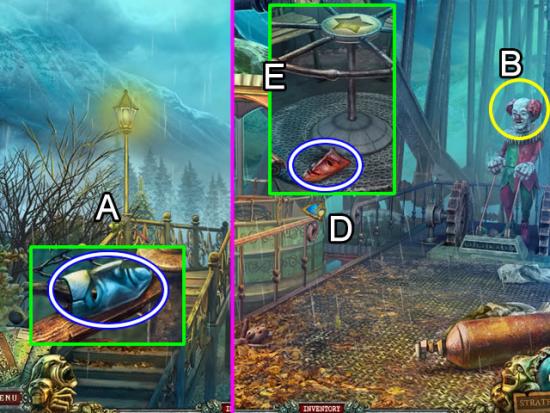
Ferris Wheel Entrance
Ferris Wheel
Attraction Entrance
Horror Room
Attraction Entrance
Ferris Wheel
Attraction Entrance
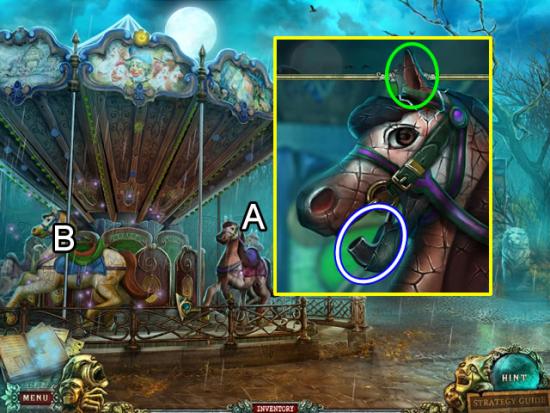
Carrousel
Attraction Entrance
Ferris Wheel
Police Station Office
Police Station Reception
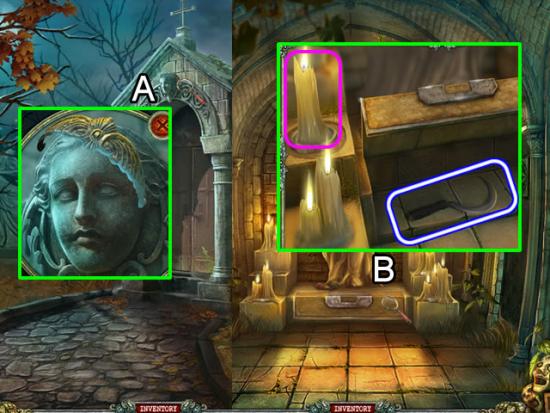
Church Exterior
Construction Site
Church Exterior
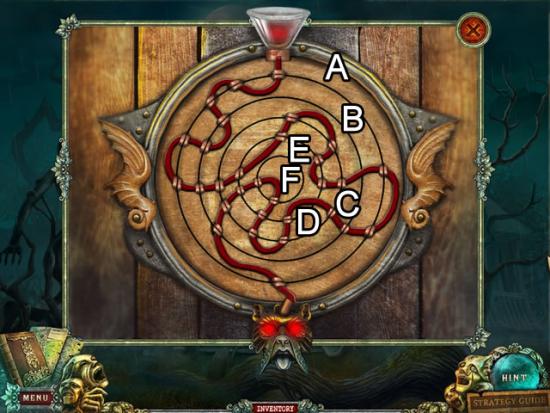
Altar
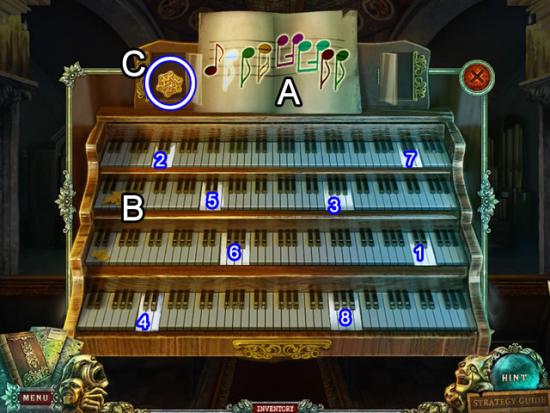
Organ
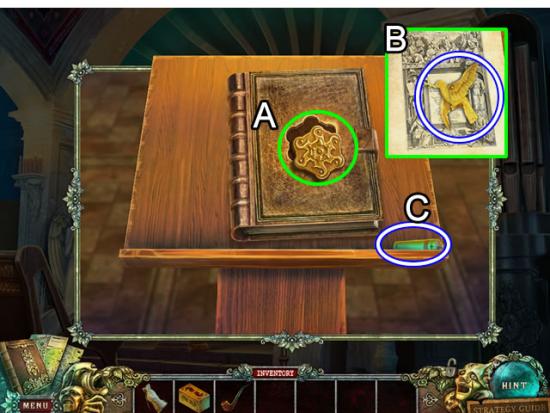
Altar
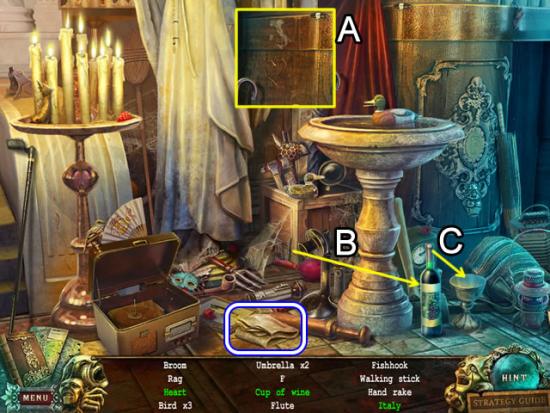
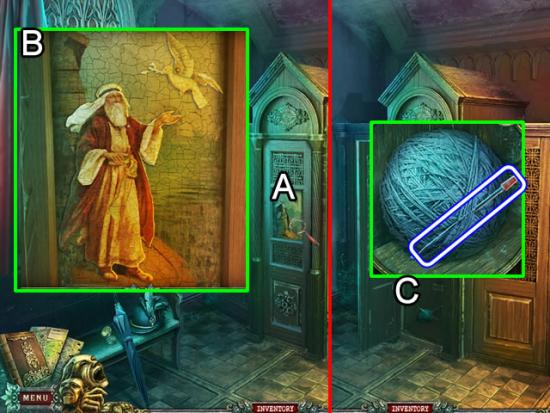
Confessional
Exterior of Mayor’s House
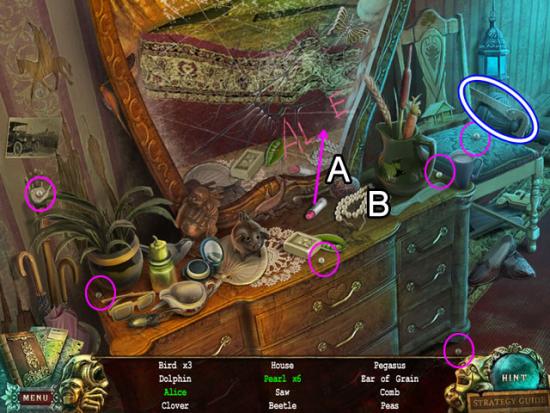
Mayor’s Living Room
Exterior of Mayor’s House
Mayor’s Living Room
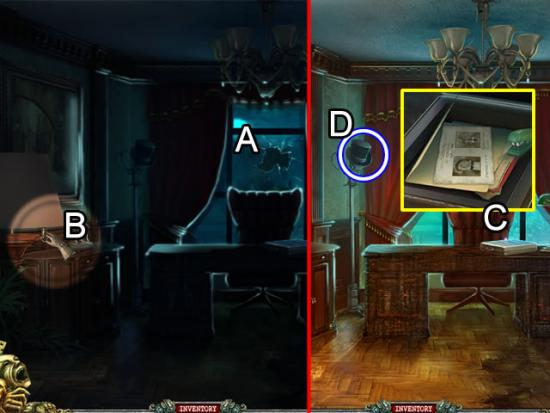
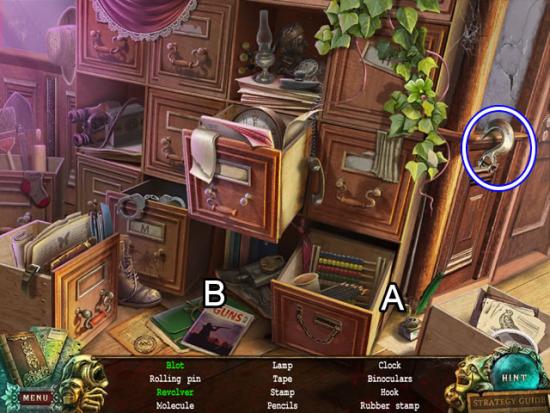
Mayor’s Office
Supermarket Office
Supermarket Interior
Path to Supermarket
House Grounds
House Foyer
House Hallway
House Grounds
Path to Supermarket
Foyer
Hallway
Jean
Main Room
Hallway
Main Room
Watch the final cut scene for the resolution to the story.
Congratulations! You have finished playing Fear for Sale: Sunnyvale Story Collector’s Edition. Select the Extras tab on the main menu to play the bonus Chapter.
Town Square
Police Station Street
Courtyard
Ghost House Entryway
Ghost House Library
Police Station Street
Sewer System
Courtyard
Broken Barricade
Road to Cemetery

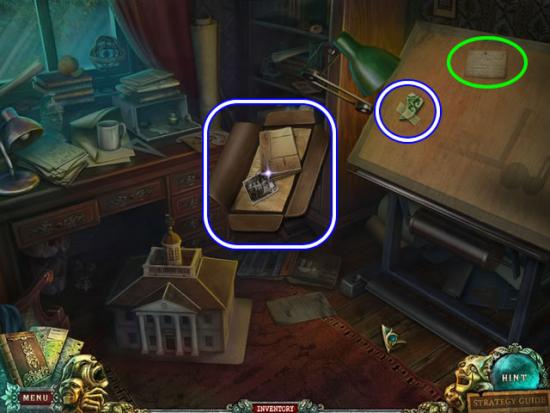
Ghost House Library

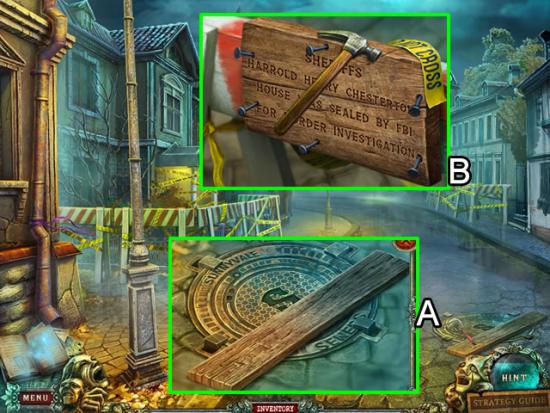
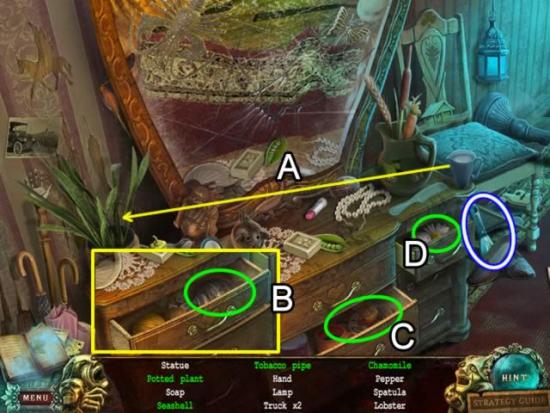
Sheriff’s Bedroom
Ghost House Library
Road to Cemetery – Roland’s House
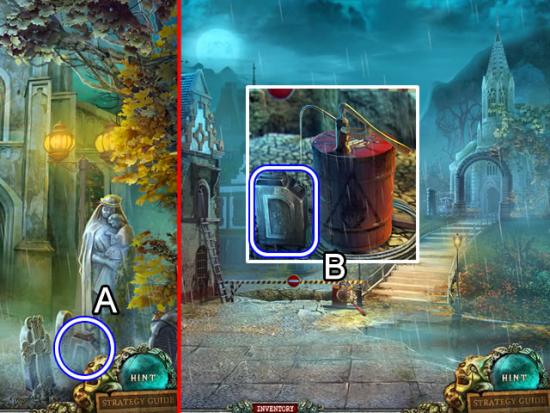
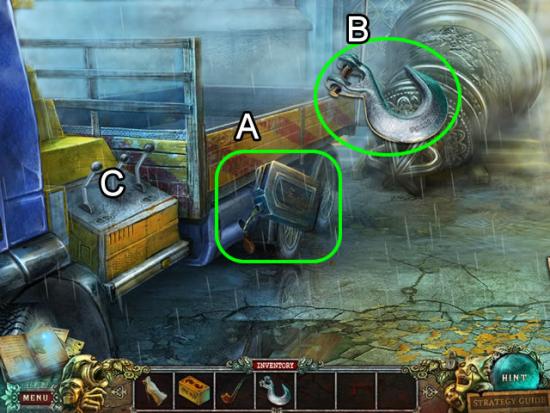
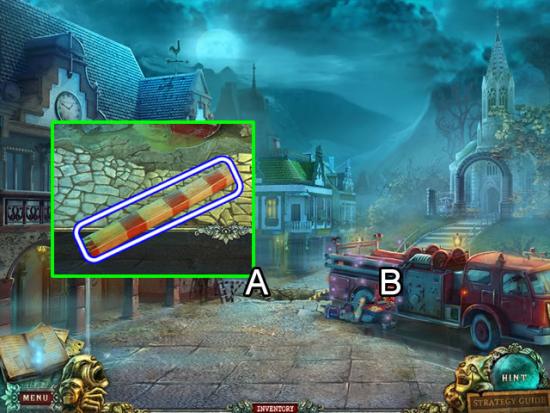
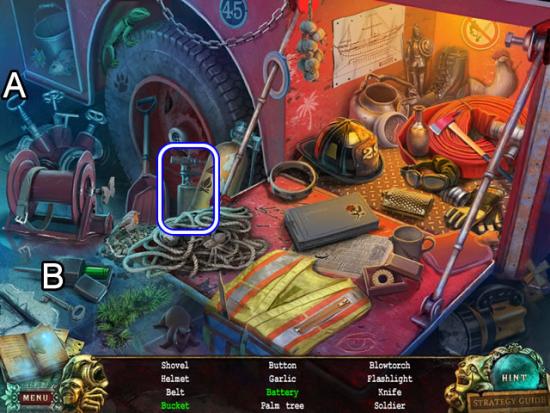
Fire Truck
Roland’s House

Ghost House Balcony
Ghost House Library
Town Square
Road to Cemetery
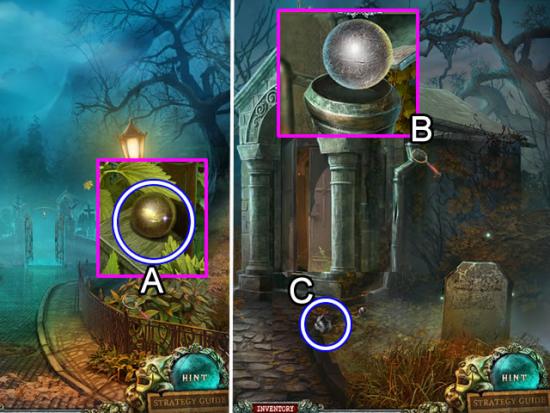
Cemetery
Road to Cemetery
Cemetery
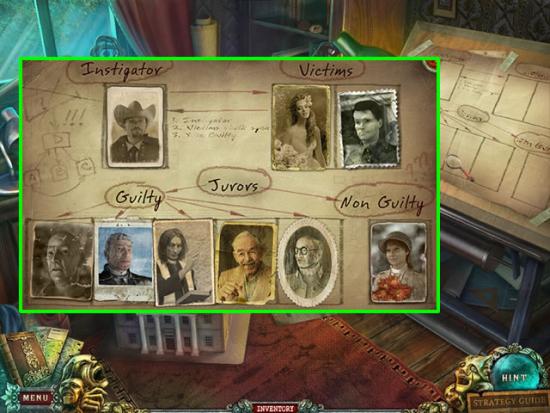
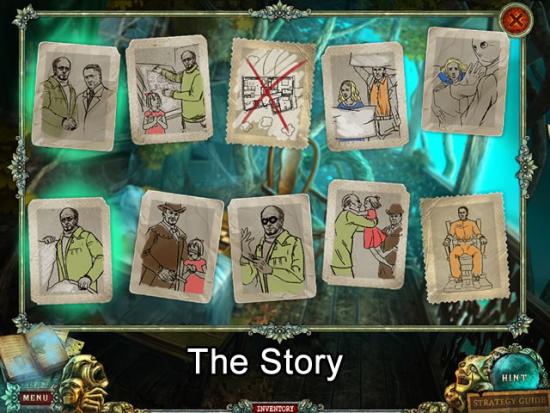
Mausoleum
Ghost House Balcony
Congratulations! You have finished playing the bonus Chapter of Fear for Sale: Sunnyvale Story Collector’s Edition.
