- Wondering how to get Monopoly GO! free rolls? Well, you’ve come to the right place. In this guide, we provide you with a bunch of tips and tricks to get some free rolls for the hit new mobile game. We’ll …
Best Roblox Horror Games to Play Right Now – Updated Weekly
By Adele Wilson
Our Best Roblox Horror Games guide features the scariest and most creative experiences to play right now on the platform!The BEST Roblox Games of The Week – Games You Need To Play!
By Sho Roberts
Our feature shares our pick for the Best Roblox Games of the week! With our feature, we guarantee you'll find something new to play!Type Soul Clan Rarity Guide – All Legendary And Common Clans Listed!
By Nathan Ball
Wondering what your odds of rolling a particular Clan are? Wonder no more, with my handy Type Soul Clan Rarity guide.
Fairly Twisted Tales: The Price Of A Rose Walkthrough
Fairly Twisted Tales: The Price Of A Rose is an interactive hidden object puzzle game created by Big Top Games. You will move from location to location solving hidden object hunts, completing mini-puzzles, and picking up items to use in order to proceed in the game. Gamezebo’s strategy guide will provide you with detailed images, tips, information, and hints on how to play your best game.
Game Introduction – Fairly Twisted Tales: The Price of a Rose
Fairly Twisted Tales: The Price Of A Rose is an interactive hidden object puzzle game created by Big Top Games. You will move from location to location solving hidden object hunts, completing mini-puzzles, and picking up items to use in order to proceed in the game. Gamezebo’s strategy guide will provide you with detailed images, tips, information, and hints on how to play your best game.
General Tips
- This walkthrough is meant to be used as a guide to assist in solving mini-puzzles and acquiring all items in order to complete the game. You may explore locations in the order you wish, this walkthrough is written to take the most direct route to the game’s finish.
- Inventory objects will be written in CAPITALS and highlighted in yellow in the screenshots. The walkthrough will state, “Use the inventory item on the blah blah,” because it assumes you have the item. If you don’t have the item, on your keyboard, press CTRL+F (at the same time). In the text box, type the name of the item you are looking for and press ENTER. This will scan this page for the appearance of that word.
- From the Main menu, click the Help button. Cursors and gameplay are explained.
- Play the tutorial! It will explain gameplay elements. The tutorial is available in Casual mode only.
- Often you need to perform an action (i.e., place or collect an inventory item) in order for the game to progress. Before assuming the game has a glitch, go through your inventory and see if you can place any of your items anywhere or look for an item to pick up, switch to flip, etc.
- The Menu button at the bottom left of the screen gives access to the options screen and can bring you back to the main menu.
- Items collected throughout the game go into your inventory, located at the bottom of your screen.
- There are no Achievements.
- Closing a window – To close the zoom-in windows, click the X or anywhere outside the window. Tip: If you can zoom in on the area again, you likely haven’t found everything you needed to find.
Difficulty Modes
- There are two difficulty modes.
- Casual Mode has faster filling Hint and Skip meters and sparkles indicate all active areas. Using a hint in a non-hidden object scene will tell you what inventory item to use and where, in that particular scene.
- Challenge Mode has slower filling Hint and Skip meters and there are no sparkles to indicate active areas. Using a hint in a non-hidden object scene will tell you what to focus on but will not indicate what inventory item to use.
- You cannot change the difficulty setting during the game.
Cursors
- A magnifying glass indicates you can inspect the area more closely.
- A grabbing hand indicates you can pick up an item to add to your inventory.
- Puzzle pieces indicate you can perform an action with an inventory item.
- A large arrow indicates you can move in that direction.
- Move your cursor over every aspect of a scene and watch for it to change, it’s the only way to find everything, especially if playing in Challenge mode.
Hidden Objects scenes (HOS)
- Shimmering effects indicate hidden object scenes.
- Hidden object scenes provide a list of items to find. These items are different each game so only the inventory item will be indicated by a yellow highlight in the screenshots.
- Items written in white are available immediately.
- Items written in blue require an extra action to be found. When they are uncovered and available, the item’s name switches to white. These items will be indicated by white highlights in the screenshots.
Journal and Map
- Your journal is located at the bottom left of the screen.
- The journal records your progress and contains clues to solve puzzles.
- There are two tabs in the journal, the journal that records your progress and contains clues to solve puzzles, and an objectives tab that lists your objectives.
- When new information is added to the journal, an exclamation point will appear on it.
- Items collected that are added to your journal will be highlighted in white in the screenshots.
- The map is located at the bottom right.
- You can use the map to jump from location to location.
- The map does not indicate objectives that need to be completed. It only shows you where you are and where you can go. Areas not yet available are covered with question marks.
- Hover your mouse over areas on the map and you can see the scene in the viewer. This helps jog your memory when wondering where to go next.
- This walkthrough will use the name of the locations as found on the map.
Hint and Skip
- The Hint button is located at the bottom right of the screen. After using a hint, the meter will recharge.
- Hints used in hidden object scenes will point out an item to find.
- Hints used during the adventure mode will point out what to focus on in the scene or where to go next. In Casual mode, hint will tell you what inventory item to use in a scene. Challenge mode will just point out what you should focus on.
- Skip allows you to skip mini-puzzles.
Prelude
- Upon starting the game, enter a name and choose a difficulty setting (see explanation above).
- Watch the cutscene.
- The game starts on the open journal. Note the two tabs, journal records your progress and provides clues to puzzles, while objectives lists your current objectives. Close the journal by clicking on the X.

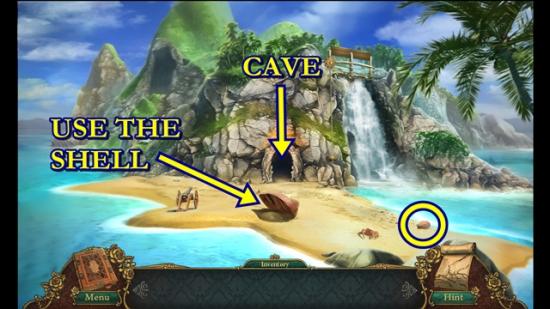
- Take the SHELL.
- Click on the overturned boat.
- Use the SHELL to dig up the sand, then take the GOGGLES.
- Enter the cave.
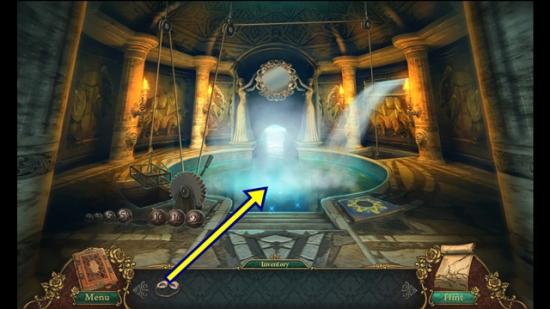
- Use the GOGGLES on the pool to start a hidden object hunt.
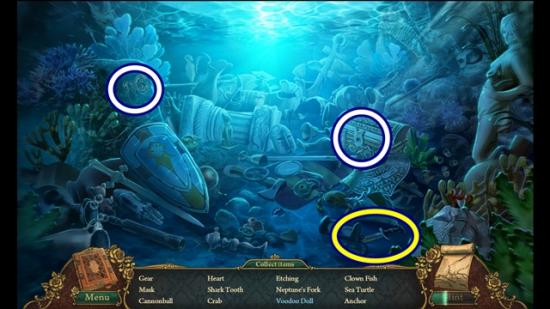
- Find all the objects. The 518 etching is added to your journal. Open the chest and take the voodoo doll. A RUSTY KNIFE is added to your inventory.
- Return to the beach.
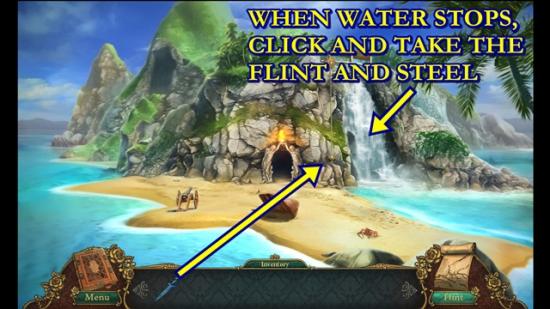
- Click on the rope holding the stone.
- Use the RUSTY KNIFE to cut the rope.
- When the waterfall stops, click on the area behind it and take the FLINT AND STEEL.
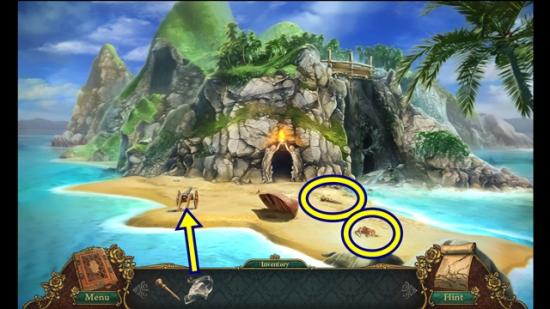
- Take the WOODEN PEG.
- Click on the crab.
- Put the WOODEN PEG in one of the holes, then take the PUZZLE PIECE.
- Click on the cannon.
- Use the FLINT AND STEEL to light the fuse.
- Take the CANNONBALL.
- Return to the cave.
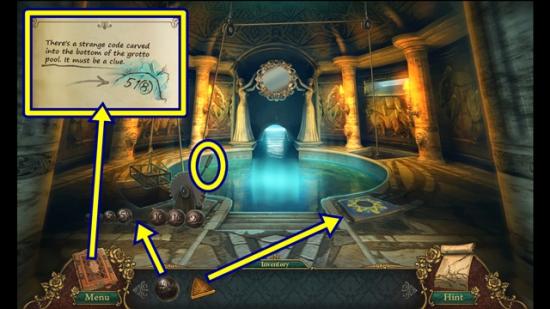
- Put the CANNONBALL with the others. Select the numbered cannonballs based on the etching found in the hidden object scene and your journal. Select the 5-1-8 cannonballs (doesn’t matter what order). Pull the lever.
- Watch the cutscene.
- Click on the area to the right of the pool.
- Add the PUZZLE PIECE.
- A mini-puzzle starts. Press the tiles in the correct sequence so they all stay pressed in. Start by pressing all the tiles until one stays in. This will be considered the first tile. Press another tile. If the first tile pops up, press it back in and press another tile. Continue in this manner until a second tile stays pressed in. Continue until all the tiles are pressed in.
- Solution:
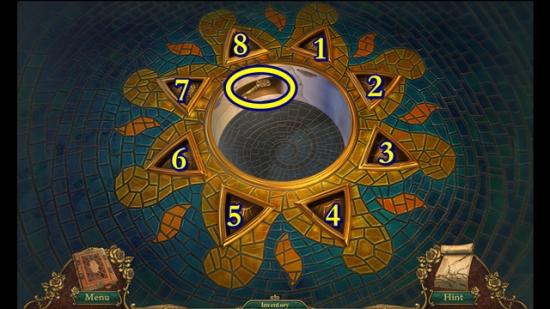
- Using the screenshot above as a guide, press in the tiles in this order: 4-8-7-1-3-5-2-6.
- Take the CHEST KEY.
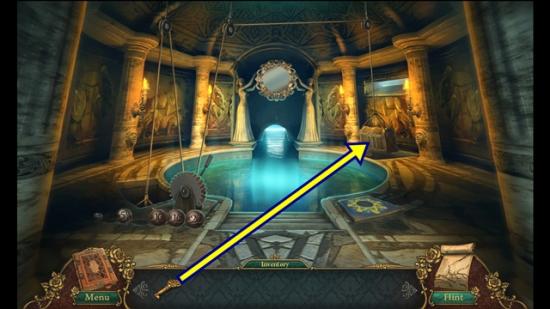
- Click on the chest.
- Unlock the chest with the CHEST KEY.
- Take the ANCIENT SCROLL.
- Watch the cutscene.
Chapter One
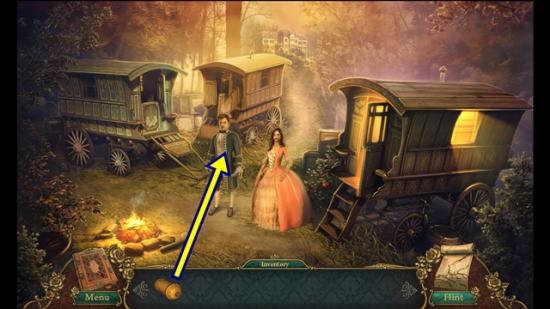
- Click through the dialogue.
- Give the ANCIENT SCROLL to Raphael.
- Click on the scroll.
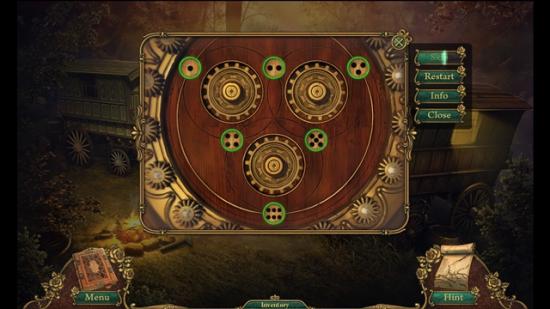
- A mini-puzzle starts. Arrange the numbers in numerical order by rotating the wheels. To rotate the wheel, click on the centre knob.
- Solution:
- Click through the dialogue.
- The ANCIENT SCROLL is added to your inventory.
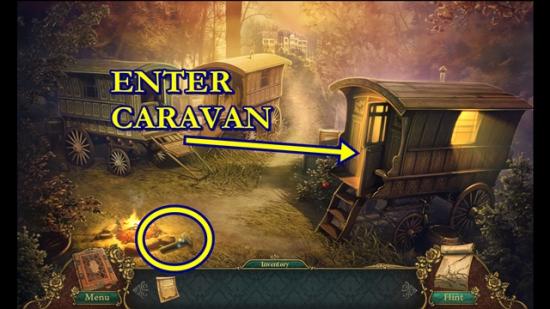
- Take the HAMMER.
- Enter the caravan.
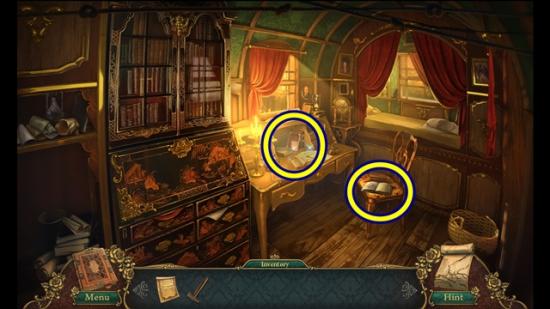
- Click on the chair.
- Read the entry. Click on the book to close it.
- Click on the desk to start a hidden object hunt.
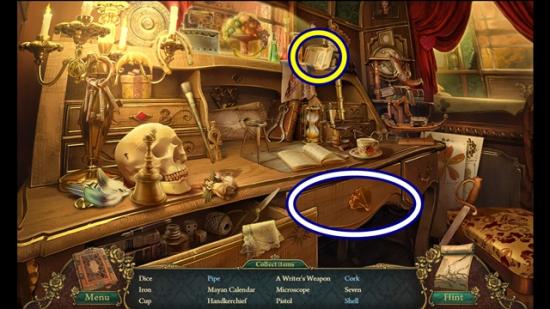
- Find all the objects. A “writer’s weapon” is a pen. Open the drawer and to find more objects. If you are asked to find a cowbell, it’s a regular hand bell. An INVITATION is added to your inventory.
- Move down, then move forward up the road.
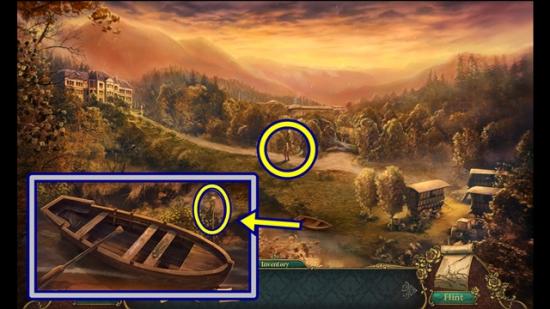
- Talk to Malger. Click through the dialogue.
- Click on the rowboat.
- Take the ROPE.
- Move left to Fouquet’s property.
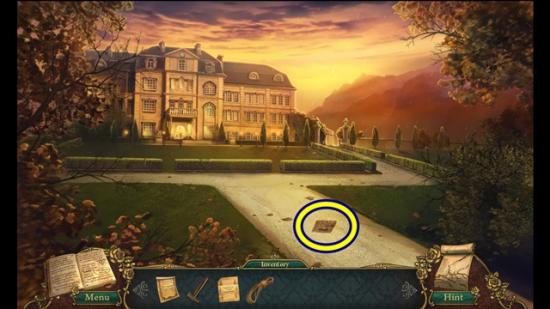
- Click on the newspaper.
- Read the headline, then click on it to add it to your journal.
- Move forward to the front porch.
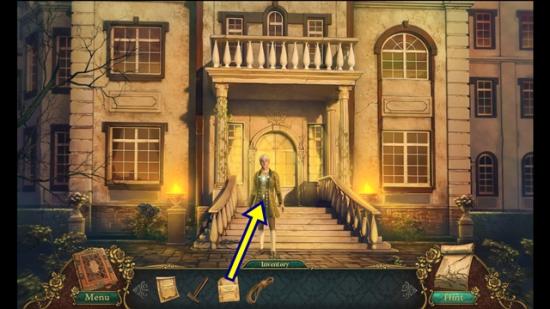
- Give the INVITATION to the doorman.
- Go through the door to the entry foyer.
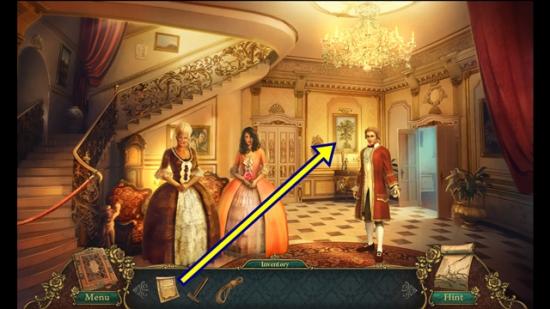
- Talk to the guests.
- Click on the tree painting.
- Add the ANCIENT SCROLL to the words of truth on the painting. Close the journal.
- Go through the door on the right into the salon.
- Talk to the guests.
- Move down to the entry foyer and move forward into the dining room.
- Click through the dialogue.
- A LOCKBOX PIECE is added to your inventory.
- Return to the salon.
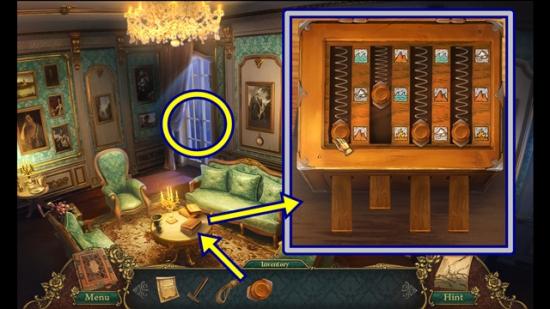
- Click on the box on the small round table.
- Add the LOCKBOX PIECE.
- A mini-puzzle starts. Slide the lockbox pieces into their appropriate slot. To move a lockbox piece, click and drag it to one of the symbols. It will lock when it’s in the correct position.
- The solution is in the screenshot above.
- Read the note. Click to remove the note, then take the BACKDOOR KEY.
- Click on the backdoor.
- Unlock the door with the BACKDOOR KEY.
- Go out to the Fouquet backyard.
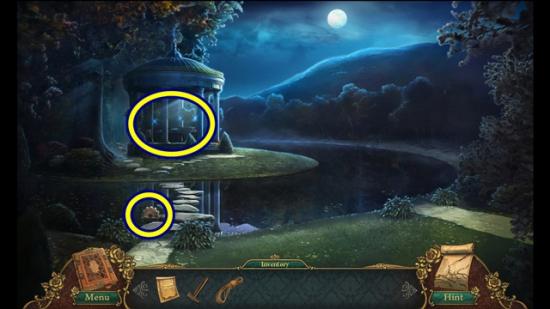
- Take the BIG GEAR.
- Click on the gazebo to start a hidden object hunt.
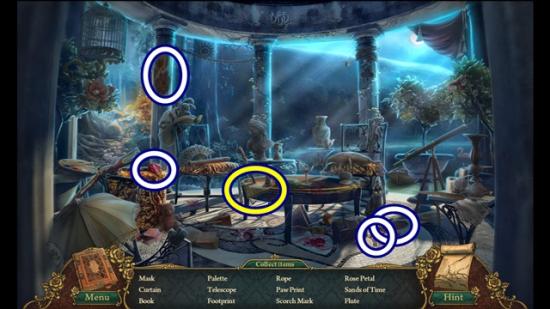
- Find all the objects. “Sands of time” is an hourglass.The paw print, scorch mark, rose petal and footprint are added to your journal. A DIARY PAGE is added to your inventory.
- Close the journal.
- Click through the dialogue.
- Take the path up the left side to the forest entrance.
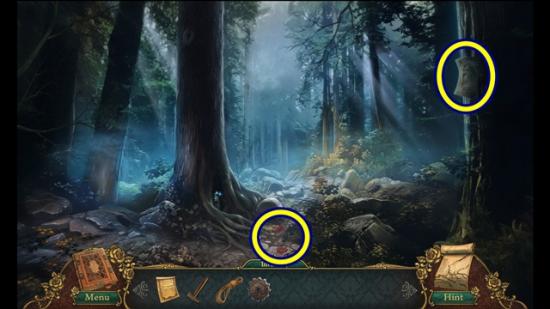
- Note the bloody paw prints.
- Look at the Wanted poster.
- Move forward to the hunter’s camp.
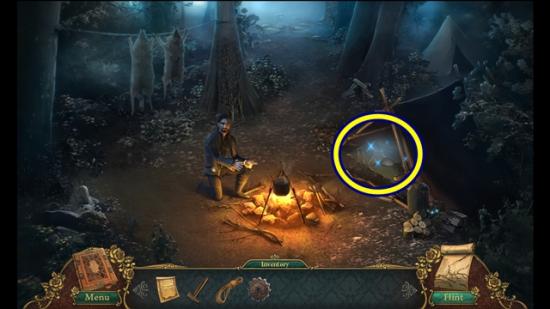
- Click through the dialogue.
- Click on the tent to start a hidden object hunt.
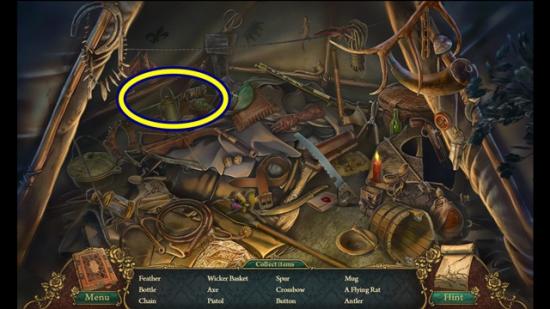
- Find all the objects. An UNLIT TORCH is added to your inventory.
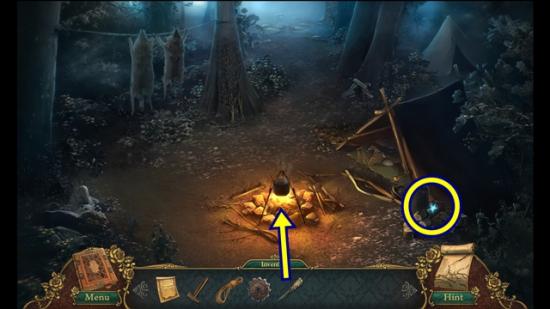
- Take the MEDIUM-SIZED GEAR.
- Put the UNLIT TORCH on the fire to get the LIT TORCH.
- Move forward up the forest path.
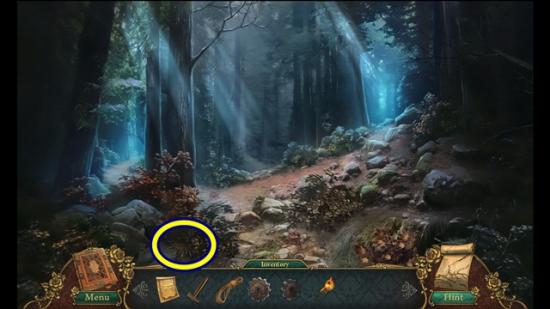
- Take the SUN DISK LEFT HALF.
- Take the right path to the waterfall.
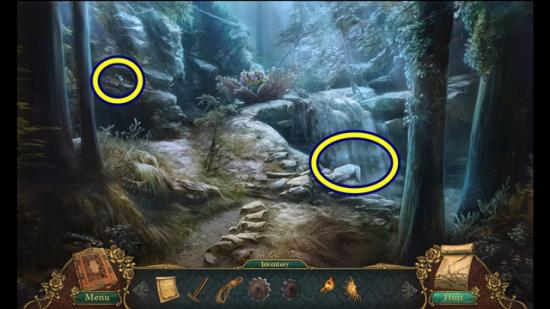
- Take the SMALL GEAR.
- Click on the waterfall to start a hidden object hunt.
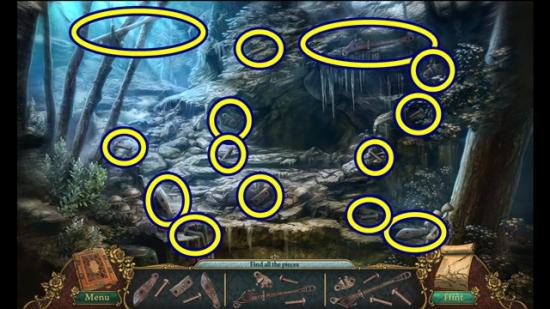
- Find all the fragmented objects. A BOLT CUTTER is added to your inventory.
- Return to the forest entrance.
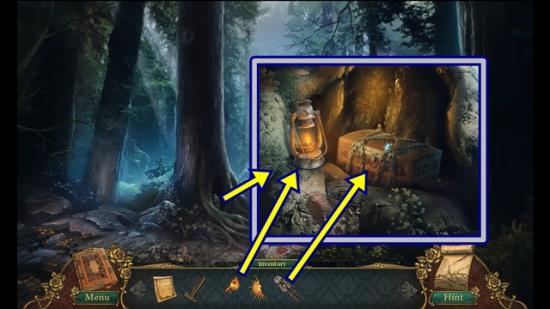
- Click on the base of the middle tree.
- Use the LIT TORCH to light the lantern.
- Use the BOLT CUTTER to cut the chains on the box.
- Take the SPEAR.
- Return to the forest path and take the left path to the northern trail.
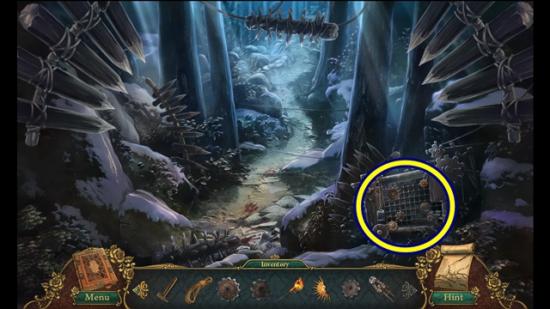
- Click on the box cage.
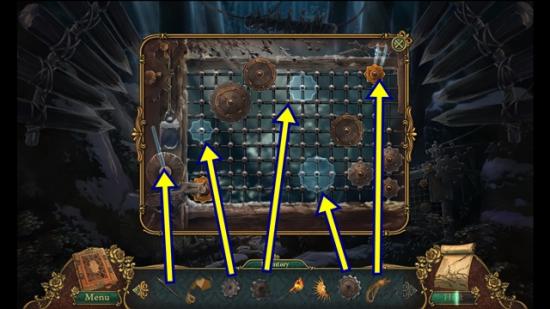
- Add the SMALL, MEDIUM-SIZED and BIG GEARS into their proper positions (note the shadows). Add the ROPE to the top right corner and the SPEAR to the bottom left side.
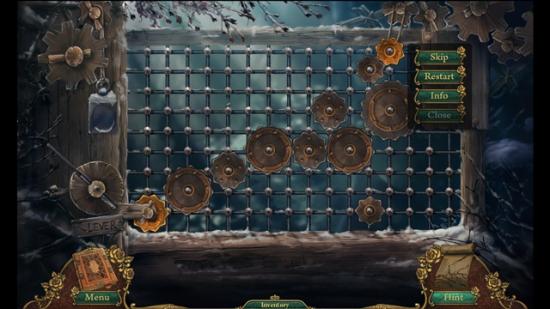
- A mini-puzzle starts. Arrange the gears to connect and rotate the two golden gears.
- One possible solution:
- Move forward to the snow-covered trail.
Chapter Two
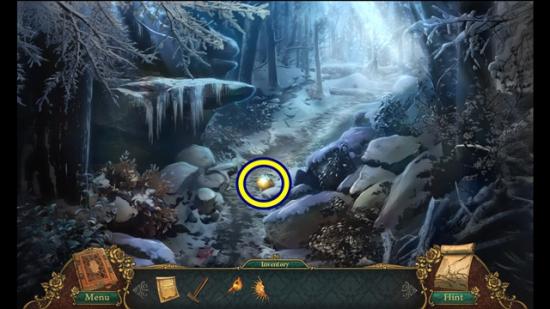
- Take the ORANGE.
- Move forward to the castle lane and continue to the castle approach.
- Take the path to the right of the castle to the garden trellis and move forward to the fountain.
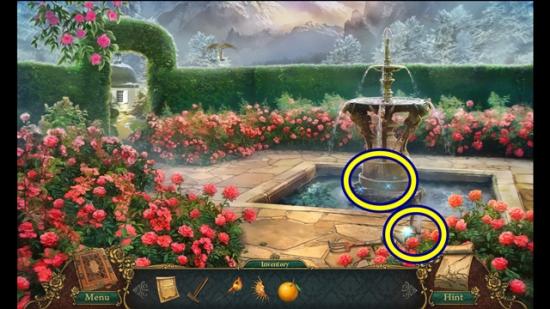
- Take the EMPTY WATERING CAN.
- Click on the fountain to start a hidden object hunt.
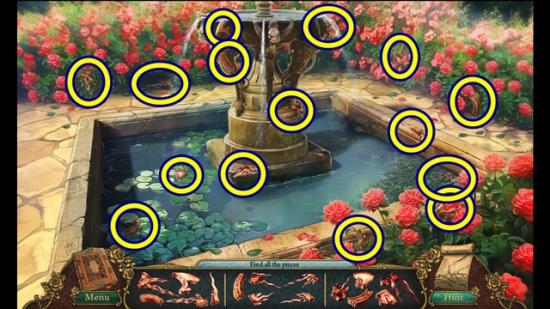
- Find all the fragmented objects. A SUN DISK RIGHT HALF is added to your inventory.
- Use the EMPTY WATERING CAN on the fountain to get the FULL WATERING CAN.
- Go through the archway to the toolshed area.
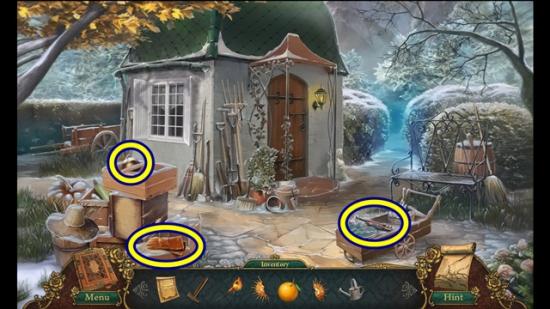
- Take the GLASS CUTTER, GARDEN GLOVES and the IRON BALL.
- Return to the castle approach (you can use your map to jump to that area).
- Go left towards the castle gates.
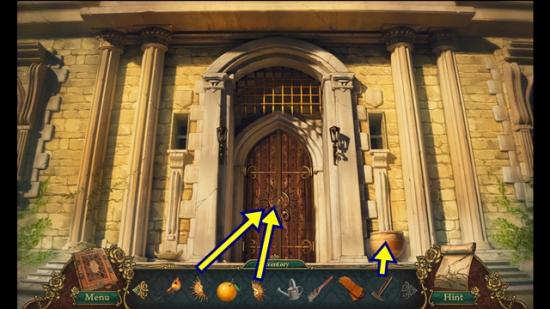
- Use the HAMMER to break the urn, then take the HANDLE.
- Click on the door.
- Add the SUN DISK RIGHT HALF and the SUN DISK LEFT HALF.
- Go through the door to the main hall.
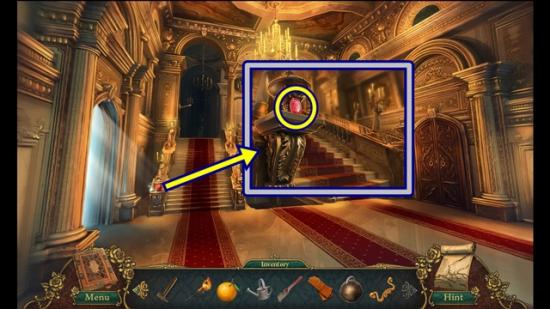
- Click on the left staircase banister.
- Take the RUBY (1/3).
- Go left into the dining room.
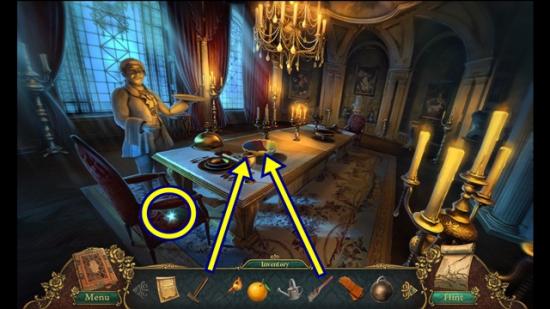
- Take the PORTRAIT FRAGMENT (1/6).
- Use the HAMMER on the glass bowl, then use the GLASS CUTTER on the fragments.
- Take the three STAINED GLASS pieces (3/4).
- Return to the main hall, then go up the stairs to the staircase landing.
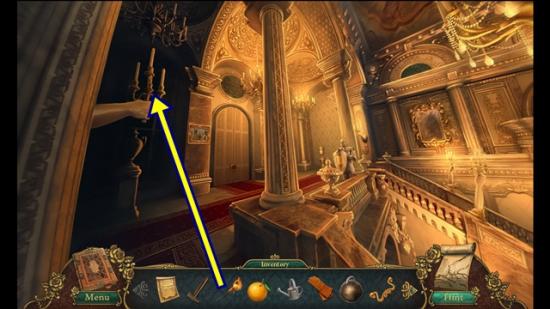
- Use the LIT TORCH on the candles.
- Watch the cutscene.
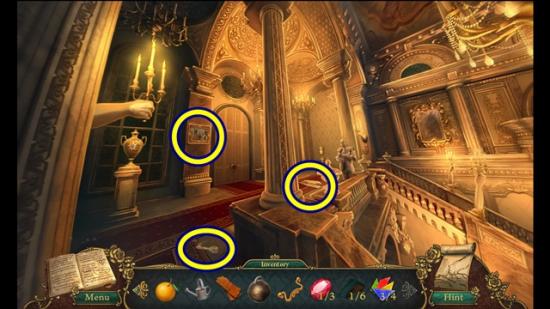
- Take the THRONE ROOM KEY and the SHIELD.
- Click on the framed picture to the left of the door.
- A mini-puzzle starts. Restore the painting of the merchant ships. Use the coloured buttons to flip the panels. Determine which panels each coloured button flips. The purple button flips panels 1, 2 and 3. The green button flips panels 2 and 4. The blue button flips panels 4, 5 and 6. The light blue/turquoise button flips panes 3 and 5.
- Assuming this puzzle isn’t random and starts the same way every game, press the Restart button (if necessary) and press the green and light blue buttons.
- Solution:
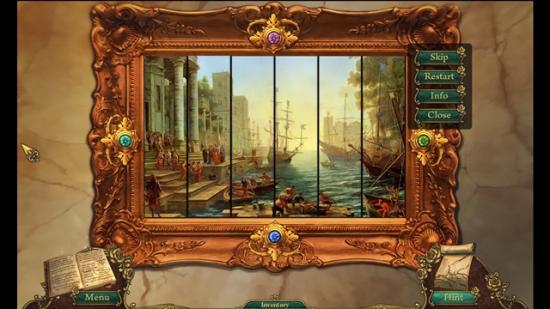
- Take the DIAMOND (1/3).
- Move down to the main hall.
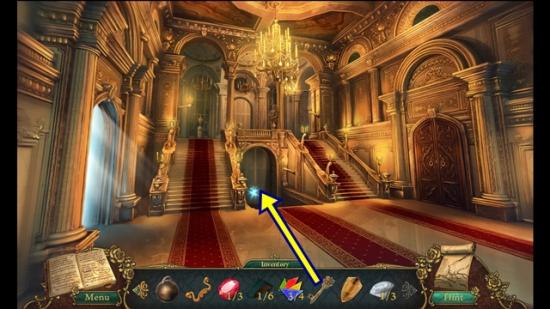
- Use the THRONE ROOM KEY to unlock the throne room door (between the stairs).
- Enter the throne room.
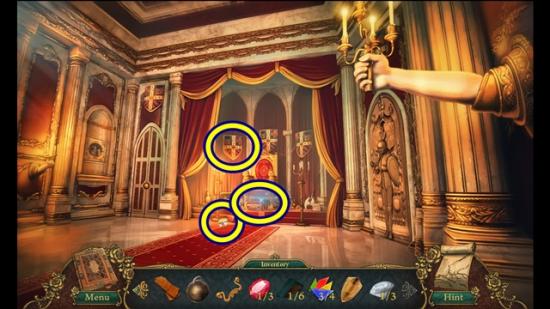
- Adjust the far left shield, then take the DIAMOND (2/3) from where it falls.
- Click on the throne to start a hidden object hunt.
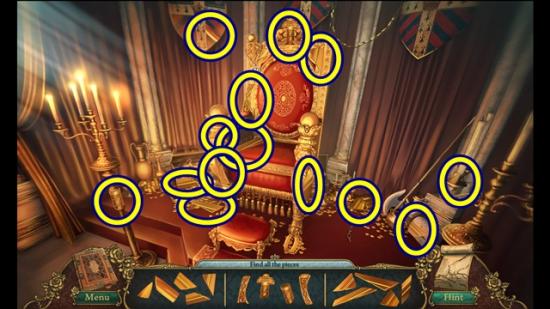
- Find all the fragmented objects. A SWORD is added to your inventory.
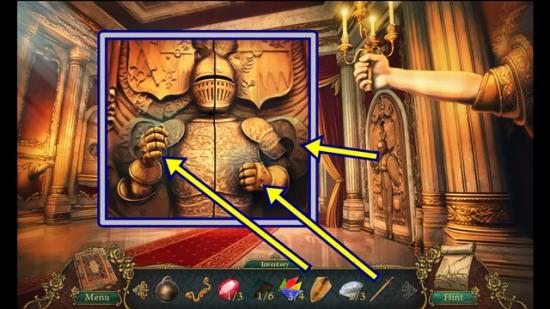
- Click on the knight on the wall.
- Put the SHIELD in the knight’s right hand (your left) and the SWORD in the knight’s left hand (your right).
- Enter the armoury.
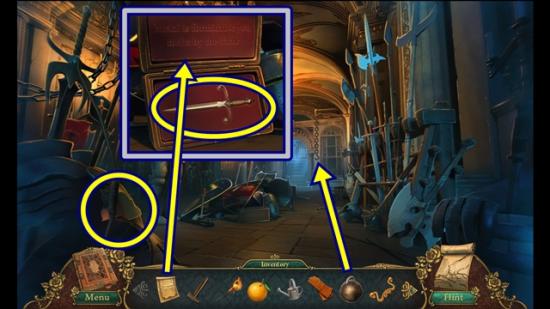
- Take the POTRAIT FRAGMENT (2/6).
- Click on the debris on the floor.
- Open the chest and take the DAGGER.
- Put the ANCIENT SCROLL on the words of truth.
- Close the journal.
- Click on the far back window (not the doorway).
- Put the IRON BALL on the hook’s chain.
- Take the RUBY (2/3).
- Return to the staircase landing (you can use your map to jump to that area).
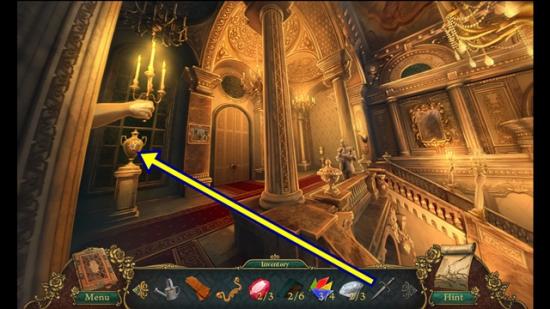
- Click on the vase.
- Use the DAGGER to take the GOLDEN STAR (1/2).
- Return to the fountain (you can use your map to jump to that area).
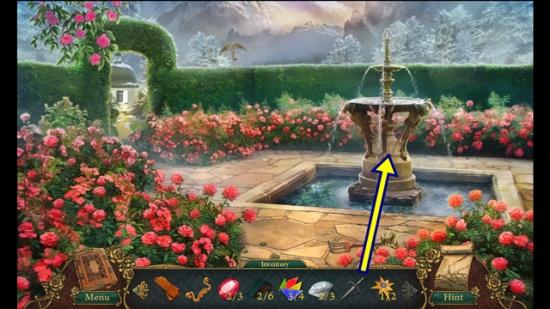
- Click on the fountain.
- Use the DAGGER to take the GOLDEN STAR (2/2).
- Return to the throne room (you can use your map to jump to that area).
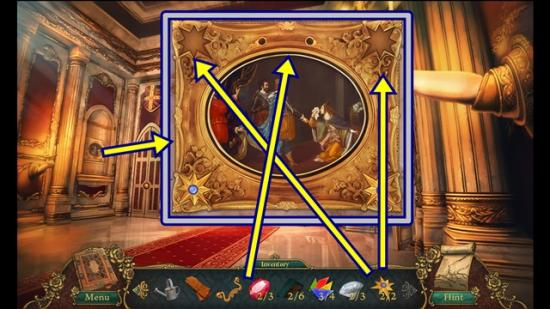
- Click on the painting on the far left wall.
- Add the two GOLDEN STARS to the top corners.
- Add the HANDLE to the top middle of the painting.
- A mini-puzzle starts. Find the five numbers that only appear once. This means numbers, however they appear; therefore if a number 2 and a roman numeral II appears, the 2 appears more than once and it is eliminated. If you click on a tile, it will glow either red or green. Red means the number is not part of the solution, green means it is part of the solution. If you click on a tile and it turns green, then click on another tile and it turns red, the board resets.
- Solution:
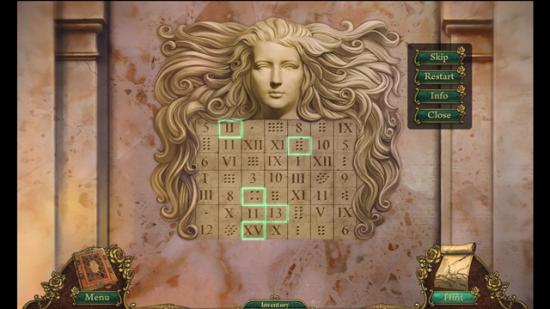
- Take the RUBY (3/3).
- Return to the dining room.
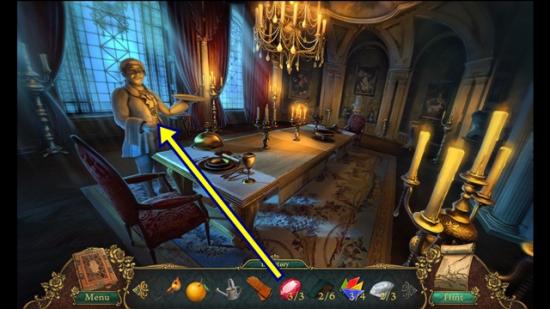
- Click on the statue.
- Add the three RUBIES.
- Click through the dialogue.
- The CHAPEL KEY is added to your inventory.
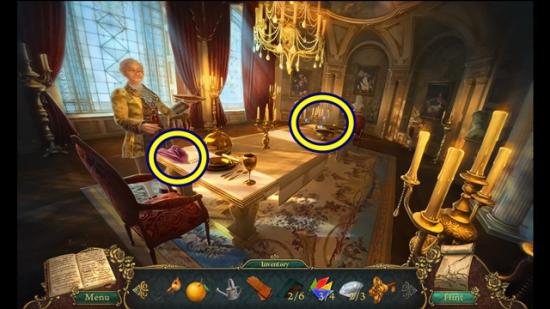
- Take the CLOTH.
- Click on the end of the table to start a hidden object hunt.
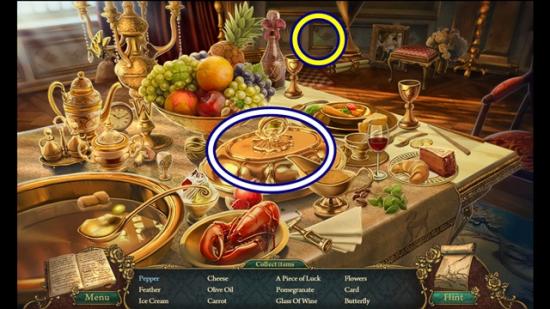
- Find all the objects. Lift the dish lid to find more objects. A “piece of luck” is a clover. A GREEN GLASS/STAINED GLASS (4/4) is added to your inventory.
- Move down to the main hall.
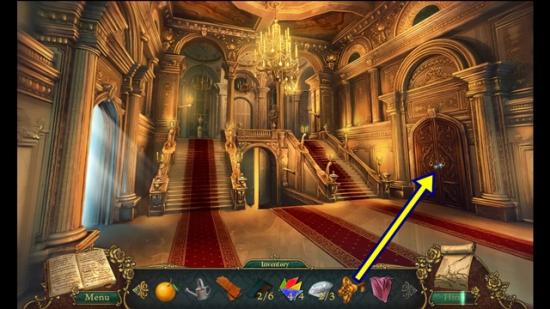
- Click on the door on the right.
- Unlock the door with the CHAPEL KEY.
- Enter the chapel.
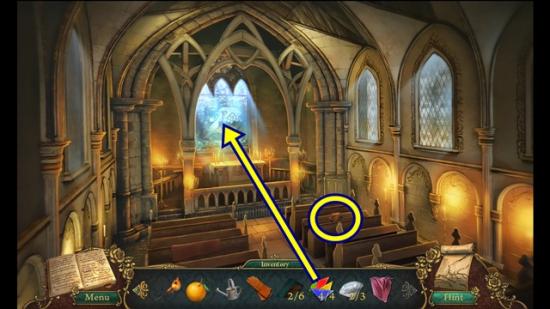
- Click on the right pews.
- Take the PORTRAIT FRAGMENT (3/6).
- Click on the window above the altar.
- Add the four STAINED GLASS pieces. If you’re having a hard time, put the pieces on the left side.
- A mini-puzzle starts. Fit all the pieces into the empty slots. Click on a piece and click the rotating arrow, if necessary, to rotate the piece. Click and drag it to move the piece. A piece locks when it’s in the correct position.
- Solution:
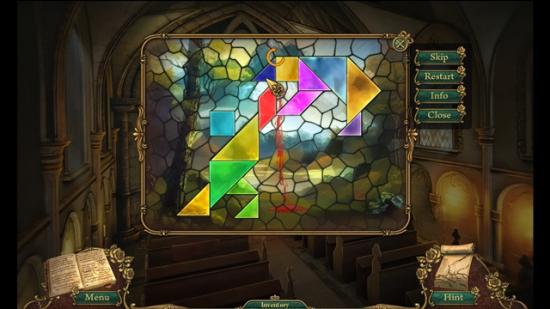
- When you are finished, take the DIAMOND (3/3) from the floor.
- Return to the armoury (you can use your map to jump to that area).
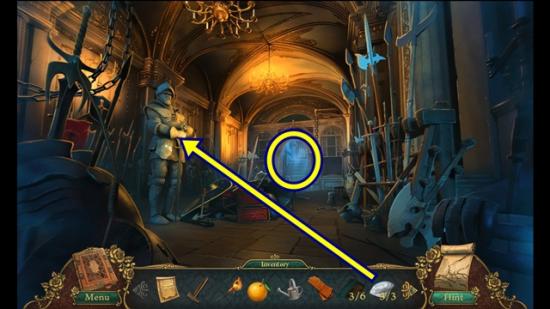
- Click on the stone knight.
- Add the three DIAMONDS.
- Click through the dialogue.
- He gives you the TREASURE ROOM KEY.
- Click on the treasure room door (back of the armoury).
- Unlock the door with the TREASURE ROOM KEY.
- Enter the treasure room.
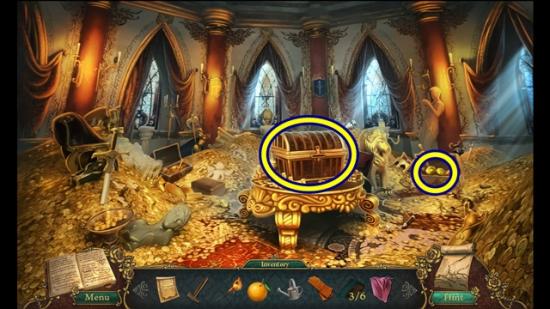
- Take the CANARY DIAMONDS.
- Click on the large chest in the centre of the room.
- A mini-puzzle starts. Swap the position of the gems so the blue gems are on the left and the red gems are on the right. Gems can only move in one direction and can only move into an empty slot. A gem can “jump” one position over an opposite coloured gem into an empty slot. If you get stuck, click Restart.
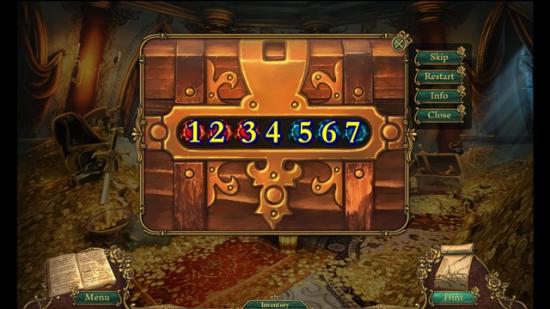
- Using the screenshot above as a guide to the labelling of each slot, from the starting position, press the slots in the following order: 5-3-2-4-6-7-5-3-1-2-4-6-5-3-4.
- Take the BOOK OF RICHES.
- Return to the staircase landing (you can use your map to jump to that area).
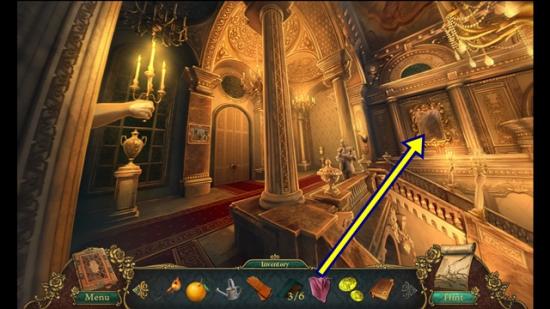
- Click on the mirror.
- Use the CLOTH to clean the mirror.
- Watch the cutscene.
- Return to the Fouquet backyard (you can use your map to jump to that area).
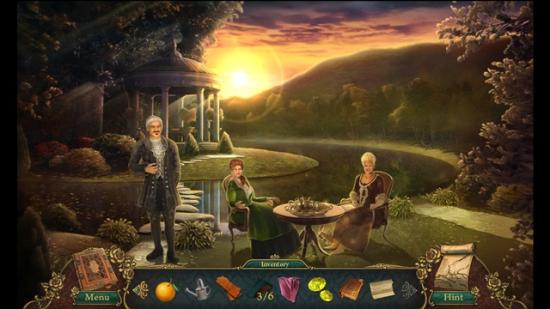
- Click through the dialogue.
- Talk to the people.
- JACQUES’ LOVE LETTERS are added to your inventory.
- Return to the front porch (you can use your map to jump to that area).
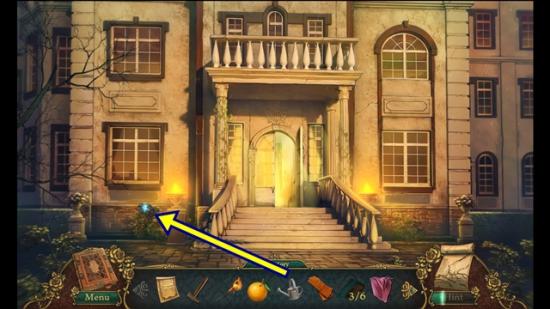
- Use the FULL WATERING CAN on the bush, then take the BLACKBERRIES.
- Return to the hunter’s camp (you can use your map to jump to that area).
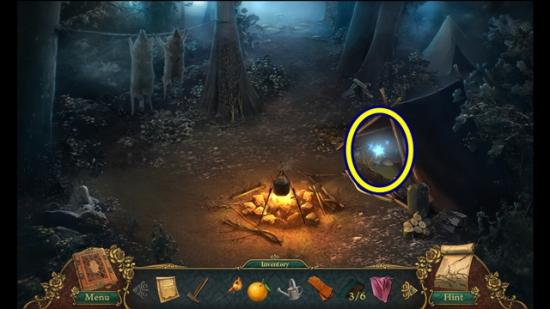
- Click on the tent to start a hidden object hunt.
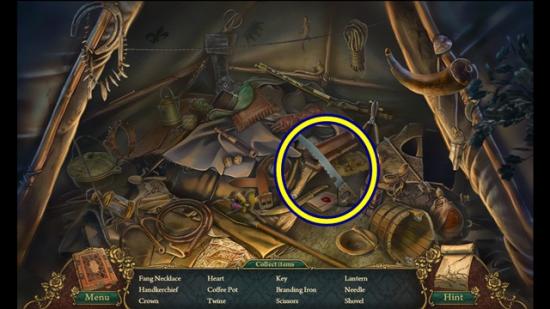
- Find all the objects. A SAW is added to your inventory.
- Return to the caravan camp (you can use your map to jump to that area).
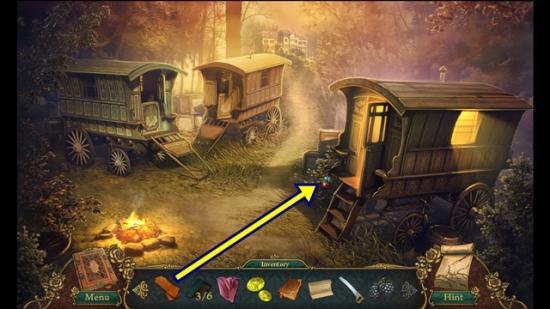
- Use the GARDEN GLOVES to take the RASPBERRY.
- Return to the road (you can use your map to jump to that area).
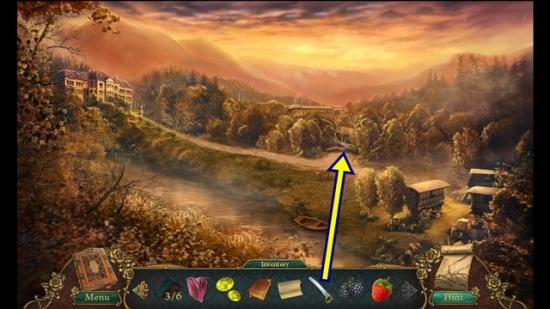
- Click on the fallen tree.
- Cut the tree with the SAW (three clicks).
- Move forward to the town square.
Chapter Three
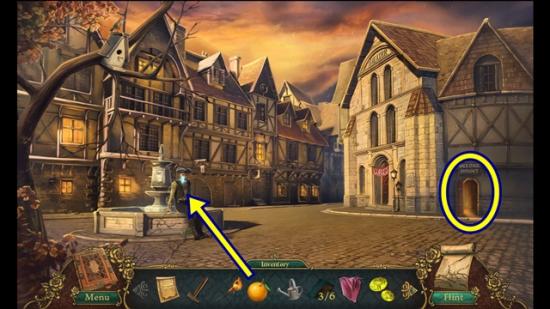
- Talk to the pirate.
- Give him the ORANGE and he gives you the MEAT STICK.
- Go into the theatre backstage.
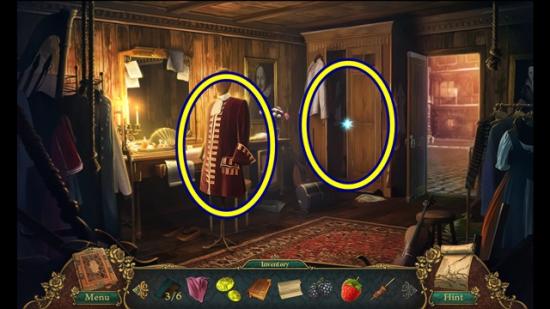
- Open the wardrobe and take the CLOAK.
- Put the CLOAK on the mannequin.
- Leave and go downtown, then go left into the tavern.
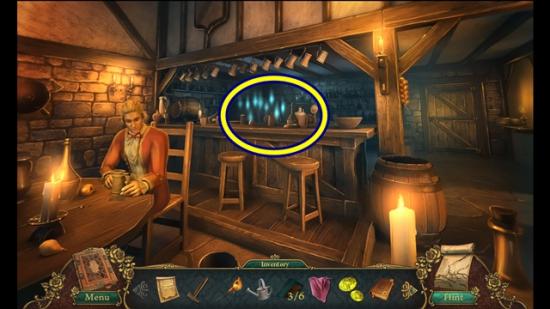
- Talk to Jacques. Click through the dialogue.
- Click on the bar to start a hidden object hunt.
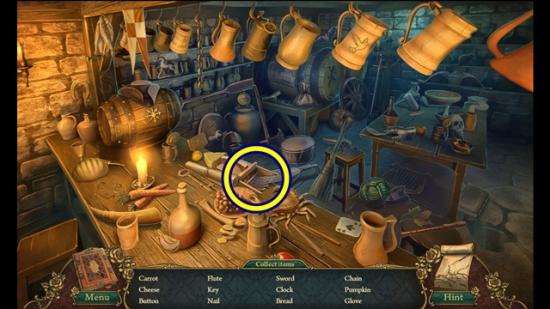
- Find all the objects. A BLUEBERRY SCOOP is added to your inventory.
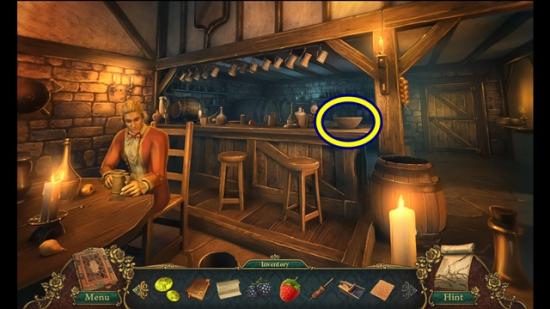
- Click on the bowl on the bar.
- Take the CRACKER.
- Return to the waterfall (you can use your map to jump to that area).
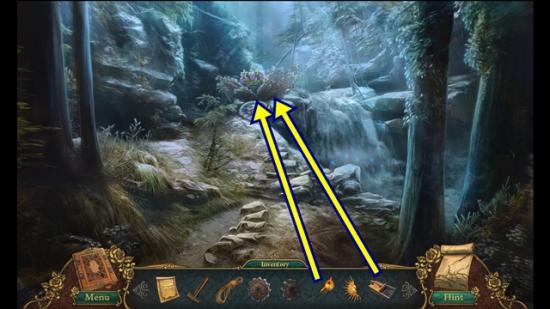
- Click on the bush. SNAKE WARNING.
- Use the LIT TORCH on the snake.
- Use the BLUEBERRY SCOOP to get the BLUEBERRIES.
- Return to downtown (you can use your map to jump to that area) and go right into the curio shop.
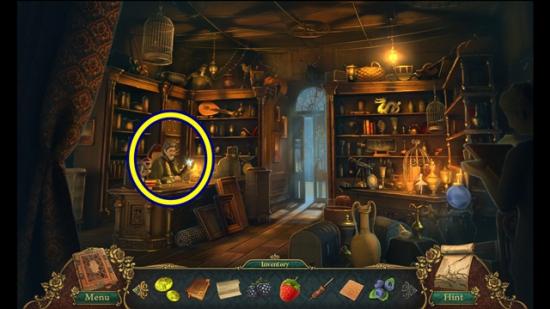
- Talk to the curio shop owner.
- Leave and move forward to the crossroads.
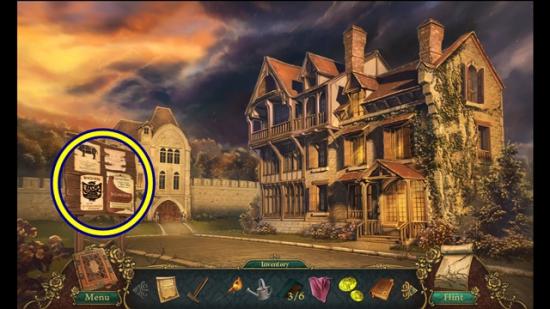
- Click on the posters on the bulletin board.
- Move forward to the town gates.
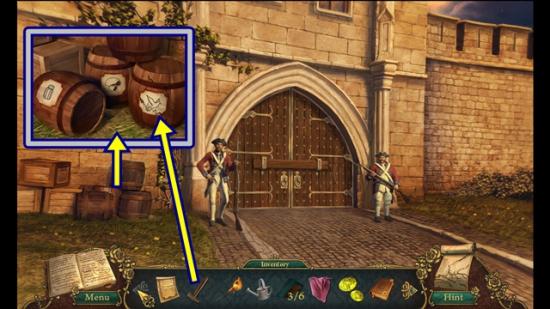
- Talk to the guards.
- Click on the barrels.
- Use the HAMMER on the bird seed labelled barrel.
- Take the BIRD SEED.
- Move down and enter Raphael’s foyer.
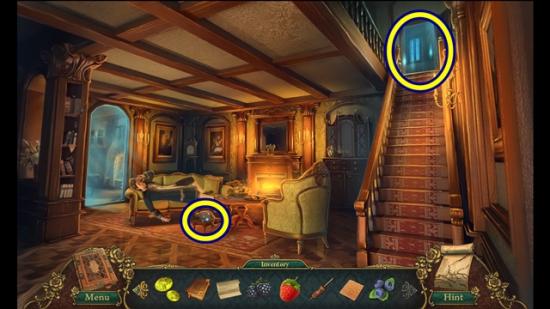
- Talk to Raphael.
- Take the PULLEY.
- Go up the stairs to Bella’s room to start a hidden object hunt.
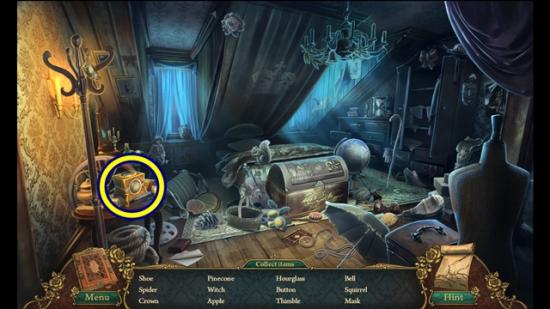
- Find all the objects. Look inside the gold box on the table to get Bella’s diary page. Look inside the box and take the diary page. A ROSE is added to your inventory. The diagram on the diary page is added as a clue to your journal.
- Go into the kitchen.
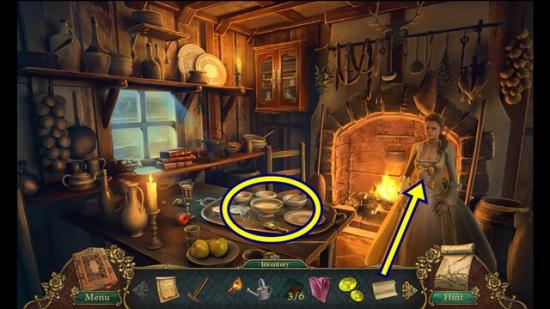
- Talk to Caprice.
- Give her JACQUES’ LOVE LETTERS.
- Click through the dialogue.
- Click on the tray on the table.
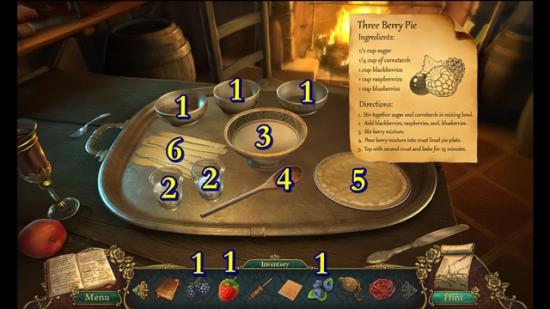
- Put the BLUEBERRIES, BLACKBERRIES and RASPBERRY in the bowls (1).
- Click and drag the cornstarch (2) and sugar (2) to the bowl (3).
- Click and drag the spoon (4) to the bowl to mix the ingredients.
- Click and drag the berries (1) to the bowl (3).
- Click and drag the spoon (4) to the bowl to mix the ingredients.
- Put the berry mixture (3) into the pie filling (5).
- Add the extra crust (6) to the pie filling (5).
- Take the THREE-BERRY PIE.
- Click through the dialogue.
- Return to the tavern (you can use your map to jump to that area).
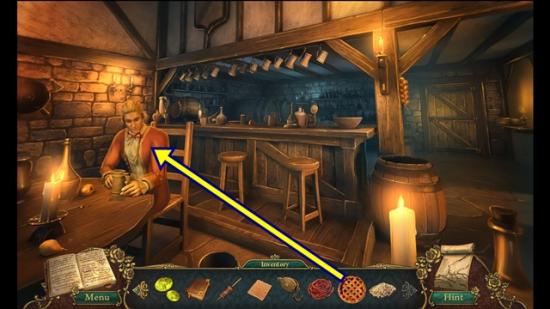
- Give Jacques the THREE-BERRY PIE.
- Talk to Jacques.
- Return to the town square.
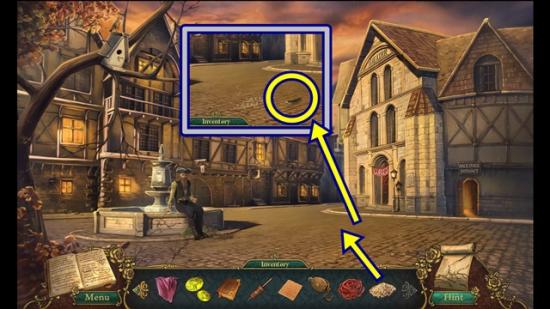
- Put the BIRD SEED on the ground.
- Leave the scene (doesn’t matter where), then immediately return.
- Take the BLACK BIRD FEATHER.
- Return to the front porch (you can use your map to jump to that area).
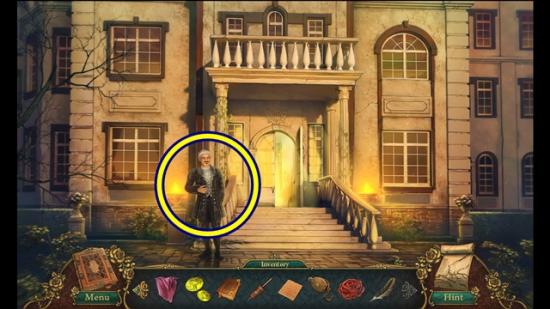
- Talk to Baron Fouquet.
- Return to the kitchen (you can use your map to jump to that area).
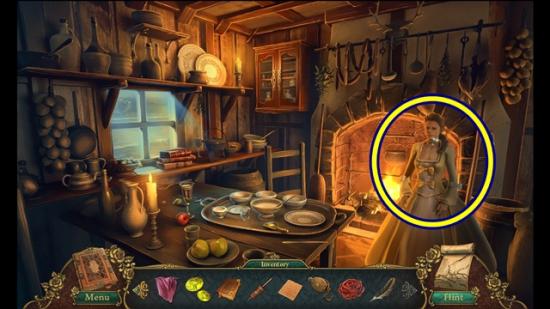
- Talk to Caprice.
- Return to the tavern (you can use your map to jump to that area).
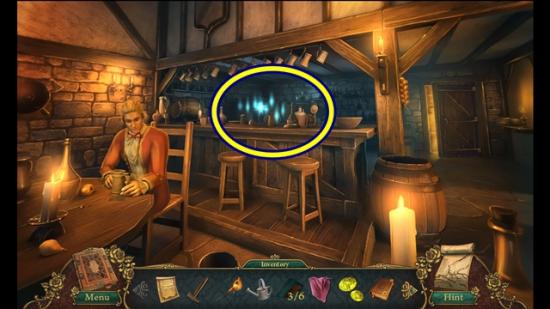
- Click on the bar to start a hidden object hunt.
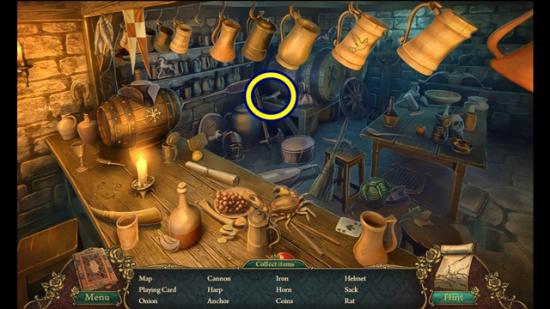
- Find all the objects. A BROKEN BOTTLE is added to your inventory.
- Leave the tavern to downtown.
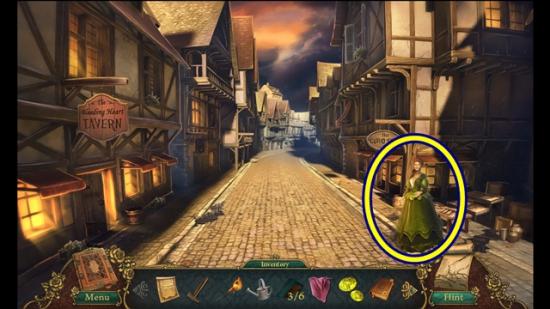
- Talk to Anne Pelois.
- Return to the town gates.
- Talk to the child.
- Read the note.
- Return to the staircase landing (you can use your map to jump to that area).
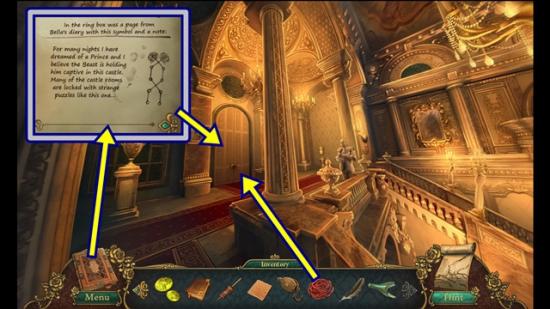
- Click on the door.
- Add the ROSE.
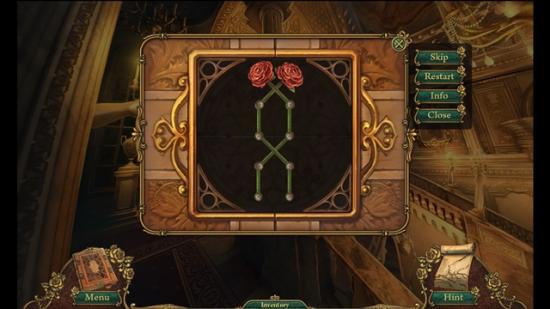
- A mini-puzzle starts. Adjust the roses to match the symbol you saw on Bella’s diary page (it’s in your journal). Click on a joint to move the stem above it. Click on the joints to get used to how they affect each other.
- Solution:
- Enter the upper hall.
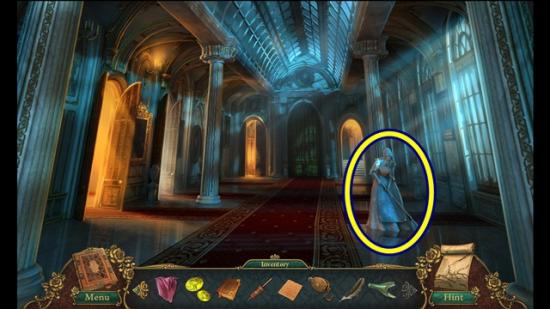
- Click on the maid statue to note she needs sapphires.
- Go left into the music room.
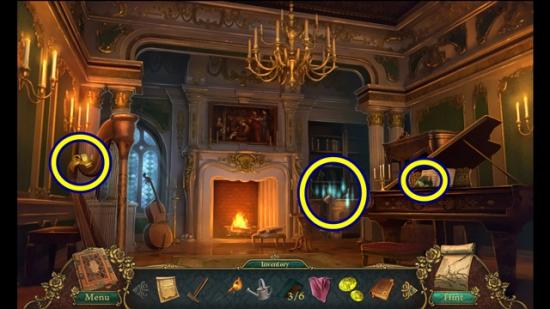
- Take the PORTRAIT FRAGMENT (4/6) and the SILK RIBBON.
- Click on the shelves to start a hidden object hunt.
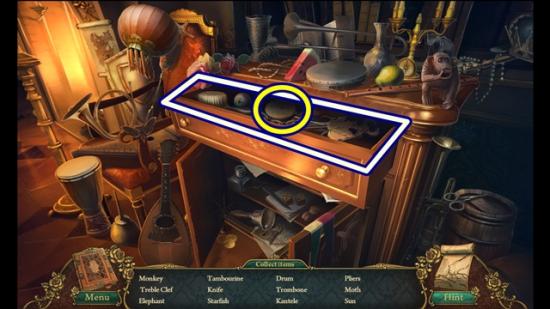
- Find all the objects. Open the drawer to find more objects. A WHEEL is added to your inventory.
- Return to the upper hall and enter the library.
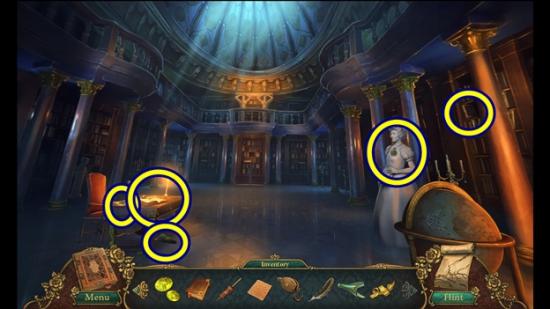
- Click on the Prince’s guardian statue to note it needs emeralds.
- Click on the desk and read the entry. Click anywhere outside the window to close it.
- Take the PORTRAIT FRAGMENT (5/6) and the SMALL PORTRAIT.
- Click on the upper right book shelf (above the Prince’s guardian statue’s left shoulder).
- Take the FULL MOON SYMBOL.
- Leave the room and enter the guardian’s room.
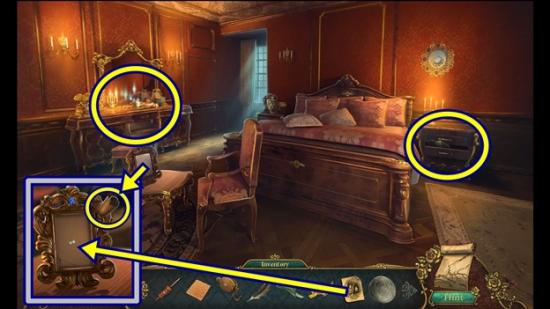
- Click on the night table.
- Take the PORTRAIT FRAGMENT (6/6).
- Click on the frame on the table.
- Take the scroll. Read the note, then click on it to add it to your journal.
- Put the SMALL PORTRAIT in the frame.
- Take the SAPPHIRE (1/3) that falls.
- Click on the dressing table to start a hidden object hunt.
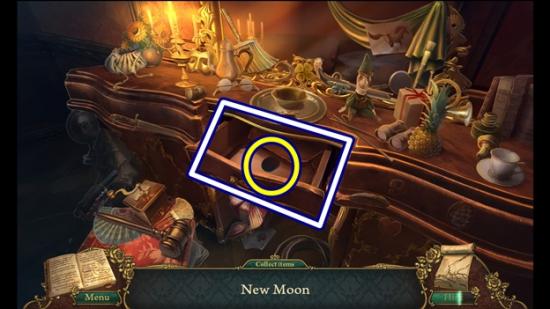
- Find all the objects. Open the drawer, then lift the panel at the bottom of the drawer. Take the NEW MOON.
- Move down to the upper hall.
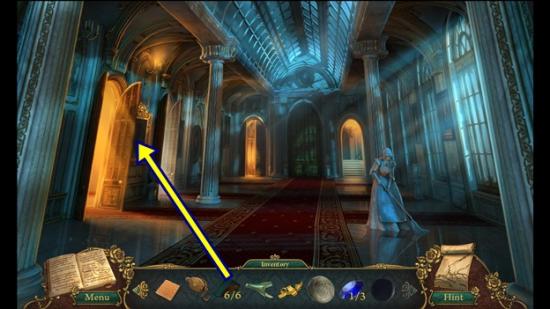
- Click on the frame on the left wall.
- Add the six PORTRAIT FRAGMENTS.
- A mini-puzzle starts. Rearrange the fragments to restore the portrait. Click on a fragment and, if necessary, click the rotating arrow to rotate the piece. Click and drag a fragment to place it. It locks when it’s in the correct position.
- Solution:
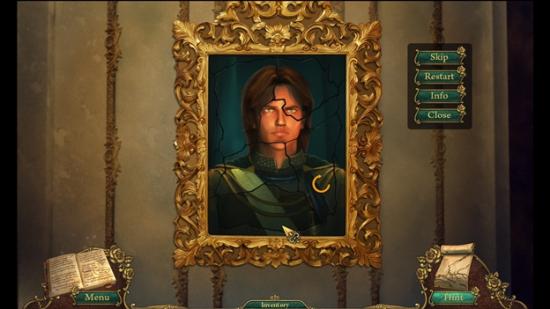
- The KEY PUZZLE PIECE is added to your inventory.
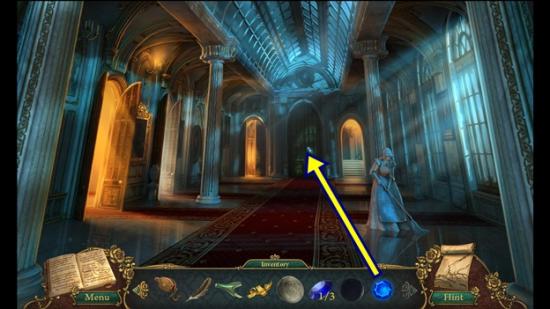
- Click on the doorway at the end of the hall.
- Add the KEY PUZZLE PIECE.
- A mini-puzzle starts. Swap the red and blue gems in seven moves. Click and drag the gems to move them along the rails.
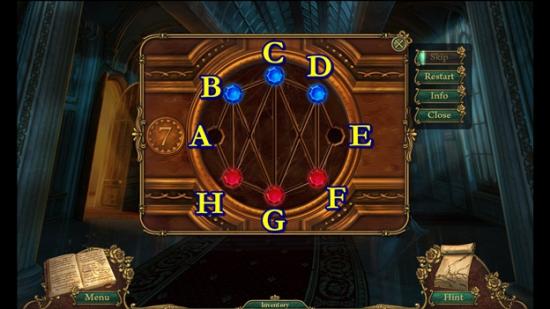
- Using the screenshot above as a guide to the labelling of each slot, from the starting position, move the gems in the following order: H to A, C to H, F to C, D to F, G to D, B to G and A to B.
- Go through the door into the ballroom.
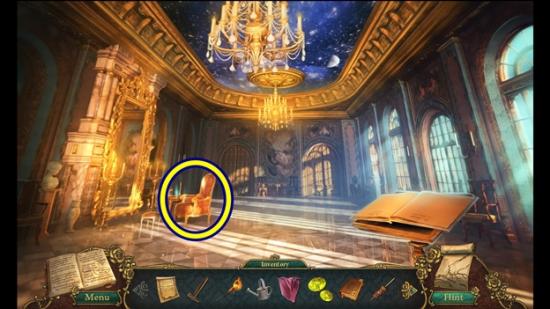
- Click on the chair to start a hidden object hunt.
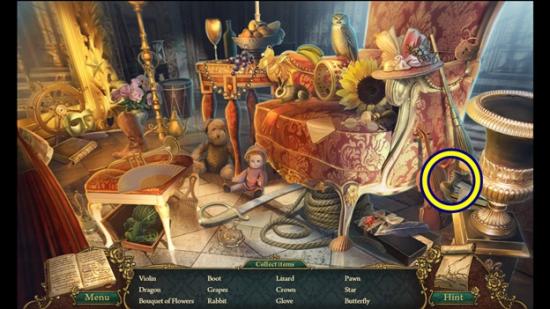
- Find all the objects. A CRANK is added to your inventory.
- Move towards the ballroom mirror.
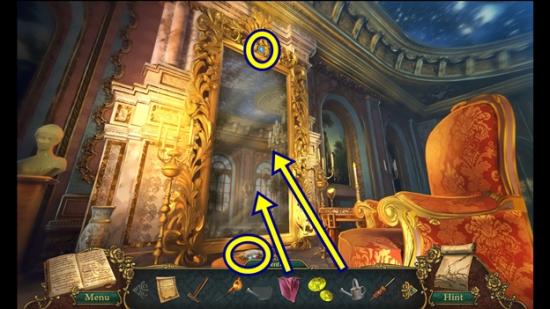
- Take the RABBIT FOOT.
- Use the FULL WATERING CAN on the mirror, then use the CLOTH.
- Click on the mirror.
- Watch the cutscene.
- Take the SAPPHIRE (2/3) from the top of the mirror.
- Return to the dining room (you can use your map to jump to that area).
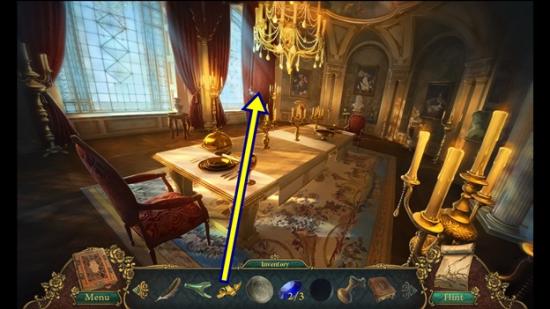
- Use the SILK RIBBON to tie back the curtain.
- Take the SAPPHIRE (3/3).
- Return to the upper hall.
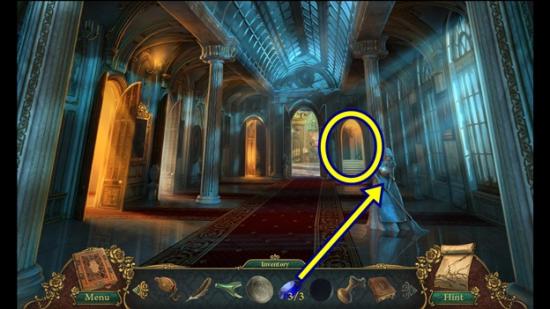
- Click on the maid statue.
- Add the three SAPPHIRES.
- Talk to the maid.
- A MOP is added to your inventory.
- Move forward to the winding staircase.
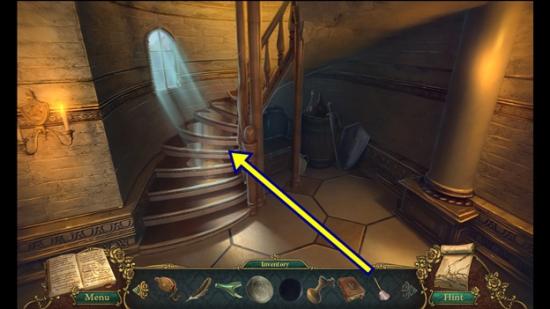
- Use the MOP on the winding stairs.
- Climb the stairs to the princess tower.
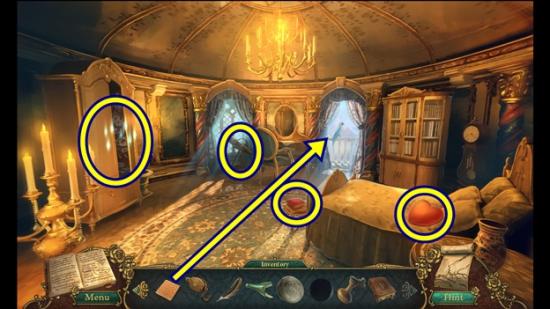
- Take the BOOK OF LOVE.
- Move the heart pillow and take the EMERALD (1/3).
- Click on the balcony.
- Give the CRACKER to the parrot.
- Take the INSTRUMENT KEYBOARD.
- Click on the telescope.
- Take note of the skulls.
- Click on the armoire to start a hidden object hunt.
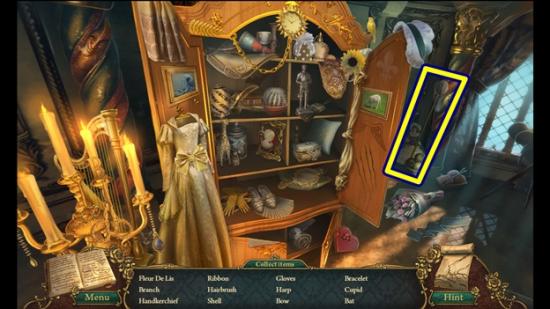
- Find all the objects. A BUTTERFLY NET is added to your inventory.
- Return to the music room (you can use your map to jump to that area).
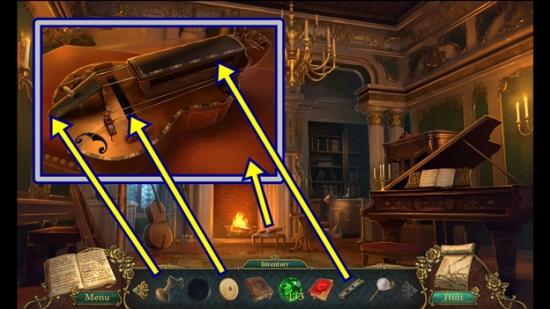
- Click on the ottoman in front of the fireplace.
- Add the WHEEL, the INSTRUMENT KEYBOARD and CRANK.
- A mini-puzzle starts. This solution comes from the clue from the parrot in your journal. The parrot repeated “face the music.” Turn the crank, then press the keys to spell F-A-C-E.
- When you are finished, take the EMERALD (2/3).
- Return to the library (you can use your map to jump to that area).
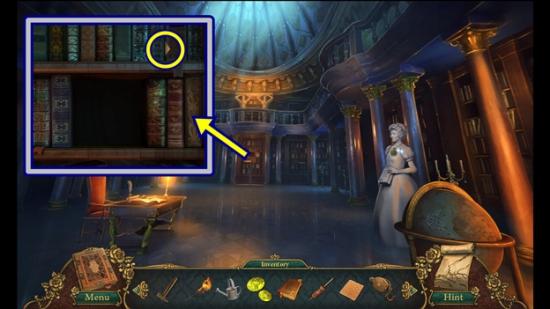
- Click on the bookshelf at the back of the room.
- Take the CLAIM CHECK.
- Return to the curio shop (you can use your map to jump to that area).
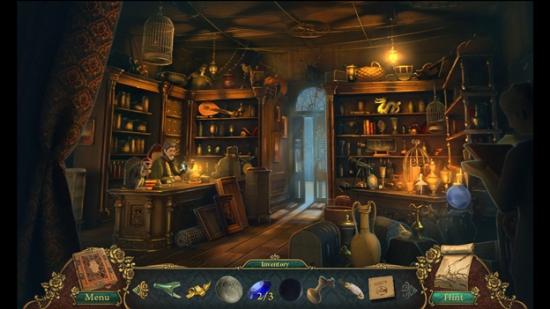
- Give the claim check to the curio shop owner.
- He gives you the BOOK OF THE POOR.
- Give him the RABBIT FOOT.
- Click on the table of stuff to start a hidden object hunt.
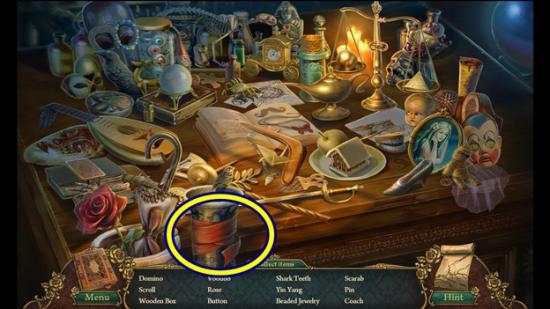
- Find all the objects. A RED SASH is added to your inventory.
- Return to the fountain (you can use your map to jump to that area).
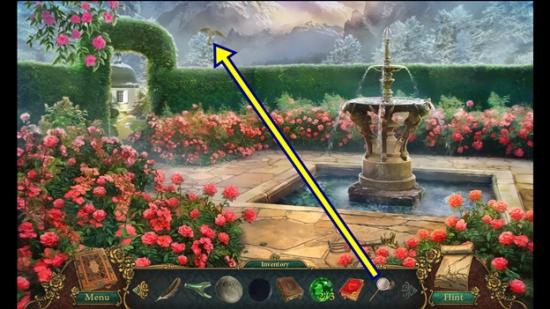
- Use the BUTTERFLY NET to get the FLYING KEY.
- Move through the archway to the tool shed area.
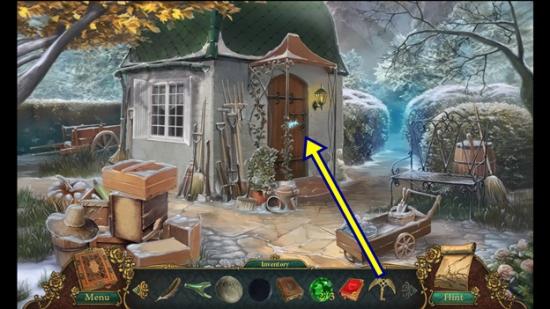
- Click on the door.
- Use the FLYING KEY to unlock the door.
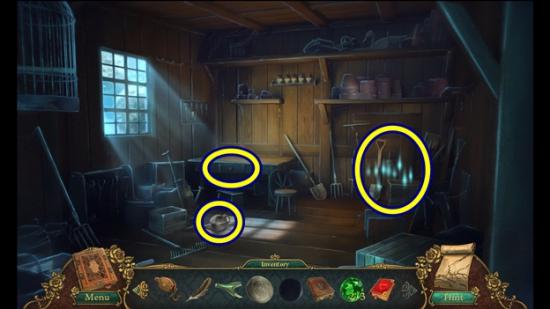
- Take the OIL CAN.
- Open the table drawer and take the EMERALD (3/3).
- Click on the tools at the right to start a hidden object hunt.
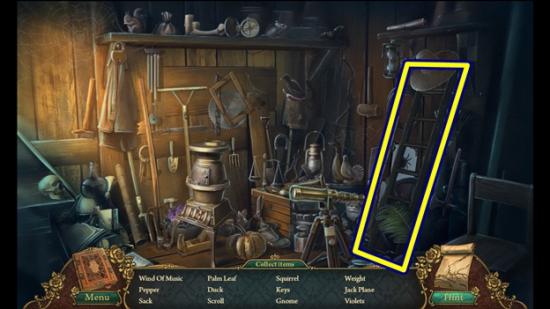
- Find all the objects. Wind of music are wind chimes. A LADDER is added to your inventory.
- Return to the ballroom.
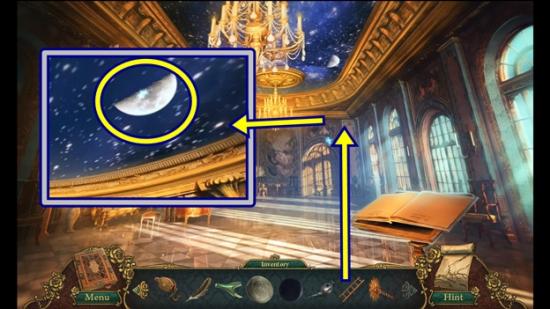
- Put the LADDER against the back wall (right side).
- Climb the ladder and take the HALF MOON.
- Return to the library (you can use your map to jump to that area).
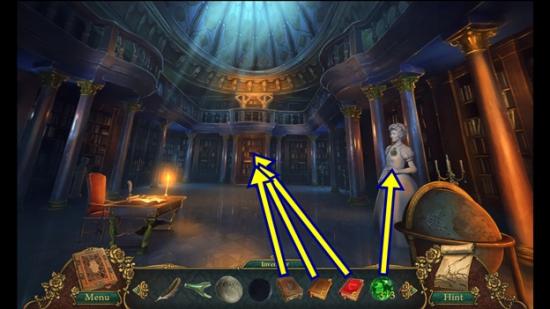
- Click on the guardian statue.
- Add the three EMERALDS.
- Talk to the guardian.
- She gives you the CHRONICLE OF WAR.
- Click on the bookshelf at the back of the room.
- Add the four books in your inventory: CHRONICLE OF WAR, BOOK OF RICHES, BOOK OF THE POOR and BOOK OF LOVE.
- A mini-puzzle starts. Rearrange the books according to the poem you found in the guardian’s room (it’s in your journal). From left to right, the books are: rich, poor, love, war.
- Solution:
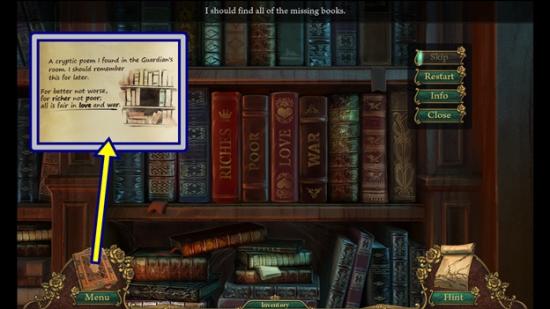
- Go through the door to the secret hallway.
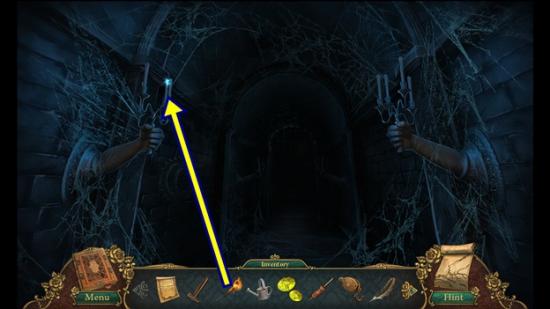
- Use the LIT TORCH to light the candelabra on the left.
- Move forward to the altar room.
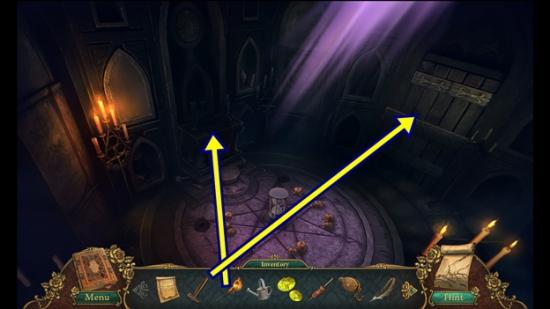
- Use the LIT TORCH to light the candles on the sacrifice area.
- Use the HAMMER on the beams.
- Click on the sacrifice area to start a hidden object hunt.
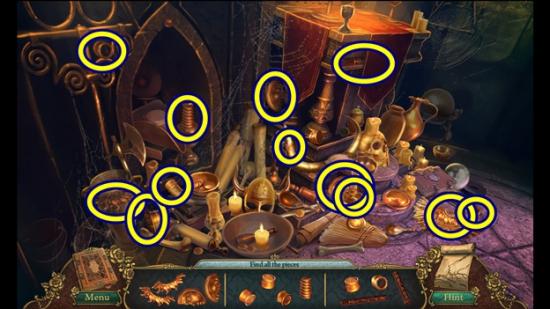
- Find all the object fragments. A SUN STAFF is added to your inventory.
- Go through the door to the guardian’s room.
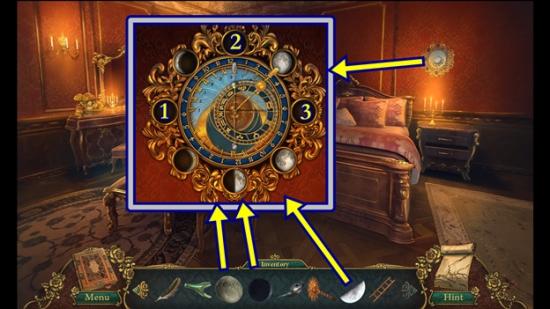
- Click on the wall clock.
- Add the NEW MOON (1), HALF MOON (2) and the FULL MOON SYMBOL (3).
- A mini-puzzle starts. Click on the moons in a particular order.
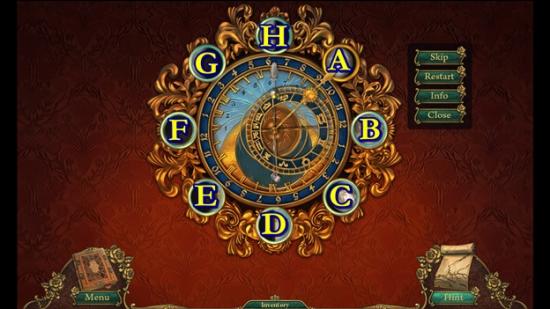
- If necessary, press Restart to make the clock spin. Using the screenshot above as a guide to the labelling of each moon, while the clock is spinning, press moon B.
- When the clock stops spinning, press moon F.
- When the clock stops spinning, press moon H.
- When the clock stops spinning, press moon D.
- When the clock stops spinning, press moon G.
- When the clock stops spinning, press moon C.
- When the clock stops spinning, press moon E.
- When the clock stops spinning, press moon A.
- If the clock doesn’t start spinning, press Restart and continue the process as outlined above.
- When you are finished, take the MOON SCEPTER.
- Return to the altar room (you can use your map to jump to that area).
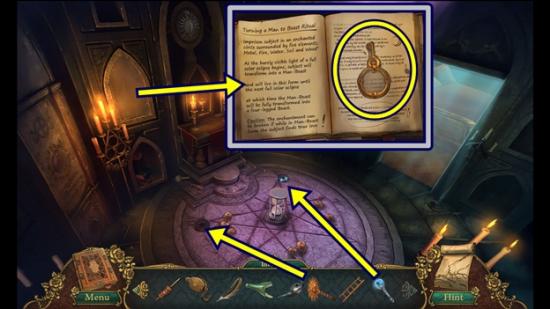
- Put the MOON SCEPTER and the SUN STAFF in the slots on the floor.
- When the panel opens, click on the book.
- Read the entry and take the CHAMBER KEY.
- Return to the throne room (you can use your map to jump to that area).
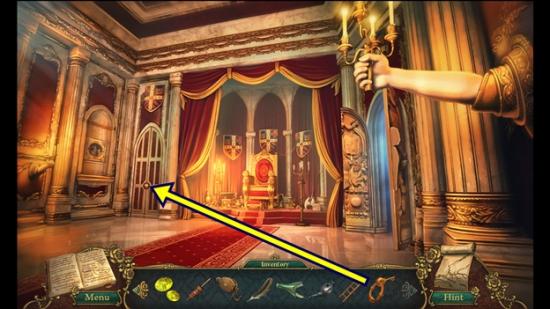
- Click on the door to the left of the throne.
- Unlock the door using the CHAMBER KEY.
- Enter the beast’s chamber.
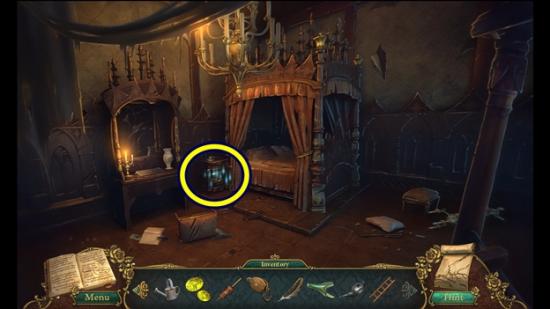
- Click on the bedside table to start a hidden object hunt.
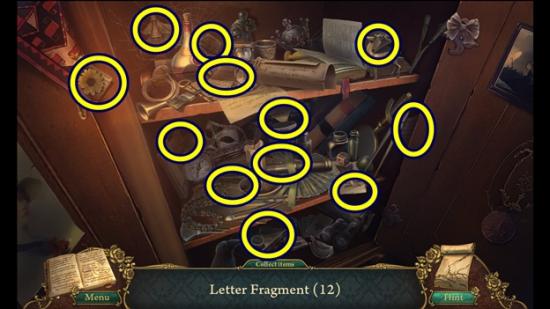
- Find the 12 letter fragments. LETTER FRAGMENTS are added to your inventory.
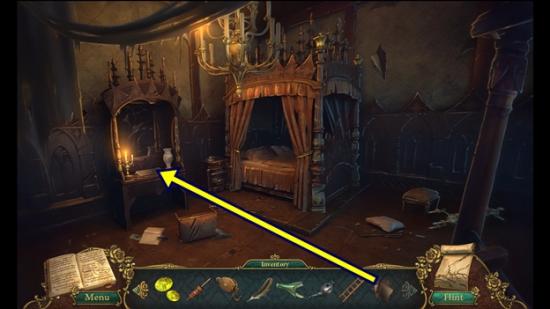
- Click on the desk.
- Add the LETTER FRAGMENTS.
- A mini-puzzle starts. Put the letter back together. Click on a fragment and, if necessary, click the rotating arrow to rotate the piece. Click and drag a fragment to place it. It locks when it’s in the correct position.
- Solution:
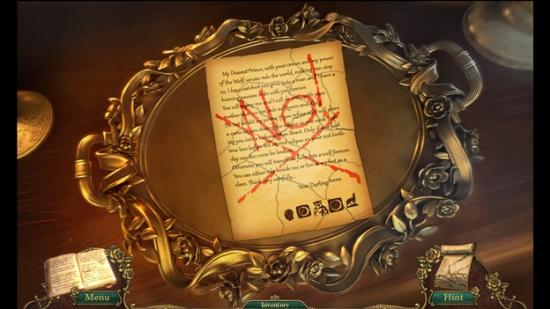
- You can skip the voice over by clicking anywhere on the letter.
- Return to the tavern (you can use your map to jump to that area).
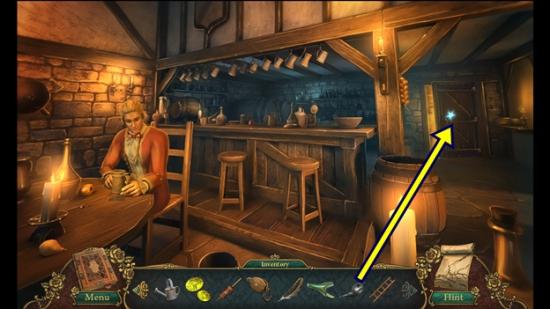
- Click on the back door.
- Use the OIL CAN on the door.
- Enter the backroom.
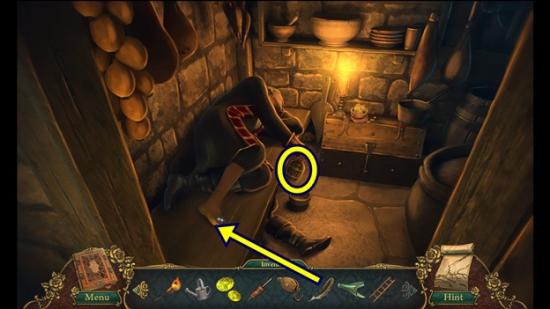
- Use the BLACK BIRD FEATHER on Malger’s foot.
- Take the RUM that drops.
- Click through the dialogue.
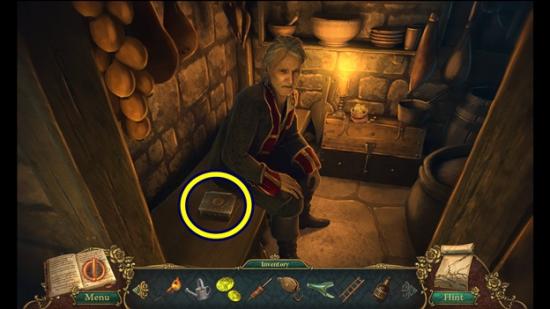
- Click on the locked box.
- A mini-puzzle starts. Enter the symbols that you saw on Anne Pelois’ love letter (it’s in your journal).
- Solution:
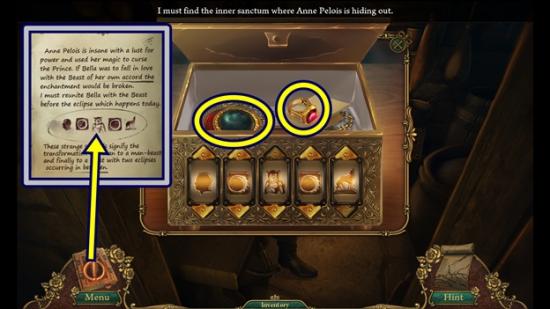
- Take the ENCHANTED RING and the ECLIPSE.
- Read the note.
- Return to the town gates (you can use your map to jump to that area).
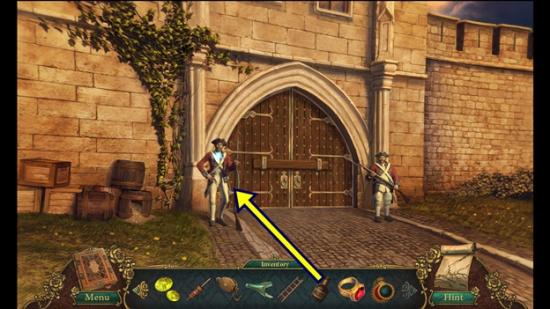
- Give the RUM to the guards.
- Go through the gates to the bridge.
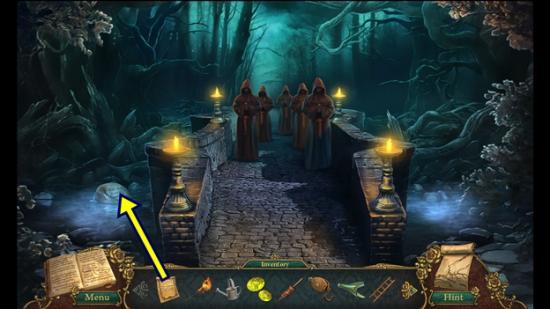
- Click through the dialogue.
- Click on the rock.
- Add the ANCIENT SCROLL.
- Close the journal.
- Return to the caravan (you can use your map to jump to that area).
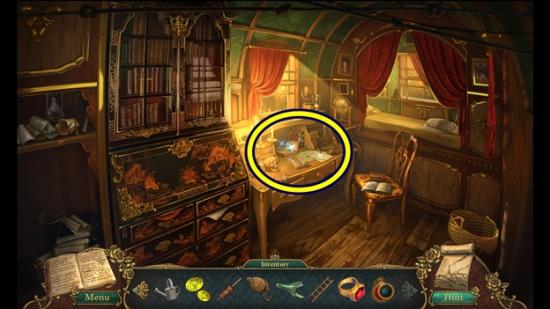
- Click on the desk to start a hidden object hunt.
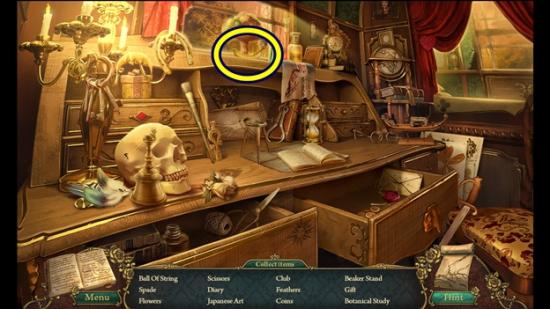
- Find all the objects. A BANANA is added to your inventory.
- Return to the curio shop (you can use your map to jump to that area).
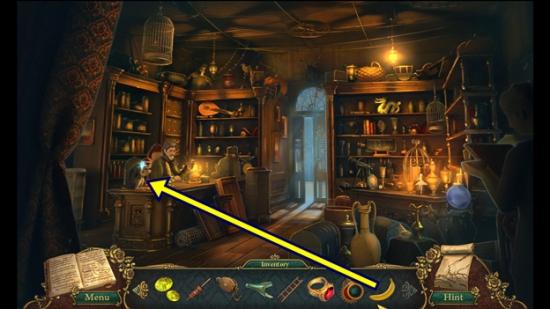
- Click on the monkey.
- Give the BANANA to the monkey.
- He gives you an EYE PATCH.
- Return to the theatre backstage.
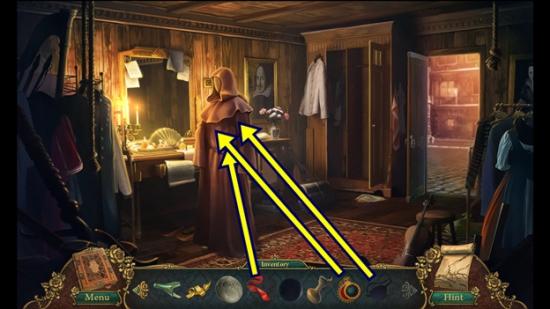
- If you haven’t already, click on the wardrobe and take the CLOAK, then put the CLOAK on the mannequin.
- Put the RED SASH, EYE PATCH and ECLIPSE on the mannequin.
- Take the DISGUISE.
Chapter Four
- Return to the bridge (you can use your map to jump to that area).
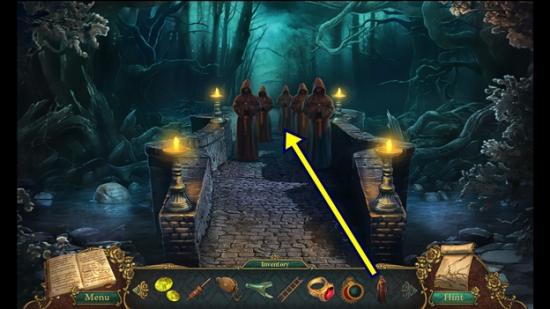
- Use the DISGUISE on the figures.
- Click through the dialogue.
- Move forward to the scary path.
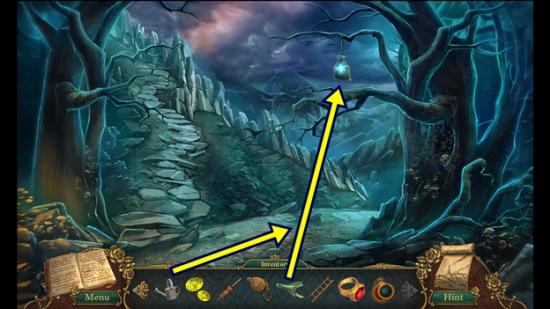
- Cut the sack with the BROKEN BOTTLE causing flour to spill on the ground.
- Click on the spilled flour.
- Add the FULL WATERING CAN to the flour, then take the CRACKER.
- Move right to the forest clearing.
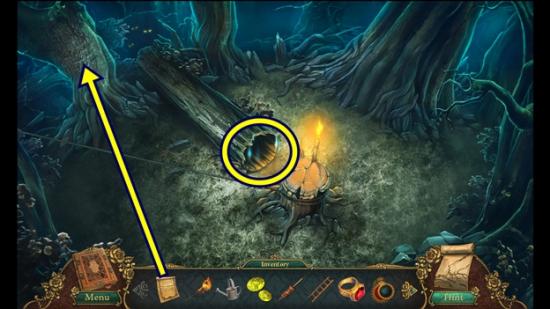
- Click on the tree on the left.
- Add the ANCIENT SCROLL.
- Close the journal.
- Click on the fallen tree to start a hidden object hunt.
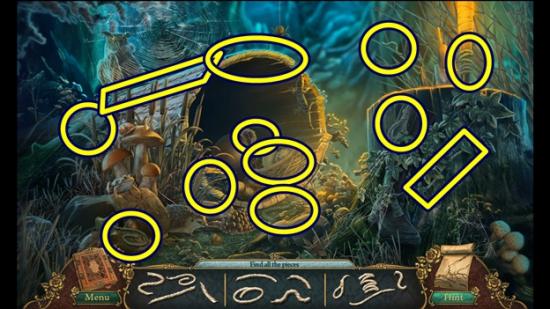
- Find all the object fragments. A ROPE is added to your inventory.
- Return to the scary path and walk forward to the sound garden.
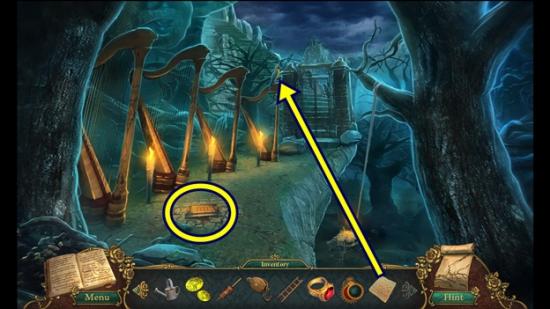
- Give the CRACKER to the parrot. Take note of the song the parrot sings.
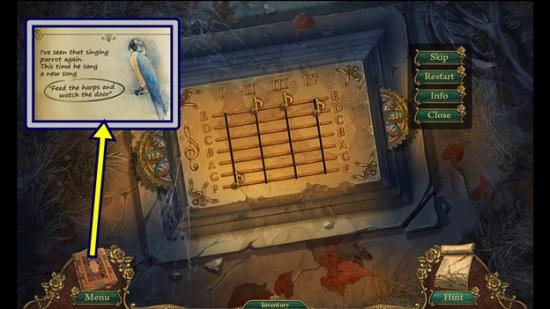
- Click on the panel on the ground.
- A mini-puzzle starts. This solution comes from the clue from the parrot in your journal. The parrot repeated “feed the harps.” Slide the dials to spell F-E-E-D.
- Solution:

- Put the PULLEY on the tree limb, then add the ROPE.
- Click on the pulley and enter the cave entrance.
Chapter Five
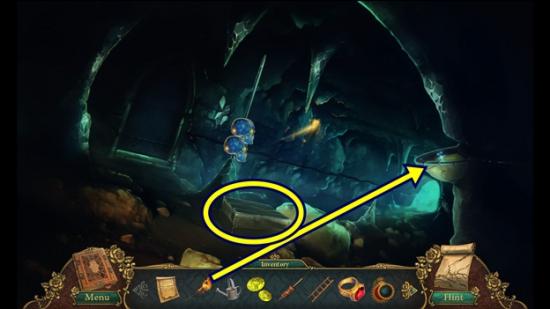
- Use the LIT TORCH on the kerosene fountain
- Click on the crate.
- Take the BOAT HOOK.
- Move right to the underground corridor.
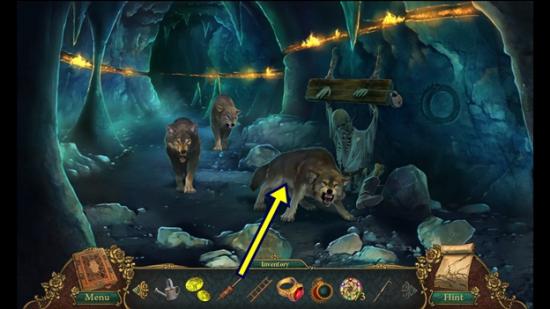
- Give the MEAT STICK to the wolves.
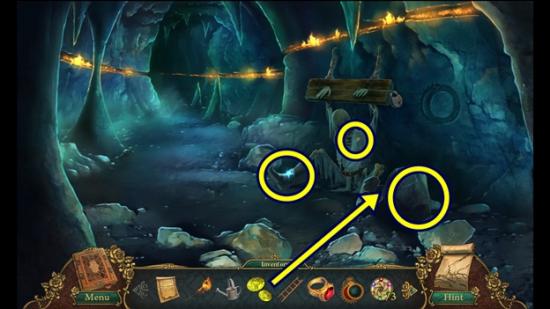
- Remove the skeleton’s boot and take the SKELETON KEY.
- Take the note from the skeleton’s shirt pocket.
- Read the note.
- Move the large rock.
- Add the CANARY DIAMONDS to the skull.
- Take the CRYSTAL SKULL (1/3).
- Move forward to the underground river.
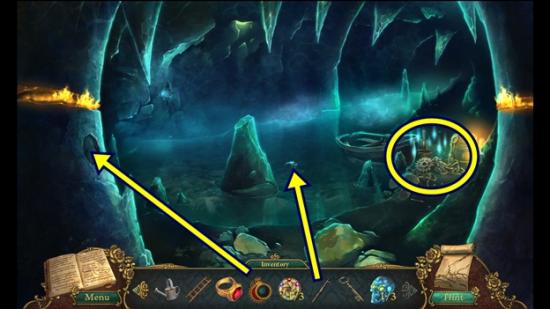
- Put the ECLIPSE in the inset.
- Use the BOAT HOOK on the water to get the JAILER’S KEYS.
- Click on the boat to start a hidden object hunt.
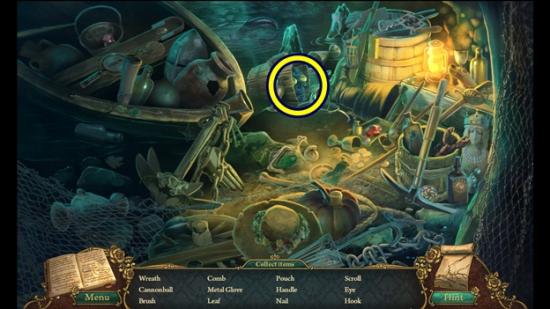
- Find all the objects. A CRYSTAL SKULL (2/3) is added to your inventory.
- Move down to the underground corridor.
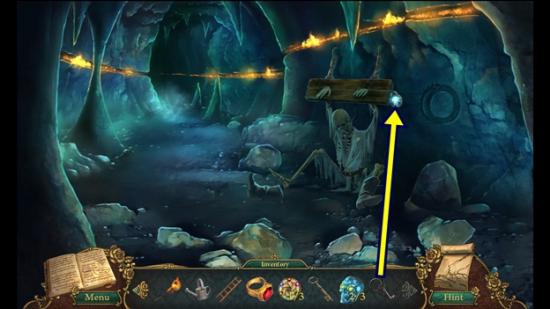
- Use the JAILER’S KEYS on the padlock.
- When the skeleton falls, take the MIRROR SHARD from the slot.
- Move forward to the underground river.
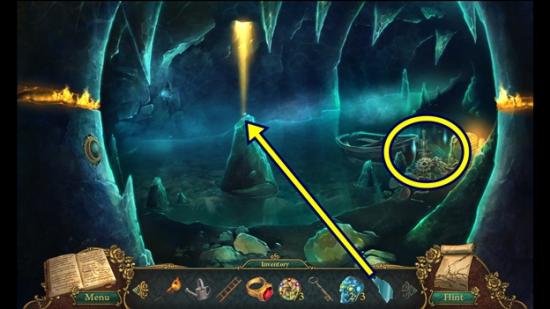
- Put the MIRROR SHARD on the rock formation.
- Click on the boat to start a hidden object hunt.
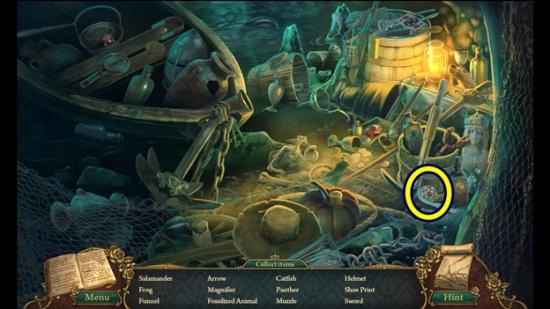
- Find all the objects. A PUZZLE DISK (1/3) is added to your inventory.
- Return to the forest clearing.
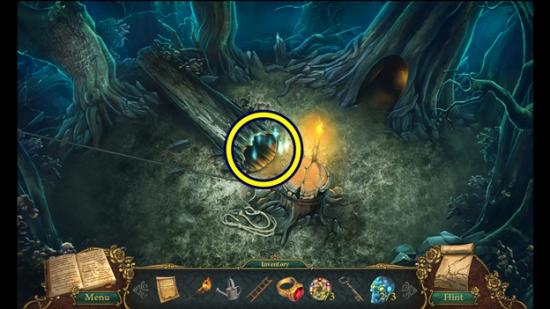
- Click on the fallen tree to start a hidden object hunt.
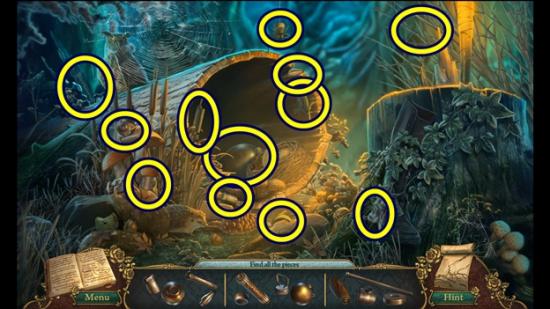
- Find all the object fragments. BUG SPRAY is added to your inventory.
- Move down to the scary path.
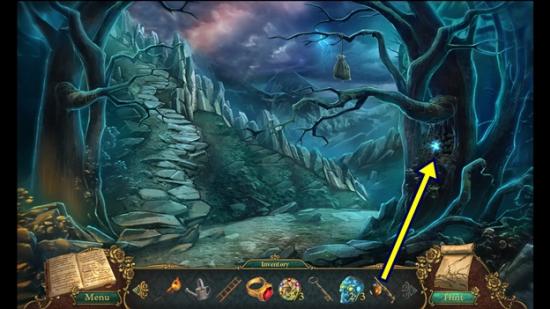
- Use the BUG SPRAY on the tree, then take the PUZZLE DISK (2/3).
- Move down to the bridge.
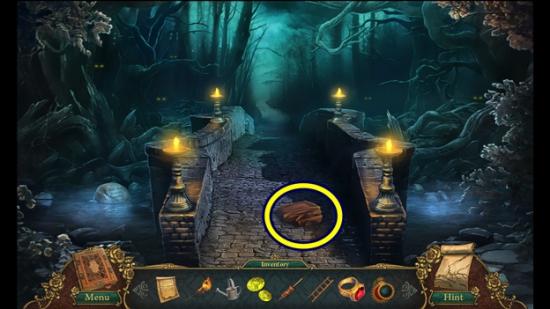
- Move the cloak and take the PUZZLE DISK (3/3).
- Return to the sound garden.
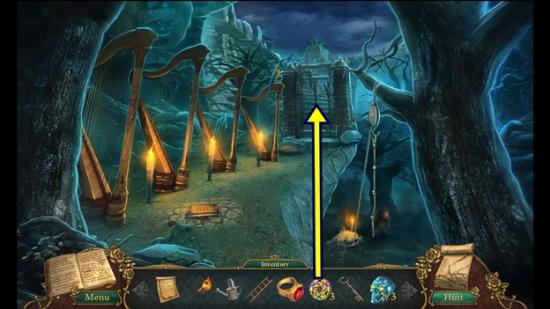
- Click on the gate.
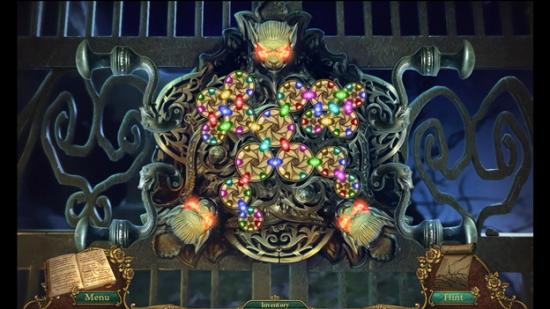
- Add the three PUZZLE DISKS.
- A mini-puzzle starts. Arrange the disks so each disk is touching a matching colour. Click on a disk to rotate it. Click and drag a disk to swap it with another of the same size.
- The screenshot below shows one possible solution:
- Enter skull mountain.
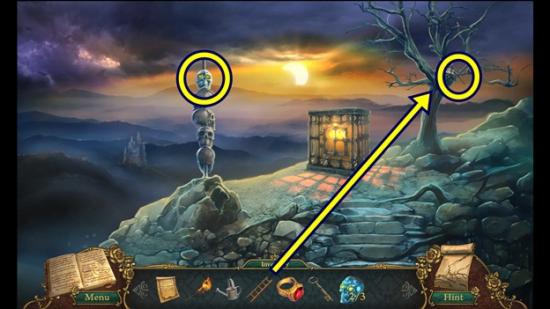
- Take the CRYSTAL SKULL (3/3).
- Put the LADDER against the tree.
- Climb the ladder and take the EAGLE’S FEATHER.
- Return to the forest clearing (you can use your map to jump to that area) and enter the cave.
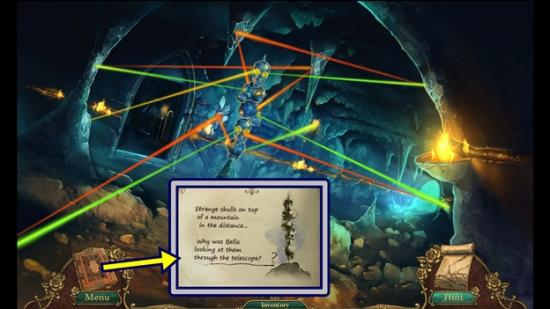
- Add the three CRYTAL SKULLS to the pole.
- Adjust the skulls to match their positions in your journal. Click on a skull to move it.
- Enter the inner sanctum.
- Watch the cutscene.
- Return to Raphael’s foyer.
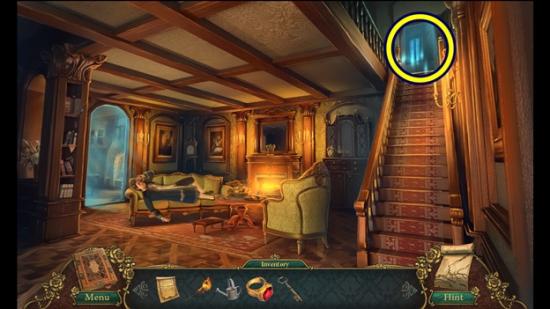
- Click on Bella’s room to start a hidden object hunt.
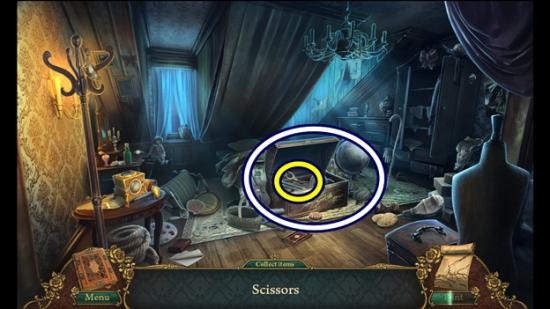
- Find all the objects. Open the chest and take the SCISSORS.
- Return to the town square (you can use your map to jump to that area).
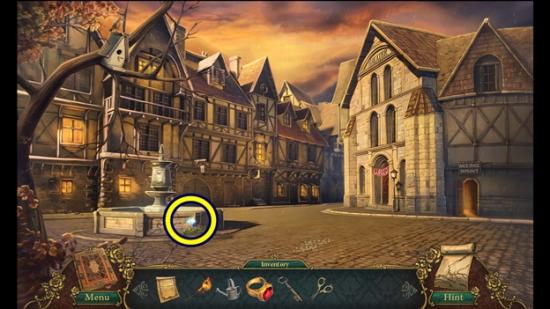
- Take the WOLFSBANE.
- Enter the theatre backstage.
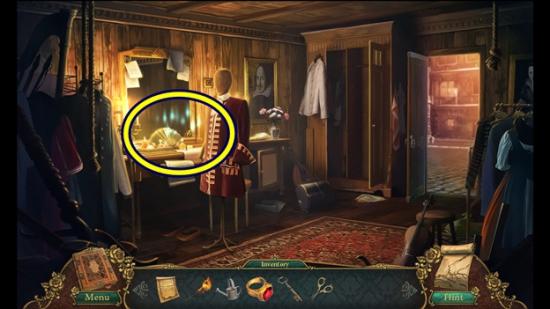
- Click on the dressing table to start a hidden object hunt.
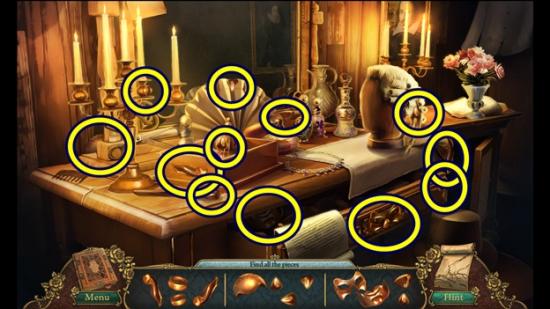
- Find all the object fragments. An EVIL MASK is added to your inventory.
- Return to the curio shop.
- Give the EVIL MASK to the shop owner.
- Click on the shelf and take the ENCHANTED SWORD.
- Return to the hunter’s camp (you can use your map to jump to that area).
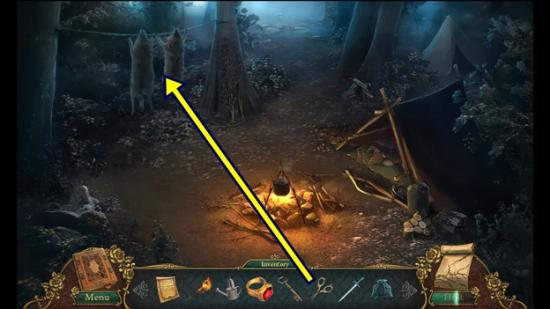
- Use the SCISSORS on the wolf pelts to get the ROPE OF WOLF FUR.
- Return to the treasure room (you can use your map to jump to that area).
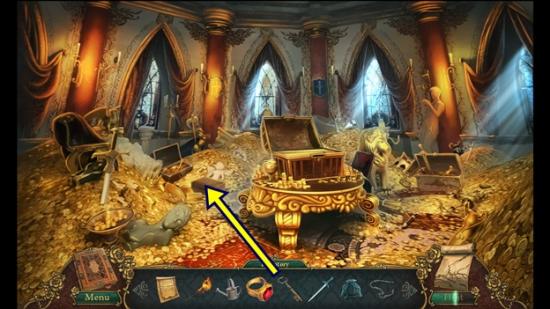
- Use the SKELETON KEY on the locked box.
- Take the SILVER INGOT to complete the talisman.
- Return to the forest clearing, enter the cave and go into the inner sanctum.
- You must have the completed talisman when you enter the inner sanctum.
- Watch the cutscene.
Chapter Six
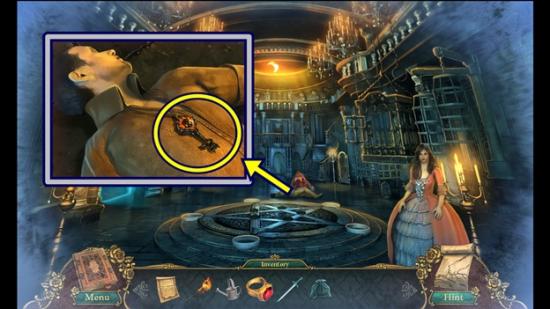
- Click on Kain’s body.
- Take the KEY NECKLACE.
- Try to exit through the door on the left.
- Watch the cutscene.
- Return to the scary path (you can use your map to jump to that area).
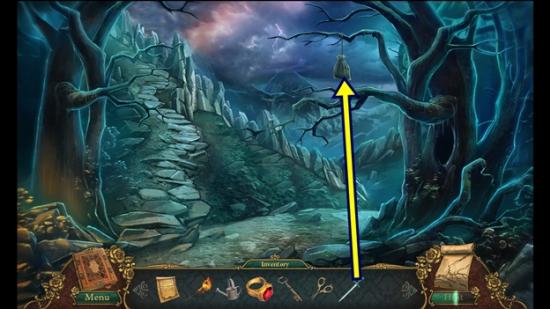
- Use the ENCHANTED SWORD on the sack, then take the SACK.
- Return to skull mountain (you can use your map to jump to that area).
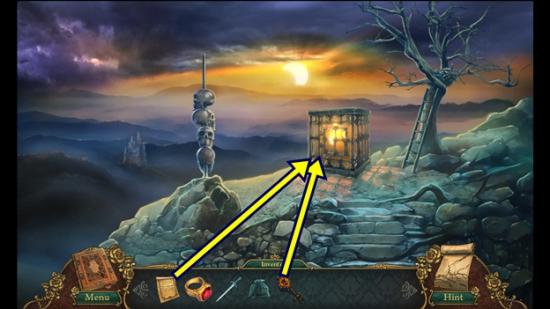
- Click on the fire cage.
- Unlock the cage with the KEY NECKLACE.
- Add the ANCIENT SCROLL. Close your journal.
- Return to the hunter’s camp.
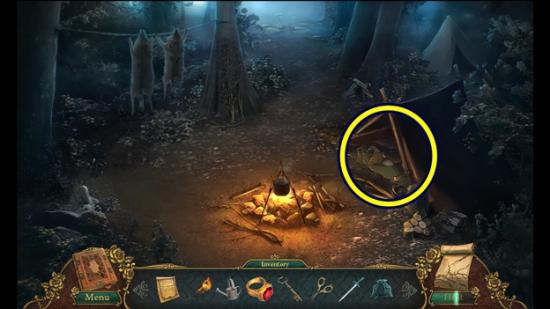
- Click on the tent to start a hidden object hunt.
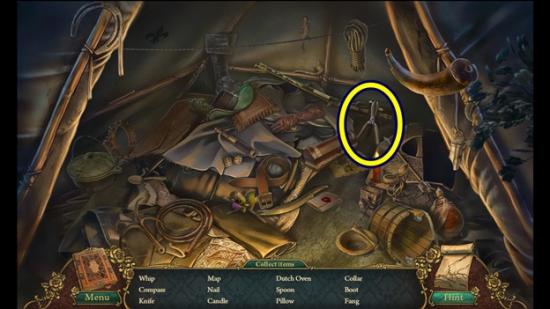
- Find all the objects. HEDGE CLIPPERS are added to your inventory.
- Return to the castle approach (you can use your map to jump to that area).
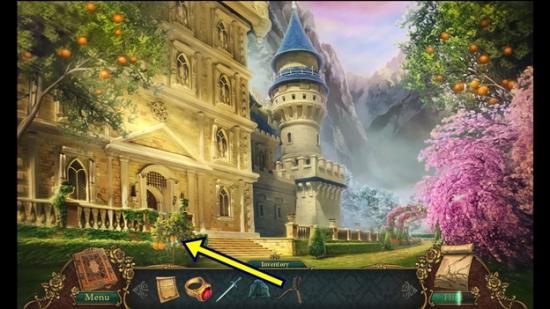
- Use the HEDGE CLIPPERS to take the ORANGE TREE SAPLING.
- Return to the tool shed (you can use your map to jump to that area).
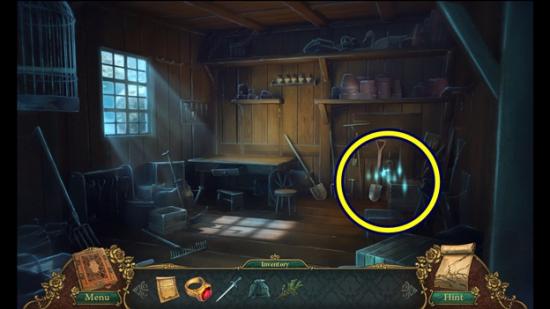
- Click on the tools on the right to start a hidden object hunt.
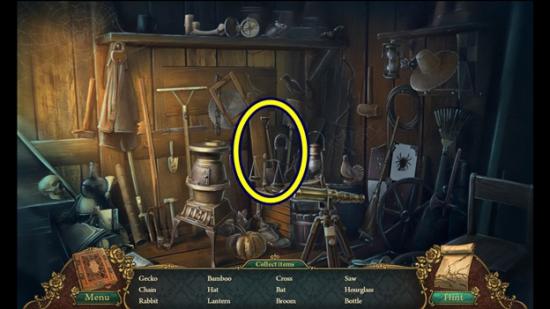
- Find all the objects. A SHOVEL is added to your inventory.
- Return to the castle lane.
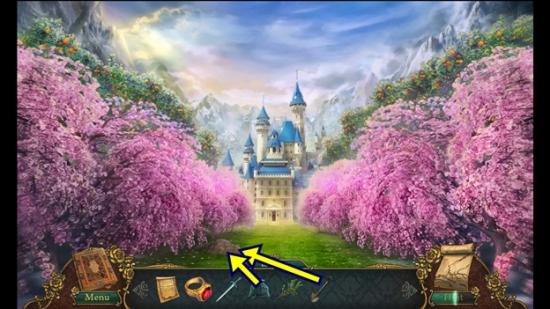
- Use the SHOVEL on the patch of dirt, then add the SACK to get the SACK OF SOIL.
- Return to the forest clearing, enter the cave and go into the inner sanctum.
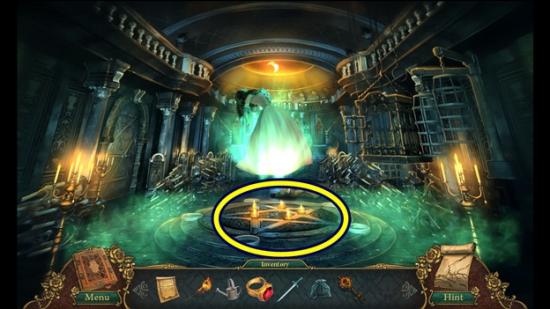
- Click on the ritual area under Bella.
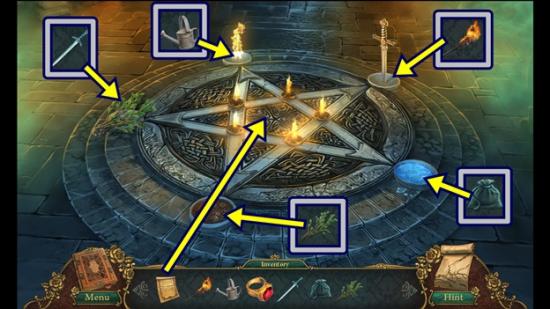
- Use the LIT TORCH on the sword.
- Use the FULL WATERING CAN on the fire.
- Put the SACK OF SOIL on the water.
- Put the ORANGE TREE SAPLING on the dirt.
- Use the ENCHANTED SWORD on the branch.
- Put the ANCIENT SCROLL in the centre of the ritual area.
- Watch the cutscene.
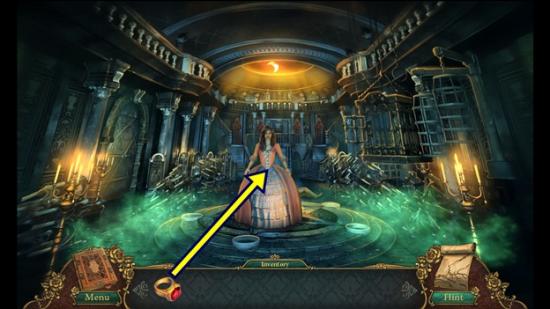
- Give the ENCHANTED RING to Bella.
- Watch the cutscene.
Congratulations! You have completed Gamezebo’s walkthrough for Fairly Twisted Tales: The Price of a Rose. Be sure to check back often for game updates, staff and user reviews, user tips, forums comments and much more here at Gamezebo!
More articles...
Monopoly GO! Free Rolls – Links For Free Dice
By Glen Fox
Wondering how to get Monopoly GO! free rolls? Well, you’ve come to the right place. In this guide, we provide you with a bunch of tips and tricks to get some free rolls for the hit new mobile game. We’ll …Best Roblox Horror Games to Play Right Now – Updated Weekly
By Adele Wilson
Our Best Roblox Horror Games guide features the scariest and most creative experiences to play right now on the platform!The BEST Roblox Games of The Week – Games You Need To Play!
By Sho Roberts
Our feature shares our pick for the Best Roblox Games of the week! With our feature, we guarantee you'll find something new to play!Type Soul Clan Rarity Guide – All Legendary And Common Clans Listed!
By Nathan Ball
Wondering what your odds of rolling a particular Clan are? Wonder no more, with my handy Type Soul Clan Rarity guide.


