- Wondering how to get Monopoly GO! free rolls? Well, you’ve come to the right place. In this guide, we provide you with a bunch of tips and tricks to get some free rolls for the hit new mobile game. We’ll …
Best Roblox Horror Games to Play Right Now – Updated Weekly
By Adele Wilson
Our Best Roblox Horror Games guide features the scariest and most creative experiences to play right now on the platform!The BEST Roblox Games of The Week – Games You Need To Play!
By Sho Roberts
Our feature shares our pick for the Best Roblox Games of the week! With our feature, we guarantee you'll find something new to play!All Grades in Type Soul – Each Race Explained
By Adele Wilson
Our All Grades in Type Soul guide lists every grade in the game for all races, including how to increase your grade quickly!
F.A.C.E.S. Walkthrough
Welcome to the F.A.C.E.S. Collector’s Edition walkthrough on Gamezebo. F.A.C.E.S. is a hidden object adventure game played on the PC created by Vogat Interactive. This walkthrough includes tips and tricks, helpful hints, and a strategy guide for how to complete F.A.C.E.S. Collector’s Edition.
F.A.C.E.S. – Game Introduction
Welcome to the F.A.C.E.S. Collector’s Edition walkthrough on Gamezebo. F.A.C.E.S. is a hidden object adventure game played on the PC created by Vogat Interactive. This walkthrough includes tips and tricks, helpful hints, and a strategy guide for how to complete F.A.C.E.S. Collector’s Edition.
General Tips
- When starting a new game, you can choose between two difficulties: Casual and Advanced. Casual includes tutorials, indication of zones of interest, and fast hint and skip recharges. Advanced mode features no tutorial, no indication of zones of interest, and slow hint and skip recharging.
- At the bottom left corner of the screen during gameplay, you can find the Files tab. Click on this to go over clues, evidence, and storyline material you’ve uncovered throughout the game. Many times codes you’ve found can also be found here.
- At the bottom right corner of the screen during gameplay, you can find the Hint button. Click on the button while you’re playing to receive hints regarding where to go and what you’ll need to do next. Click on the button while in a hidden object area to reveal the location of one of the items listed at the bottom of the screen. Click on the button while in a puzzle to skip the puzzle, however you will have to wait a certain amount of time before this option becomes available.
- Hints are unlimited, however you will have to wait for an allotted amount of time to pass before you can use one again.
- At the bottom of the screen is the inventory bar. Key Items from hidden object areas and that you find throughout the game can be found here. You can click on the lever on the upper left corner of the inventory bar to either lock it in place, or allow it to drop out of view when you’re not using it.
- Collector’s Edition content can be accessed via the “bonus content” button from the main menu.
- The Bonus Adventure can be accessed once you’ve completed the game’s main quest and storyline.
- Key/Inventory Items are identified in the guide below with CAPS and are circled in red. Locations that are outlined with a red square require you to look closer or perform an action before retrieving the item.
- Items in hidden object areas are often randomized, therefore only the Key/Inventory Items have been circled in the screenshots below.
Chapter 1: The Asylum
Gallery Photo
- Take a closer look at the control panel slightly to the right that says “Laser On”. In the close-up, flip the switch to turn the laser off.
- Take a closer look at the Red Gem in the middle of the room. Click on the Gem to collect it.
Cell (Front)
- Take a closer look at the window. There’s a newspaper article here you can choose to read.
- Take a closer look at the crack in the floor. Click on the crumpled paper next to the crack to uncover a File, then notice the photo on the crack: you’ll have to find something to fish it out.
- Proceed to the right.
Cell (Back)
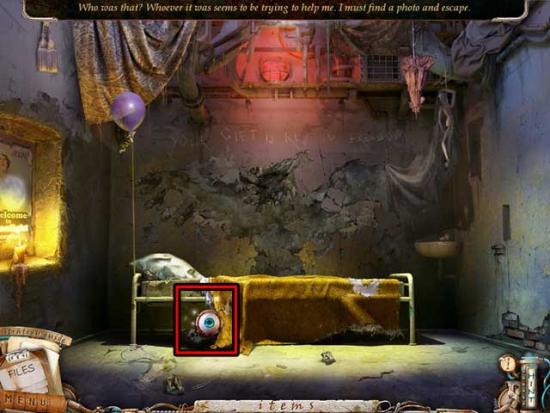
- Talk to the character sitting on the bed. Once they disappear, click on the top corner of the drooping blankets to move them aside and reveal a hidden object area.

- Find the objects listed at the bottom of the screen: objects are randomized. The Key Item is circled in red.
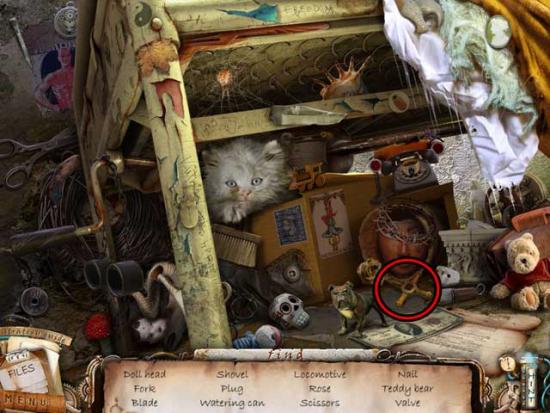
- Upon completing the area, the VALVE will be added to your inventory.
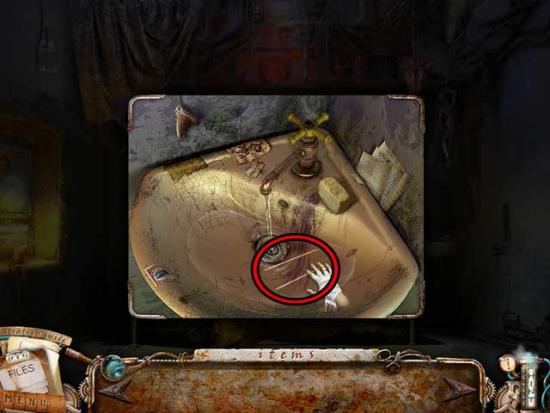
- Take a closer look at the sink in the right corner of the room. Use the VALVE on the top of the faucet and collect the CHOPSTICKS that appear to add them to your inventory.
- Go back to the front of the Cell.
Cell (Front)
- Take a closer look at the crack in the floor again. Use the CHOPSTICKS to obtain the Photo of Home and watch what happens.
Living Room
- Take a closer look at the tank on the left. Note there’s a mask inside: we’ll come back to this later.
- Examine the table in the center of the room for a closer view. Click on the AFRICAN MASK to add it to your inventory.
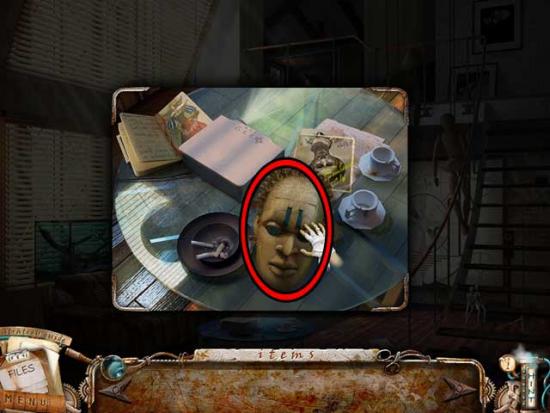
- Take a closer look at the photo lying near the top of the table. Take note of the date “58/3/1”.
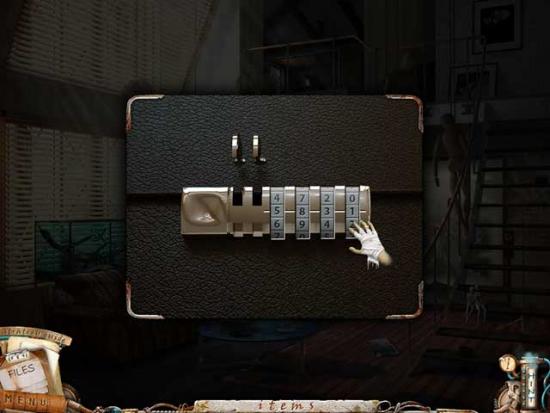
- Go back to the main living room area and take a look at the briefcase lying in the corner of the couch. Input the code “5831” (the date on the photo) to open it.
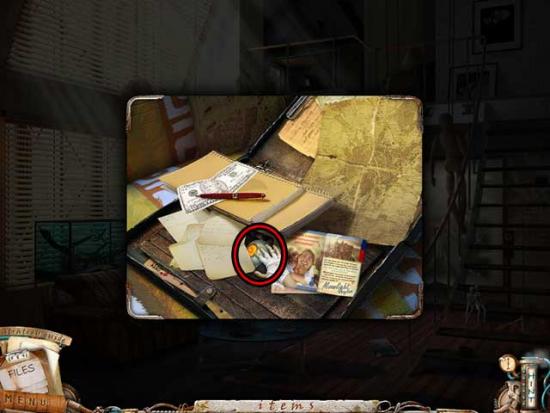
- Look inside the briefcase. Click on the brochure for a closer view, which will trigger a brief cutscene. Once the cutscene is finished, click on the GLASS EYE 1/4 to add it to your inventory.
- Proceed up the stairs on the right.
Bedroom
- Take a closer look at the hidden object scene over the bed on the left.
- Find the objects listed at the bottom of the screen: objects are randomized. The Key Item is circled in red.
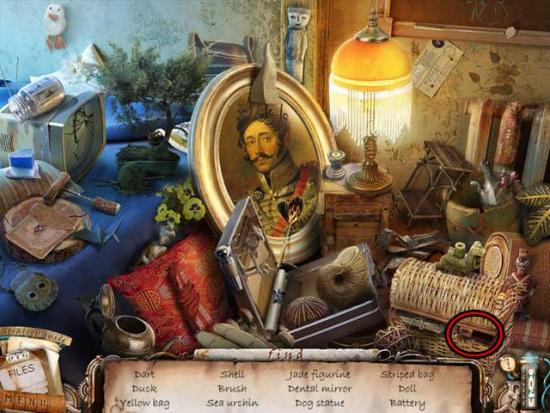
- Upon completing the area, the BATTERY 1/2 will be added to your inventory.
- Examine the closet area at the back of the left side of the room. Click on the hat to remove it from the mannequin, then click on the VENETIAN MASK to add it to your inventory.
- Exit the close-up back to the bedroom and take a closer look at the area on the right.
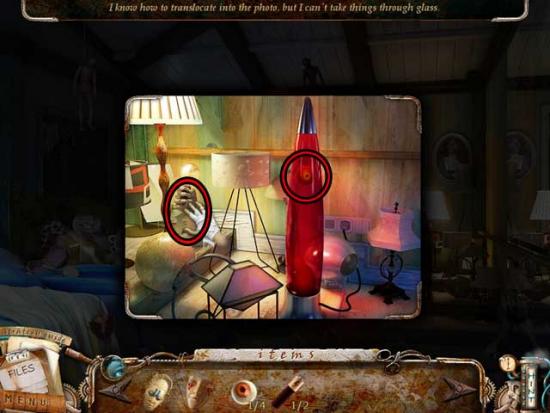
- Click on the plug for the lava lamp to plug it into the wall, revealing a Glass Eye inside. Click on the silver top of the lava lamp to open it, then collect the GLASS EYE 2/4. Before leaving the area, click on the hand on the left so it drops the light bulb, then click on the DUMMY’S HAND to add it to your inventory.
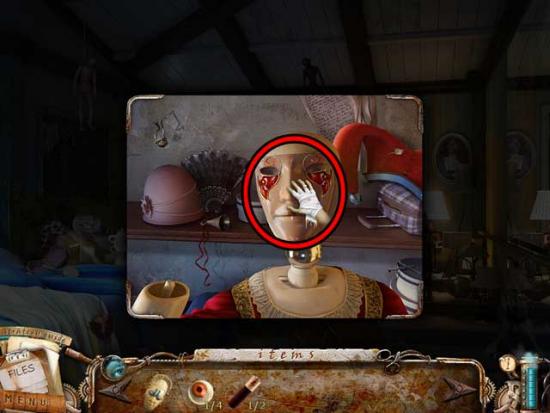
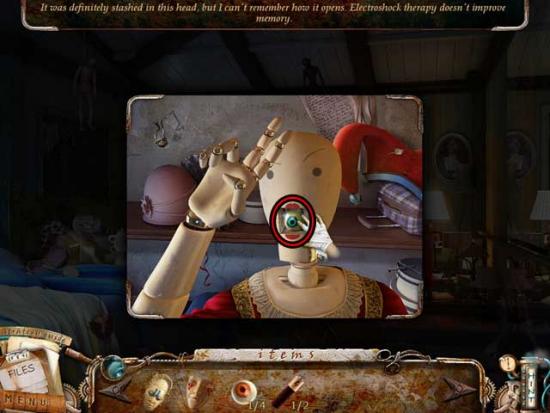
- Examine the closet area again. Use the DUMMY’S HAND on the partial arm on the left, then bend the fingers so it’s forming a “peace” sign (as shown in the screenshot below). Click on the GLASS EYE 3/4 that appears in the Dummy’s mouth to add it to your inventory.
- Enter through the door at the far end of the room to enter the Bathroom.
Bathroom
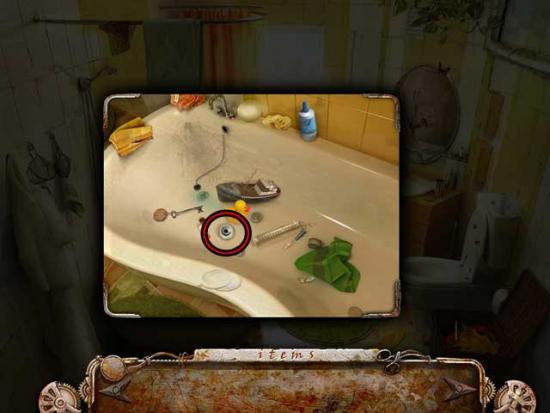
- Take a closer look at the bathtub. Click on the plug within the water to drain it, revealing the objects at the bottom of the tub. Click on the GLASS EYE 4/4 to add it to your inventory.
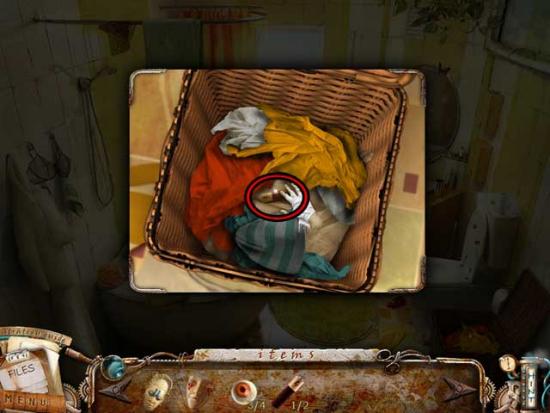
- Take a closer look at the laundry basket on the right. Click on the various articles of clothing to move them aside until you see the BATTERY 2/2 at the bottom of the basket. Click on it to add it to your inventory.
- Open the cabinet beneath the sink to reveal a hidden object area.
- Find the objects listed at the bottom of the screen: objects are randomized. The Key Item is circled in red.
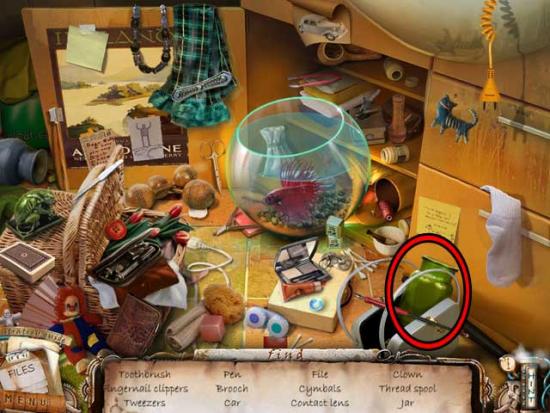
- Upon completing the area, the JAR will be added to your inventory.
- Return to the living room.
Living Room
- Take a closer look at the terrarium on the left again. Use the JAR on the scorpion to trap it, then click on the MASK WITH BEAK to add it to your inventory.
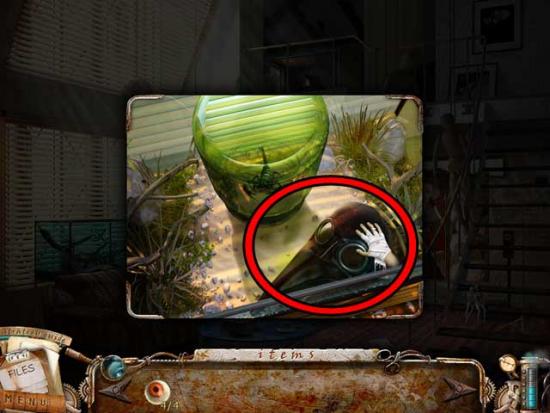
- Examine the table in the center of the room. Use the BATTERIES on the remote lying on the table, then click on it to remove the projector screen on the far wall. Examine the area.
- Use the AFRICAN MASK on the left painting, the MASK WITH BEAK on the middle painting, and the VENETIAN MASK on the right painting.
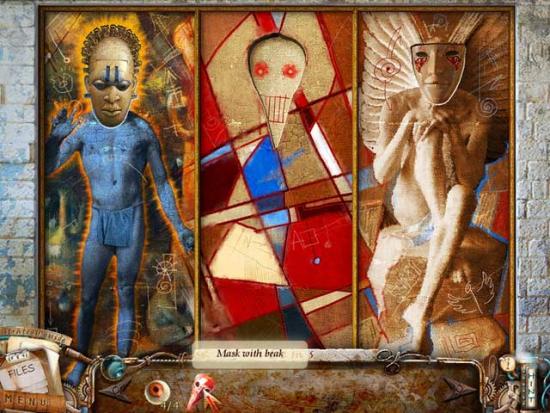
- Once all the masks are in place, the painting will split, revealing a puzzle. Use the GLASS EYE 4/4 from your inventory to trigger the puzzle. The eyes will automatically go into their correct positions.
- Connect all the lines by rotating the smaller circles to activate the laser rays. The solution is shown below. Once you’ve completed the puzzle, click on the SKELETON KEY to add it to your inventory.
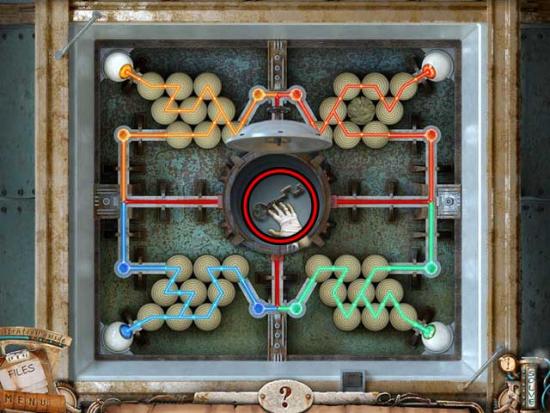
- Examine the entryway door at the far end of the room. Use the SKELETON KEY on the lock, then watch what happens.
Chapter 2: Escaping the Cell
Cell (Front)
- Back in the cell, examine the door. Use the SKELETON KEY on the lock to open it, revealing a puzzle. Click on it to activate it.
- Put the circles in the correct order by lining up the correct graphics to unlock the door. Rotate the 1st (center) ring so that the runes are on the bottom, then rotate the 2nd ring to extend the left pattern. Rotate the 3rd ring, continuing the pattern, then the 2nd again for adjustments. Lastly, rotate the 4th ring to complete the puzzle. The solution is shown below.
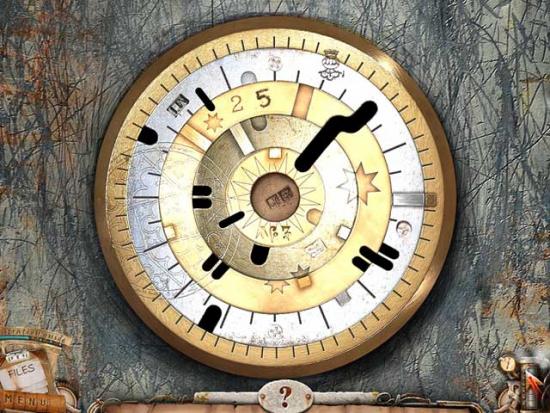
- Upon completing the puzzle, the door will open, allowing you to leave the cell.
Hallway 4F
- Take a closer look at the sparking switch on the right. Click on it to restore power to the hallway.
- Examine the clipboard at the far end of the room on the floor for more information about yourself as a patient.
- Click on the hidden object area on the left.
- Find the objects listed at the bottom of the screen: objects are randomized. The Key Item is circled in red.
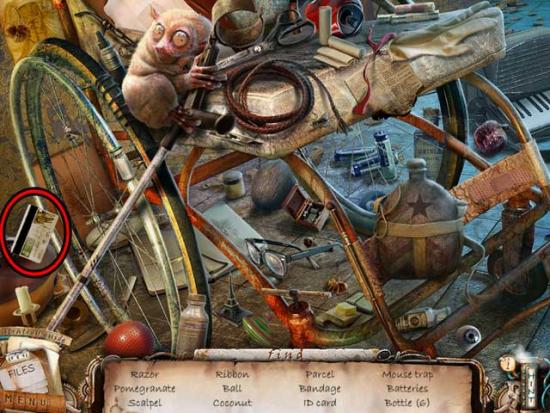
- Upon completing the area, the ID CARD will be added to your inventory.
- On the right is a door to the Drug Storehouse, but it cannot be opened (yet). A note reveals the key is somewhere on the 2nd floor.
- Take a closer look at the switch to the right of the elevator at the far end of the hallway. Click on it to call the elevator up, then enter the elevator.
Elevator
- Take a closer look at the panel on the far right. Use the ID CARD on the slot at the top left to restore power to the elevator.
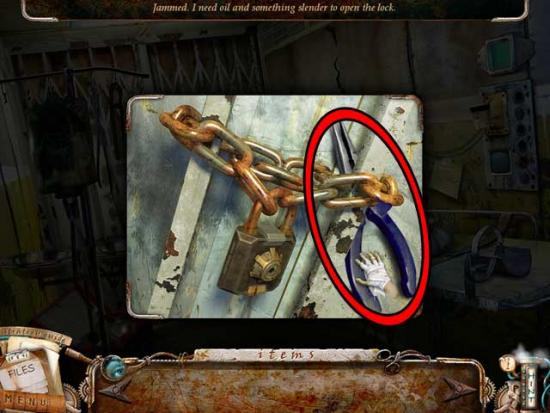
- Read the clipboard on the gurney on the right and the note on the right wall for more information regarding the patients, then take a closer look at the padlock and chain holding the grates over the far doors together.
- The padlock cannot be unlocked right now, but click on the PLIERS to add them to your inventory.
- Click on the hidden object area on the left.
- Find the objects listed at the bottom of the screen: objects are randomized. The Key Item is circled in red.
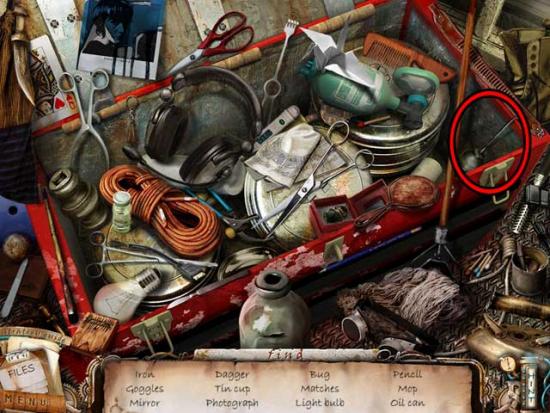
- Upon completing the area, the OIL CAN will be added to your inventory.
- Take a closer look at the control panel on the right again. Use the PLIERS to remove the PIN jammed in the Ground Floor button to add it to your inventory.
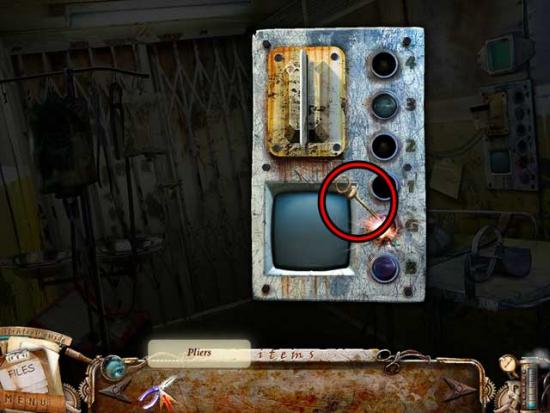
- Take a closer look at the padlock at the back of the elevator again. Use the OIL CAN on the padlock, then use the PIN on the padlock. Click on it to unlock it.
- Examine the control panel again and select the 3rd floor. Once the elevator arrives, the door will open. Exit the elevator.
Hallway 3F
- The hallway is rather dark at the moment. Continue forward through the door on the left.
X-Ray Room
- Take a closer look at the computer screen on the far left. Click on the lever located on the bottom right corner of the computer to turn it off. This will trigger a puzzle.
- Click on the incorrect picture in each set to turn off the X-Ray machine. The solutions are shown below.
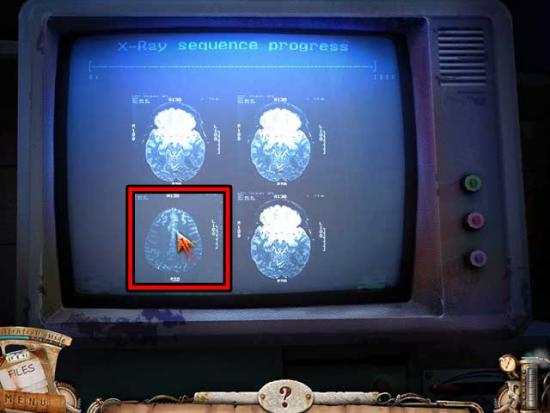
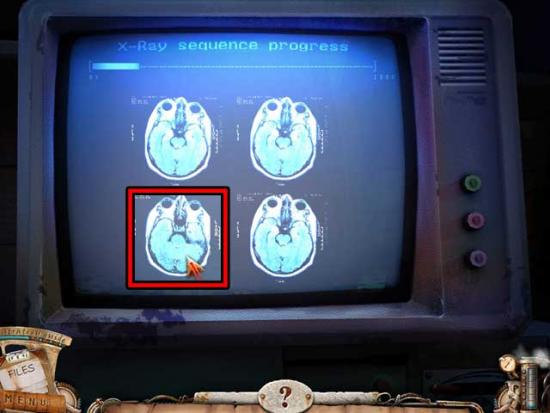
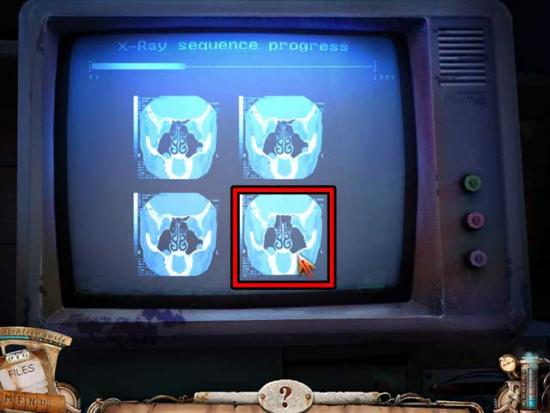
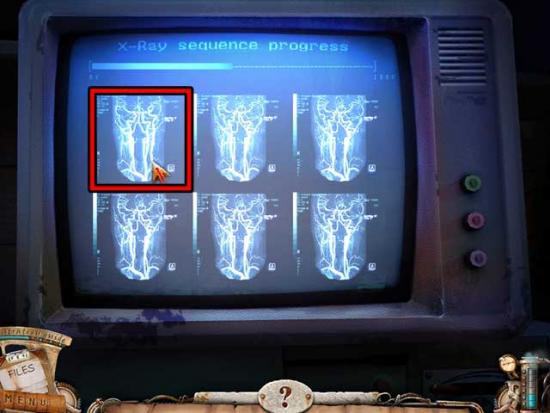
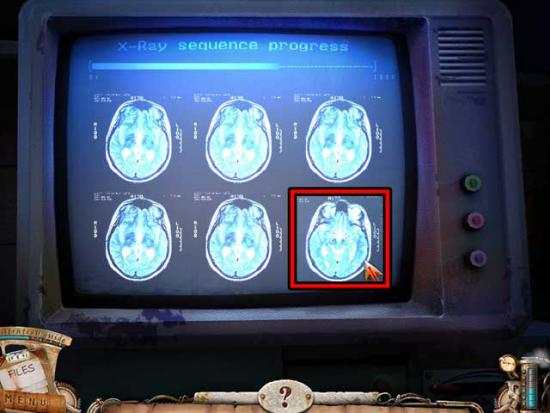
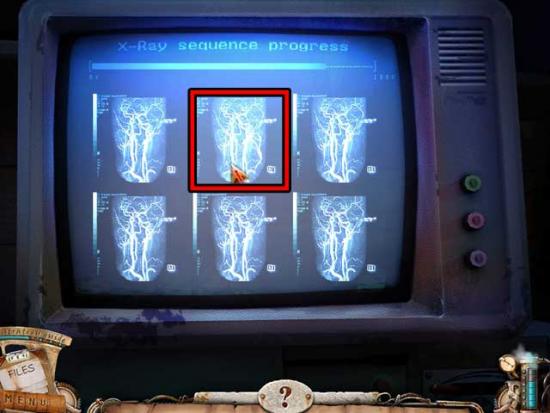
- Upon completing the puzzle, click on the DATA DISK to add it to your inventory.
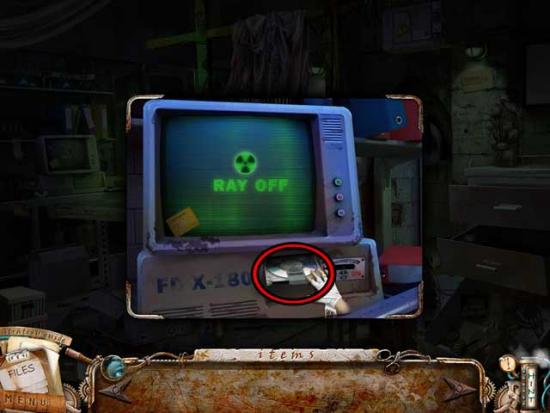
- There’s a newspaper lying on a box beneath the computer and X-Ray machine if you choose to read it. You may also choose to read the note beneath the light on the far wall.
- Examine the X-Ray machine. Now that the power’s off, you can open it. Open the door and remove the 3RD-FLOOR FUSE to add it to your inventory.
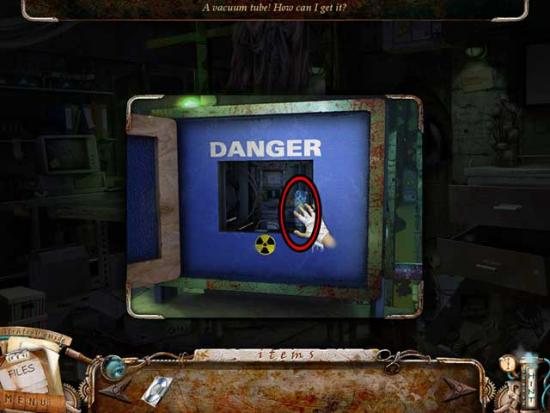
- Take a closer look at the gurney with the X-rays at the back of the room. Click on the GLASS SHARD 1/4 to add it to your inventory.
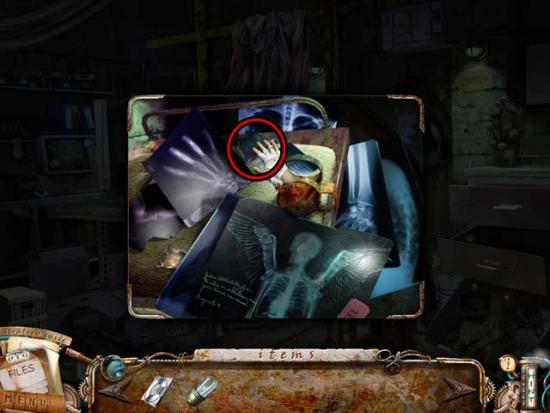
- Finally, click on the hidden object area on the lower right.
- Find the objects listed at the bottom of the screen: objects are randomized. The Key Item is circled in red.
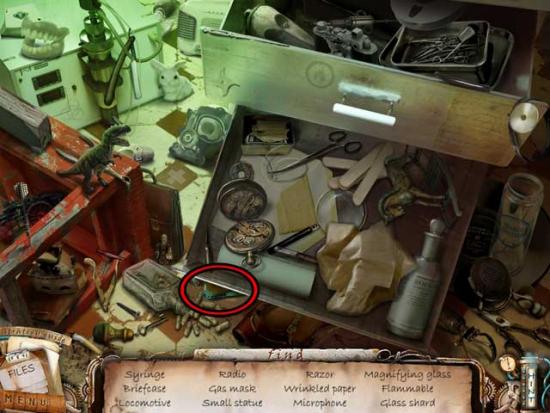
- Upon completing the area, the GLASS SHARD 2/4 will be added to your inventory.
- Exit the room back to the hallway.
Hallway 3F
- Take a closer look at the window at the back of the room. You can’t open it for now, but click on the GLASS SHARD 3/4 to add it to your inventory.
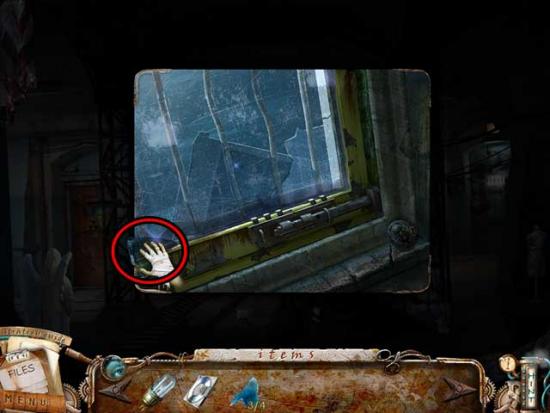
- Exit the close-up and proceed down the corridor to the right.
Icarus’ Cell
- There’s a note to the right of the door you can read.
- Click on the phone on the left for a closer view. Click on the GLASS SHARD 4/4 to add it to your inventory.
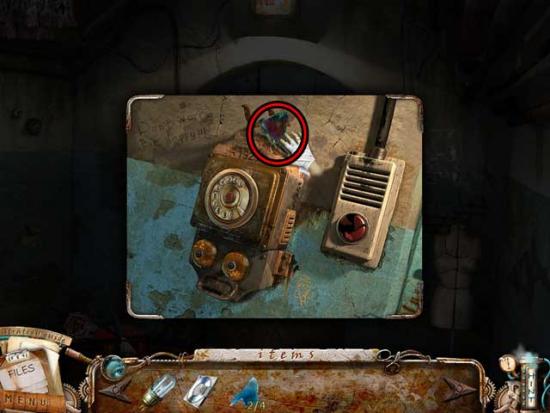
- Take a closer look at the mirror on the front of Icarus’ door. Use the GLASS SHARDS on it to trigger a puzzle.
- Put the fragments of broken glass into their proper places to fix the mirror. Right-click the fragments to rotate them. The solution is shown below.
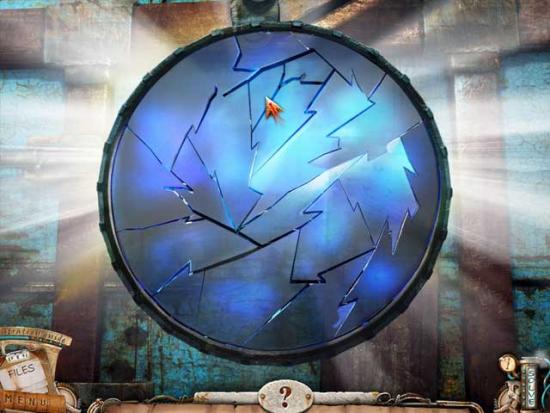
- Once the mirror has been reassembled, click on it to talk with Icarus. Once the conversation is finished, he will give you the KEYBOARD BUTTONS.
- Go back to the hallway and enter the elevator.
Elevator
- Take a closer look at the control panel on the right. Select the Basement button as your destination, then exit once the elevator has arrived.
Basement
- The basement is too dark to see anything at the moment, so proceed forward into the lit security room.
Security Room
- There’s a note hanging on the dart board on the right you can read if you wish.
- Take a closer look at the cabinet on the left. Click on the drawer to open it and collect the KEY, then click on the ELEVATOR BUTTONS 1/3 to add them to your inventory.
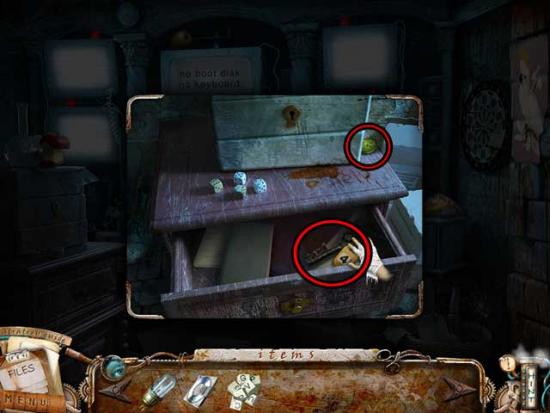
- Exit the close-up, then examine the keyboard lying on the desk. Use the KEYBOARD BUTTONS on the keyboard, then use the DATA DISK on the disk drive just above it to restore the computer to working order.
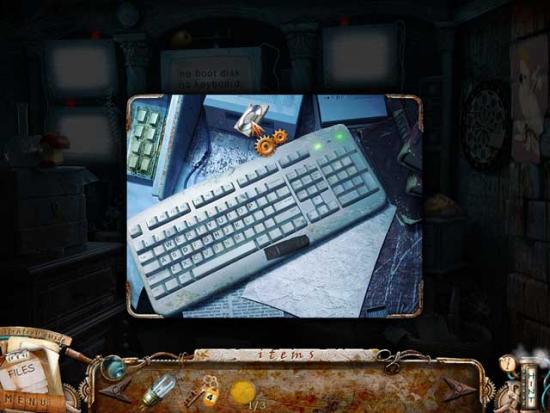
- Take a closer look at the security console screen. Click on the BASEMENT FUSE to add it to your inventory.
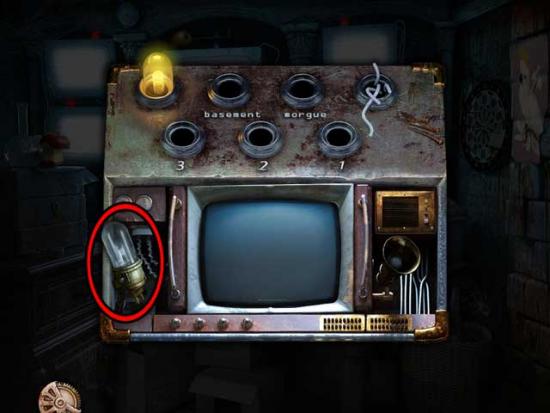
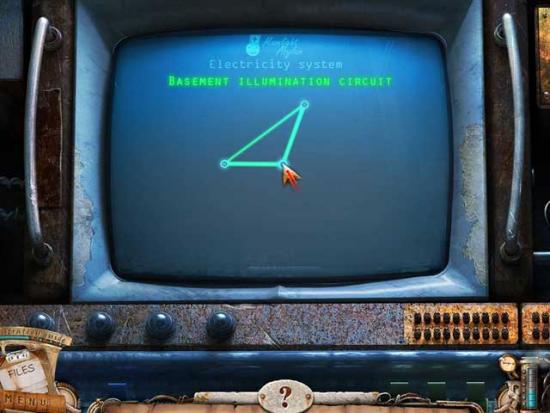
- Use the BASEMENT FUSE on the slot marked “Basement”, then click on the computer screen to trigger a puzzle.
- Move the blue points to untangle all of the lines (so that they’re all green and none of them cross). A possible solution is shown below.
- Take a closer look at the security console again. Use the 3RD-FLOOR FUSE on the slot marked “3”, then click on the computer screen to trigger a puzzle.
- Move the blue points to untangle all of the lines (so that they’re all green and none of them cross). A possible solution is shown below.
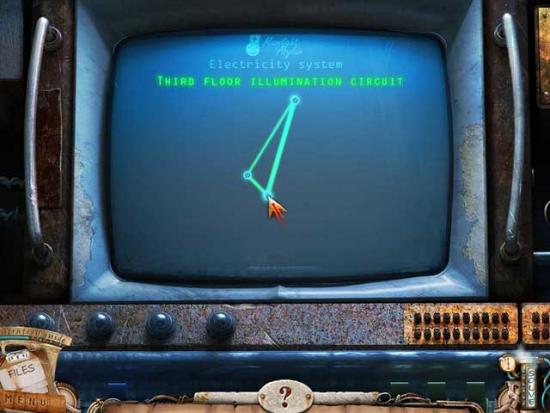
- After completing these two puzzles, power will be restored to the basement and the 3rd floor.
- Exit to the basement.
Basement
- Talk to the guardian that appears. Once done talking with her, click on the hidden object area beneath the stairs.
- Find the objects listed at the bottom of the screen: objects are randomized. The Key Item is circled in red.
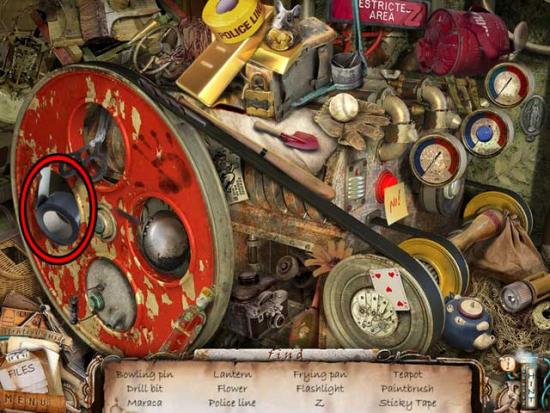
- Upon completing the area, the DUCT TAPE will be added to your inventory.
- Enter through the door on the left.
Boiler Room
- There’s a note on one of the front pipes if you choose to read it.
- Click on the hidden object area in the upper left corner.
- Find the objects listed at the bottom of the screen: objects are randomized. The Key Item is circled in red.
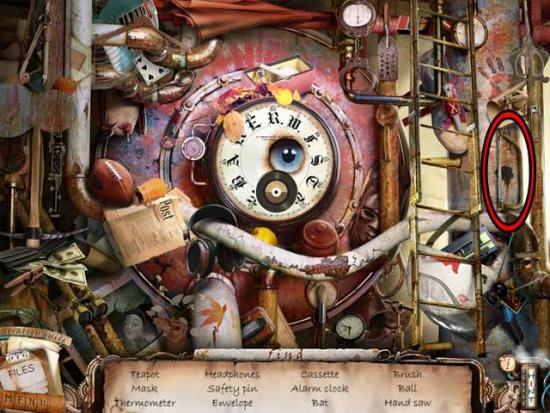
- Upon completing the area, the HAND SAW will be added to your inventory.
- Exit the basement, then enter through the door on the right and into the morgue.
Morgue
- It’s very dark in here currently, so take a closer look at the illuminated area on the left.
- Click on the ELEVATOR BUTTONS 2/3 to add it to your inventory.
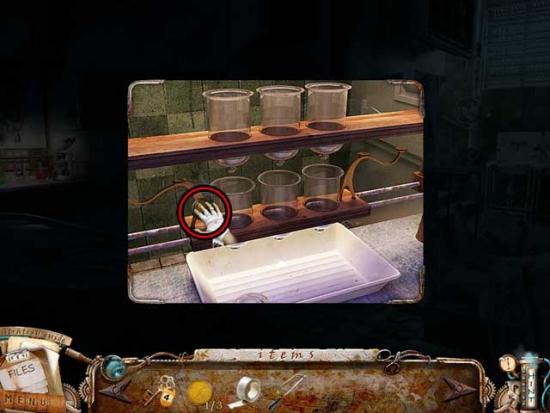
- Exit the morgue and return to the elevator, selecting the 3rd floor as your destination.
Hallway 3F
- You’ll notice the lights are now on. Take a closer look at the electrical box on the right for a note, then proceed towards Icarus’ Cell on the right.
- Click on the mirror to talk to Icarus. Once your conversation is over, he will give you the KNOB, which will be added to your inventory.
- Return to the hallway.
Hallway 3F
- Take a closer look at the window at the far end of the room. Use the KNOB on the window latch, then click on it to open the window. Collect the Consultation Center Photo outside and watch what happens.
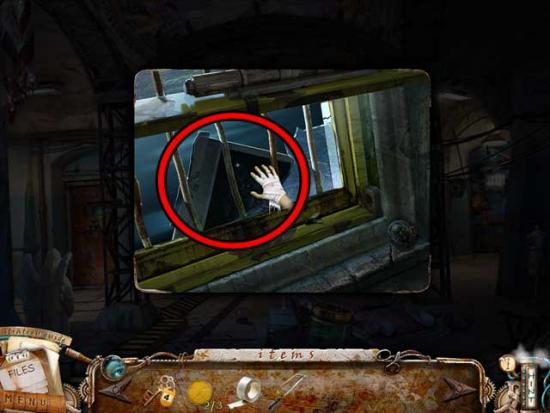
Chapter 3: The Consultation Center
Consultation Center
- Examine the green trash bin beneath the palm tree in the middle of the screen. Move the wooden boards within the bin aside to reveal the RUBBER GLOVE. Click on it to add it to your inventory.
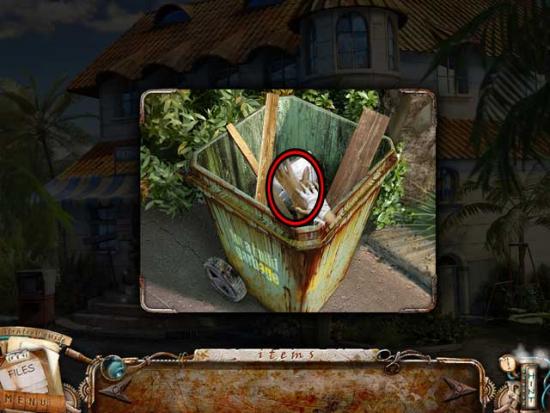
- Click on the hidden object area over the front steps.
- Find the objects listed at the bottom of the screen: objects are randomized. The Key Item is circled in red.
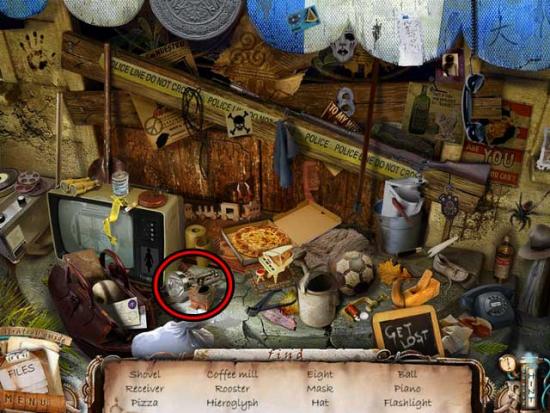
- Upon completing the area, the FLASHLIGHT will be added to your inventory.
- Proceed towards the door on the right.
Garden
- Click on the hidden object area over the sandbox on the right.
- Find the objects listed at the bottom of the screen: objects are randomized. The Key Item is circled in red.
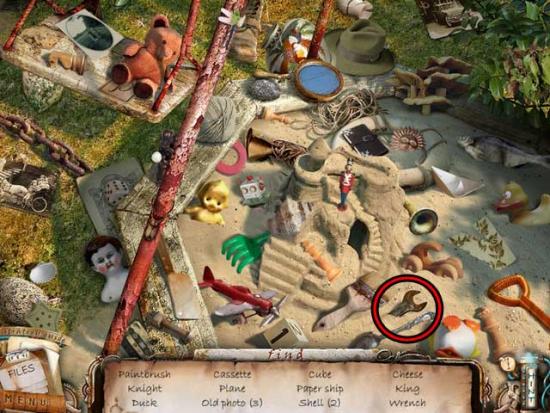
- Upon completing the area, the WRENCH will be added to your inventory.
- Return to the consultation center.
Consultation Center
- Take a closer look at the gutter grate beneath the steps to the center. Use the WRENCH to remove the bolts holding the grate, then click to remove it. Collect the COIN to add it to your inventory.
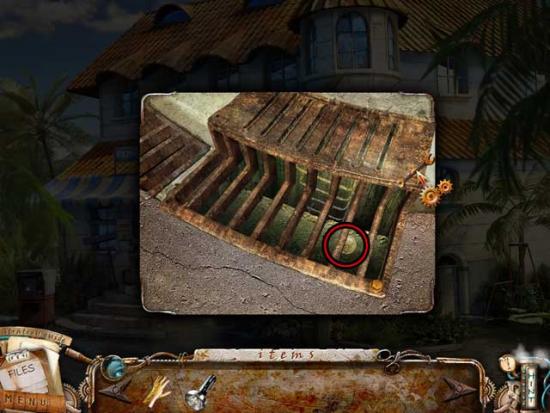
- Use the FLASHLIGHT on the dark area surrounding the ladder going down to enter the sewer.
Sewer (Level 1)
- Move the cursor into the upper right corner, where you will see thick cobwebs. Click for a closer view.
- Click on the cobwebs until they’re completely removed, then click on the GEAR 1/3 to add it to your inventory.
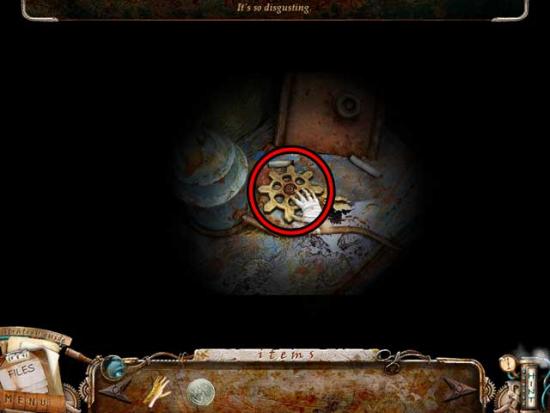
- Click on the steps at the top of the screen to proceed further down.
Sewer (Level 2)
- Take a closer look at the area on the right. Click on the CANE stuck between the bars to remove it and add it to your inventory.
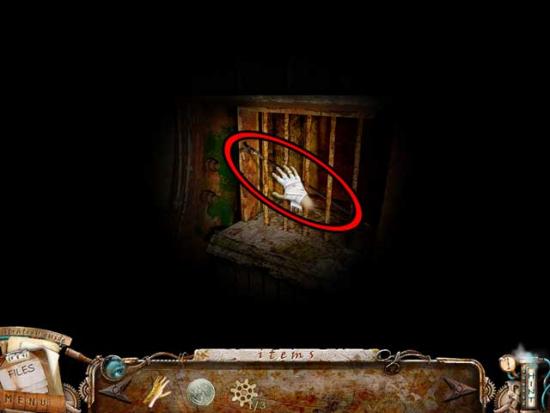
- Take a closer look at the blue object stuck between the doors, behind the large bars, slightly to the upper left of the middle of the screen. Use the CANE to knock it free, causing a pile of trash to spill out.
- Take a closer look at the pile of trash, which also happens to be a hidden object area.
- Find the objects listed at the bottom of the screen: objects are randomized. The Key Item is circled in red.
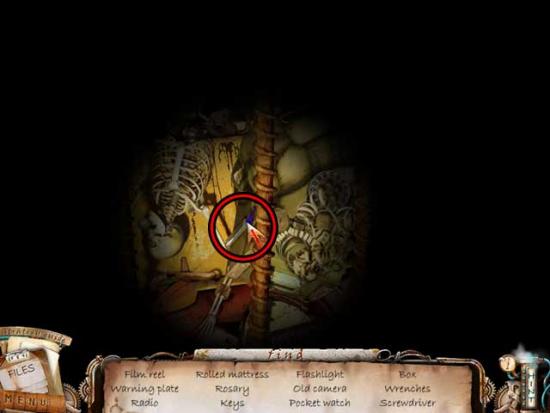
- Upon completing the area, the SCREWDRIVER will be added to your inventory.
- Now that you’re done here, proceed down, which will take you back to sewer level 1.
Sewer (Level 1)
- Proceed down through the hatch on the lower left to make your way back outside to the consultation center.
Consultation Center
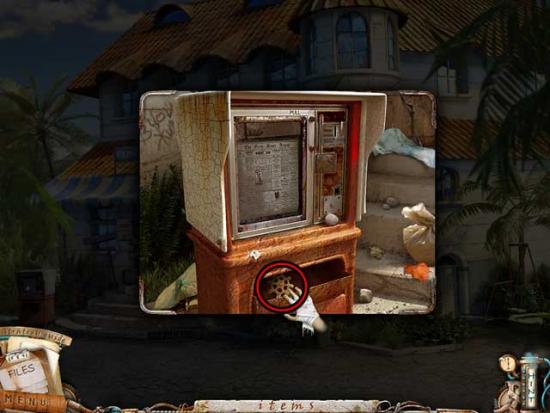
- Take a closer look at the newsstand on the left.
- Use the COIN on the coin slot in the upper right corner of the machine to activate it, causing the GEAR 2/3 to fall into the collection slot. Click on it to add it to your inventory.
- Return to the garden on the right.
Garden
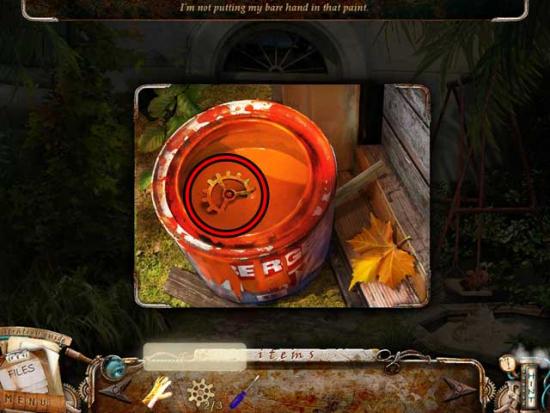
- Take a closer look at the lock on the door (you may choose to read the note to the right if you wish). Use the SCREWDRIVER to remove the screws, causing the plate to open and something to fall into the red paint below. Click on the paint bucket for a closer view.
- Use the RUBBER GLOVE to remove the GEAR 3/3 from the paint and add it to your inventory.
- Examine the lock on the door again. Use the GEARS on it to place them inside, however you’ll need solvent to clean the gear covered in paint.
- Return to the consultation center.
Consultation Center
- Click on the hidden object area over the front steps.
- Find the objects listed at the bottom of the screen: objects are randomized. The Key Item is circled in red.
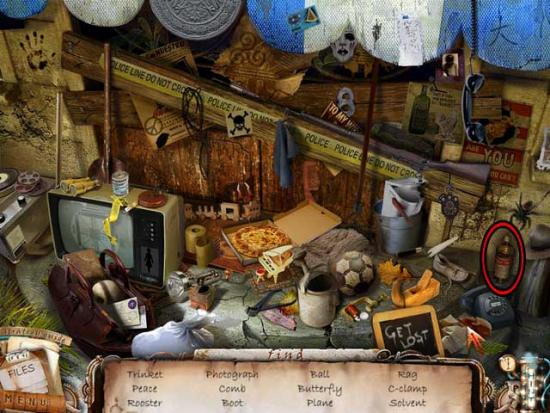
- Upon completing the area, the SOLVENT will be added to your inventory.
- Return to the garden.
Garden
- Take a closer look at the lock on the door again. Use the SOLVENT on the red gear to clean it, then click on the lock again to trigger a puzzle.
- Put the gears into their proper places to connect the two sides of the lock mechanism. The solution is shown below. Upon completing the puzzle, click on the door knob to activate the mechanism.
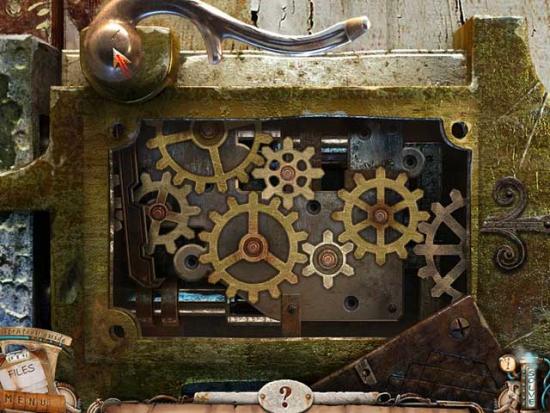
- Enter through the door.
Chapter 4: Discovering New Floors
Hallway 3F
- You’ll find yourself back in hallway 3F, and this time there’s a hidden object area right in front of you.
- Find the objects listed at the bottom of the screen: objects are randomized. The Key Item is circled in red.
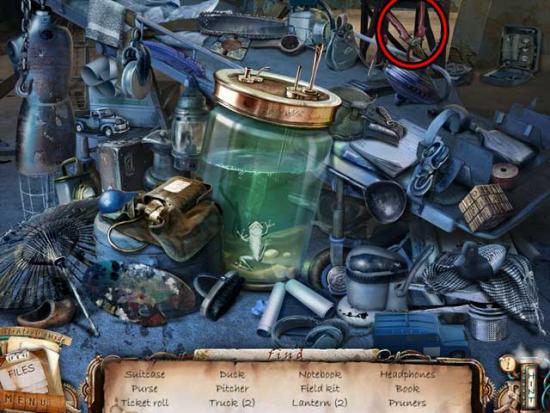
- Upon completing the area, the PRUNER will be added to your inventory.
- Proceed towards Icarus’ Cell.
Icarus’ Cell
- Take a closer look at the phone on the wall on the left. Use the SCREWDRIVER to remove the PHONE BELL at the bottom of the phone and add it to your inventory.
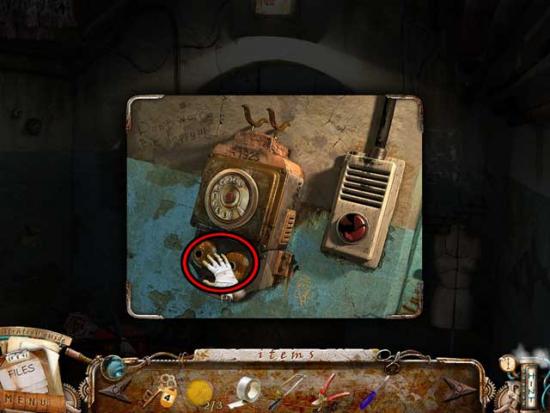
- Return to the elevator.
Elevator
- Take a closer look at the panel on the right wall marked with a yellow triangle. Use the SCREWDRIVER to remove the screws and remove the front panel.
- Next, use the DUCT TAPE on the severed wires within the panel box to fix them. You will see the comment “Now I can check the other floors of the hospital” appear at the top of the screen.
- Click on the control panel on the right and select the basement as your destination.
Basement
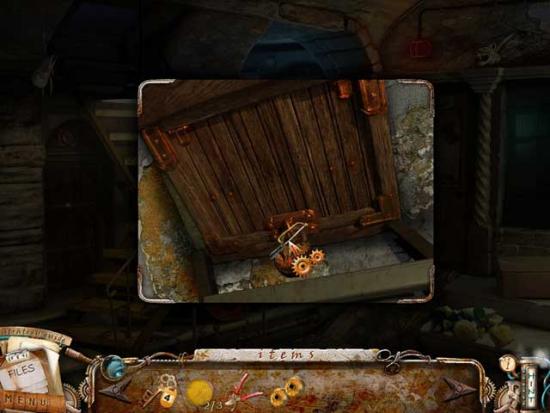
- Take a closer look at the hatch at the top of the stairs on the left. Use the HAND SAW on the padlock holding it shut to open it, then click to remove it and proceed up to the next floor.
Reception
- You may choose to read the note on the glass to the left of the crow if you wish.
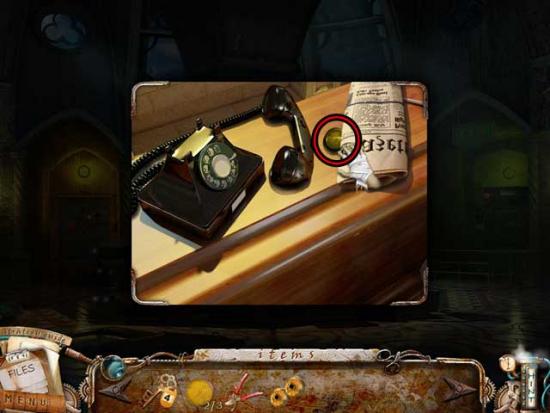
- Take a closer look at the front of the reception desk, next to the wheelchair.
- Click on the newspaper to move it aside, then collect the ELEVATOR BUTTONS 3/3 to add it to your inventory.
- Back in the main reception area, click on the hidden object area on the left.
- Find the objects listed at the bottom of the screen: objects are randomized. The Key Item is circled in red.
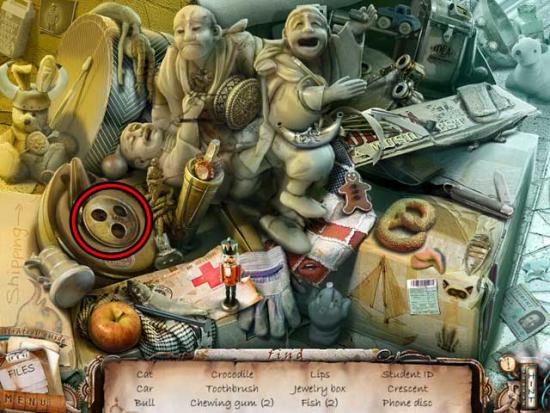
- Upon completing the area, the PHONE DISC will be added to your inventory.
- Return to the basement, then back to the elevator.
Elevator
- Take a closer look at the control panel on the right. Use the ELEVATOR BUTTONS on the panel. You can now access all the floors!
- Examine the control panel again and select the 4th floor as your destination. Once there, exit the elevator.
Hallway 4F
- Return to your former cell.
Cell (Front)
- Take a closer look at the cabinet on the right. Use the KEY to unlock it and reveal a hidden object area.
- Find the objects listed at the bottom of the screen: objects are randomized. The Key Item is circled in red.
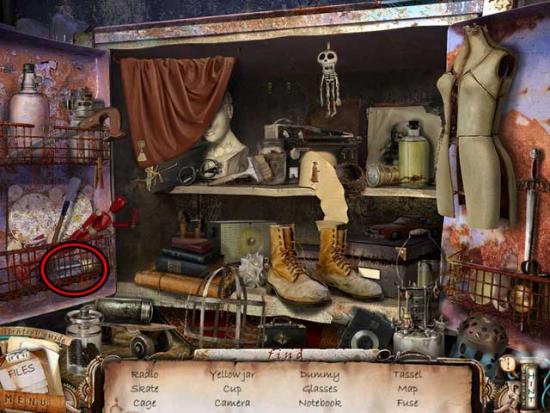
- Upon completing the area, the 2ND-FLOOR FUSE will be added to your inventory.
- Return to the elevator, select the basement as your destination, then proceed to the security room.
Security Room
- Take a closer look at the security console. Use the 2ND-FLOOR FUSE on the slot marked “2”, then click on the screen to trigger a puzzle.
- Move the blue points to untangle all of the lines (so that they’re all green and don’t cross). A possible solution is shown below.
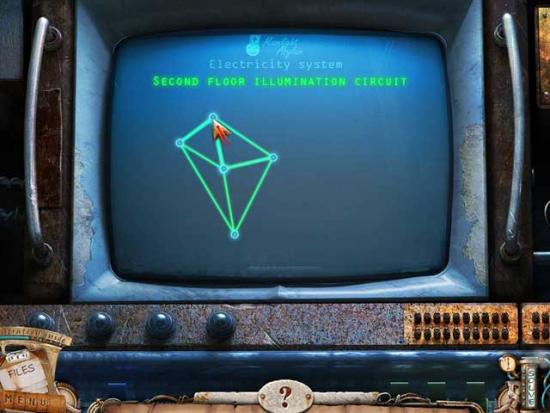
- The power has now been restored to the 2nd floor.
- Return to the elevator and select the 2nd floor as your destination.
Hallway 2F
- Take a closer look at the large board hung up on the wires/ropes. Use the PRUNER to cut them (specifically the bottom one) and create a safe passage across.
- Take a closer look at the switch on the far wall on the right. Click on it to shut it off: there will no longer be electricity surging through the water.
- Click on the hidden object area that appears on the left, on the edge of the pool.
- Find the objects listed at the bottom of the screen: objects are randomized. The Key Item is circled in red.
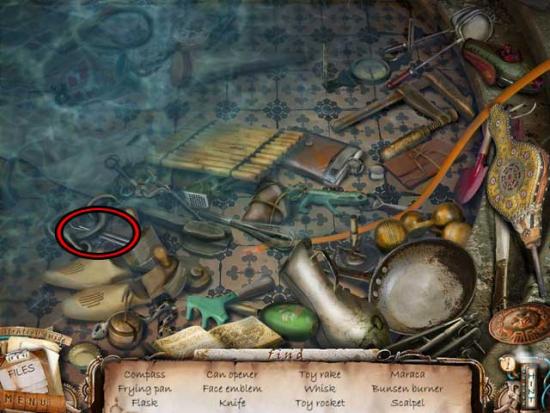
- Upon completing the area, the SCALPEL will be added to your inventory.
- Proceed forward towards the door across from you. Read the clipboard about the patient and the note left by the repairman for a clue of what to do next.
- Return to the elevator and select the 3rd floor as your destination.
Hallway 3F
- Take a closer look at the red gurney in the middle of the room. Use the SCALPEL on the indentation to open it, revealing the STERILIZER KEY. Click on it to add it to your inventory.
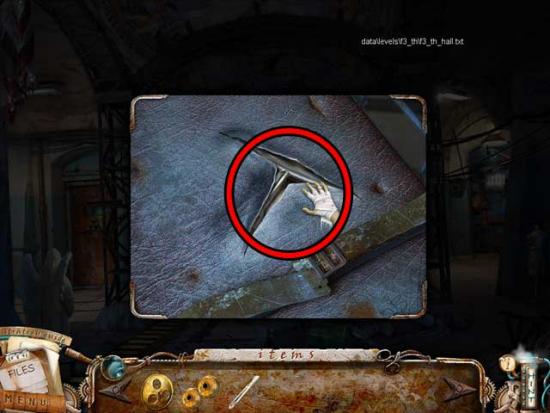
- Take the elevator back down to the 2nd floor.
Hallway 2F
- Take a closer look at the round hatch on the left. Use the STERILIZER KEY to open it, then click to reveal a puzzle.
- Rotate the circles until you get 3 balls of the same color in a row near one of the handles sharing that same color. Use balls on handles to see what colors are needed to be brought near them. There are several ways to do this puzzle, but the best is to align three colors per side at a time (so they match that on the handles). Use the screenshots below as a reference on where the various dials should be so you can get the row of three colors to match up.
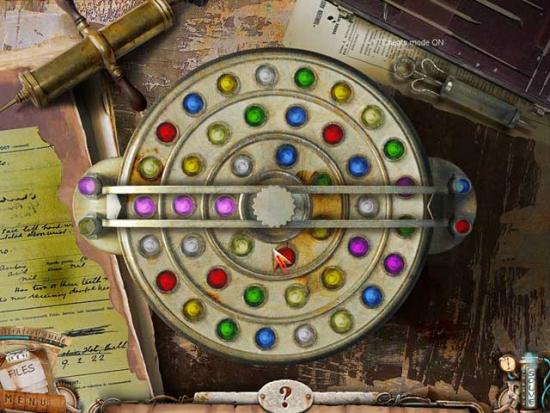
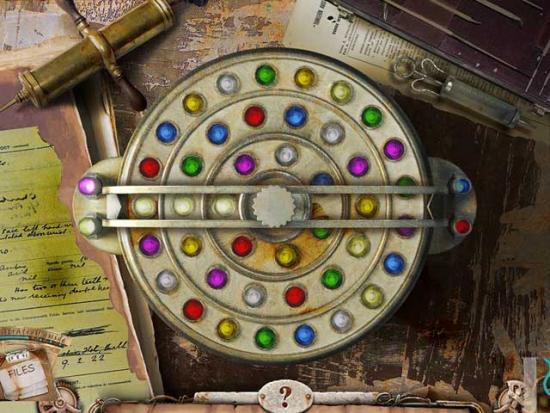
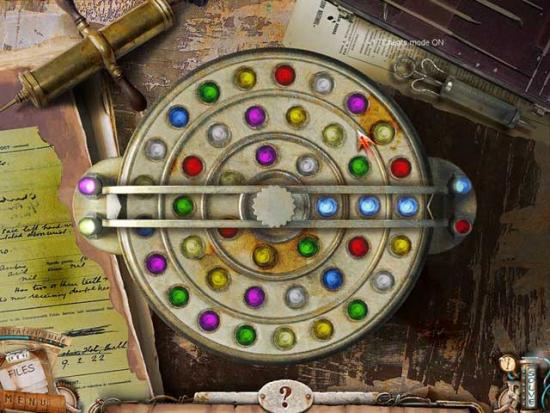
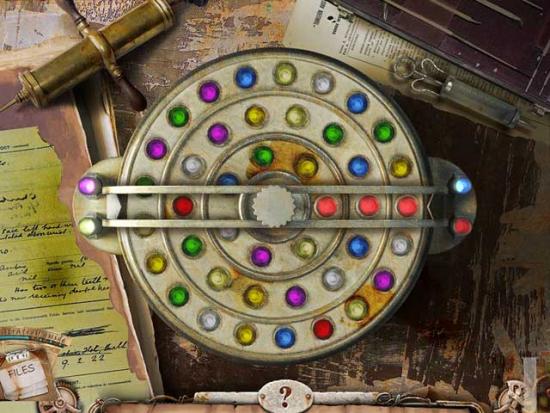
- Upon completing the puzzle, the top will open, revealing the DEVELOPER FLUID. Click on it to add it to your inventory.
- The guardian will appear again, giving you a clue as to where you should go next.
- Return to the elevator and take it down to the basement, then enter the boiler room.
Boiler Room
- Click on the hidden object area in the upper left corner.
- Find the objects listed at the bottom of the screen: objects are randomized. The Key Item is circled in red.
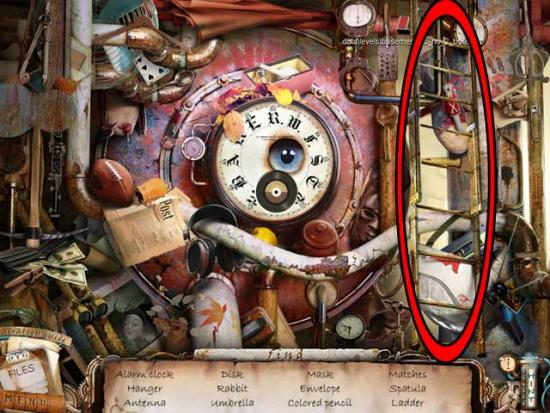
- Upon completing the area, the LADDER will be added to your inventory.
- Exit the boiler room, then proceed up the stairs and go through the hatch back to reception.
Chapter 5: Finding the Way Out
Reception
- Take a closer look at the front of the reception desk, near the wheelchair. Use the SCALPEL on the phone chord to cut it and obtain the HANDSET.
- Go back down to the basement and enter the elevator, taking it to the 4th floor and entering your former cell again.
Cell (Front)
- Proceed to the right to access the back of the cell.
Cell (Back)
- Use the LADDER on the grate in the upper right corner of the screen (behind the pink hanging umbrella) to gain access to it, triggering a new hidden object area.
- Find the objects listed at the bottom of the screen: objects are randomized. The Key Item is circled in red.
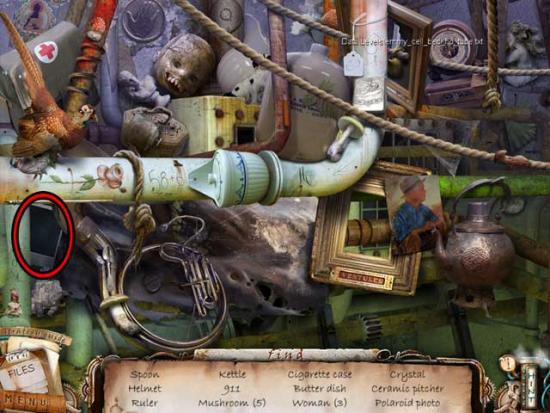
- Upon completing the area, the UNDEVELOPED PHOTOGRAPH will be added to your inventory.
- Return to the elevator, taking it down to the basement, then enter the morgue.
Morgue
- Take a closer look at the illuminated area on the left. Use the UNDEVELOPED PHOTOGRAPH in the white tray, then use the DEVELOPER FLUID on the flasks to trigger a puzzle.
- Mix the paints (fluids) to get the right colors. The colors scheme on the wall may help you. Use the arrows on either side of the bottom tray set to move it around, then press the red button at the top to combine the colors.
1) Press the red button right off the bat so that the bottom flask colors match those of the top (yellow, pink, and light blue respectively).
2) Move the bottom tray over to the right once, so that the rightmost bottom flask is below the top middle flask (in this case, yellow below pink, and pink below light blue). Press the red button twice: the bottom flask colors are now red, blue, and light blue.
3) Move the bottom tray all the way over to the left, so that the light blue flask on the far right is below the yellow flask on the top. Press the red button to dump yellow fluid into the light blue, causing the flask to turn green and the puzzle to be complete.
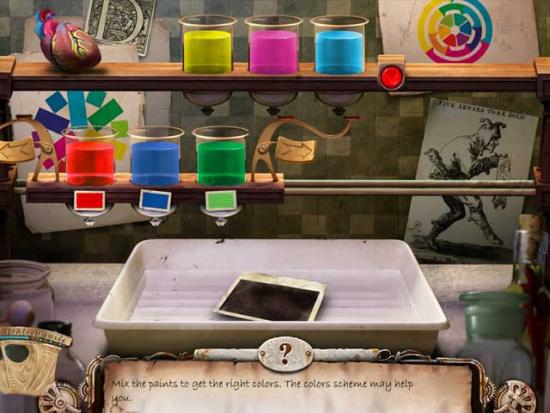
- Upon completing the puzzle, you’ll obtain the Inside Consultation Center Photo. Watch what happens.
Kitchen
- Click on the hidden object area straight ahead.
- Find the objects listed at the bottom of the screen: objects are randomized. The Key Item is circled in red.
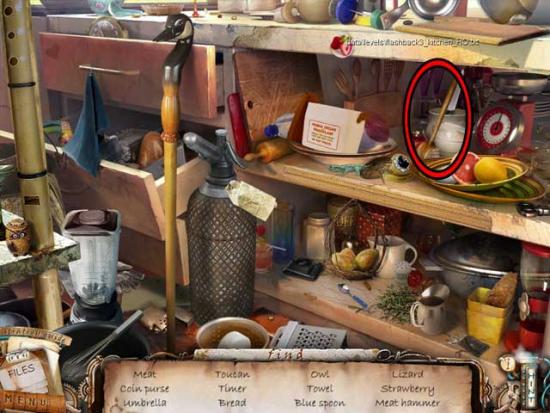
- Upon completing the area, the MALLET will be added to your inventory.
- Proceed to the left.
Cafe
- Examine the cash register: it will open if you can find out the cost of a latte and a piece of lemon pie.
- Examine the food display case on the left. Use the MALLET to break open the glass, triggering a hidden object area.
- Find the objects listed at the bottom of the screen: objects are randomized. The Key Item is circled in red.
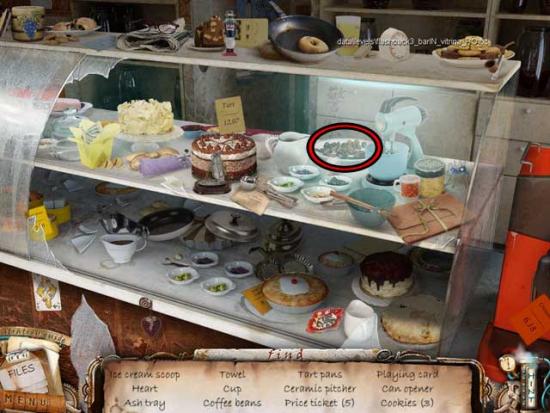
- Upon completing the area, the COFFEE BEANS will be added to your inventory.
- Take a closer look at the red espresso machine, between the food display and the cash register.
- Use the COFFEE BEANS on the espresso machine, then return to the kitchen.
Kitchen
- Click on the reactivated hidden object area.
- Find the objects listed at the bottom of the screen: objects are randomized. The Key Item is circled in red.
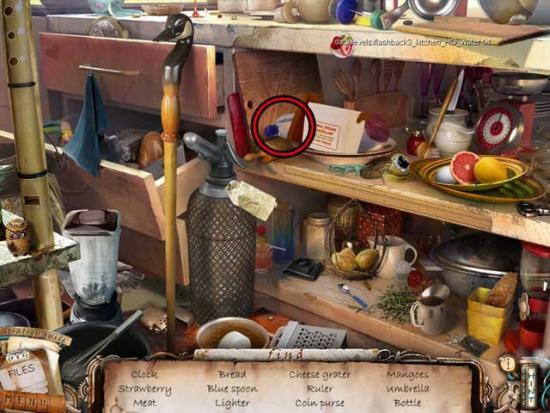
- Upon completing the area, the WATER BOTTLE will be added to your inventory.
- Return to the cafe.
Cafe
- Take a closer look at the red espresso machine again. Use the WATER BOTTLE on the machine to make a latte, then collect the LATTE PRICE and add it to your inventory.
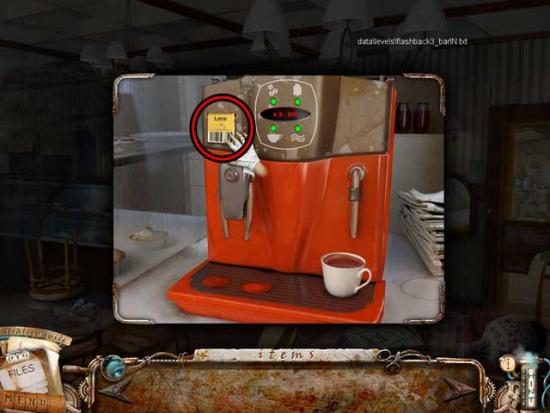
- Examine the cash register again and use the LATTE PRICE on the black and red scan area in the upper left to input the price. Now just the lemon pie to go!
- Back in the main cafe area, proceed to the left.
Restaurant
- Click on the hidden object area over the stairs.
- Find the objects listed at the bottom of the screen: objects are randomized. The Key Item is circled in red.
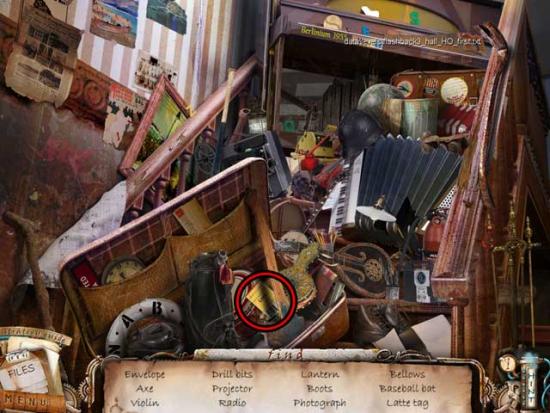
- Upon completing the area, the LEMON PIE PRICE will be added to your inventory.
- Go right, back to the cafe area.
Cafe
- Click on the cash register for a closer view, then use the LEMON PIE PRICE tag on the black and red scanner in the upper left corner to input the price. The cash register will open, revealing the KEY. Click on it to add it to your inventory.
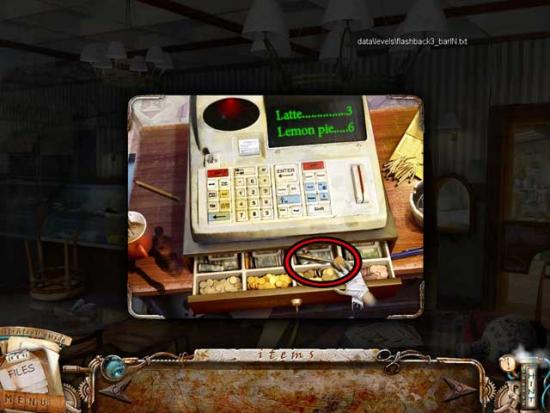
- Return to the kitchen.
Kitchen
- Take a closer look at the freezer in the corner. Use the KEY on the padlock to open it, revealing a wall of solid ice. You’ll have to find a way to get rid of it.
- Return to the restaurant.
Restaurant
- Click on the reactivated hidden object area over the stairs.
- Find the objects listed at the bottom of the screen: objects are randomized. The Key Item is circled in red.
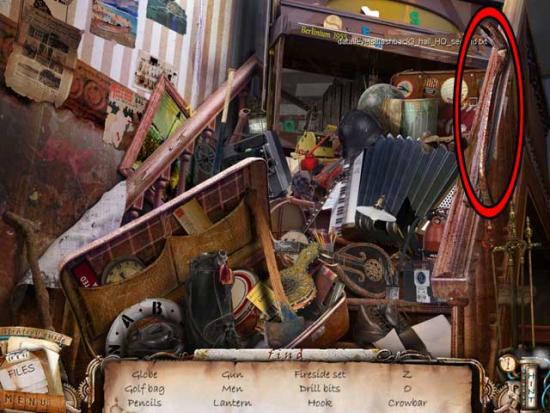
- Upon completing the area, the CROWBAR will be added to your inventory.
- Return to the kitchen.
Kitchen
- Take a closer look at the freezer again. Use the CROWBAR to break away the ice until the secret door is fully revealed. Click on it for a closer view.
- Enter the proper code to open the lock. Use the signs of equation as a clue. The solution is 7-6/1=1.
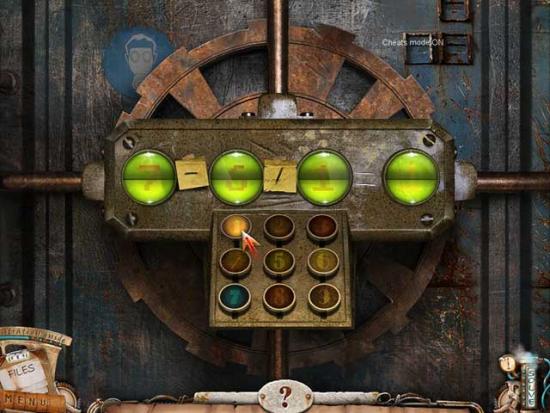
- Enter through the passageway and watch what happens.
Morgue
- You’ll find yourself back in the morgue. Make your way to the elevator and take it up to the 2nd floor.
Hallway 2F
- Proceed towards the door at the far end of the room.
- Take a closer look at the grate on the right side of the door. Use the CROWBAR to break the lock open, then click on the grate to remove it. Use the HANDSET, the PHONE BELL, and the PHONE DISC on the phone to restore it to working order.
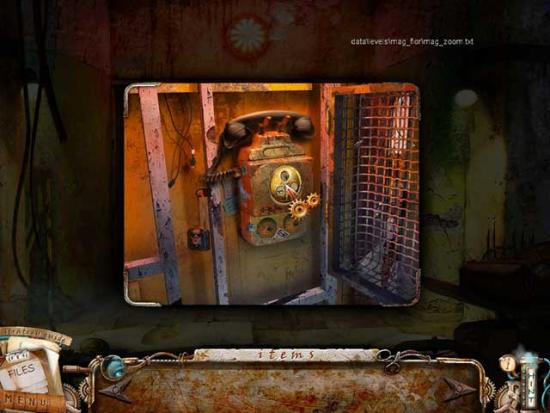
- Talk to the prisoner inside. Once the conversation is done, take a closer look at the slot near the base of the door. Click on the 1ST-FLOOR FUSE to add it to your inventory.
- Take the elevator back down to the basement and enter the security room.
Security Room
- Take a closer look at the security console. Use the 1ST-FLOOR FUSE on the slot marked “1”, then click on the screen to trigger a puzzle.
- Move the blue points to untangle all of the lines (so that they’re all green and none of them cross). A possible solution is shown below.
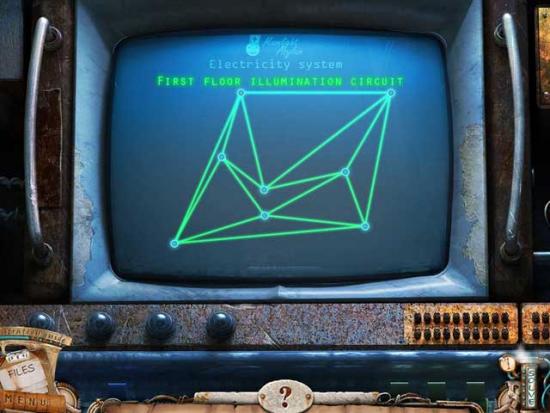
- Upon completing the puzzle, light will be restored to the 1st floor.
- Go back to the elevator and take it to the 1st floor.
Entrance 1F
- Read the notice hanging on the bars below the monitor: it will give you a clue on where to go next.
- Take a closer look at the area just below the monitor. Click on the CLOTH to add it to your inventory.
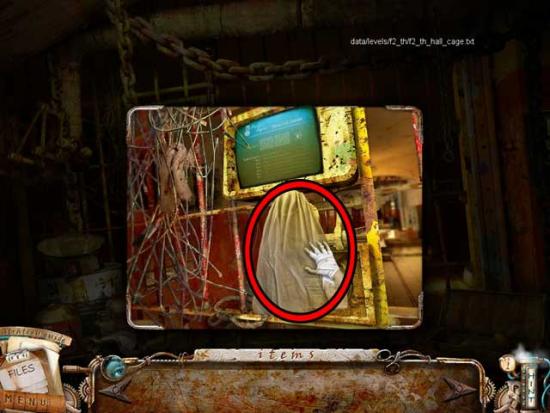
- Return to the elevator and take it up to the 4th floor.
Hallway 4F
- Take a closer look at the reactivated hidden object area.
- Find the objects listed at the bottom of the screen: objects are randomized. The Key Item is circled in red.
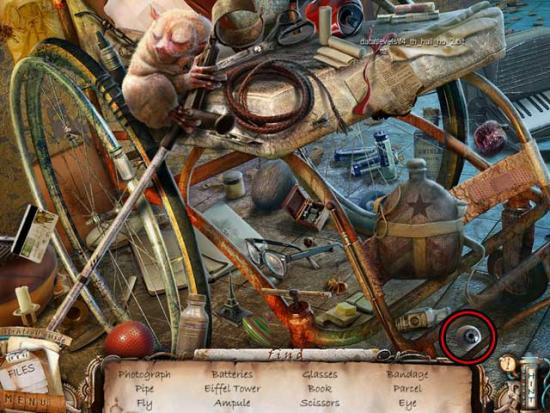
- Upon completing the area, the GLASS EYE will be added to your inventory.
- Return to the elevator and take it back down to the 1st floor.
Entrance 1F
- Take a closer look at the control panel beneath the monitor. Use the GLASS EYE on the scanner, then click on the number pad underneath to trigger a puzzle.
- Put the correct numbers in the gaps to gain access. The system will keep track of the numbers you input, how many of those numbers are correct, as well as how many are correct and in the right location, to help you solve the puzzle. Solutions are randomized, however an example is shown below.
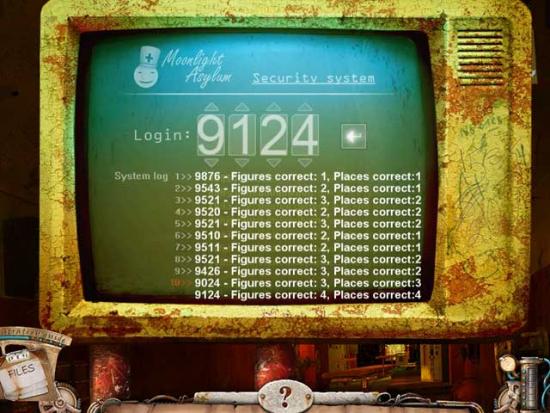
- Once you’ve completed the puzzle, the gate will open, giving you further access to the 1st floor. Proceed forward.
Hallway 1F
- Click on the hidden object area beneath the archway on the left.
- Find the objects listed at the bottom of the screen: objects are randomized. The Key Item is circled in red.
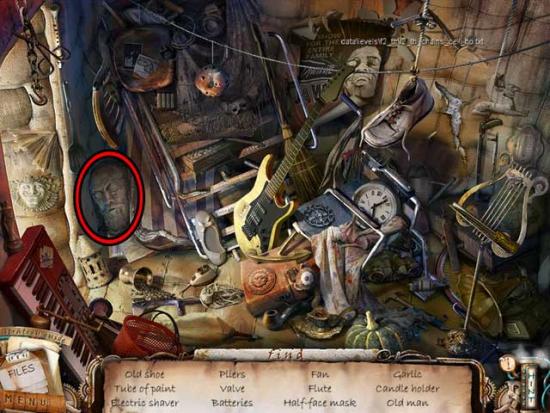
- Upon completing the area, the STATUE HEAD will be added to your inventory.
- Continue forward to the next portion of the hallway.
Corridor 1F
- There’s a note on the wall ahead on the left that leaves a clue as to what you should do next.
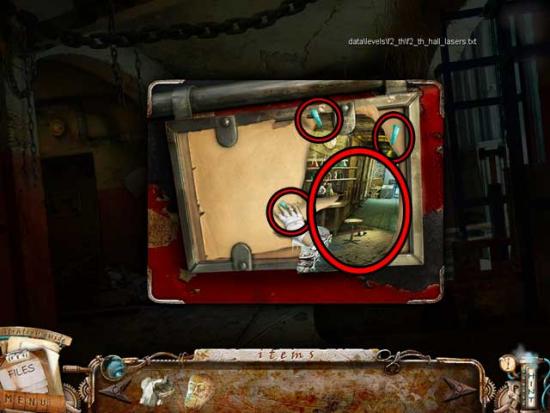
- Take a closer look at the information sheet at the foot of the bed on the right.
- Once in the close-up, click on the PINS (x3: 3/6) and the PHOTO PART 1/2 to add them to your inventory.
- Return to the elevator and take it down to the basement. Once there, proceed up the stairs through the hatch to the reception.
Reception
- Click on the hidden object area over the wheelchair and suitcases.
- Find the objects listed at the bottom of the screen: objects are randomized. The Key Item is circled in red.
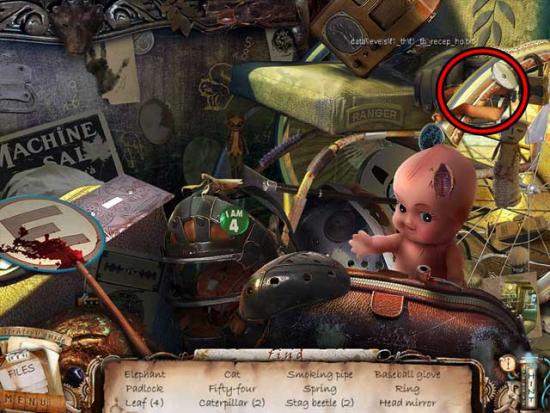
- Upon completing the area, the HEAD LAMP MIRROR 1/3 will be added to your inventory.
- Return to the basement, then go to the elevator and take it up to the 2nd floor.
Hallway 2F
- Click on the hidden object area that has appeared on the right.
- Find the objects listed at the bottom of the screen: objects are randomized. The Key Item is circled in red.
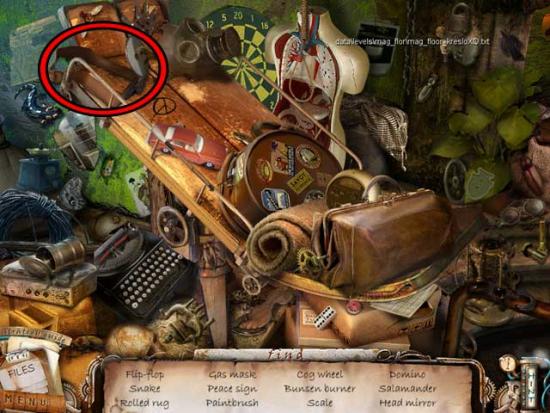
- Upon completing the area, the HEAD LAMP MIRROR 2/3 will be added to your inventory.
- Return to the elevator and take it up to the 3rd floor.
Hallway 3F
- Enter the X-ray room on the left.
X-Ray Room
- Click on the hidden object area on the lower right.
- Find the objects listed at the bottom of the screen: objects are randomized. The Key Item is circled in red.
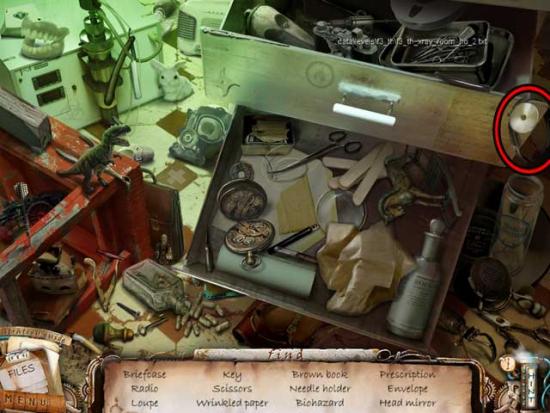
- Upon completing the area, the HEAD LAMP MIRROR 3/3 will be added to your inventory.
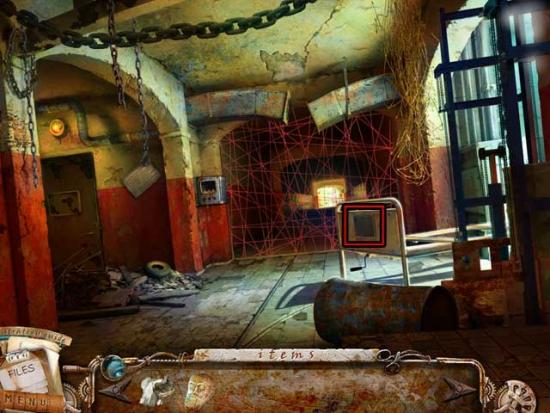
- Return to the elevator and take it back down to the 1st floor, and proceed forward until you reach the corridor with the lasers.
Corridor 1F
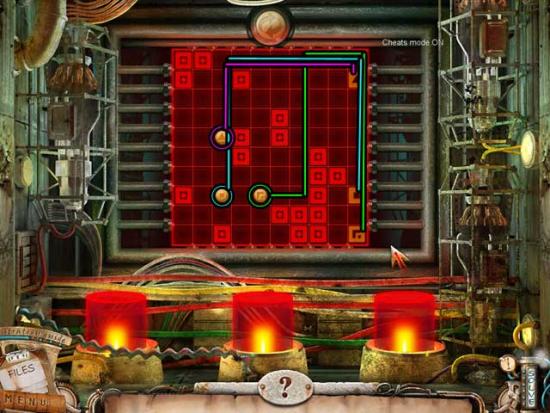
- Take a closer look at the metal box to the left of the lasers. Use the HEAD LAMP MIRRORS on it to trigger a puzzle.
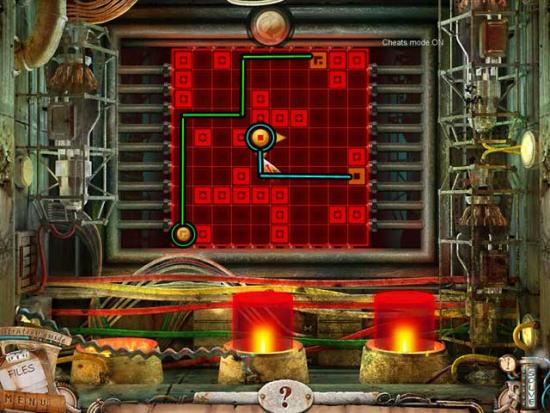
- Move the balls to the squares marked with their matching symbols to push the levers down. A ball simply has to slide into its space, not land their exactly. Some puzzles will require you to complete certain symbols first (these “pause” locations will be marked with an “X”). There’s a possibility for multiple solutions. There are three puzzles, with the solutions shown below.
- Puzzle 1:
- Puzzle 2:
-First, move the square (blue) ball into the position marked with a blue X, then move the triangle (purple) ball into the position marked with a purple X.
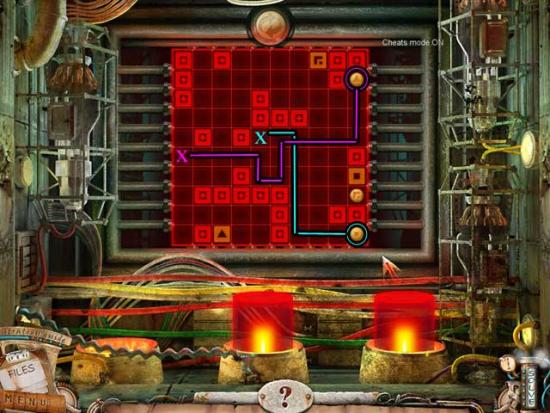
-Next, move the green ball into the position marked with a green X, then move the triangle (purple) ball into its final position.
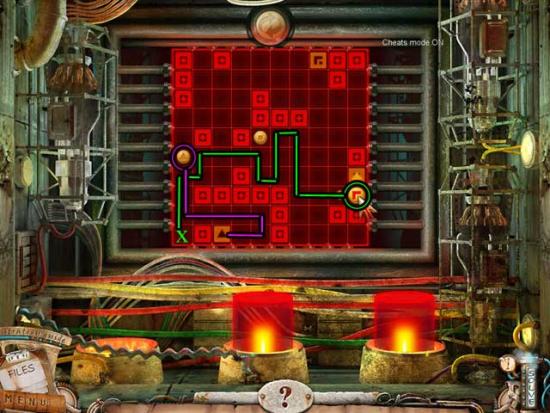
-Finally, move the square (blue) ball into its final position, then move the green ball into its final position as shown below.
- Puzzle 3:
-First, move the square (blue) ball into the position marked with a blue X, then move the triangle (purple) ball into its final position.
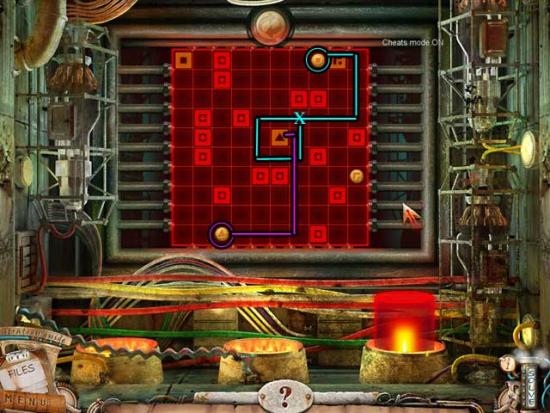
-Lastly, move the square (blue) ball into its final location, then move the green ball into its final location.
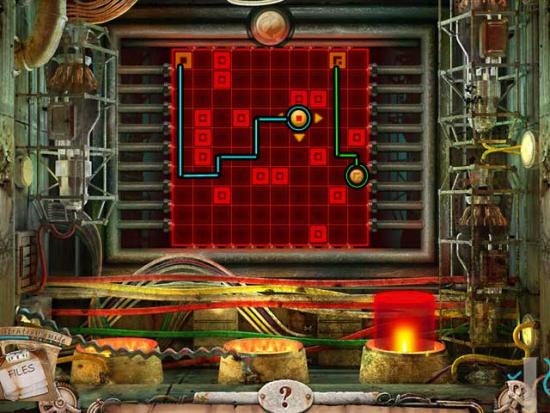
- Upon completing the puzzle, the lasers will disappear, giving you access further down the corridor.
Patient X’s Cell
- There’s a mechanism on the left, but there’s nothing you can do with it just yet.
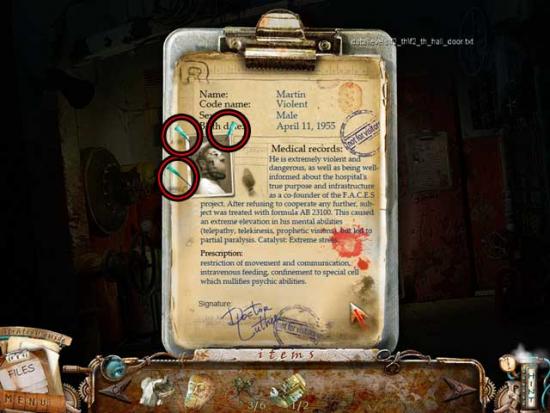
- Take a closer look at the clipboard to the right of the door. Click on the 3 PINS around the photo to obtain PINS 6/6.
- Return to the elevator and take it to the 2nd floor.
Hallway 2F
- Take a closer look at the shelf across the room and on the right, between the blue door and the main patient’s door.
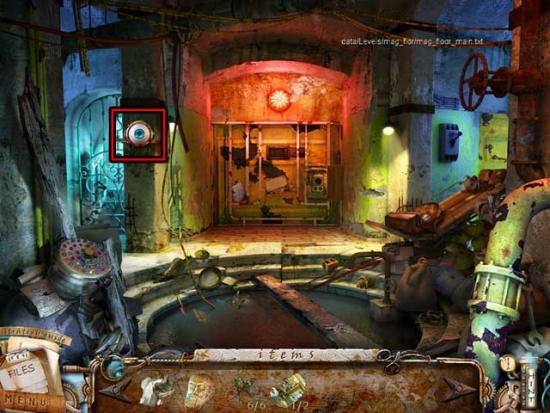
- Use the STATUE HEAD on the headless bust to restore it, unlocking the door on the left to the blue corridor.
- Proceed up the stairs to the new room.
Electroshock Room
- You may choose to look at the monitor above the chair, but it shows pieces of photo are missing.
- Go back to Hallway 2F.
Hallway 2F
- A hidden object area will appear on the right.
- Find the objects listed at the bottom of the screen: objects are randomized. The Key Item is circled in red.
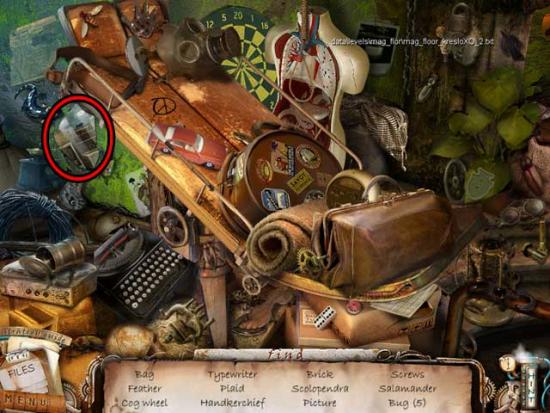
- Upon completing the area, the PHOTO PART 2/2 will be added to your inventory.
- To lighten your inventory load for now, proceed forward towards the main door of the patient at the far end of the room.
- Take a closer look at the open slot towards the bottom of the door. Place the CLOTH and the PINS 6/6 in the slot. There’s one more item needed, but we’ll come back to that later.
- Proceed up the blue passage on the left, back to the electroshock room.
Electroshock Room
- Take a closer look at the monitor above the chair. Use the PHOTO PART 2/2 on the monitor to trigger a puzzle.
- Assemble all the puzzle pieces so that they form a complete picture. The solution is shown below.
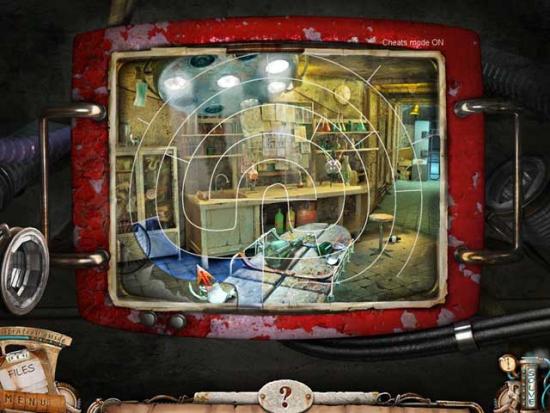
- Upon completing the puzzle, click on the monitor and watch what happens.
Chapter 6: The Escape
Lab
- Click on the hidden object area over the cabinet on the left.
- Find the objects listed at the bottom of the screen: objects are randomized. The Key Item is circled in red.
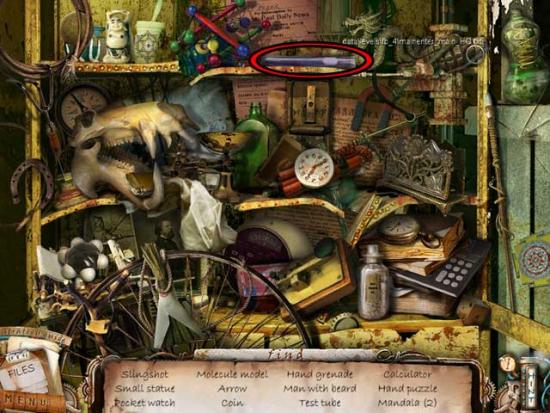
- Upon completing the area, the CHEMICAL FLASK will be added to your inventory.
- Click on the machine sitting on the counter top. Use the CHEMICAL FLASK on the glass tube on the right. You will need one more.
- Exit back to the main view of the lab, then look under the counter, at the floor beneath the machine. Click to remove the various bottles and containers, then click on the CHEMICAL FLASK (2) to add it to your inventory.
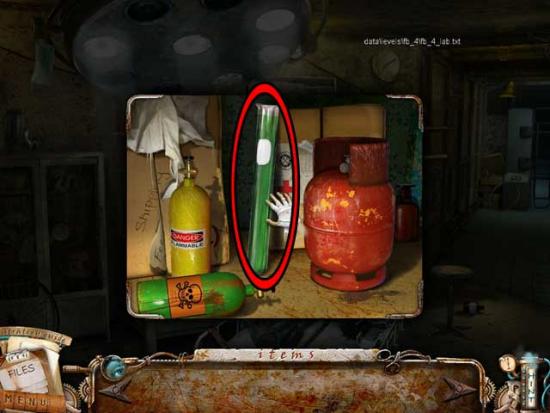
- Look at the machine on the counter top again. Use the CHEMICAL FLASK (2) on the left glass tube, then click on the viewing area on the right to trigger a puzzle.
- Connect the dots so it mirrors the image on the right. The example on the right will rotate after a certain number of moves. Use the lit points as a reference of where to go next. The completed solution is shown below.
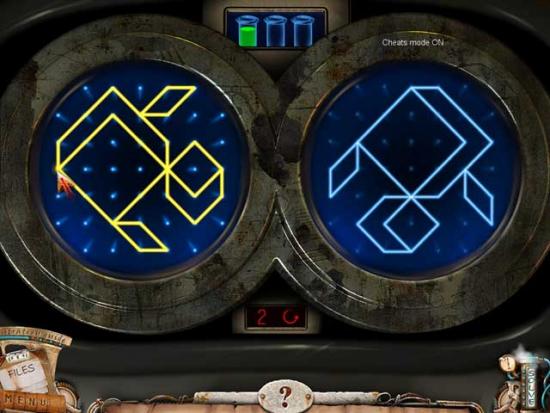
- Upon completing the puzzle, the ACID will be added to your inventory.
- Proceed forward via the hallway on the right.
Mechanical Gate
- Click on the hidden object area on the left.
- Find the objects listed at the bottom of the screen: objects are randomized. The Key Item is circled in red.
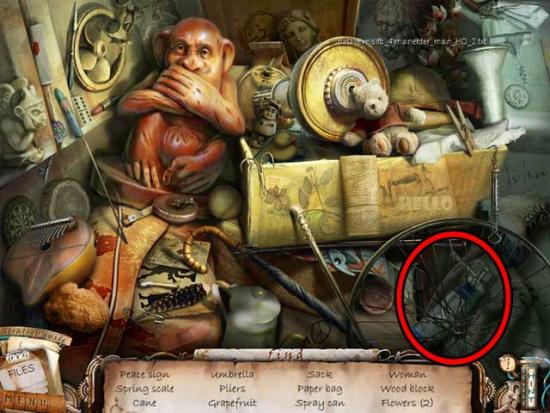
- Upon completing the area, the LIQUID NITROGEN will be added to your inventory.
- Take a closer look at the panel to the right of the gate (it’s covered with scraps and photos). Use the LIQUID NITROGEN on the panel to freeze it.
- Next, take a closer look at the lock in the middle of the gate. Use the ACID to destroy the lock.
- Return to the lab.
Lab
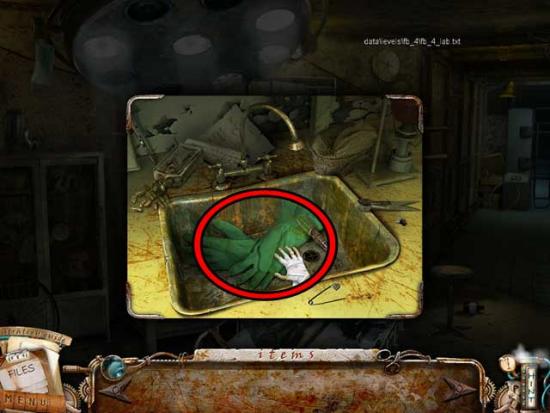
- Take a closer look at the sink on the counter, between the cabinet on the left and the machine. Click on the THICK GLOVES to add them to your inventory.
- Return to the mechanical gate.
Mechanical Gate
- Take a closer look at the frozen panel on the right. Use the THICK GLOVES to break apart the ice until there’s a clear hole, then click on the MECHANICAL KEY to add it to your inventory.
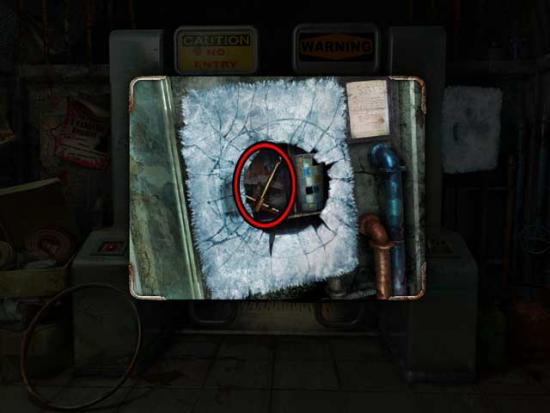
- Take a closer look at the protruding area of the gate on the right. Use the MECHANICAL KEY on the slot, then click to turn it and open the mechanical gate.
- Proceed through the open gate and into the next area.
Subway
- Click on the hidden object area on the right.
- Find the objects listed at the bottom of the screen: objects are randomized. The Key Item is circled in red.
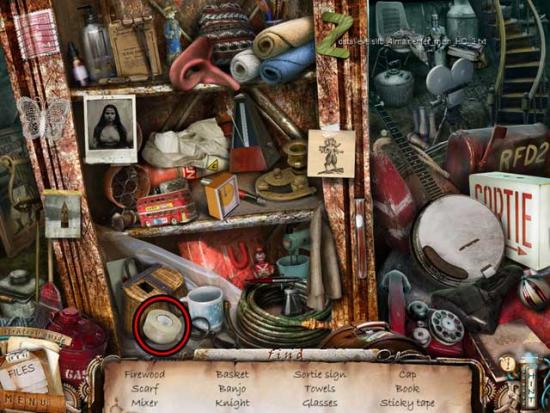
- Upon completing the area, the STICKY TAPE will be added to your inventory.
- Enter through the door on the upper right that has “Get Out” written on it.
Operator Booth
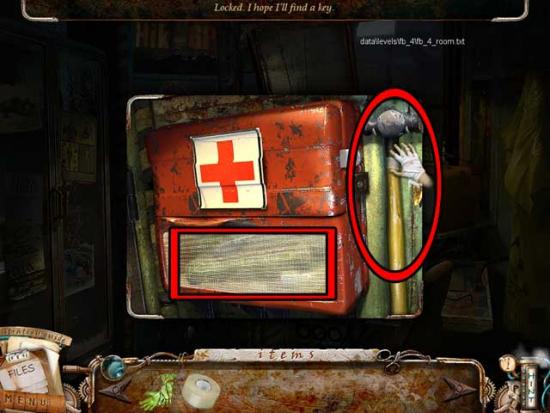
- Take a closer look at the red first aid box hanging on the wall towards the left. Click on the HAMMER on the right to add it to your inventory, then use it to break through the glass at the bottom of the kit. Click on the EMERGENCY FLARE to add it to your inventory.
- Take a closer look at the monitor on the control board. Use the STICKY TAPE on the handprint on the screen, then click on the tape to add the FINGERPRINT to your inventory.
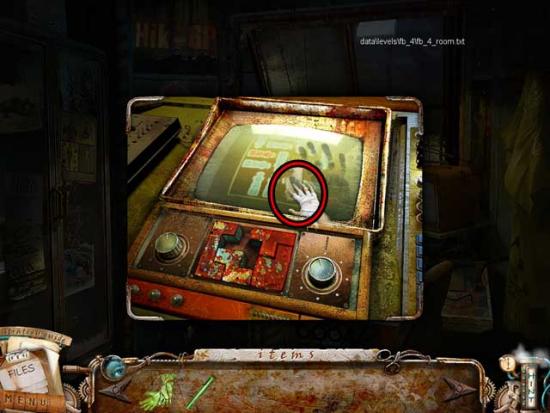
- Exit back to the subway.
Subway
- Click on the area with the gate on the left for a closer view. Use the EMERGENCY FLARE to light the close-up up, then click on the panel to open it. Click on the inside of the panel to activate a puzzle.
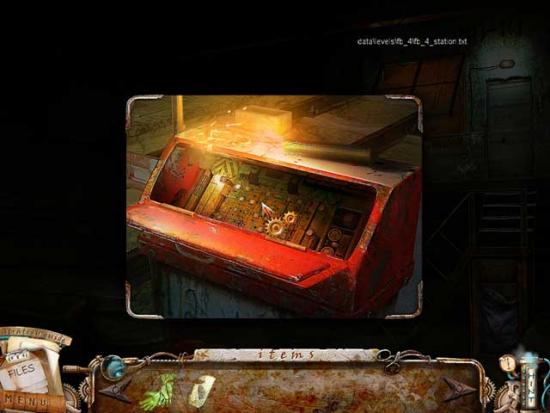
- Connect all the parts of the scheme together. Click on pieces to rotate them. A good strategy is to start from the semi-circle connection corners on the sides of the puzzle, and then work your way in and around. The solution is shown below.
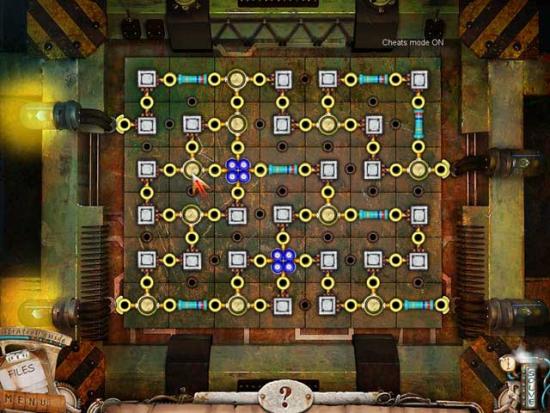
- Upon completing the puzzle, the lights will be restored and the train will arrive. Click on the train for a closer view.
- Use the FINGERPRINT on the blue scanner to open the train door, then proceed inside.
Train
- Click on the hidden object area on the right.
- Find the objects listed at the bottom of the screen: objects are randomized. The Key Item is circled in red.
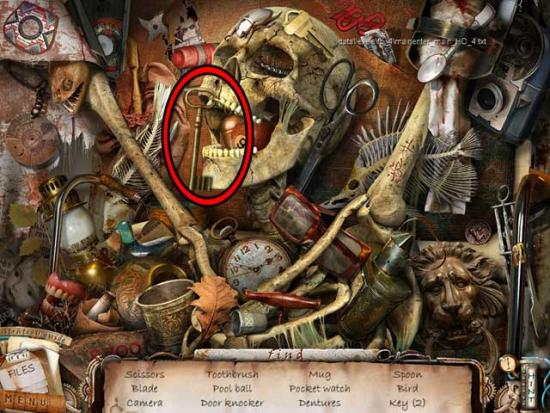
- Upon completing the area, the CABINET KEY will be added to your inventory.
- Exit the train and return to the operator booth.
Operator Booth
- Take a closer look at the first aid cabinet again. Use the CABINET KEY on the lock on the right, then click on the panel to open it. Collect the CONTROL PANEL PART inside and add it to your inventory.

- Take a closer look at the monitor on the control panel again. Use the CONTROL PANEL PART on the red puzzle pieces beneath the monitor to trigger a puzzle.
- Try to remove the trains that block the red train’s path. Every train can be moved in two directions– up and down or left and right. Click on the circular arrow button to reset the puzzle. Refer to the screenshot below for a step-by-step of the solution.

- Once you’ve completed the puzzle, hurry back to the train and climb aboard.
Train
- Click on the hidden object area on the right.
- Find the objects listed at the bottom of the screen: objects are randomized. The Key Item is circled in red.
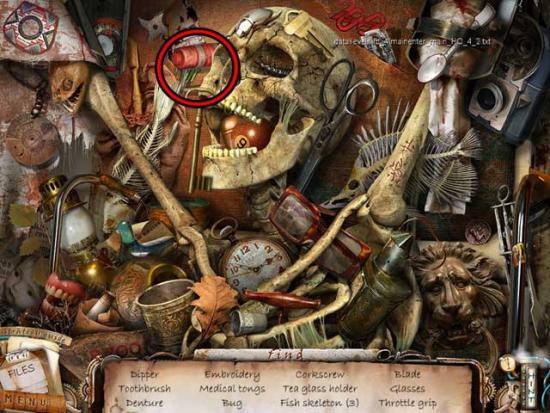
- Upon completing the area, the THROTTLE GRIP will be added to your inventory.
- Take a closer look at the control console at the front of the train. Use the THROTTLE GRIP on the area missing it, then click on it to start the train.
- Watch the cutscene that follows.
Electroshock Room
- Note the code that has appeared on the monitor above the chair: “53951”.
- Backtrack to the elevator and take it down to the basement, then enter the boiler room.
Boiler Room
- Take a closer look at the green knob in front of you. Use the THICK GLOVES on the knob to turn it and shut off part of the steam system.
- Return to the elevator and take it up to the 1st floor.
Entrance 1F
- Proceed towards Patient X’s cell.
Patient X’s Cell
- Take a closer look at the clipboard on the right. Click on the photo to obtain the PATIENT X PHOTO.
- Return to the elevator and take it up to the 2nd floor.
Hallway 2F
- Proceed forward to the large cell door and take a look at the slot towards the bottom. Place the PATIENT X PHOTO in the slot and the patient will reward you with the VOODOO DOLL. Click on it to add it to your inventory.
- Return to the elevator, take it down to the basement, and enter the boiler room again.
Boiler Room
- Click on the area where the steam was formerly let out for a close-up and to trigger a puzzle.
- Click on the various wheels to turn them, changing the outlet of the steam vents. Do this until all the steam vents are shut off. Refer to the screenshot below for the positions of the wheels and which to click on it what order. The solution is shown below:
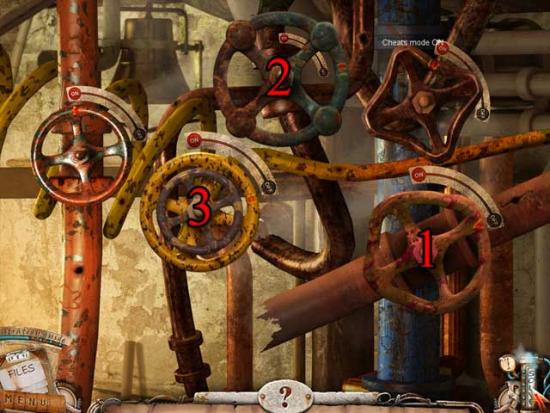
- Once you’ve completed the puzzle and shut off the steam, click on the oven beneath the vents for a closer view. Use the VOODOO DOLL on the oven to burn it, revealing a key. You will need to find a way to retrieve it, though.
- Return to the elevator and take it up to the 1st floor.
Entrance 1F
- Proceed forward to Patient X’s cell.
Patient X’s Cell
- Take a closer look at the mechanism on the left. Click on the red wheel to turn it and open the door to Patient X’s Cell.
- Enter the cell.
Patient X’s Cell (Inside)
- Talk with Patient X to discover his true identity. He will give you helpful tips on what to do next.
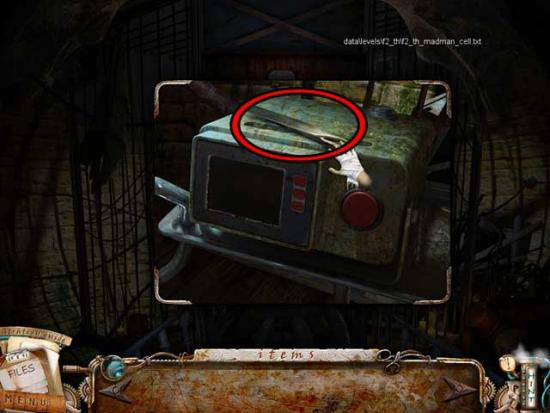
- Before leaving, check the small panel to the immediate right of Patient X, beneath the right monitor. Click on the TWEEZERS to add them to your inventory.
- Exit and return to the elevator, taking it back down to the basement and entering the boiler room.
Boiler Room
- Take a closer look at the oven again. Use the TWEEZERS to recover the DRUGSTORE KEY and add it to your inventory.
- Return to the elevator and take it up to the 4th floor.
Hallway 4F
- Take a closer look at the door on the far right with the sign “Drug Storehouse” above it. Use the DRUGSTORE KEY on the lock to open the door, then proceed inside.
Drug Storehouse
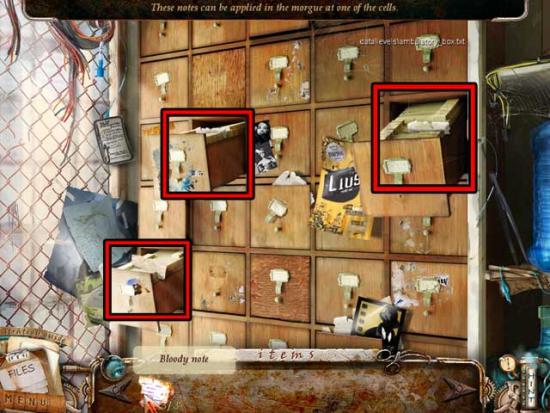
- Take a closer look at the large shelf of cabinets on the far left. Click on the three cabinets shown below to open them, then retrieve the BLOODY NOTE inside. After opening all three and collecting the notes, you should have BLOODY NOTE 3/3 in your inventory.
- Go back to the main storehouse area, then click on the hidden object area at the back of the room.
- Find the objects listed at the bottom of the screen: objects are randomized. The Key Item is circled in red.
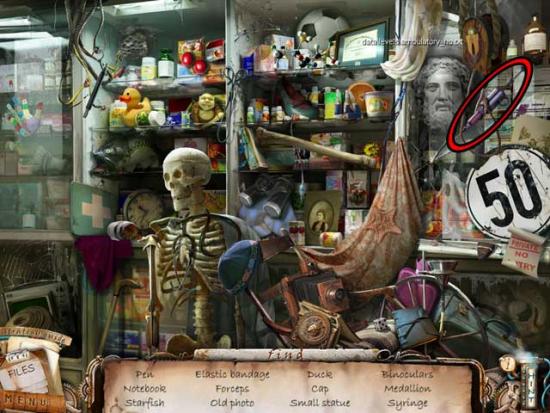
- Upon completing the area, the CURE FOR ICARUS will be added to your inventory.
- Exit the storehouse and return to the elevator, taking it down to the 3rd floor.
Hallway 3F
- Proceed to the right, to Icarus’ Cell.
Icarus’ Cell
- Use the CURE FOR ICARUS on the glass mirror to trigger a conversation. Once it’s finished, enter the cell.
Icarus’ Cell (Inside)
- Continue talking with Icarus until he leaves. Once he’s gone, play the hidden object scene.
- Find the objects listed at the bottom of the screen: objects are randomized. The Key Item is circled in red.
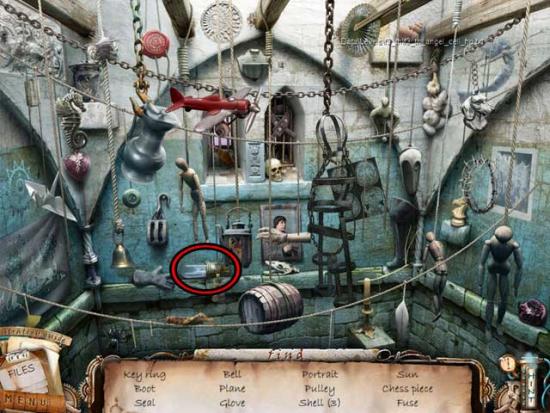
- Upon completing the area, the MORGUE FUSE will be added to your inventory.
- Return to the elevator and take it down to the basement, then enter the security room.
Security Room
- Click on the security panel for a closer view. Use the MORGUE FUSE on the slot labeled “morgue”, then click on the screen to trigger a puzzle.
- Move the blue points to untangle all of the lines (so that they’re all green and none of them cross). A possible solution is shown below.
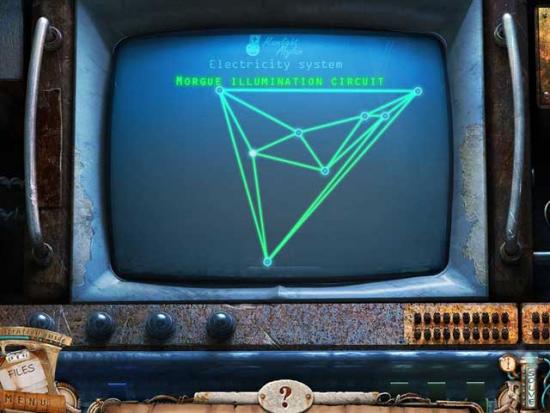
- Upon completing the puzzle, power will be restored to the morgue.
- Exit the security room back to the basement, then enter the morgue.
Morgue
- Take a closer look at the closed panel at the right edge of the morgue body storage unit. Use the BLOODY NOTE 3/3 on the panel (which you’ll now notice, requires a code). The notes will reveal the code “02-01-70”. Simply input the numbers on the paper onto the lock to open the panel.
- Once the panel is open, click once again for a closer view. Click on the FROZEN HAND to add it to your inventory.
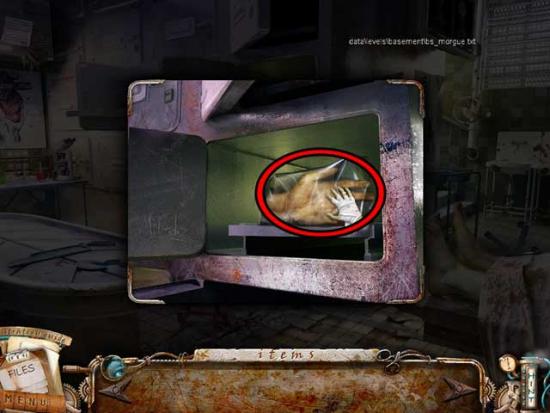
- Once you’ve collected the hand, exit the morgue to the basement, then proceed up the stairs through the hatch to reception.
Reception
- Continue towards the green doorway on the right.
Asylum Exit
- Take a closer look at the panel on the left. Use the FROZEN HAND on the red scanner in the upper right corner, then click on the keyboard below. Input the code “53951”.
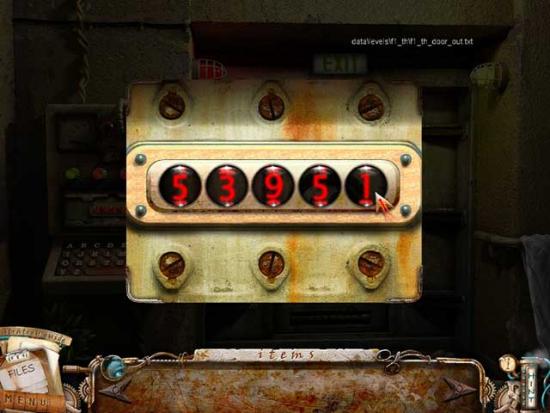
- The door is jammed! Go back through reception and back down to the basement.
Basement
- Click on the hidden object area beneath the stairs.
- Find the objects listed at the bottom of the screen: objects are randomized. The Key Item is circled in red.
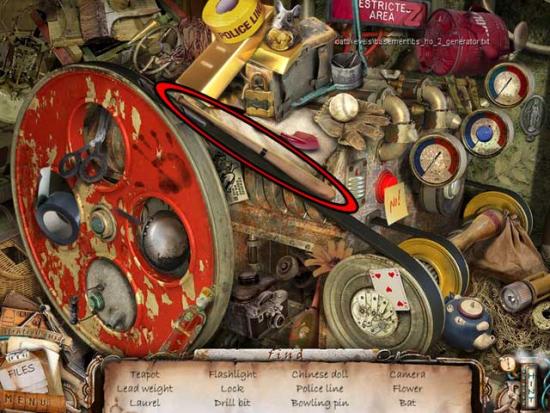
- Upon completing the area, the BAT will be added to your inventory.
- Enter the security room.
Security Room
- Take a closer look at the security panel. Use the BAT to smash each and every one of the fuses.
- Patient X will appear on the screen. You can now escape!
- Exit the security room back to the basement and proceed through the hatch up to reception to the asylum exit.
Asylum Exit
- Go through the door to freedom.
Congratulations! You’ve completed the main adventure of F.A.C.E.S.!
Collector’s Edition Bonus Adventure
To access the extra game, you must first complete the main adventure of F.A.C.E.S. Once you have, go back to the main menu, select “bonus content”, then under the tab “extra game”, click Play Game.
Outside Mansion
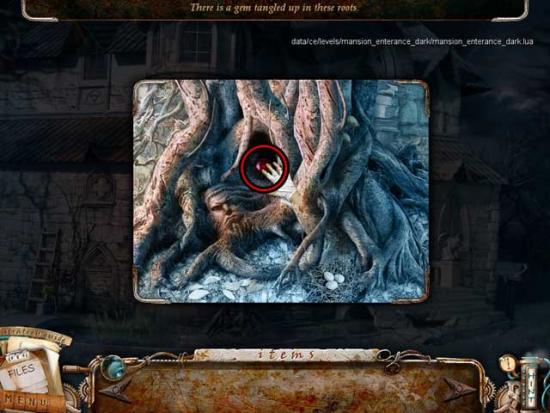
- Take a closer look at the base of the dead tree in the middle of the screen. Click on the roots to move them aside and reveal the GLASS EYE. Click on it to add it to your inventory.
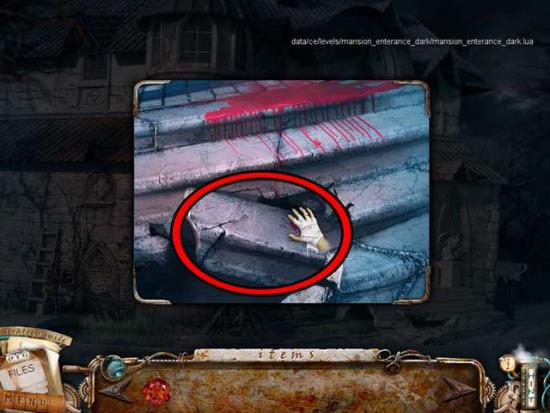
- Take a closer look at the base of the stone steps leading up to the front doors of the house. Click on the bottom step to loosen it, then click on it again to add the HEAVY STONE to your inventory.
- Examine the small gargoyle sitting on the railing between the front door and the mailbox. Read the note in it’s wing, then use the HEAVY STONE on the upper left fang to add the STONE TOOTH to your inventory.
- Look at the water at the bottom left of the screen for a closer view. Click on the lilies to move them aside and notice a catfish swimming with a key in it’s mouth: we’ll come back to this later.
- Take a closer look at the front door of the mansion. Use the GLASS EYE on the empty left socket and the STONE TOOTH on the empty left tooth socket.
- The door will now open. Proceed inside.
Entryway
- Take a closer look at the broken floorboards on the left. Click on the PILLOW to add it to your inventory.
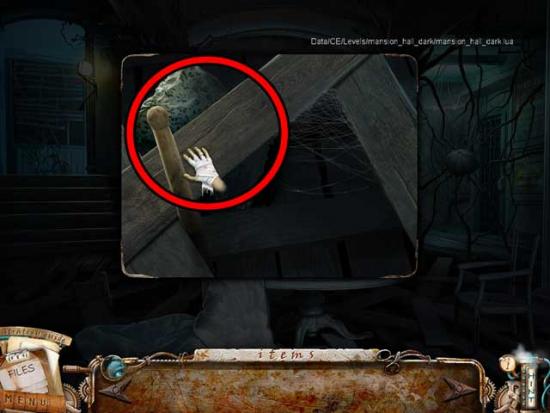
- Proceed through the doorway on the left.
Hallway
- Click on the hidden object area over the phone on the right.
- Find the objects listed at the bottom of the screen: objects are randomized. The Key Item is circled in red.
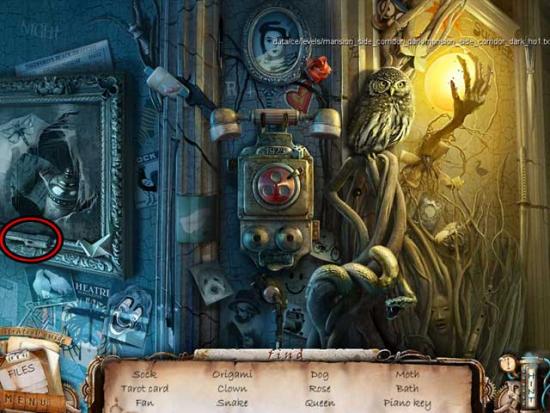
- Upon completing the area, the PIANO KEYS 1/3 will be added to your inventory.
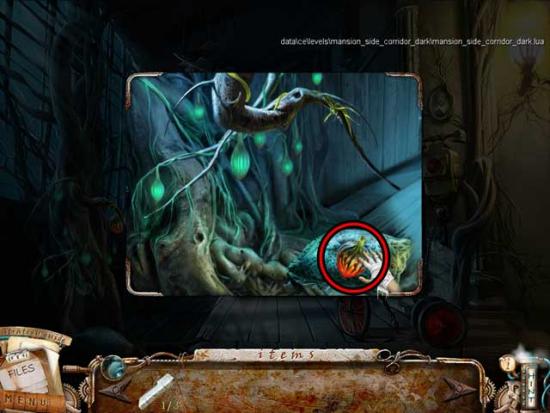
- Take a closer look at the fruit tree on the left. Use the PILLOW on the floor space, then click on the orange fruit. Pick it up from the pillow to add the EXPLOSIVE FRUIT to your inventory.
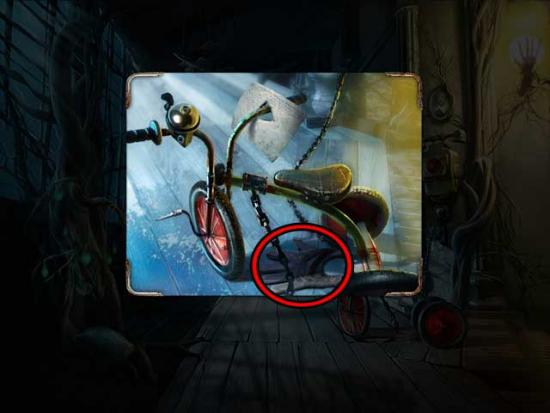
- Take a closer look at the tricycle on the right. Click on the THICK GLOVES to add them to your inventory.
- Take a closer look at the wall blocking the doorway at the far end of the room. Use the EXPLOSIVE FRUIT on the empty brick slot to blow the wall apart.
- Continue through the new doorway and into the next room.
Living Room
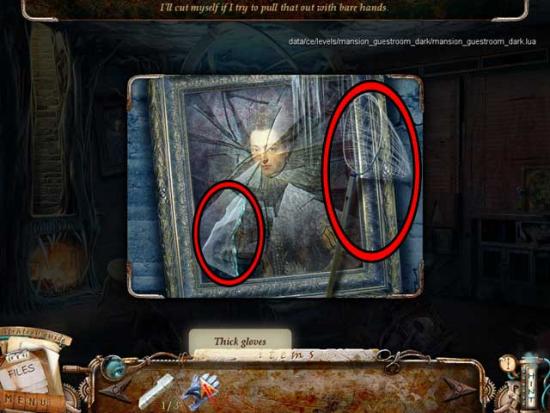
- Take a closer look at the portrait painting hanging on the back wall on the left. Use the THICK GLOVES to pick up the SHARP GLASS, then click on the DIP NET to add them to your inventory.
- Exit the close-up, then continue forward towards the right wall.
Living Room Wall
- Take a closer look at the puzzle contraption in the middle of the screen. Click on the OIL CAN to add it to your inventory.
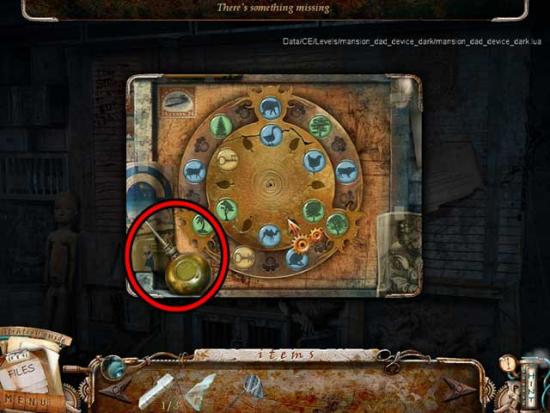
- You may also choose to read the note on the right side of the wall.
- Exit and return to the entryway.
Entryway
- Take a closer look at the flower and vines covering the doorway on the right. Use the OIL CAN on the flower bud to open it, then click on the CROWBAR inside to add it to your inventory.
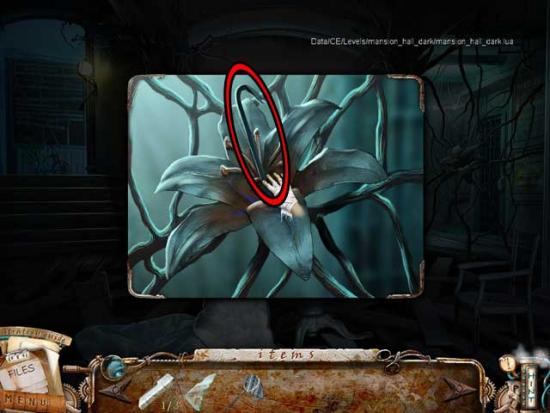
- Once you’ve collected the Crowbar, the flower and vines will burst into flame, giving you access to the new area.
- Examine the door on the right. The keychain near the lock will give you a clue as to what you should do next.
- Exit the mansion.
Outside Mansion
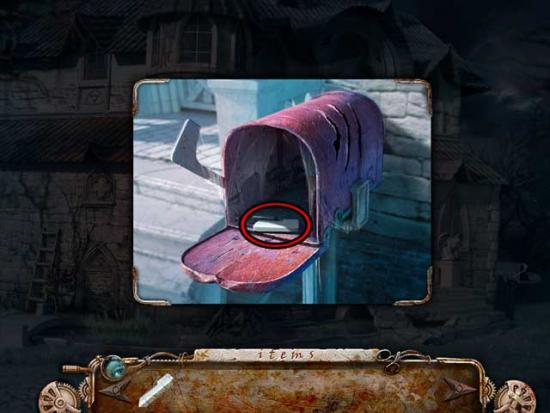
- Take a closer look at the mailbox on the far right. Use the CROWBAR to open the mailbox, then take a closer look at the newspaper. Collect the FISH FOOD sampler inside to add it to your inventory.
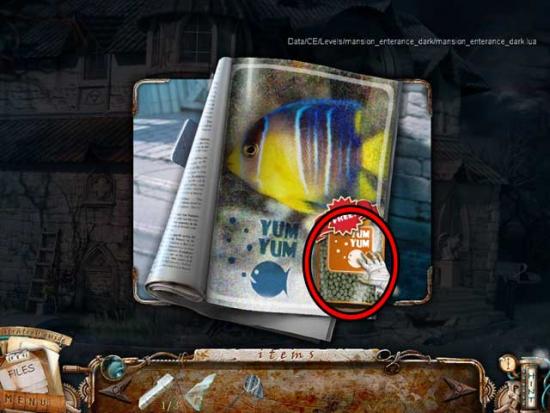
- Exit the close-up back to the main outside area, then take a closer look at the water at the bottom left of the screen.
- Use the FISH FOOD to distract the fish, then use the DIP NET to collect the ROOM KEY and add it to your inventory.
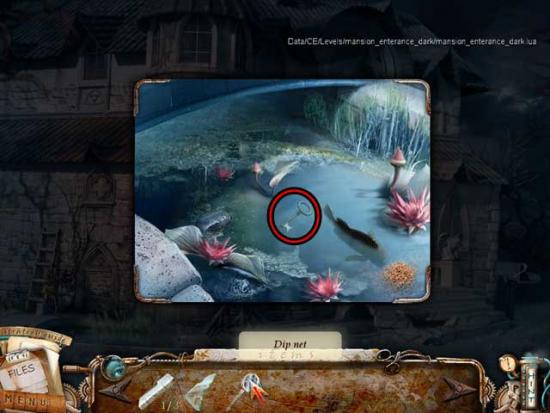
- Take note: the pond is also a great place to get some water for later, but not right now.
- Enter the mansion again.
Entryway
- Take a closer look at the door on the right. Use the ROOM KEY on the lock to open the door and gain access into the next room.
Side Room
- Click on the hidden object area over the desk on the right.
- Find the objects listed at the bottom of the screen: objects are randomized. The Key Item is circled in red.
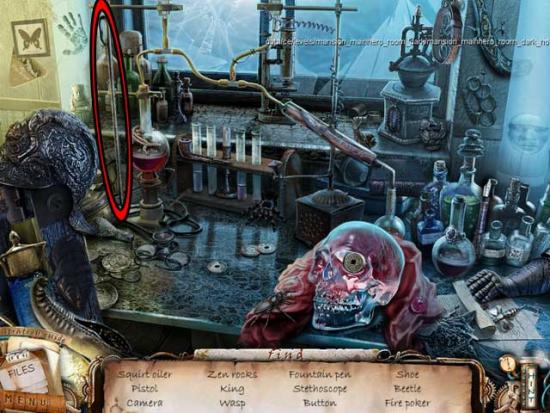
- Upon completing the area, the FIREPLACE POKER will be added to your inventory.
- Take a closer look at the open book at the bottom of the screen. Click on the drawing to move it and reveal the PIECE OF PUZZLE. Click on it to add it to your inventory.
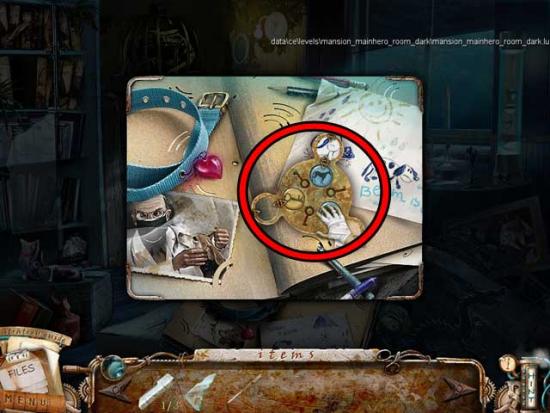
- Exit the side room and return to the living room.
Living Room
- Take a look at the right wall.
Living Room Wall
- Click on the puzzle where you previously found the oil can for a closer view. Use the PIECE OF PUZZLE on it to trigger a puzzle.
- Click the arrows to move the colored buttons, repositioning so that the sequences make logical sense. Rotate the middle dial and switch pieces as necessary to obtain the solution, which is shown below.
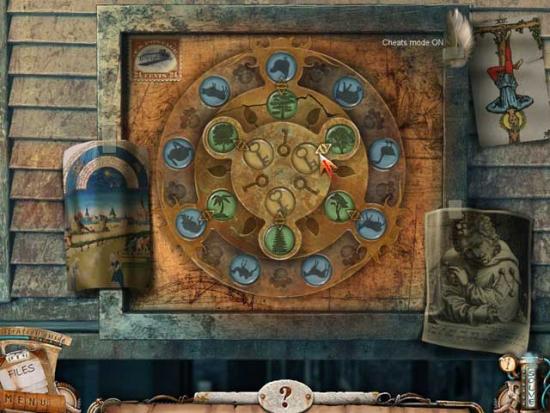
- Upon completing the puzzle, the shutter will open, revealing a new hidden object area.
- Find the objects listed at the bottom of the screen: objects are randomized. The Key Item is circled in red.
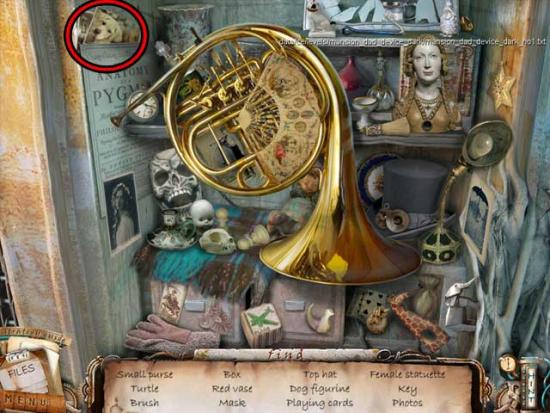
- Upon completing the area, the ROOM PHOTO will be added to your inventory.
- Watch the cutscene that follows.
- Take a closer look at the device on the middle shelf. Use the ROOM PHOTO on the picture frame, then click on the DUCT TAPE to add it to your inventory.
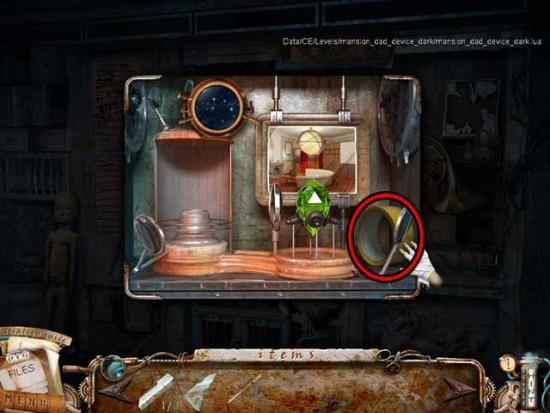
- Exit back to the main living room area.
Living Room
- Take a closer look at the clock lying at the base of the couch, towards the right side of the screen. Use the DUCT TAPE on the watering can to obtain the EMPTY WATERING CAN.
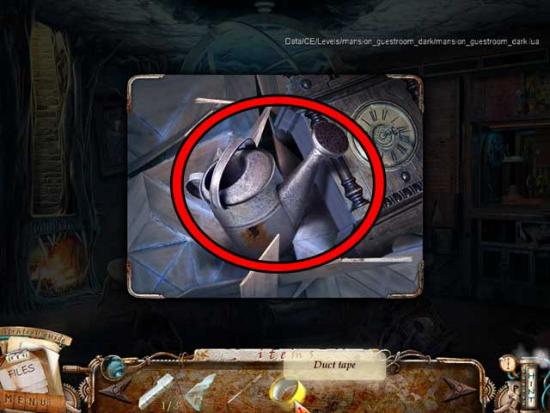
- Remember the pond from earlier? Time to go back! Return to the outside of the mansion.
Outside Mansion
- Take a closer look at the pond in the lower left corner of the screen. Use the EMPTY WATERING CAN on the water to obtain the FULL WATERING CAN.
- Enter the mansion and return to the living room.
Living Room
- Take a closer look at the fireplace on the left side of the room. Use the FULL WATERING CAN on the fire to extinguish it, then use the FIREPLACE POKER to move the burnt logs and obtain the BUG.
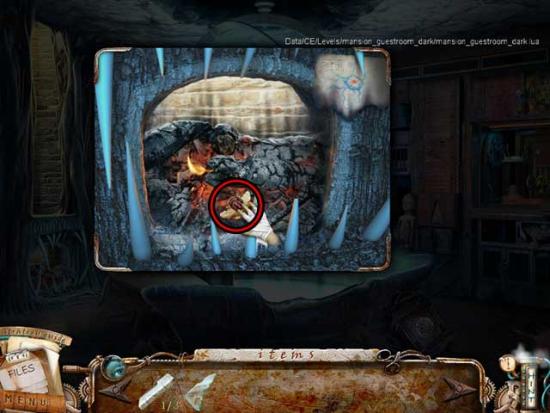
- You may also choose to view the note in the upper right corner before exiting.
- Return to the side room.
Side Room
- Take a closer look at the caged toad at the top of the screen, towards the left. Use the BUG on the toad to feed it, opening the doorway to the next room. Proceed inside.
Bedroom
- Take a closer look at the top of the bed. Click on the DUSTER to add it to your inventory, then use the SHARP GLASS on the yellow creature to kill it, loosening its grip on the KEY and allowing you to add it to your inventory.
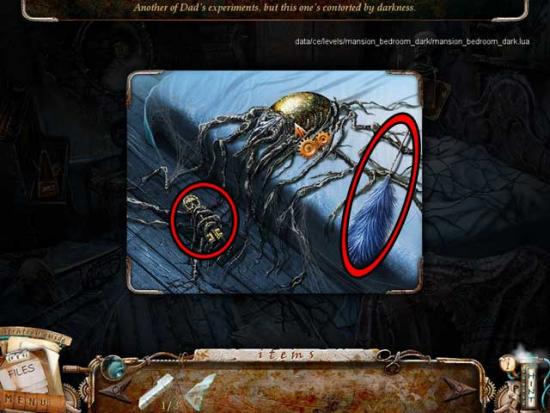
- Take a closer look at the piano on the left. Click on the METRONOME to add it to your inventory, then use the KEY on the lock to open the piano and reveal the keys.
- Exit the close-up, then take a closer look at the skeleton in the upper right corner. Click on the BOOK it’s holding (visible in the lower right corner) to add it to your inventory.
- Return to the side room.
Side Room
- Examine the bookcase on the left. Use the BOOK on the bookcase to trigger a puzzle.
- Place the books in the correct order to complete the picture. The solution is shown below.
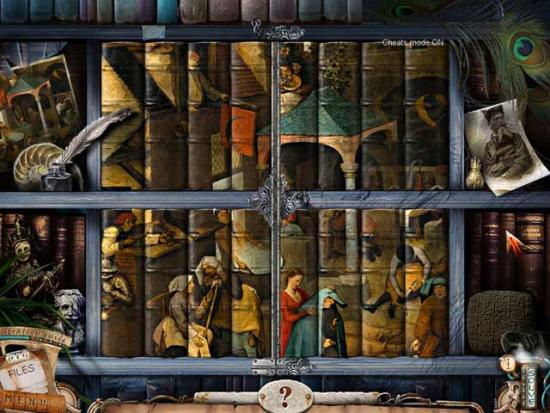
- Upon completing the puzzle, the books will separate, revealing the MUSICAL NOTES. Click on them to add them to your inventory.
- Return to the outside of the mansion.
Outside Mansion
- Take a closer look at the mailbox on the far right. Use the DUSTER on the cobwebs until they’re all gone, then click on the PIANO KEYS 2/3 to add it to your inventory.
- Enter the mansion and return to the living room.
Living Room
- Take a closer look at the wall on the right again.
Living Room Wall
- Click on the hidden object area on the right.
- Find the objects listed at the bottom of the screen: objects are randomized. The Key Item is circled in red.
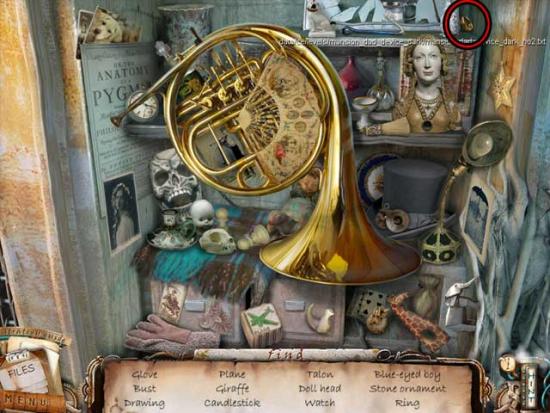
- Upon completing the area, the RING will be added to your inventory.
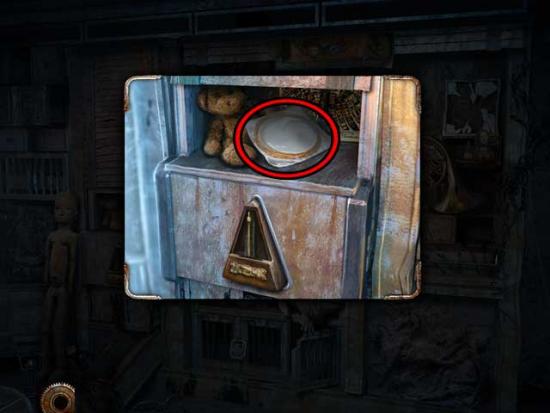
- Take a closer look at the triangular indentation on the left. Use the METRONOME on the groove to reveal the PIANO STRINGS. Click on them to add them to your inventory.
- Return to the bedroom.
Bedroom
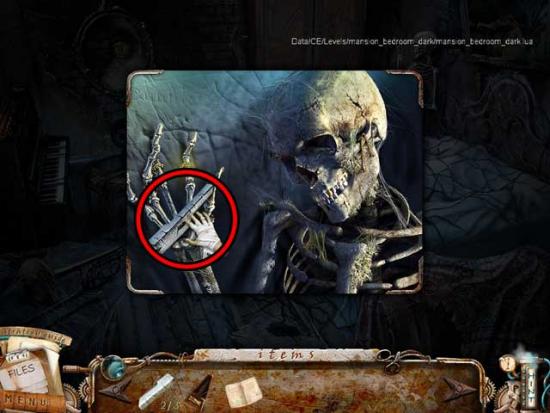
- Revisit the skeleton in the upper right corner. Use the RING on the on its bare finger to cause its hand to open. Click on the PIANO KEYS 3/3 to add it to your inventory.
- Examine the piano on the left again. Use the PIANO KEYS 3/3, the PIANO STRINGS, and the MUSICAL NOTES on the piano to trigger a puzzle.
- Pick the right notes as they fall. Choose a note that matches the one illuminated on the music sheet at the top of the screen. You can wait or take as long as you need to. Do this until you complete the puzzle. An example is shown below.
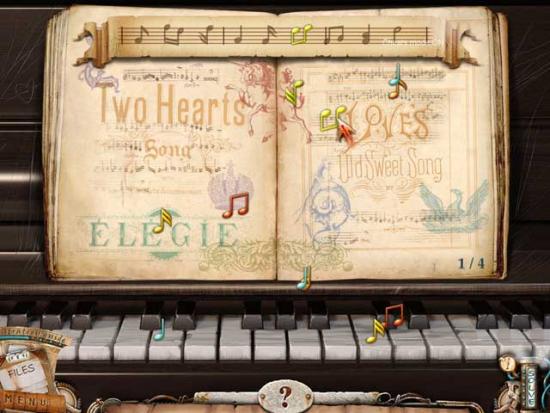
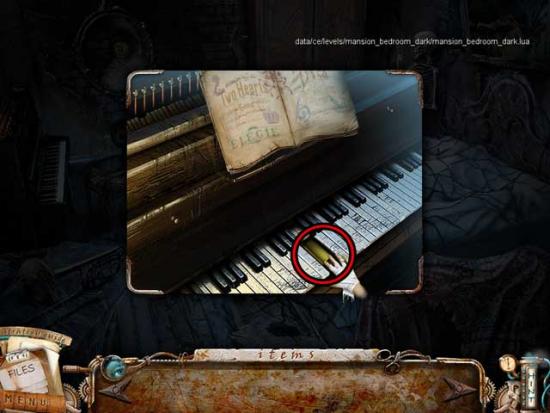
- Upon completing the puzzle, the DRAWING MARKER will be revealed. Click on it to add it to your inventory.
- Return to the side room.
Side Room
- Take a closer look at the open book at the bottom of the screen again. Use the DRAWING MARKER on the drawing to restore the sun and rid the room of darkness.
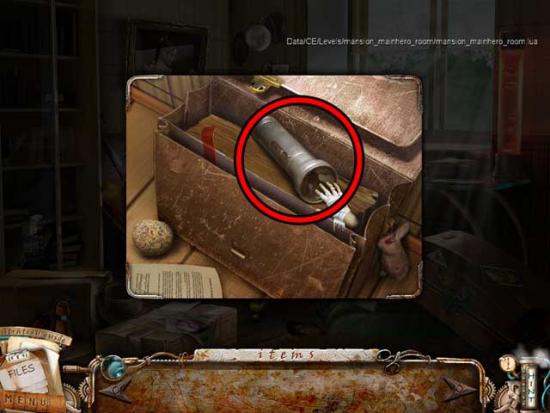
- Examine the briefcase bag beneath the table and to the right of the red chair. Click on the FLASHLIGHT to add it to your inventory.
- Backtrack to the entryway.
Entryway
- Examine the broken floorboards on the lower left again. Use the FLASHLIGHT on the dark space to illuminate it, revealing the code “3098” and the SCREWDRIVER. Click on it to add it to your inventory.
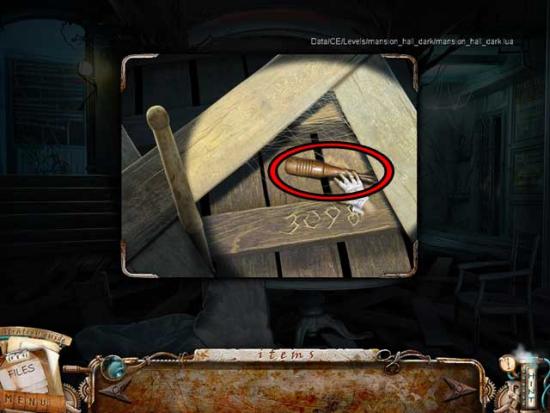
- Exit the mansion.
Outside Mansion
- Take a closer look at the chained ladder on the far left side of the screen. Input the code “3098”, then click on the STEP LADDER to add it to your inventory.
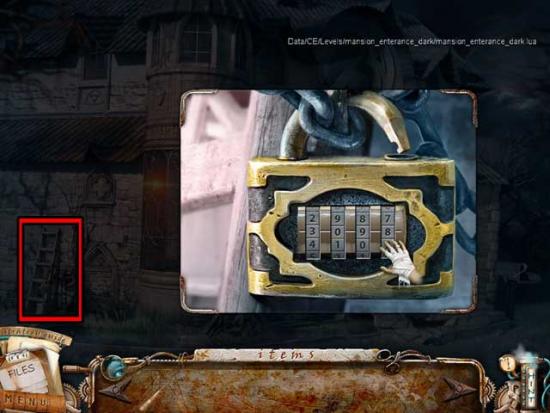
- Enter the mansion and return to the hallway.
Hallway
- Use the STEP LADDER in the hallway (to reach the plane hanging from the ceiling). We’ll come back to this soon.
- Click on the hidden object area on the right.
- Find the objects listed at the bottom of the screen: objects are randomized. The Key Item is circled in red.
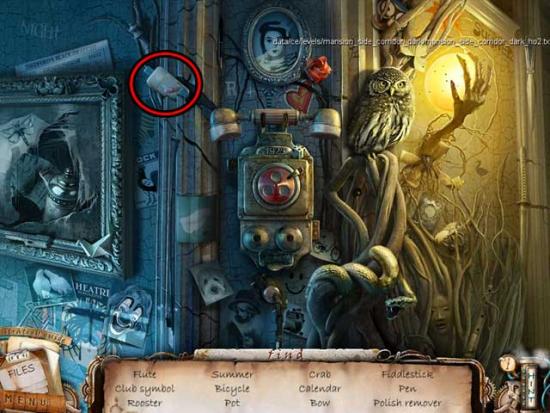
- Upon completing the area, the POLISH REMOVER will be added to your inventory.
- Return to the side room.
Side Room
- Take a closer look at the large suitcase on the right. Use the POLISH REMOVER on the sticky substance covering the lock to open the suitcase, revealing the KNIFE. Click on it to add it to your inventory.
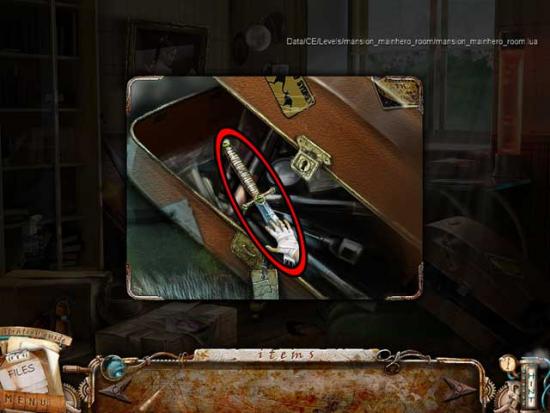
- Examine the package lying on the floor towards the bottom left area of the screen. Use the KNIFE to cut it open, revealing the AIRPLANE MODEL. Click on it to add it to your inventory.
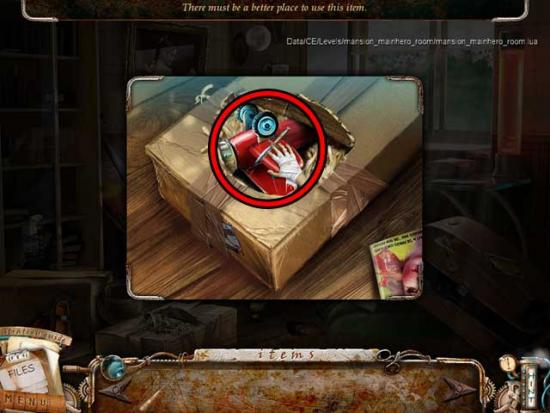
- Return to the hallway.
Hallway
- Examine the airplane model hanging from the ceiling. Use the AIRPLANE MODEL from your inventory on the old model to purge the room of darkness.
- Take a closer look at the right wall.
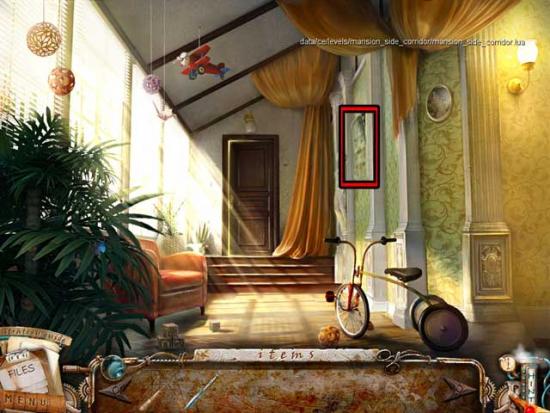
- Use the KNIFE to cut away the wallpaper, then use the SCREWDRIVER to remove the panel screws. Once the panel has been removed, click on the circuits to trigger a puzzle.
- Disconnect the red bulb from the power source, which is marked with a lightning bolt. To do this, drag and drop three yellow switches into the right locations. The solution is shown below.
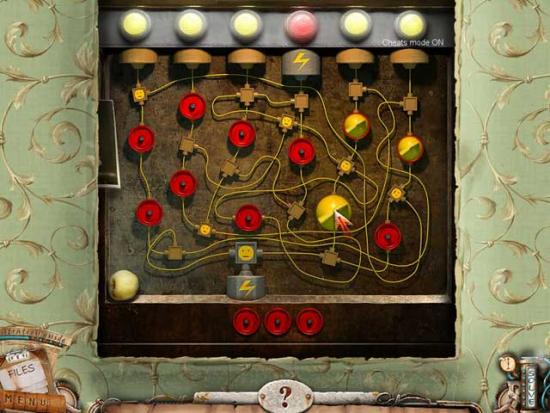
- Upon completing the puzzle, the panel will move up. Click on the BULB to add it to your inventory.
- Enter the living room and proceed towards the right wall.
Living Room Wall
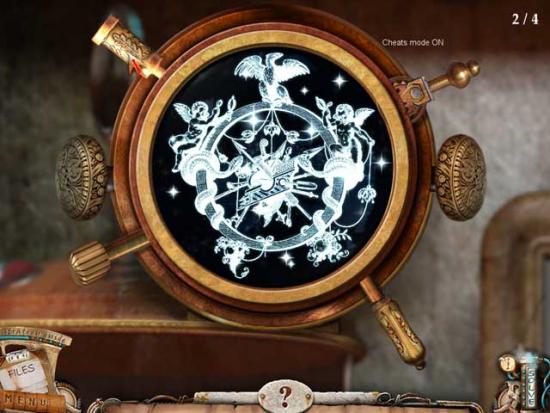
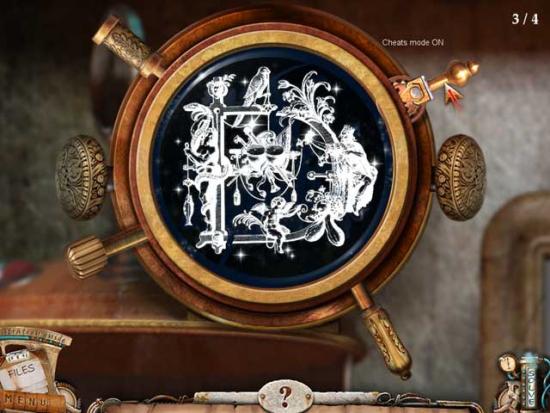
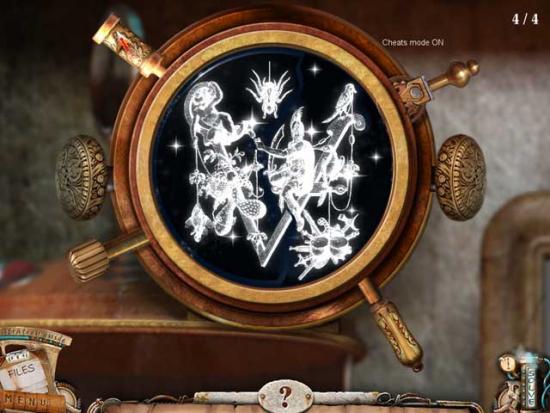
- Click on the device on the middle shelf for a closer view. Use the BULB on the left slot to trigger a puzzle.
- Try to bring the two images into one picture using the levers around the lens. Take note of the pictures and the positions of the levers as shown in the screenshots below. The solutions are shown here:
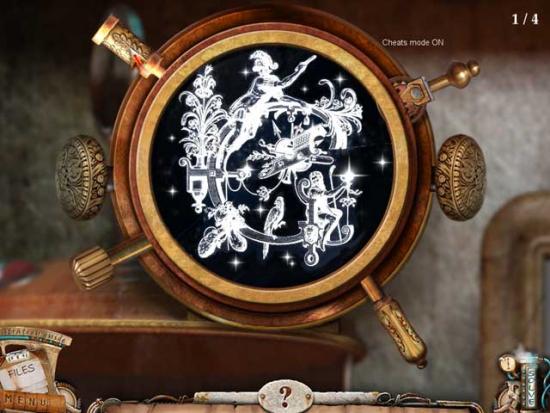
- Upon completing the puzzle, the lens will open, revealing the GLOBE. Click on it to add it to your inventory.
- Exit to the main living room.
Living Room
- Use the GLOBE on the large circular frame hanging from the ceiling to rid the room of darkness.
- Proceed through the new doorway straight ahead.
Study
- Click on the hidden object area over the desk.
- Find the objects listed at the bottom of the screen: objects are randomized. The Key Item is circled in red.
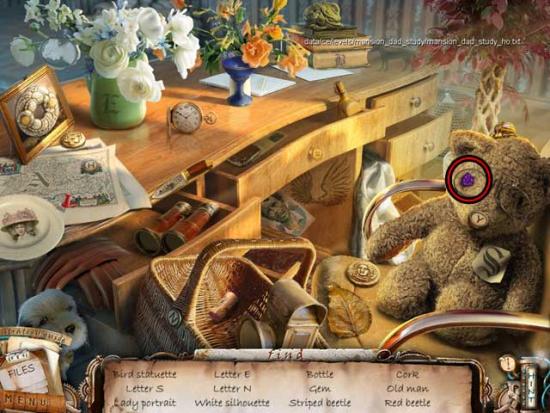
- Upon completing the area, the VIOLET GEM will be added to your inventory.
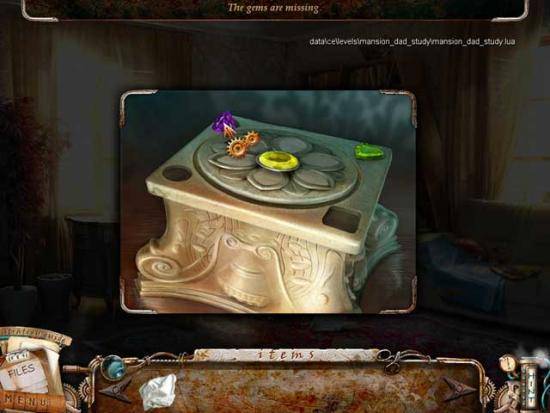
- Take a closer look at the bookcase in the corner. Click on the RAG to remove it from the box and add it to your inventory, then place the VIOLET GEM in the upper left slot.
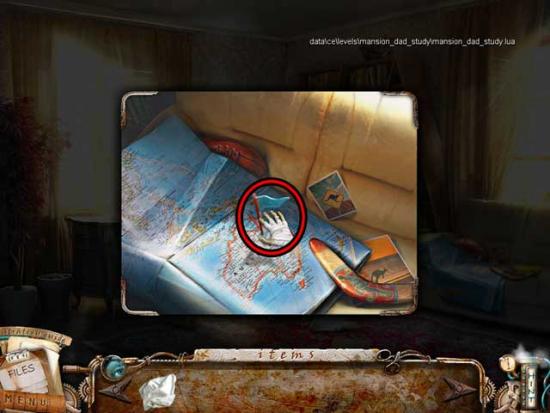
- Examine the couch on the right. Click on the FLAG to add it to your inventory.
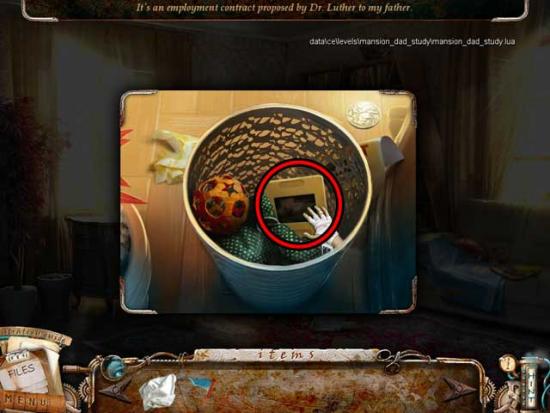
- Examine the waste bin to the left of the desk. Click on the note to read it, then move the rubbish aside until you find the SLIDE. Click on it to add it to your inventory.
- Return to the living room.
Living Room
- Examine the projector sitting on the table slightly to the left. Click on the red button to turn it on, then use the SLIDE on the slot on the side. Finally, use the RAG to clean the lens.
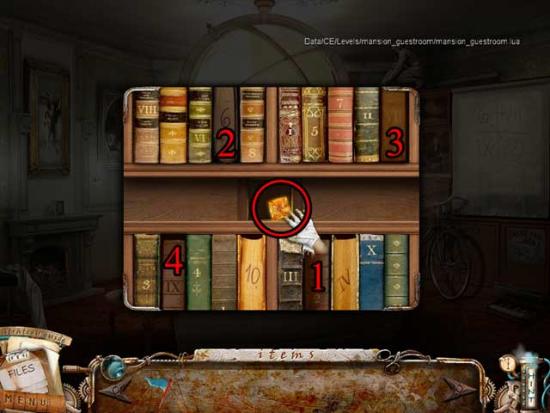
- Now you can see the projector slide, which reveals a code. Click on the books to the left of the projector screen.
- Click on the books in the correct order according to their markings (2, 6, VII, then IX) to reveal a hidden compartment. Click on the YELLOW GEM to add it to your inventory.
- Take a closer look at the large globe near the top of the screen. Click to rotate the globe until it shows Australia, then use the FLAG on Australia to reveal the BLUE GEM. Click on it to add it to your inventory.
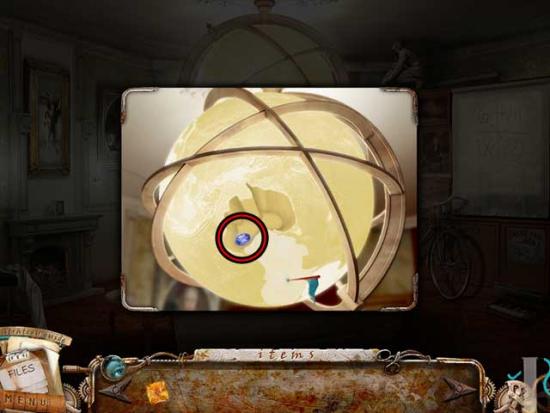
- Return to the study.
Study
- Examine the box on the bookshelf near the corner again. Use the YELLOW GEM and the BLUE GEM on their respective slots to open the box and reveal the PIECE OF ORNAMENT. Click on it to add it to your inventory.
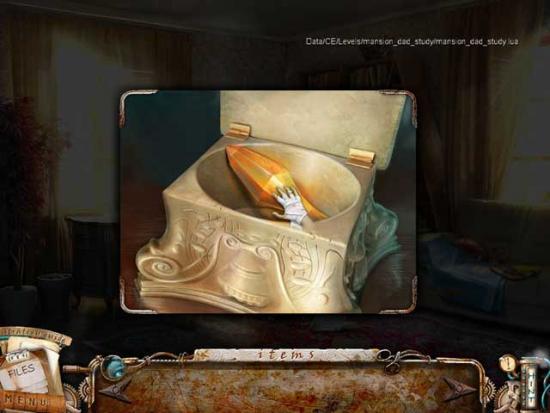
- Return to the entryway.
Entryway
- Take a closer look at the stained glass artwork on the wall straight ahead. Use the PIECE OF ORNAMENT on the slot on the right to turn the battle into the righteous angel’s favor.
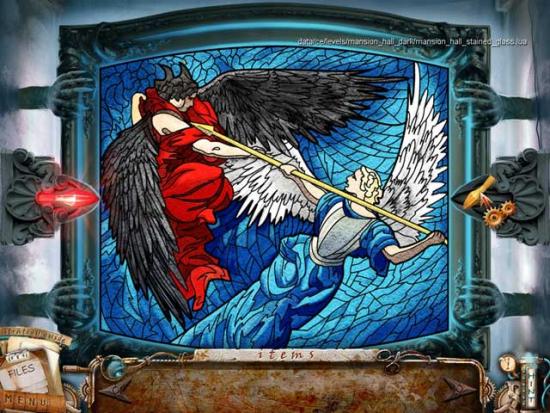
- The darkness has now been purged from the area. Examine the picture frame straight ahead, within which is a book. Read the book to find an important message, then watch the final cutscene.
Congratulations! You’ve completed F.A.C.E.S. Collector’s Edition!
More articles...
Monopoly GO! Free Rolls – Links For Free Dice
By Glen Fox
Wondering how to get Monopoly GO! free rolls? Well, you’ve come to the right place. In this guide, we provide you with a bunch of tips and tricks to get some free rolls for the hit new mobile game. We’ll …Best Roblox Horror Games to Play Right Now – Updated Weekly
By Adele Wilson
Our Best Roblox Horror Games guide features the scariest and most creative experiences to play right now on the platform!The BEST Roblox Games of The Week – Games You Need To Play!
By Sho Roberts
Our feature shares our pick for the Best Roblox Games of the week! With our feature, we guarantee you'll find something new to play!All Grades in Type Soul – Each Race Explained
By Adele Wilson
Our All Grades in Type Soul guide lists every grade in the game for all races, including how to increase your grade quickly!


