- Wondering how to get Monopoly GO! free rolls? Well, you’ve come to the right place. In this guide, we provide you with a bunch of tips and tricks to get some free rolls for the hit new mobile game. We’ll …
Best Roblox Horror Games to Play Right Now – Updated Weekly
By Adele Wilson
Our Best Roblox Horror Games guide features the scariest and most creative experiences to play right now on the platform!The BEST Roblox Games of The Week – Games You Need To Play!
By Sho Roberts
Our feature shares our pick for the Best Roblox Games of the week! With our feature, we guarantee you'll find something new to play!All Grades in Type Soul – Each Race Explained
By Adele Wilson
Our All Grades in Type Soul guide lists every grade in the game for all races, including how to increase your grade quickly!
Escape the Museum 2 Walkthrough
Welcome to Gamezebo's strategy guide for Escape the Museum 2. General Tips Escape the Museum 2 consists of a mix between standard adventure puzzle solving and object finding. For the puzzle solving scenes, move the yellow cursor around the screen until a question mark icon is shown below the cursor; this means that the area can be examined more closely. Sometimes when you examine the correct object, a yellow spark area will appear above objects on the scene. This spark area can be examin…
a:1:i:0;a:2:s:13:”section_title”;s:31:”Escape the Museum 2 Walkthrough”;s:12:”section_body”;s:45657:”
Welcome to Gamezebo’s strategy guide for Escape the Museum 2.
General Tips
- Escape the Museum 2 consists of a mix between standard adventure puzzle solving and object finding.
- For the puzzle solving scenes, move the yellow cursor around the screen until a question mark icon is shown below the cursor; this means that the area can be examined more closely. Sometimes when you examine the correct object, a yellow spark area will appear above objects on the scene. This spark area can be examined more closely to start an object finding scene.
- For the object finding scenes, a list is shown at the right side of the screen with the objects that need to be found. Look closely for an object and then left click on it to remove it from the list. Find all objects to complete the scene. Clicking too many times on the wrong objects will cause David’s heart rate to rise, and when this happens the screen will glow red and the cursor will have less control. Wait a few seconds and things will return to normal. You can click the Help picture to be shown a hint of where the object is. After about ten seconds, the picture will become available again so that another hint can be requested.
- You will need to collect all twenty bridge parts and complete the seven side quests as you progress through the game. These are normally found by selecting objects that shake slightly when the cursor moves over them.
- Select the map icon at the bottom-left corner of the screen to travel to a new location. Yellow stars refer to completed locations, exclamation marks refer to a location that has been passed but tasks still remain to be completed, and a green circle refers to the current level that is being played.
- The green bag icon at the bottom-right corner of the screen opens the inventory, which lists any of the twenty bridge parts that have been acquired in the game, and also displays any side missions that are in progress or have been completed. A green tick will be placed by any completed tasks, a red exclamation mark refers to incomplete tasks and a blank task description refers to a side mission that has not yet been found.
- The gears icon at the bottom-right corner of the screen opens the game menu. Select resume to return to the game, options to display the options menu or quit to return to the main menu. From the options screen you can toggle between windowed mode, auto pause and custom cursor, and can adjust sound effects, music volume and voice volume.
Walkthrough
Level 1: House Foyer
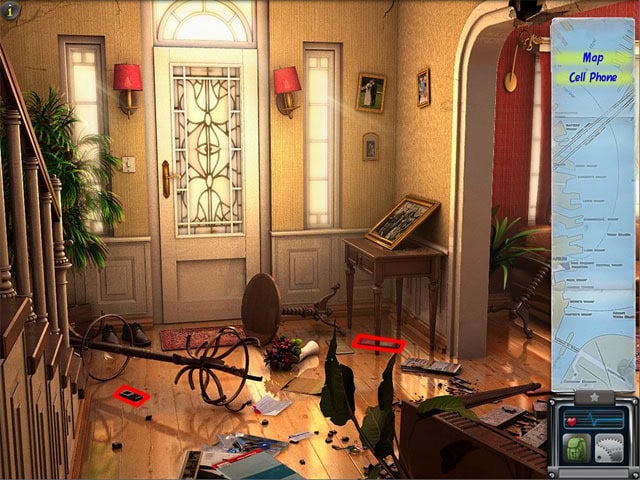
Find both items:

After finding the items, select the door to leave the house.
Level 2: Outside Front Steps
Select the rear window of the car to see that someone is trapped in the car:
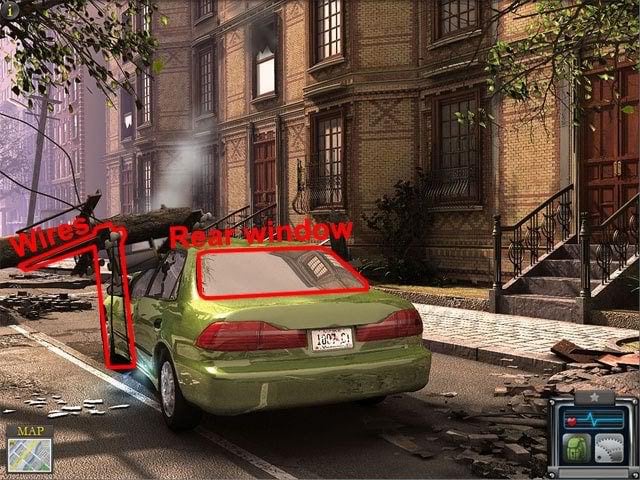
After selecting the rear window, yellow sparks will appear in front of the bush. Select the spark area and find the items:
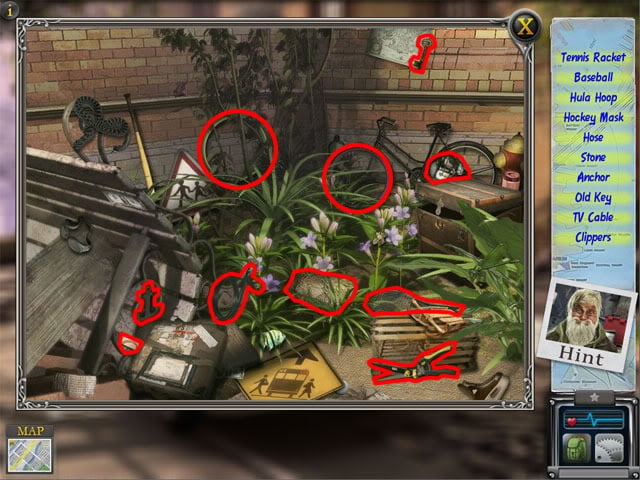
Three inventory items will now be added. Use the stone on the rear window of the car to break it. Select the rear window of the car and find the items:
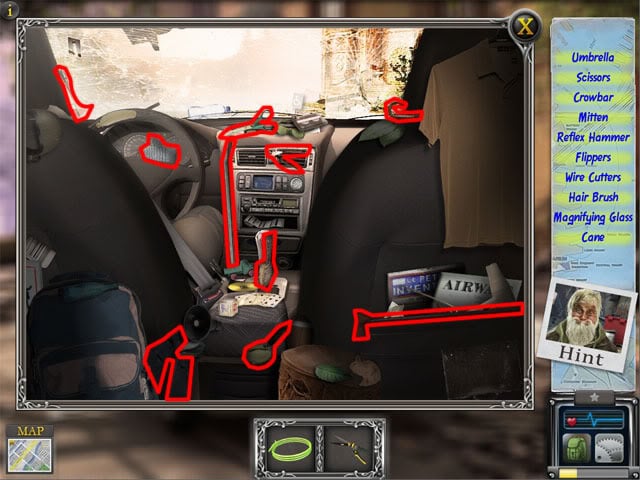
Use the hose on the wires to attach it to the telephone pole. Use the umbrella on the wires to move them. Select the car and use the clippers on the seatbelt. Select the person.
Level 3: Gallant Street
Select the pipes:
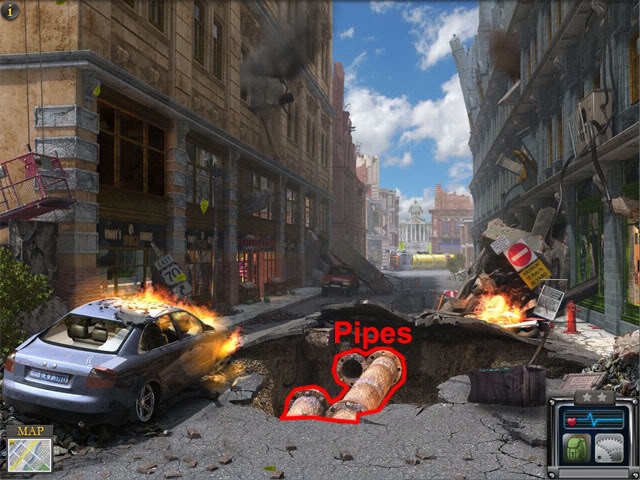
An old man will agree to show you the way if you can find ten cars.
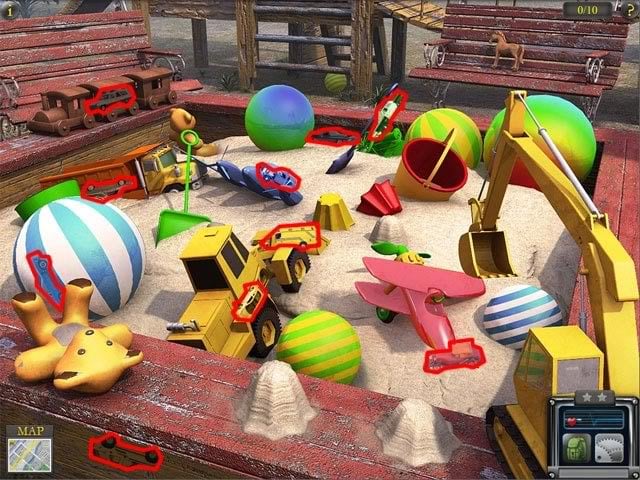
More objects can now be selected on the street:
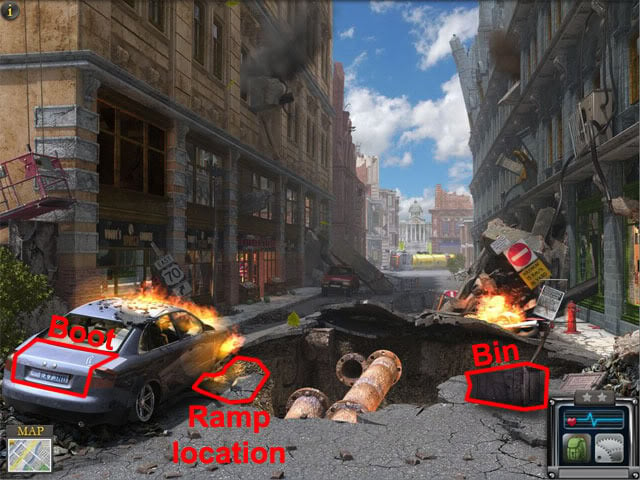
Select the bin to see that a dog was hiding behind it. Side mission 1: dog is added to the missions list window in the inventory. Close the inventory and select the car boot to see sparks appear at the right side of the street. Select the spark area and find the items:
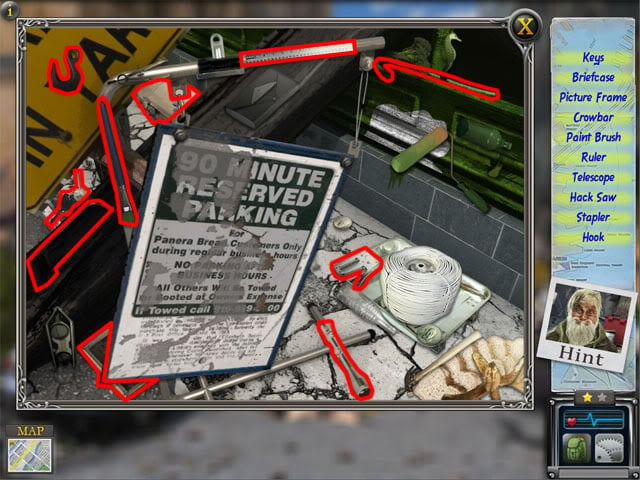
Use the crowbar on the car boot. Select the boot and find the items:
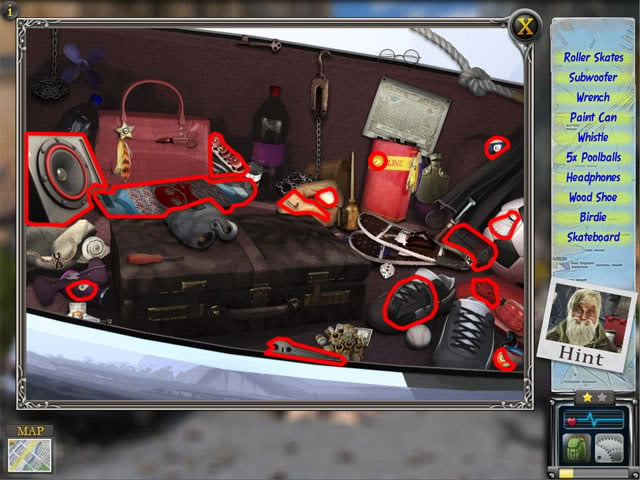
Select the spark area at the right side of the street. Use the wrench on the sign to take it. Use the subwoofer, sign and skateboard on the ramp location.
Level 4: Shopsy’s Convenience
Select the ATM:
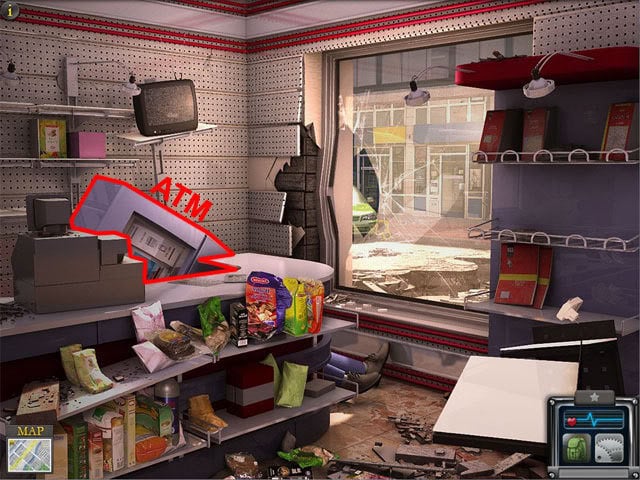
Two spark areas will now be visible. Select the left spark area and find the items:
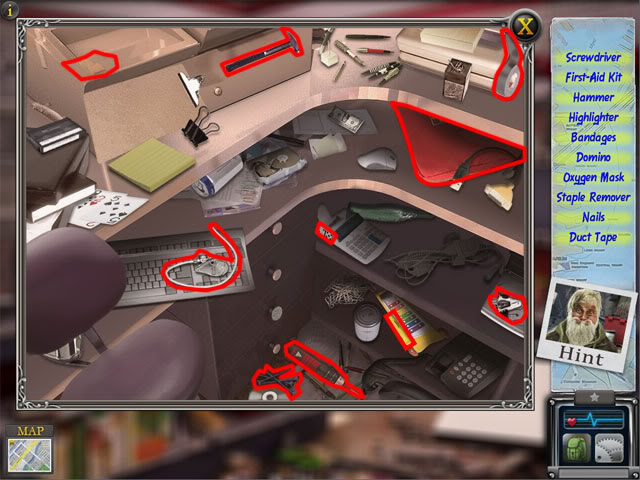
Select the right spark area and find the items:
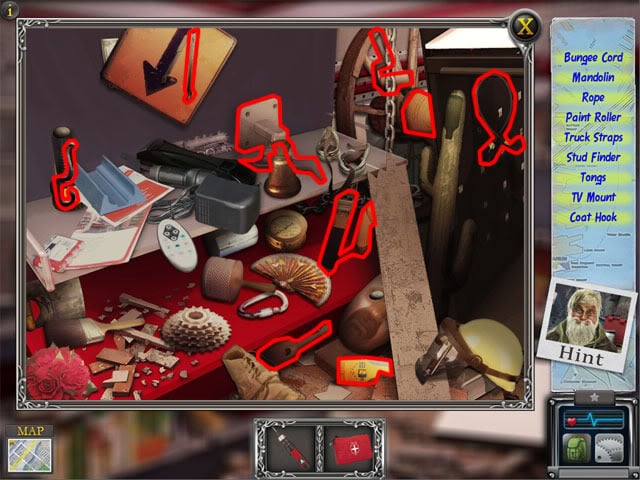
More objects can now be selected on the street:
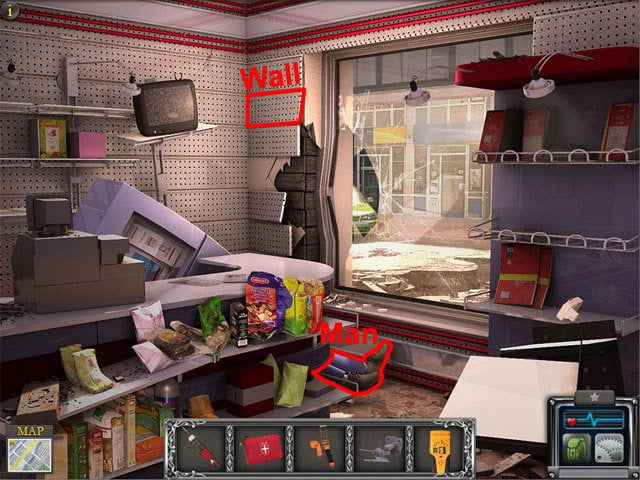
Use the stud finder on the wall to mark a red X on the wall. Use the TV mount on the X. Use the screwdriver on the TV mount. Use the truck straps on the TV mount to raise the ATM. Use the first aid kit on the man.
Level 5: Mustang Gas Station
Select the tire to find bridge part 1: Gas tank.
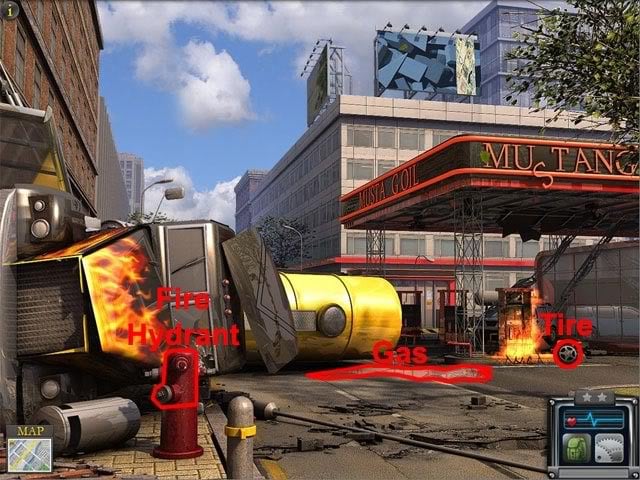
Select the fire hydrant and the gas to see two spark areas appear. Select the left spark area and find the items:
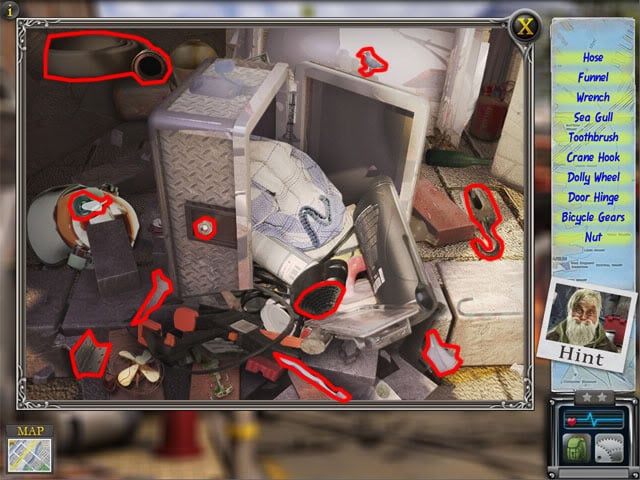
Select the right spark area and find the items:

Use the sand on the gas. Use the wrench on the fire hydrant. Use the hose on the fire hydrant. Use the wrench on the fire hydrant.
Level 6: East Cowan Bridge
Select the bridge:
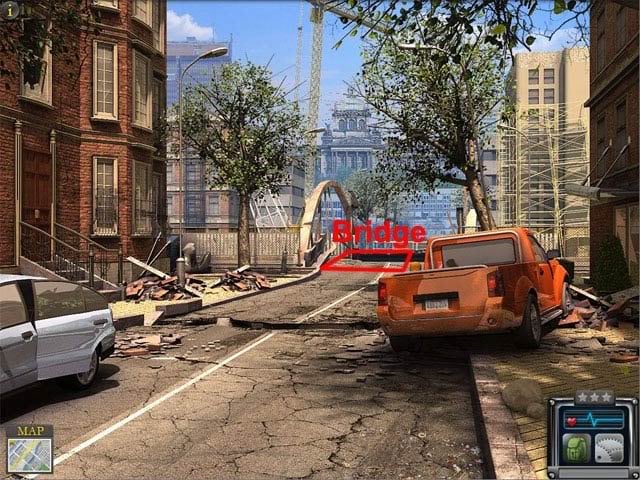
The old man wants you to find ten seashells:
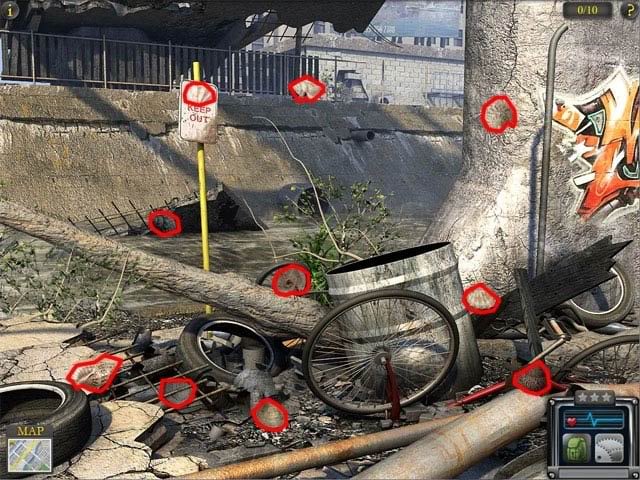
More objects can now be selected on the street:
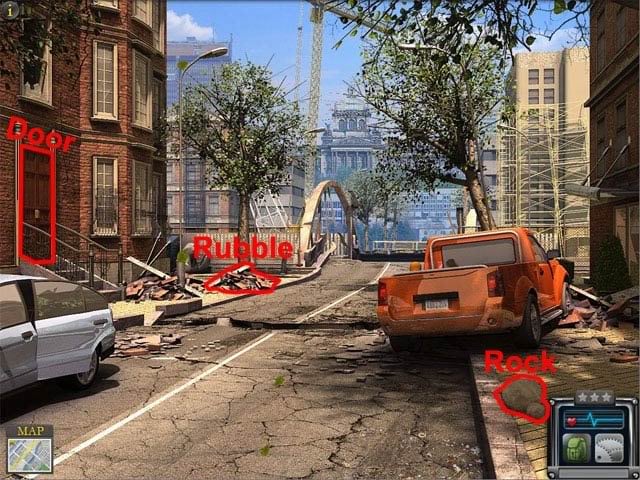
Select the rock to find bridge part 2: Knob. Select the rubble to find side mission 2: Kitten. Select the door and two spark areas will appear. Select the left spark area and find the items:
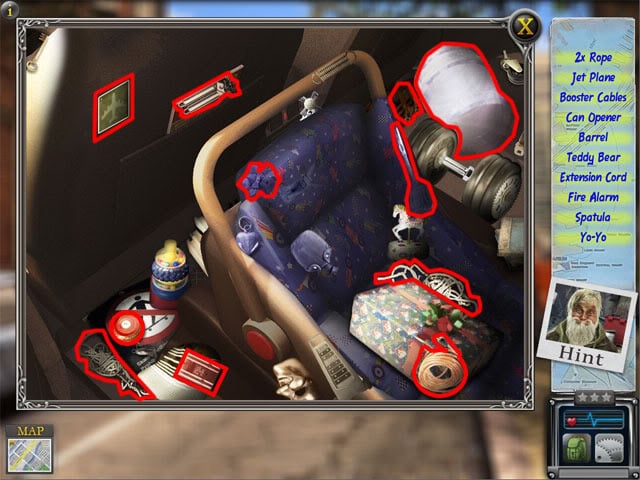
Select the right spark area and find the items:
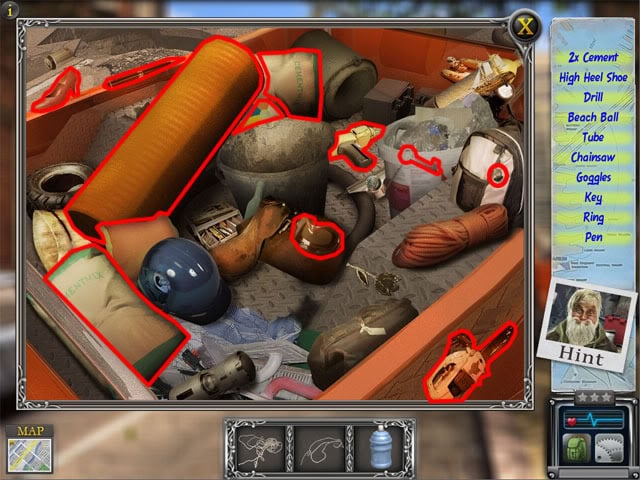
Use the tube on the bucket. Use the cement, water, drill and both pieces of rope on the tube. Select the tube to take the ram. Use the ram on the door.
Level 7: Riverside Apartments
Select the stairs to move closer:
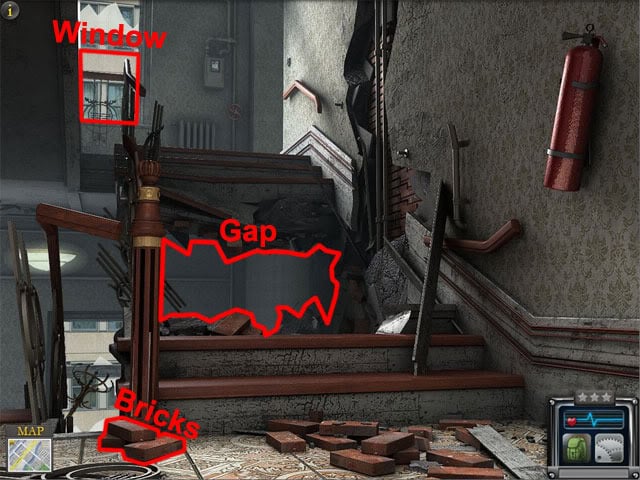
Select the bricks to find bridge part 3: Bolt. Select the window to complete side mission 1: Dog. Select the gap and two spark areas will appear. Select the left spark area and find the items:
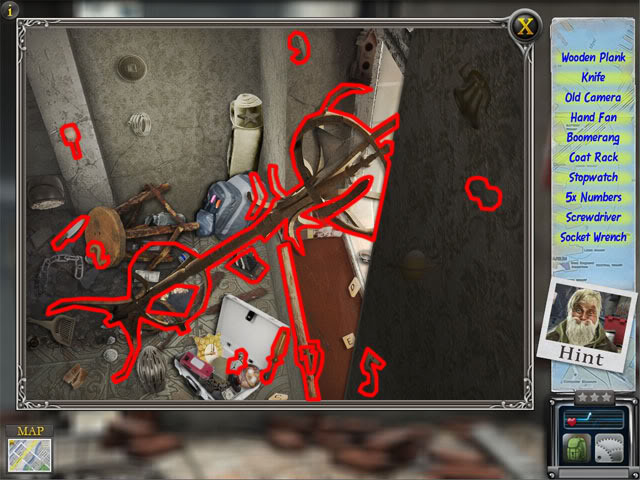
Select the right spark area and use the knife on the brackets:
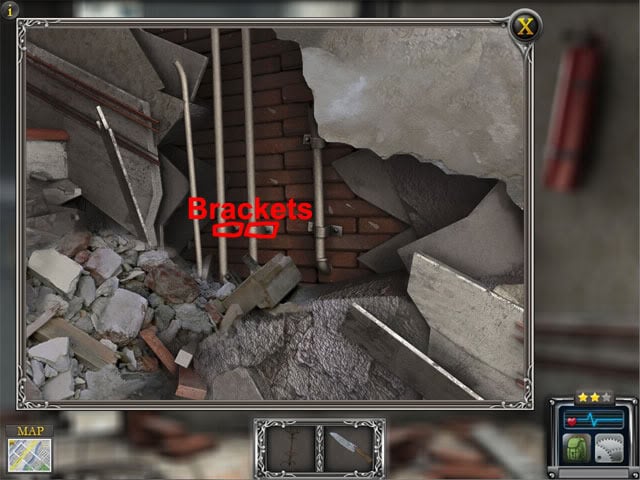
Use the coat rack on the gap. Use the brackets and knife on the coat rack. Select the top of the stairs. Open the door at the top of the stairs.
Level 8: Riverside Apartments – Roof Top
Select the gap and a spark area will appear:
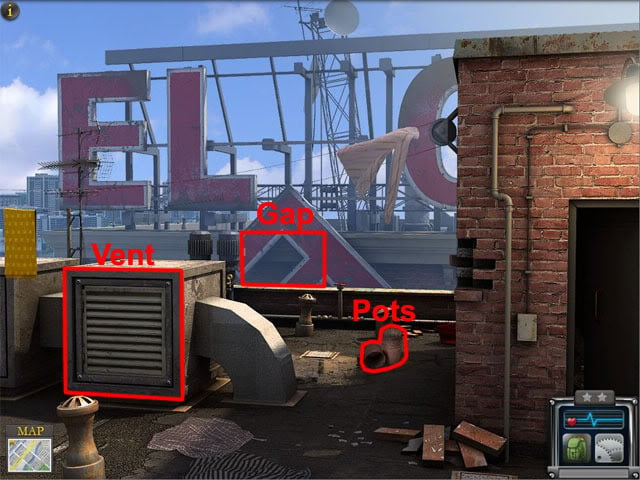
Select the pots to find side mission 3: Teddy bear. Select the spark area and find the items:
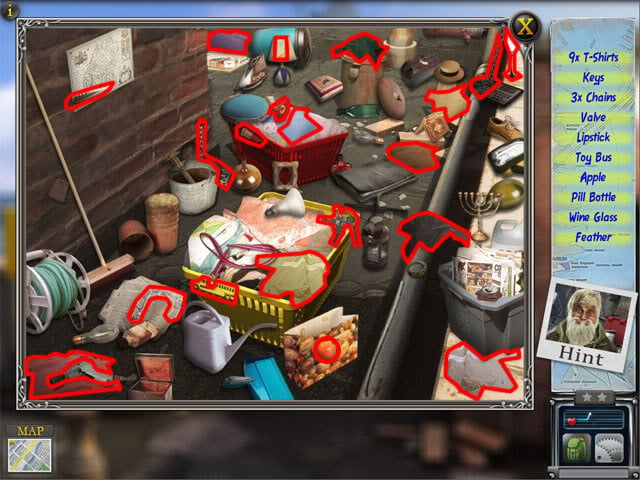
Use the keys on the vent. Select the vent and find the items:
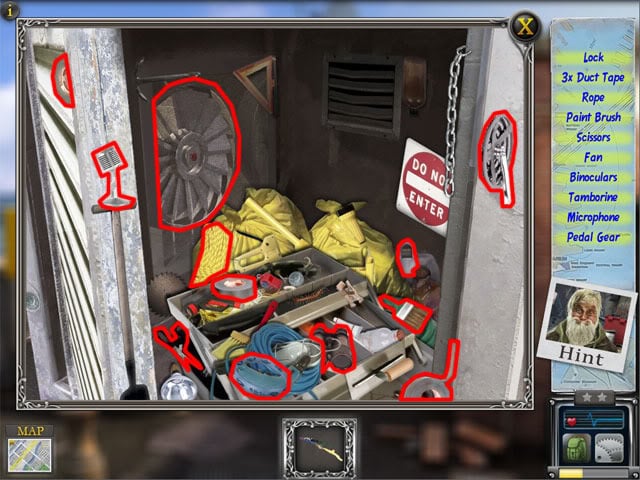
Combine the t-shirts with the fan in the inventory to make the grappling hook. Use the grappling hook on the gap. Select the gap.
Level 9: Crown Apartments – Roof Top
Select the cell tower and two spark areas will appear:
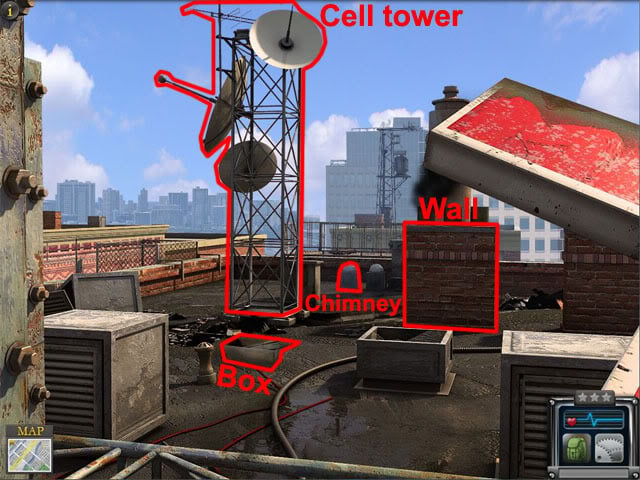
Select the box to find bridge part 4: Gear. Select the chimney to find bridge part 5: Wire. Select the right spark area and find the items:
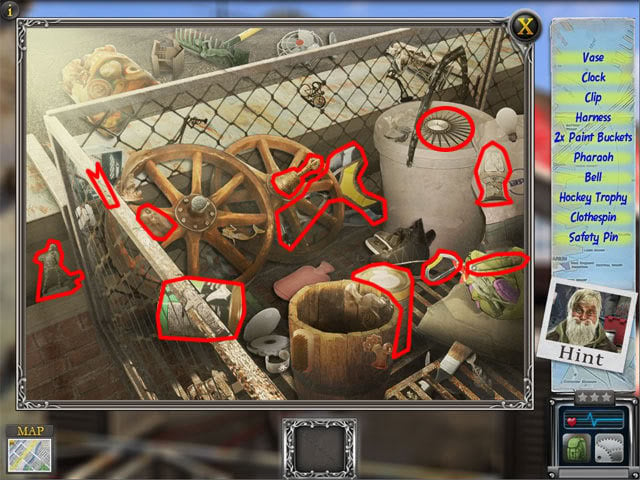
Select the left spark area and find the items:
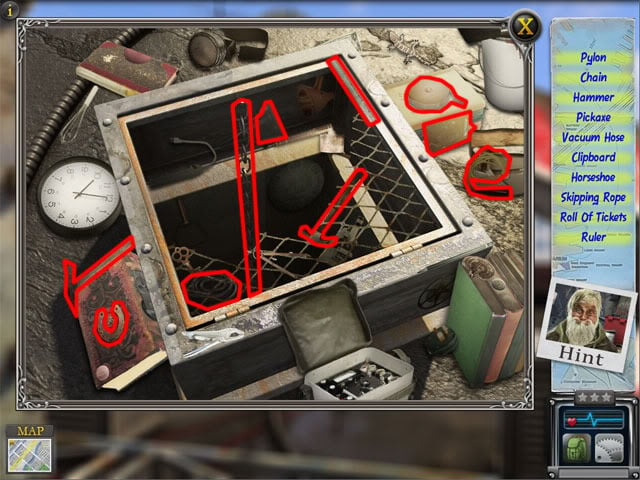
Use the clip on the cell tower. Use the harness on the wall. Use the chain and the paint cans on the cell tower. Select the railing at the left side of the wall.
Level 10: Crown Apartments – Fire Escape
Select the ladder and two spark areas will appear:
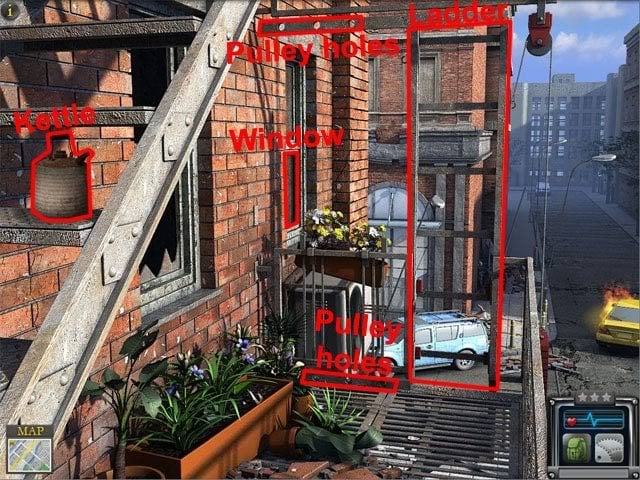
Select the kettle to find bridge part 6: Button. Select the window to complete side mission 2: Kitten. Select the top spark area and find the items:
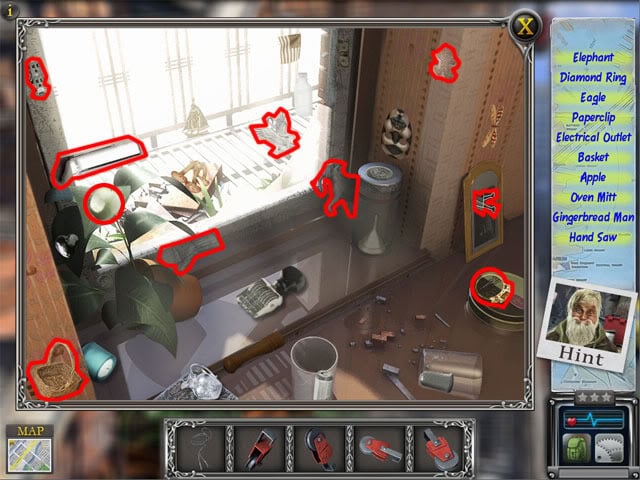
Select the bottom spark area and find the items:
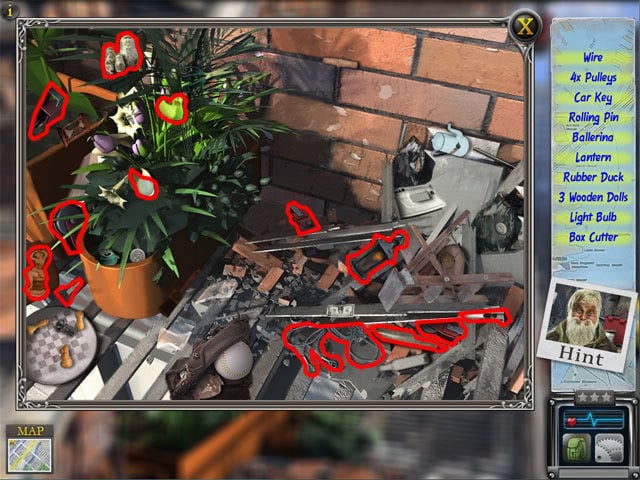
Put pulleys in the top-left hole, top-right hole, bottom-left hole and bottom-right hole. Use the wire on the pulleys. Use the elephant on the loop:
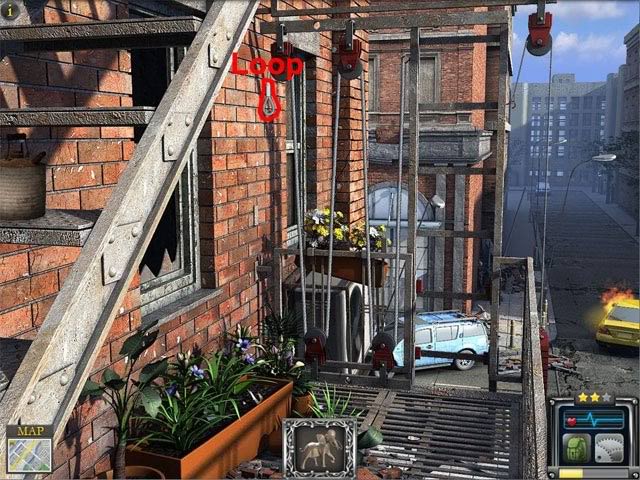
Select the ladder to lower it. Select the ladder again.
Level 11: Police Car – Backseat
Select the panel and a spark area will appear:
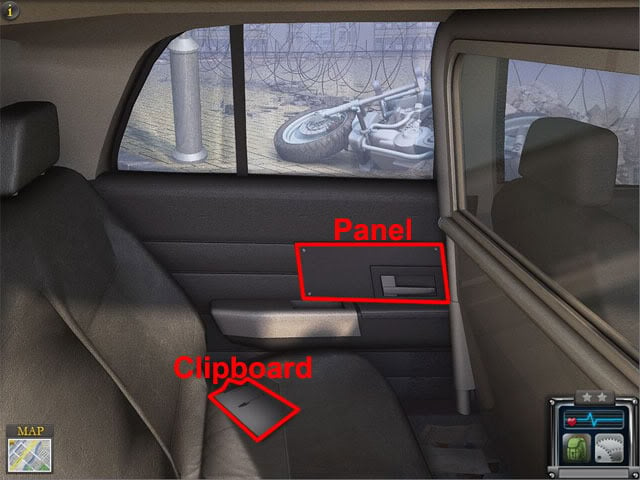
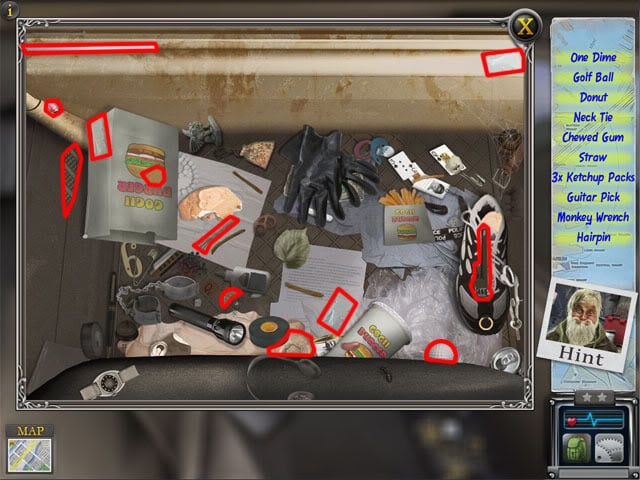
Select the clipboard to find bridge part 7: Key. Select the spark and find the items:
Use the dime on the panel. Select the panel and use the gum on the teeth. Use the hairpin on the slot:
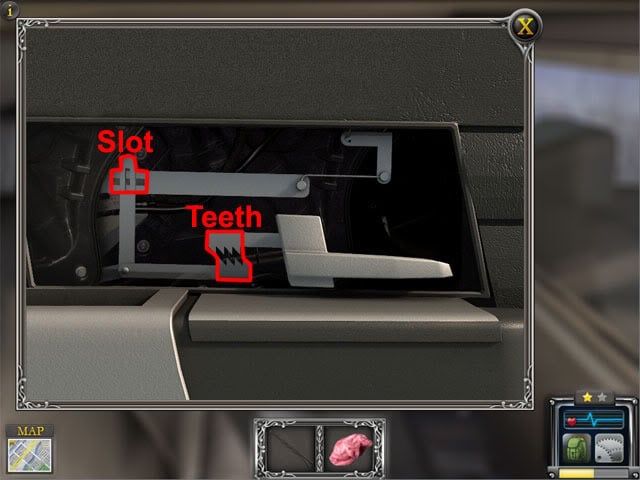
Use the handle to open the door. Select the gap to exit the car.
Level 12: West Couture Bridge
Select the truck and a spark area will appear:
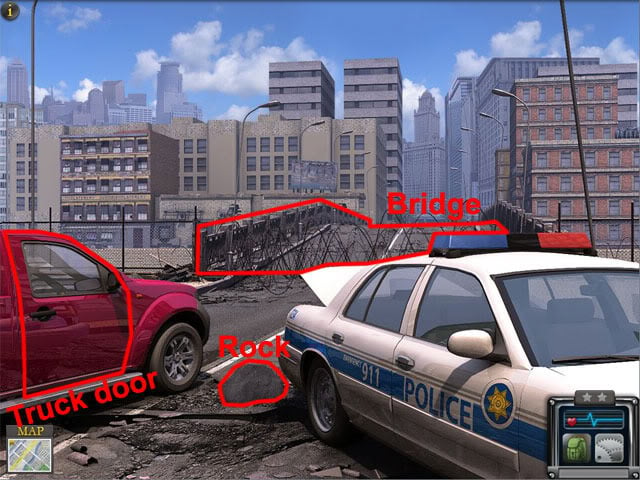
Select the rock to find bridge part 8: Gear. Select the spark area and find the items:
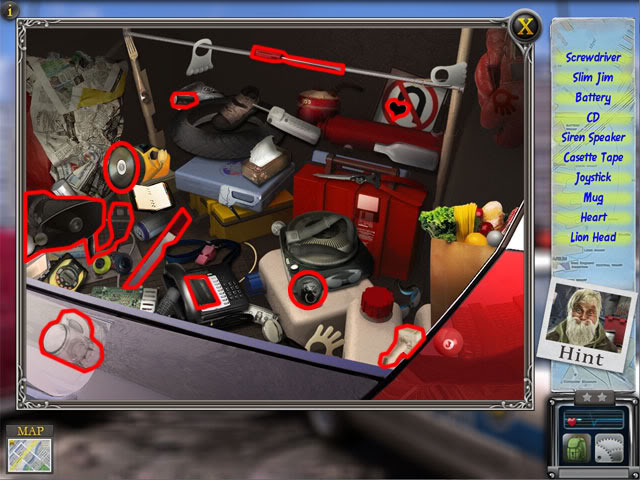
Use the slim jim on the truck door. Select the truck and find the items:
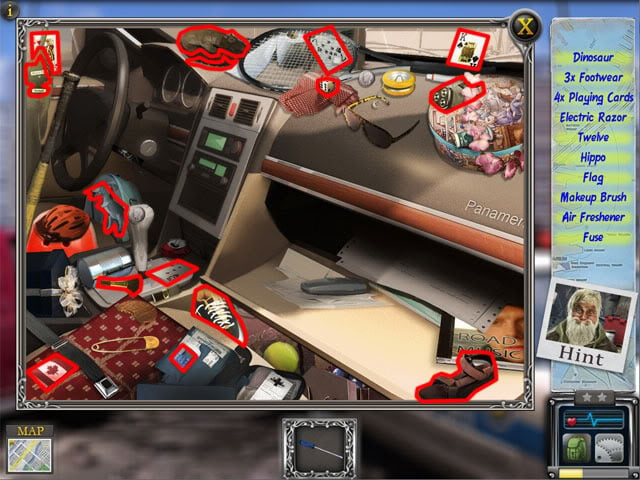
Select the fuse box below the ignition. Use the blue fuse on the red fuse to replace it. Select the truck and use the screwdriver in the ignition.
Level 13: St. James Cathedral
Select the laundromat window:
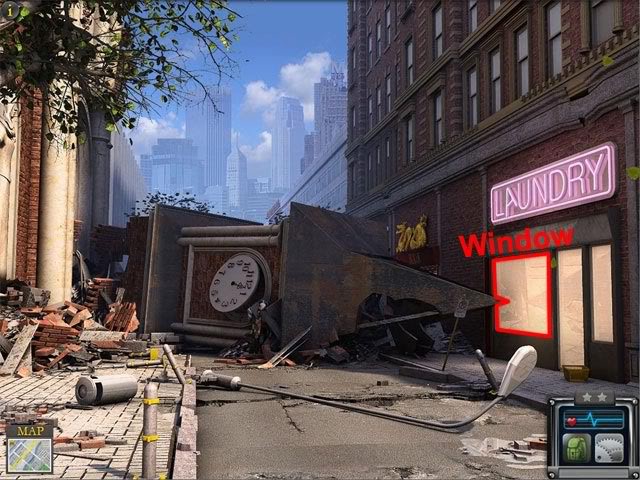
The old man wants you to find ten stamps:
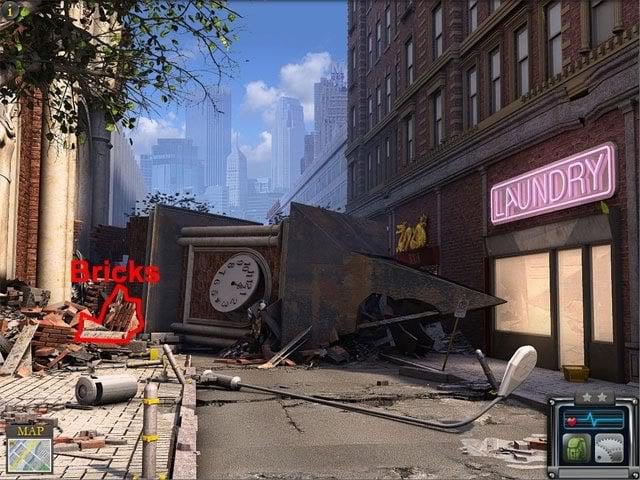
Select the bricks to find side mission 4: Young boy:
Select the laundromat window again and a spark area will appear. Select the spark area and find the items:
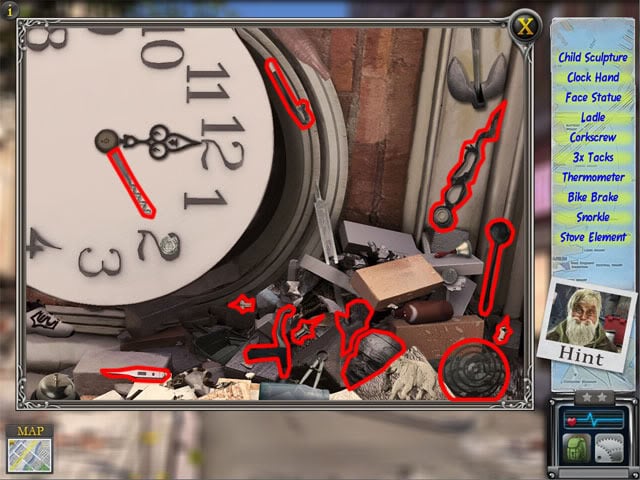
Select the clock face and use the clock hand on the clock. Select the clock face again. Select the gap in the clock face and find the items:
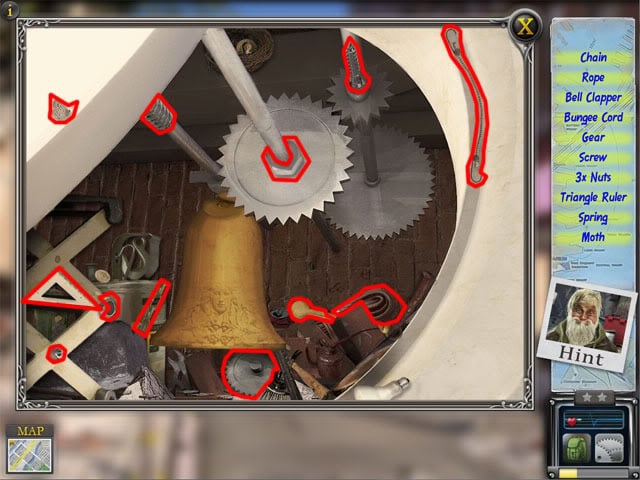
Use the bell clapper on the bottom of the bell. Use the gear on the gear mechanism. Exit the view of the clock face and then keep selecting the clock face until the hour hand is on 3 o’clock. Select the window.
Level 14: Flora’s Laundromat
Select the dryer and two spark areas will appear:
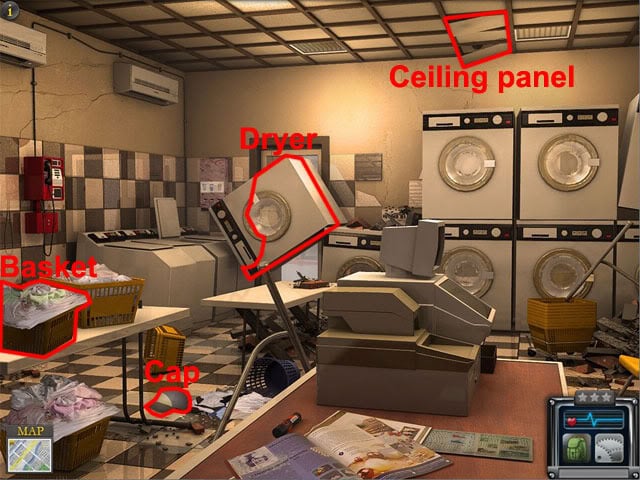
Select the basket to find side mission 5: Dog. Select the cap to find bridge part 9: Chain. Select the right spark area and find the items:
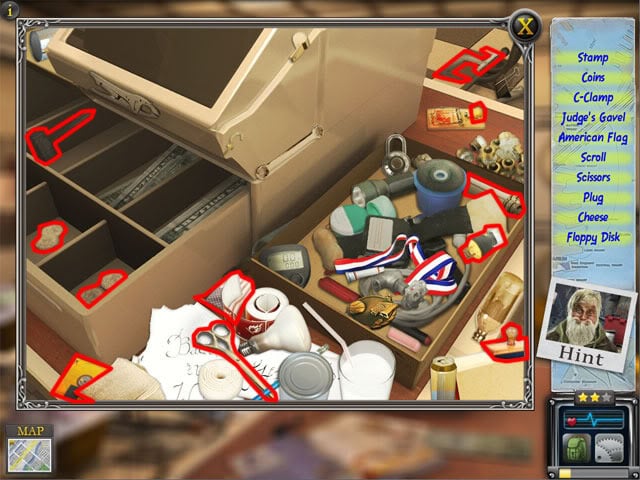
Select the left spark area and use the scissors on the cord:
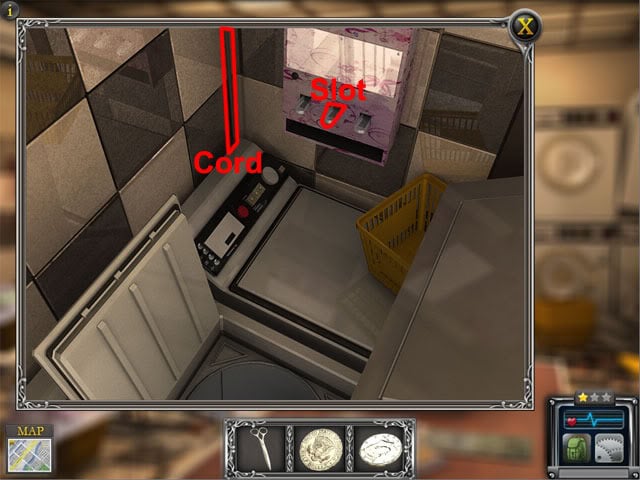
Use the coin on the slot. Take the soap. Take the cord. Select the ceiling panel. Use the soap on the ceiling panel. Use the phone cord on the ceiling panel. Use the coin on the washing machine. Select the door.
Level 15: Flora’s Alleyway
Select the fence and a spark area will appear:
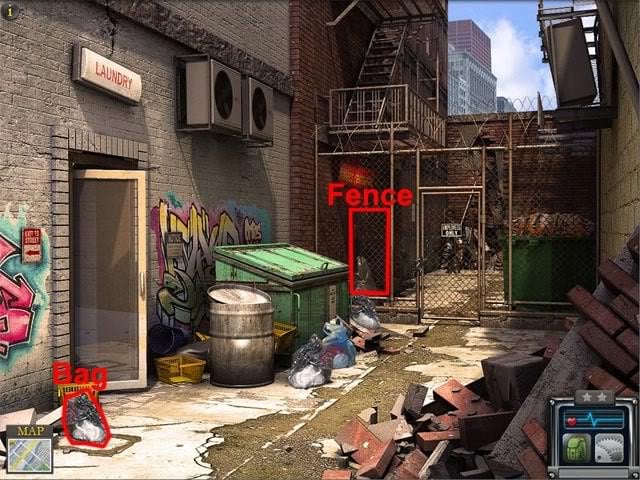
Select the bag to find bridge part 10: Bolt. Select the spark area twice and find the items:
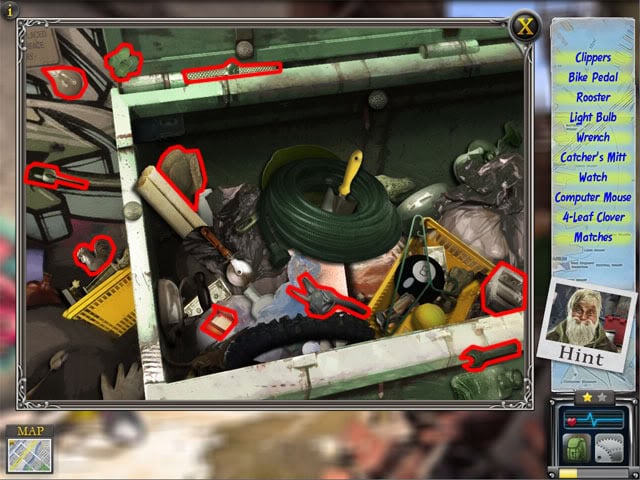
Use the clippers on the fence. Select the fence and a spark area will appear. Select the spark area and find the items:
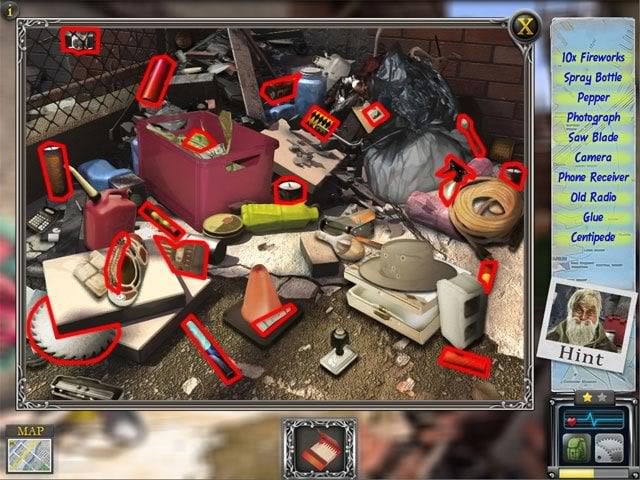
Use the fireworks and the matches on the door behind the fence. Select the door.
Level 16: Wong’s Chinese
Select the fire and two spark areas will appear:
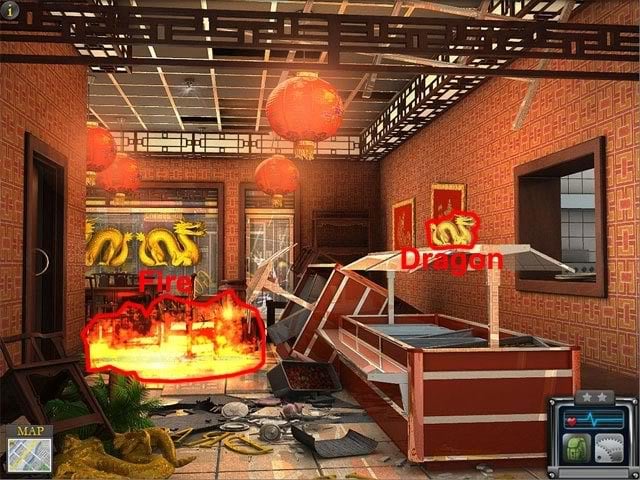
Select the dragon to find bridge part 11: Lever. Select the left spark area and find the items:
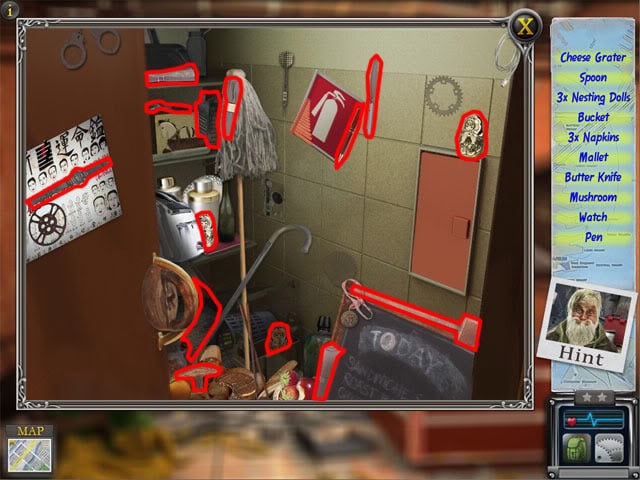
Exit the view of the closet. Select the right spark area and find the items:
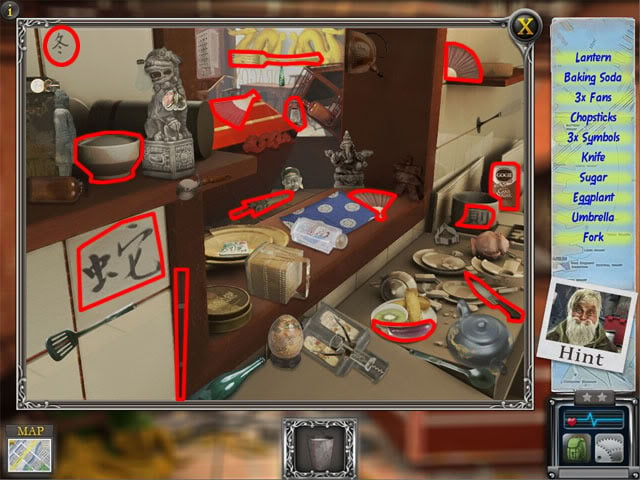
Select the left spark area and use the knife on the panel. Select the valve to turn the sprinklers off. Use the baking soda on the fire. Use the bucket on the fire. Select the door.
Level 17: Hannah Boulevard Overpass
Select the gap and two spark areas will appear:
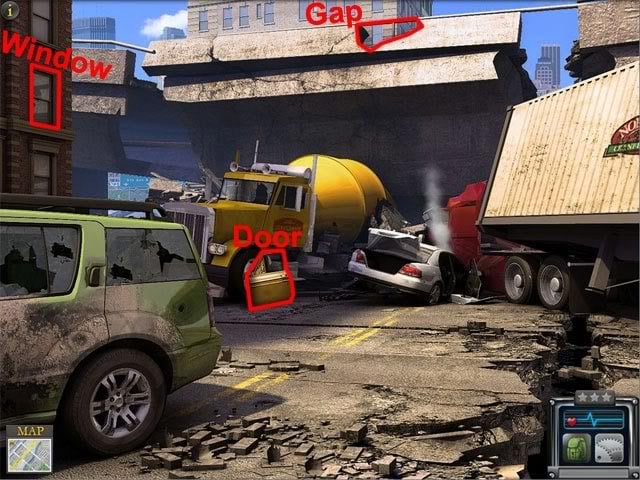
Select the window to complete side mission 4: Young boy. Select the yellow car door to find bridge part 12: Gate. Select the left spark area and find the items:
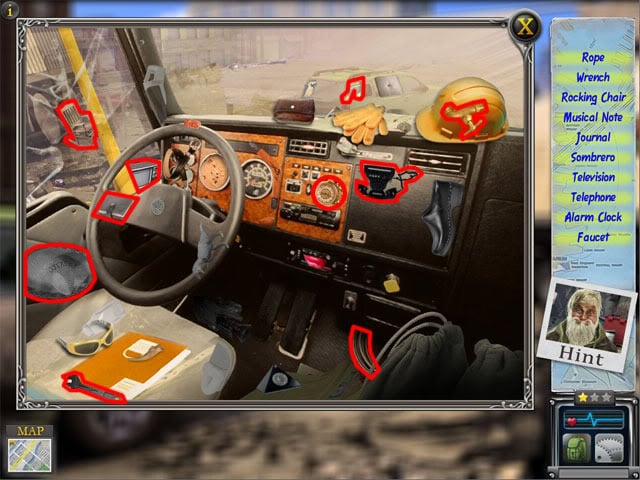
Select the right spark area and use the wrench on the bolt in the middle of the tire. Take the tire. Combine the tire and rope in the inventory. Use the tire and rope on the gap in the overpass. Select the gap.
Level 18: North Side Mall: Main Entrance
Select the front of the mall:
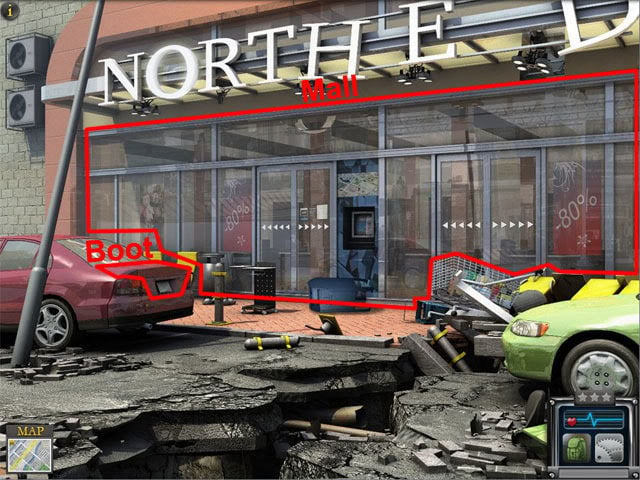
The old man wants you to find ten action figures:
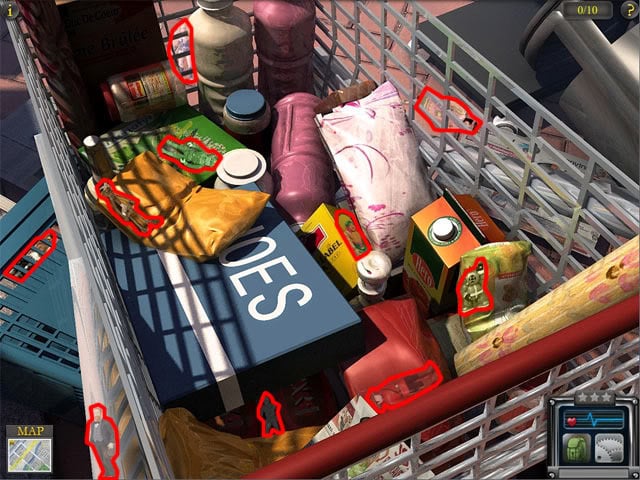
More objects can now be selected:
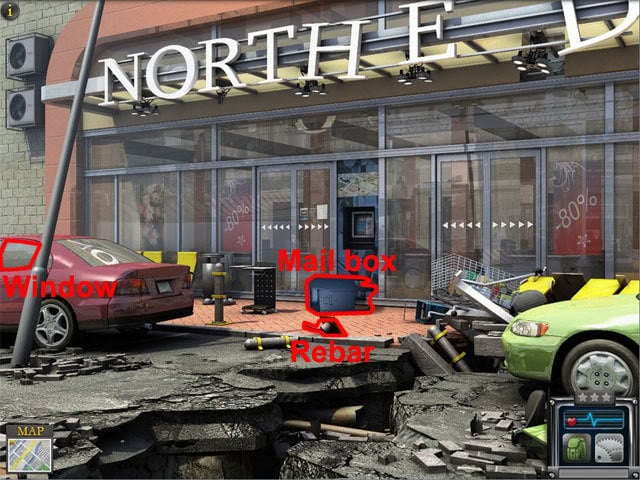
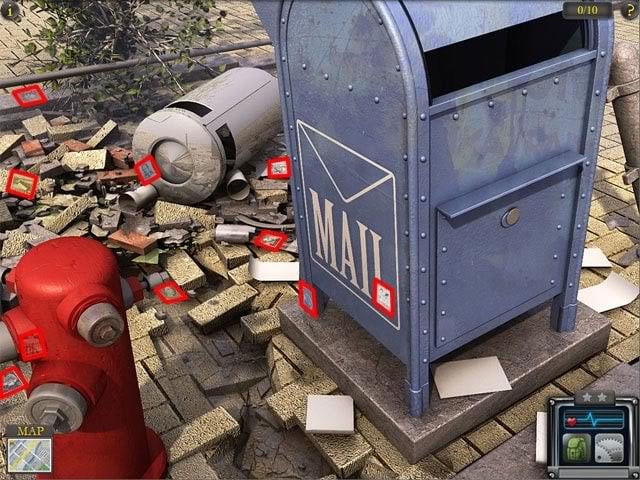
Select the car window to complete side mission 3: Teddy bear. Select the mail box to find bridge part 13: Weight. Select the rebar and a spark area will appear. Select the spark area and find the items:
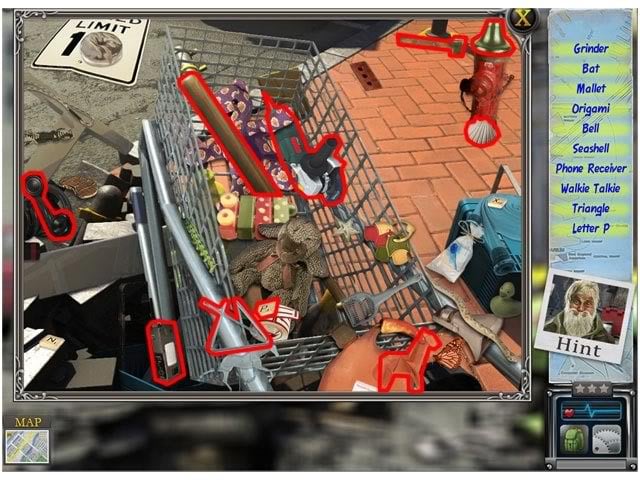
Use the angle grinder on the rebar. Use the rebar on the trunk. Select the trunk and find the items:
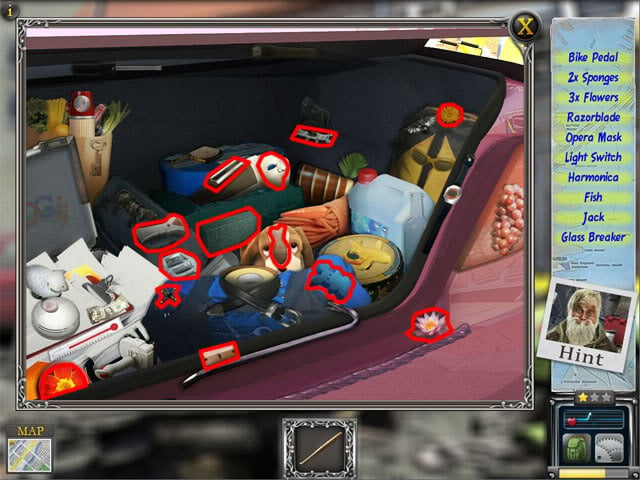
Use the glass breaker on the mall door. Select the door.
Level 19: North Side Mall – Vestibule
Select the phone box and a spark area will appear:
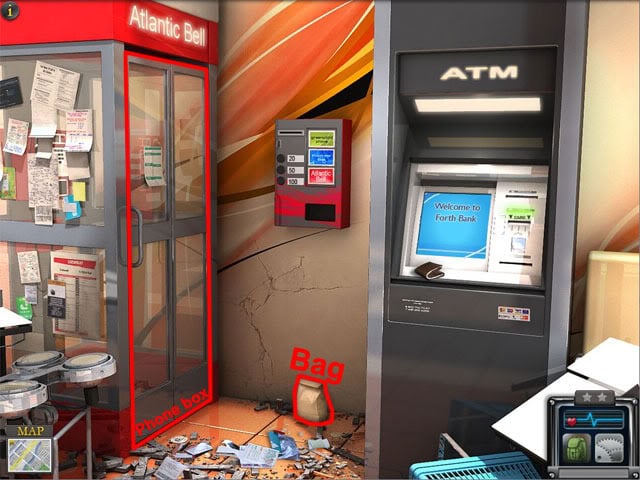
Select the bag to find bridge part 14: Gear. Select the spark area and find the items:
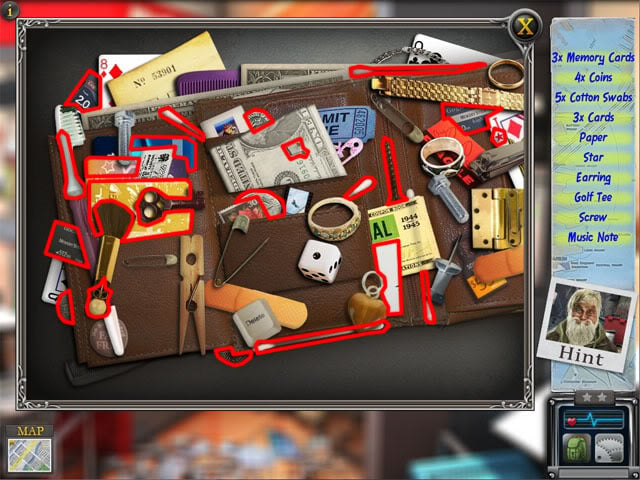
Use one of the credit cards on the ATM machine and enter the pin 8690. Do the same thing for the other two credit cards. On the third card, the pin will be accepted. Select 20 and then take the note from the slot. Use the money on the calling card dispenser and select the button next to 20. Select the calling card to take it. Open the phone box. Select the phone box and find the items:
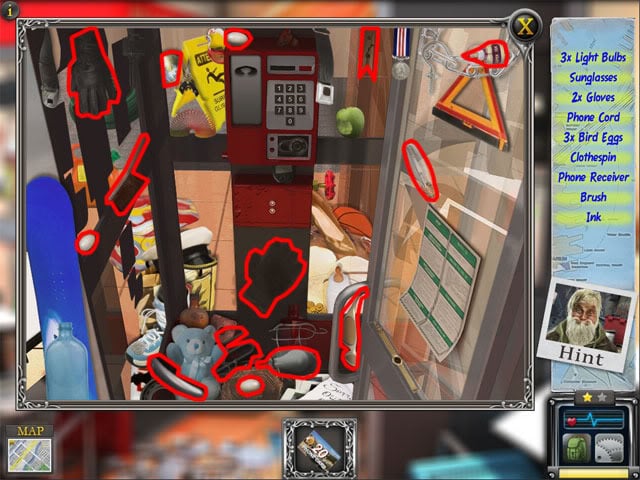
Use the phone receiver, phone cord and calling card in the correct slots:
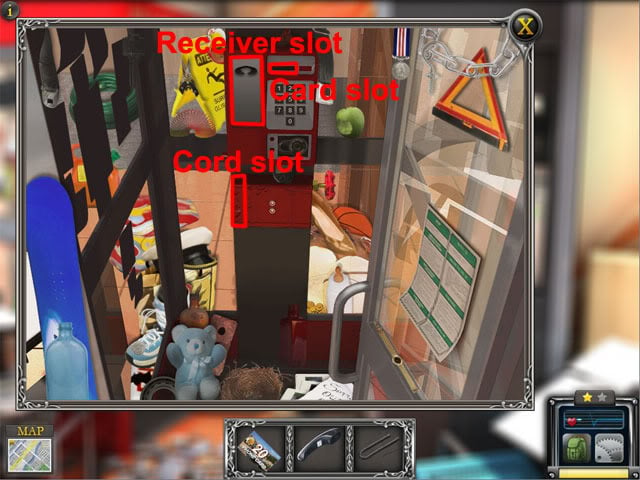
Select the phone receiver.
Level 20: North Side Mall
Select the door:
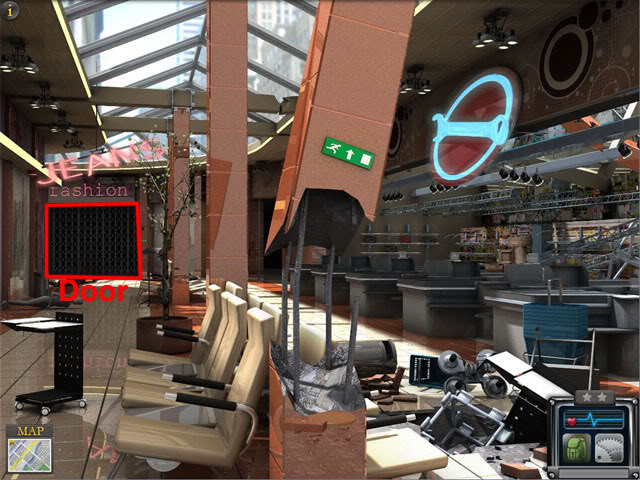
The old man wants you to find ten ticket stubs:
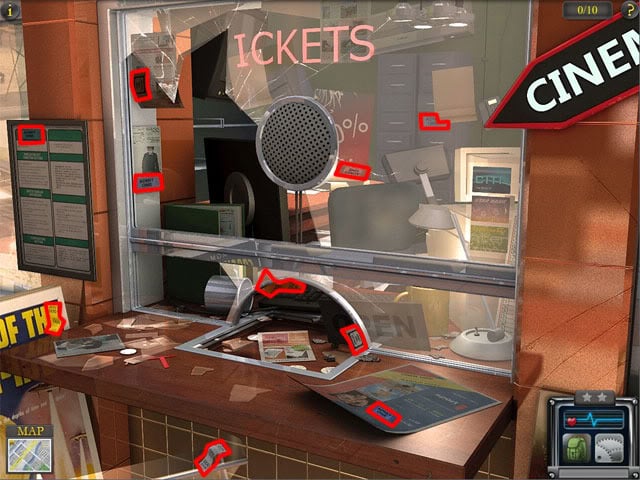
More objects can now be selected:
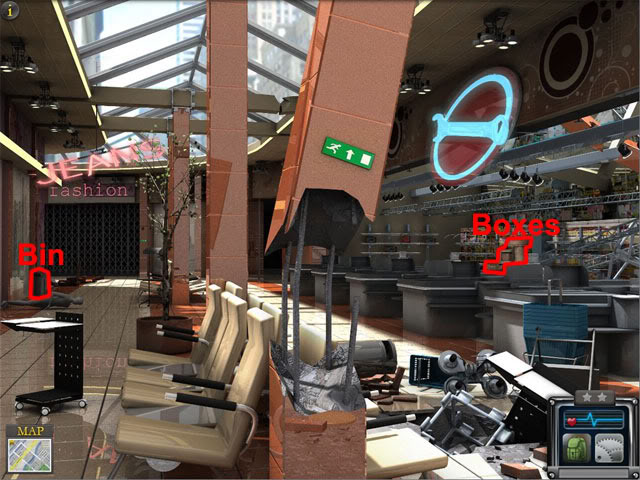
Select the boxes to find side mission 6: Mom. Select the door and a spark area will appear. Select the spark area and find the items:
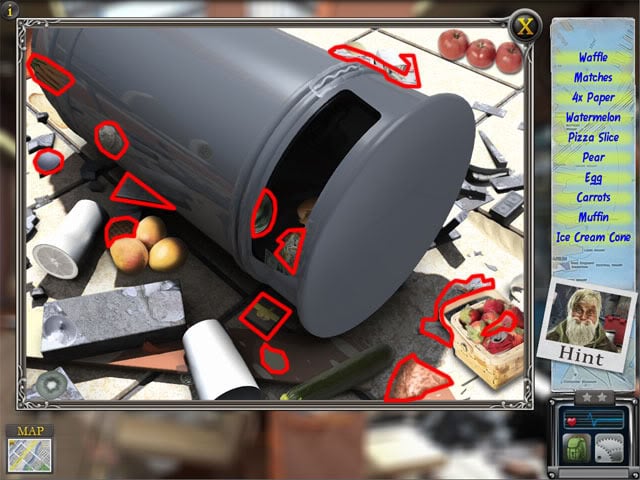
Use the paper ball and the matches in the bin. Select the tree at the right side of the bin and a new spark area will appear. Select the spark area and find the items:
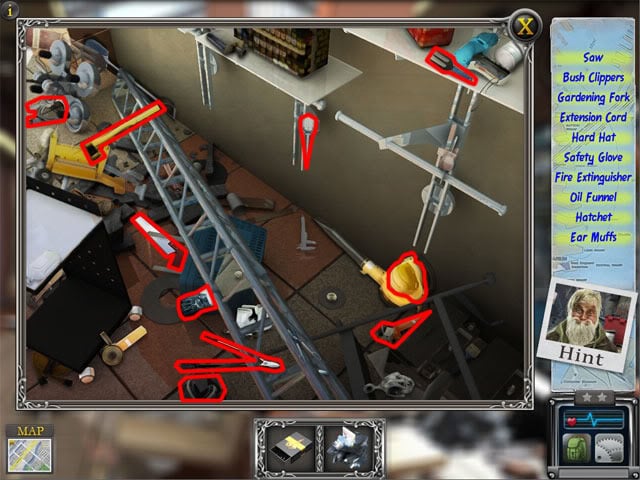
Use the saw on the tree. Combine the bush clippers with the tree in the inventory to make the branch. Use the branch on the door. Select the door.
Level 21: North Side Mall – Simon’s Jewelry
Select the window of the right door and a spark area will appear:
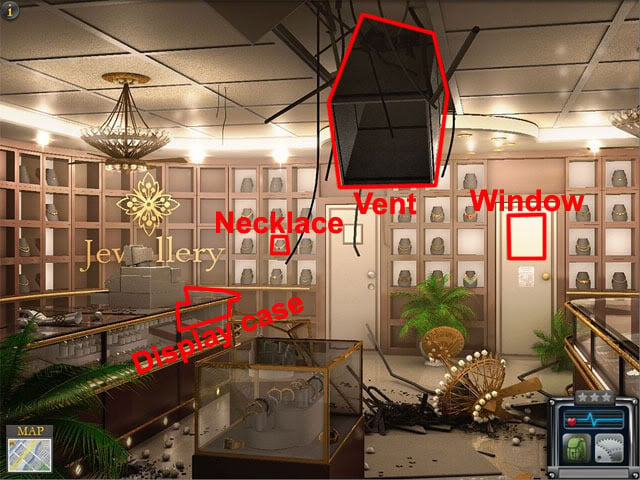
Select the display case to complete side mission 5: Dog. Select the necklace to find bridge part 15: Wire. Select the spark area and find the items:
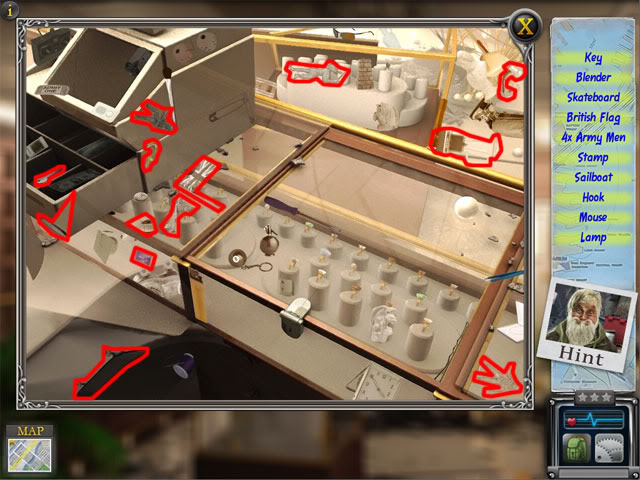
Use the key on the lock to open the case. Select the diamond ring:
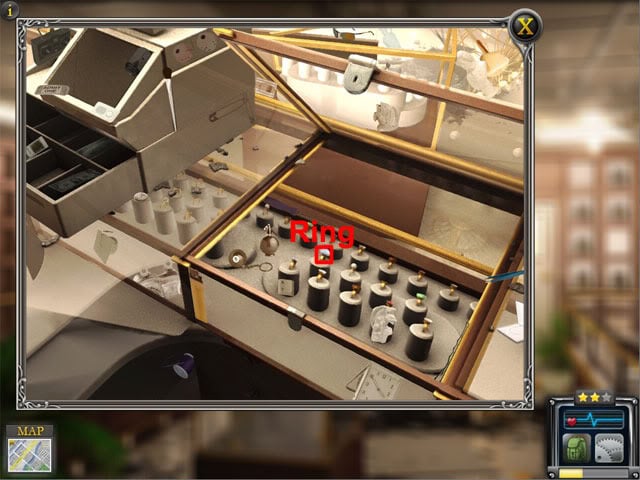
Use the diamond ring on the window of the right door. Select the door and find the items:
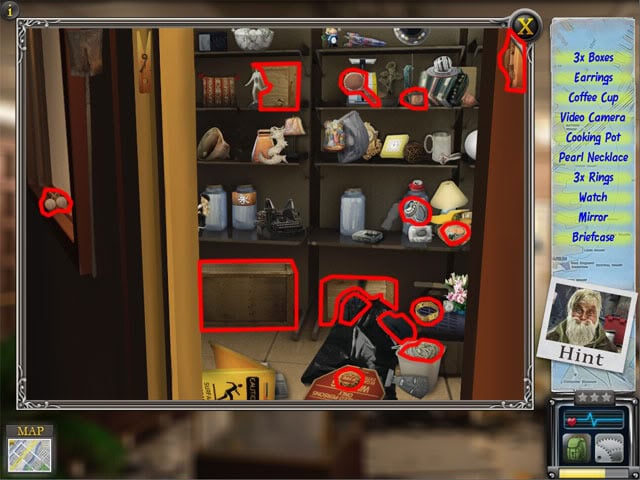
Use the boxes on the vent. Select the vent.
Level 22: North Side Mall – Loading Bay
Select the controls and a spark area will appear:
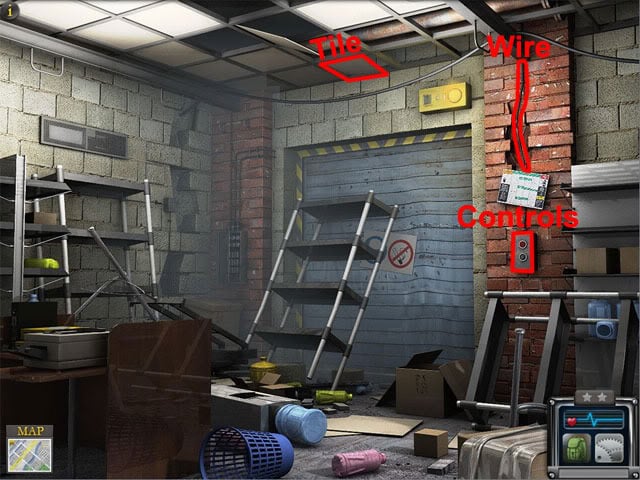
Select the ceiling tile to find bridge part 16: Red bulb. Select the wire and another spark will appear. Select the right spark area and find the items:
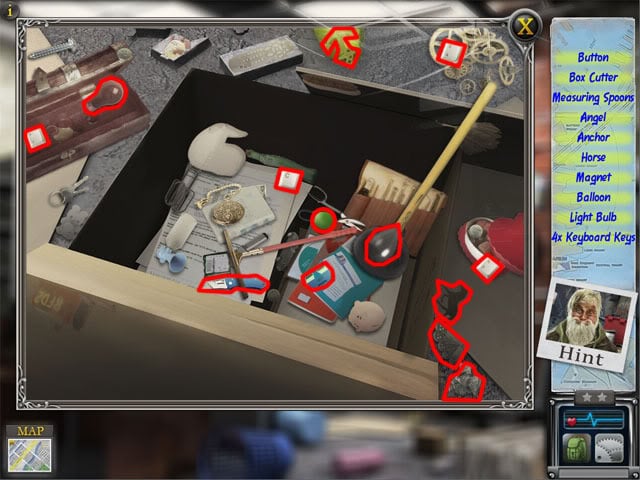
Select the left spark area and find the items:
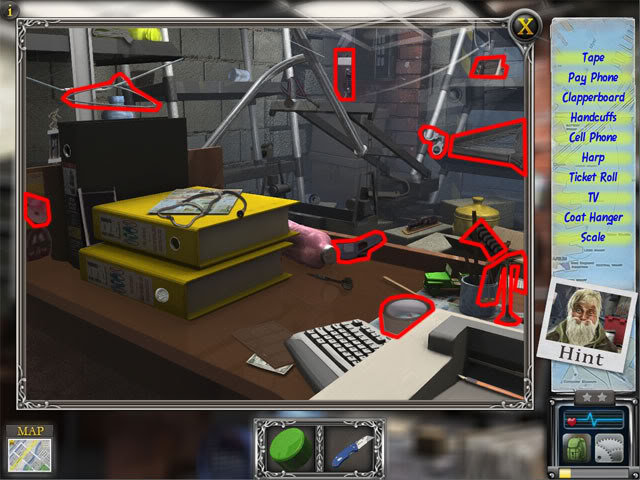
Combine the box cutter with the coat hanger in the inventory to make a wire segment. Use the box cutter on the wall wire. Use the wire segment on the wall wire. Use the tape on the wall wire. Use the green button on the controls. Select the controls to open the shutter. Select the gap.
Level 23: North Side Mall – Loading Zone
Select the broken glass and a spark area will appear:
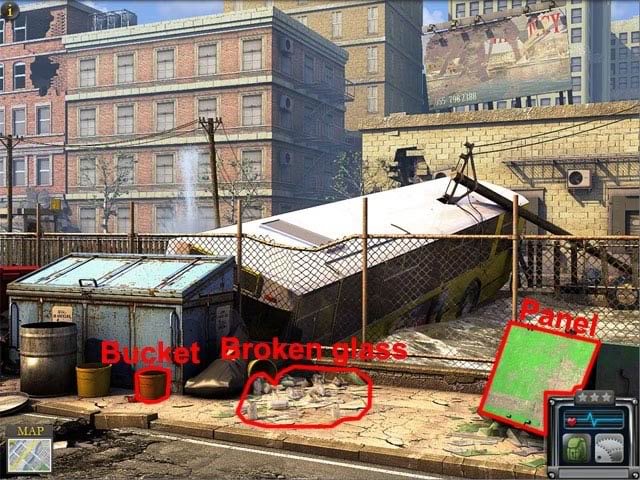
Select the panel to complete task 6: Mom. Select the bucket to find bridge part 17: Knob. Select the spark area and find the items:
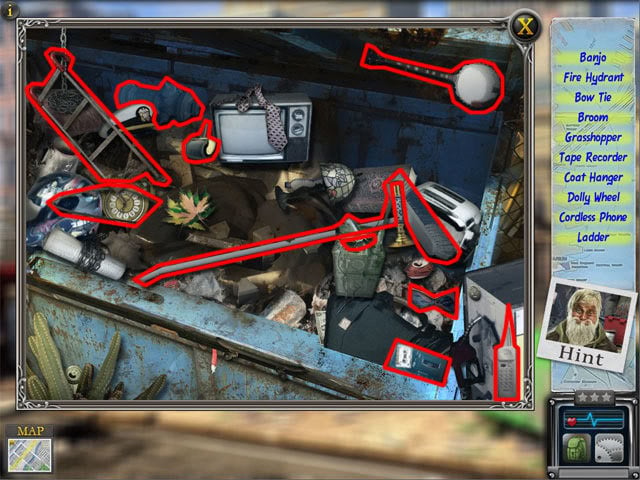
Use the broom on the broken glass and another spark area will appear. Select the spark area to view the steering wheel:
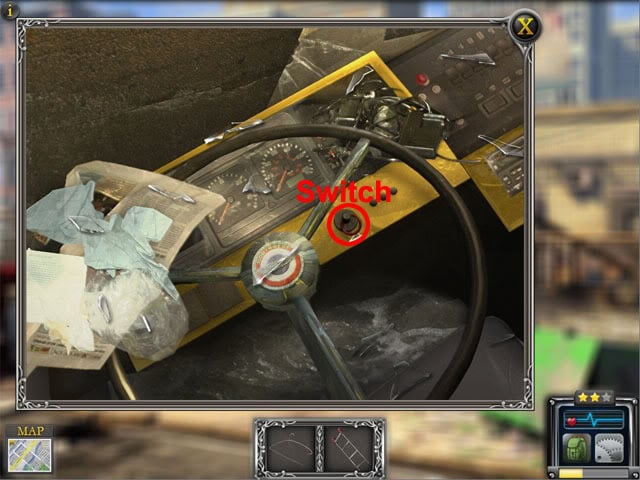
Use the coathanger on the roof release switch. Use the ladder on the fence. Select the hatch on the roof of the bus.
Level 24: City Bus
Select the wires and a spark area will appear:
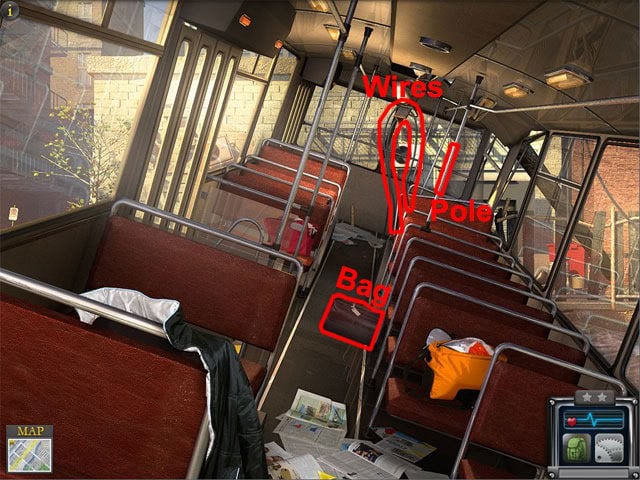
Select the bag to find side mission 7: Puppy. Select the spark area and find the items:
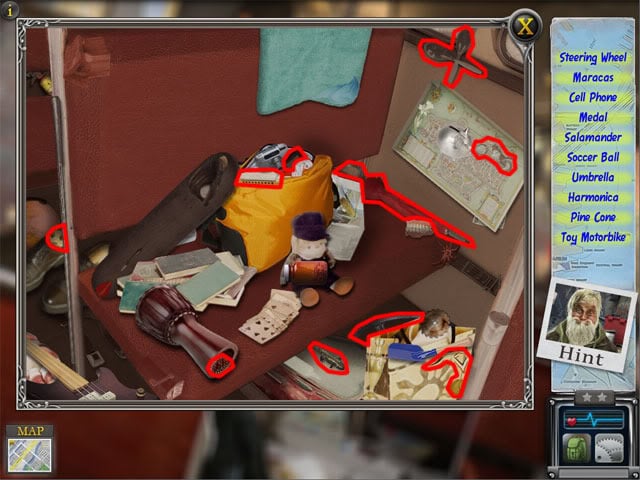
Select the pole and another spark area will appear. Select the spark area and find the items:
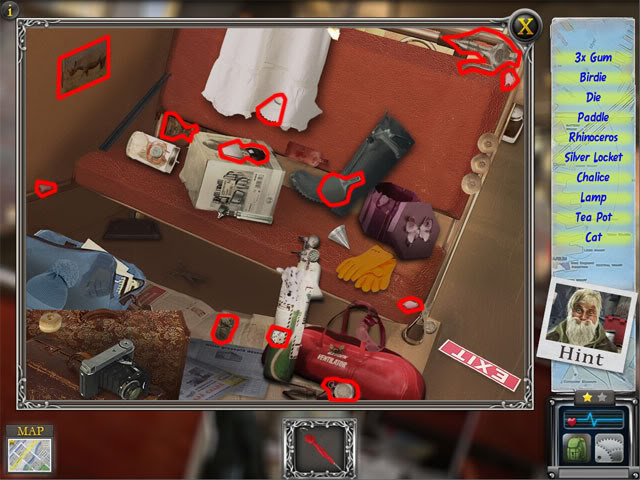
Use the three pieces of gum on the pole. Use the umbrella on the wires. Select the back of the bus.
Level 25: Dead End Alley
Select the back of the alley. The old man wants you to find ten clocks:
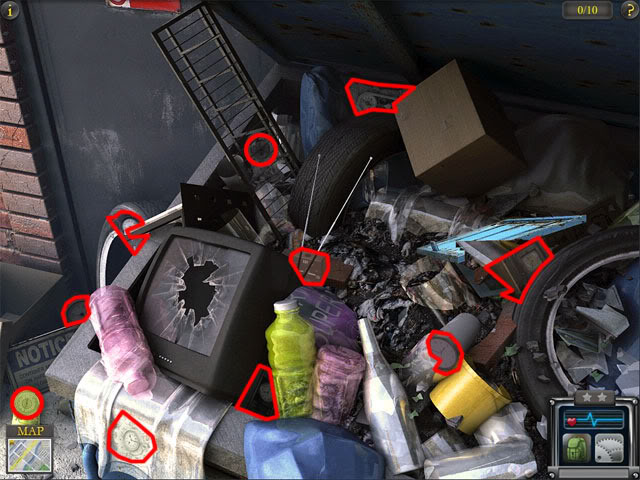
More objects can now be selected:
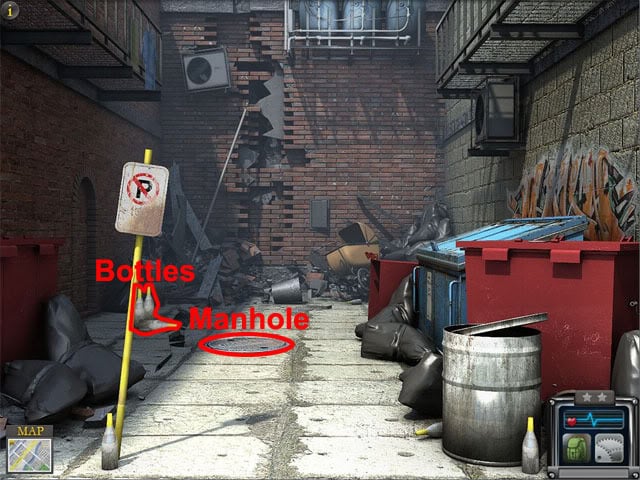
Select the bottles to find bridge part 18: Gear. Select the manhole and two spark areas will appear. Select the left spark area and find the items:
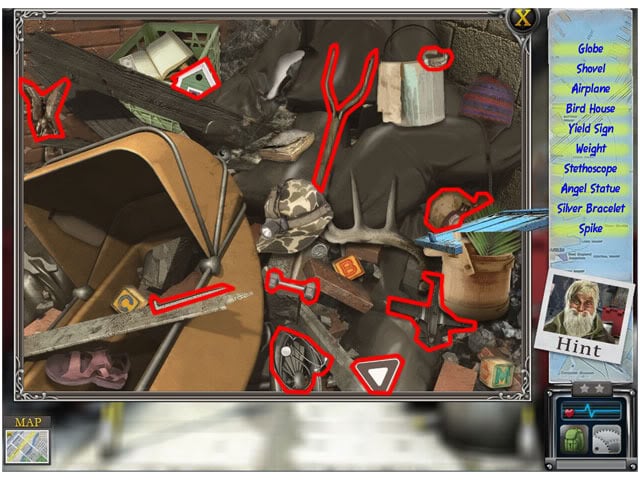
Use the shovel on the right spark area to open the dumpster. Select the dumpster and find the items:
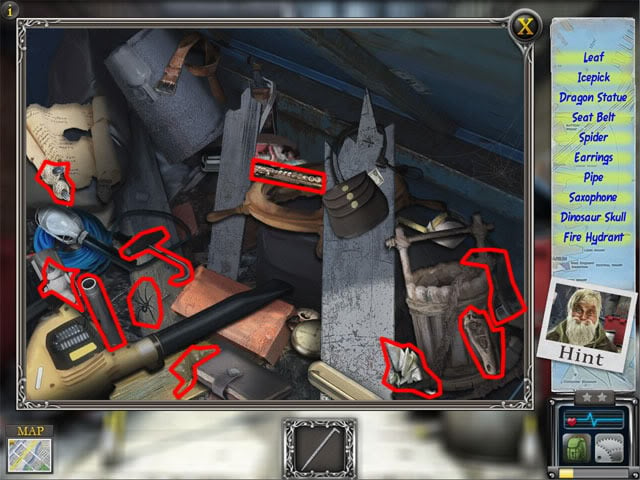
Use the spike and pipe and on the manhole. Select the manhole to open it. Use the icepick on the manhole. Select the manhole.
Level 26: Service Tunnel
Select the pipe valve and a spark area will appear:
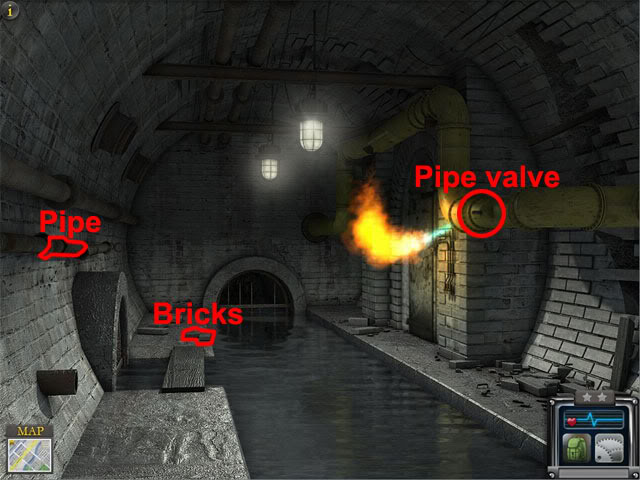
Select the bricks to find bridge part 19: Bolt. Select the spark area and find the items:
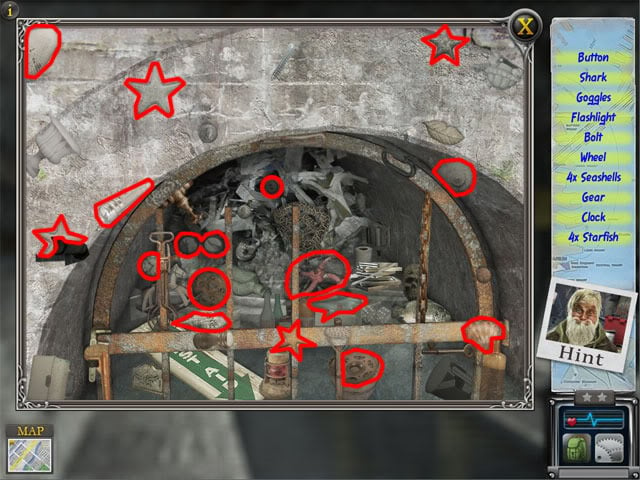
Select the pipe and another spark area will appear. Select the spark area and find the items:
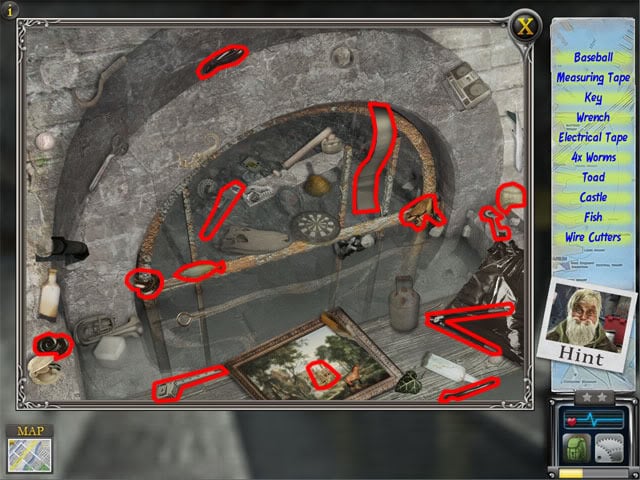
Use the wrench on the pipe. Use the valve wheel, bolt and pipe on the pipe valve. Use the key on the door. Use the electrical tape on the light above the door. Select the door.
Level 27: Subway Terminal – North Stop
Select the turnstiles and a spark area will appear:
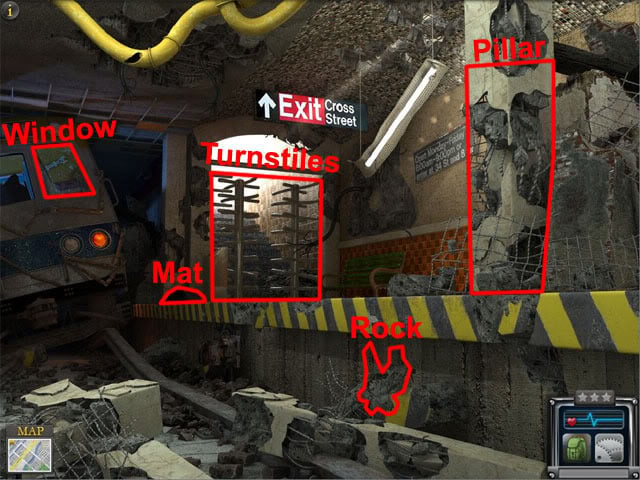
Select the pillar to complete side mission 7: Puppy. Select the rock to find bridge part 20: Battery. Select the mat and another spark area will appear. Select the left spark area and find the items:
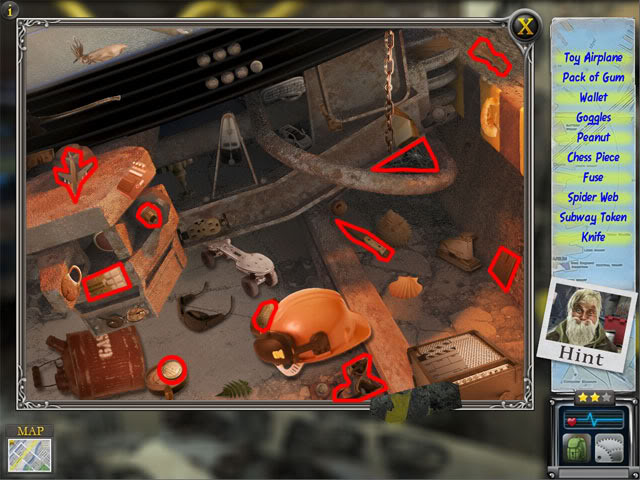
Use the knife on the rubber mat. Use the rubber mat on the train window. Select the window to take the wrench. Select the right spark area. Use the wrench on the bolts. Use the subway token on the turnstiles. Select the rubber mat. Use the rubber mat on the turnstiles. Select the turnstiles.
Level 28: North Canal Drawbridge
Select the post:
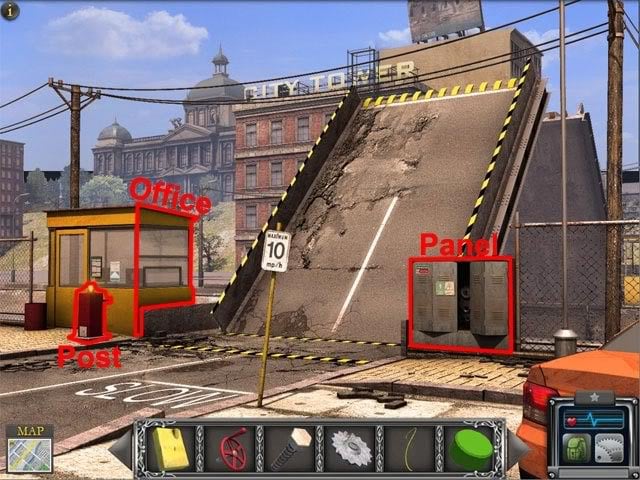
Select the various parts of the post to see that a description is given for each bridge part that is needed. Use the gate on the post, the three bolts on the gate and the counterweight on the end of the post. Select the panel. Use the gears on the correct pegs, the chain on the gears, the lever on the lever slot, the gas tank on the gas tank slot, the battery on the battery slot and the wires on the battery. Select the lever. Select the office. Use the knobs on the controls, the start button on the slot, the red bulb on the socket and the key in the keyhole. Turn the key. Select the green start button. Select both wheels to lower the bridge. Select the bridge.
Level 29: National Museum – Front Steps
Select the tree and two spark areas will appear:
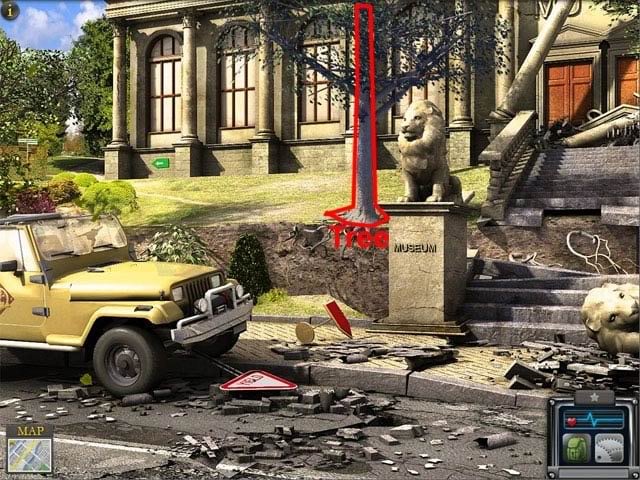
Select the left spark area twice and find the items:
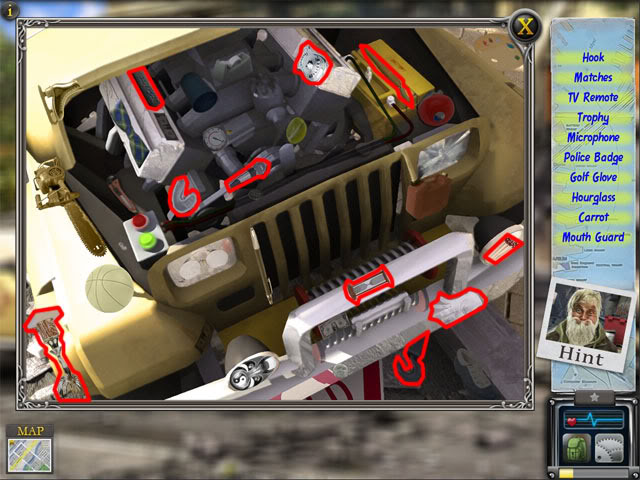
Select the right spark area and find the items:
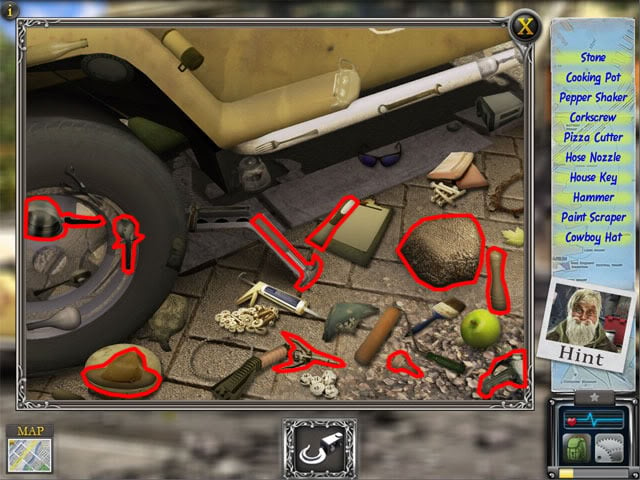
Use the stone on the yield sign to break it. Combine the hook with the yield sign in the inventory to make the harpoon. Use the harpoon on the tree. Select the jeep and then select the green winch button. Select the path at the left side of the museum.
Level 30: National Museum – Front Steps
Select the door and a spark area will appear. Select the spark area and find the items:
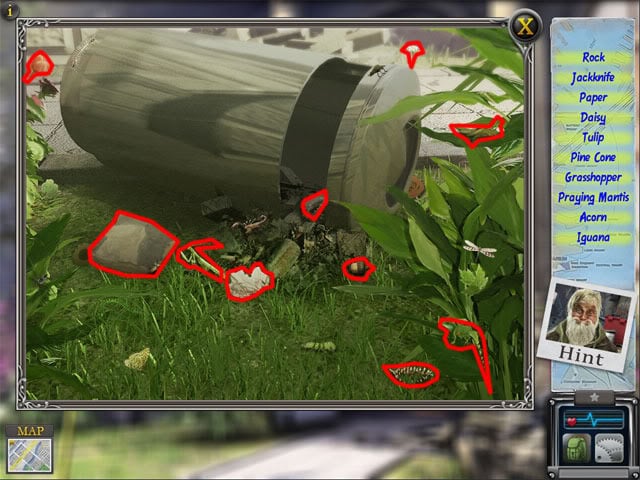
Examine the security panel at the right side of the door and enter the code 10447 to see that it has expired. Use the jackknife on the panel. Use the rock on the panel and then select the door to complete the game.
“;
More articles...
Monopoly GO! Free Rolls – Links For Free Dice
By Glen Fox
Wondering how to get Monopoly GO! free rolls? Well, you’ve come to the right place. In this guide, we provide you with a bunch of tips and tricks to get some free rolls for the hit new mobile game. We’ll …Best Roblox Horror Games to Play Right Now – Updated Weekly
By Adele Wilson
Our Best Roblox Horror Games guide features the scariest and most creative experiences to play right now on the platform!The BEST Roblox Games of The Week – Games You Need To Play!
By Sho Roberts
Our feature shares our pick for the Best Roblox Games of the week! With our feature, we guarantee you'll find something new to play!All Grades in Type Soul – Each Race Explained
By Adele Wilson
Our All Grades in Type Soul guide lists every grade in the game for all races, including how to increase your grade quickly!


