![All VV Ultimatum Titles [How to Get]](/wp-content/uploads/2026/06/vv-ultimatum-titles.jpg "All VV Ultimatum Titles [How to Get]")
All VV Ultimatum Titles [How to Get]
Do titles provide buffs?


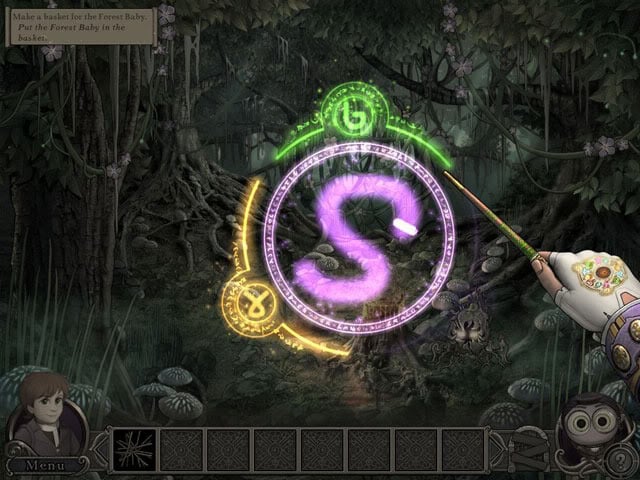
Welcome to Gamezebo’s walkthrough for Elementals: The Magic Key.
a:1:i:0;a:2:s:13:”section_title”;s:37:”Elementals: The Magic Key Walkthrough”;s:12:”section_body”;s:101342:”
Welcome to Gamezebo’s walkthrough for Elementals: The Magic Key.

TOC n h z t "Heading 1,1" General Tips
Chapter 2: The Great Forest (Nature)
Chapter 4: The Great River (Water)
Chapter 5: The Sky Castle (Air)
Chapter 6: Thunder Hills (Energy)
Chapter 7: The Temple of Flames (Fire)
Appendix: Battle Strategy Guide
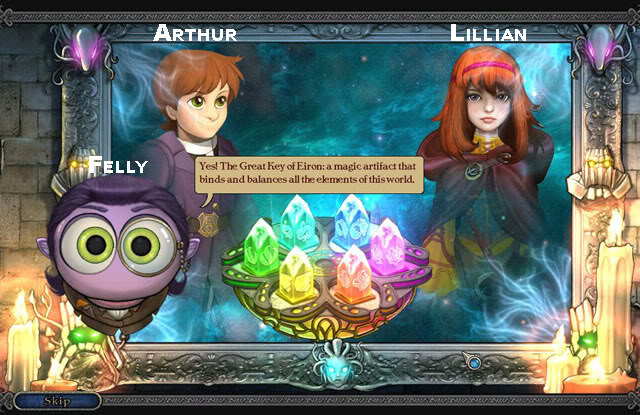
The magical world of Eiron is inhabited by "Elementals" of Water, Fire, Earth, Energy, Air and Nature. You play the part of Sir Albert, a Sorcerer in the Magic Tower. Your sister, Mistress Lillian ("Lily"), Keeper of The Great Key of Eiron, has been kidnapped! The shards of the Great Key have been stolen and scattered!
To win the game, you must retrieve all the missing Shards of the Great Key and rescue your sister.
The game is organized into 7 Chapters.
Chapter 1 introduces you to the mechanics of the game.
During your adventure, you will be assisted by your familiar, Fellian ("Felly"), who comments on the action and provides unlimited Hints (which recharge rather quickly). You will need to solve 30 Puzzles/Minigames (most of which may be skipped) and conquer ferocious opponents in Battles (which also may be skipped, but you’ll miss lots of the fun).
Getting Started
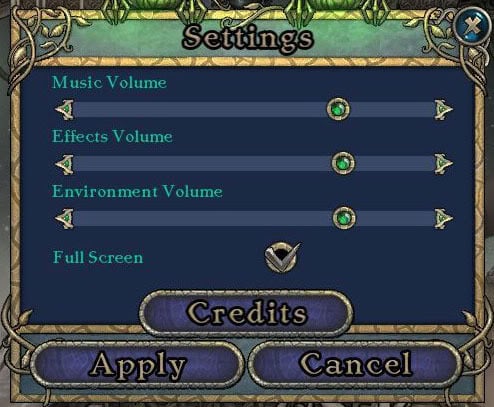
Screen Features and Controls
Most scenes use this layout:
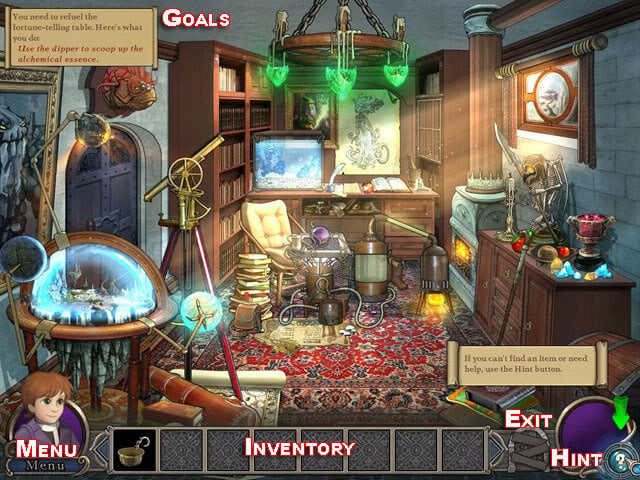
Cursors
Your cursor changes shapes depending on where you have it on the screen.
Changing Scenes
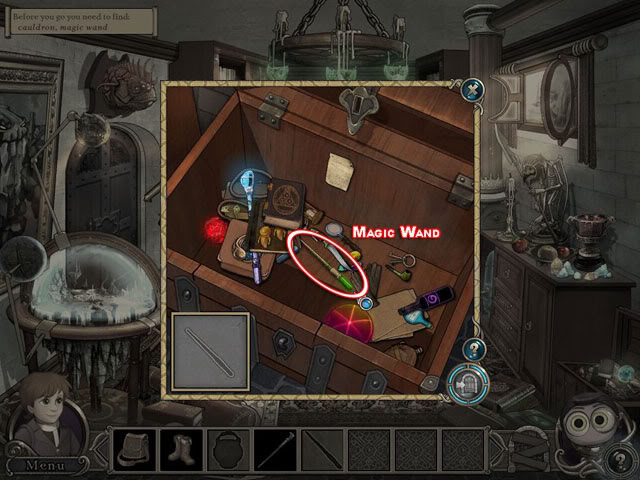
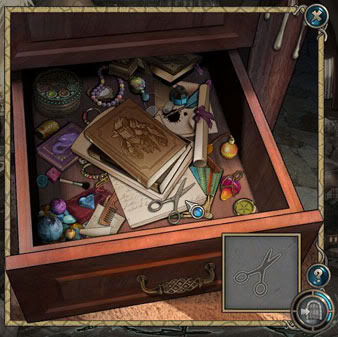
Chapter 1: The Magic Tower Albert’s Room
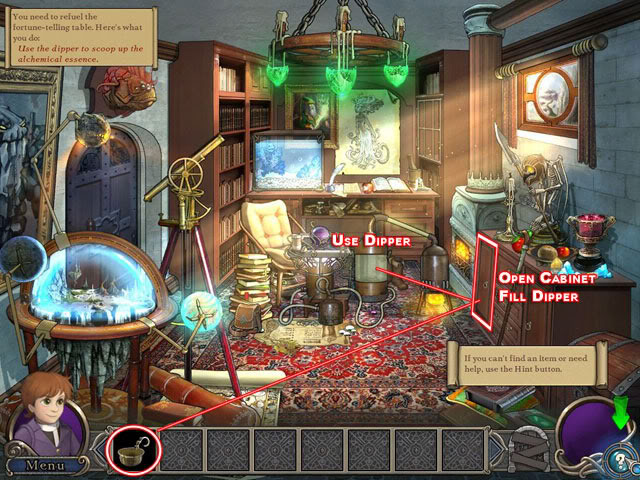
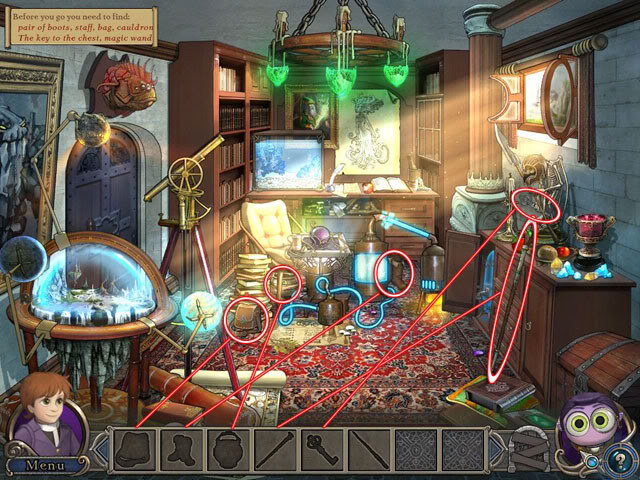
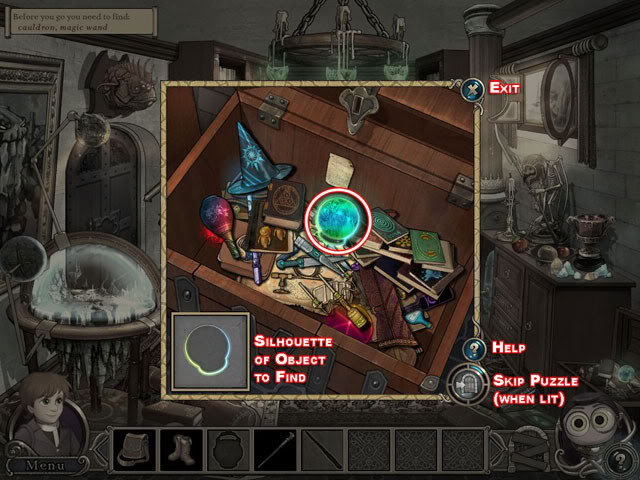
You start the game in Albert’s room in the Magic Tower and discover your goals. The first scene acts as a Tutorial.
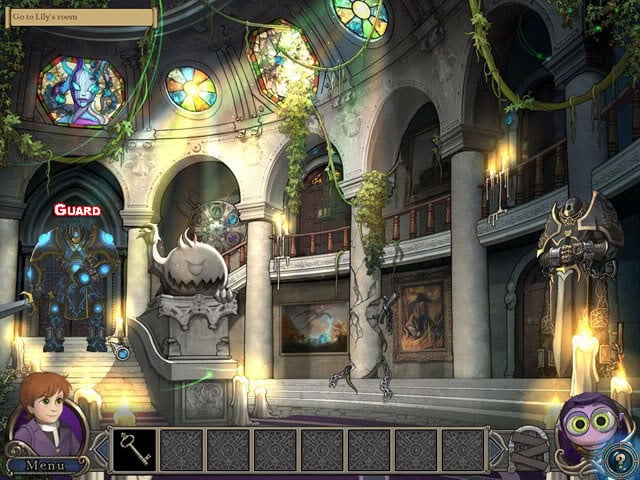
Tower Hall
NOTE: Battle scenes will be listed, but not detailed in this walkthrough. Skip to the very end of the Guide for an Appendix on Battle Strategy.
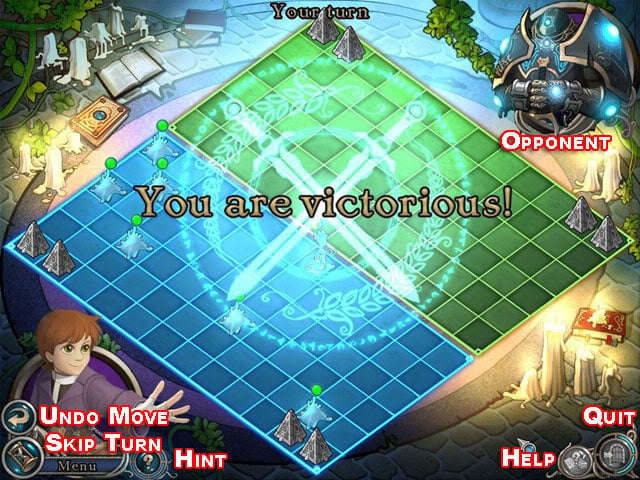
– Undo Move Button: Undoes your last move (and attack).
– Skip Turn: Skips a turn and lets the Opponent move and attack again.
– Hint Button: Suggests a move to make. Not necessarily the best move (if you have a different strategy).
– Help Button: Provides detailed help on Battles. There are 3 tabs on the help screen for Battles.
– Quit Button: Leaves the Battle (after it is charged).
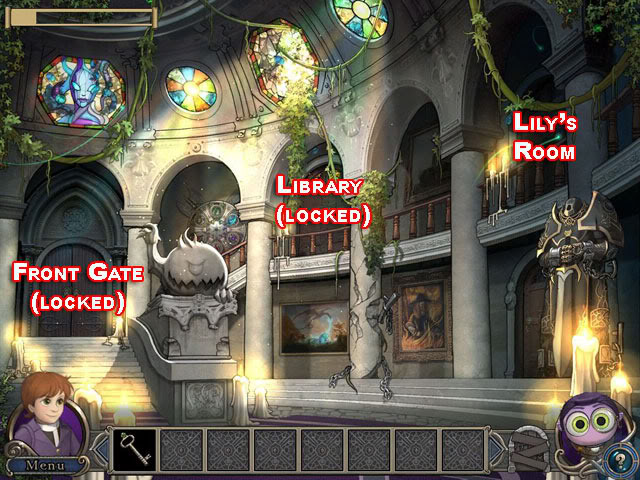
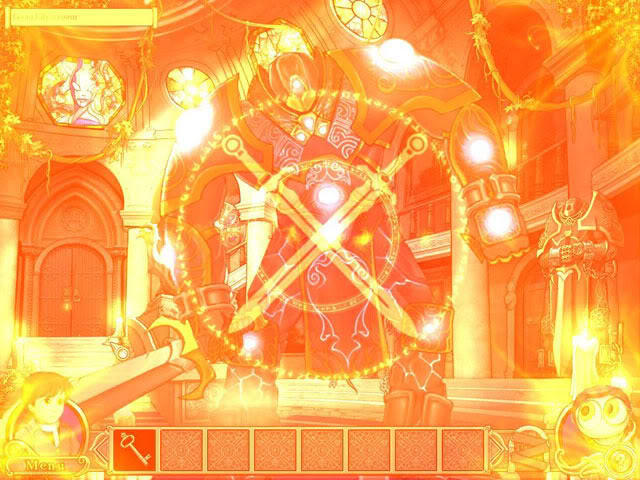
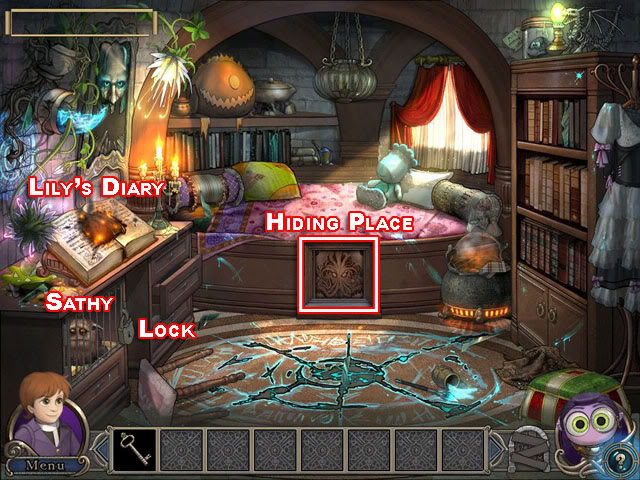
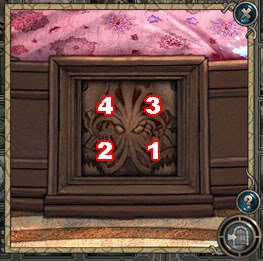
Lily’s Room
NOTE: Battle scenes will be listed, but not detailed in this walkthrough. Skip to the very end of the Guide for an Appendix on Battle Strategy.
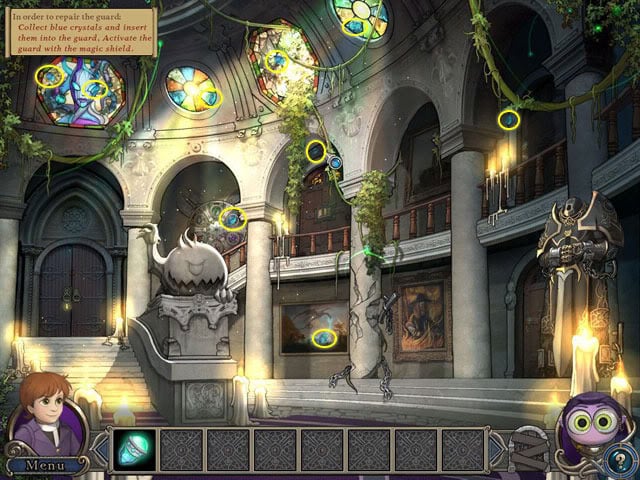
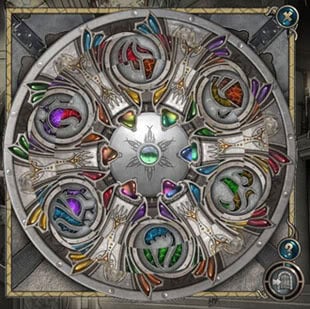
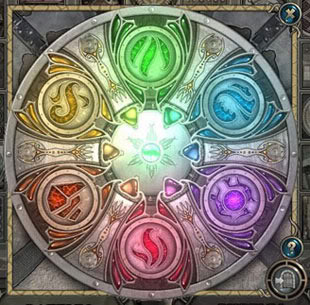
Tower Hall 2: Repair the Guard
The Golem Guard in the Tower Hall needs 9 blue crystals for energy.
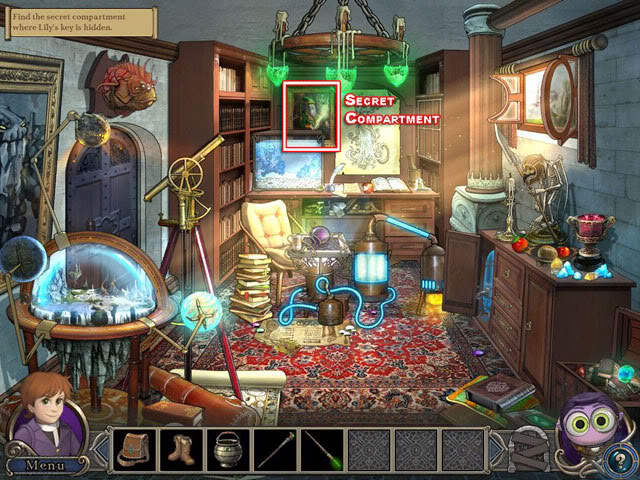
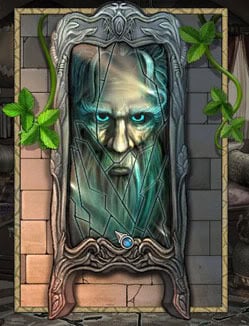
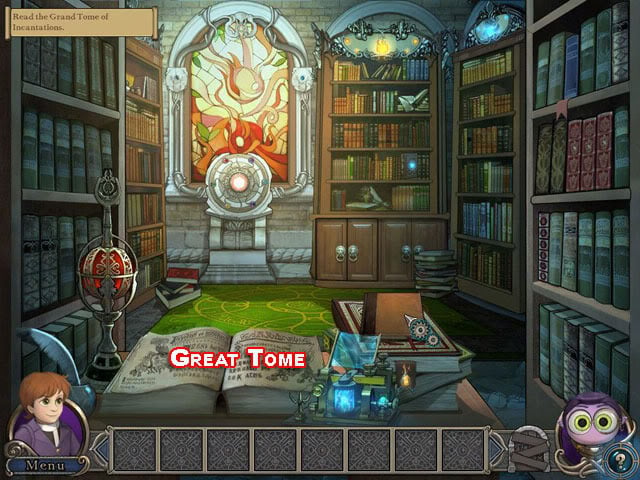
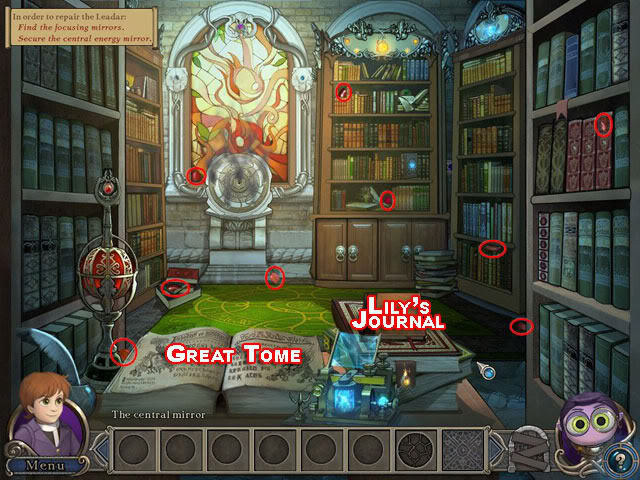
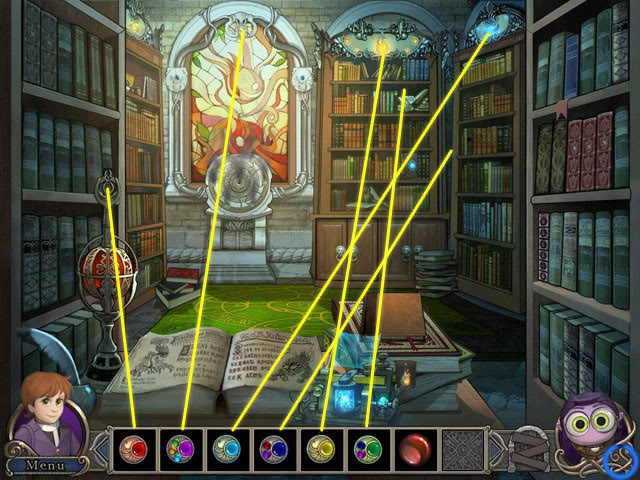
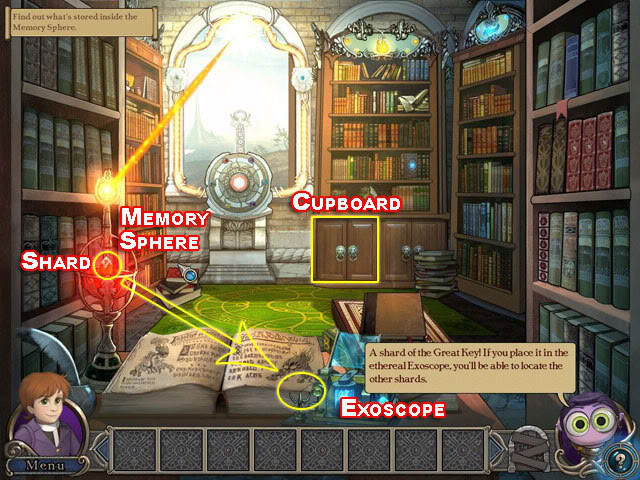
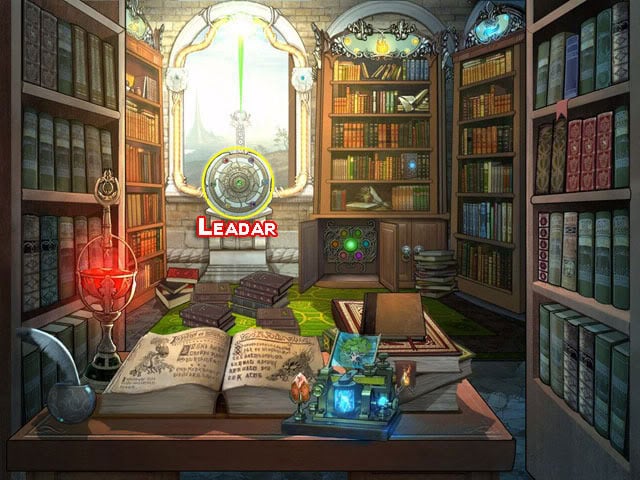
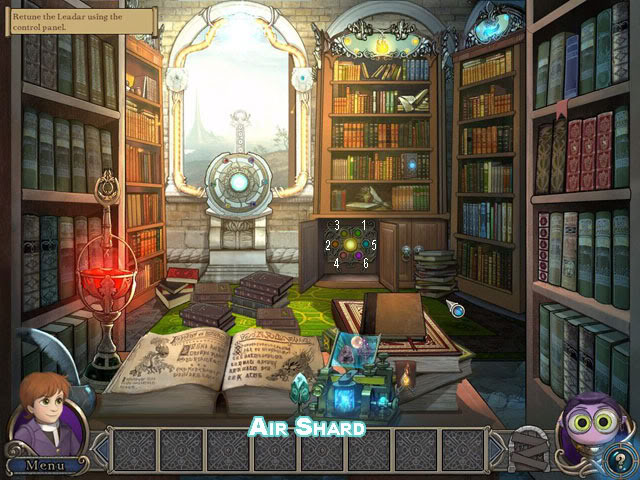
Library: Fix the Leadar
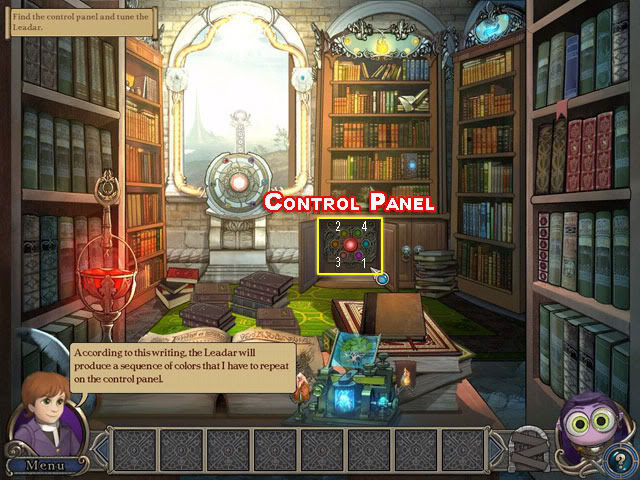
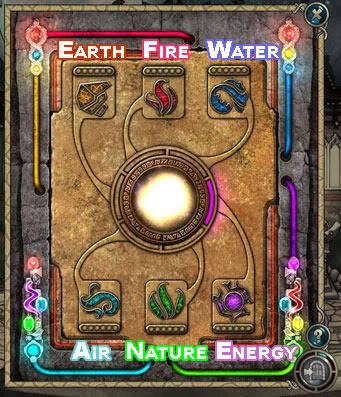
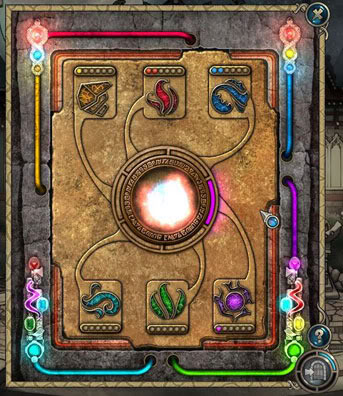
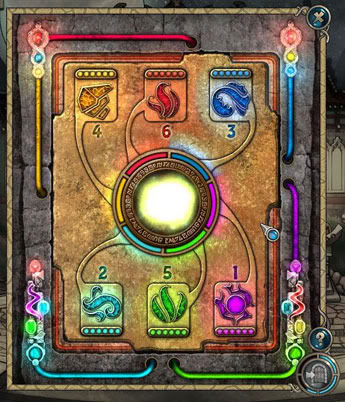
Library: Control Panel

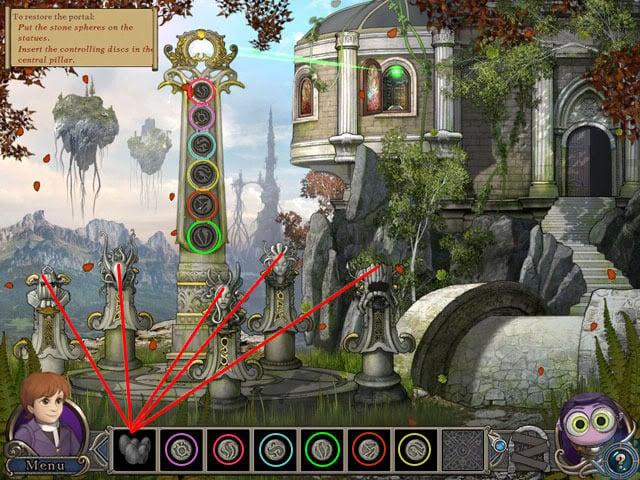
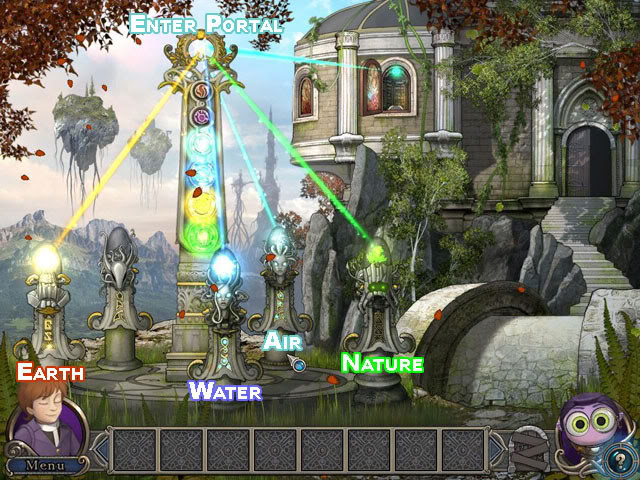
Tower Hall 3: Unlock the Door

Portal to Nature
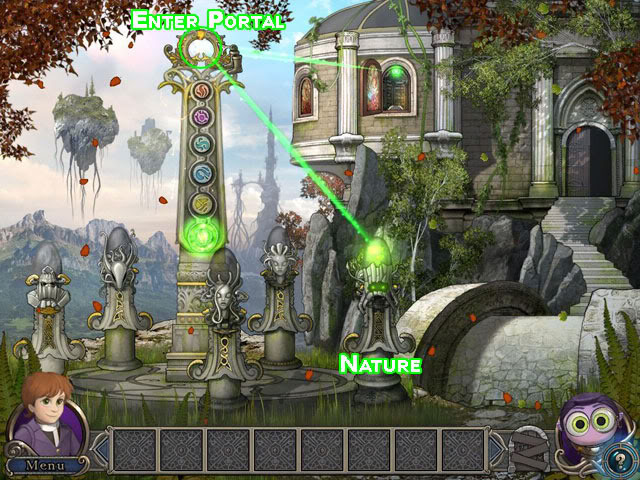
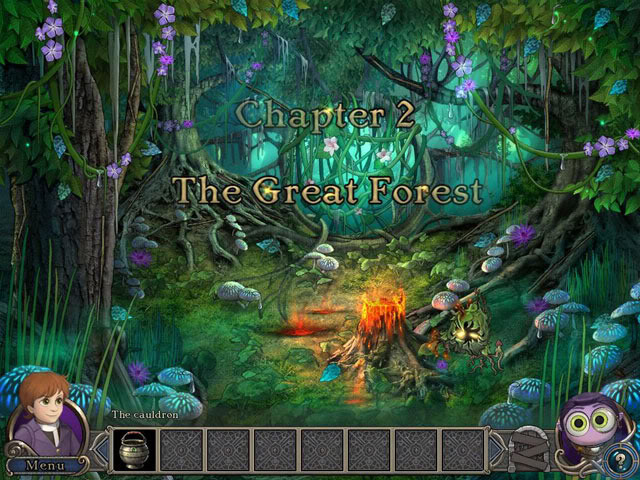
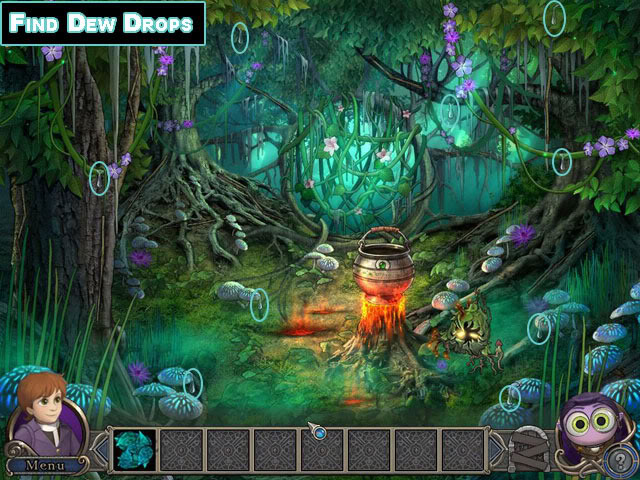
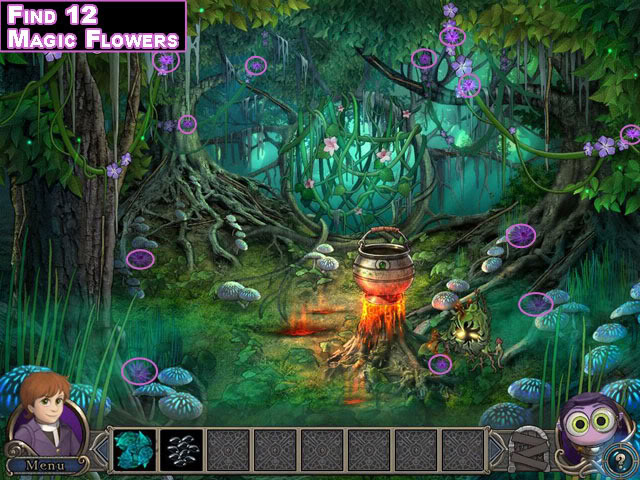
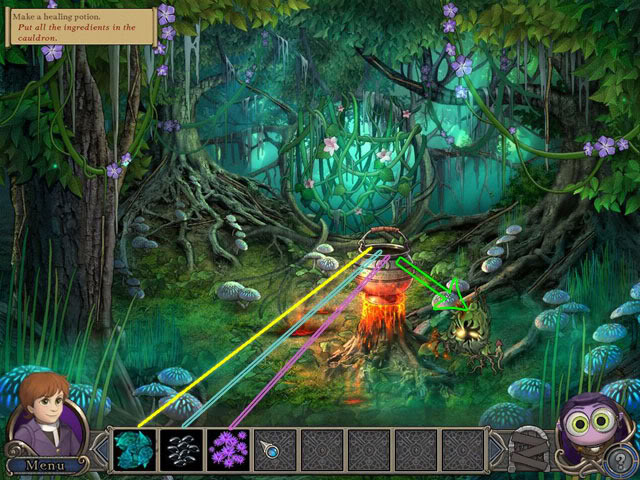
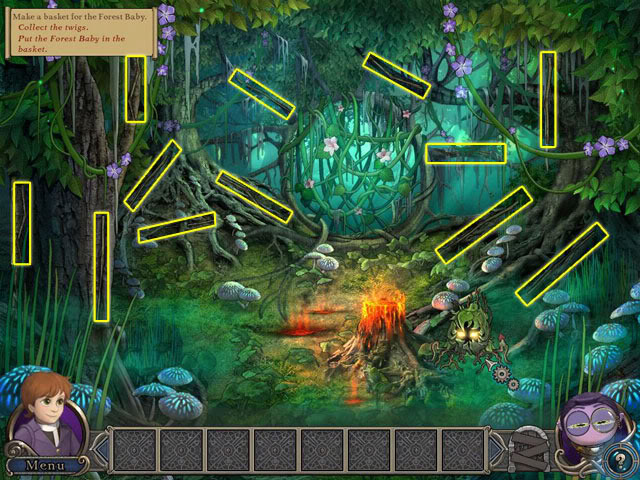
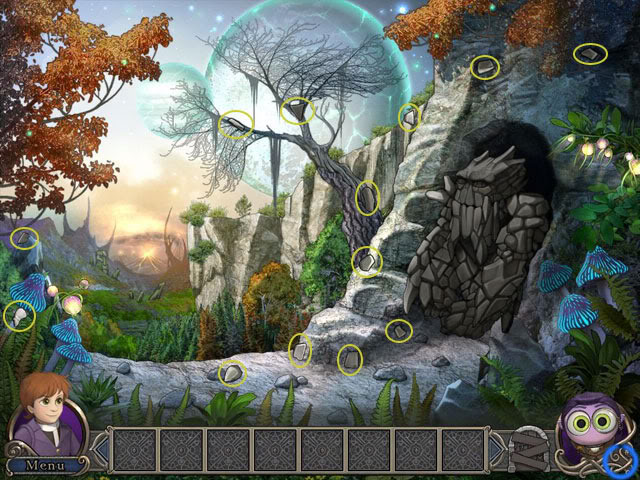
Chapter 2: The Great Forest (Nature)
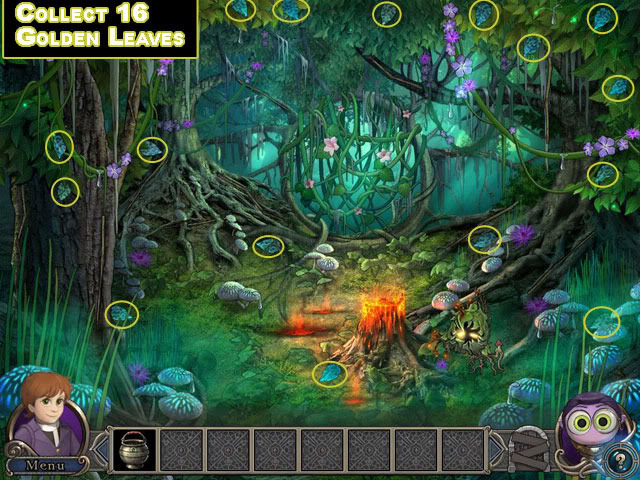
You have traveled through the Portal the realm of Primordial Nature: The Great Forest.
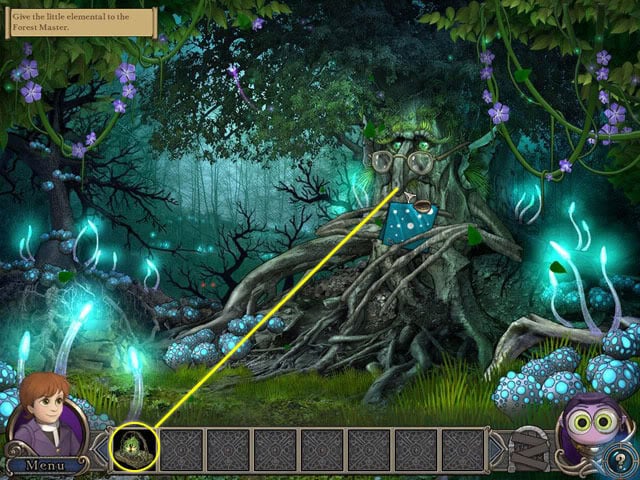
The Forest Baby
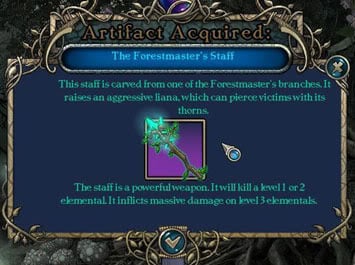
The Forestmaster
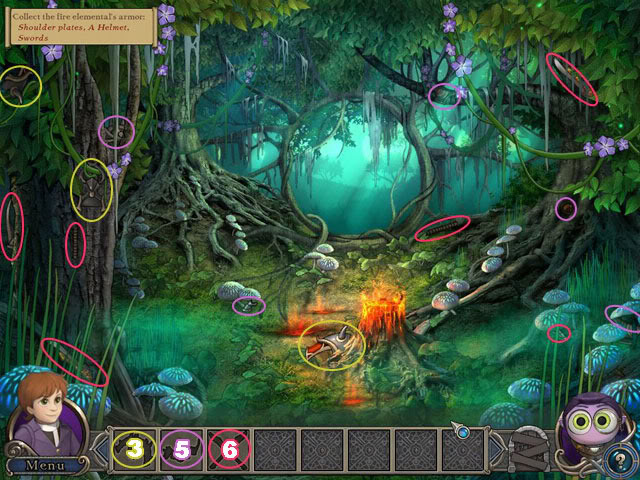
Collect Armor Pieces
Collect Mushroom Spores

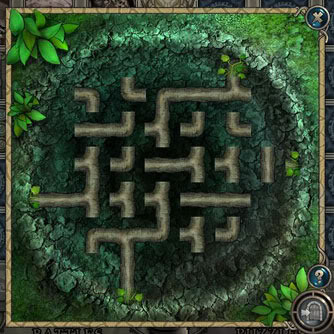
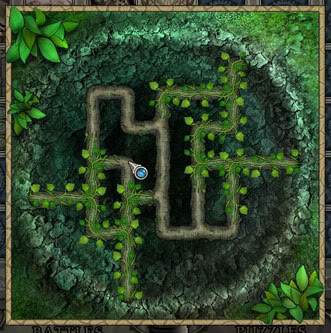
Connect the Roots Puzzle
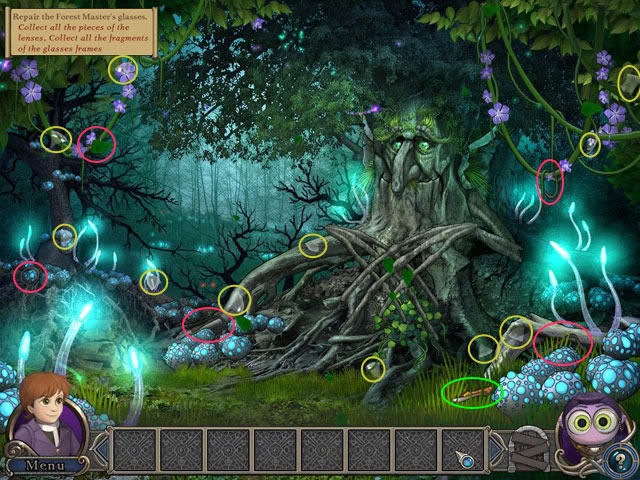
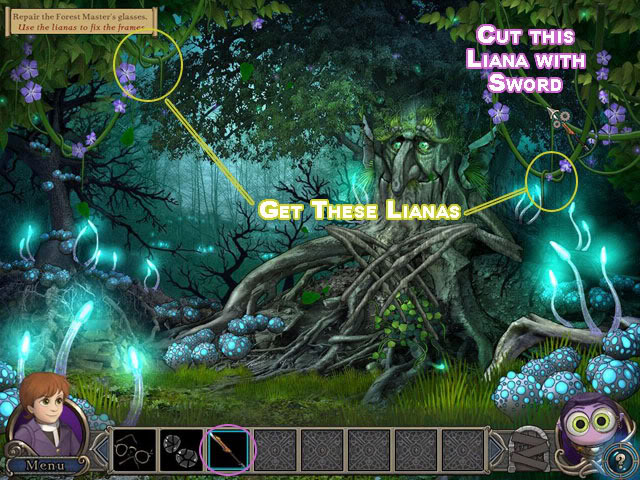
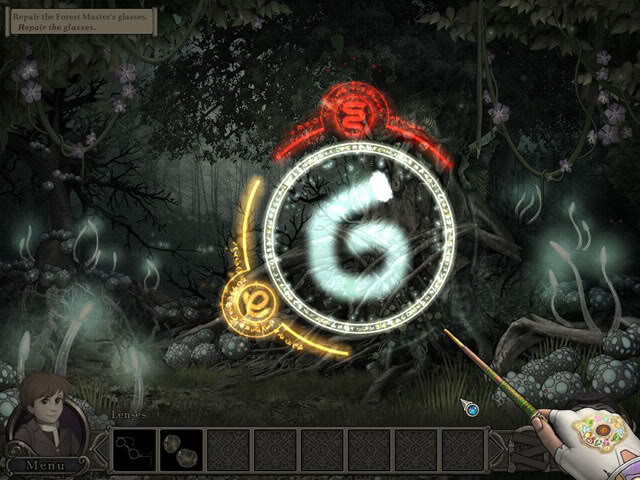
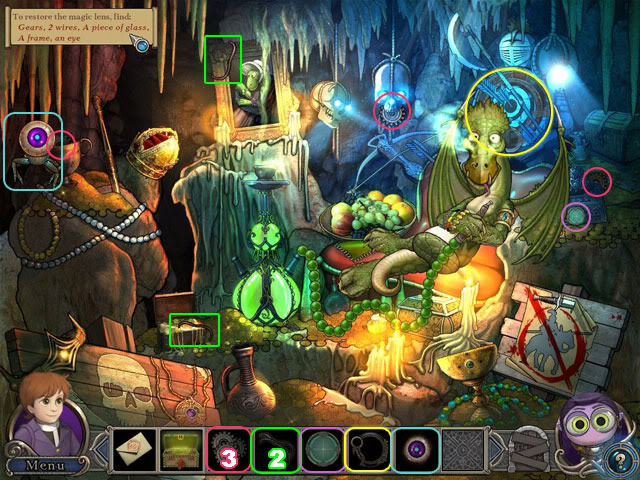
Repair the Glasses

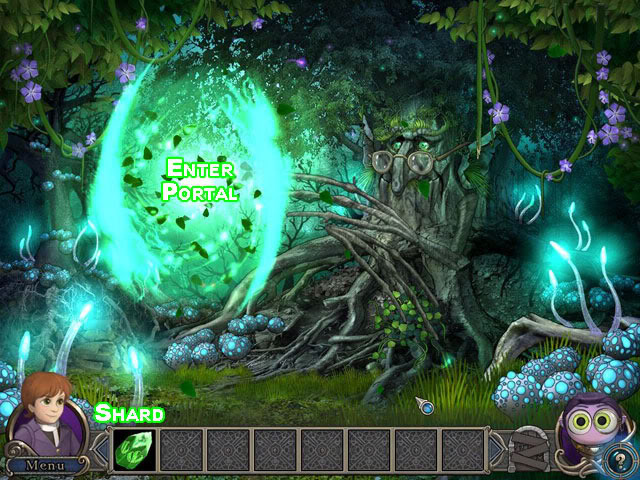
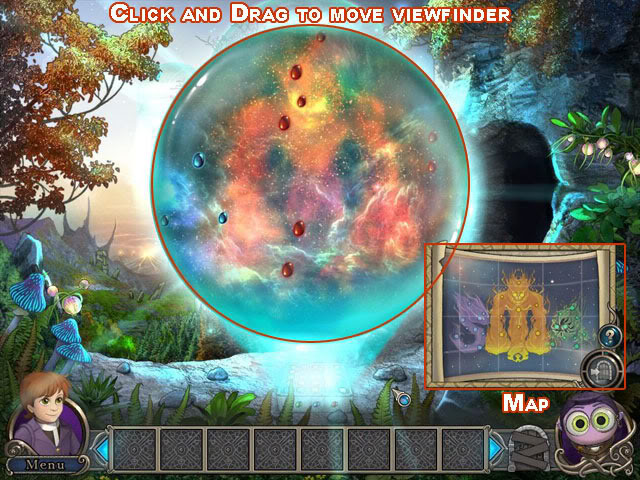
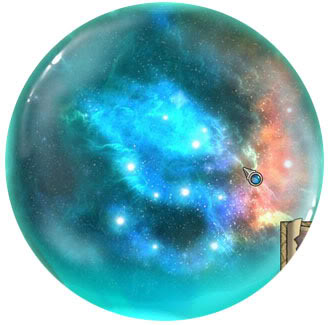
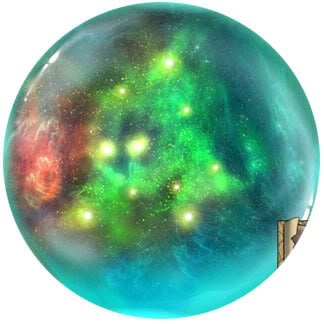
Library: Tune to Your Next Destination.

Portal to Earth
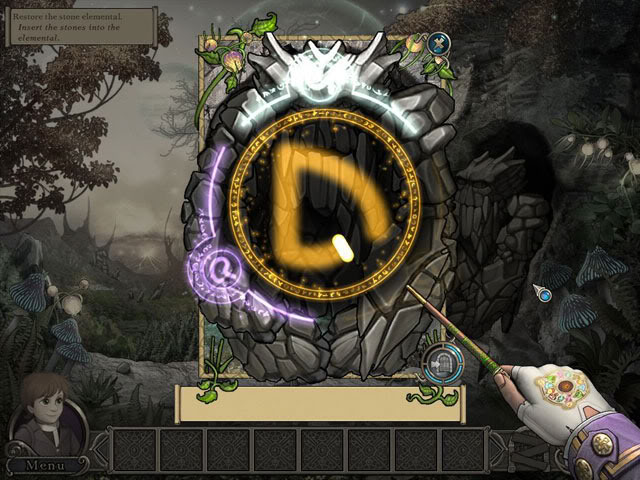
Chapter 3: The Cavern (Earth) The Stone Elemental

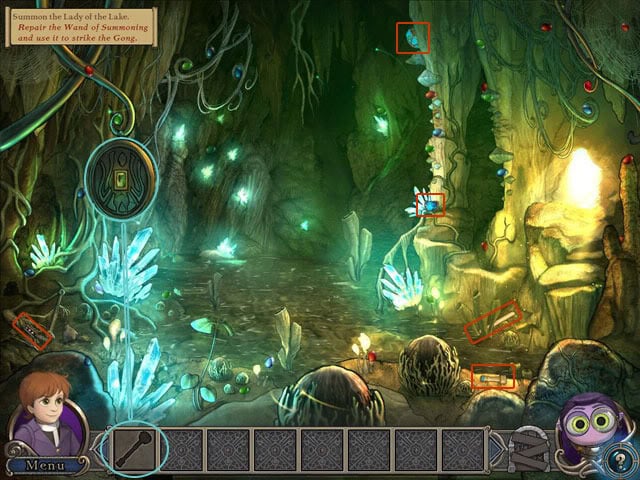
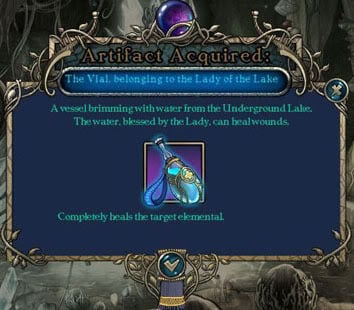
Cavern: Summon the Lady
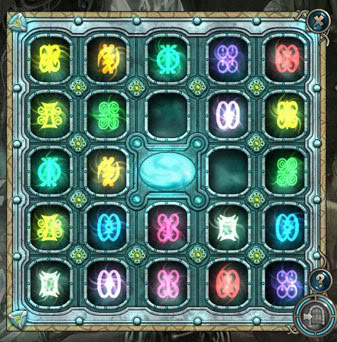
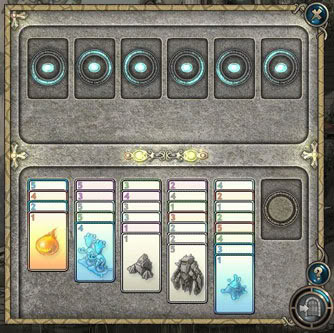
Cavern: Conjuring Box Puzzle
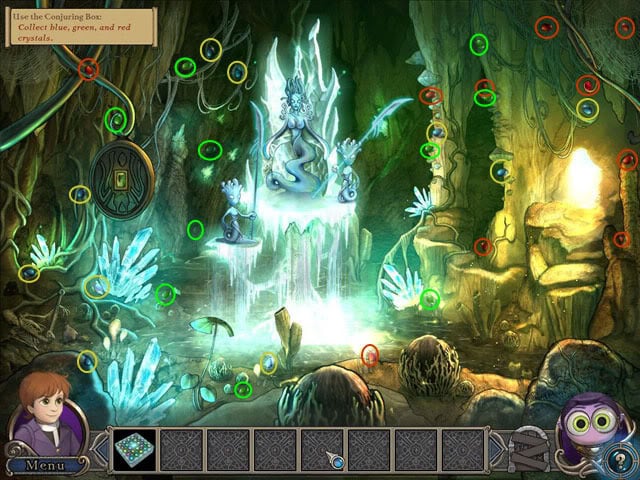
Cavern: Find Crystals
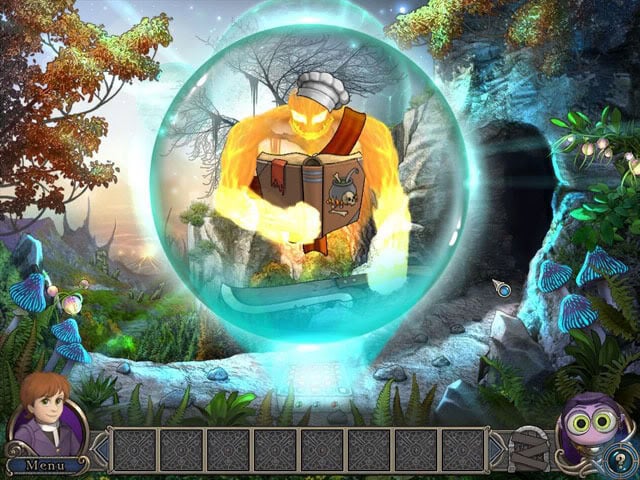
Cavern Entrance: Summon the Fiery Hunter
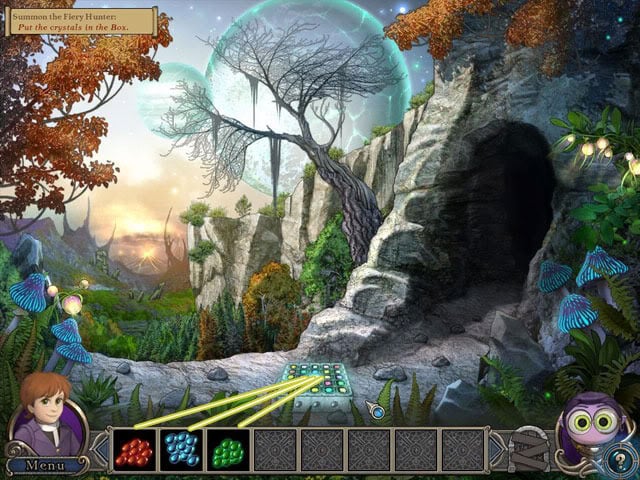

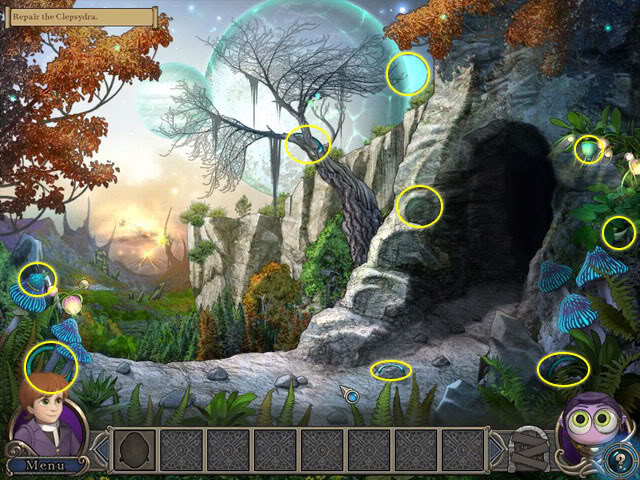
Cavern Entrance: Repair the Aquatic Clepsydra
Library: Tune to Your Next Destination

Portal to Water
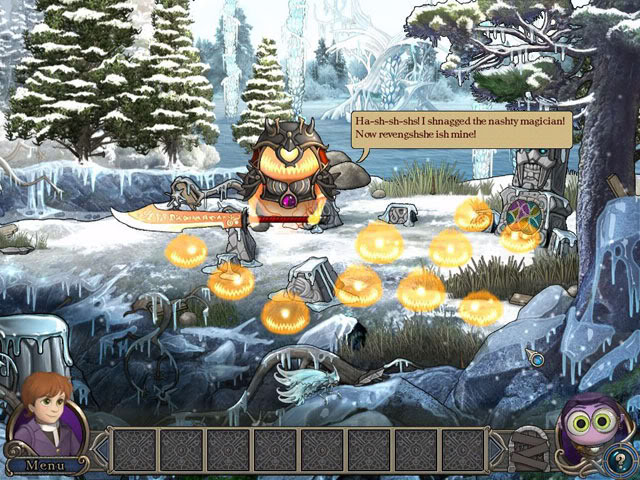
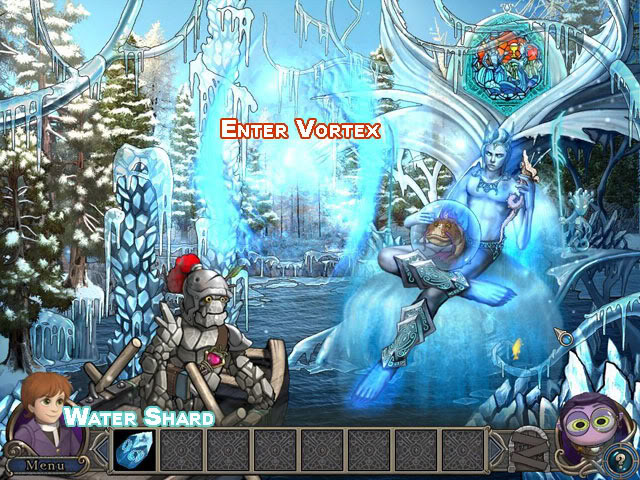
Chapter 4: The Great River (Water)
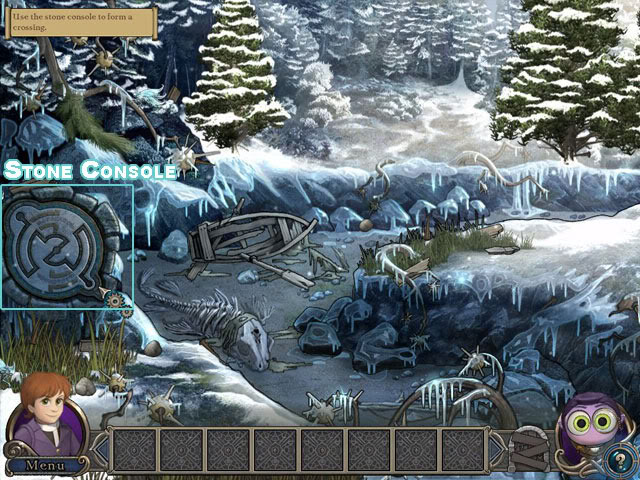
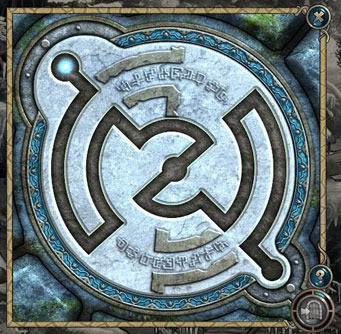
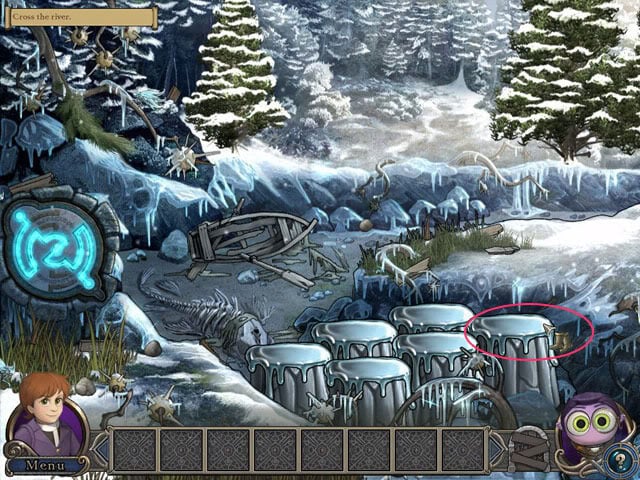
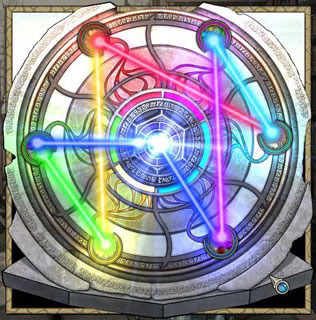
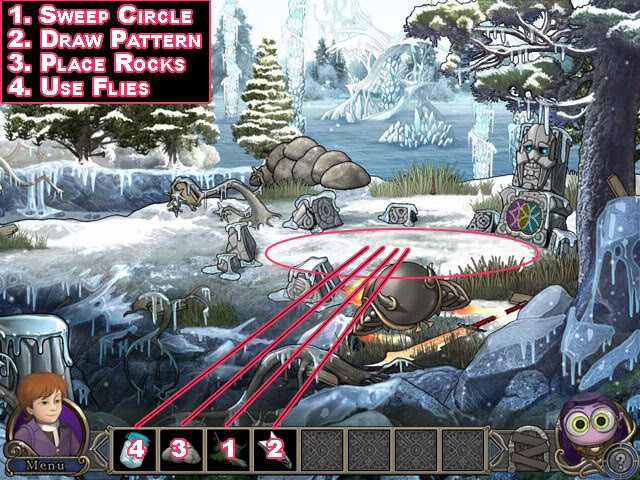
Stone Circles Puzzle
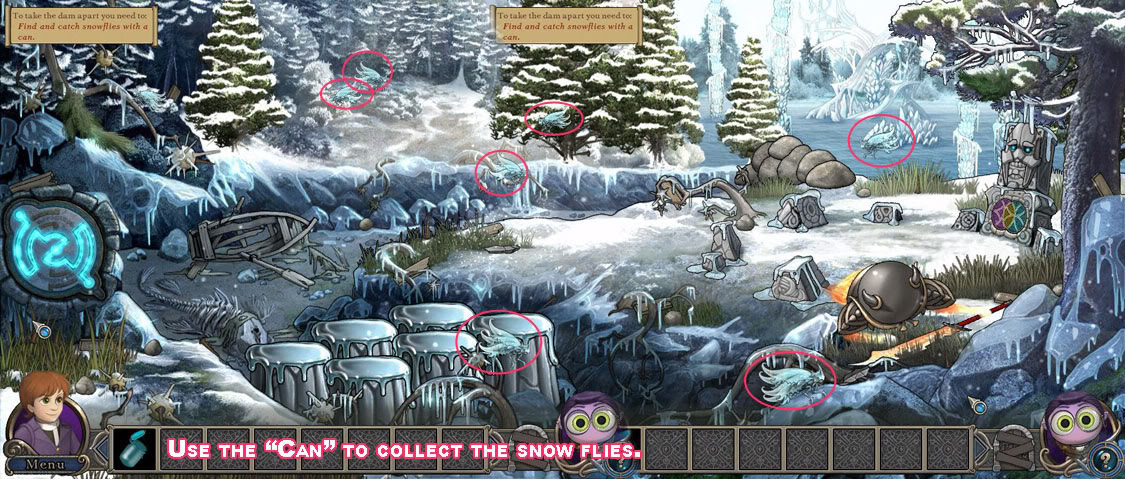
Catch the Snow Flies
Collect Rocks

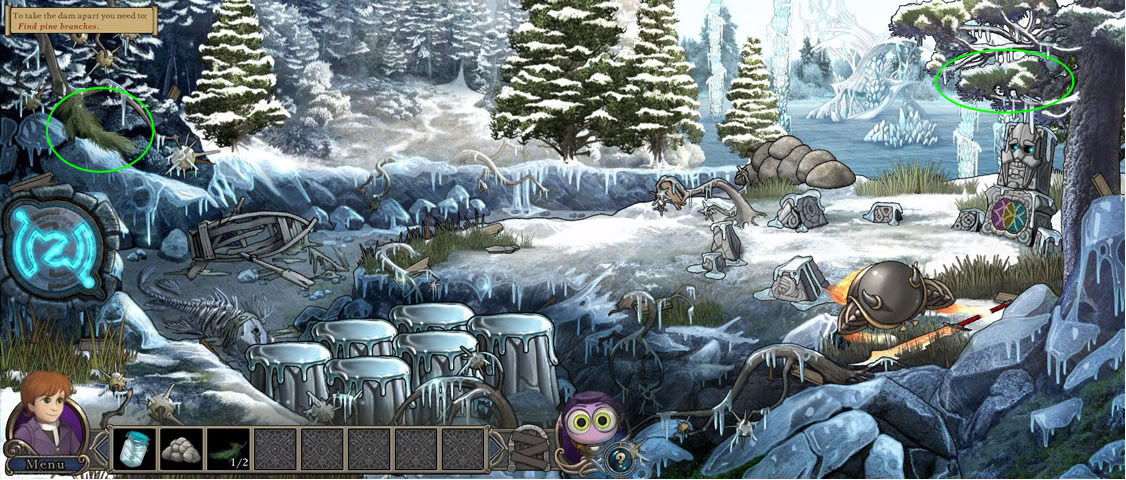
Collect Pine Branches
Find Stone Styluses
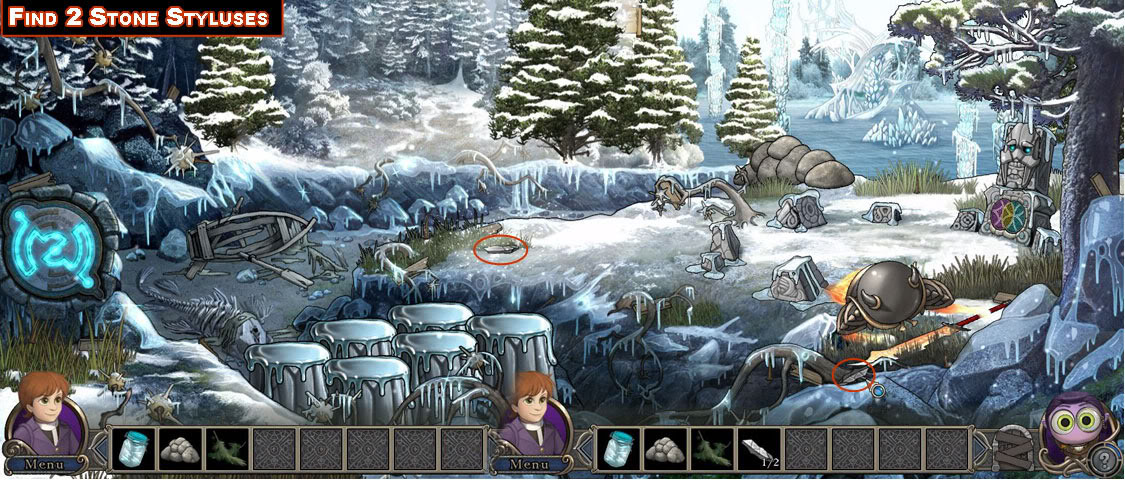
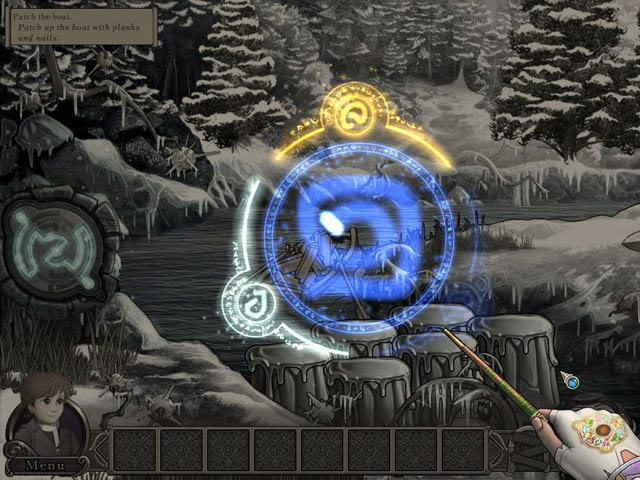
Perform the Ritual
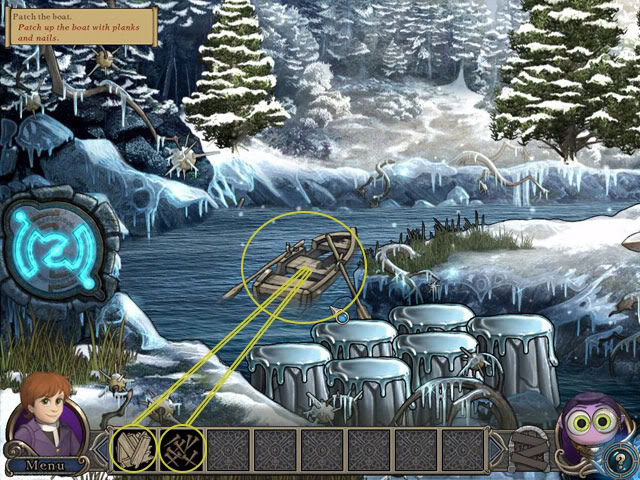
Patch the Boat

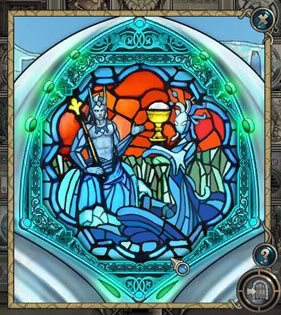
The Water House
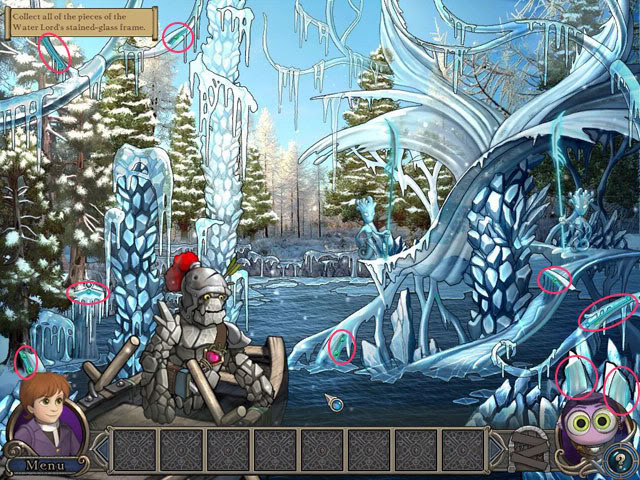
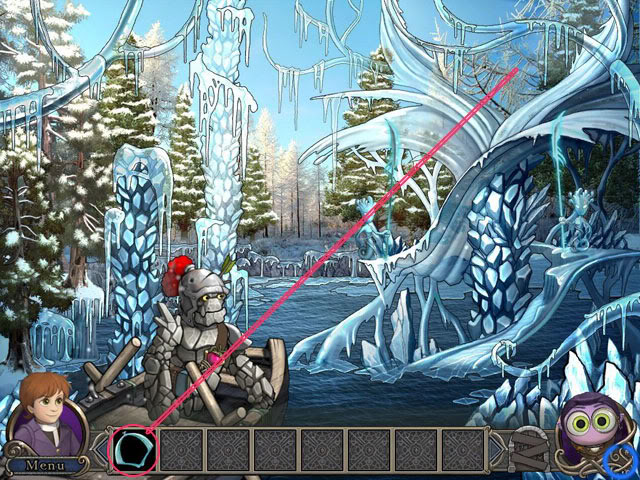
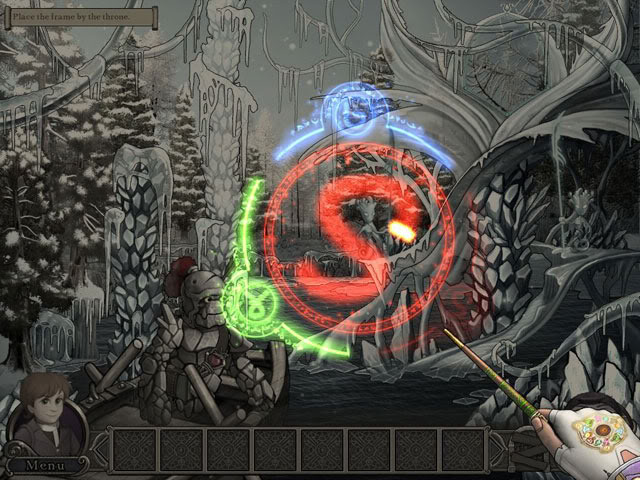
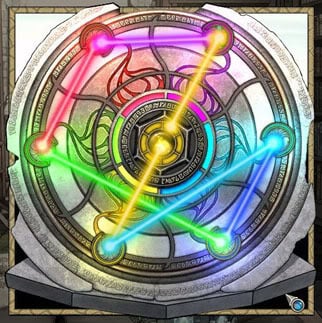
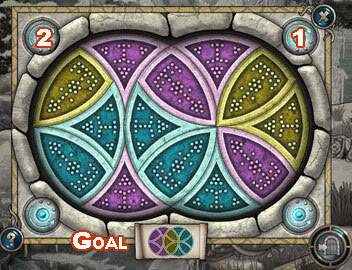
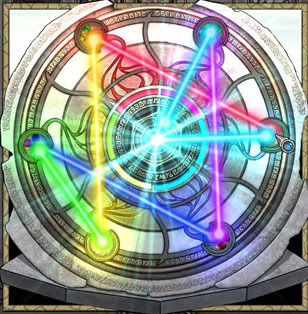
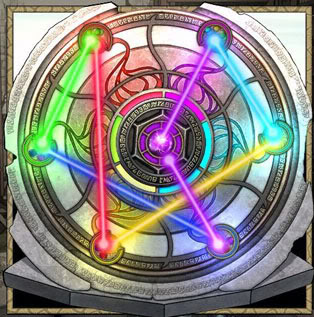
Stained Glass Rings Puzzle

Library: Tune to Your Next Destination

Portal to Air
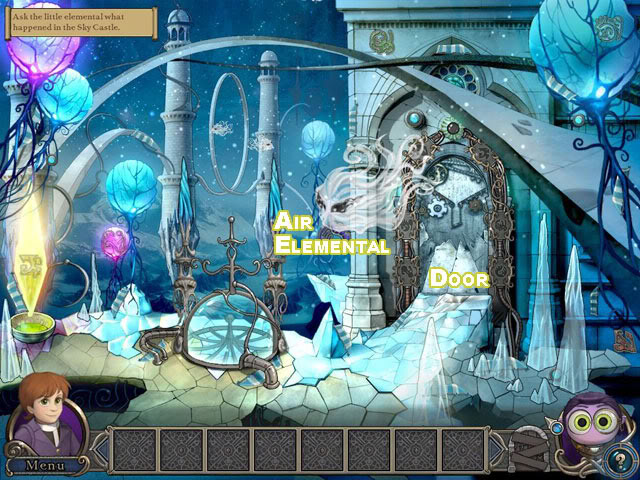
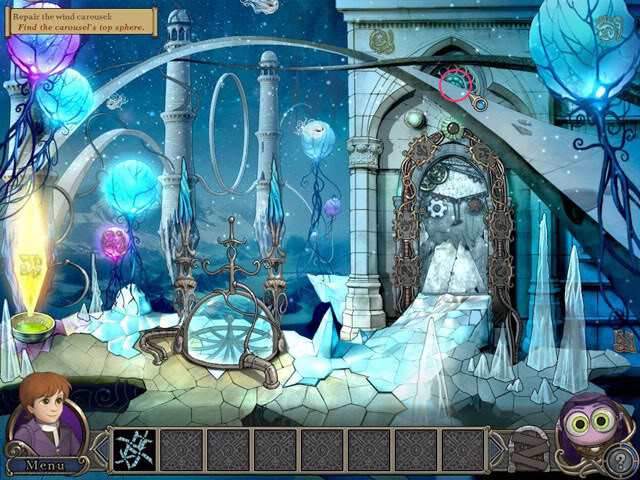
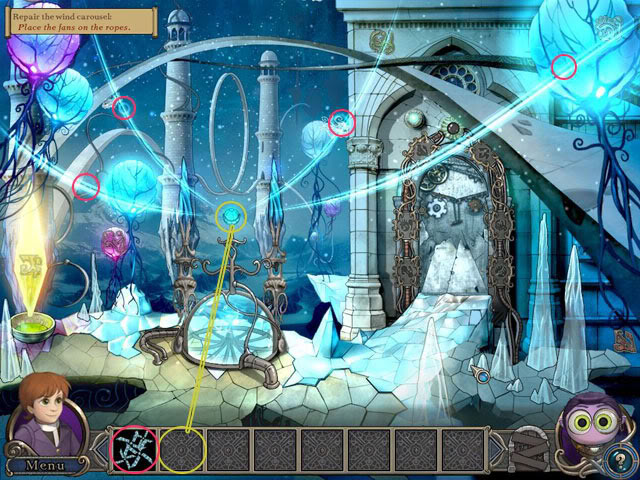
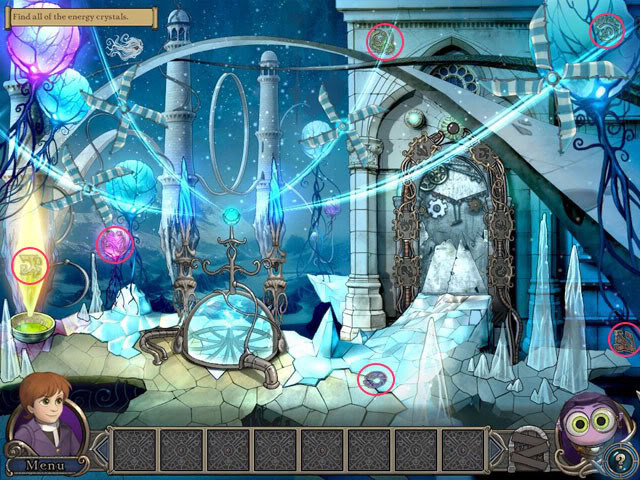
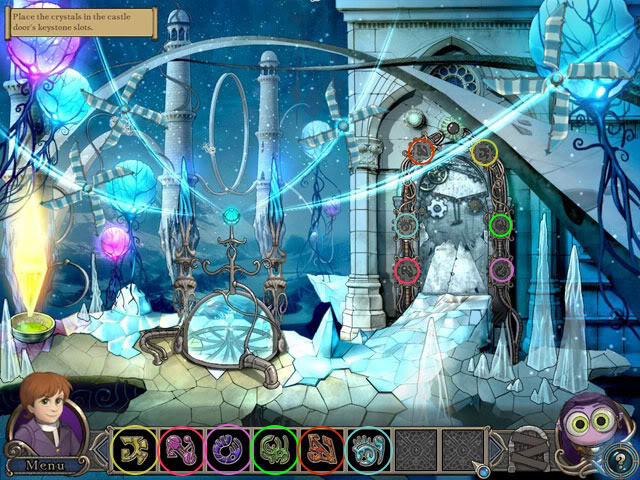
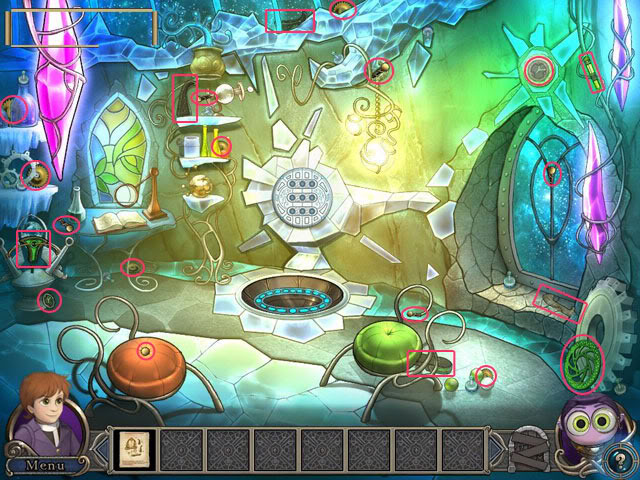
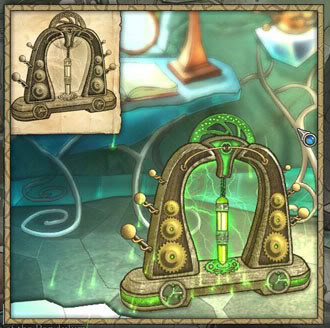
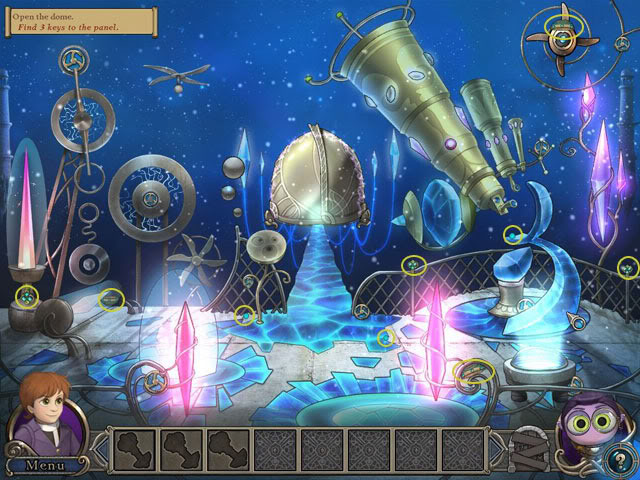
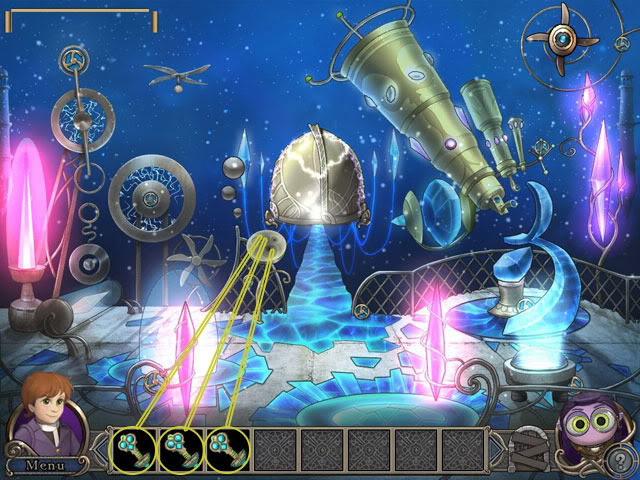
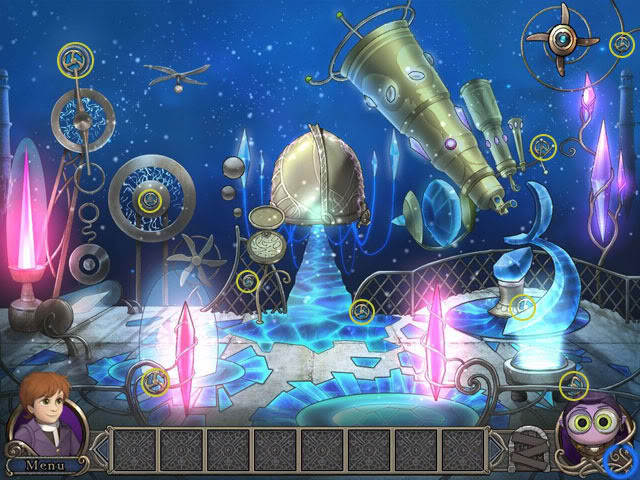
Chapter 5: The Sky Castle (Air)
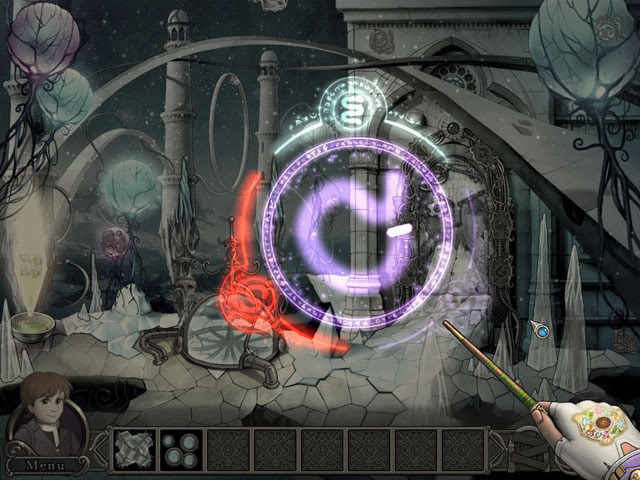

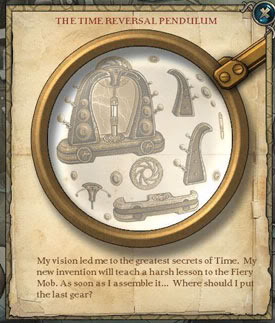
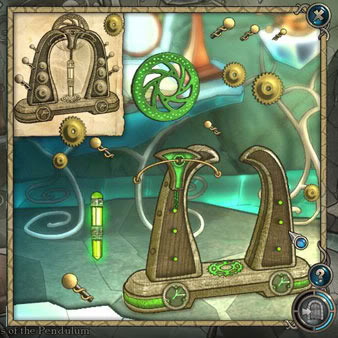
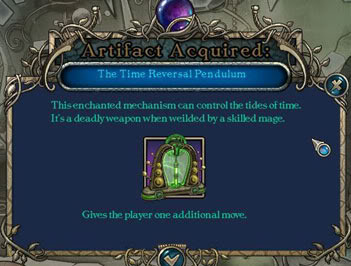
Time Reversal Pendulum
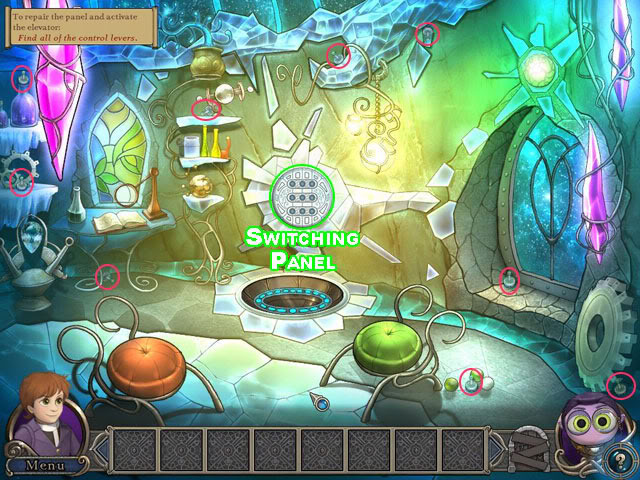
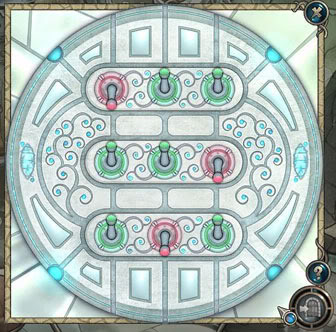
Repair Elevator Control Panel
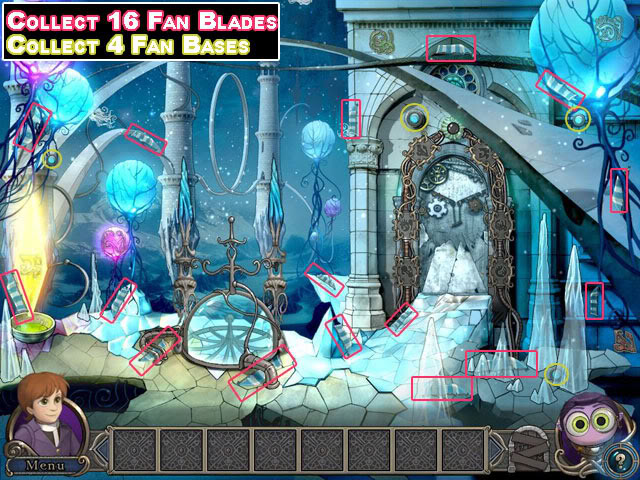
Top Floor of Wind Castle: Find Keys
Find Gears

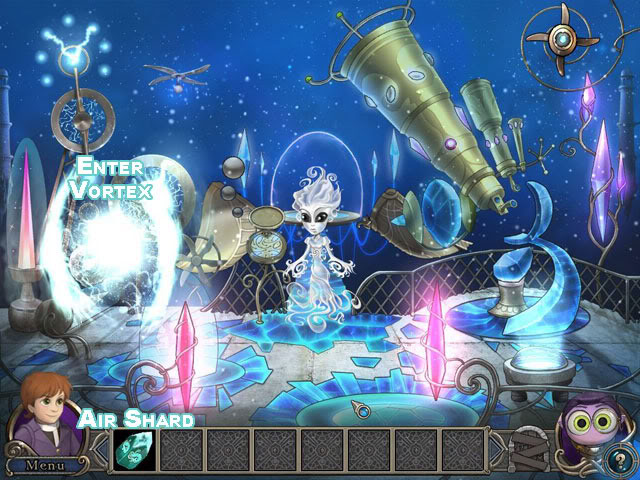
Library: Tune to Your Next Destination
Portal to Energy

Chapter 6: Thunder Hills (Energy)
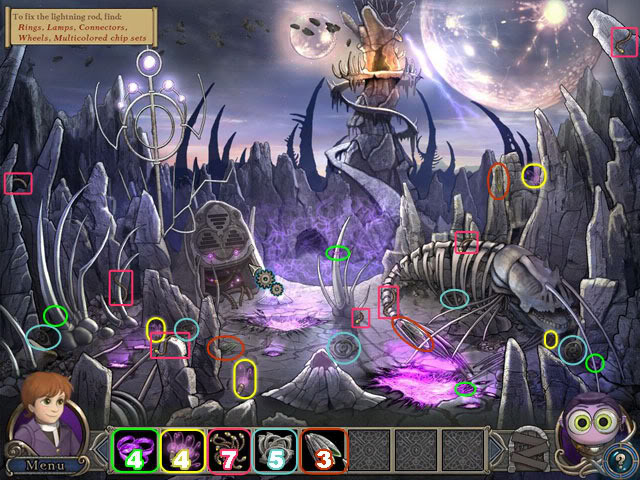
Repair the Lightning Rod
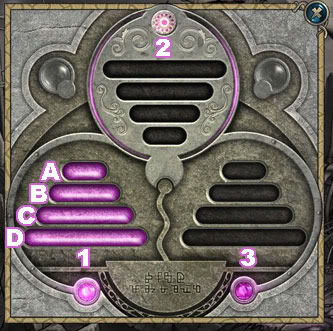
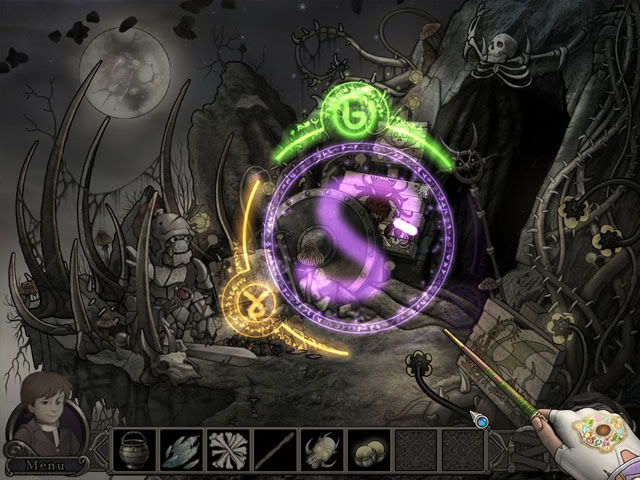
Lightning Rod Control Panel Puzzle
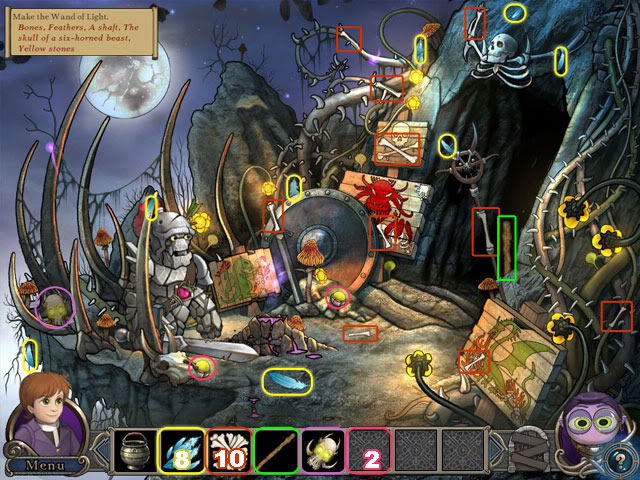
Assemble Wand of Light
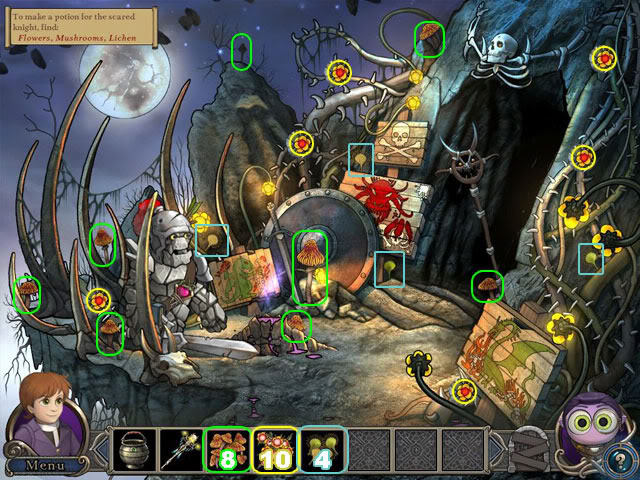
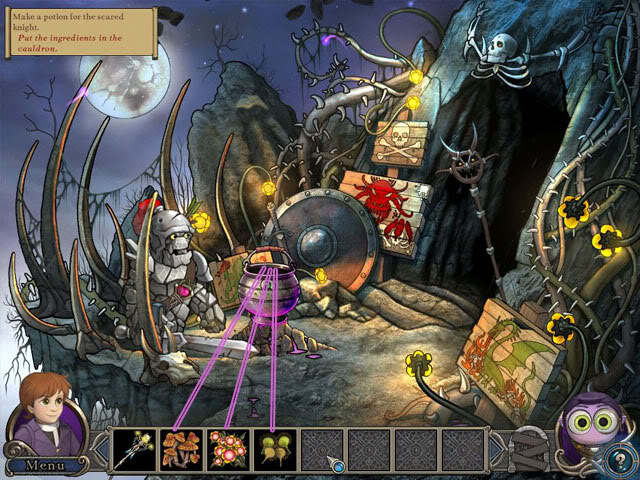
Make Tranquilizer Potion
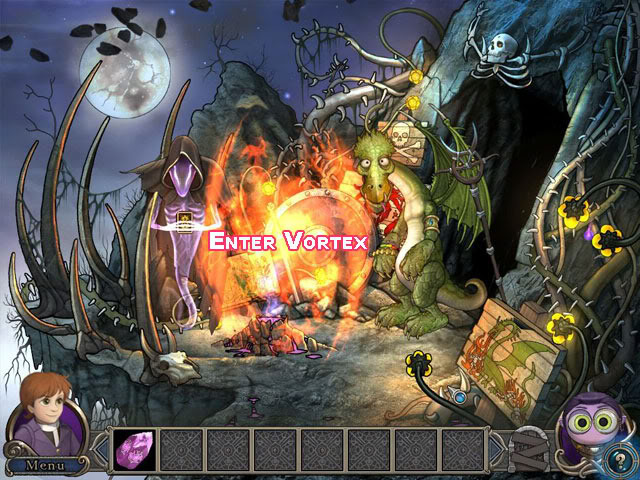
Inside Dragon Cave
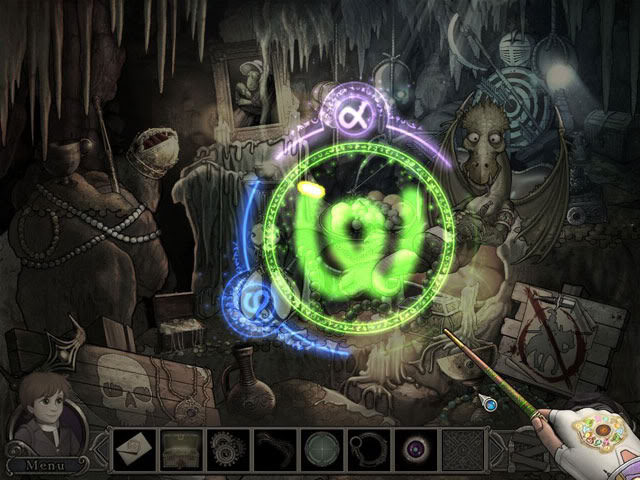
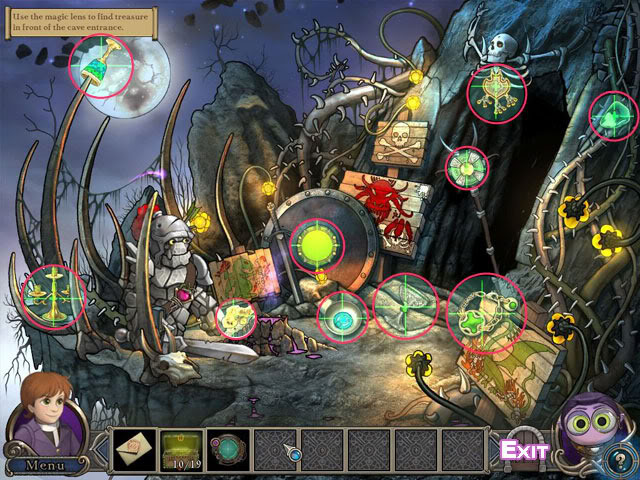
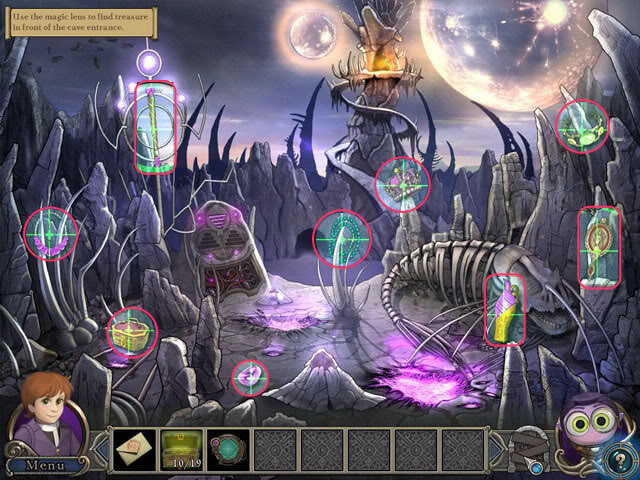
Cave Entrance with Magic Lens
Thunder Valley with Magic Lens
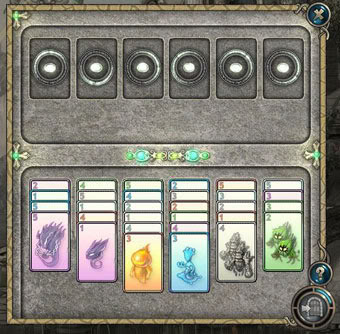
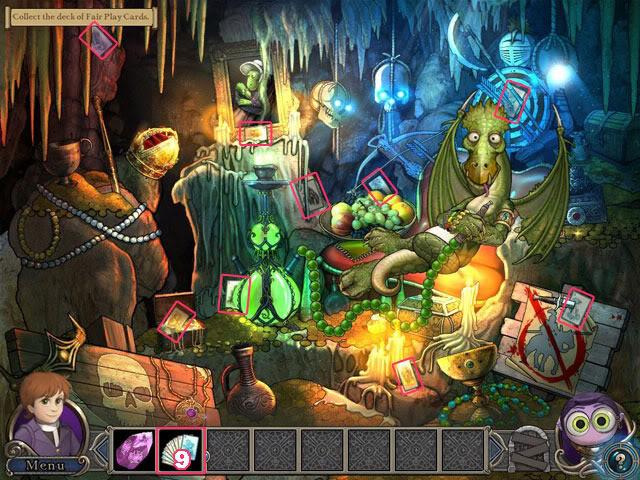
Dragon’s Cave: Find Fair Play Cards
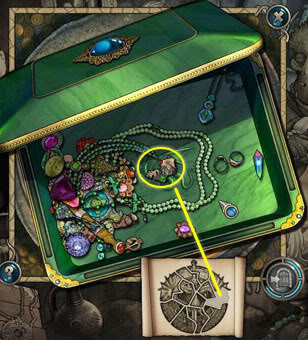
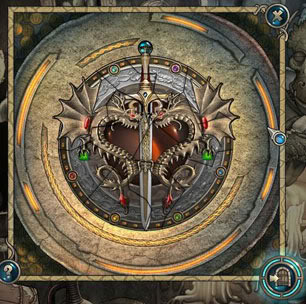
Dragon’s Little Box Puzzle
Portal to Fire
Chapter 7: The Temple of Flames (Fire)
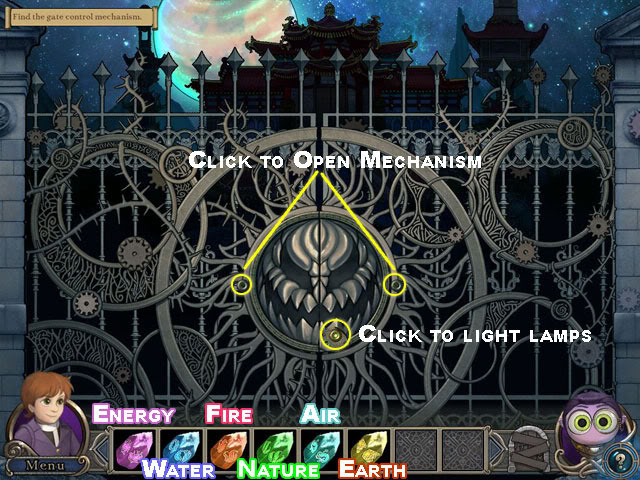
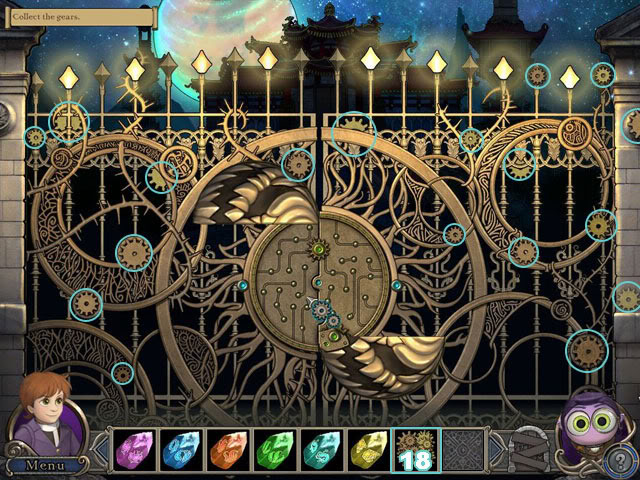
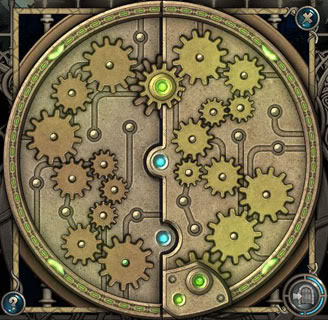
Gate Lock Gears Puzzle
Meet Sibelius: The Final Battle
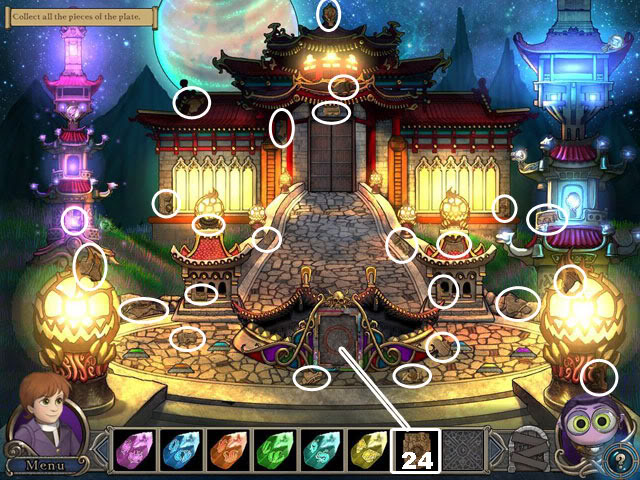
Find Plate Pieces
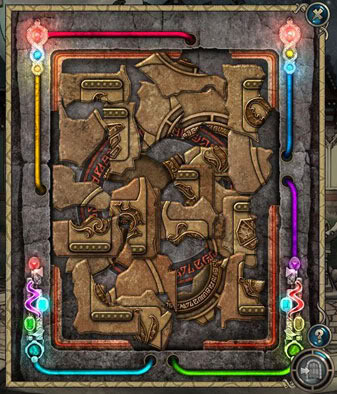
Magic Plate Puzzle
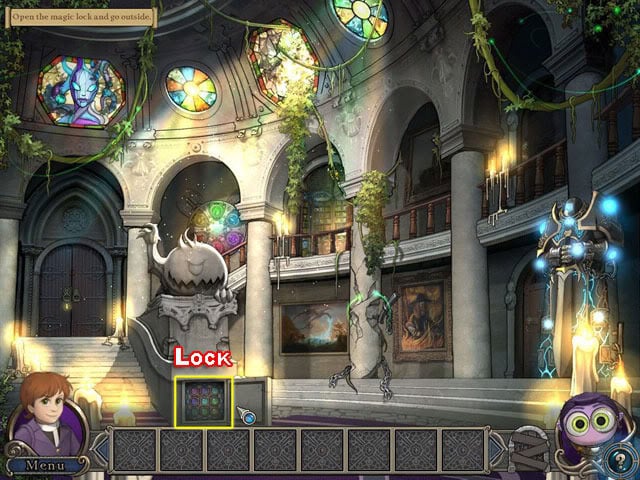
Magic Lock Puzzle
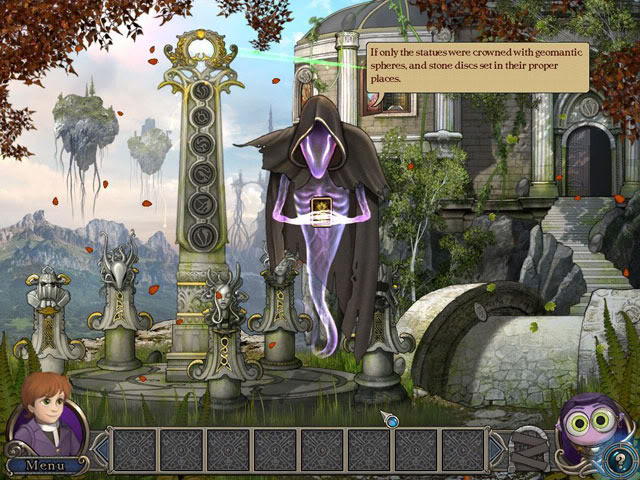
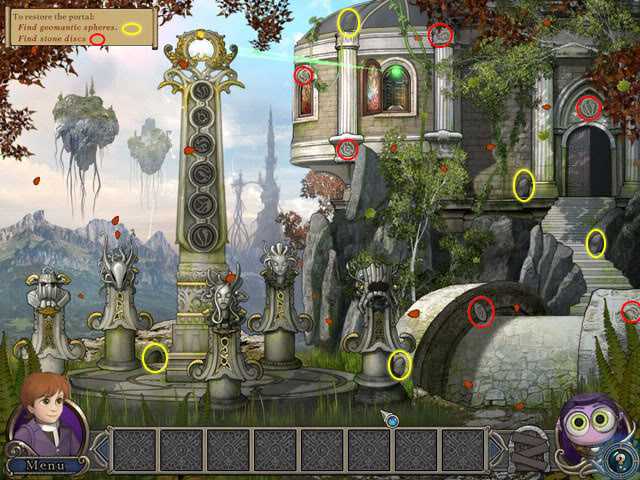
Place the Shards
Find the Keys
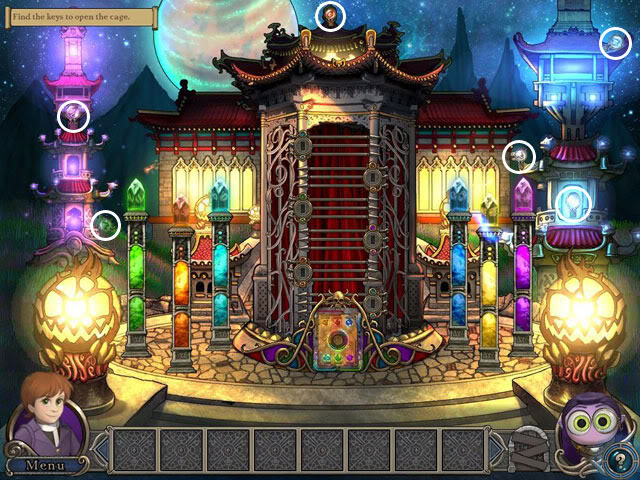
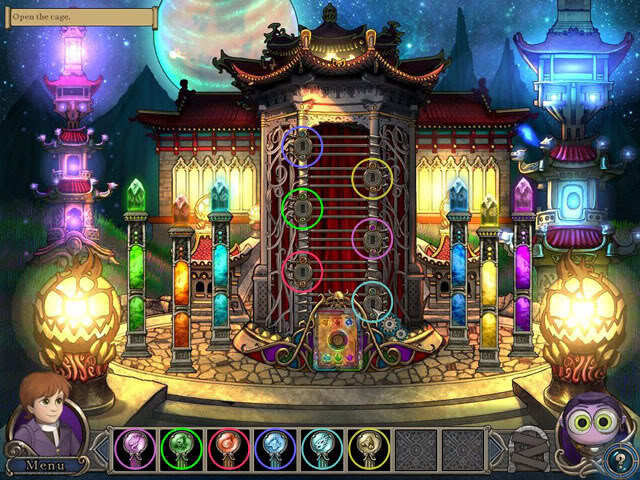
Open the Cage
Endgame
Congratulations! You have completed Elementals: The Magic Key.
Appendix: Battle Strategy Guide Replaying Battles
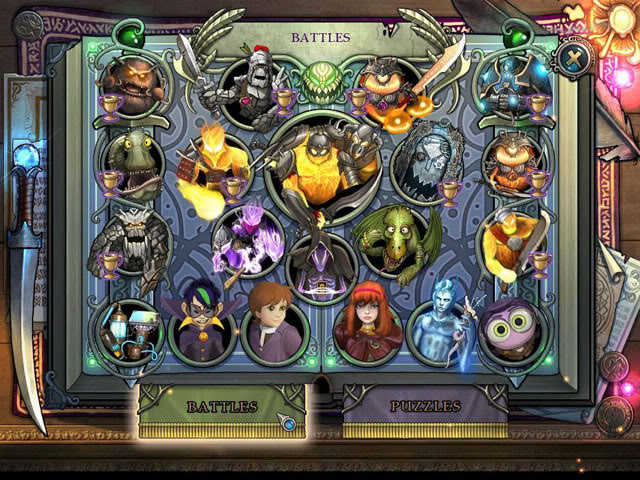
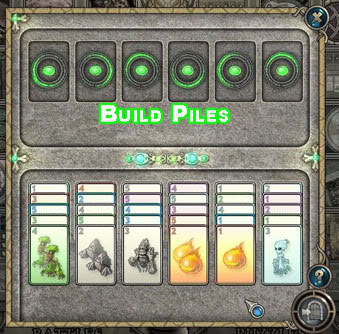
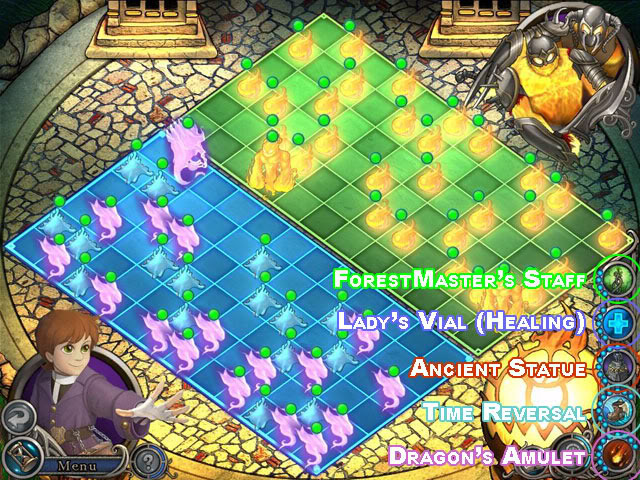
Battle Screen
– Undo Move Button: Undoes your last move (and attack).
– Skip Turn: Skips a turn and lets the Opponent move and attack again.
– Hint Button: Suggests a move to make. Not necessarily the best move (if you have a different strategy).
– Help Button: Provides detailed help on Battles. There are 3 tabs on the help screen for Battles.
– Quit Button: Leaves the Battle (after it is charged).
Battle Strategy
The game DOES provide help in learning how the Battles work (click on the "?" button while you’re in one).
Battle Combinations
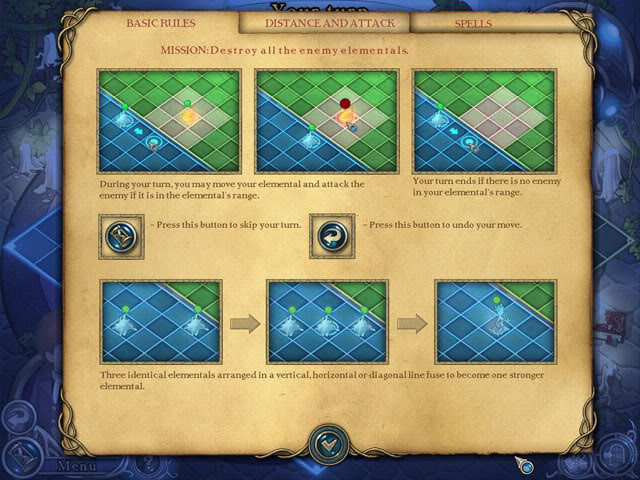
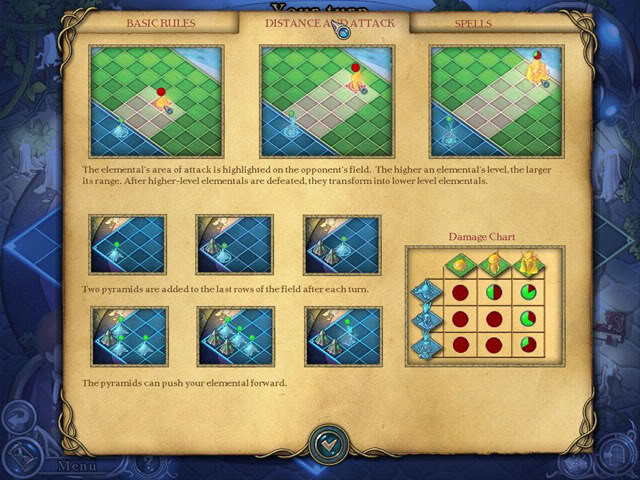
Battle Distance and Attack
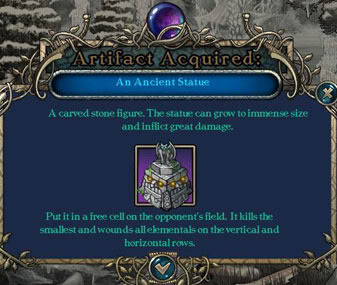
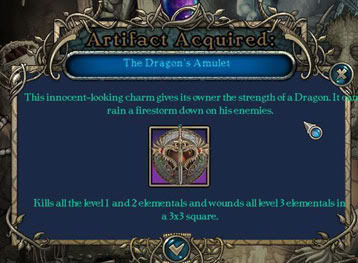
Battle Spells (Artifacts)

“;
