![Digimon UP Tier List [Supports, Buddies, and Partners]](/wp-content/uploads/2026/07/digimon-up-tier-list.jpg "Digimon UP Tier List [Supports, Buddies, and Partners]")
Digimon UP Tier List [Supports, Buddies, and Partners]
These Digimon will get you UP the leaderboard.


![Haze Seas Boss Drops [Chances, Locations, and How to Spawn]](/wp-content/uploads/2026/07/haze-seas-boss-drops.jpg "Haze Seas Boss Drops [Chances, Locations, and How to Spawn]")

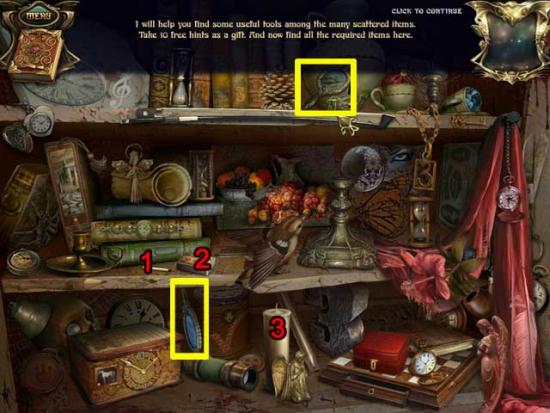
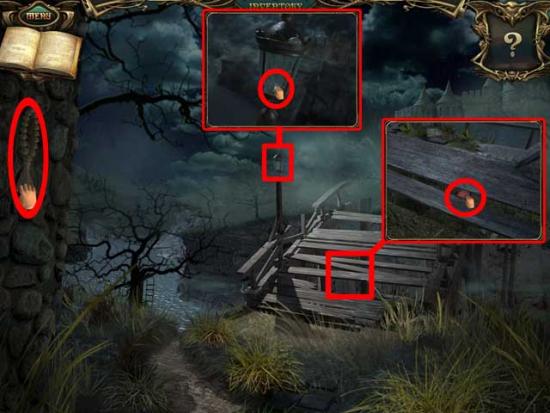
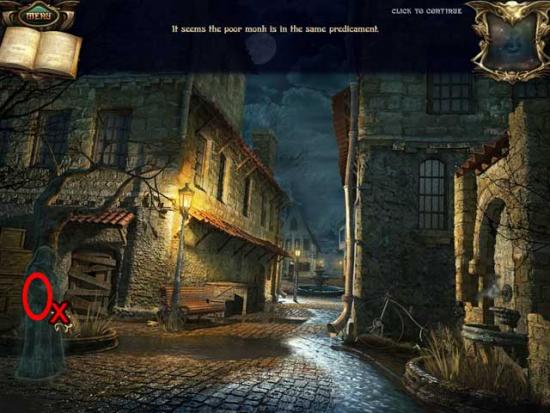
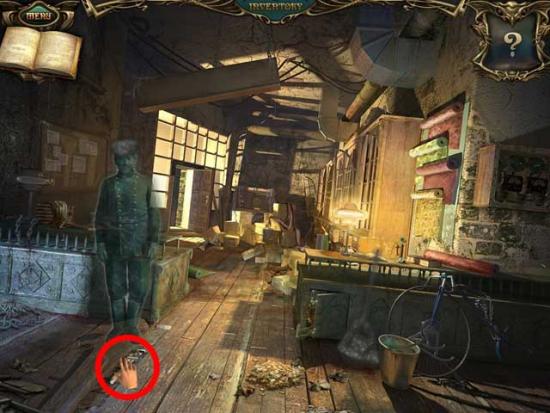
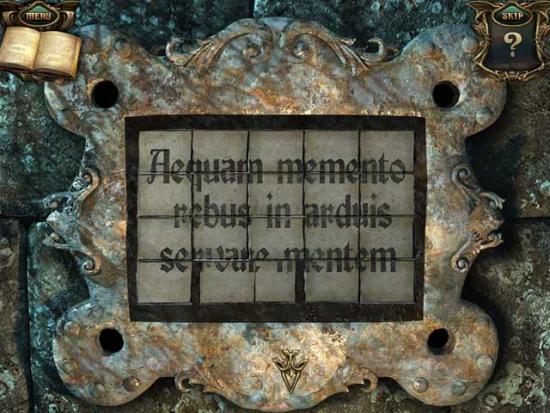
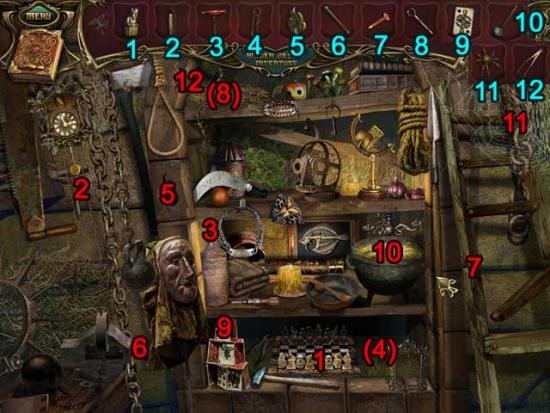
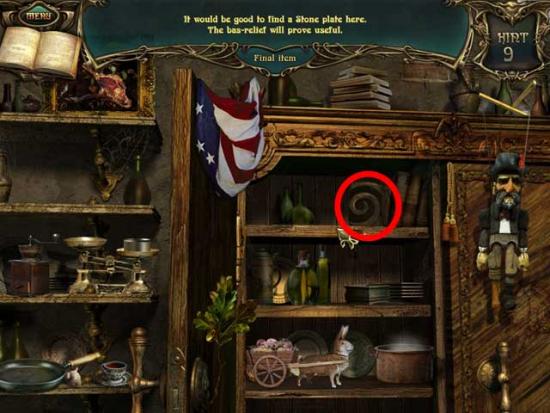
Welcome the Echoes of the Past: The Castle of Shadows walkthrough on Gamezebo. Echoes of the Past: The Castle of Shadows is a hidden object adventure game played on the PC created by Big Fish Games. This walkthrough includes tips and tricks, helpful hints, and a strategy guide for how to complete Echoes of the Past: The Castle of Shadows.

Welcome the Echoes of the Past: The Castle of Shadows walkthrough on Gamezebo. Echoes of the Past: The Castle of Shadows is a hidden object adventure game played on the PC created by Big Fish Games. This walkthrough includes tips and tricks, helpful hints, and a strategy guide for how to complete Echoes of the Past: The Castle of Shadows.

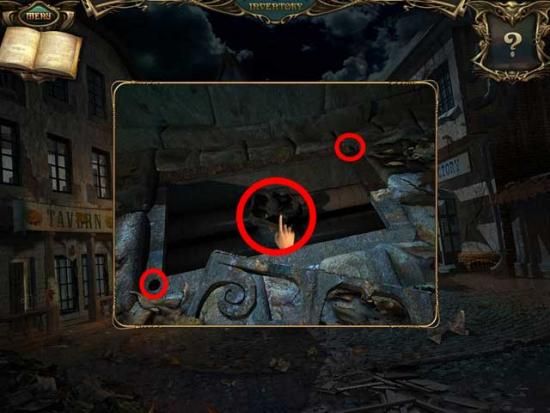
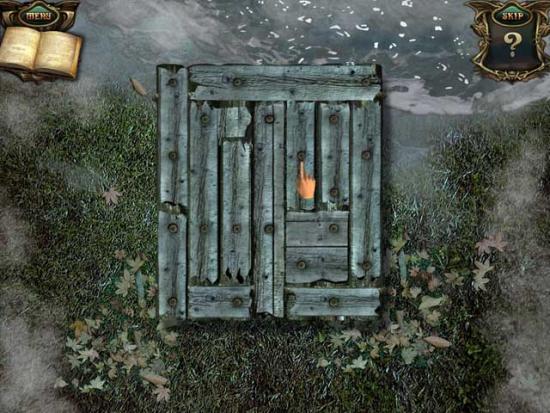
? 1. Pick up the Match
? 2. Strike the Match on the Matchbox
? 3. Use the lit match on the Burning Candle, then click it to strike it from the list. The Burning Candle will be added to your inventory.

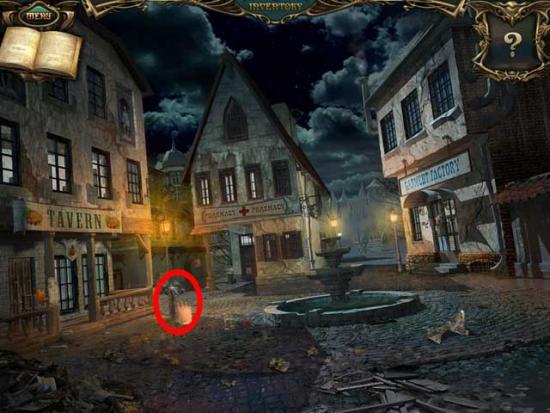
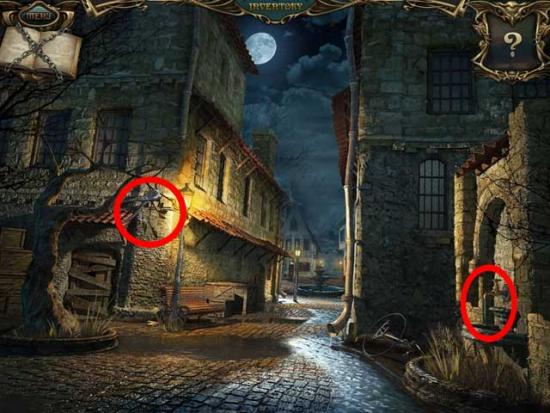
Town Square
? 1. Pick up the Hammer
? 2. Use it on the Piggy Bank and pick up the Coin inside to strike it from the list.
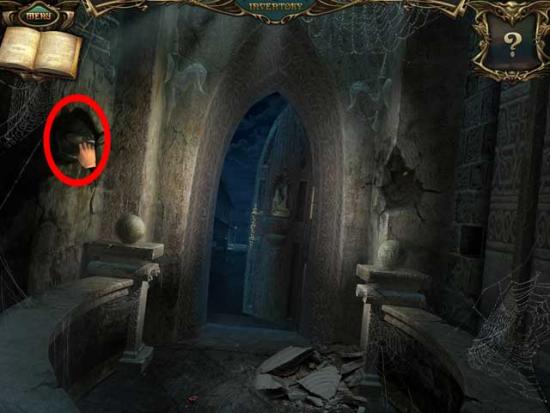
Chapel
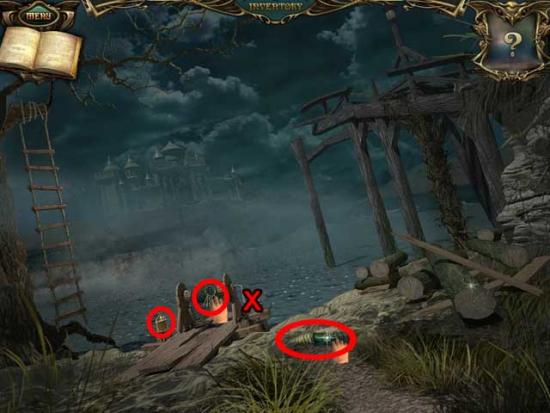
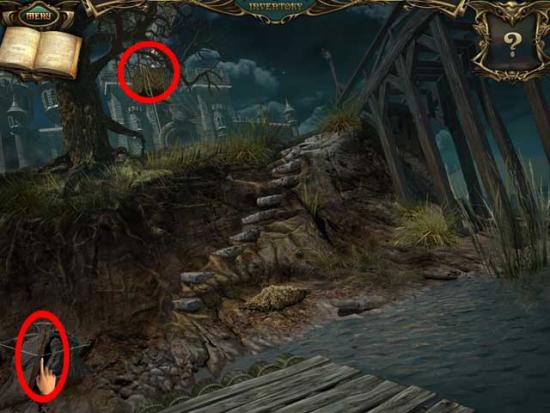
Bridge
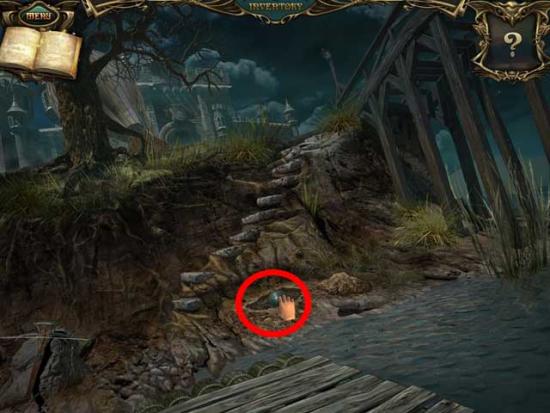
River Bank
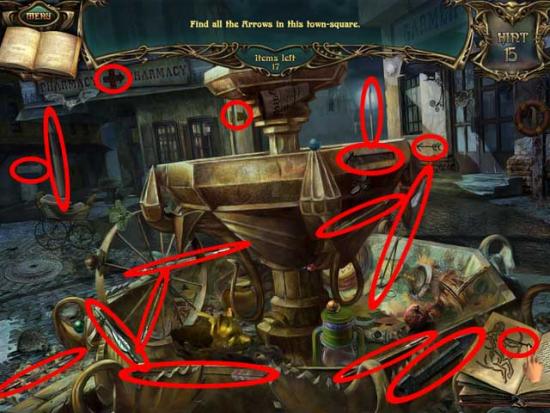
Town Square
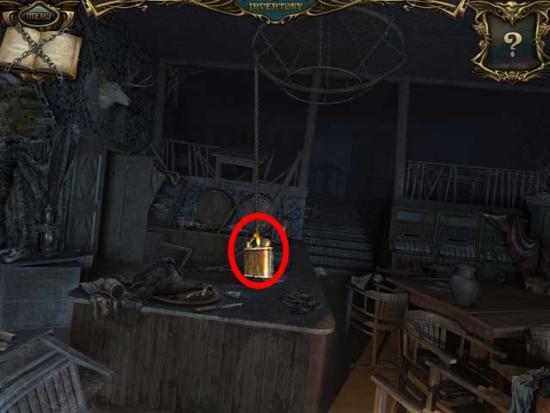
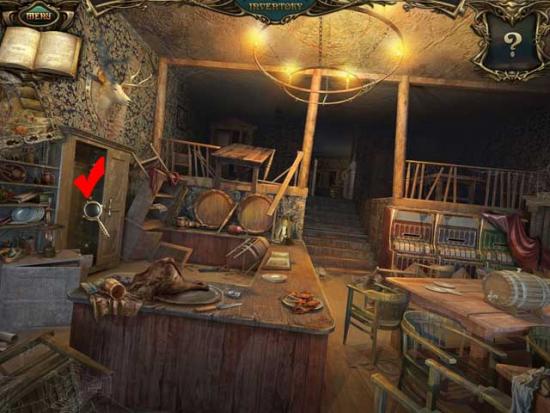
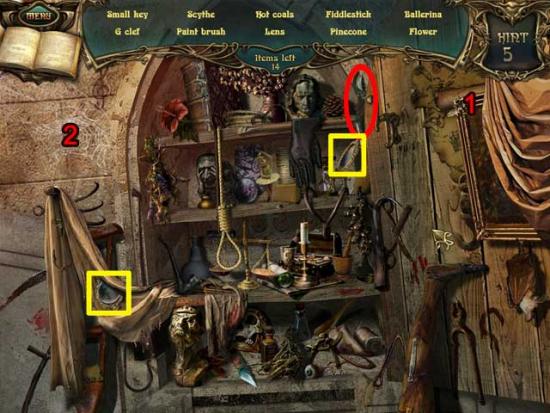
Tavern
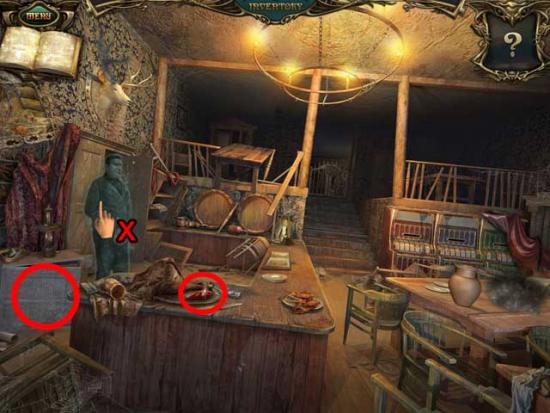
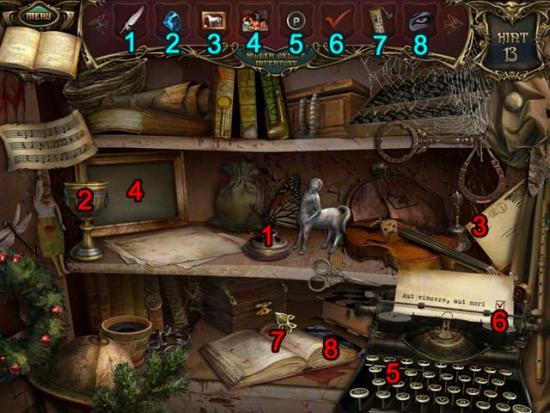
? 1. Pick up the Paintbrush.
? 2. Dip the Paintbrush in the Paint.
? 3. Use the Paint(brush) on the Egg to strike the Easter Egg off your list.
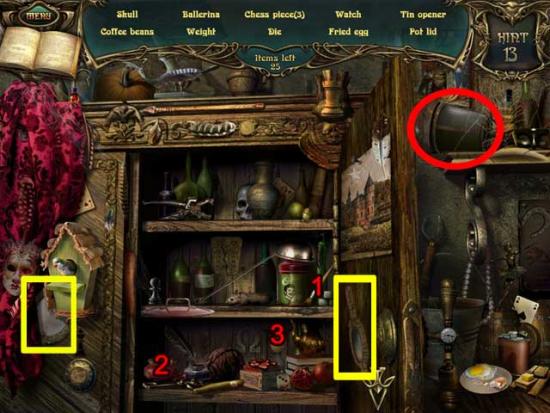
Tavern Room
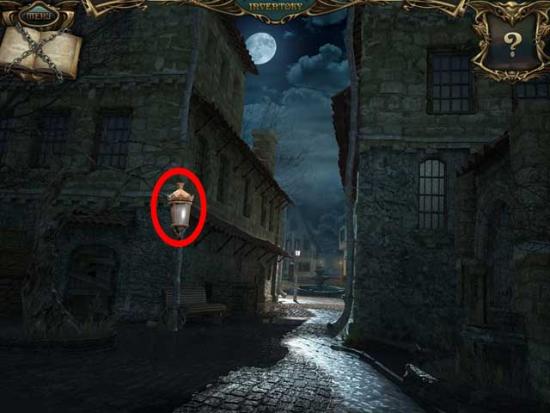
Side Street
Chapel
Town Square
Garment Factory

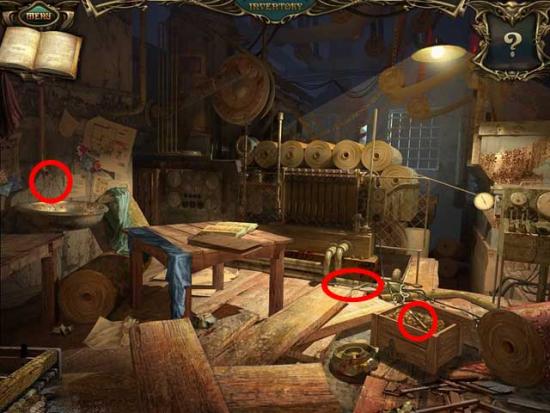
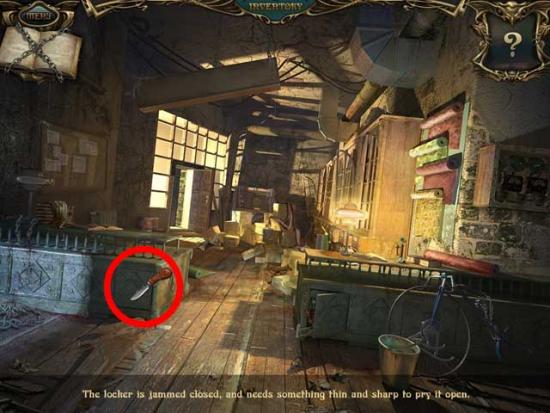
? 1. Pick up the Knife.
? 2. Use the Knife on the Pencil to sharpen it and cross it from your list.
Factory Floor
Tavern
Tavern Room

Tavern
Factory
Factory Floor
Town Square
Side Street
Factory
Tavern
Tavern Room
Town Square
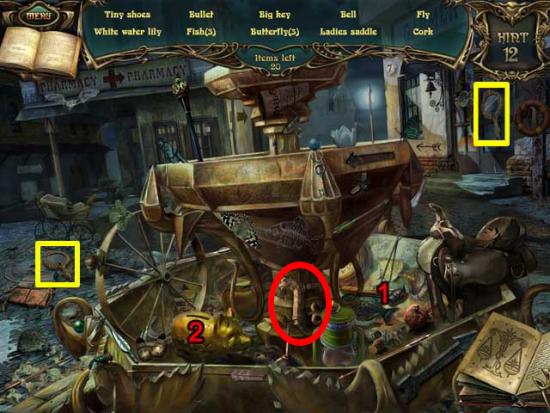
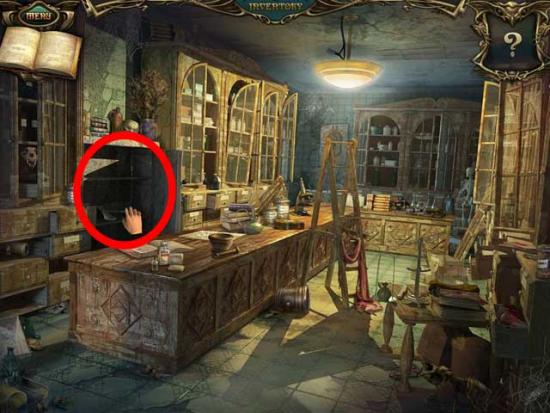
Pharmacy
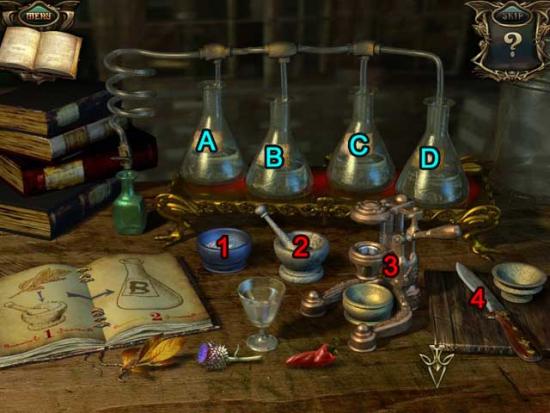
? 1. Place the Dry Tree Branch in the (2)Mortar & Pestle.
? 2. Place the crushed Dry Tree Branch from the (2)Mortar & Pestle into Beaker (B).
? 3. Place the Pepper into the (3)Press to liquify it.
? 4. Place the liquified Pepper contents from the (3)Press into Beaker (C).
? 5. Place the Dried Herbs onto the (4)Cutting Board to chop them.
? 6. Place the chopped Dried Herbs from the (4)Cutting Board into Beaker (D).
? 7. Pour the Glass of Water into the (1)Bowl.
? 8. Pour the contents of the (1)Bowl into Beaker (A).
River Bank
Town Square
Tavern
Factory
River Bank
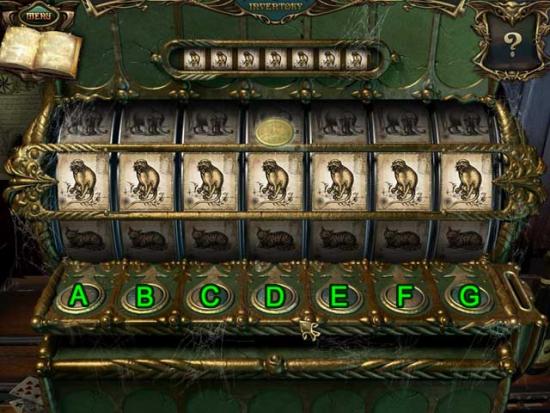
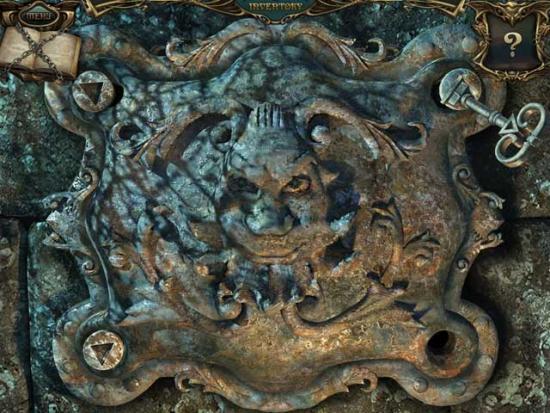
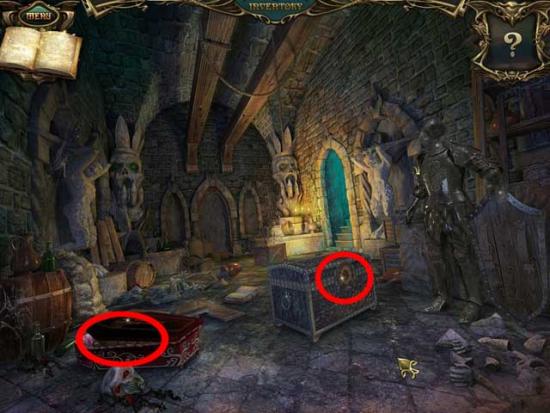
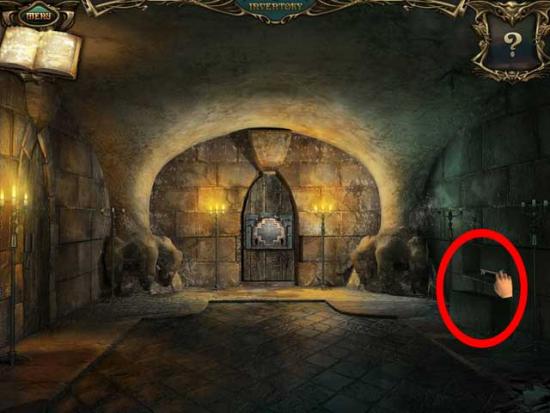
Castle Bank
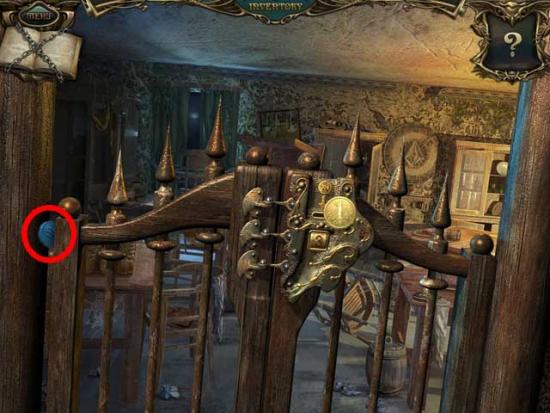
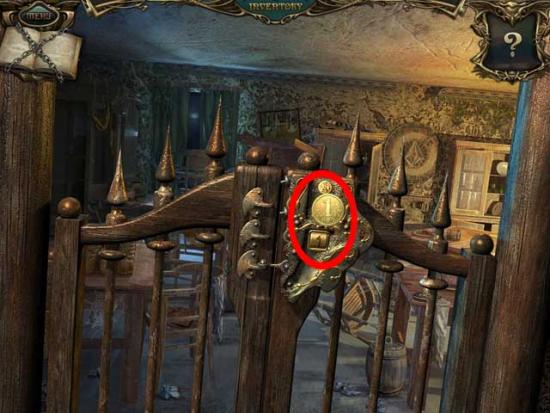
Castle Gate
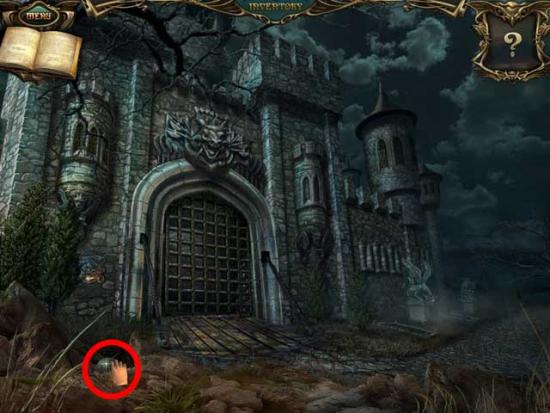
Chapel Door

Castle Gate
Courtyard
? 1. Pick up the Knife.
? 2. Use the Knife on the Stump to obtain the Wooden Doll.

Castle Gate
Courtyard
Throne Room
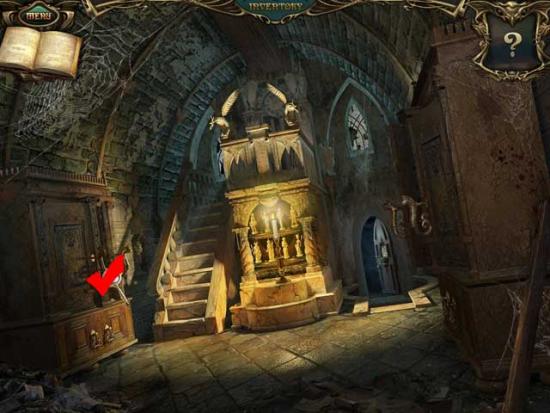
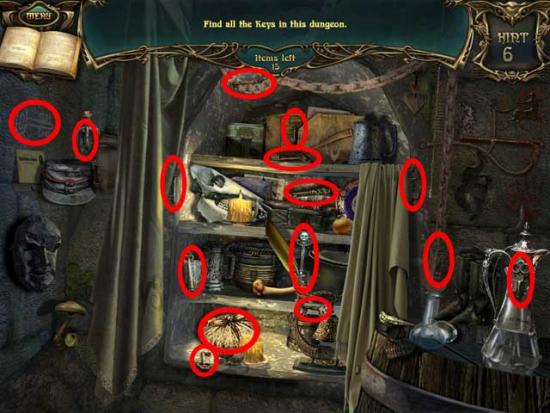
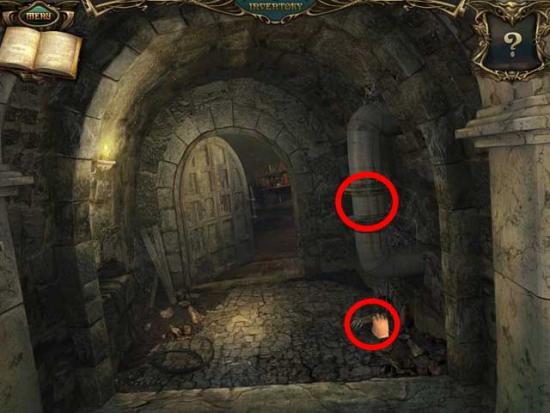
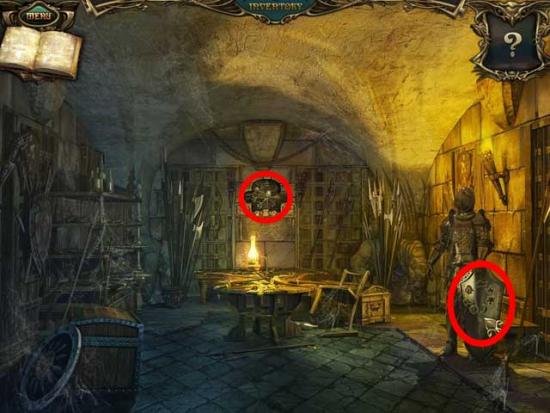
Dungeon
? 1. Pick up the Pencil.
? 2. Use the Pencil on the Paper to obtain the Sketch.
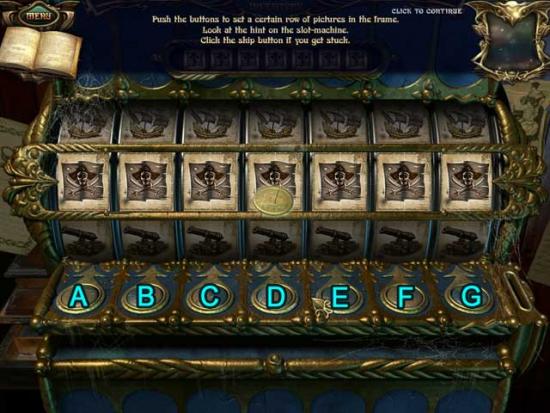
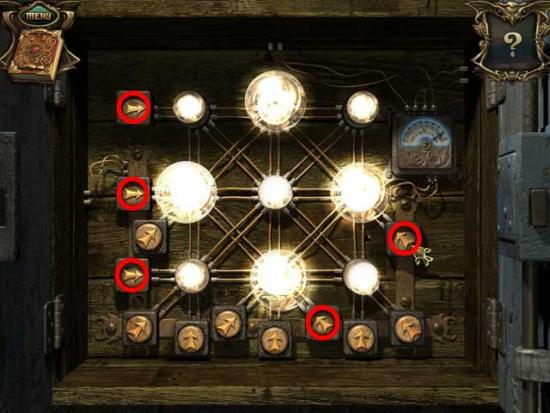
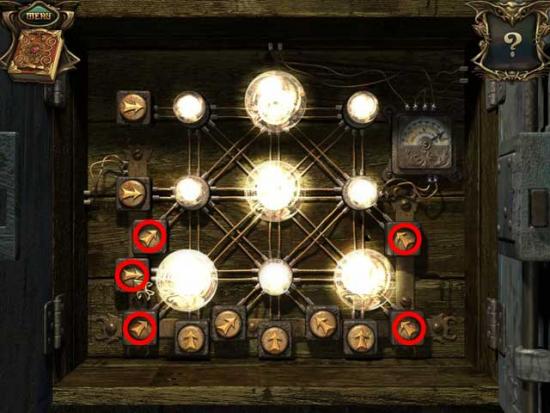
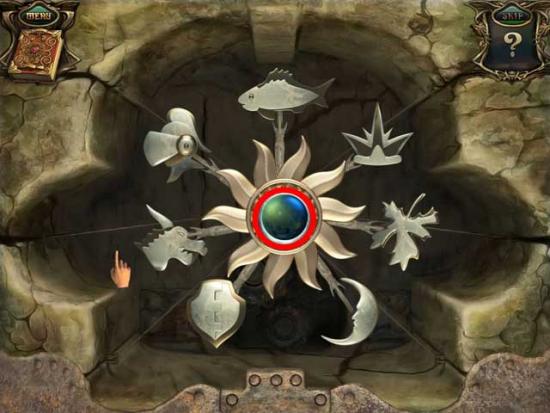
? First row: Out-Out-In-Out-In-Out-In
? Second row: Out-Out-In
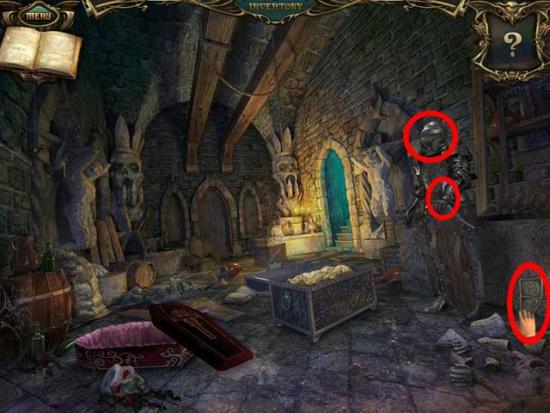
Torture Room
Dungeon
Torture Room
Hall

Tower Corridor
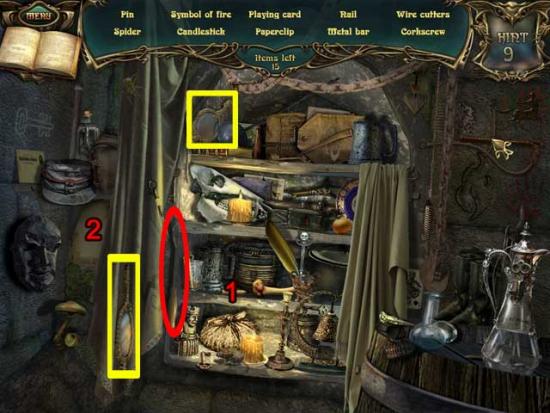
? 1. Pick up the Fly.
? 2. Place the Fly on the web to lure out the Spider. Click it to cross it off the list.
Tower

Tower Chamber
Tower Corridor
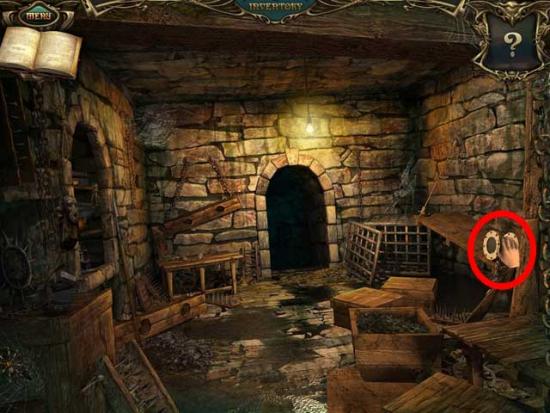
Storage Room
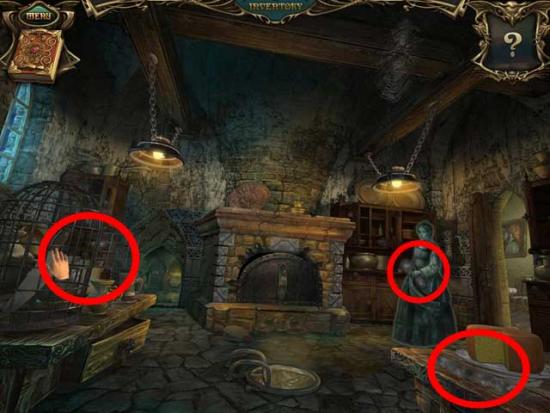
Torture Room
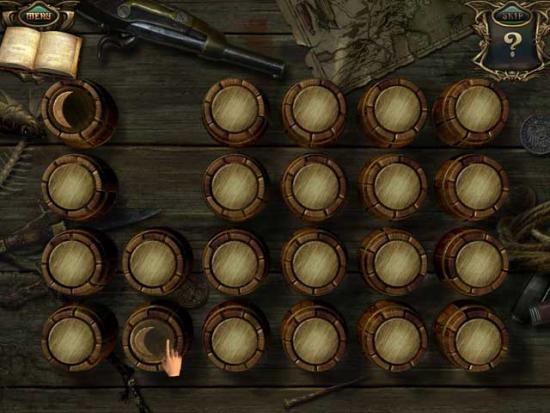
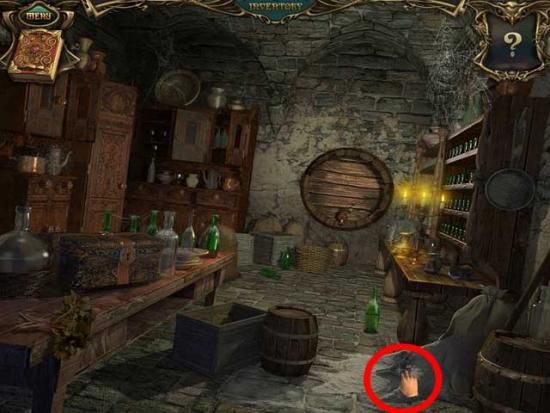
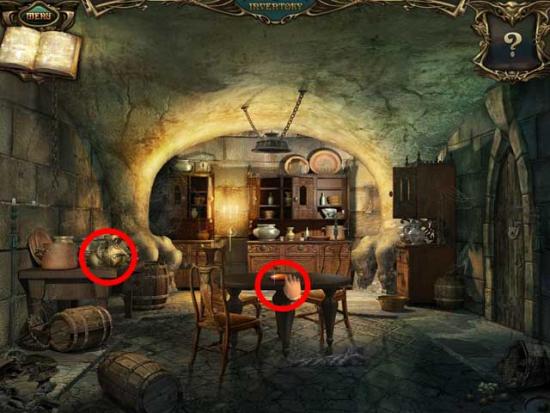
Kitchen

Wine Cellar
Tower Corridor
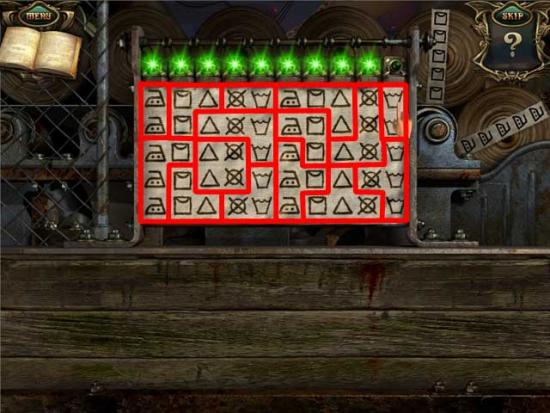
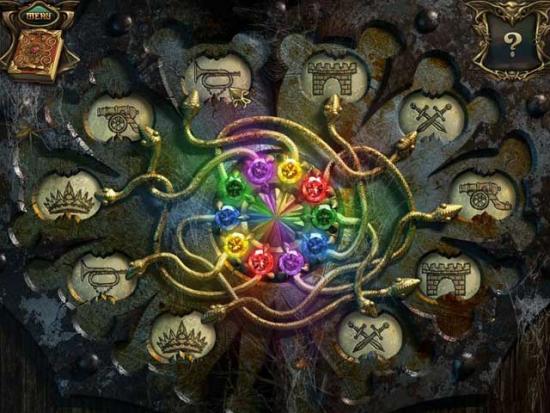
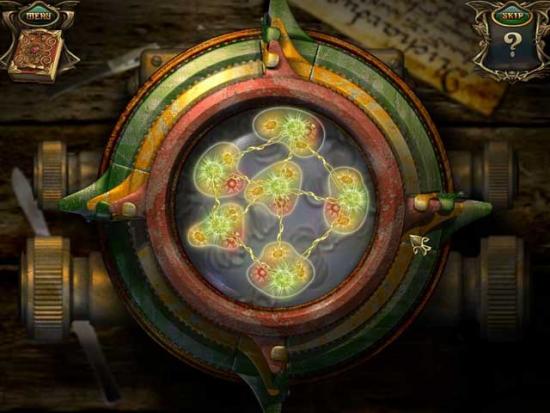
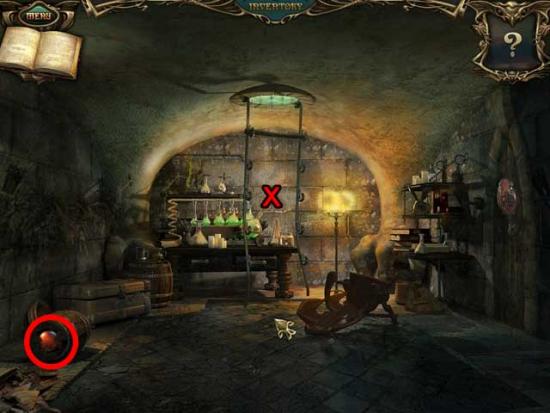
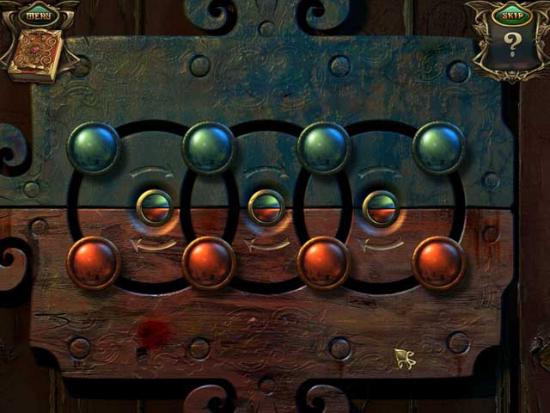
Laboratory
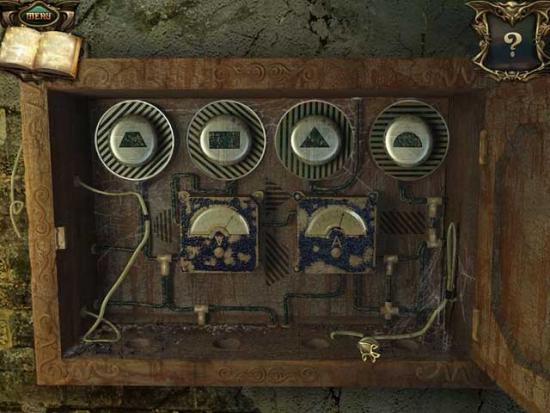
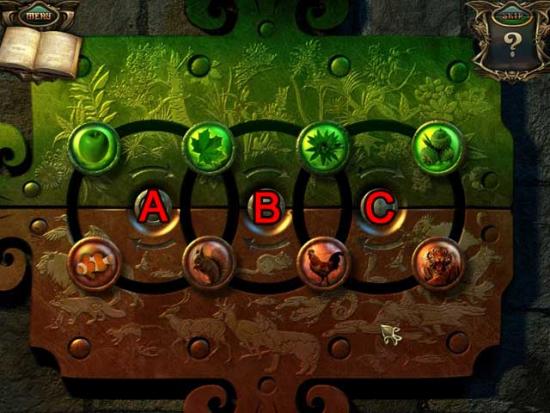
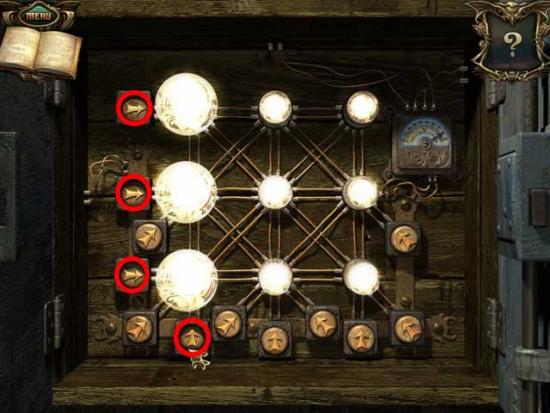
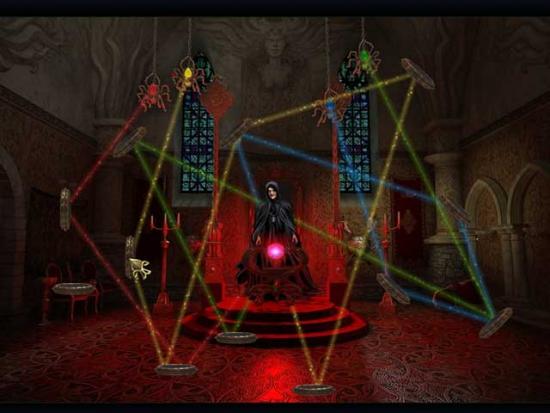
? Click 3 times on the Green Ring (or until 6 green molecules are visible).
? Click 3 times on the Yellow Ring (or until 12 yellow molecules are visible).
? Click 3 times on the Red Ring (or until 6 red molecules are visible).
Wine Cellar
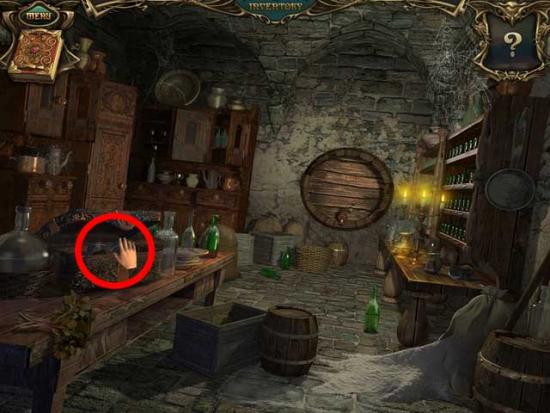
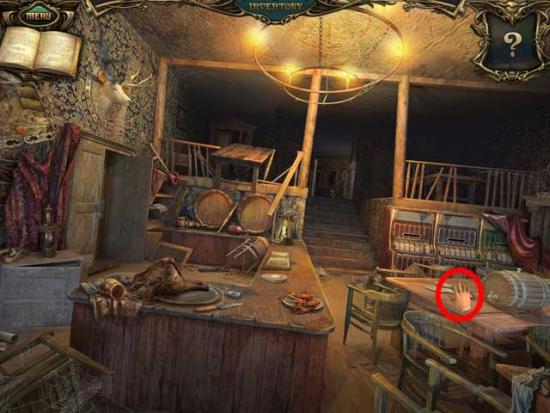
Kitchen
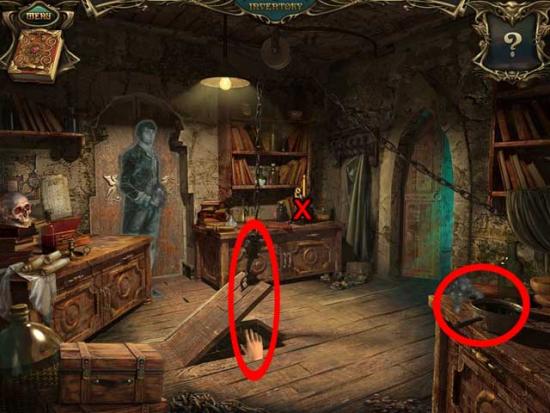
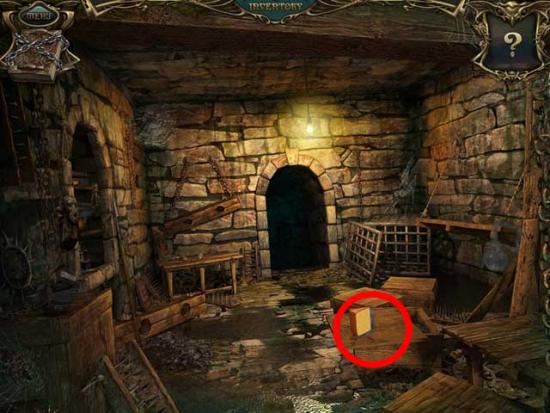
Go down through the hole in the kitchen and return to the second area of the Torture Room.
Torture Room
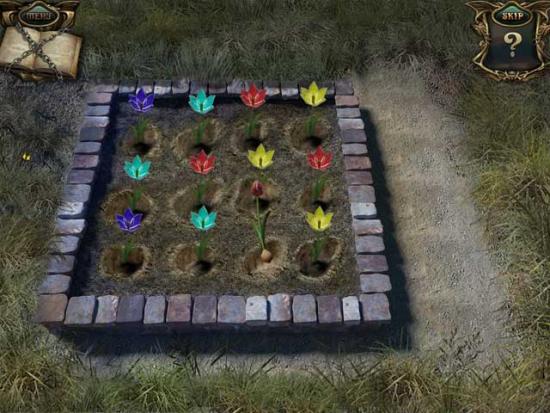
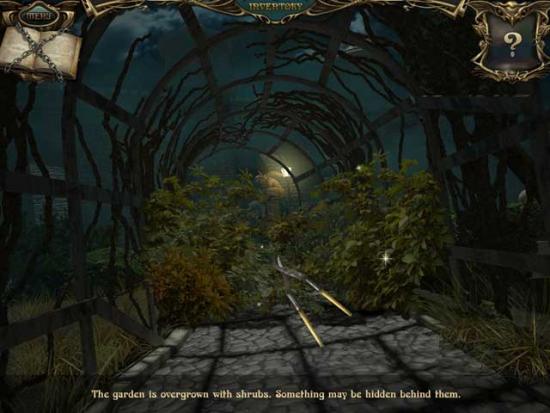
Garden
Castle Courtyard

Castle Bank
Chapel Door
Chapel
Laboratory
Torture Room
Entrance Room
Storage Room
Garden

Laboratory
Throne Room
Congratulations, you’ve completed Echoes of the Past: The Castle of Shadows!
If you own the Collector’s Edition of Echoes of the Past: The Castle of Shadows, then you’re fortunate enough to have unlocked a Bonus Adventure upon completing your first playthrough! This portion of the guide is a walkthrough for the Bonus Adventure.
Throne Room
Catacombs
Dragon Room
Catacombs
Kitchen
Catacombs
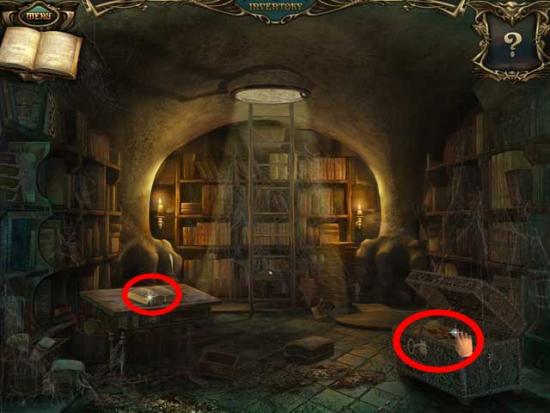
Library
Chapel
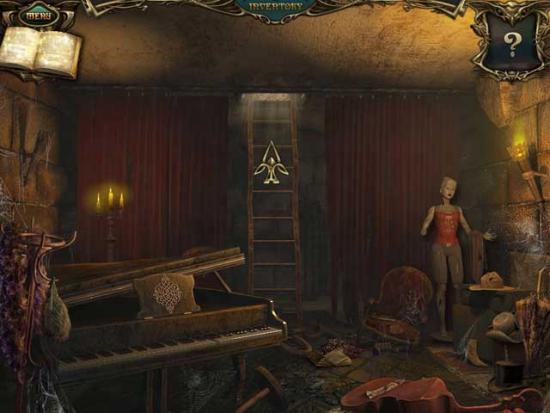
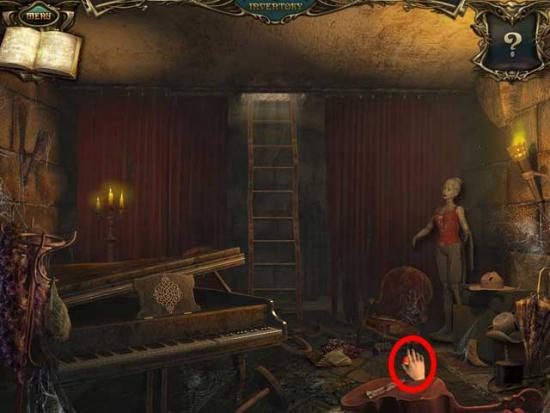
Piano Room
Tavern
Dragon Room
Factory
Kitchen
Catacombs
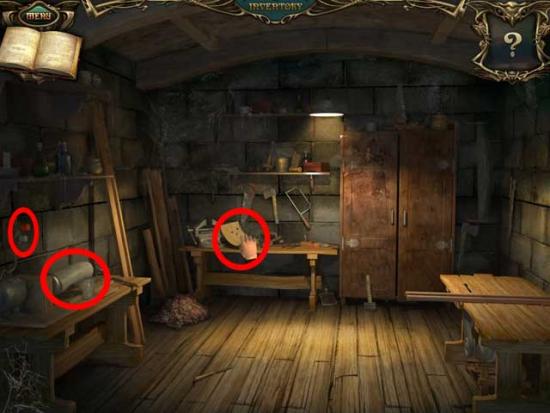
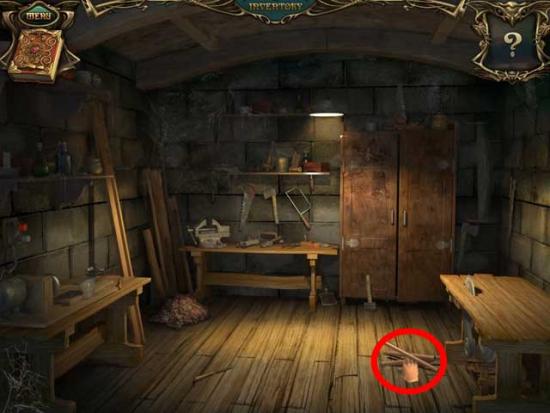
Workshop
Library
Piano Room
Catacombs
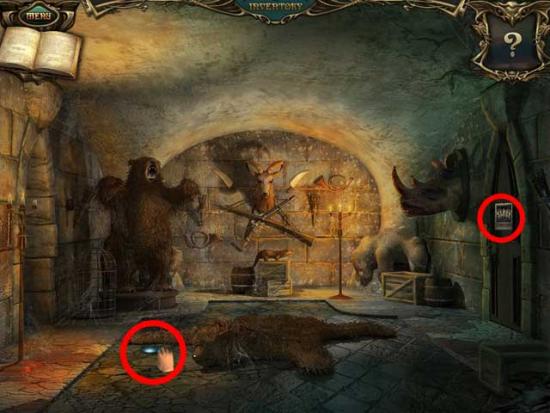
Trophy Room
Torture Room
Workshop
Science Room
Armor Room
Catacombs
Congratulations! If you completed this, that means both wallpapers and concept art are now unlocked via the extras menu and that you’ve completely beaten Echoes of the Past: The Castle of Shadows Collector’s Edition!
