![Digimon UP Tier List [Supports, Buddies, and Partners]](/wp-content/uploads/2026/07/digimon-up-tier-list.jpg "Digimon UP Tier List [Supports, Buddies, and Partners]")
Digimon UP Tier List [Supports, Buddies, and Partners]
These Digimon will get you UP the leaderboard.

![Haze Seas Boss Drops [Chances, Locations, and How to Spawn]](/wp-content/uploads/2026/07/haze-seas-boss-drops.jpg "Haze Seas Boss Drops [Chances, Locations, and How to Spawn]")

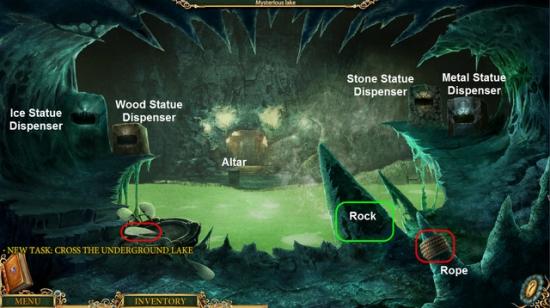
E.P.I.C. Wishmaster Adventure is Hidden Object game created by G5 Entertainment. Join Sue as she faces mysterious puzzles, riddles, harsh challenges and difficult decisions in her search for her long-lost, beloved father and learn the mystery of her birth. Gamezebo’s quick start strategy guide will provide you with detailed images, tips, information, and hints on how to play your best game.
E.P.I.C. Wishmaster Adventure is Hidden Object game created by G5 Entertainment. Join Sue as she faces mysterious puzzles, riddles, harsh challenges and difficult decisions in her search for her long-lost, beloved father and learn the mystery of her birth. Gamezebo’s quick start strategy guide will provide you with detailed images, tips, information, and hints on how to play your best game.
Difficulty Levels
Cursors
Hidden Object Scenes
Inventory
Hint and Skip Buttons

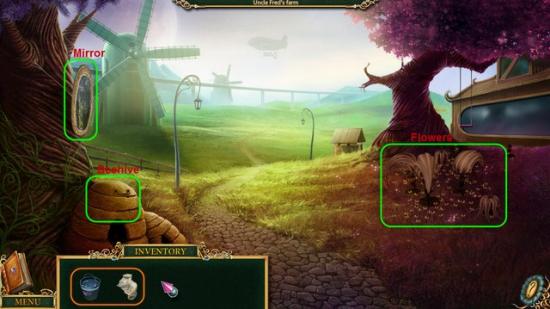
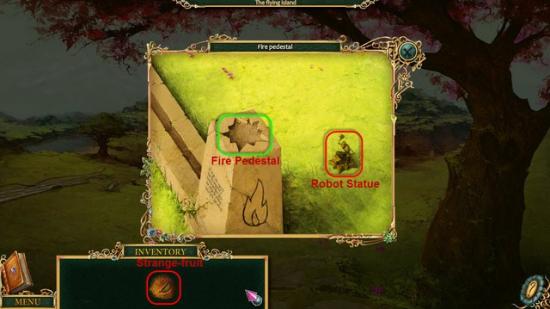

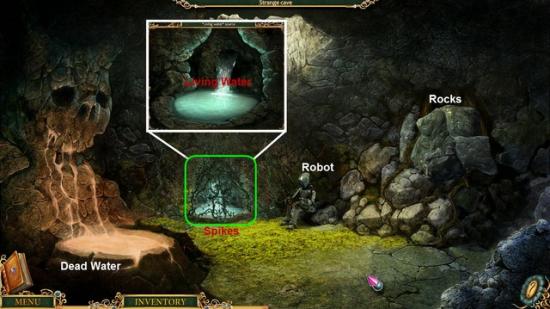
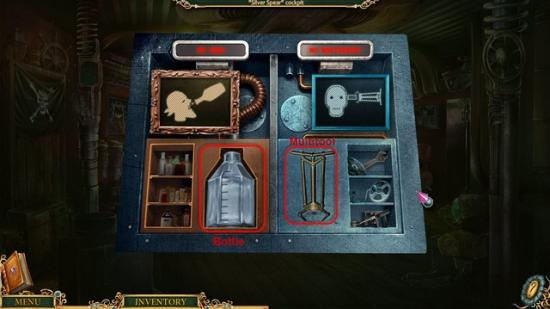
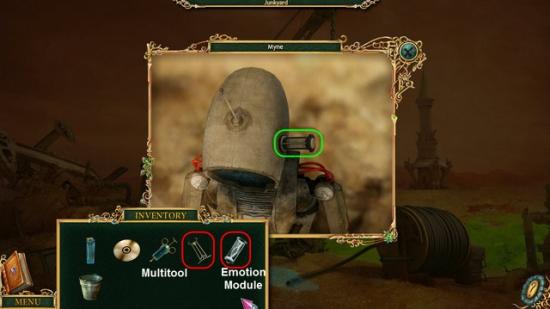
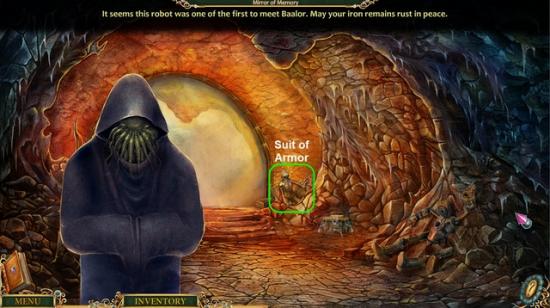
• Talk to the Robot.
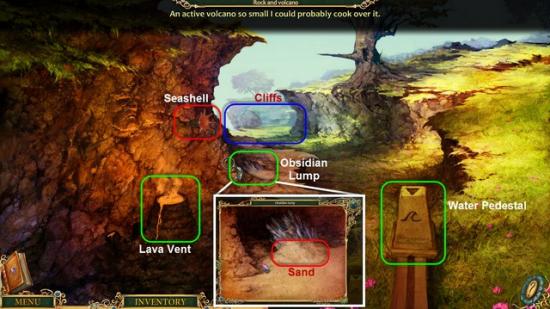
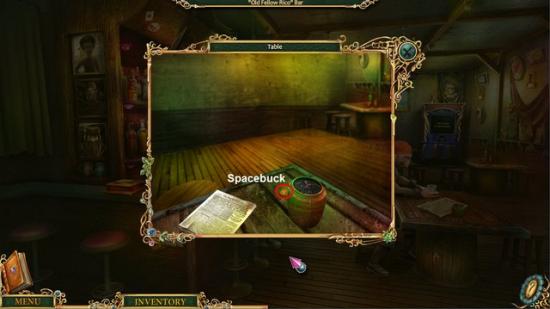
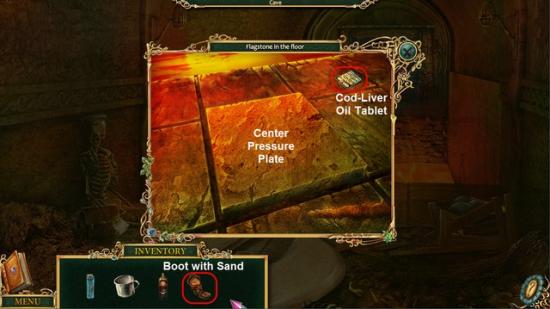
• Use the SHELL, in your Inventory, to gather DEAD WATER.
• Examine the Spikes.
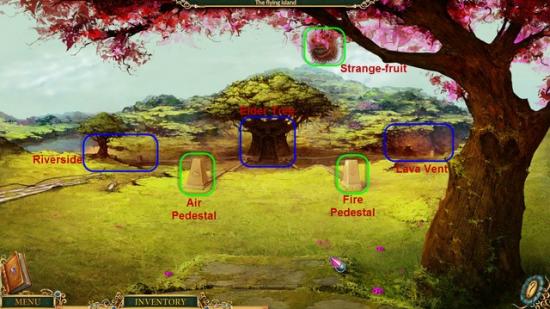
• Use the DEAD WATER on the Spikes.
• Use the SHELL to gather LIVING WATER.
• Use the LIVING WATER on the Rocks.
• Enter the Inner Hall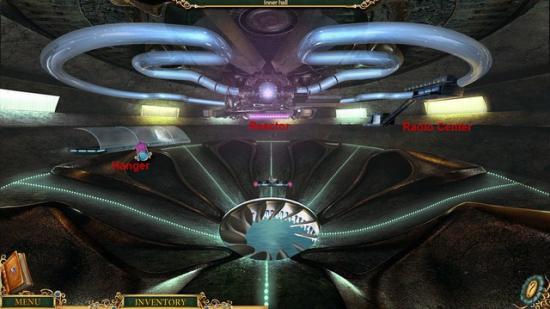
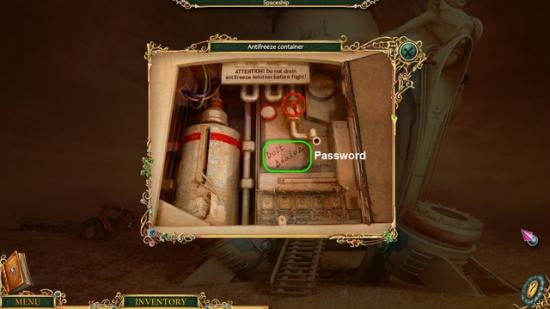
• Examine the Panel.
• Head back one screen and talk to the Robot.
• Use the Code he gives you on the Panel.
• Code is “1011”
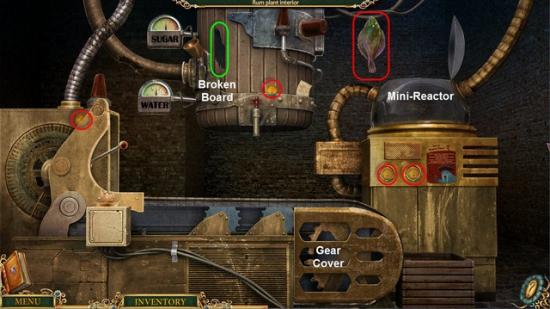
• Enter the Hanger.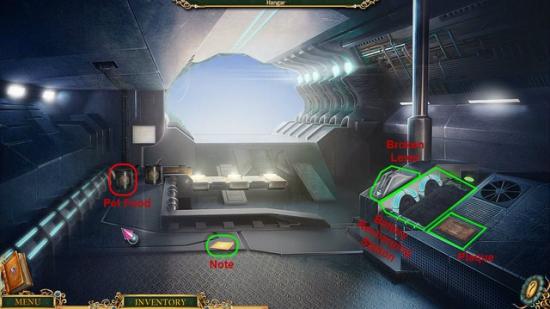
• Examine the Note.
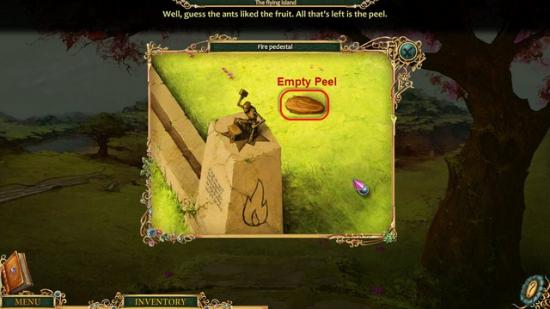
• Gather the PET FOOD.
• Head back one screen
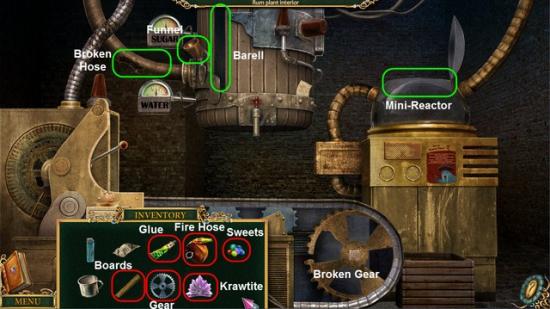
• Head to the Reactor.
• Examine the Island Model.
• Examine the Reactor Manual.
• Gather the WEAK BATTERY.
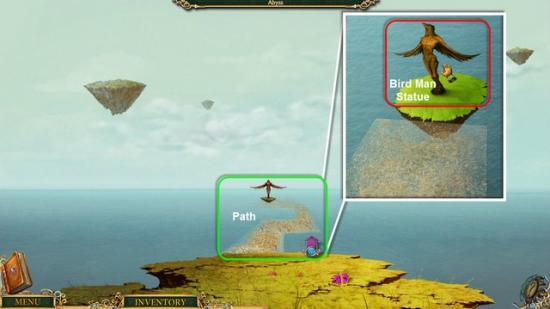
• Take Elevator to topside of Island.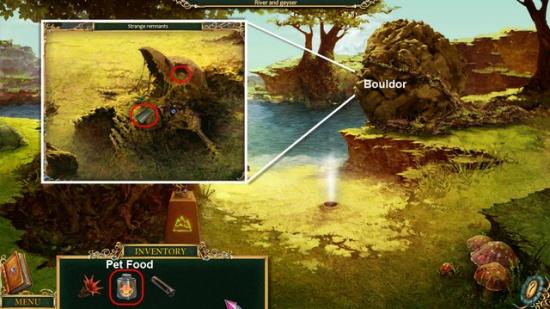
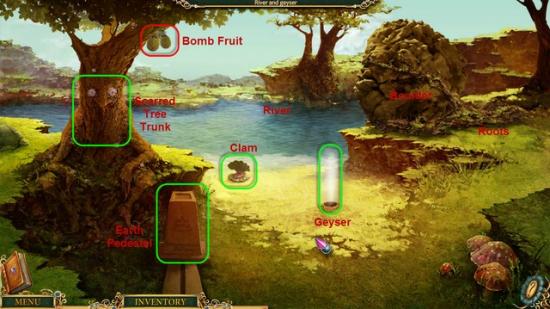
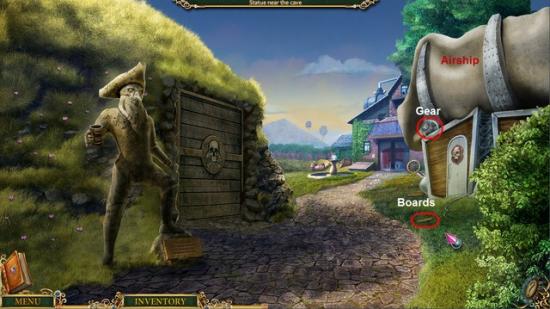
• Return to the River.
• Use the PET FOOD on the Boulder.
• Examine the Roots under the Boulder.
• Gather the KEY CARD and TOKEN.
• Head back two screens.
• Take Elevator back down to Reactor.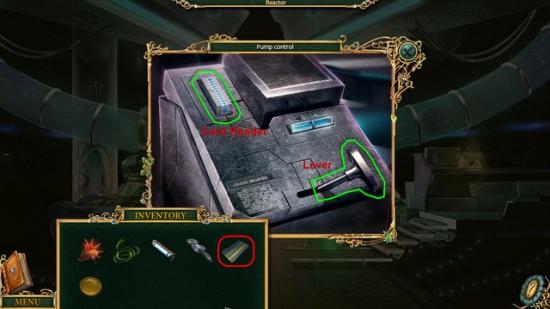
• Examine the Pump Control.
• Use the KEY CARD on the Card Reader.
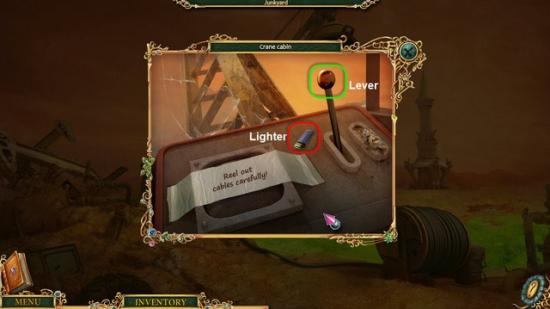
• Pull the Lever.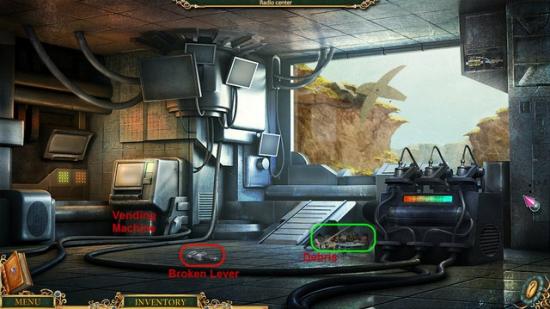
• Head to the Radio Center.
• Gather the BROKEN LEVER.
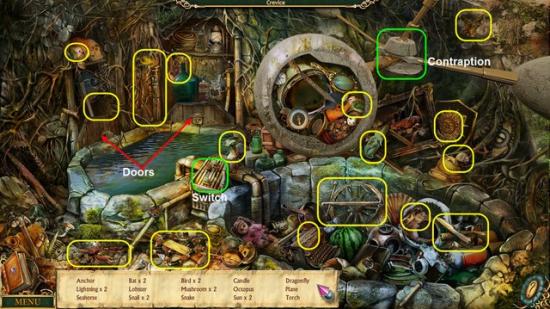
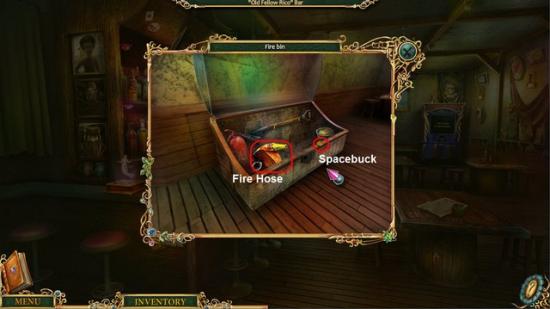
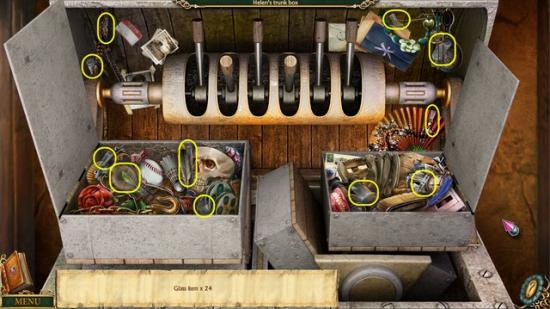
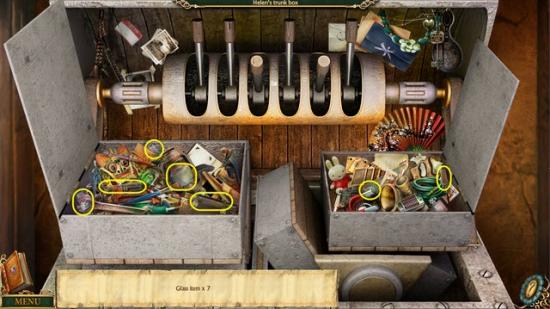
• Examine the Debris.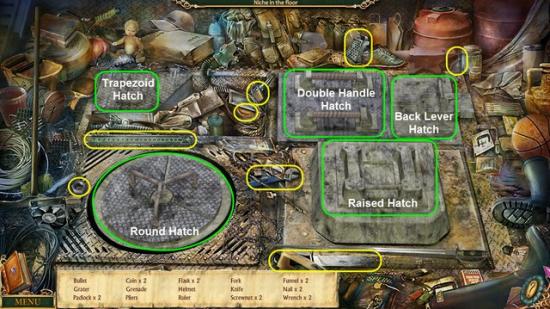
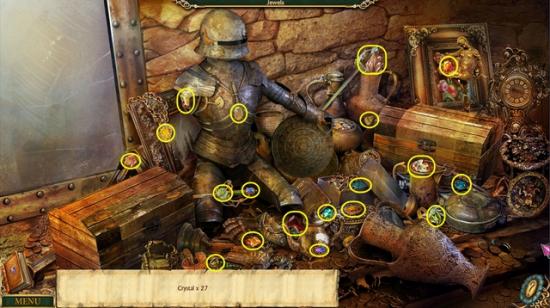
• Gather the Hidden Objects highlighted in Yellow.
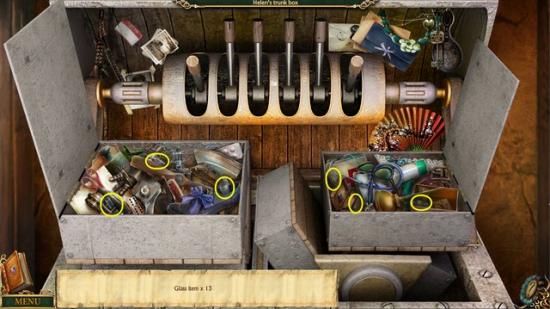
• Open the Trapezoid Hatch, Double Handle Hatch, and Back Lever Hatch.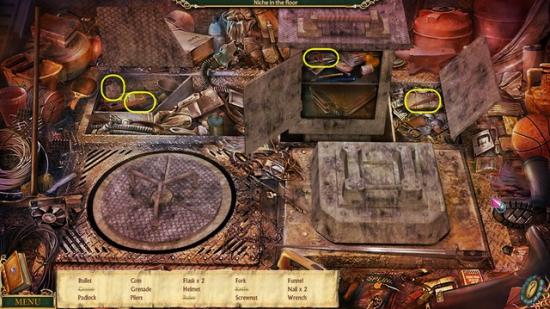
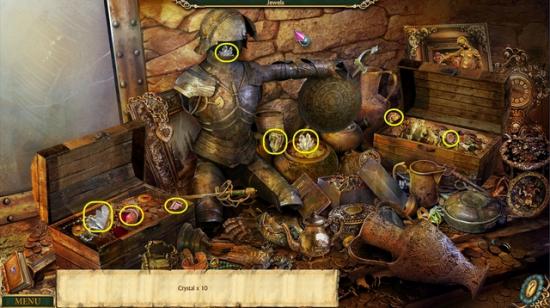
• Gather the Hidden Objects highlighted in Yellow.
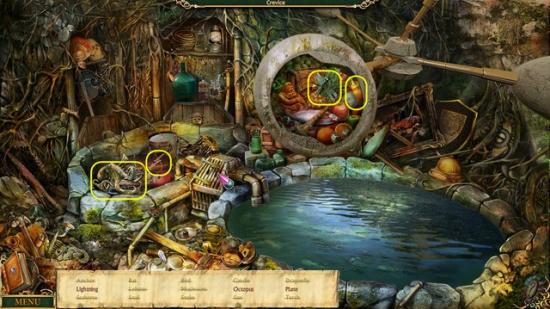
• Open the Raised Hatch and the Round Hatch.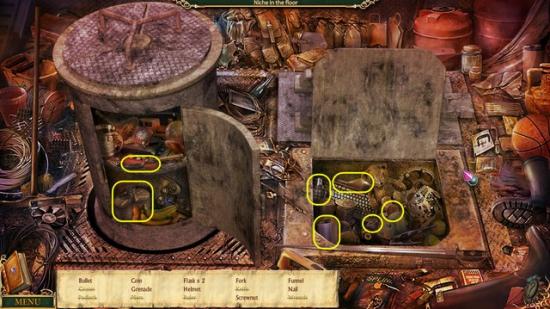
• Gather the Hidden Objects highlighted in Yellow.
• Click the Round Hatch Door to rotate the Hatch to reveal the other two hidden areas.
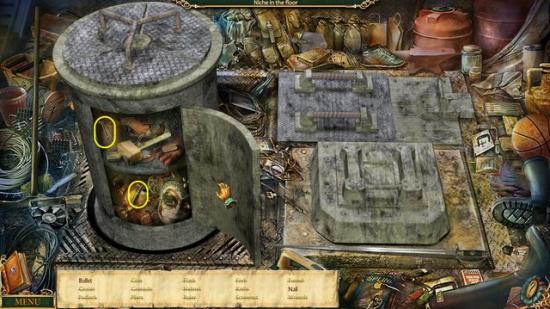
• Gather the Hidden Objects high in Yellow.
• Receive METAL SCRAPS.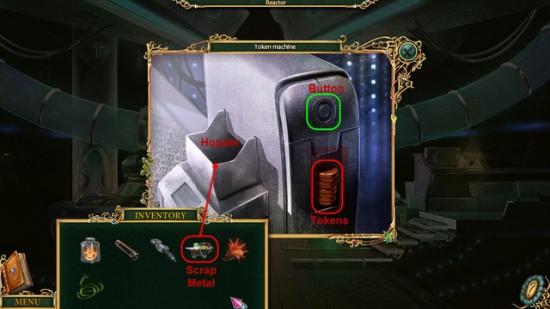
• Return to the Reactor.
• Examine the Token Machine.
• Place the METAL SCRAPS into the Hopper.
• Press the Button.
• Gather the EIGHT TOKENS.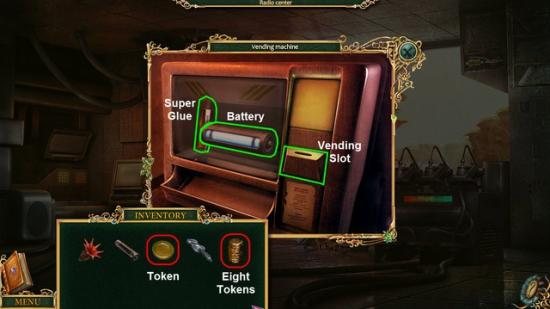
• Return to the Radio Center.
• Examine the Vending Machine.
• Deposit the EIGHT TOKENS into the Vending Machine.
• Receive the BATTERY.
• Deposit the TOKEN into the Vending Machine.
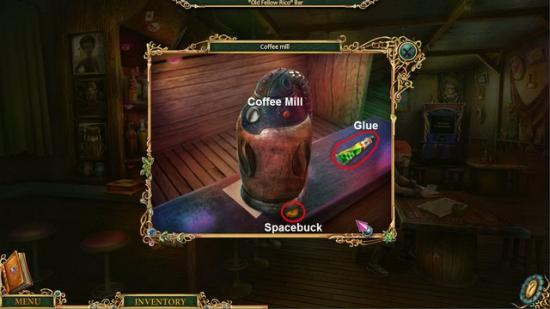
• Receive the SUPER GLUE.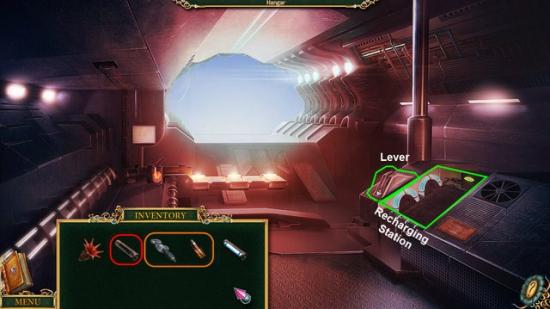
• Return to the Hanger.
• Combine the SUPER GLUE and BROKEN LEVER, receive the LEVER WITH GLUE.
• Place the WEAK BATTERY into the Recharging Station.
• Place the LEVER WITH GLUE into the Lever slot.
• Pull the Lever.
• Retrieve the BATTERY.
• Return to the Strange Cave.
• Talk to the Robot.
• Follow the Robot to the Radio Center.
• Place the BATTERY into the Battery Slot.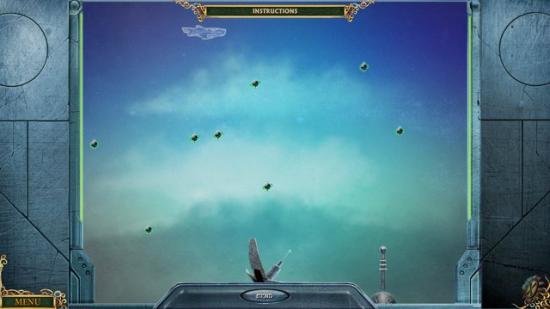
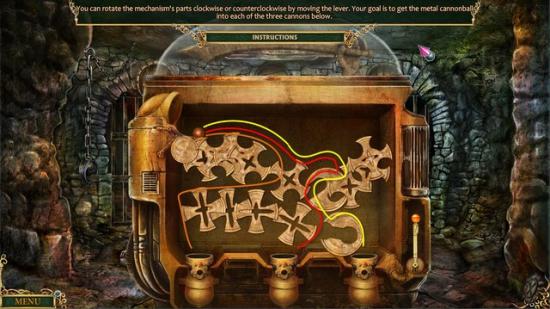
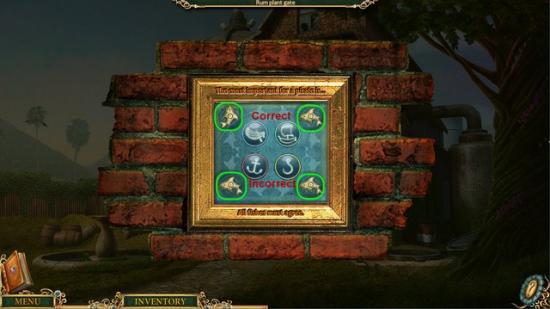
• For this Mini-Game you need to aim the Antenna so the signal will reach the Ship.
• Use the Lever to aim the Antenna and “Send” to send the signal.
• The Small Satellites will repel the Signal.
• See image for solution.
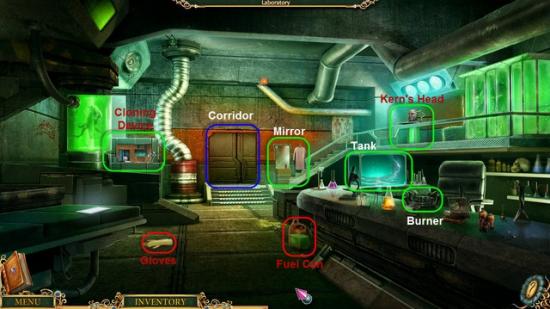
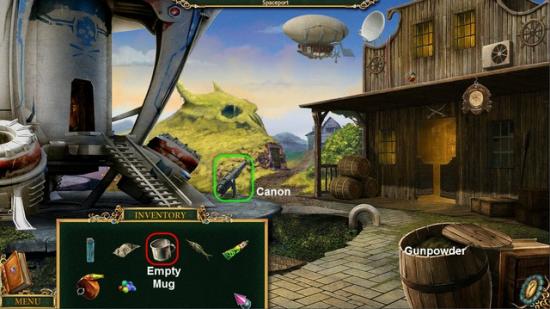
• Gather the GLOVES and FUEL CAN.
• Use the GLOVES on the Tank to retrieve the MUTANT ELECTRIC EEL.
• Examine the Mirror.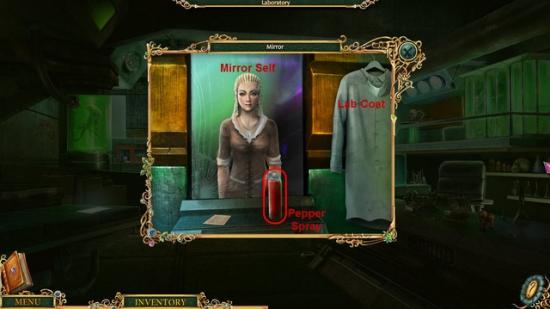
• Take the PEPPER SPRAY and LAB COAT.
• Use LAB COAT on mirror self to put on LAB COAT.
• Examine Kern’s Head.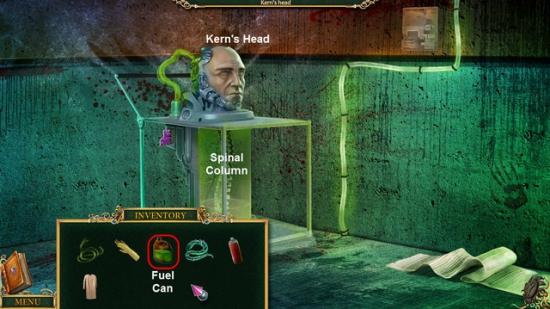
• Lower the Glass Partitions.
• Use the FUEL CAN on the Spinal Column.
• Talk to Kern’s Head.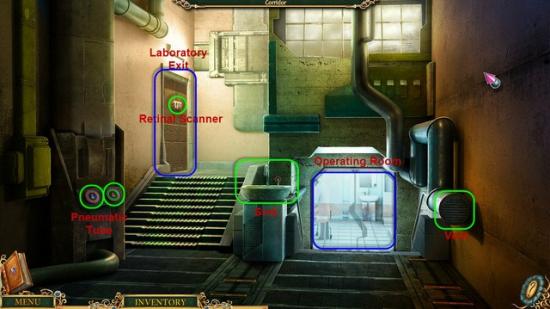
• Enter the Corridor.
• Press the Green Arrow to open the Pneumatic Tube.
• Press the Pink Arrow to reveal the JAR.
• Gather the JAR.
• Open the Vent and use the PEPPER SPRAY on open Vent.
• Place the MUTANT ELECTRIC EEL in the Sink.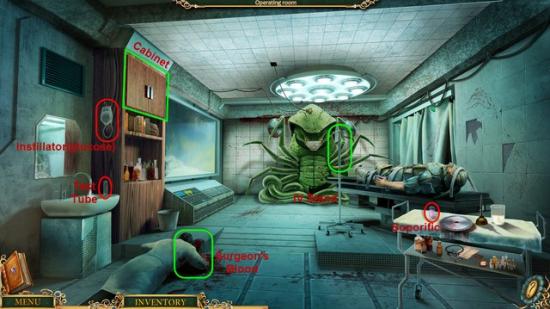
• Enter the Operating Room.
• Gather the INSTILLATOR(glucose), SOPORIFIC, and TEST TUBE.
• Use the TEST TUBE on the Surgeon and receive the SURGEON’S BLOOD.
• Examine the IV Stand.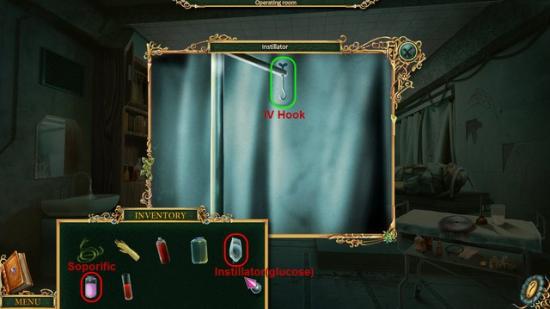
• Place the INSTILLATOR(glucose) on the IV Hook.
• Add the SOPORIFIC to the INSTILLATOR(glucose).
• Guard will drop Blaster.
• Gather the BLASTER(uncharged).
• Open the Cabinet.
• Examine the Cabinet Interior.
• Talk to Captain Nimi.
• Return to the Laboratory.
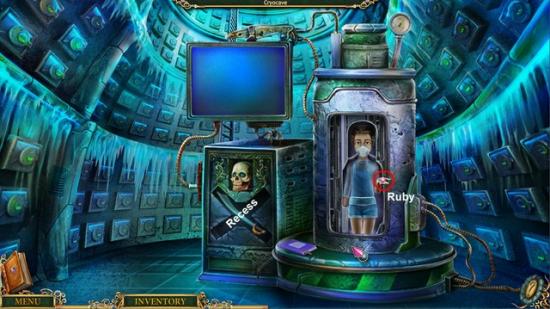
• Examine the Cloning Device.
• Place the SURGEON”S BLOOD into Section 1.
• Choose Eye in Section 2.
• Gather the EYE from Section 3.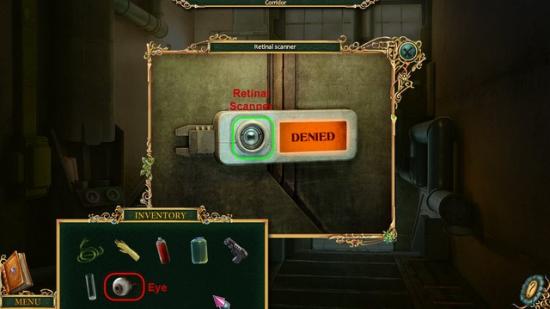
• Head to the Exit from the Laboratory.
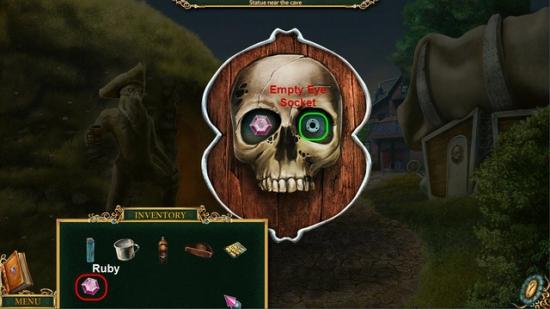
• Examine the Retinal Scanner.
• Use the EYE on the Retinal Scanner.
• Exit the Laboratory.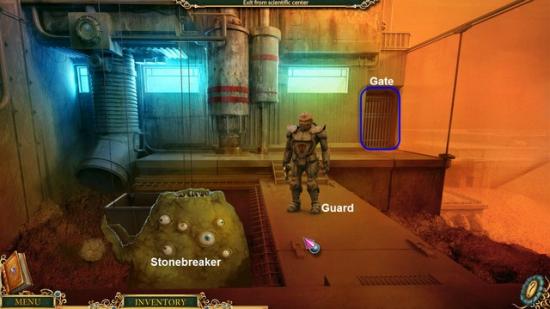
• Talk to the Guard.
• Return to the Operating Room.
• Talk to Captain Nimi.
• Pull the wires apart.
• Gather up CAPTAIN NIMI.
• Return to the Cloning Device.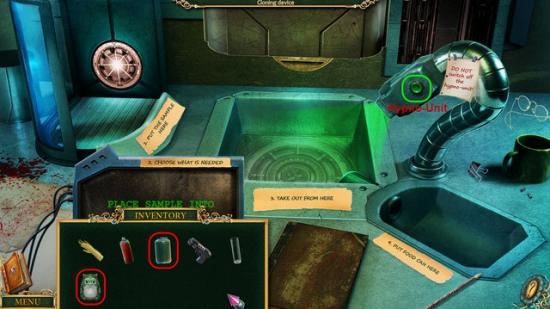
• First turn off the Hypno-Unit.
• Place CAPTAIN NIMI into Section 1.
• Place JAR in Section 4.
• Choose Full Clone from Section 2.
• Have CAPTAIN NIMI talk to the Ariukanas in Section 3.
• Gather the Jar of ANGRY ARIUKANAS.
• Return to the Exit from the Laboratory.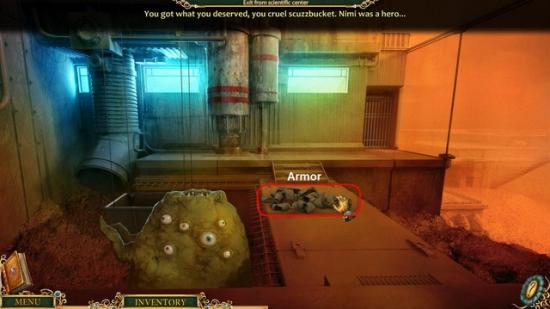
• Give the Jar of ANGRY ARIUKANAS to the Guard.
• Take the ARMOR.
• Talk to the Pair of Ariukanas that were under the Armor.
• Offer to help the Pair of Ariukanas.
• Receive the PAIR OF ARIUKANAS.
• Head back to the Laboratory.
• Examine the Mirror.
• Use the ARMOR on your Mirror Image.
• Return to the Exit from the Laboratory.
• Examine the Gate.
• Pull the Lever.
• Enter the Pit.
• Enter the Barracks.
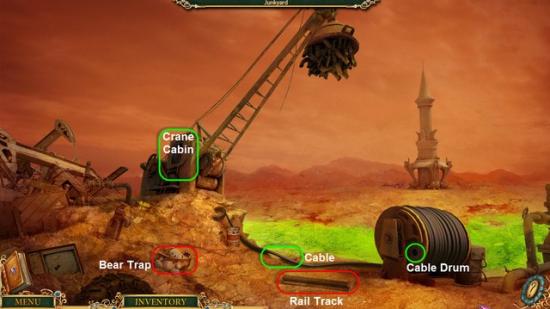
• Next head to the Mine Shaft.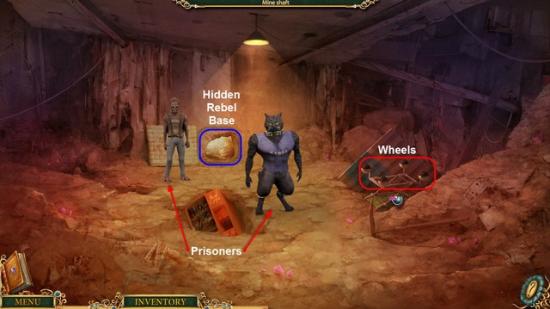
• Talk to the Prisoners.
• Examine the Shopping Cart.
• Take the WHEELS.
• Enter the Hidden Rebel Base.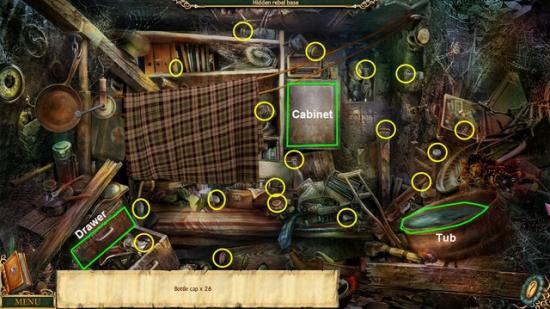
• Find the Hidden Objects highlighted in Yellow.
• Open the Drawer, empty the Tub, and open the Cabinet.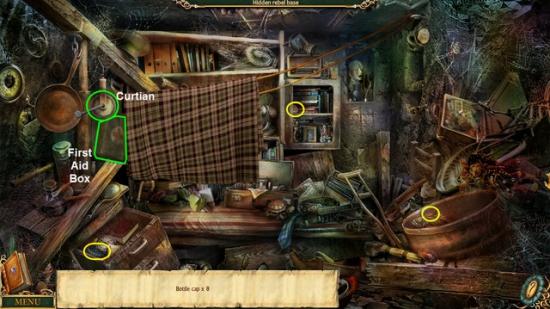
• Gather the Hidden Objects highlighted in Yellow.
• Move the Curtain and open the First Aid Box.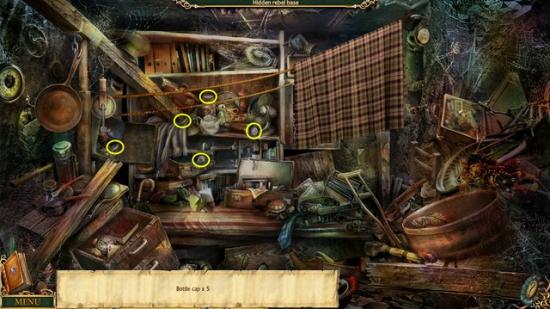
• Gather the Hidden Objects highlighted in Yellow.
• Head to the Quarry Gate.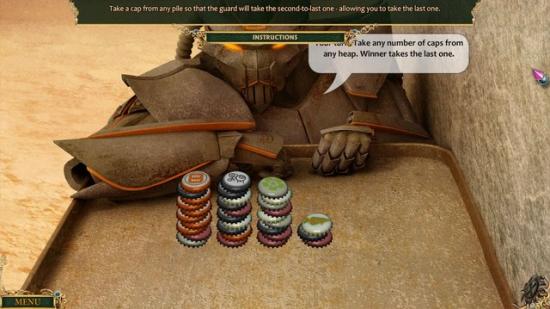
• Talk to the Guard.
• For this Mini-Game you can remove any number of Caps from any Pile. The Goal is to be the one to remove the last Cap.
• If you lose, just talk to the Guard to play another round.
• Receive CHARGER.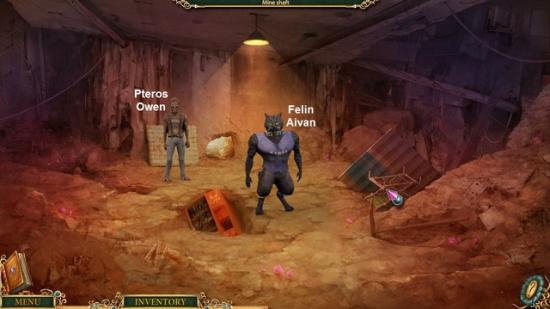
• Combine the CHARGER with the BLASTER(uncharged).
• Receive the BLASTER(fully charged).
• Return to the Mine Shaft.
• Talk to the Slaves
• Return to the Barracks.
• Go back to the Mine Shaft once again.
• Talk to slave Avain.
• Receive FELIN AIVAN”S BLOOD.
• Talk to Owen.
• Receive FEATHER from Pteros Owen.
• Return to the Laboratory.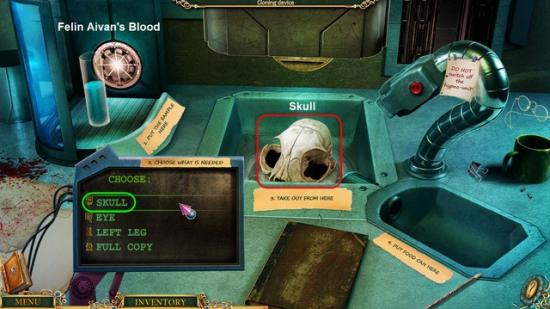
• Examine the Cloning Device.
• Place FELIN AIVAN”S BLOOD into Section 1.
• Choose Skull in Section 2.
• Gather the FELIN SKULL in Section 3.
• Next, Place FEATHER into Section 1.
• Choose Skull in Section 2.
• Gather the PTEROS SKULL in Section 3.
• You will now have two SKULLS.
• Step back one screen.
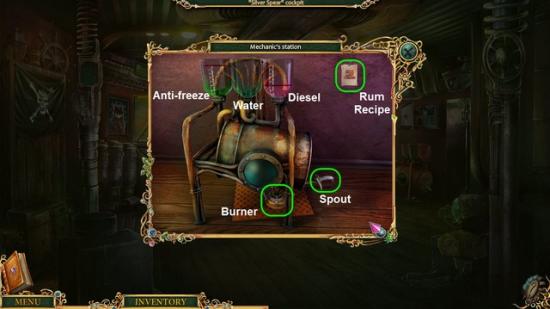
• Turn on the Burner.
• Place FELIN SKULL into the Burner.
• Receive BURNT FELIN SKULL.
• Place PTEROS SKULL into the Burner.
• Receive BURNT PTEROS SKULL.
• Return to the Barracks.
• Talk to the Sergeant.
• Examine the Computer.
• Return to the Mine Shaft.
• Talk to the Slaves.
• Head to the Quarry Gate.
• Talk to the Guard.
• Return to the Laboratory.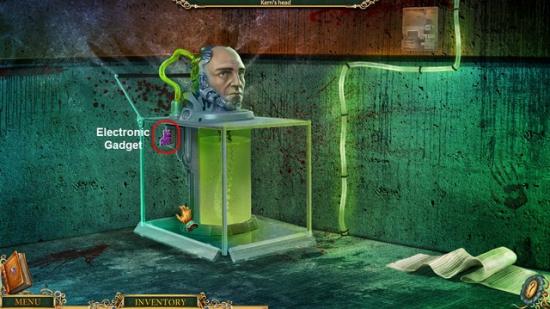
• Talk to Kern’s Head.
• Take the ELECTRONIC GADGET.
• Return to the Barracks.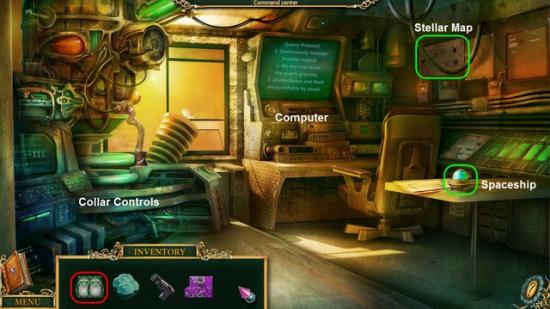
• Examine the Computer.
• Place the ELECTRONIC GADGET into the Computer Slot.
• Click for Sergeants Mail.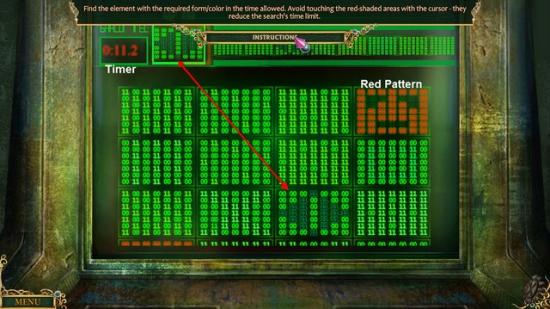
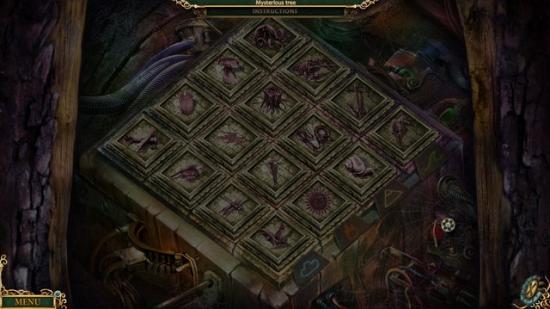
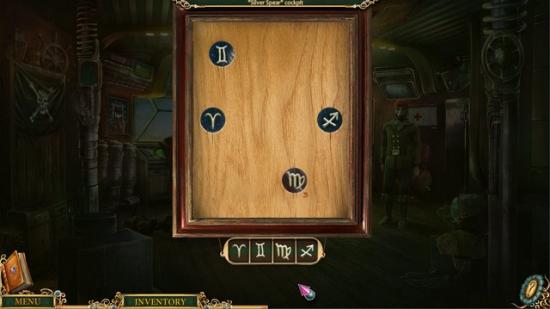
• To pass this Mini-Game you will need to find the matching patterns in a sequence of Patterns.
• There is a time limit for each Pattern.
• Moving the Cursor over a Red Pattern will speed up the Timer.
• As each Pattern come up in sequence click on its matching Pattern in the rows.
• If Timer runs out, will have to restart with a new sequence of Patterns.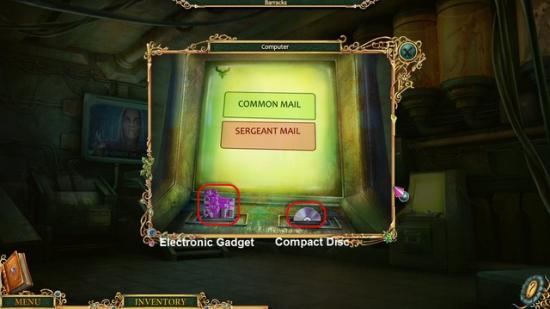
• Gather the ELECTRONIC GADGET and COMPACT DISC.
• Examine the Report Box.
• Place the COMPACT DISC into the Report Box.
• Enter the Command Center.
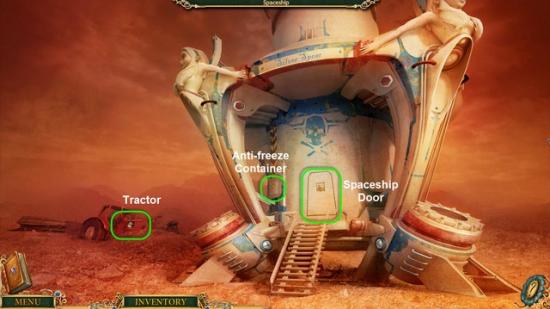
• Place the PAIR OF ARIUKANAS in the Spaceship.
• Return to the Laboratory.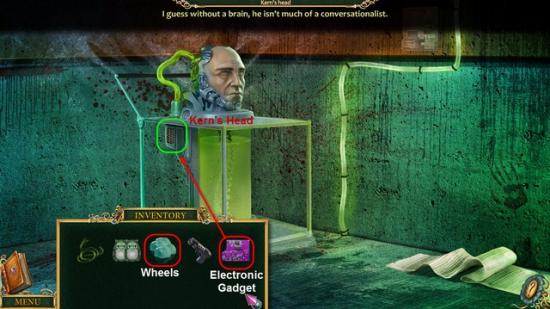
• Examine Kern’s Head.
• Replace the ELECTRONIC GADGET in Kern’s Head.
• Place the WHEELS on to Kern’s Head.
• Talk to Kern’s Head.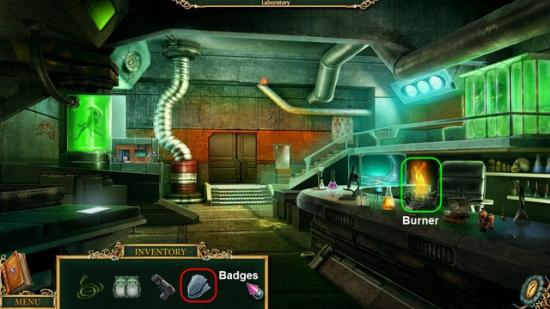
• Return to the Mine Shaft.
• Talk to the Slaves.
• Head to the Quarry Gate.
• Talk to the Guard.
• Receive BADGES.
• Return to the Laboratory.
• Use the BADGES on the Burner.
• Receive SILVER BALL.
• Return to the Command Center.
• Talk to Kern’s Head.
• Ask Kern’s Head “if there is anything you can do for him”
• Take the ELECTRONIC GADGET from Kern’s Head.
• Head back one screen.
• Examine the Computer.
• Place the ELECTRONIC GADGET into the Slot.
• Click to “Send” the e-mail.
• Gather the ELECTRONIC GADGET and return to the Command Center.
• Reinsert the ELECTRONIC GADGET into Kern’s Head.
• Talk to Kern once again.
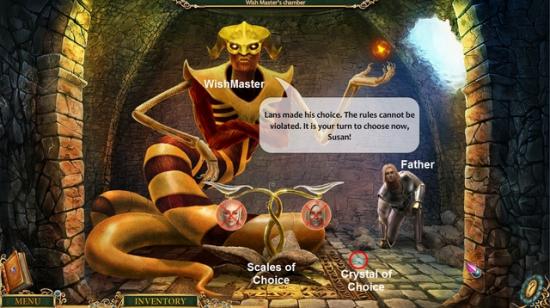
• Talk to the Slaves.
• Choose one Slave to stay behind.


*If you choose to sign the Contract, use the FEATHER to sign the Contract.
Bonus
After completion of the game, you can play through again, making different choices, and try for and alternate ending.
You have completed Gamezebo’s walkthrough for E.P.I.C Wishmaster Adventures. Be sure to check back often for game updates, staff and user reviews, user tips, forums comments and much more here at Gamezebo!
