![Digimon UP Tier List [Supports, Buddies, and Partners]](/wp-content/uploads/2026/07/digimon-up-tier-list.jpg "Digimon UP Tier List [Supports, Buddies, and Partners]")
Digimon UP Tier List [Supports, Buddies, and Partners]
These Digimon will get you UP the leaderboard.


![Haze Seas Boss Drops [Chances, Locations, and How to Spawn]](/wp-content/uploads/2026/07/haze-seas-boss-drops.jpg "Haze Seas Boss Drops [Chances, Locations, and How to Spawn]")

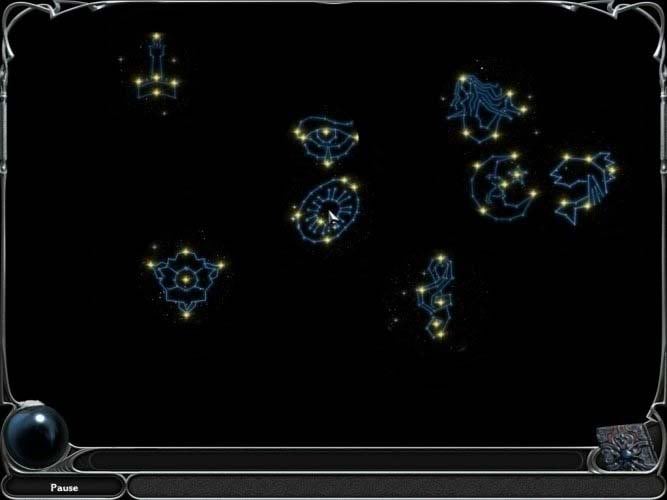
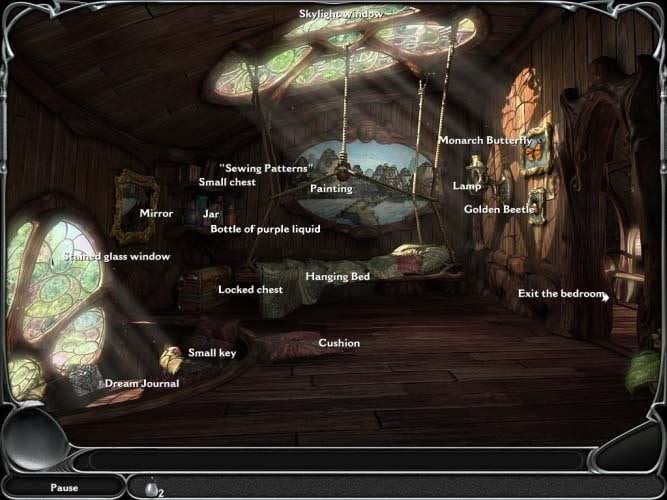
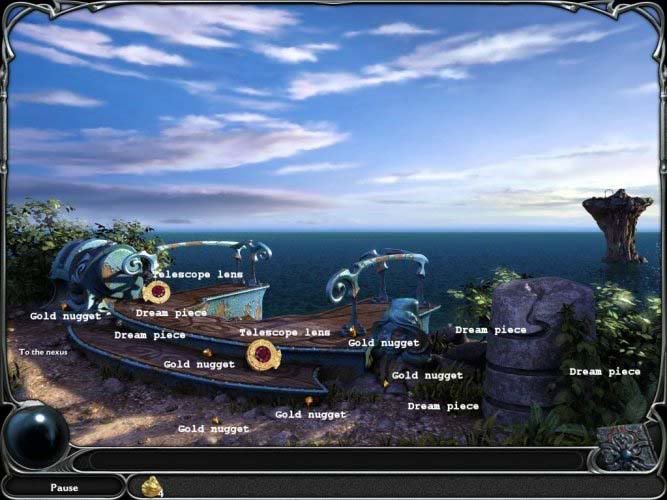
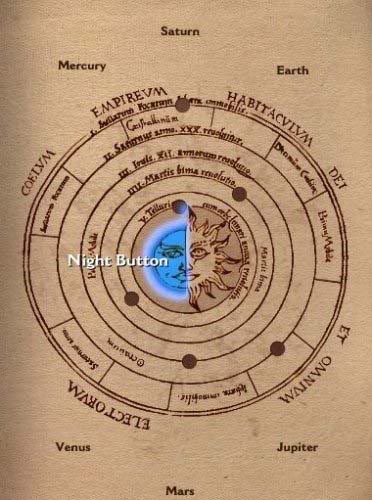
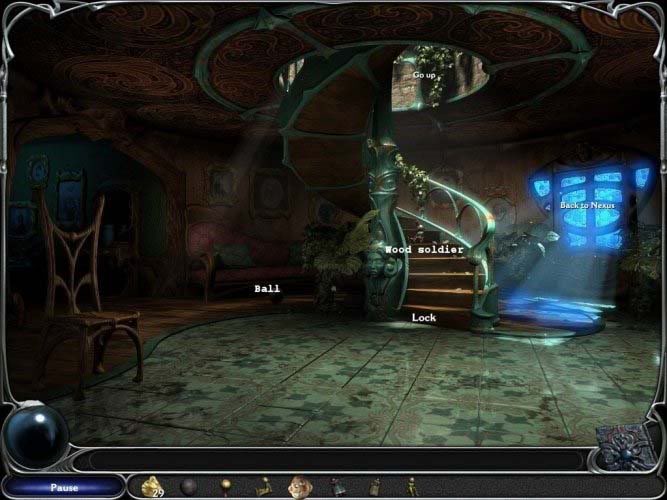
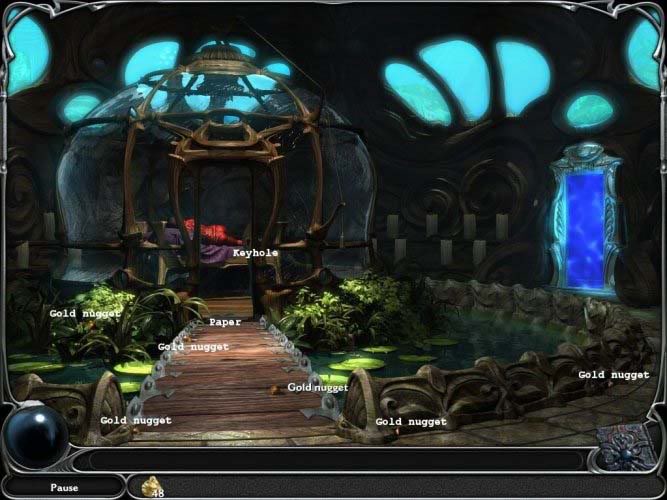
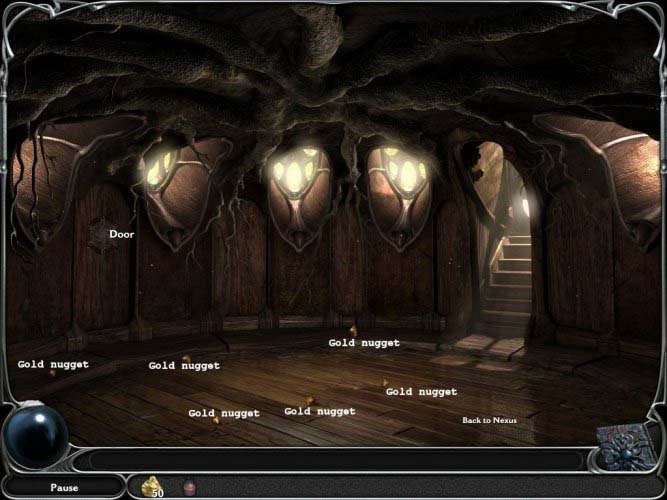
Check out our walkthrough for Dream Chronicles: The Chosen Child. Walkthrough Collect any dream pieces and gold nuggets you see as soon as possible. Trying to gather them later on is a pain. You don’t need to get them all, actually only a small amount, but they help make up your highscore at the end. To find the star constellations, check this sky map: Chapter 1 – Treehouse Brenna’s Bedroom Grab the Dream Journal next to the window and a crystal ball will appear in the ro…
Check out our walkthrough for Dream Chronicles: The Chosen Child.
Walkthrough

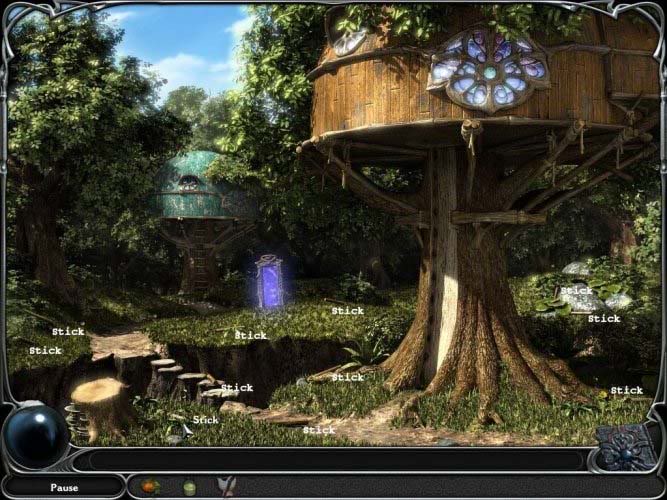
Chapter 1 – Treehouse
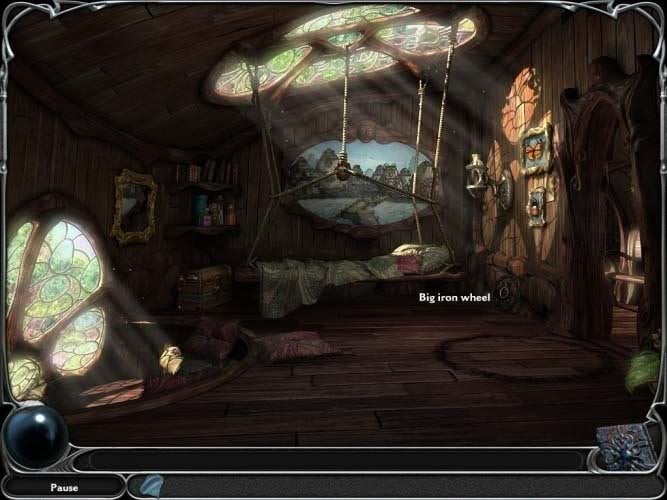
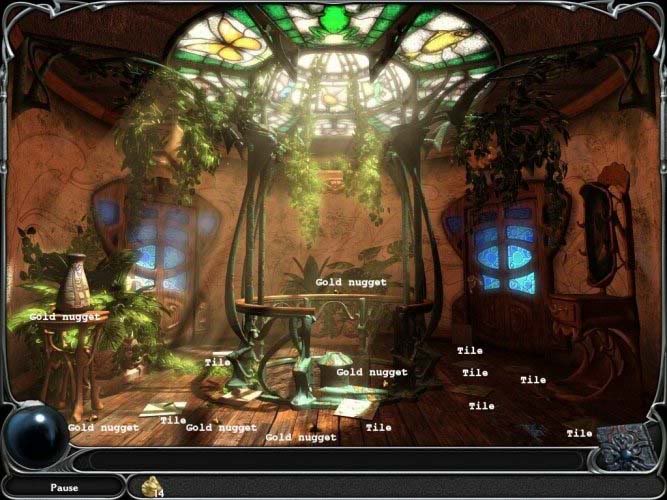
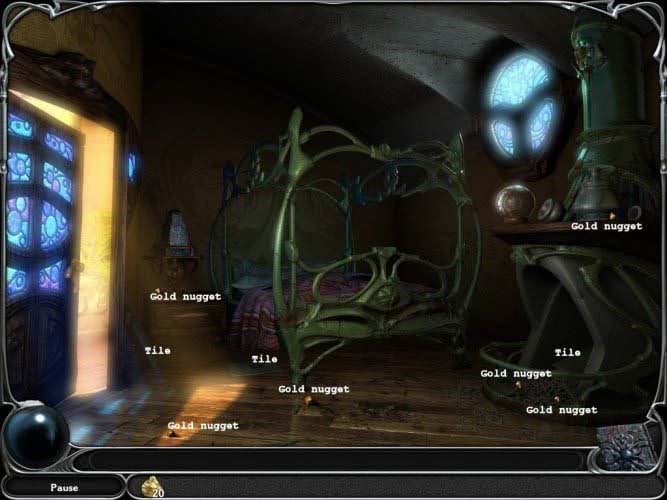
Brenna’s Bedroom
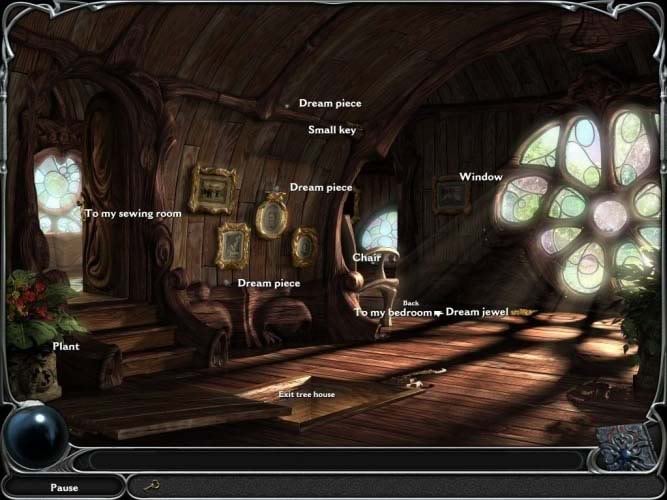
Brenna’s House Entrance – the first dream jewel
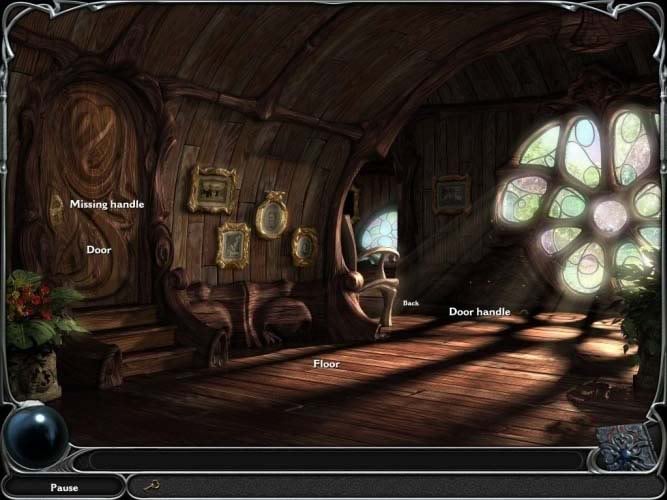
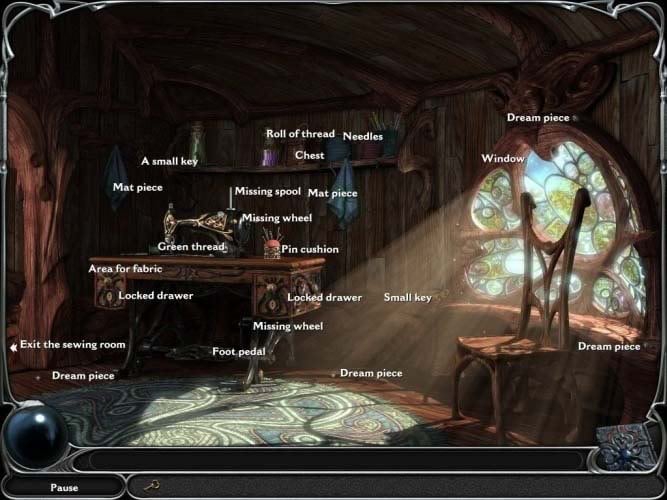
Brenna’s House Entrance – open the sewing room
Sewing Room – restore the mat
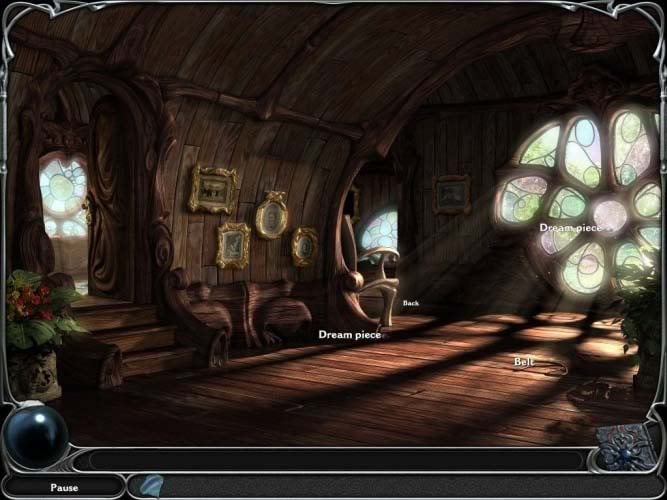
Outside Brenna’s house
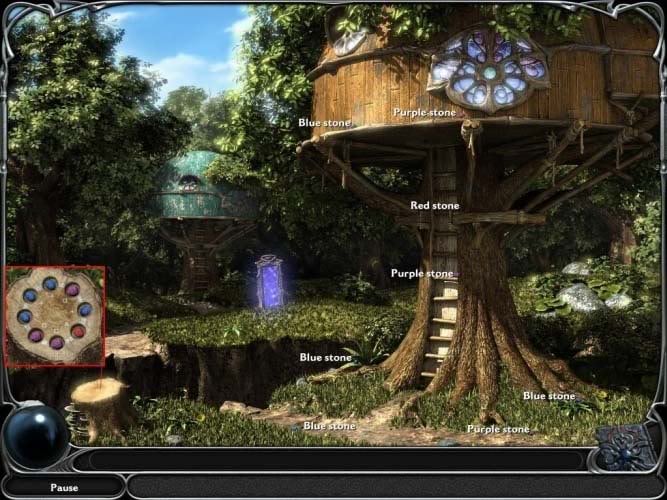
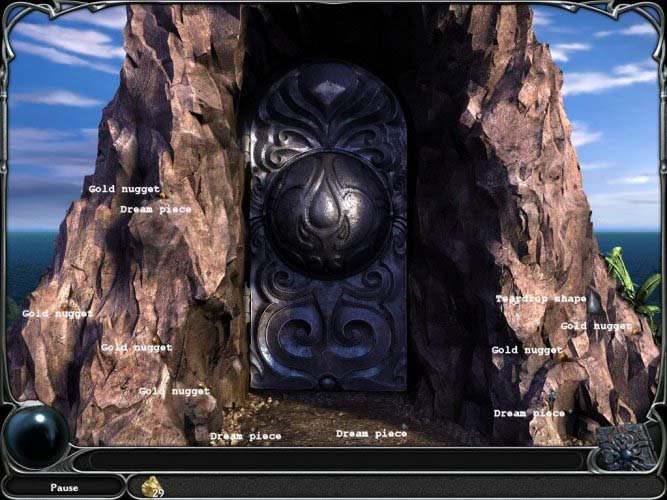
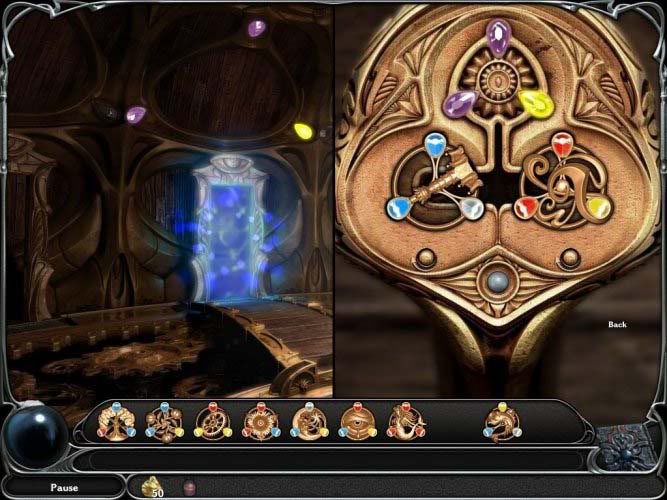
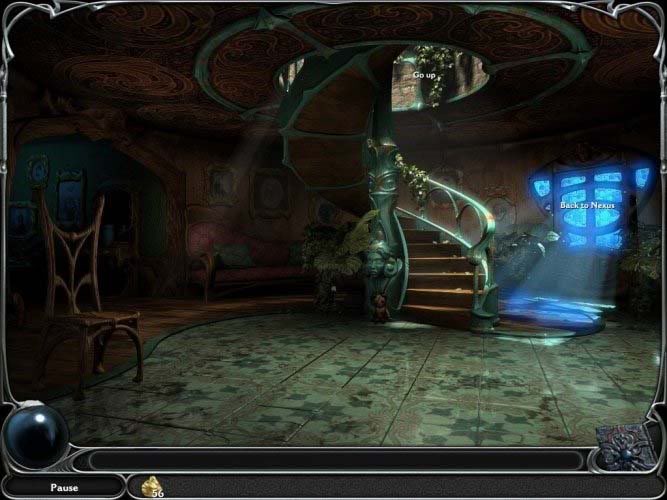
Nexus gate
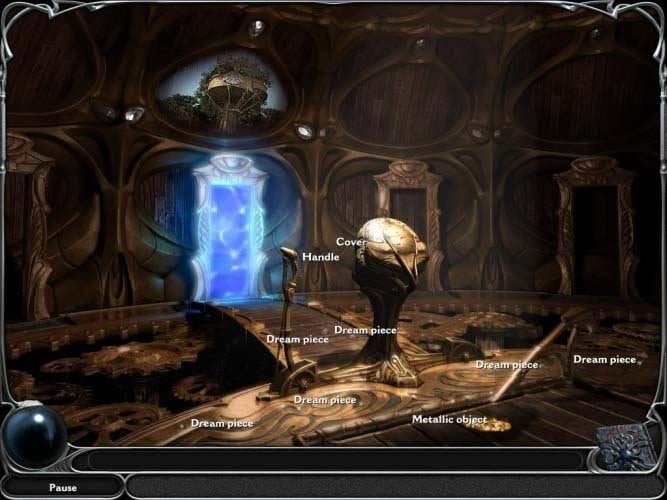
First collect the metallic object.
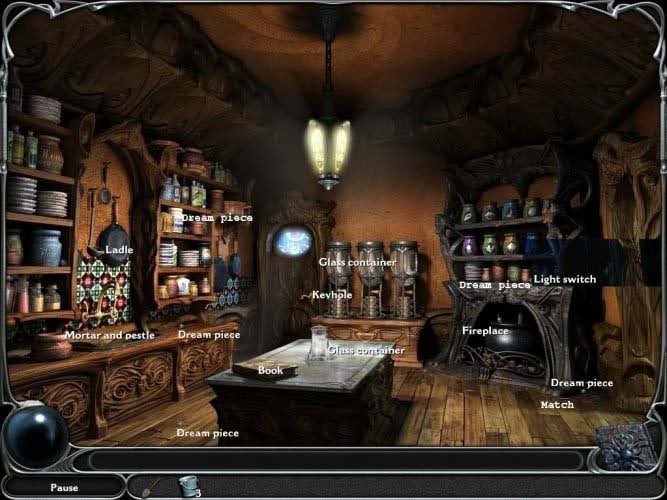
Chapter 2 – Herbalist’s House
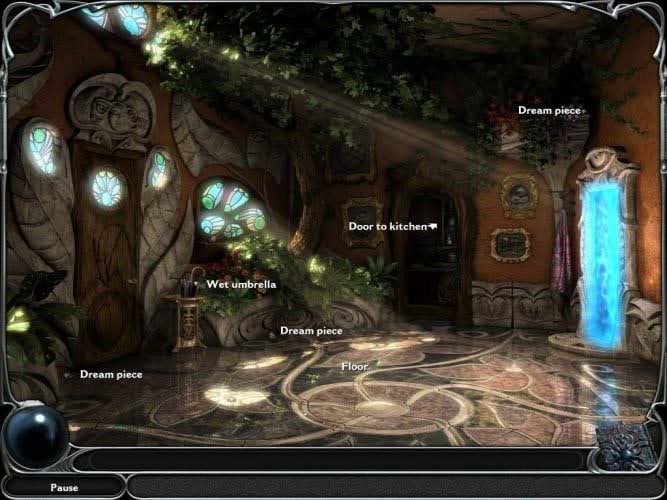
Herbalist’s Entrance
Outside Herbalist’s House
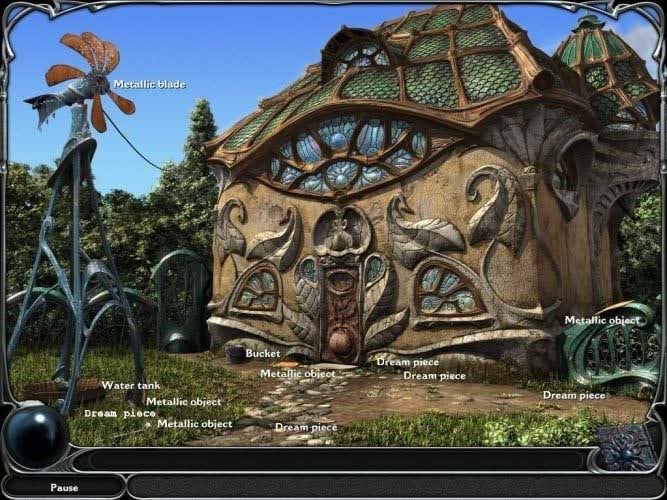
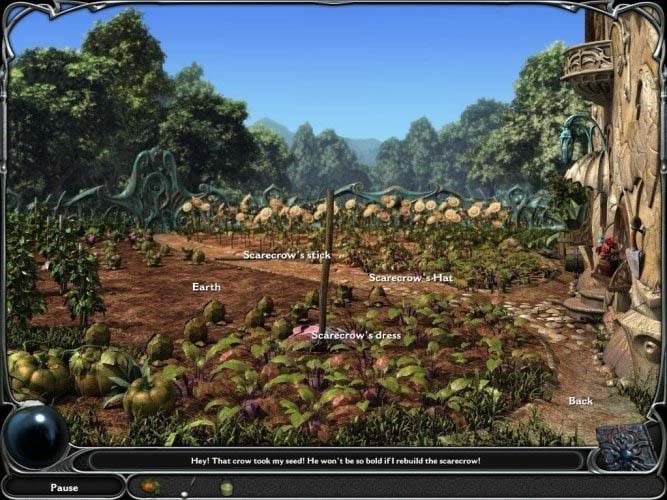
Herbalist’s Garden – find the windmill blades
Outside Herbalist’s House – fix the windmill
Herbalist’s Garden – get a pumpkin
Outside Herbalist’s House – fix the windmill
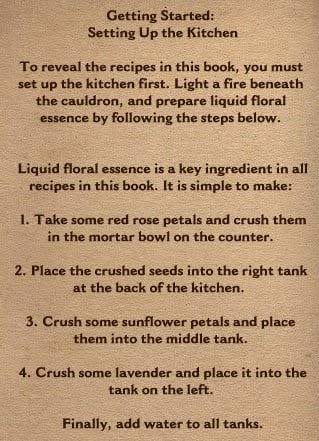
Herbalist’s Kitchen – prepare first two potions
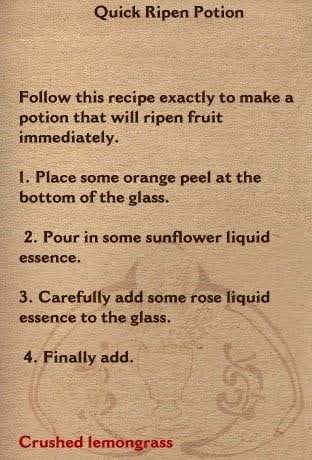
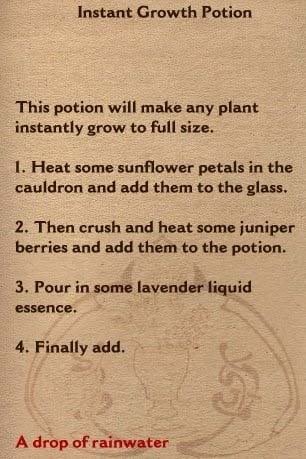
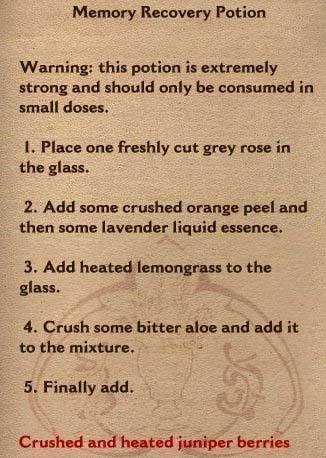
Prepare the Memory Recovery Potion – part 2
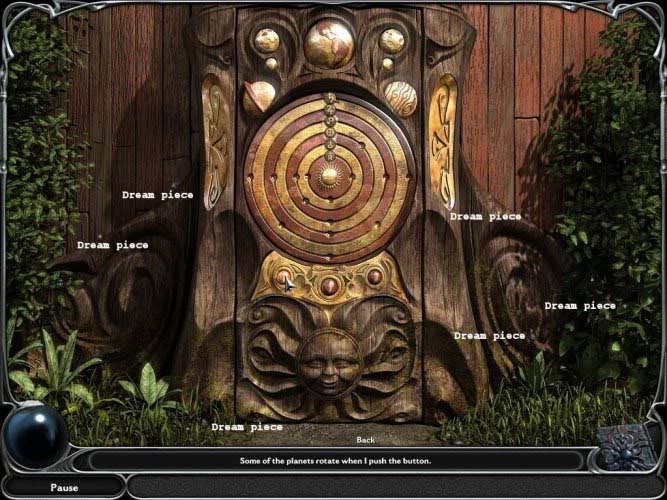
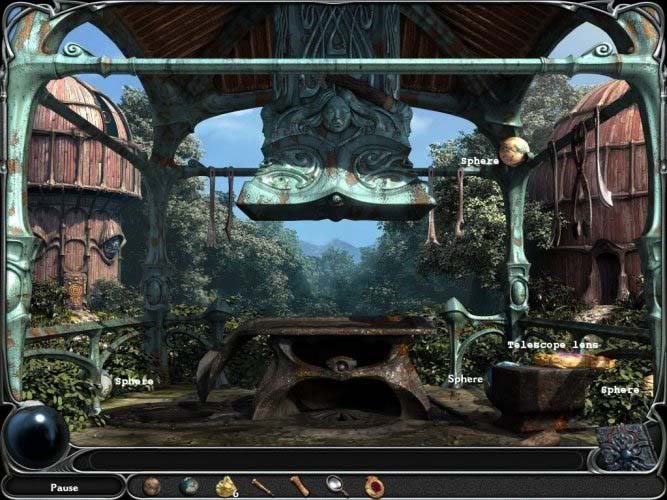
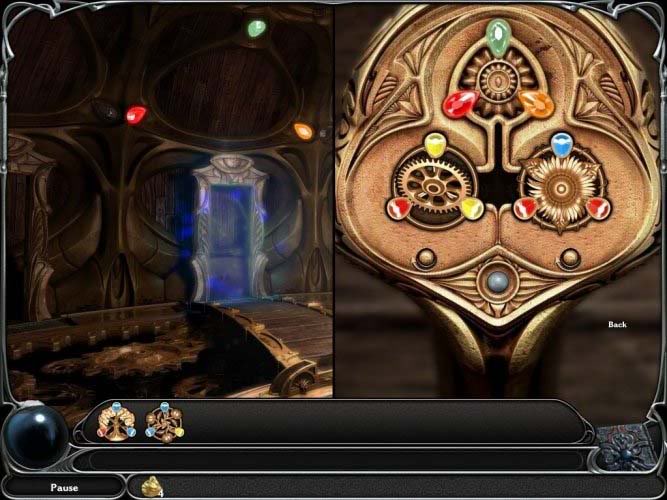
Chapter 3 – Forging Area
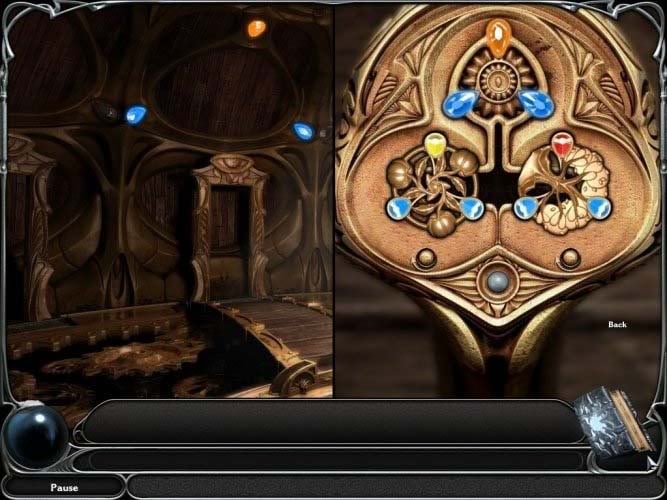
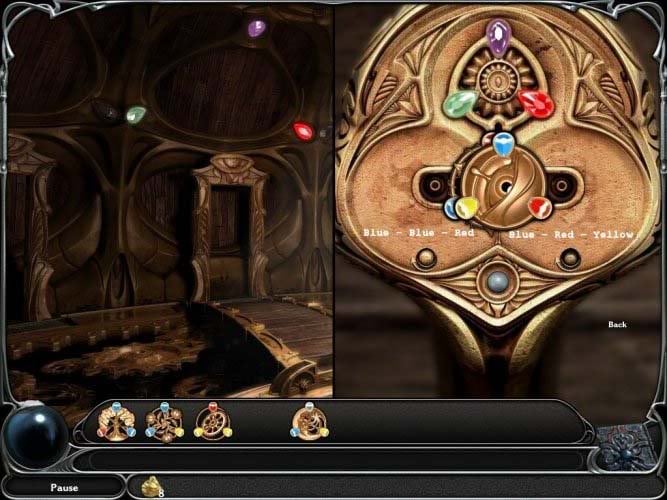
Forging Device
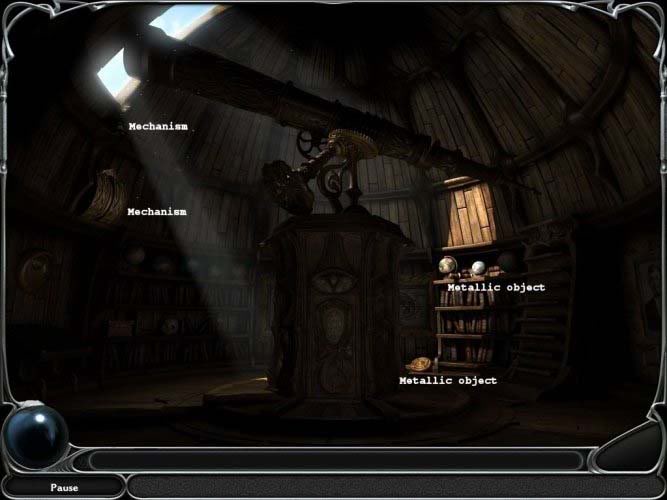
Observatory door
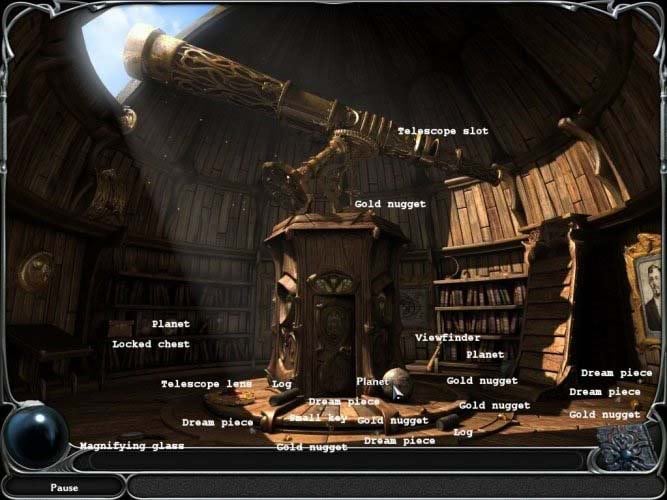
Telescope room

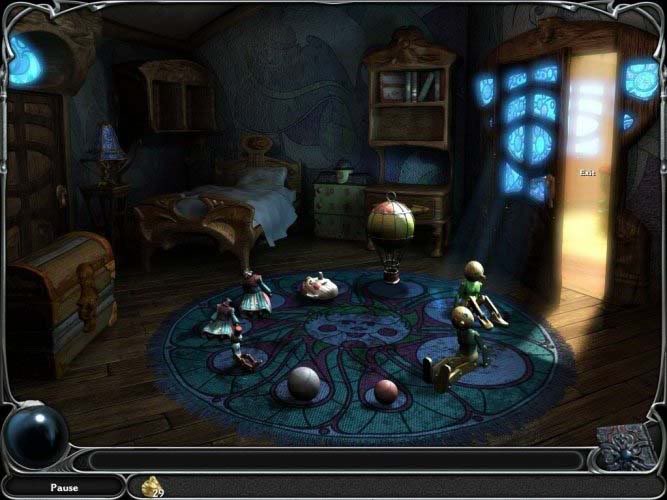
Chapter 4 – My Home
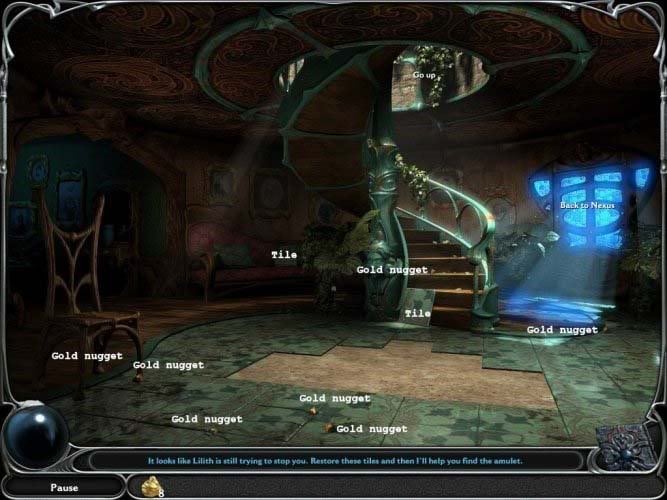
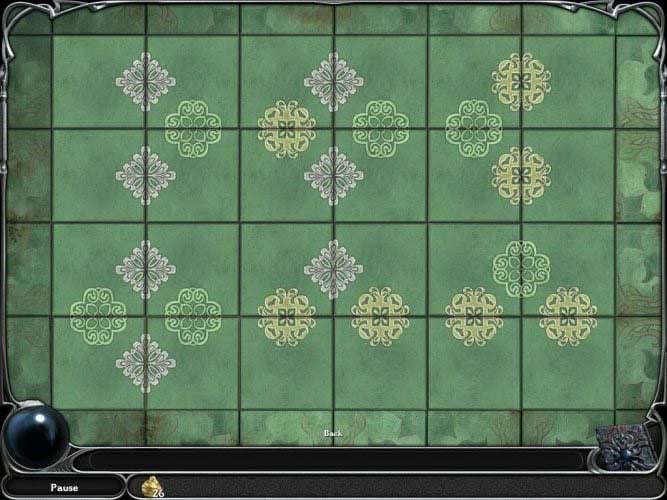
Return Home – tiles
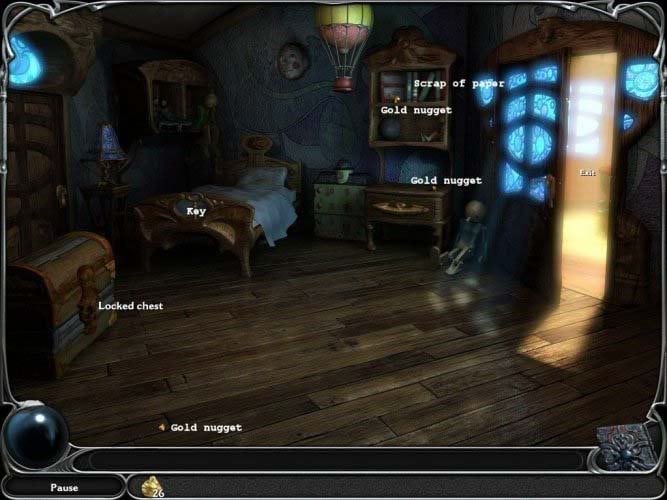
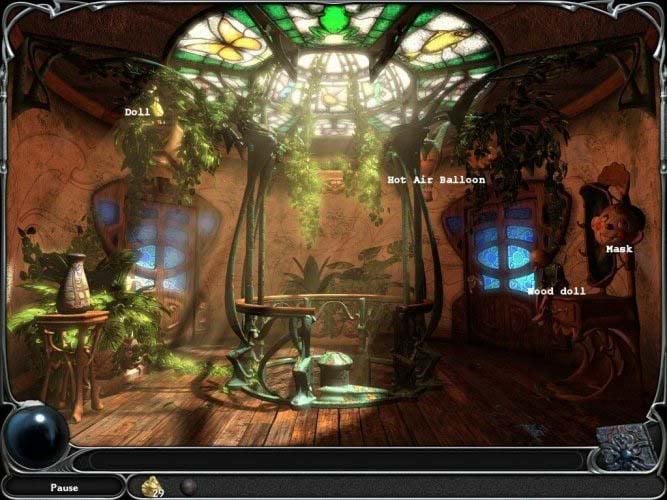
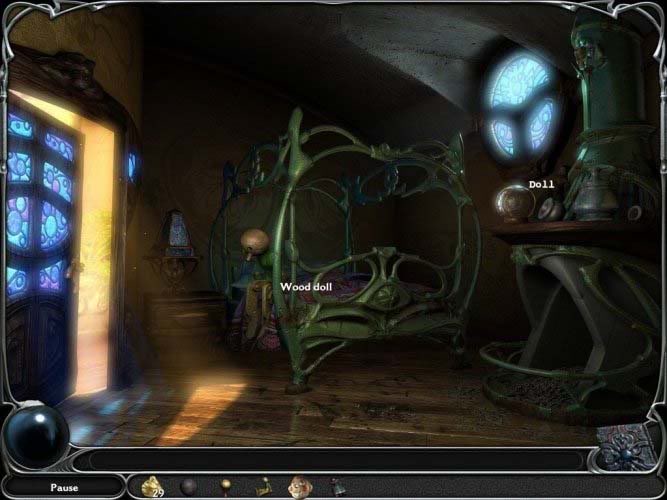
My Home – Lyra’s toys
Chapter 5 – Fairy Retreat
Enter the retreat
The Maze
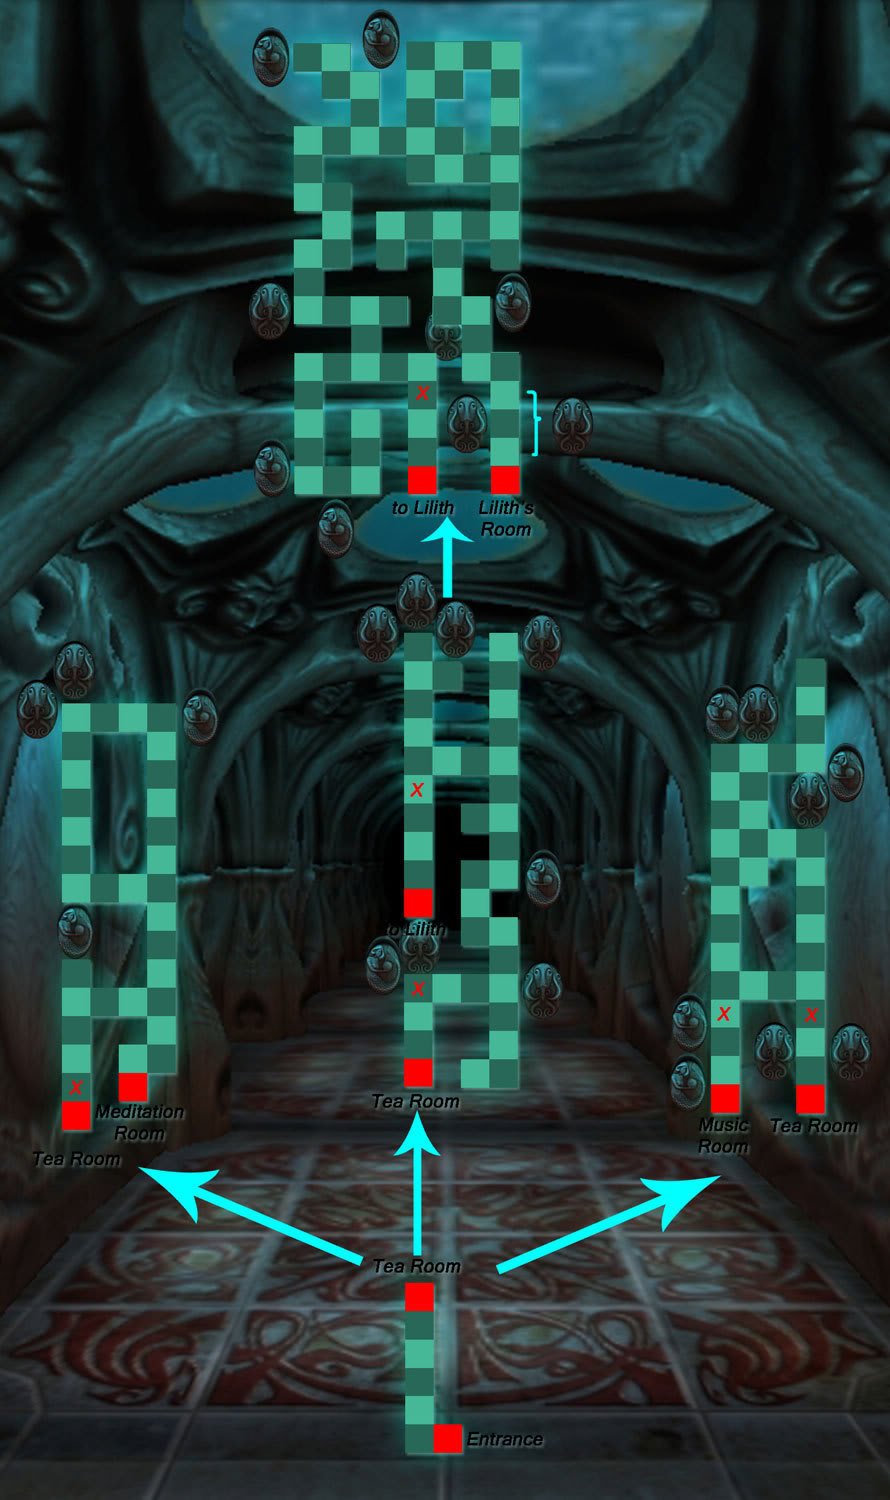
(map image and description by Tawny Ditmer.)
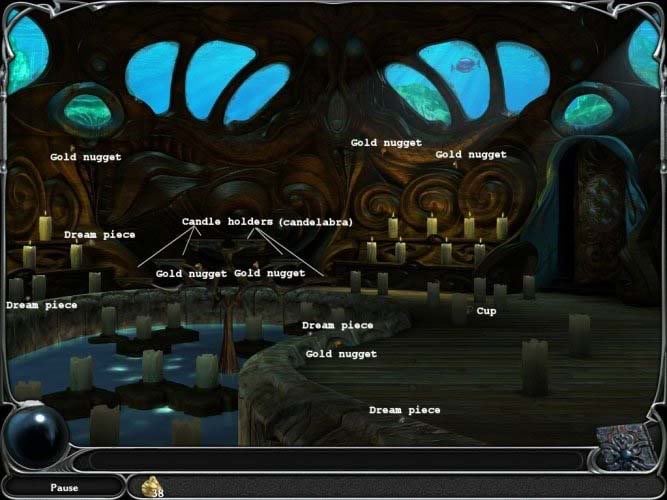
Tea room
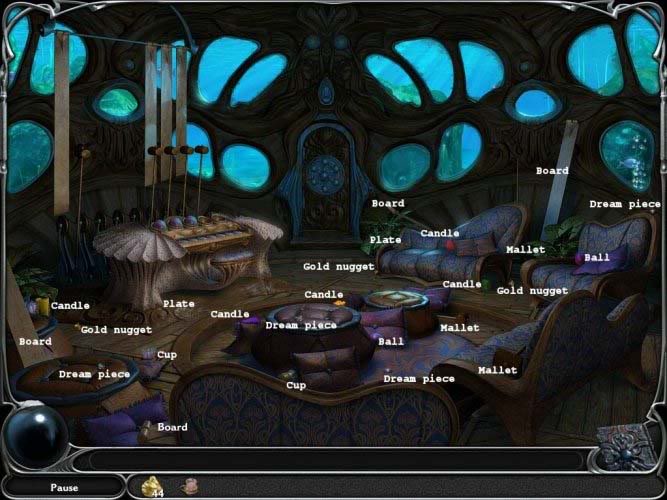
Meditation room
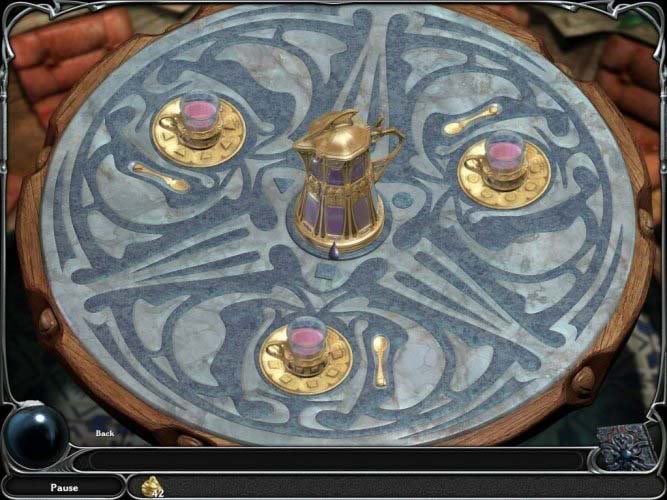
Music room
Music room – play the instrument
Return the candles
Complete the tea set
Steam bath tunnel
Lilith’s Retreat
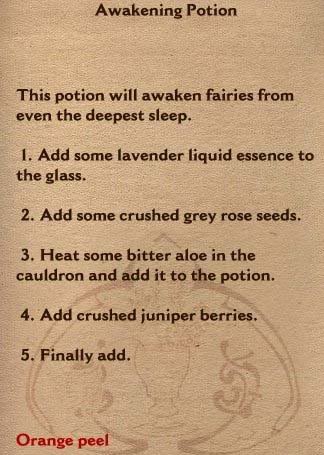
Prepare the Waking Potion
When she talks to you, reply with the following answers:
– Where’s Lyra?
– Instructions? You mean the notes I found?
– But why would you help me?
– No. Who is the Dream Librarian?
– That sounds familiar. Can you remind me?
– Lyra? The Fairy Lord? No. It’s too much to expect from her. She’s only a child. My child!
– Because I see you have your own selfish interests at heart, I will trust you.
– What kind of magic?
– Just tell me what to do, I can handle it.
– What is the potion for?
– Yes, I know the one you mean. She loves that bear!
– I’ll do it.
Chapter 6 – Magic Tree
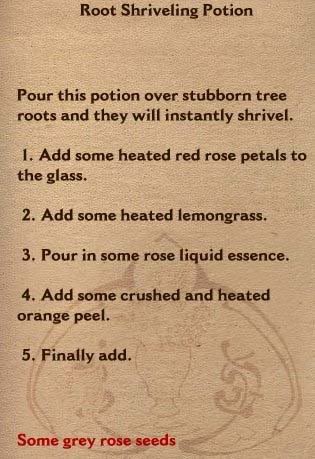
Prepare the Root Shriveling Potion
Magic Tree
Return home
CONGRATULATIONS! YOU HAVE FINISHED THE GAME.
ENJOY THE ENDING.
