![All VV Ultimatum Titles [How to Get]](/wp-content/uploads/2026/06/vv-ultimatum-titles.jpg "All VV Ultimatum Titles [How to Get]")
All VV Ultimatum Titles [How to Get]
Do titles provide buffs?


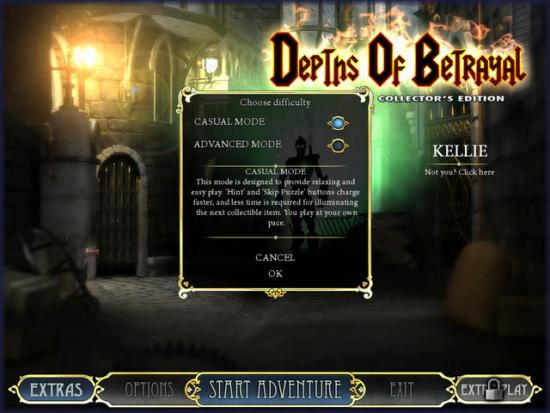
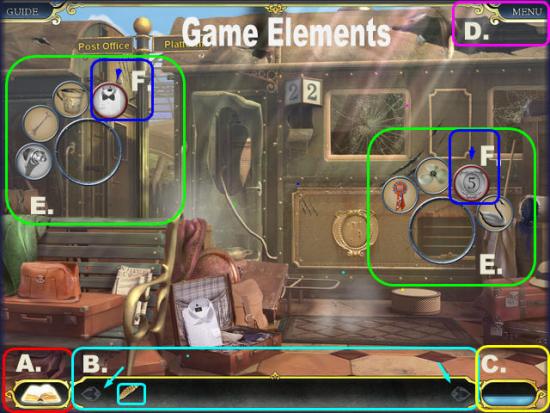
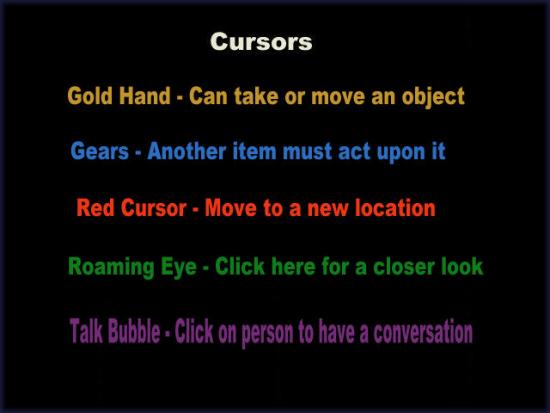
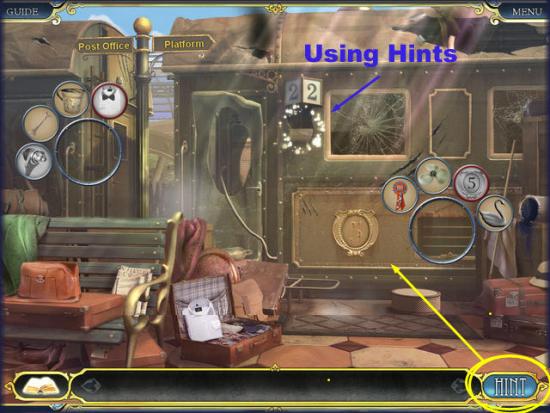
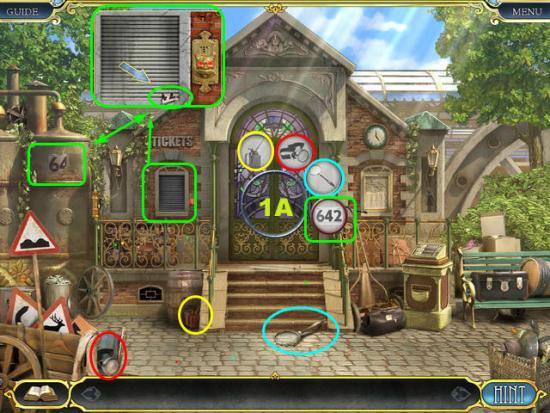
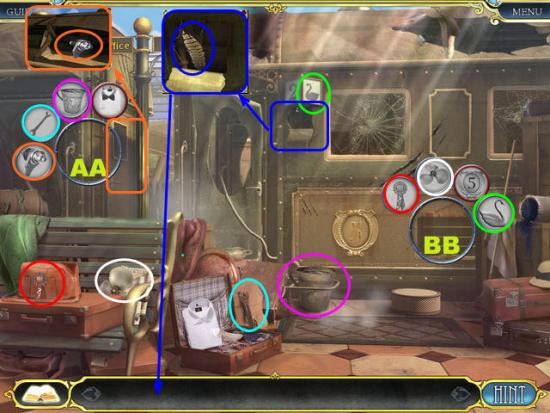
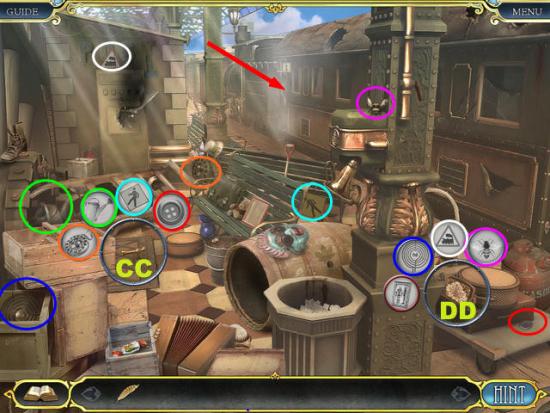
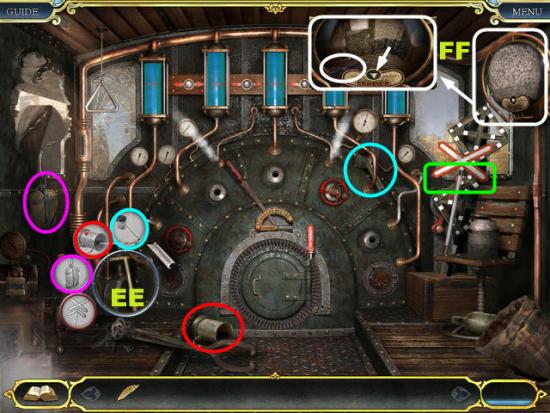
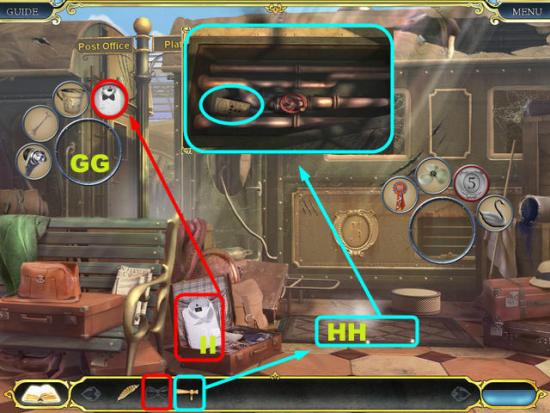
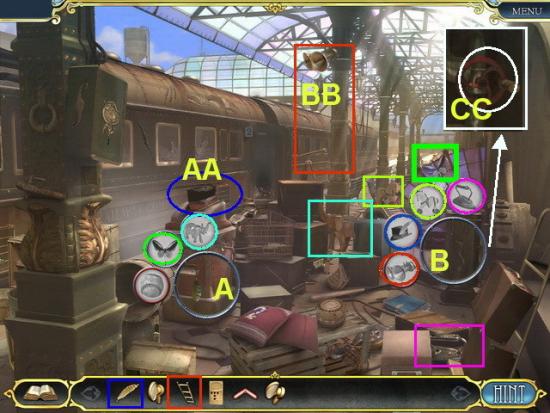
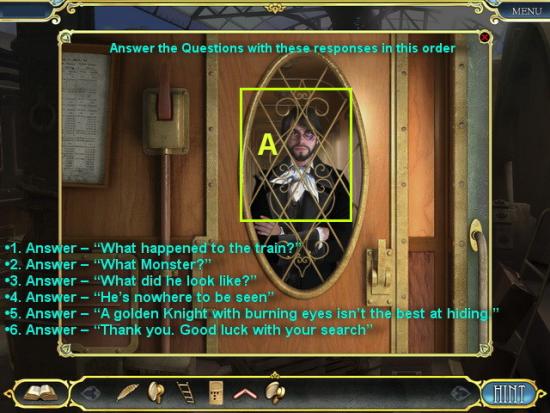
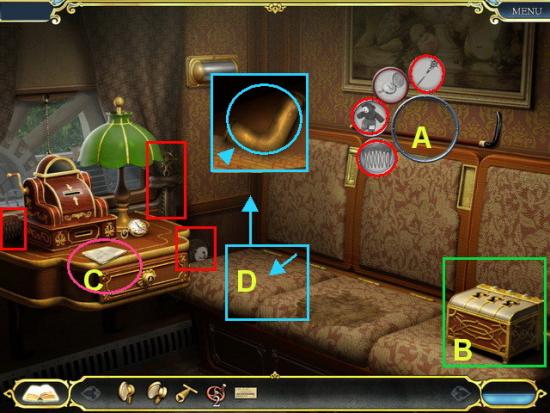
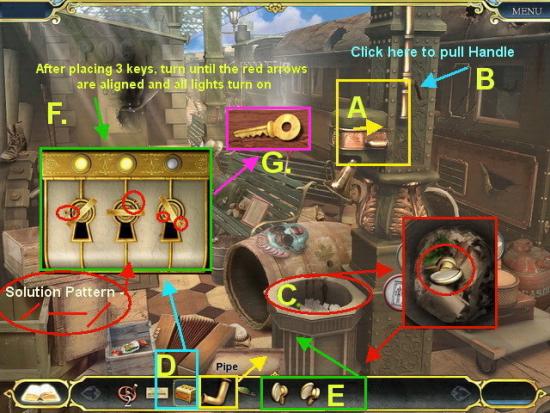
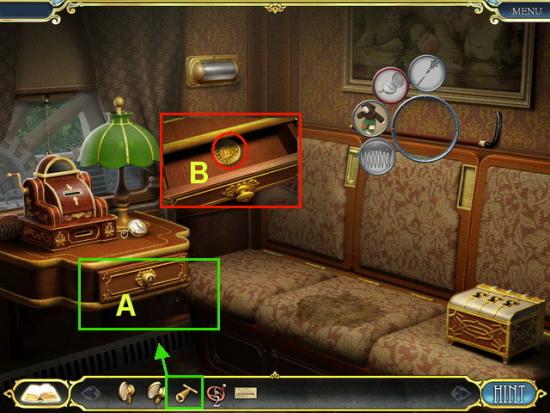
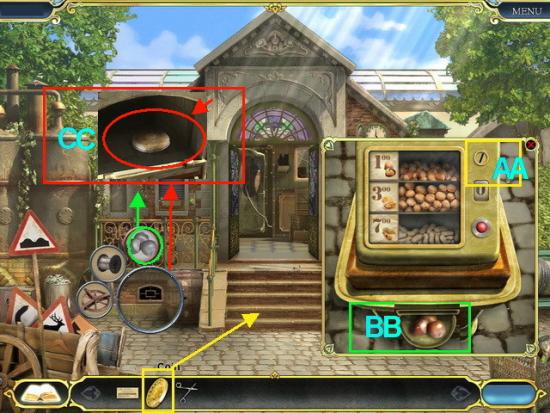
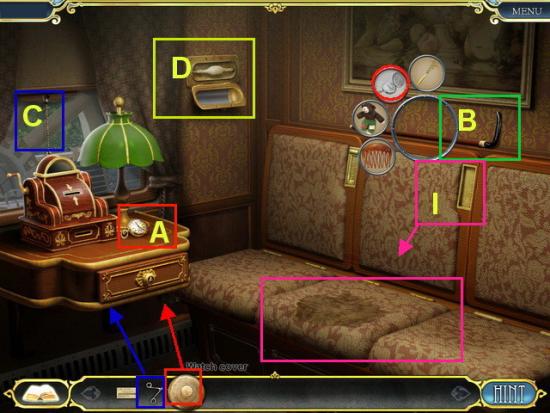
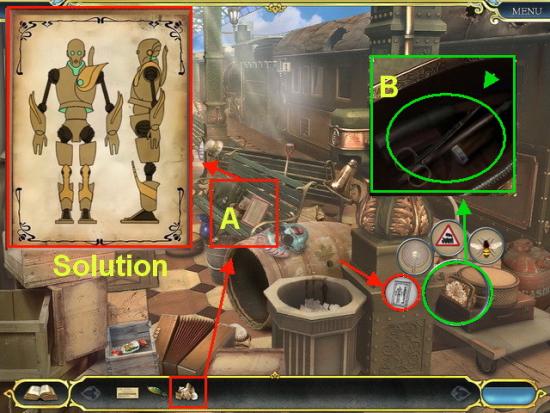
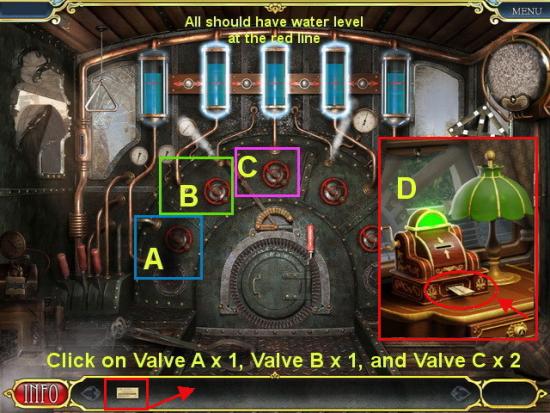
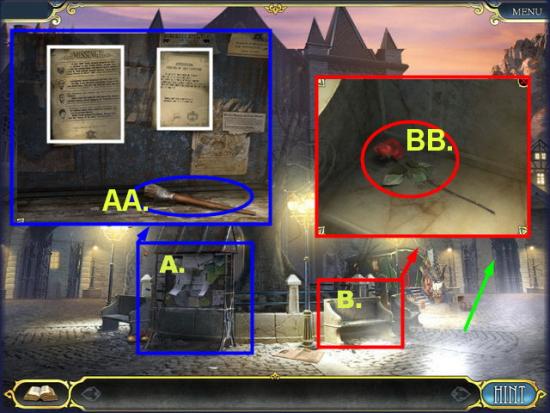
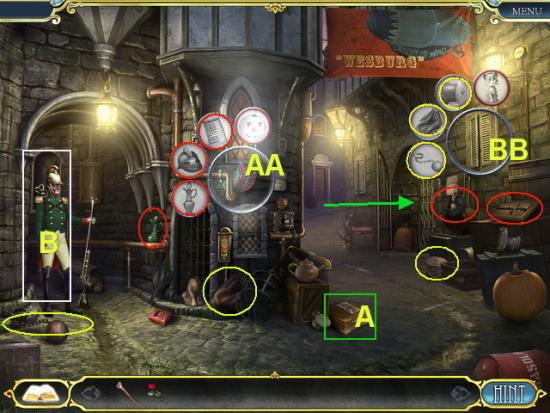
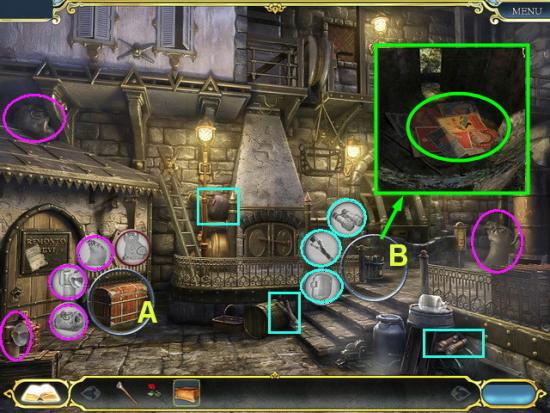
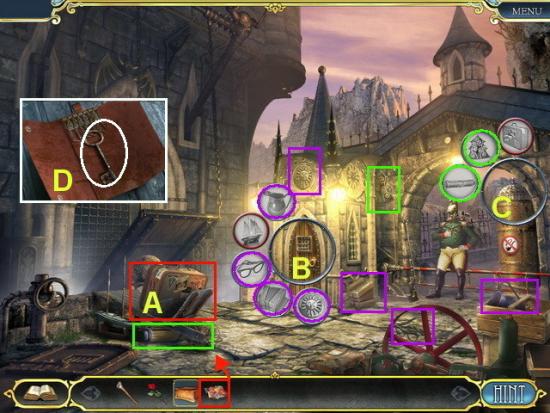
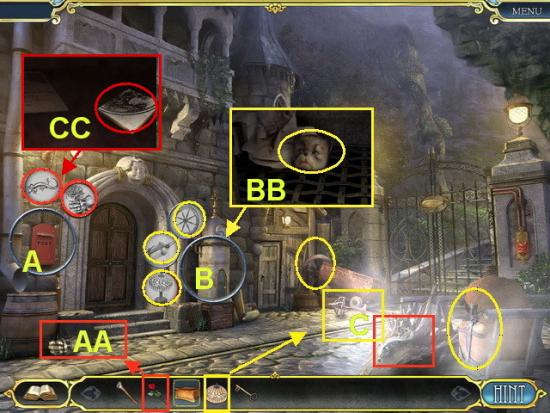
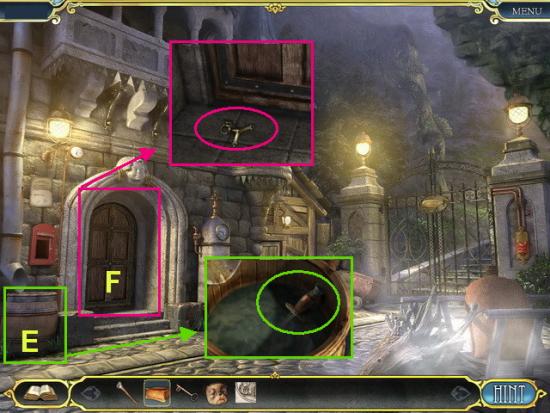
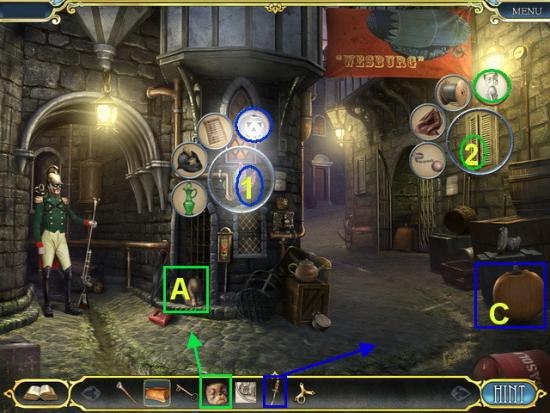
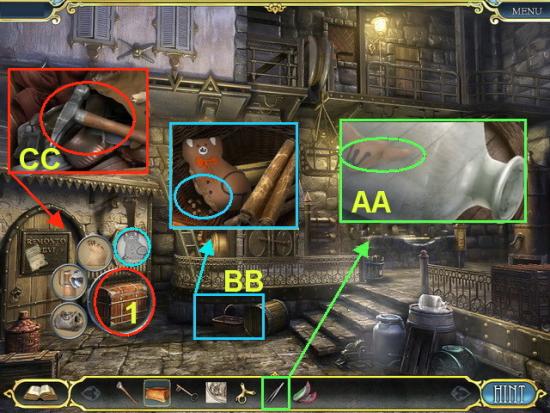
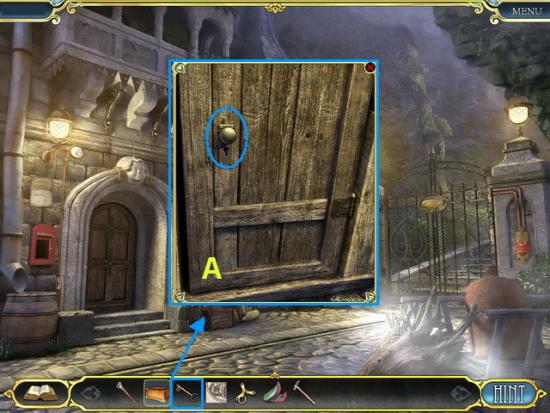
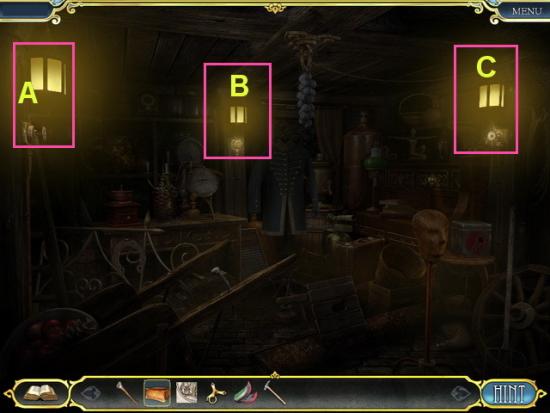
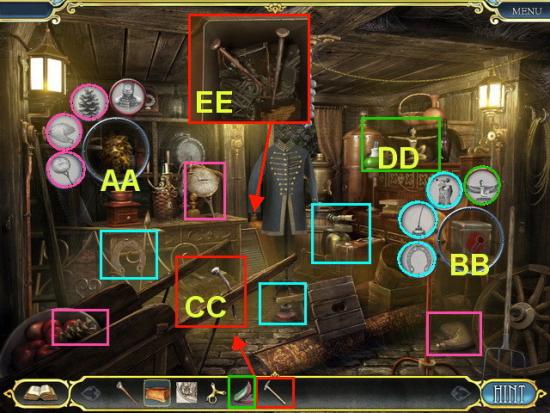
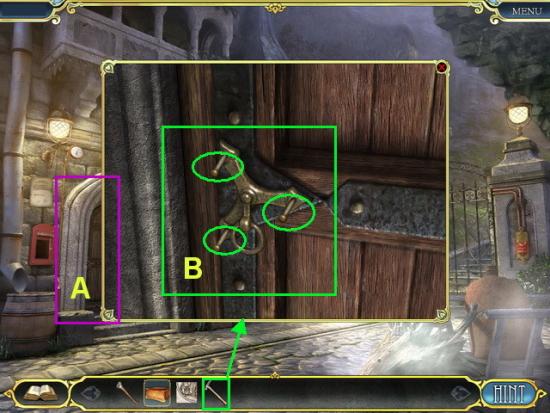
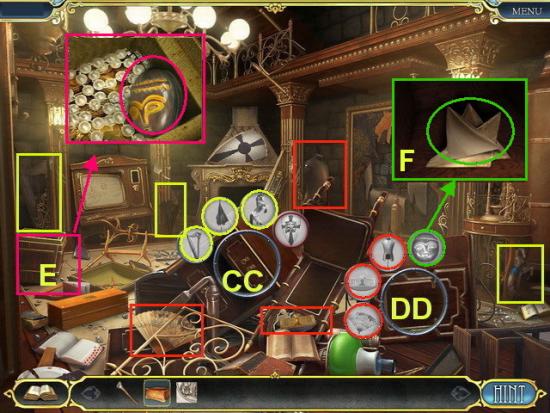
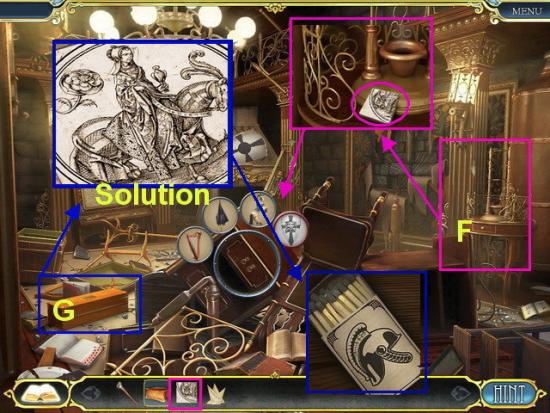
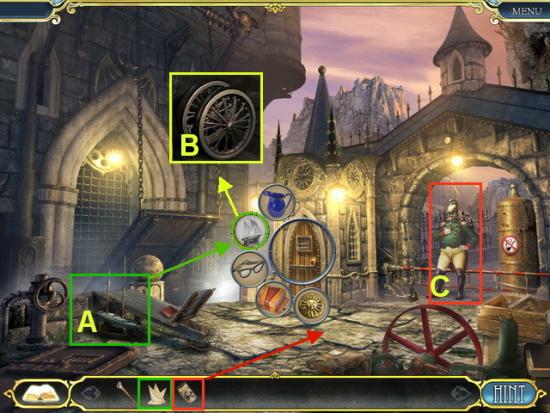
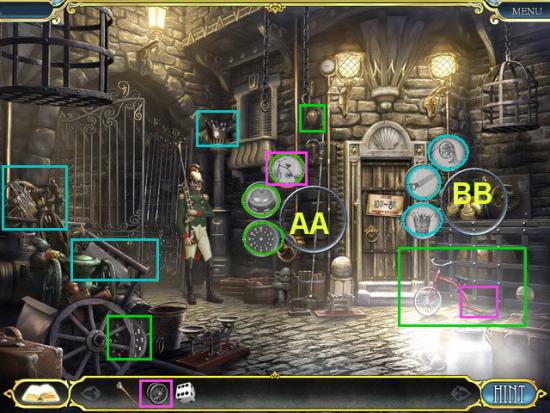
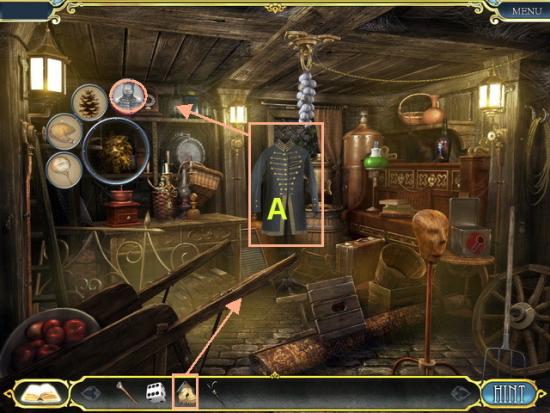
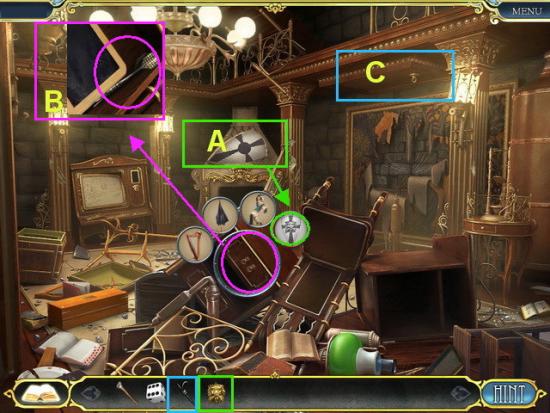
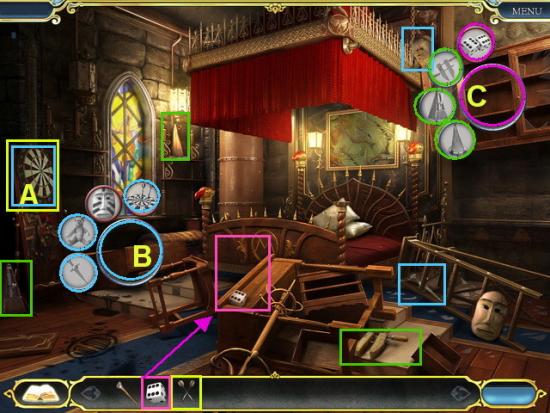
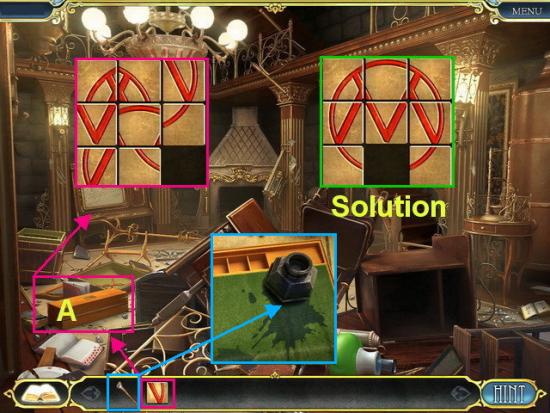
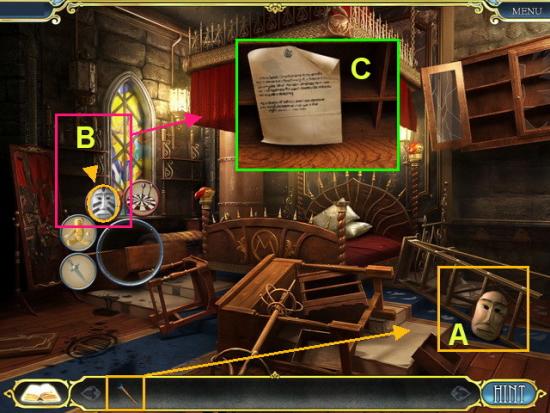
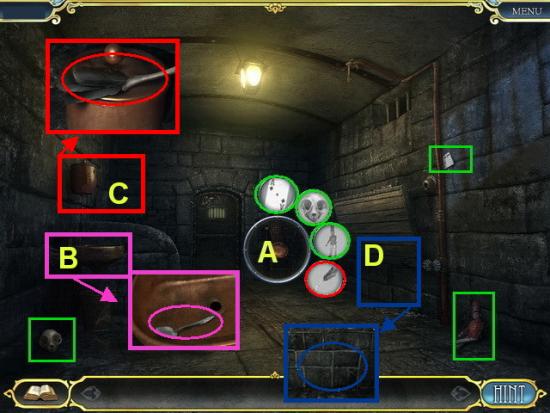
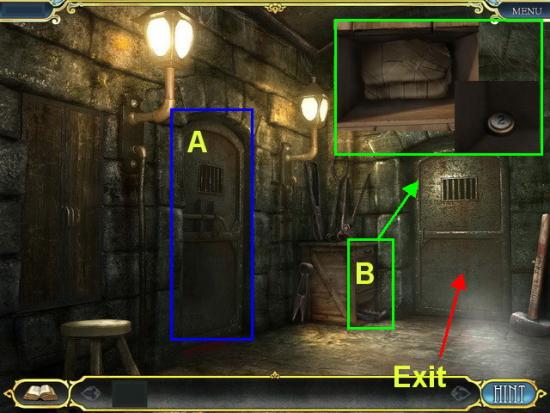
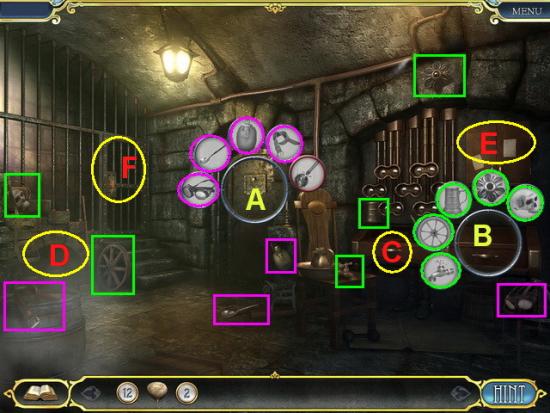
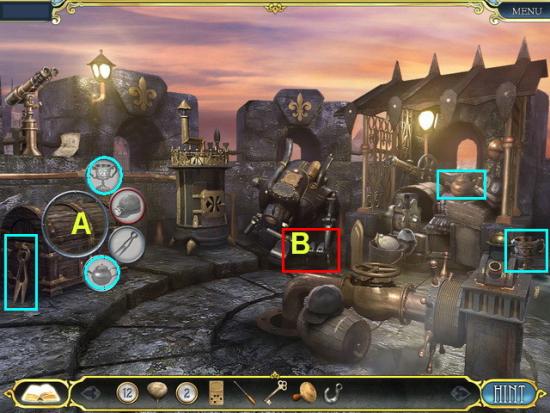
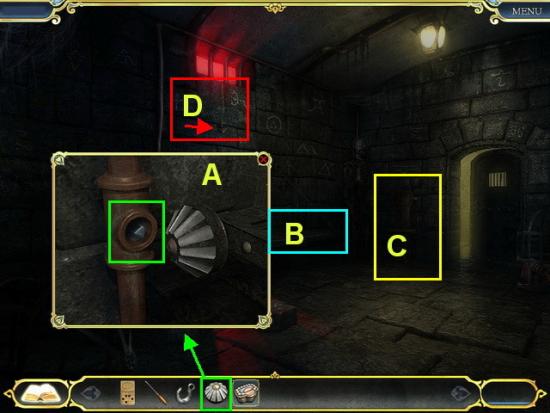
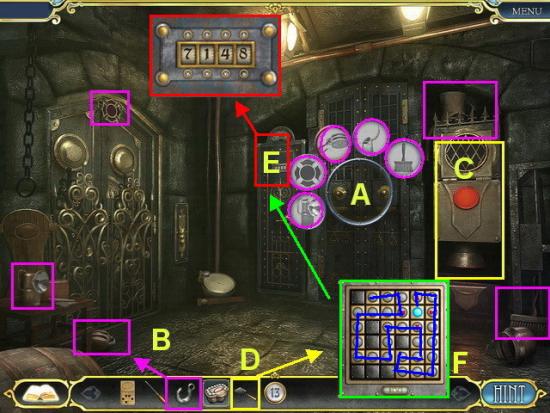
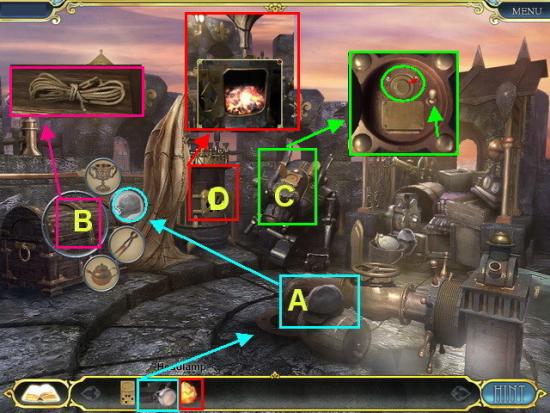
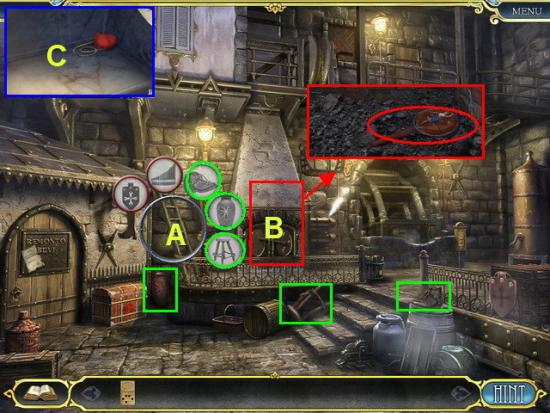
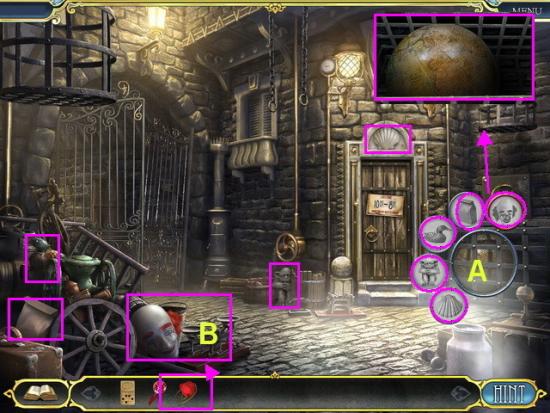
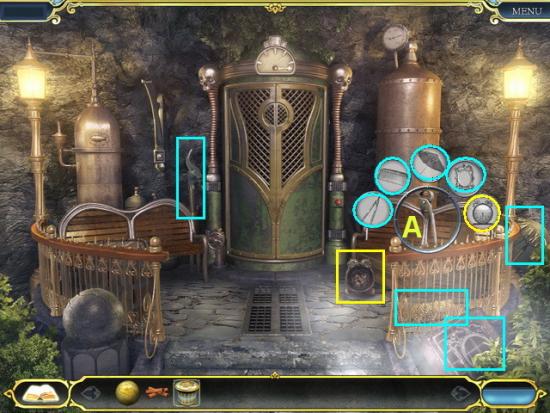
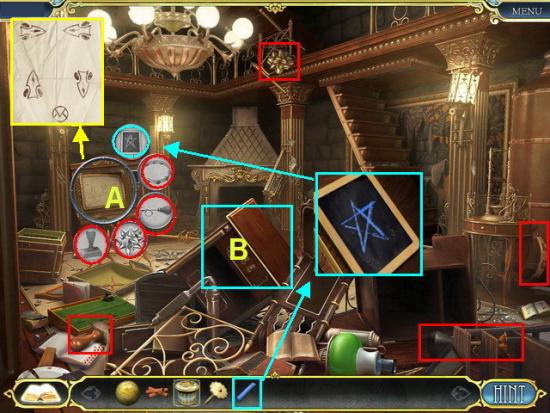
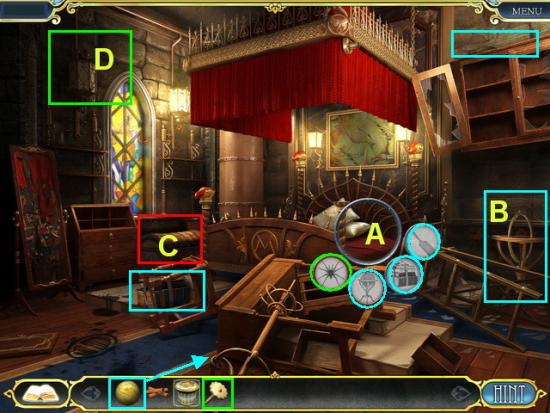
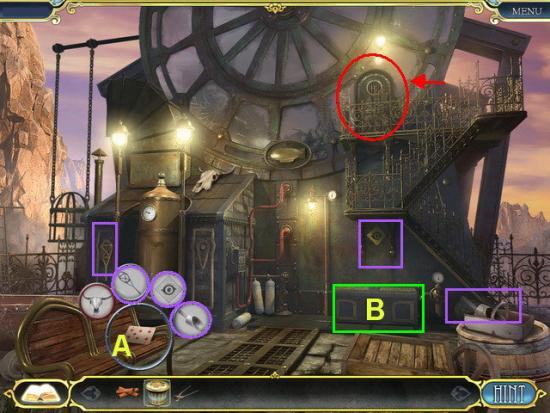
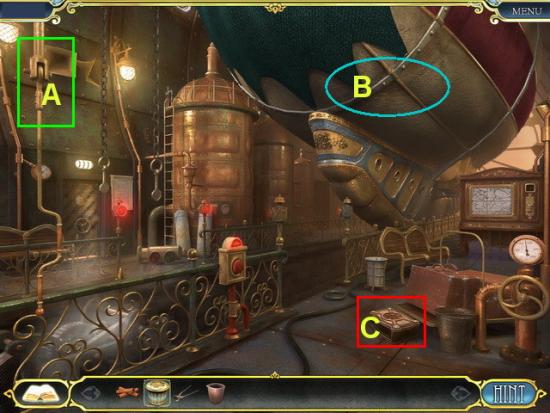
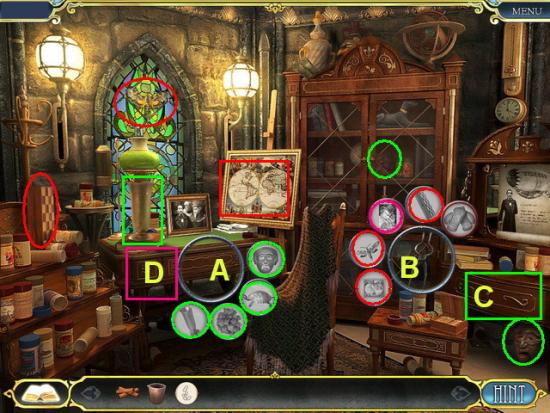
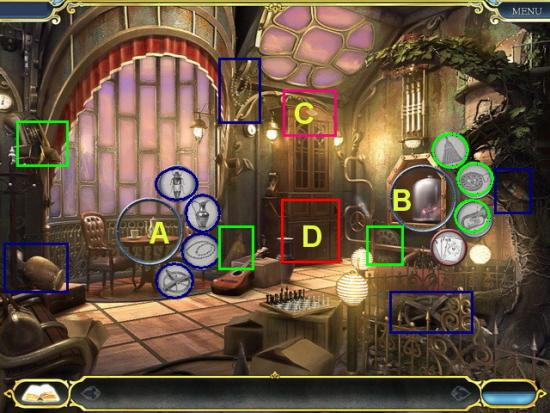
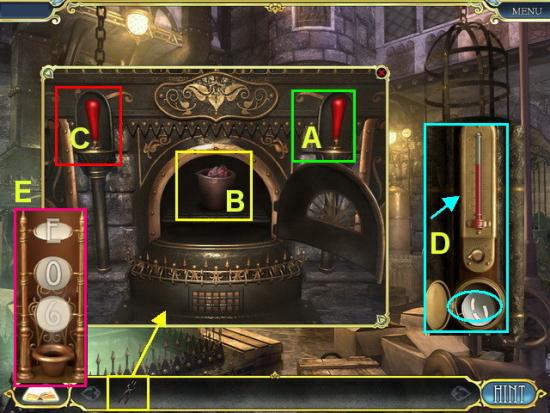
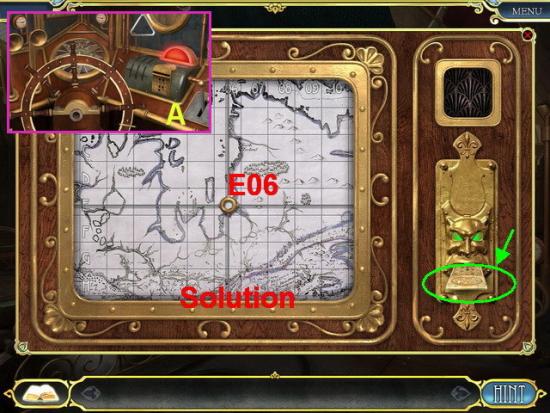
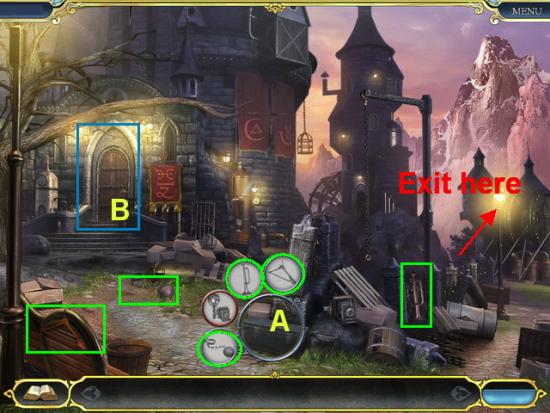
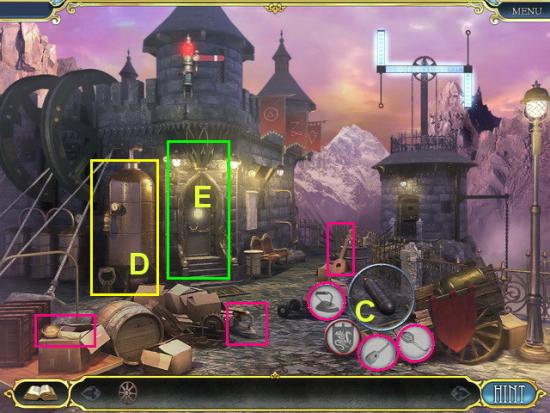
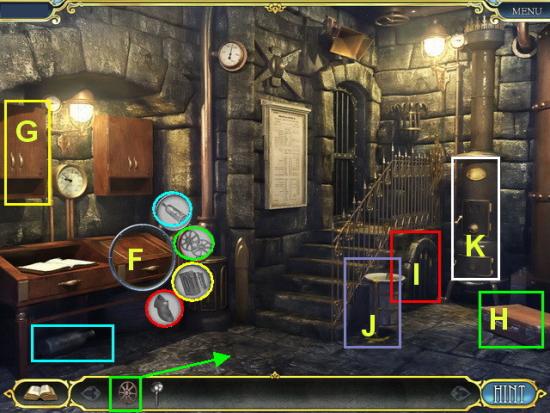
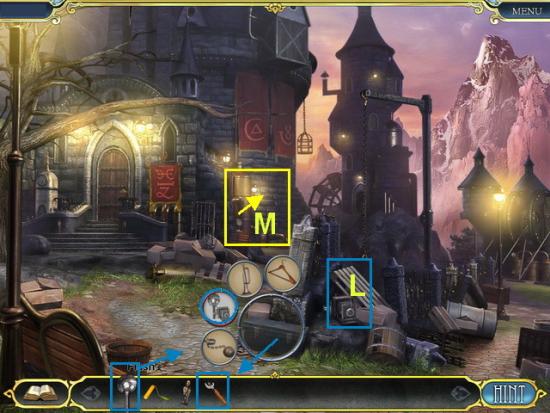
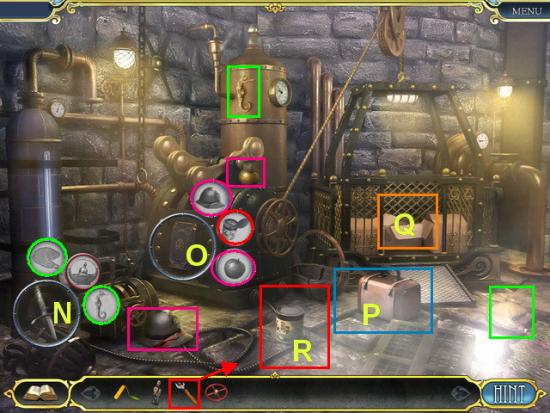
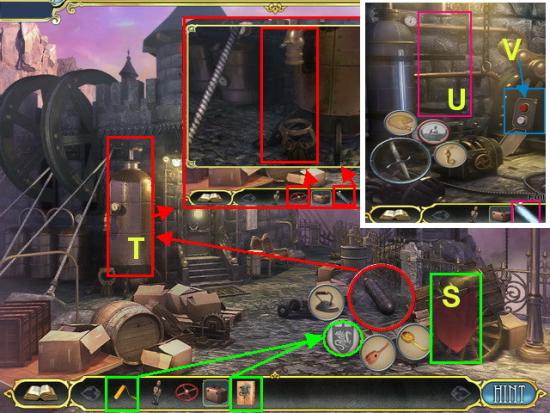
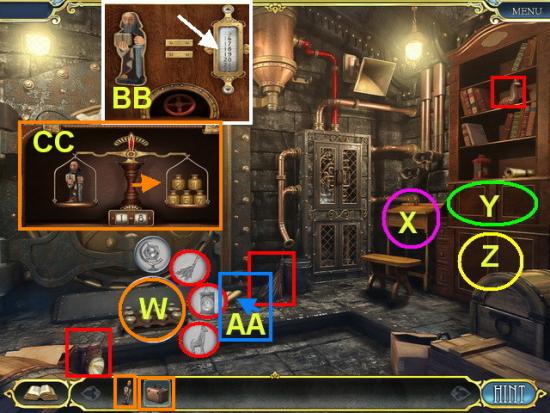
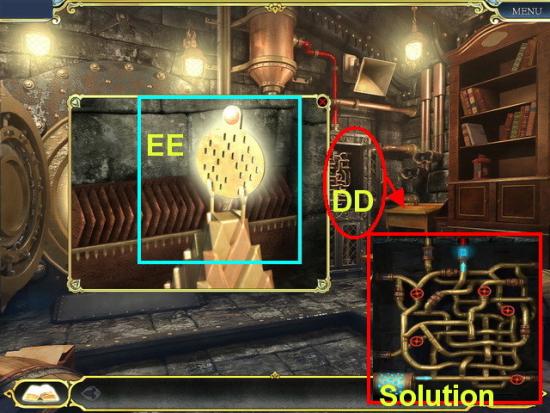
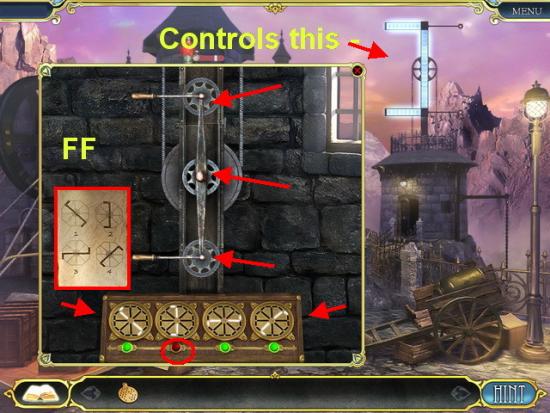
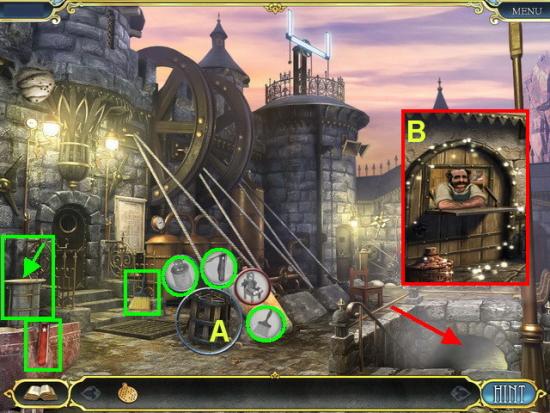
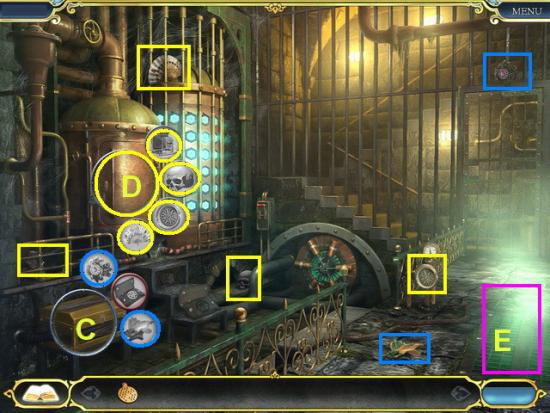
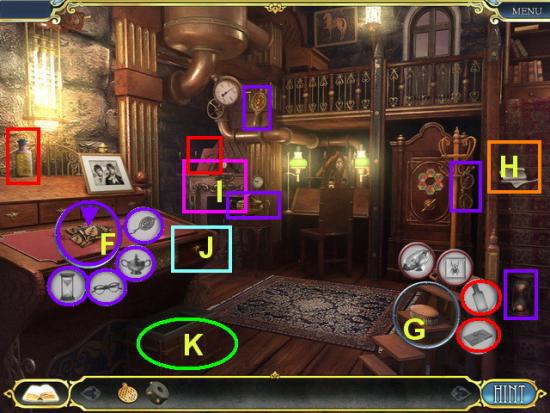
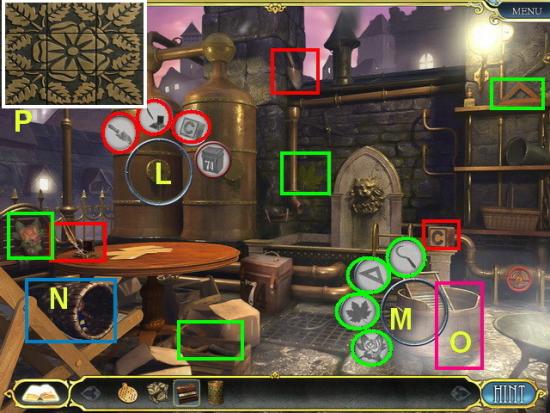
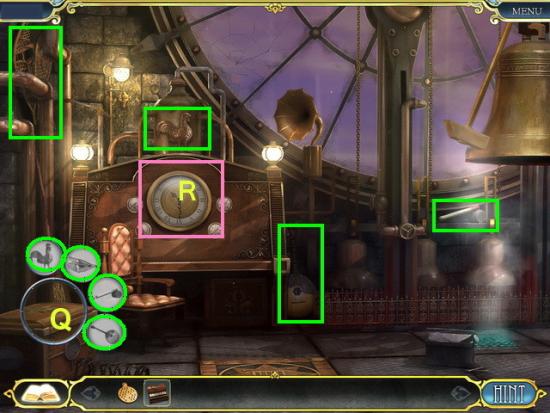
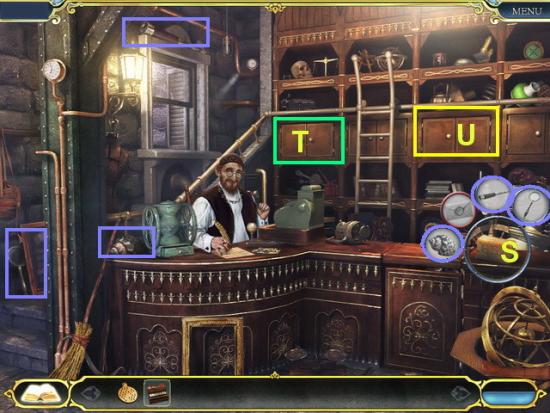
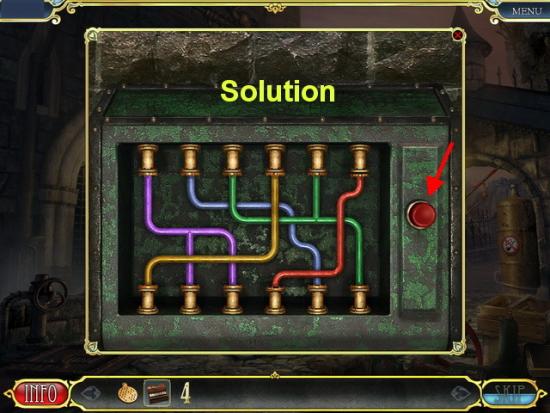
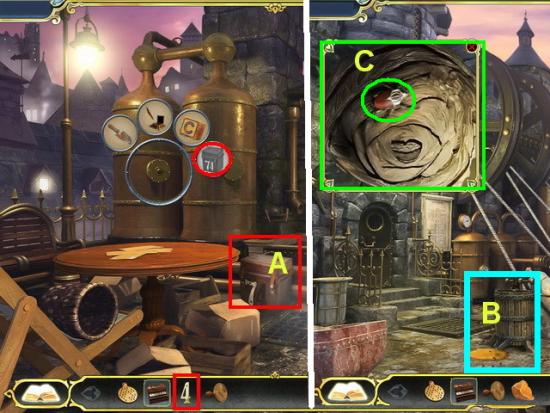
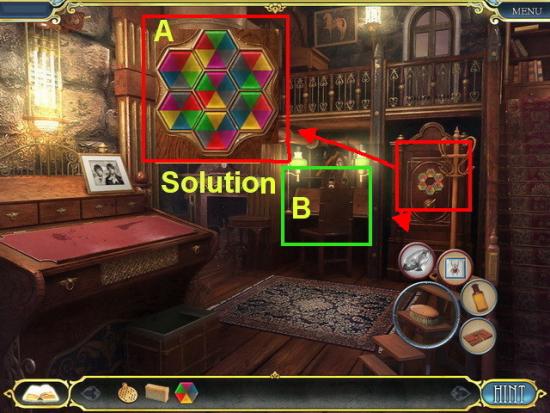
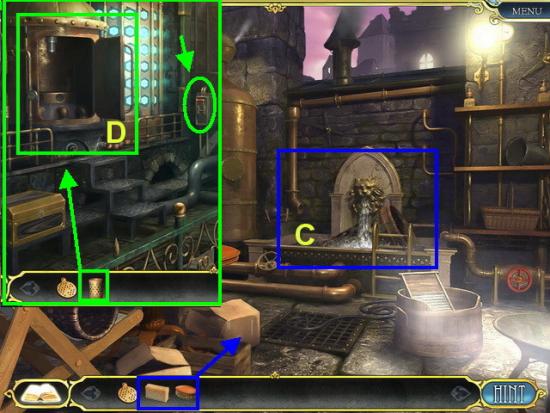
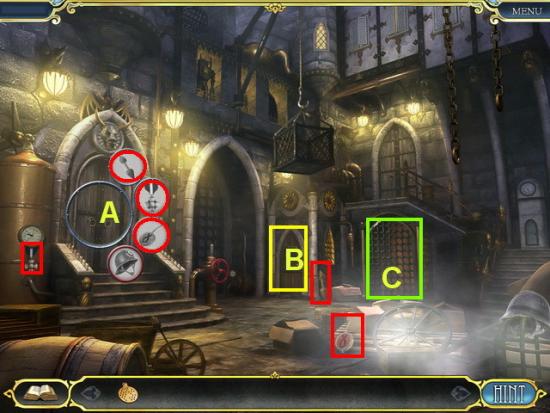
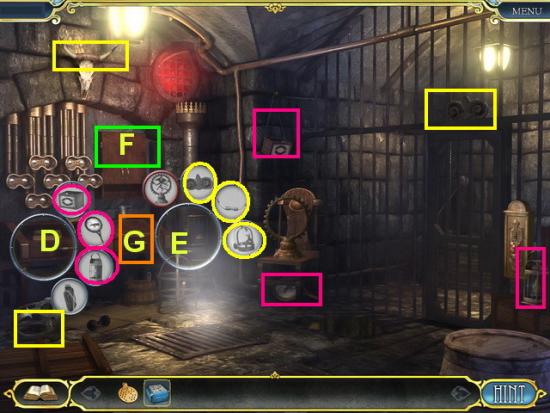
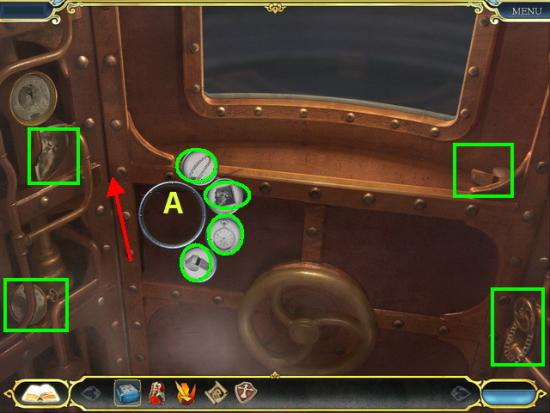
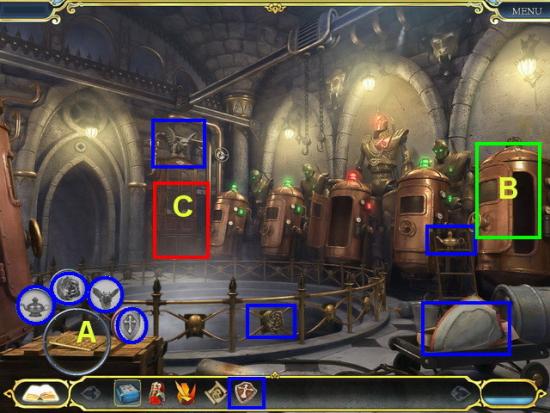
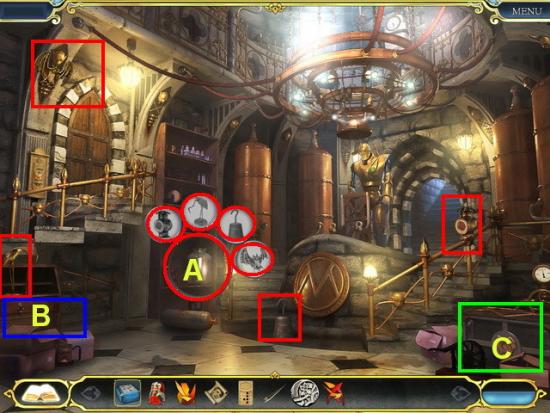
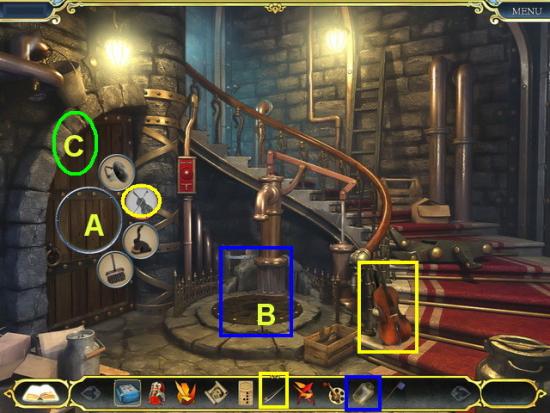
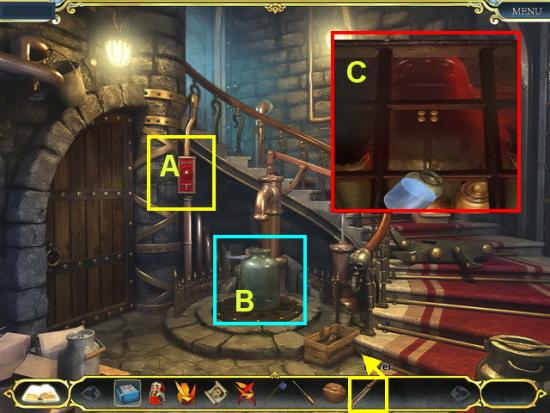
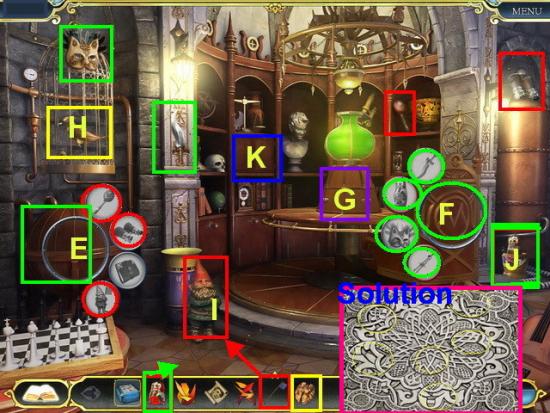
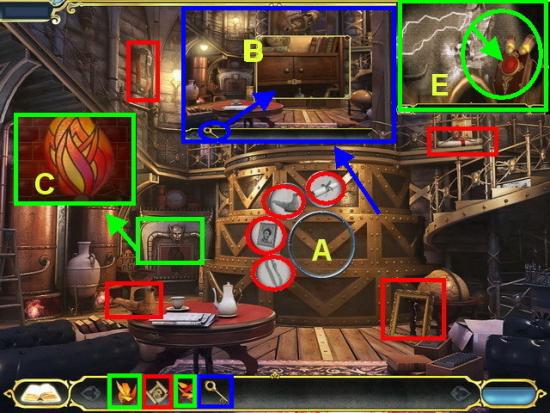
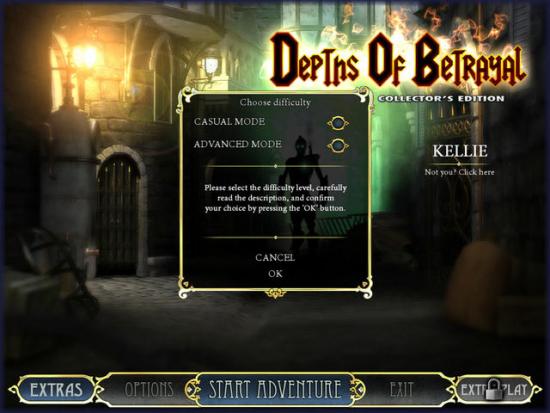
Depths of Betrayal by Artogon Games takes you along to meet Professor Grundlagen, a scientist that has accomplished the unthinkable: he has created a mechanical being and has given it life. In an unexpected tragedy the mechanical monster turns on his creator and mankind, wreaking havoc on the small town. In this brilliant adventure/hidden object game, you work to capture the monster and bring the town peace once again. Locate hidden objects, solve challenging puzzles, and master mini games in either advanced or casual game play mode. Gamezebo’s Depths of Betrayal walkthrough provides you with detailed images, tips, and latest information on how to do your best in the game.
Depths of Betrayal by Artogon Games takes you along to meet Professor Grundlagen, a scientist that has accomplished the unthinkable: he has created a mechanical being and has given it life. In an unexpected tragedy the mechanical monster turns on his creator and mankind, wreaking havoc on the small town. In this brilliant adventure/hidden object game, you work to capture the monster and bring the town peace once again. Locate hidden objects, solve challenging puzzles, and master mini games in either advanced or casual game play mode. Gamezebo’s Depths of Betrayal walkthrough provides you with detailed images, tips, and latest information on how to do your best in the game.