- Wondering how to get Monopoly GO! free rolls? Well, you’ve come to the right place. In this guide, we provide you with a bunch of tips and tricks to get some free rolls for the hit new mobile game. We’ll …
Best Roblox Horror Games to Play Right Now – Updated Weekly
By Adele Wilson
Our Best Roblox Horror Games guide features the scariest and most creative experiences to play right now on the platform!The BEST Roblox Games of The Week – Games You Need To Play!
By Sho Roberts
Our feature shares our pick for the Best Roblox Games of the week! With our feature, we guarantee you'll find something new to play!All Grades in Type Soul – Each Race Explained
By Adele Wilson
Our All Grades in Type Soul guide lists every grade in the game for all races, including how to increase your grade quickly!
Delaware St. John: The Seacliff Tragedy Walkthrough
Welcome to the Delaware St. John: The Seacliff Tragedy walkthrough on Gamezebo. Delaware St. John: The Seacliff Tragedy is a simulation game created by Big Time Games for PC. This walkthrough includes tips and tricks, helpful hints, and a strategy guide to how to complete Delaware St. John: The Seacliff Tragedy.
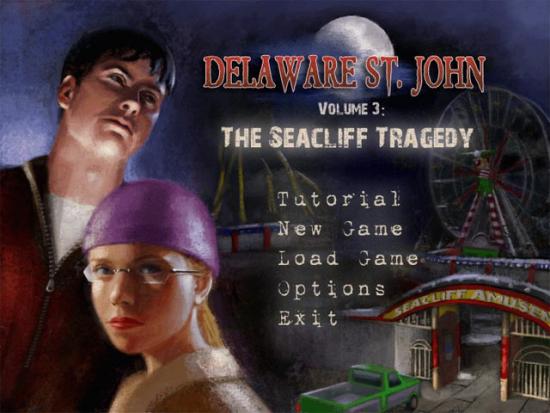
General Information
Welcome to the Delaware St. John: The Seacliff Tragedy walkthrough on Gamezebo. Delaware St. John: The Seacliff Tragedy is a simulation game created by Big Time Games for PC. This walkthrough includes tips and tricks, helpful hints, and a strategy guide to how to complete Delaware St. John: The Seacliff Tragedy.
Main Menu

Tutorial: Starts an interactive tutorial on the controls that are used in the game.
New Game: Displays the story selection screen. There are two main stories in the game: Everyone Loves a Clown and The Protector. The first story must be completed before the second story can be played.
Load Game: Displays a list of games that have been saved while playing the game. The name, date and time of the game is shown at the side of the saved games.
Options: Displays slider bars to adjust the music and voice volume. The subtitles can be toggled on or off.
Exit: Quits the game without a prompt.
Controls
Move the mouse cursor to different locations on the screen and watch as the cursor changes over hotspots. The green directional arrows are used to move to a new location. Common directions are back to half turn, left to quarter turn left, right to quarter turn right and forward to move forward. There are also directional arrows for forward-left and forward-right to move diagonally. Enter and exit arrow cursors are used when entering or exiting areas.
Other cursors in the game include a moving eye to examine objects more closely, a grasping hand to interact with an object or add it to the inventory, and a breaking door icon which is occasionally used by Delaware to kick down doors.
Inventory and VIC
The inventory main menu button and VIC are all displayed at the bottom of the screen. Items that are added to the inventory can be selected with a left click and then used on another object in the game. For example, a key may be selected from the inventory and used on a door lock. You can tell when the item has been moved over the correct object as a red border will be displayed around the item. Occasionally, an item that is found can be combined with an inventory item.
The game menu button is found at the right side of the inventory. Pressing this button displays the game menu, where there are options to continue the game from the current point, save the game, access game options or exit to the main menu.
The Voice Imagery Communicator (VIC) is displayed at the bottom-right corner of the screen. The Connect button contacts Simon for a suggestion, the Photograph button sends a photograph to Simon that can be analysed for paranormal activity and the Record button records sound in a room to be analysed by Simon.
Shadow People
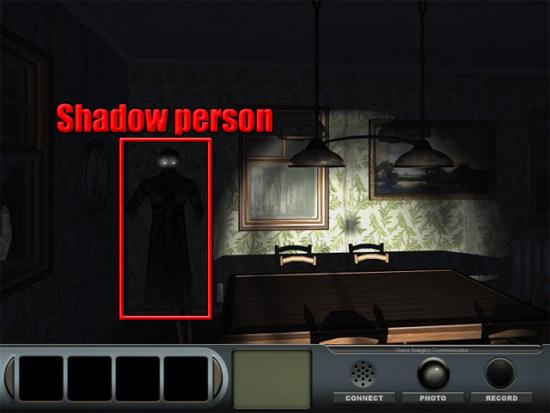
The Shadow People will appear frequently as you play through the game. Their breathing can be heard while playing as Delaware, or while playing as Kelly they can be identified by the crackling of the EMF device. As soon as they appear, quickly move the cursor over them and click to make them disappear. If you don’t do this, the character will be knocked out for a few seconds. Nothing major will happen, but the score that is shown at the end of each chapter will be lowered.
Walkthrough – Story 1: Everyone Loves a Clown
Playing as Delaware
Outside
The game starts in the amusement park. Simon will explain about the incident that occurred in the park where over a hundred people died. After Simon finishes talking, move forward and examine the structure in front:
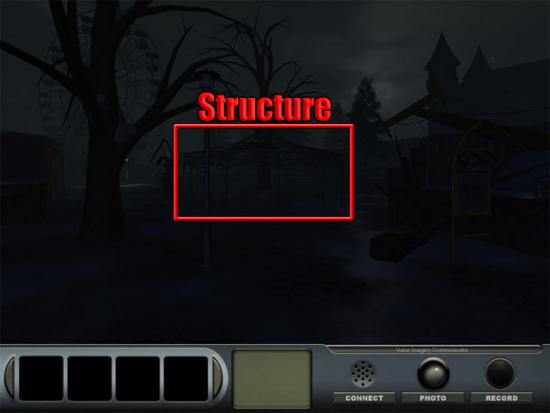
Delaware says that he will need to return to his truck to get his flashlight. Turn back, move forward and turn left. Examine the truck to see that Kelly has come along: She tells Delaware to explore the park while she sets up the equipment. Move forward, forward-right and back to see an information board. Examine the board:
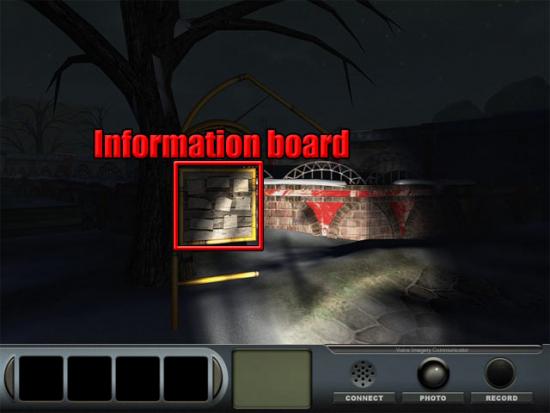
Examine the pieces of paper in the board to see that they list missing children that all disappeared within a year of one another. Exit the view of the board. Turn right, move forward three times and turn right to see the doorway to the big wheel:
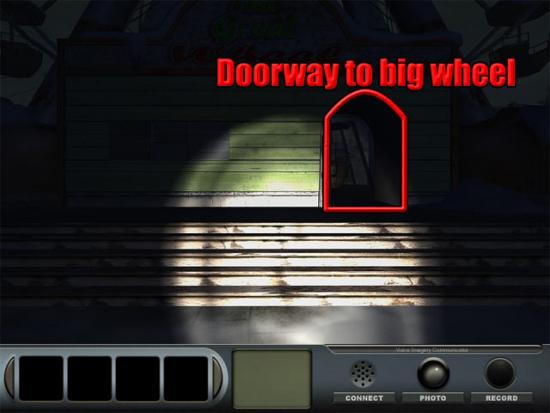
Move forward through the doorway, move forward again at the right side of the pillar and then turn left to see a ladder. Take the rung of the ladder:
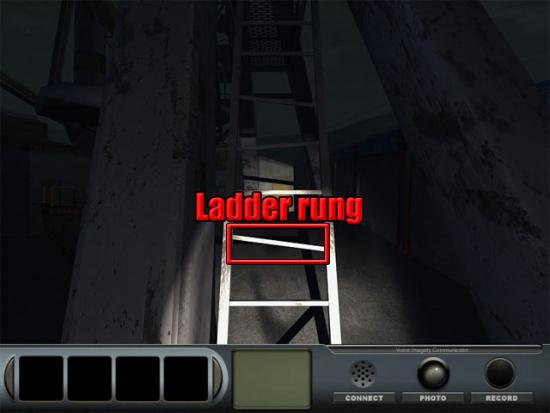
Turn left, move forward and go through the doorway to exit the big wheel. Turn right and move forward to the clown. Turn left and move forward. A cutscene is shown where Delaware shines his flashlight on a shadow person and it disappears. Move forward-left to the gates. Examine the gates and then select the gates to open them. Go through the gate to enter the front garden of the house. Simon calls at this point and Delaware tells him about the shadow person he just saw. Simon tells him that they can be scared away with bright light. Turn right, move forward and turn left to see the basement hatch:
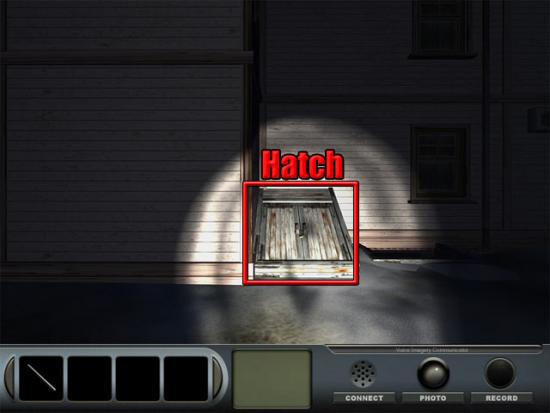
Examine the hatch. Select the ladder rung from the inventory and use it on the lock to break the chain. Open the hatch and move forward to enter the basement.
House
Turn right and select the shadow person that appears to make it disappear:
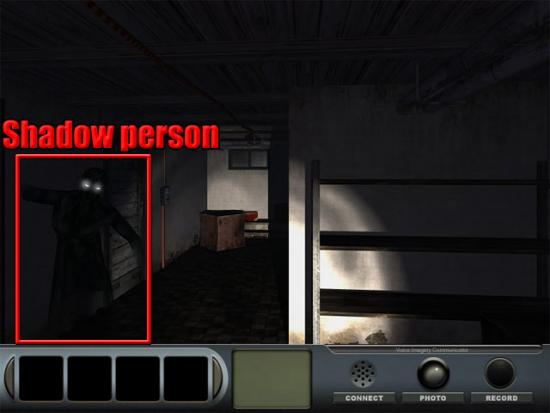
Move forward and examine the television on the table. Examine the newspaper clipping below the television:
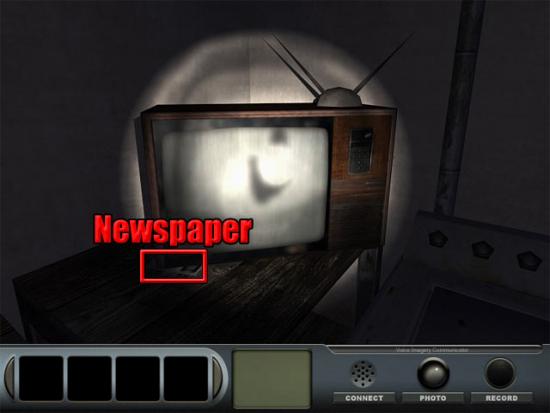
The newspaper clipping mentions that Margaret Krandall died at the amusement park funhouse when she fell off a railing. Left click to put the newspaper clipping into the inventory. Exit the view of the television. Turn back, turn right and open the door. Go through the doorway and move forward-left to hear Theodore Krandall talking on the other side of the door. He thinks Delaware may be a reporter and says that he will wait for her to return before he opens the door. Use the newspaper clipping on the door and Theodore will unlock the door. Open the door and move forward into the kitchen. Turn left, move forward, turn right and move forward into the dining room. Select the shadow person:
Turn right and examine the photograph on the table:
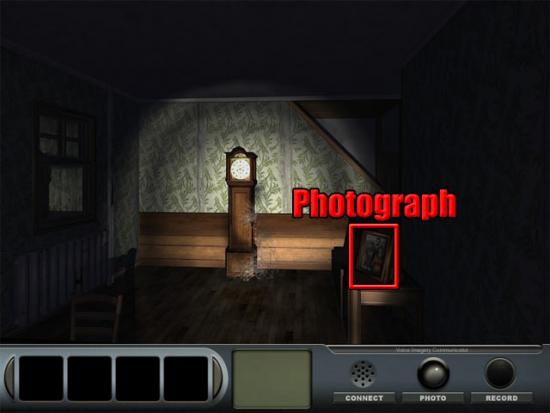
Note that there are three people in this photograph. Exit the view of the photograph. Turn right and move forward into the kitchen. Turn left and move forward twice to the living room. Turn left and go upstairs. Turn back, forward to the flower in the vase and right to the door. Try opening the door to talk to Theodore again. After he finishes talking, turn right, move forward and turn left to hear a sliding noise. Go downstairs to see that a painting has fallen to reveal a hidden safe. Examine the safe to see Roman Numerals:
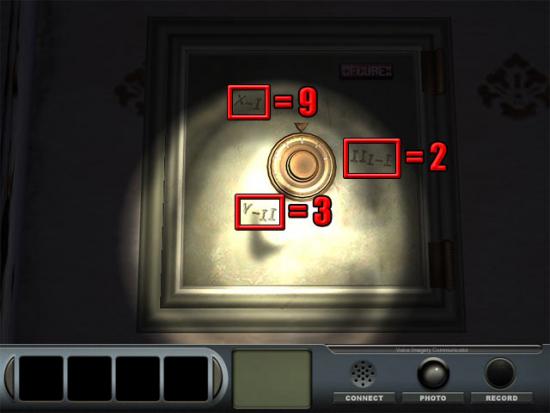
Use the dial and select the numbers 923 to open the safe. Examine the photograph on the top shelf and take it. Delaware notices that the boy in the photograph isn’t on any of the other photographs in the house. Exit the view of the safe, turn back and go upstairs. Turn back, move forward and turn right. Use the photograph on the door handle to talk to Theodore again. He says that the boy in the photograph is his son Adam, who disappeared a year before his wife’s accident. After he finishes talking, open the door and enter the bedroom. Move forward, turn left and select the shadow person:
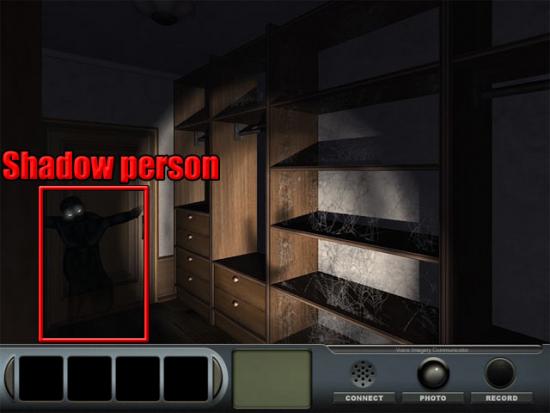
Move forward to the door. Try to open the door to talk to Theodore again: He says that the place is cursed, and when Delaware mentions the hooded person he refuses to talk and runs away. Open the door and enter the bathroom. Open the door and move forward to enter Adam’s bedroom. Turn left, move forward, turn left and open the door. Move forward to the hall. Turn right, move forward, turn right and try to open the door with the restricted area sign to talk to Theodore again: He thinks the hooded person took Adam and tells Delaware to help if he can. Open the door and move forward into the bedroom. Examine the photograph on the table:
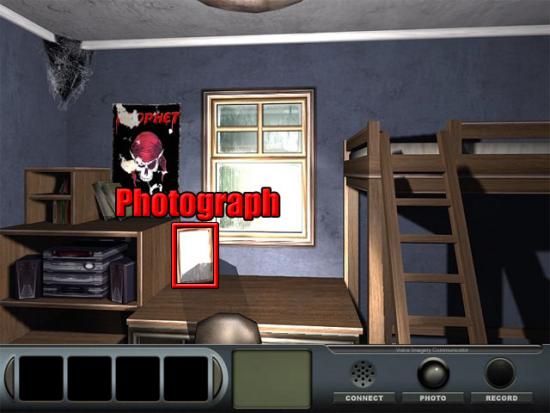
Examine the photograph again and Delaware thinks the clown may be a park employee. Exit the view of the photograph. Turn back, open the door and move forward into the hall. Go downstairs. Turn right and select the shadow person:
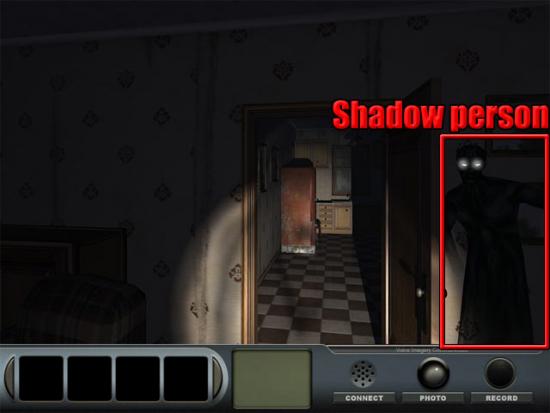
Move forward into the kitchen. Turn left and move forward through the doorway. Go downstairs, open the door and move forward to enter the basement. Turn right, move forward, turn left and go upstairs to exit the cellar.
Outside
Turn right, move forward, turn left and go through the gate. Move forward-right, turn right, move forward, turn left, move forward and turn right. Select the shadow person:
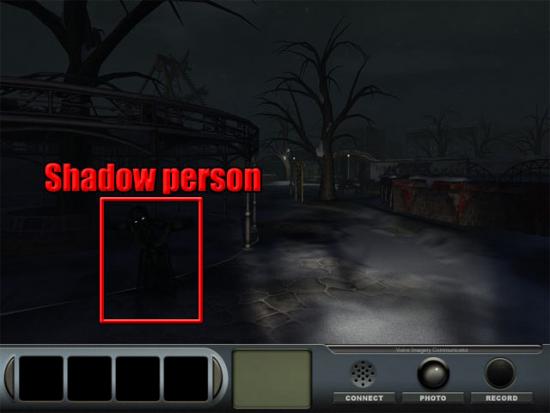
Move forward-right and forward twice to return to Kelly. Delaware tells her about what he has seen in the park so far, and the game then switches to Kelly.
Playing as Kelly
Outside
Move forward to hear EMF readings. Select the photo button on the VIC panel to send a picture to Simon. Simon will report back to say that he has either seen nothing unusual or that he has seen floating orbs. Turn left and move forward to enter the pirate ship. Turn right, move forward and turn left to the deck of the ship. Look at the seat above the right cannon:
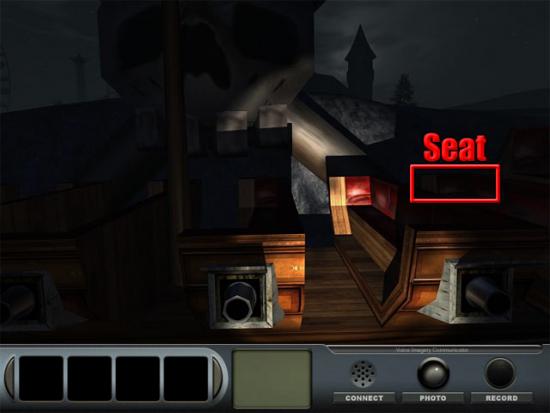
Take the can of grease on the floor:
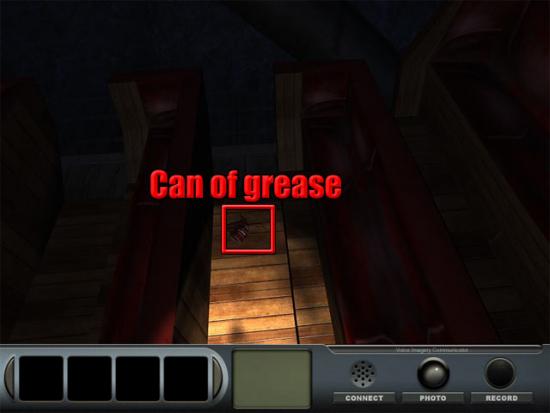
Exit the view of the seat. Turn left, move forward, turn left and move forward to exit the pirate ship. Turn left and move forward-left. Select the shadow person:
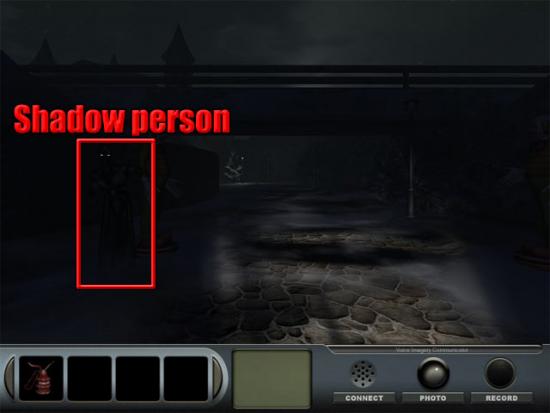
Move forward and forward-left to talk to Simon about the shadow person that was just seen. Move forward three times, turn right and move forward to see a woman walking through the rollercoaster entrance. Move forward twice and examine the rollercoaster: Kelly says that there must be an easier way up the hill. Turn back, move forward, turn left and move forward to the yellow post. Turn left and Simon will call again to ask if Delaware ever mentioned the Protector. Move forward-left to the gate. Examine the hacksaw behind the fence:
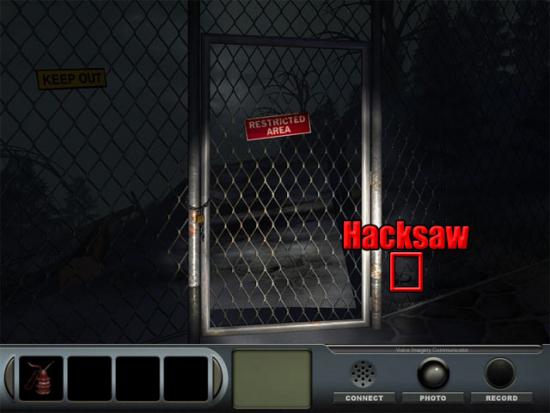
Exit the view of the hacksaw. Turn back from the gate, turn right, move forward, turn back and then move forward to the booth. Examine the left booth and then examine the shelf to see a spool of string:
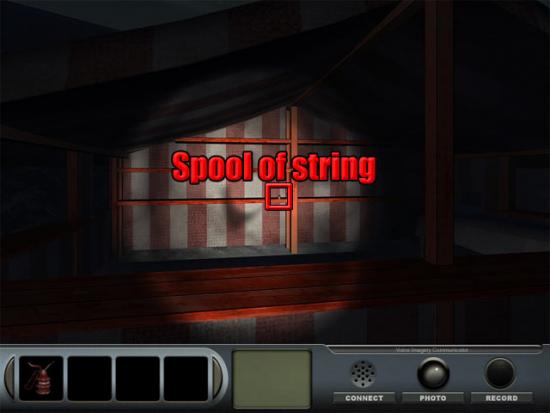
Take the spool of string. Exit the view of the shelf and the booth. Turn left and move forward to the employees only door. Select the door handle to see that it is stuck. Examine the hinges at the top-left corner of the door:
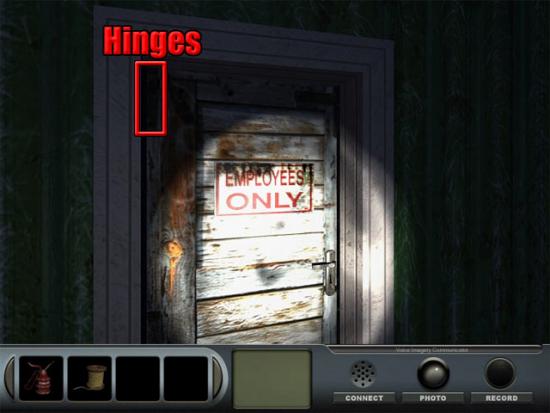
The hinges are rusted. Use the can of grease on the hinges and then select the handle to open the door. Enter the shed.
Shed
Turn right to see a vent. Move forward-left at the left side of the vent, turn back and examine the magnet on the left shelf:
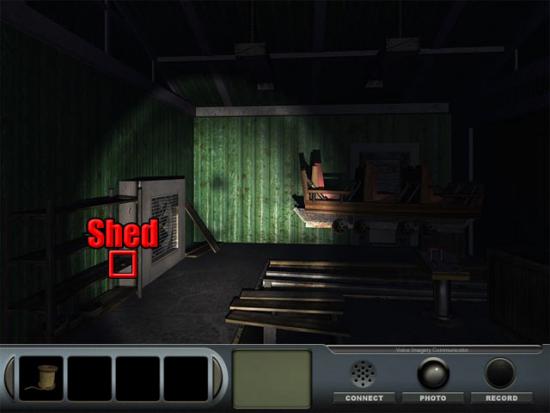
Use the spool of string on the magnet and the magnet on a string will be added to the inventory. Back away from the shelf, move forward-right and open the door. Move forward to exit the shed.
Outside
Turn right, move forward, turn right and move forward-left to the gate. Examine the hacksaw behind the fence. Use the magnet on a wire with the hacksaw:
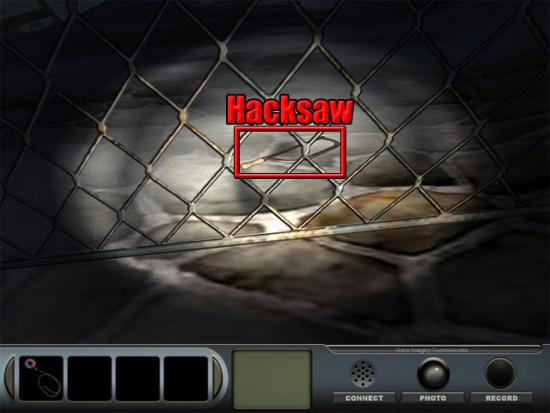
Exit the view of the fence and examine the lock on the gate. Use the hacksaw on the chain to remove the lock. Select the gate to open it. Move forward twice to watch a cutscene where Kelly meets the woman she saw earlier: She says that she is a fortune teller that used to work in the amusement park. After the conversation, turn back and move forward twice. Quarter turn right and select the shadow person:
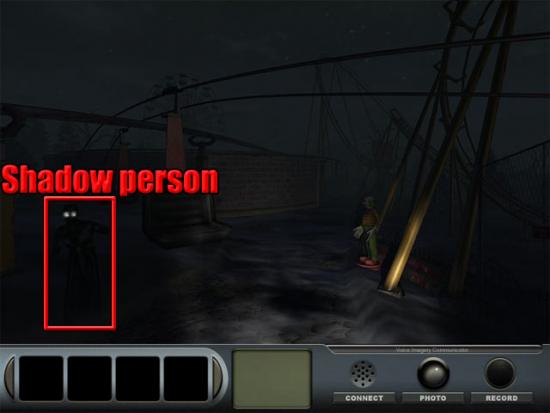
Move forward twice, turn left, move forward twice, turn left and move forward three times to the clown barrel. Turn right and move forward twice to see two clown statues. Turn back, move forward and forward-left to see two more clown statues. Turn back, quarter turn right and select the manhole cover to enter the sewer:
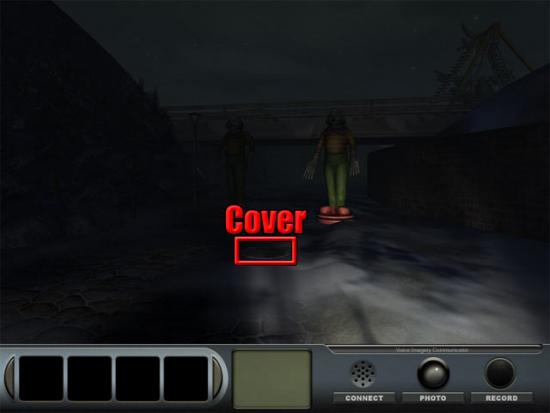
Sewer
Turn right and examine the sewer map. Exit the view of the map. Examine the wheel and turn it:
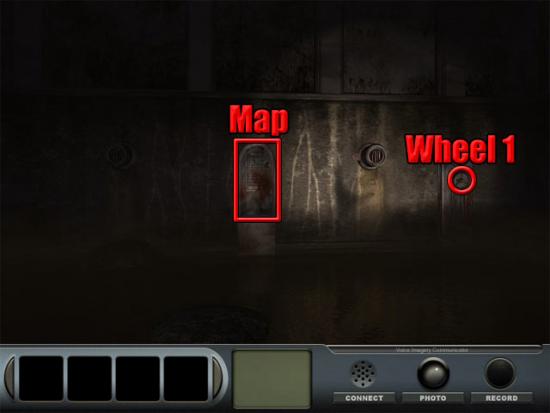
Exit the view of the wheel. Turn back and move forward through gate 1. Turn left, move forward-right, forward through gate 2, turn left, move forward-right and turn right to see three wheels. Turn wheels 2 and 4. Turn right, move forward-left, turn left, move forward, turn right, move forward through the gate, turn right, move forward and select the shadow person:
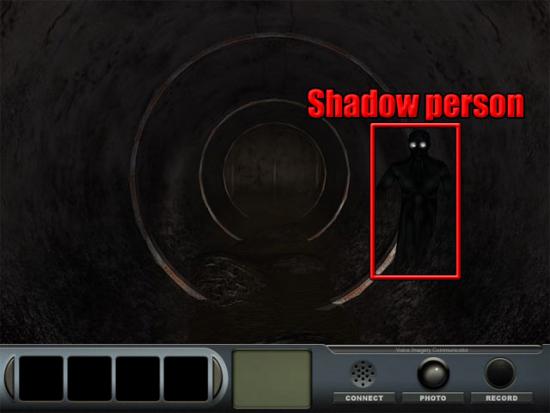
Move forward, turn right, move forward twice through gate 2, move forward-right and examine the wheels on the right. Turn wheel 6. Back away from the view of the wheels. Move forward, turn left, move forward, turn left, move forward four times, turn left, move forward twice through gate 5 and select the shadow person:
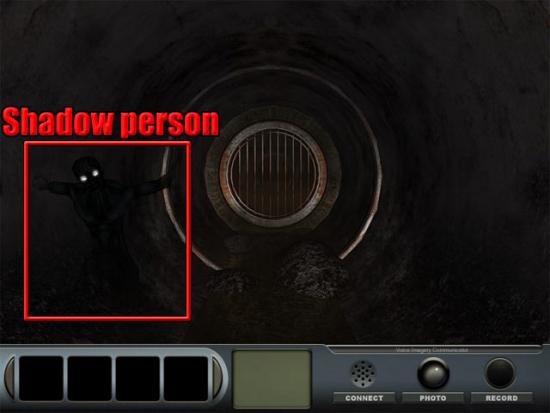
Turn right and turn wheel 7. Turn right, move forward twice, turn right, move forward, turn left, move forward through gate 7, turn right and move forward twice to see a ladder. Climb up the ladder to exit the sewer. Kelly meets Delaware at the top of the ladder and the game now switches back to him.
Playing as Delaware
Outside
Move forward, forward-left and then turn left. Examine the noticeboard:
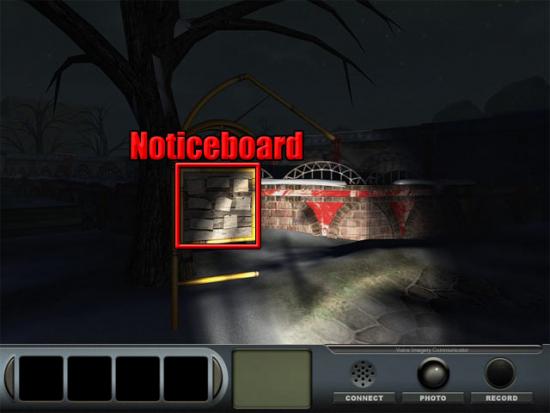
Delaware sees a vision of the funhouse where a skeleton is hidden behind one of the walls. Exit the view of the noticeboard. Turn right, move forward and turn left. Move forward to hear a clown voice talking from the funhouse. Examine the funhouse door to see that it is boarded up. Exit the view of the funhouse door and move forward at the right side of the funhouse. Turn right, move forward twice and select the shadow person:
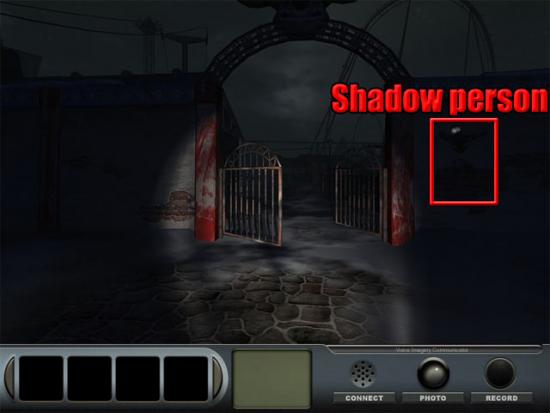
Move forward through the gate and continue forward to see a cans game on one of the booths. Examine the cans:
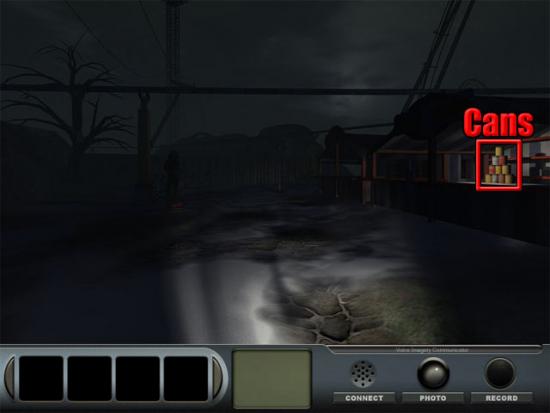
Delaware meets Carl, who agrees to give information if Delaware can knock down all of the cans. Take a ball from the bucket:
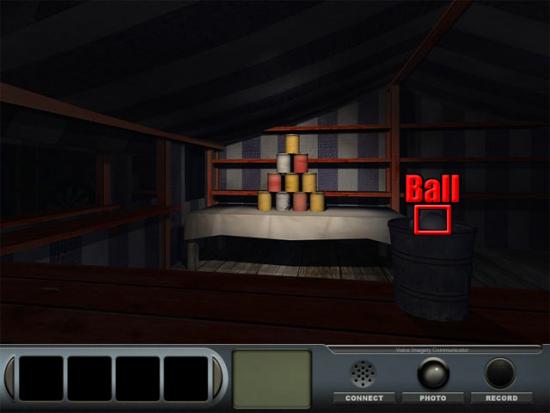
Delaware will always miss if you try to throw the normal ball at the cans, so we need to find a way of weighting the ball evenly. Exit the view of the booth. Turn right and move forward to see the carousel. Turn right and examine the sandpit to see the ghost of Adam. Examine the toy shovel in the sandpit:
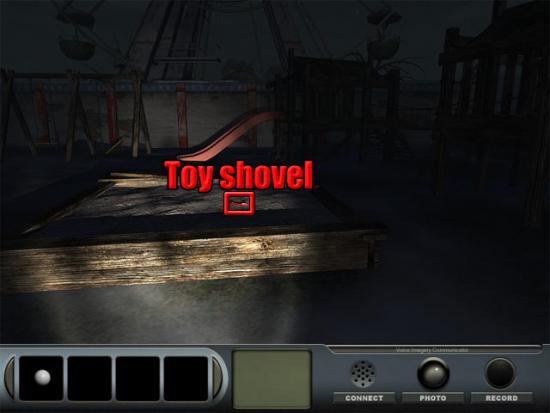
Use the ball on the shovel to fill the ball with sand. Move back twice to exit the view of the toy shovel and the sandpit. Turn right, move forward, turn right and examine the cans game. Use the ball on the cans to knock them down. After the conversation with Carl, examine the crowbar above the cans:
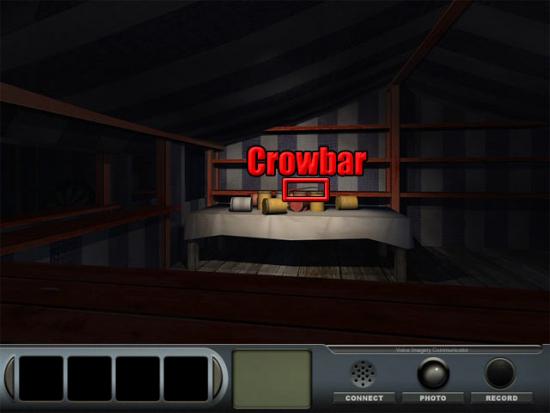
Take the crowbar. Move back twice to exit the view of the booth. Turn back and select the shadow person:
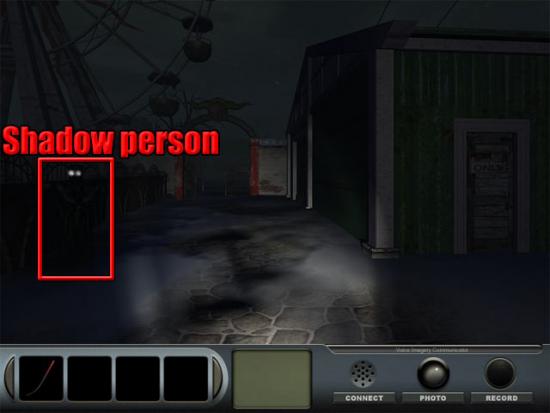
Move forward four times, turn left, move forward and turn right. Examine the funhouse door and then use the crowbar on the boards to remove them. Open the door and enter the funhouse.
Funhouse
Move forward twice, turn left, move forward and select the shadow person:
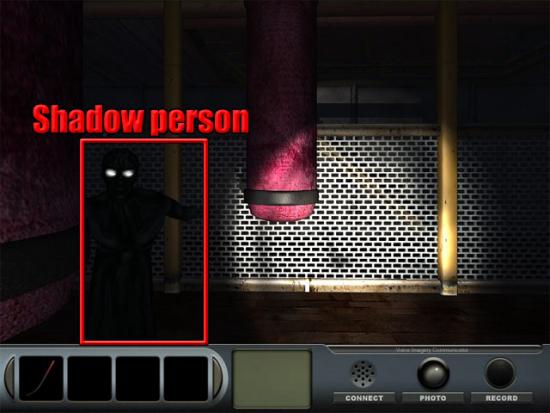
Turn left, move forward-right, forward, turn back and go upstairs. Move forward to see a series of buttons on the wall:
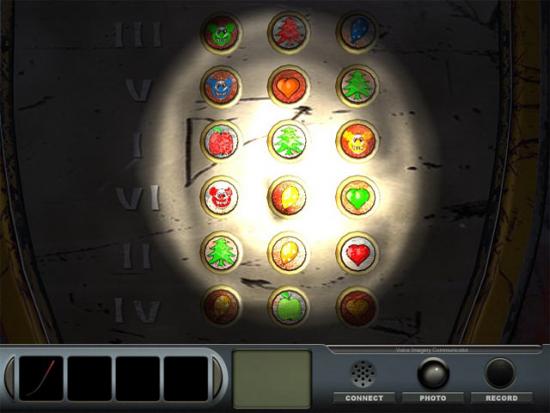
Turn left, open the red door and move forward to enter the maze. Turn right to see the door with the first set of buttons:
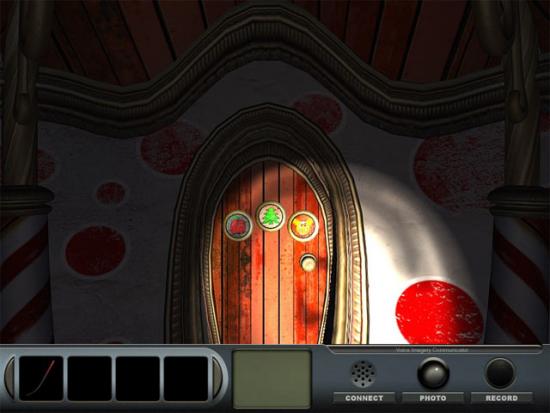
Open the door and move forward into the next room. Turn left to see the door with the second set of buttons:
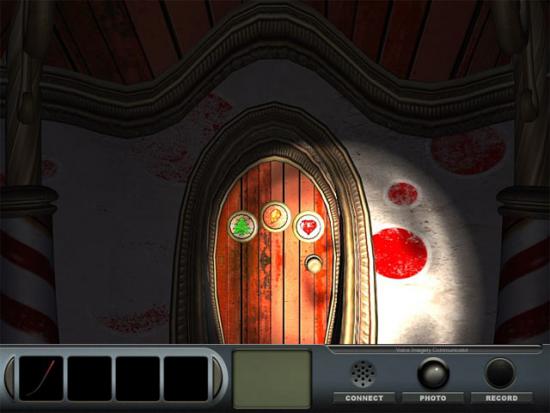
Open the door and move forward into the next room. Turn left to see the door with the third set of buttons:
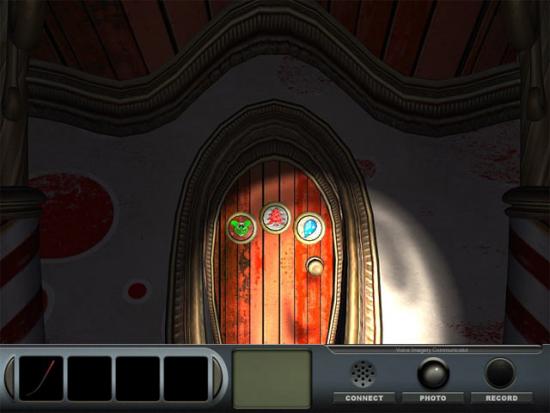
Open the door and move forward into the next room. Turn right to see the door with the fourth set of buttons:
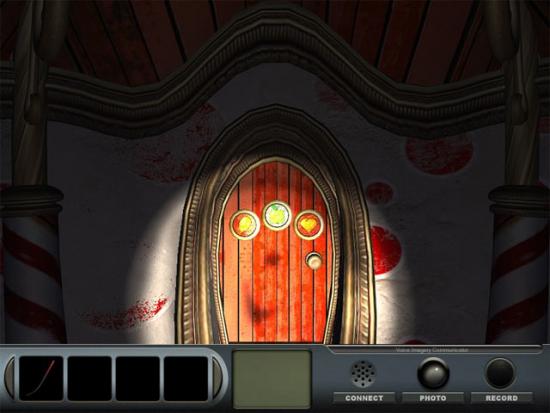
The door in front shows the fifth set of buttons:
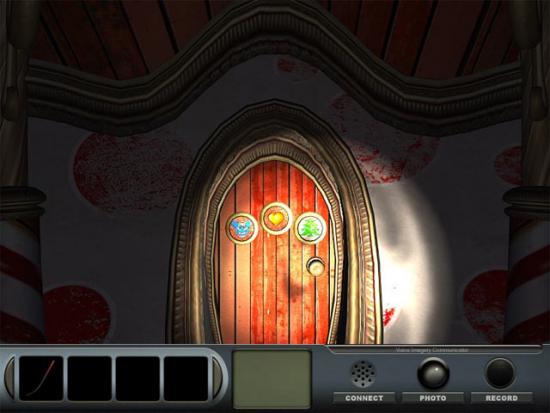
Open the door and move forward into the next room. The door in front shows the sixth set of buttons:
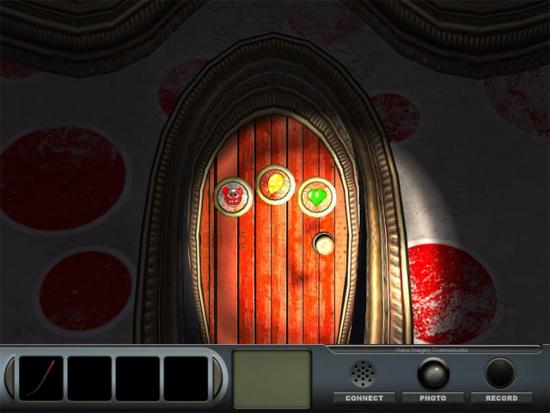
Open the door and move forward to exit the funhouse maze. Turn left and move forward to see a cutscene where Margaret talks to Delaware. After the cutscene, move forward, turn right and examine the wall at the right side of the yellow post:
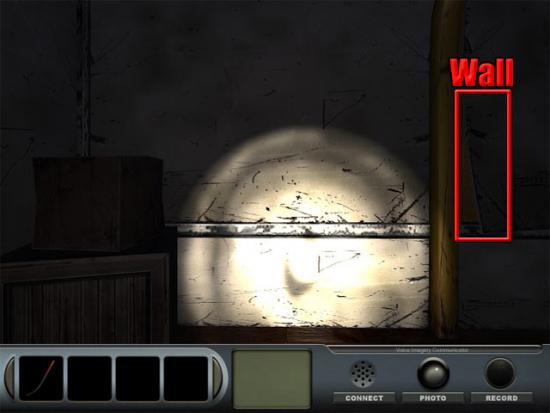
Use the crowbar on the wall to reveal a skeleton. Simon calls and Delaware brings him up to date on the latest events. Exit the view of the wall. Turn right and go down the stairs. Turn left, open the door and move forward to exit the funhouse.
Outside
Turn back, move forward at the right side of the funhouse, turn left and move forward-left to the gate. Examine the gate and select it to open it. Move forward through the gate into the front garden of the house. Turn right, move forward, turn left and examine the hatch. Open the hatch and enter the basement.
House
Delaware talks to Theodore in the basement. He says that the last time he saw Robert was when he asked him to clean the grounds near the rollercoaster. Turn back and go upstairs to exit the house.
Outside
Turn right, move forward, turn left and move forward through the gate. Move forward-right to meet Katherine. After she leaves, move forward, turn right, move forward three times, forward-right and forward twice to meet up with Kelly and complete the first story.
Story 2: The Protector
Playing as Kelly
Outside
Move forward, forward-left, forward, forward-left and forward three times to the rollercoaster. Select the shadow person:
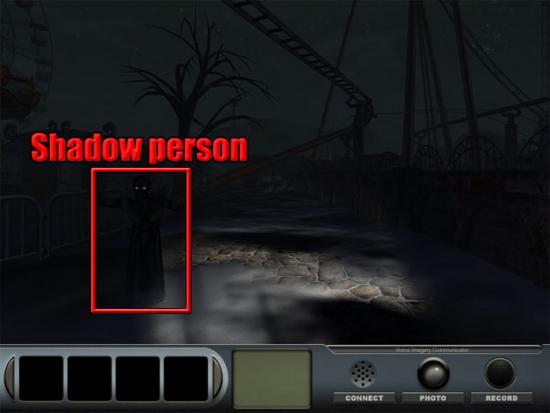
Turn right and move forward to see a cutscene with Miss Rose. She shows a symbol to Kelly and Simon identifies it as being used to break barrier spells. After the cutscene, move forward twice to the barrier and Simon will call again to ask about the latest events. Move forward to fall down into the cave.
Cave
Move forward-right, forward, turn left and move forward to see a brick wall. Turn left, move forward, turn left and take the brick:
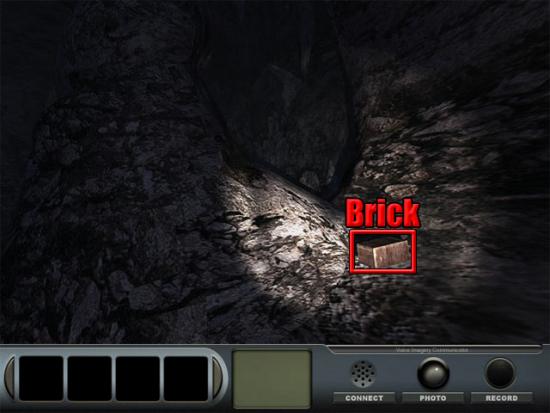
Turn left, move forward and turn left to the brick wall. Examine the wall. Use the brick on the hole in the wall. Move forward into the room to escape from the hunter.
Employee Building
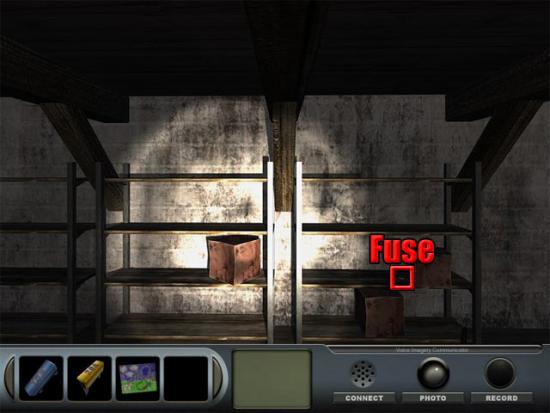
Examine the fuse on the crate:
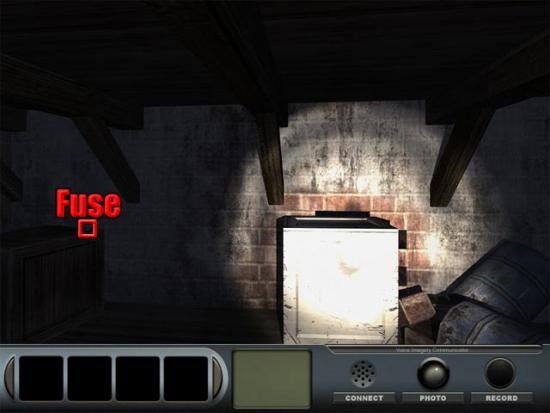
Take the blue fuse. Move back from the crate. Turn left and open the door. Move forward, turn left, move forward twice, forward-left and forward to the door at the end of the tunnel. Open the door and move forward into the room. Turn right, move forward, turn left and go upstairs. Open the door and move forward to meet up with Delaware. After the conversation with Delaware, examine the fuse on top of the crate:
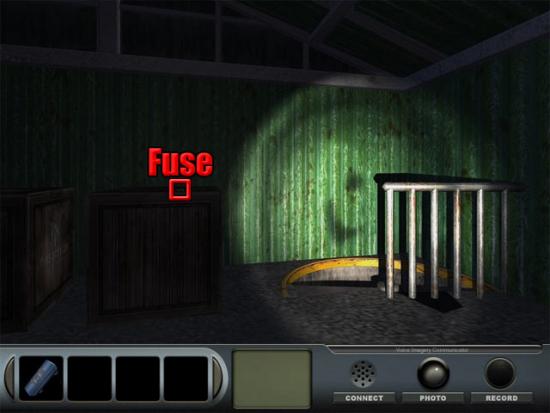
Take the yellow fuse. Exit the view of the crate. Go downstairs. Turn back. Open the door and move forward into the tunnel. Turn right and select the shadow person:
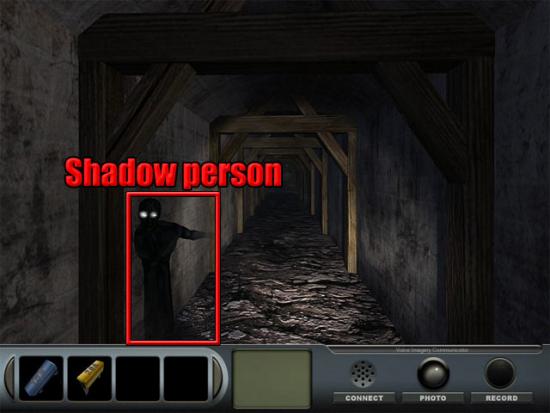
Move forward twice, turn left and open the door. Move forward into the locker room. Turn left and examine the right locker:
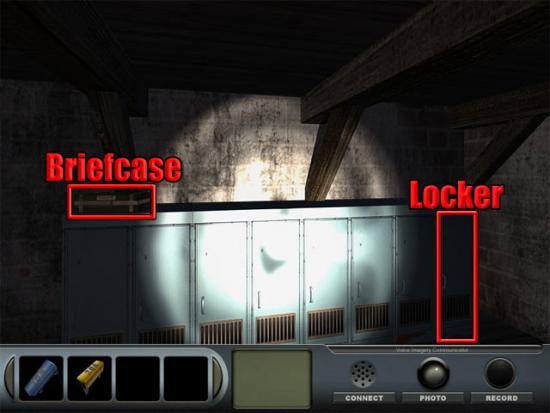
Open the locker and examine the note:
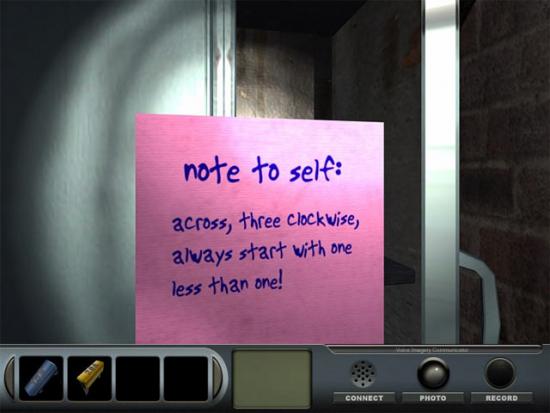
Exit the view of the note and the locker. Examine the briefcase on top of the locker. Examine the top of the briefcase to see numbers:
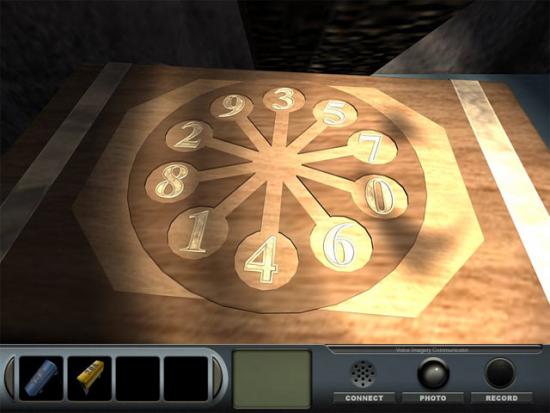
Remembering the note from the locker, we can work out the code for the briefcase. Exit the view of the top of the briefcase and examine the lock on the briefcase. Select the numbers 5984 to open the briefcase. Take the tube of face paint:
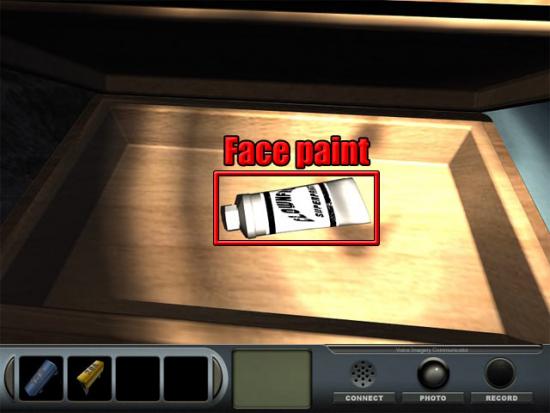
Move back twice to exit the view of the briefcase. Turn left and open the door. Move forward, turn right and move forward twice. Turn left and open the door. Move forward into the room. Move forward, turn left and open the door. Move forward through the door. Move forward once and select the shadow person:
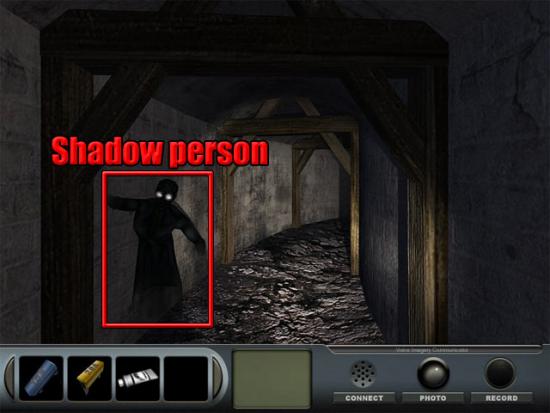
Move forward-right, forward and left to see a door. Use tube of face paint on the door to paint the symbol shown by Miss Rose:
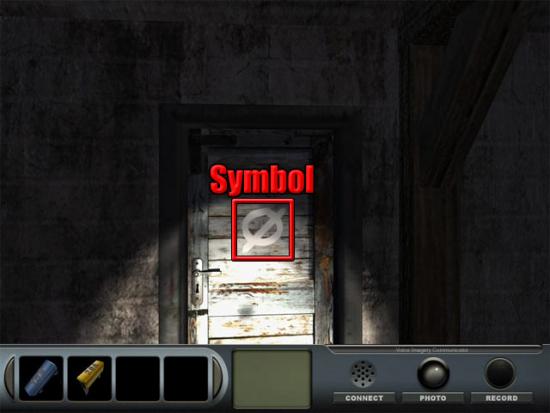
Open the door and move forward into the room. Examine the drawings on top of the desk. Examine the drawing of the boy and the hunter:
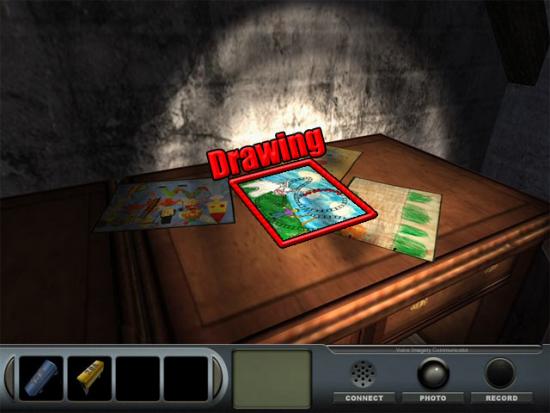
Examine the hunter on the drawing: Kelly says that she will have to show the drawing to Delaware. Take the drawing. Back away from the view of the desk. Turn left and examine the fuse on the shelf:
Take the red fuse. Back away from the view of the shelf. Turn back and examine the left box to see a skeleton. Move back, turn right and open the door. Move forward into the tunnel. Turn right, move forward, forward-left and forward. Open the door and move forward into the room. Turn right, move forward, turn left and go upstairs. Open the door and move forward to talk to Delaware.
Outside
After the conversation with Delaware, turn right, move forward-left, forward, forward-left, forward three times, turn right, move forward three times and turn left. Select the shadow person:
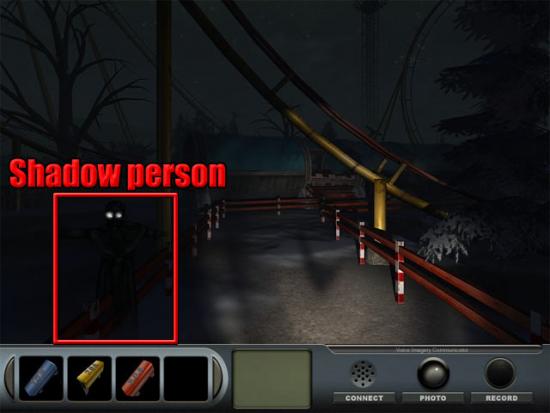
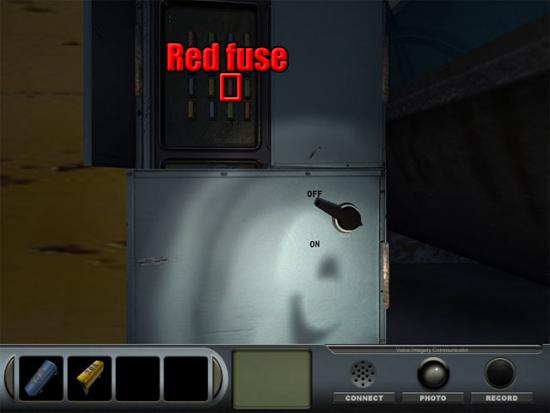
Move forward twice to pass through the rollercoaster tube. Turn right and examine the fusebox at the right side of the door. Open the top-left panel of the fusebox and put the red fuse in the slot:
Close the top-left panel. Open the top-right panel and put the yellow fuse in the slot:
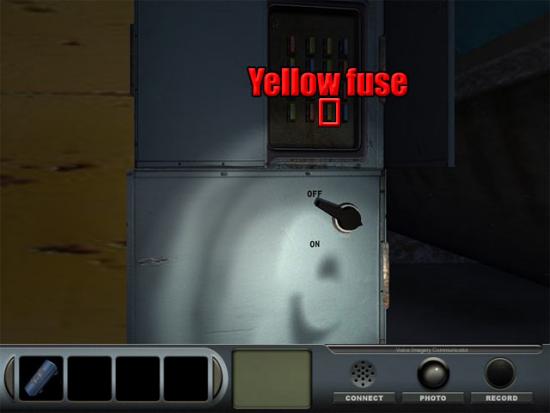
Close the top-right panel. Open the bottom-left panel and put the blue fuse in the slot:
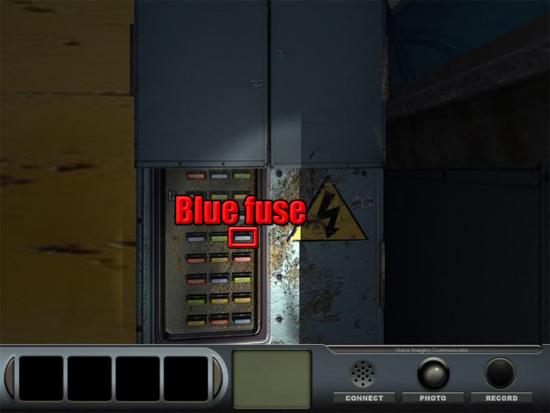
Close the bottom-left panel. Select the switch to turn the power on. Move back to exit the view of the fusebox. Move forward into the control station. Turn left and examine the right locker:
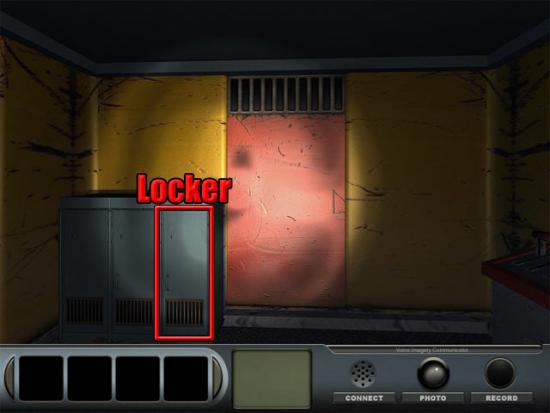
Open the locker to reveal another skeleton. Exit the view of the locker. Turn left and move forward through the door to exit the station. Turn left and move forward through the rollercoaster tube. A cutscene is shown where Kelly is kicked onto the rollercoaster by a clown. After the cutscene, the game switches to Delaware.
Playing as Delaware
Outside
Move forward and select the shadow person:
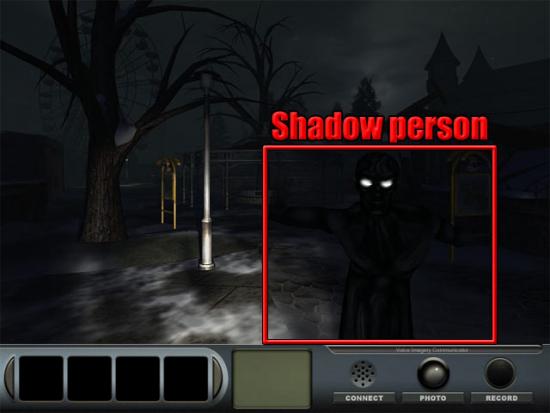
Move forward-left, forward four times, turn right, move forward three times, turn right and move forward twice to the carousel to see a cutscene where Delaware talks to Adam. After the conversation, turn back and move forward-left to talk to Simon about the Protector. Move forward and Delaware has a vision of a can and a games token. Turn left, move forward three times, turn left, move forward three times, forward-right, forward twice, turn back, move forward, forward-right and go up the stairs. Examine the can on the floor:
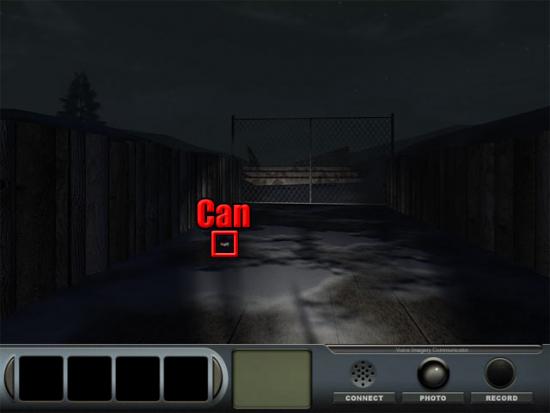
Take the games token behind the can. Back away from the view of the can. Turn back, move forward-left, forward four times, turn right, move forward four times and turn right to see the back of the booths. Examine the Skiball booth:
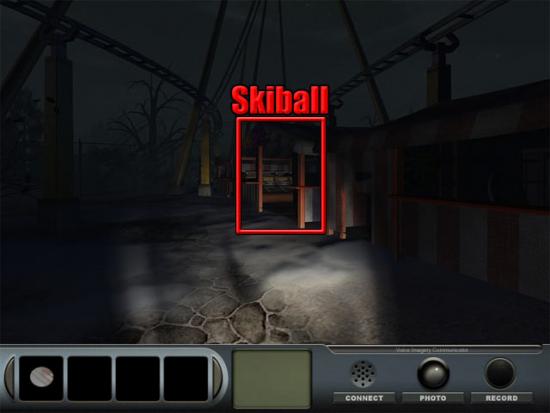
Go through the door at the left side of the Skiball booth to see the horse race game. Use the games token on the slot to see the horse race and win in the order of 6, 2, 9 and 1:
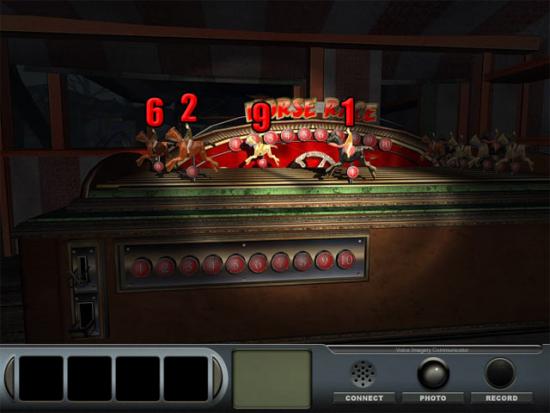
Move back twice to exit the view of the Skiball booth. Turn right, move forward, turn left and move forward twice to the carousel. Examine the control panel at the left side of the carousel:
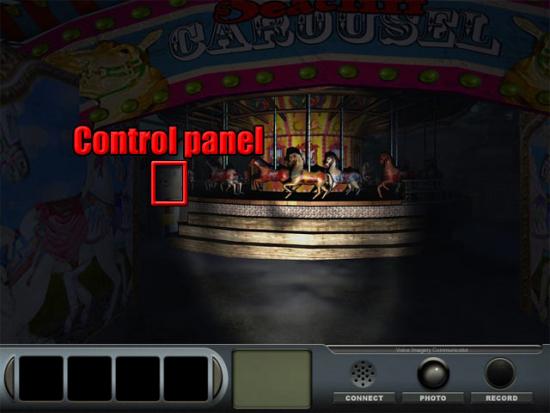
Open the control panel and enter the numbers 6291 to turn on the carousel. After the cutscene, Adam tells Delaware to look in locker 16 for something he may be able to use. Turn back, move forward-left, forward, turn left, move forward three times, turn left, move forward three times, forward-right and forward twice to the amusement park entrance. Examine the lockers and then examine locker 16:
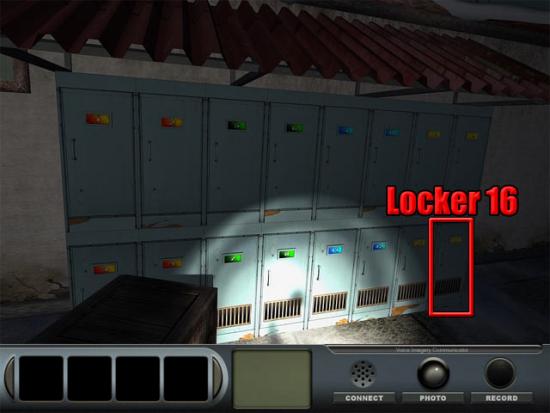
Open the locker and select the map to see an X near the Gravity Drop ride:
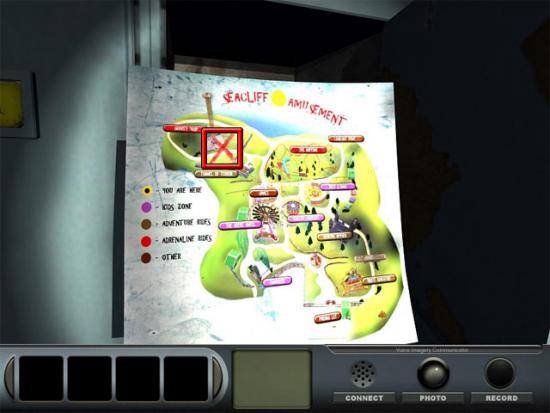
Exit the view of the map and then move back twice to exit the view of the lockers. Turn back, move forward, forward-left, forward four times, turn right, move forward five times, forward-left and forward through the gate to the Gravity Drop. Select the shadow person:
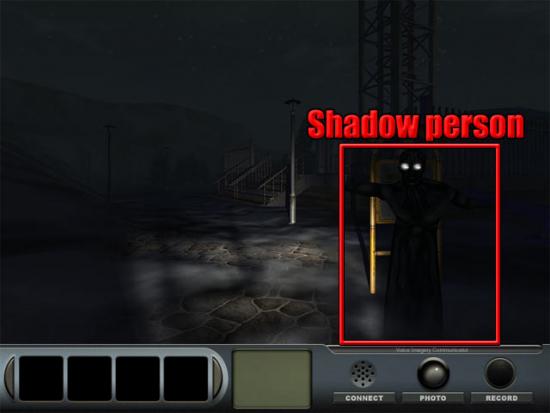
Examine the map to see an X by the Great Wheel ride:
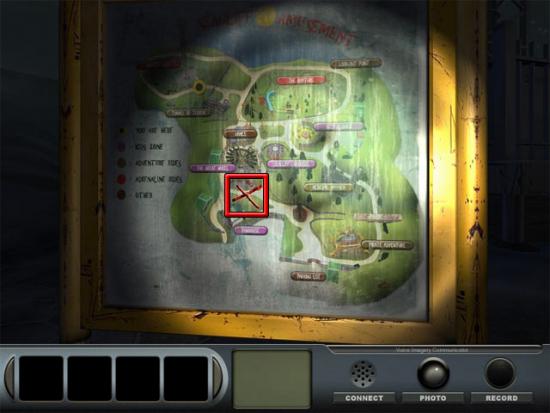
Exit the view of the map. Turn back, move forward through the gate, turn right, move forward at the left side of the lamppost, move forward five times, turn left, move forward, turn right and examine the map to see an X by the carousel:
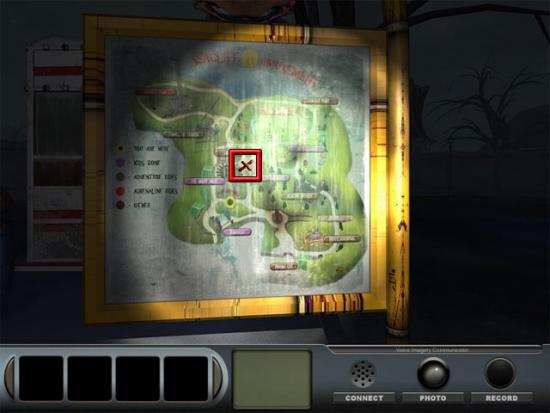
Exit the view of the map. Turn right, move forward, turn right, move forward three times, turn right, move forward twice, turn right and examine the map to see an X by the Tunnel of Terror:
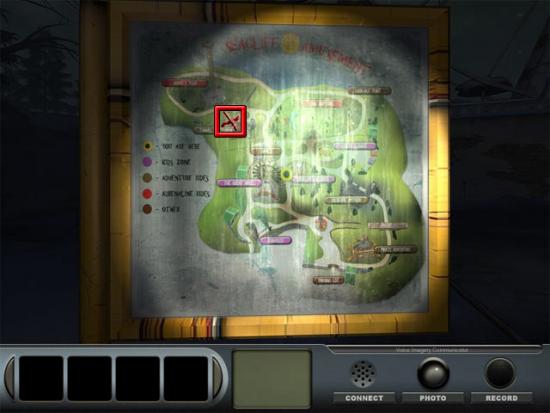
Exit the view of the map. Turn right, move forward-left, forward, turn right, move forward twice, turn left and move forward to the Tunnel of Terror entrance. Examine the map to see a question mark by the Tunnel of Terror:
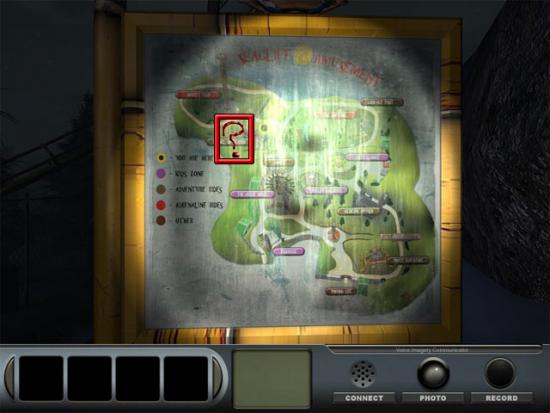
Exit the view of the map. Move forward-right, forward-left and select the shadow person:
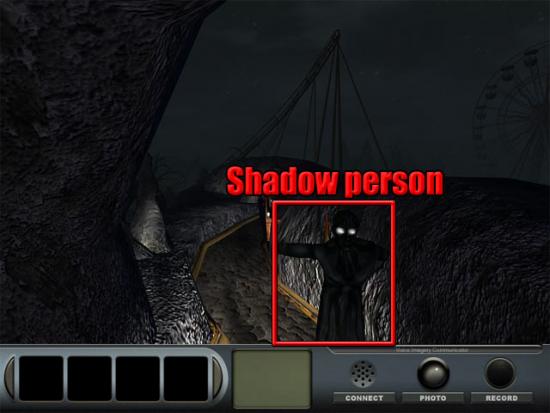
Move forward-right to board the train.
Tunnel of Terror
After the train stops, turn back, move forward-right, forward and select the shadow person:
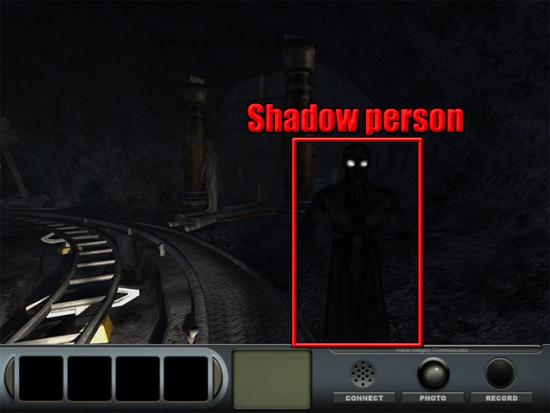
Move forward, turn left, move forward twice, forward-right and forward to see a cutscene where Delaware meets Cindy. After the conversation, turn left, move forward, turn right and examine the coffin. Open the coffin to see two skeletons. Move back to exit the view of the coffin. Turn back, move forward-right, forward, forward-left, turn right and move forward into the dressing room. Move forward, turn left and examine the letter on Cindy’s desk:
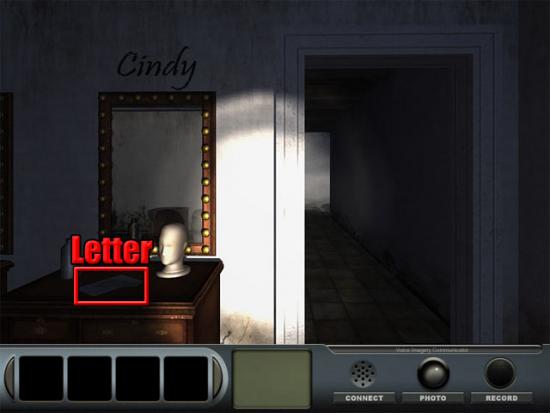
Examine the letter and select it to read about the bracelet. Delaware has a vision of a bracelet on a table near a clown toy. Exit the view of the letter. Move forward-right through the doorway, forward, turn left and move forward to the door. Open the door and move forward to go outside.
Outside
Move forward, turn right and examine the Skiball booth. Move forward into the Skiball booth to see the clown toys from Delaware’s most recent vision. Examine the clown toys:
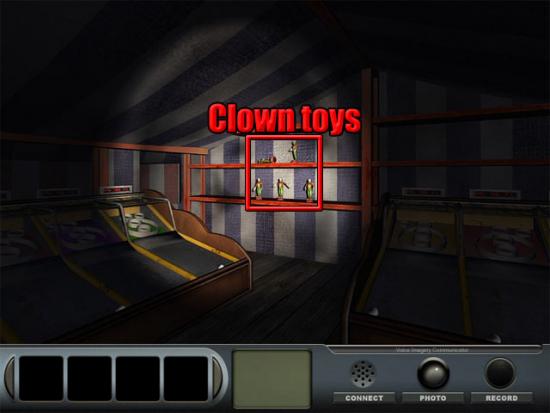
Examine the top shelf to see the bracelet. Take the bracelet:
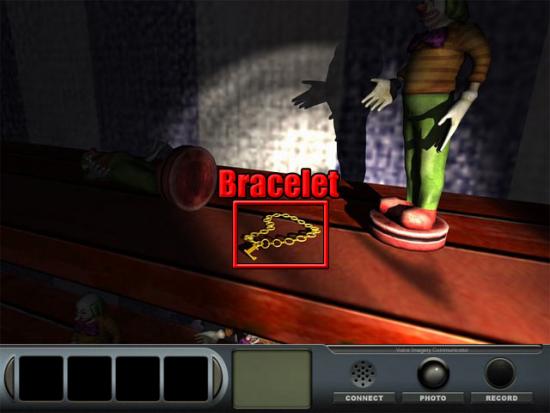
A cutscene is shown where Carl tells Delaware to fix the game booths. Move back four times to exit the Skiball booth. Examine the dart booth at the right side of the Skiball booth to see that one of the darts is missing. Delaware has a vision of a clown statue with a dart in its eye. Back away from the dart booth. Turn left, move forward, turn left, move forward, turn right and examine the clown statue that was seen in Delaware’s vision:
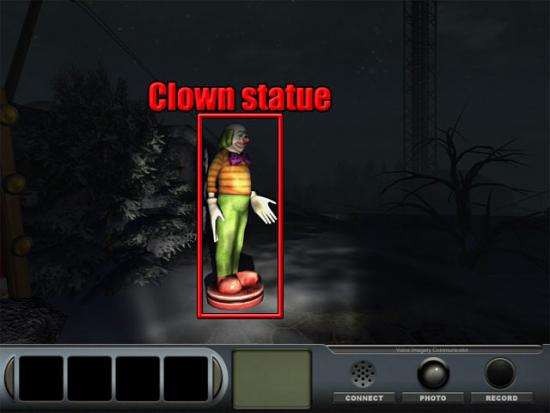
Take the dart from the eye of the clown statue to find another skeleton. Back away from the clown statue. Turn back, move forward, turn right, move forward, turn left and examine the dart booth. Use the dart on the dartboard. Exit the view of the dart booth and examine the Skiball booth. Enter the Skiball booth and Carl says that the machine is missing one of the balls. Delaware has a vision of a ball on the bench. Move back twice to exit the view of the Skiball booth. Turn right, move forward three times, turn right to see two benches. Examine the left bench:
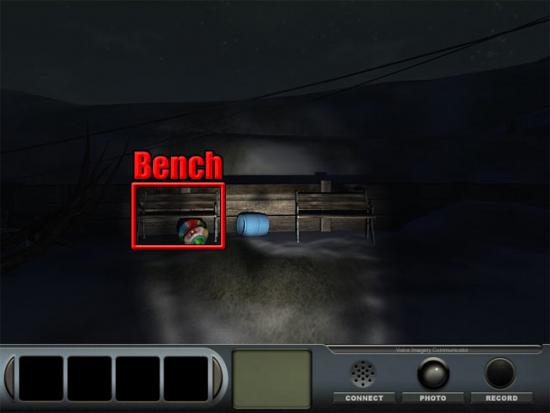
Take the ball from the bench. Exit the view of the bench. Turn right, move forward three times, turn right and examine the Skiball booth. Move forward into the Skiball booth and use the ball on the middle-left Skiball machine:
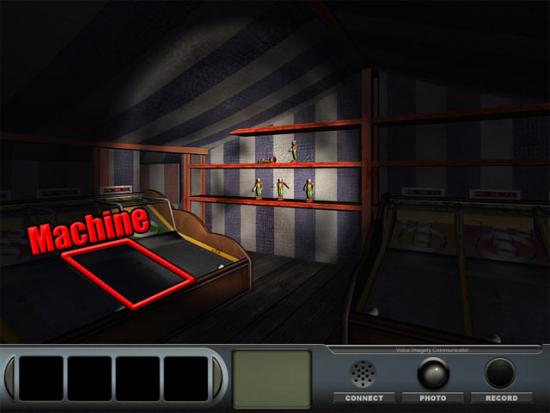
Move back twice to exit the view of the Skiball booth. Turn right, move forward, turn left, move forward and turn left to see the bean bags booth. Examine the bean bags booth and Carl will say that a bean bag is missing. Delaware has a vision of the beanbag below the mummy in the Tunnel of Terror. Exit the view of the bean bags booth. Turn left, move forward, turn left and examine the employees only door. Open the door and move forward into the building.
Employee Building
Move forward, turn right, move forward-left, forward to the dressing room, turn right and move forward twice to the tunnel in the Tunnel of Terror.
Tunnel of Terror
Turn left to hear a scream. Move forward-right and select the shadow person:
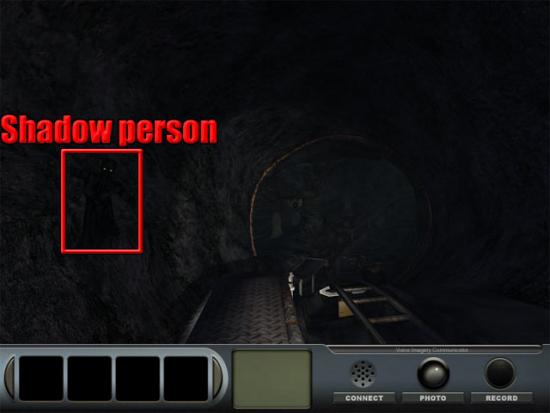
Move forward, turn left, move forward, turn right, move forward, turn right, move forward-left, forward three times and turn left to see the mummy. Examine the bean bag below the mummy:
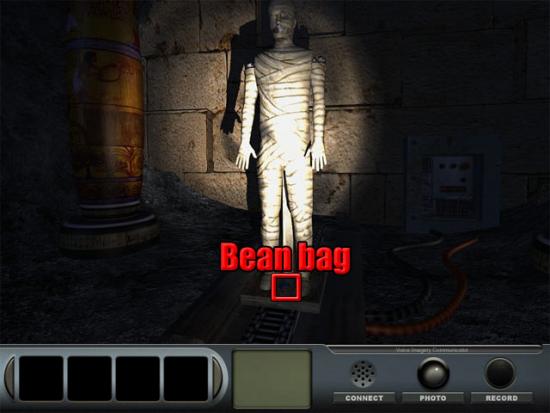
Take the bean bag. Exit the view of the mummy. Turn left, move forward twice, forward-right, forward, turn left, move forward, turn left, move forward-right, forward, forward-left, right and forward to the dressing room.
Employee Building
Move forward, left, forward-right, forward, turn left and move forward to the door. Open the door and move forward to exit the employee building.
Outside
Turn right, move forward, turn left and examine the bean bag booth. Use the bean bag on the counter of the booth and Carl will say that the bracelet can now be taken. Exit the view of the booth. Turn left, move forward, turn right, move forward, turn right and examine the Skiball booth. Enter the Skiball booth and then examine the shelf with the clown statues. Examine the top shelf and take the bracelet. Move back four times to exit the view of the Skiball booth. Turn right, move forward and examine the employees only door. Open the door and move forward into the building.
Employee Building
Move forward, turn right, move forward-left and forward to the dressing room. Turn right and move forward twice to the tunnel in the Tunnel of Terror.
Tunnel of Terror
Turn left to hear a scream. Move forward-right, forward, turn left, move forward, turn right, move forward, turn left and give the bracelet to Cindy:
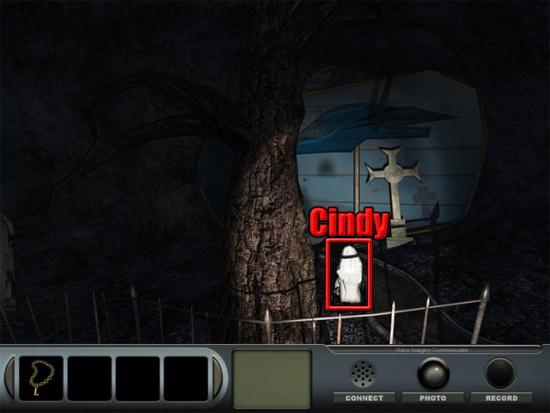
A cutscene is shown where Cindy gives a key to Delaware. Turn left, move forward, turn left, move forward-right, forward, forward-left, right and forward twice to the dressing room.
Employee Building
Move forward, turn left, move forward-right, forward, turn left and move forward to the door. Open the door and move forward to exit the employee building.
Outside
Turn back and move forward four times and forward-left to the gate. Examine the gate and then open it. Move forward into the front garden of the house. Turn right, move forward and examine the door to the shed. Use the key on the lock. Open the door and examine the top of the crate. Examine the spell sheet:
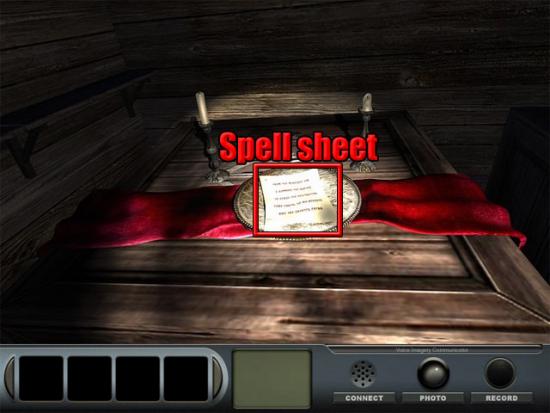
A cutscene is shown where the sheet blows away. After the conversation with Simon, move back three times to exit the shed. Turn back, move forward, turn left and move forward to see the clown run away at the side of the green building. Move forward-right, forward, turn back and examine the door on the green building:
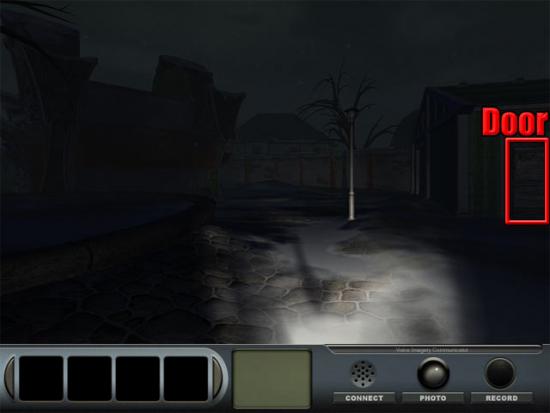
Select the door above the sign to break it down. Enter the building.
Green Building
Examine the top of the crate to see an announcement about keys for the park. Exit the view of the announcement and examine the board on the wall:
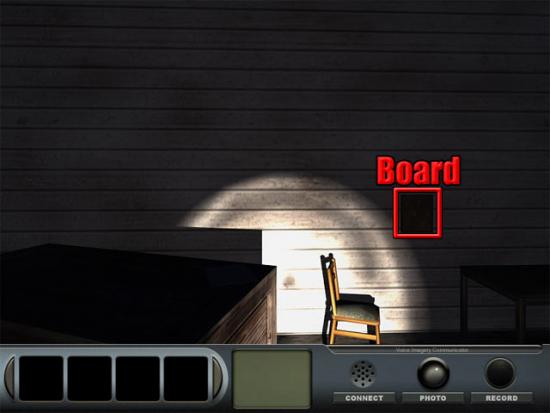
Take yellow key 4 from the board:
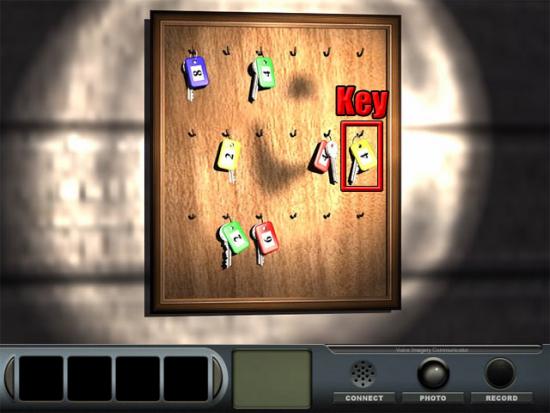
Move back to exit the view of the board. Turn right and examine the chest. Open the chest to reveal another skeleton. Exit the view of the chest. Turn right, open the door and move forward to go outside.
Outside
Move forward three times, turn back and examine the employee door. Open the door and move forward to enter the employee building.
Employee Building
Turn right and examine the elevator. Examine the control panel and then use the yellow key on the lock. Press the bottom green button to start moving down.
Tunnel of Terror
After arriving in the tunnel, Delaware will have a vision of a key. Turn left and move forward three times to the wall to see a message. Turn back, move forward and select the shadow person:
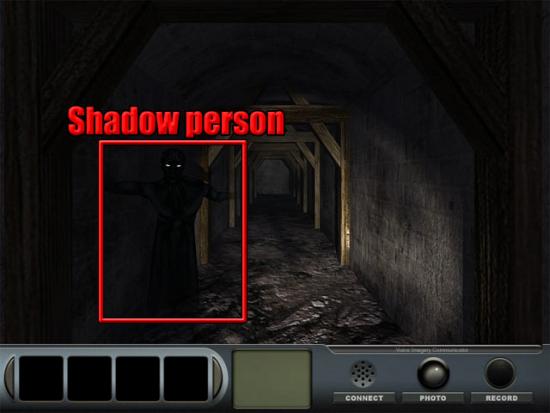
Move forward twice, turn left and move forward twice. Turn left and select the area above the handle on the door to look down:
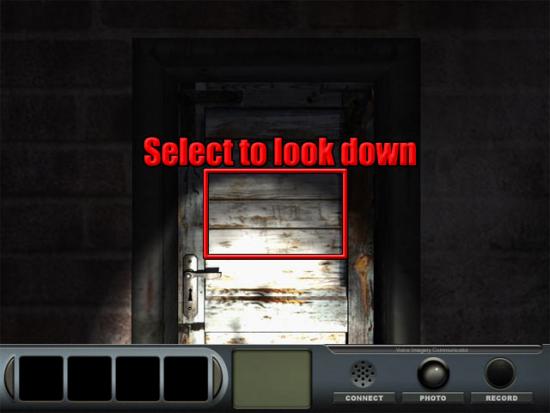
Examine the key below the door. Move back from the view of the key. Turn left and select the shadow person:
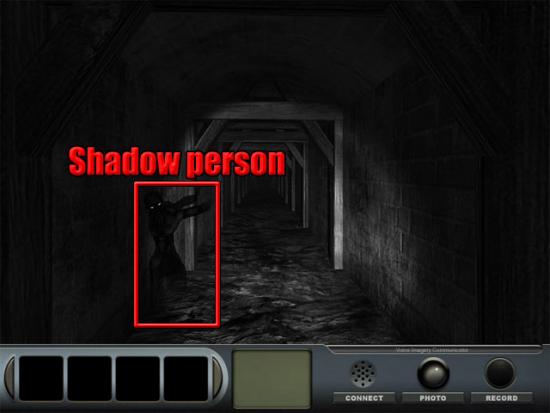
Move forward twice, turn right, move forward twice and turn left. Break down the door and move forward into the room. Turn left. Examine the wire hanger:
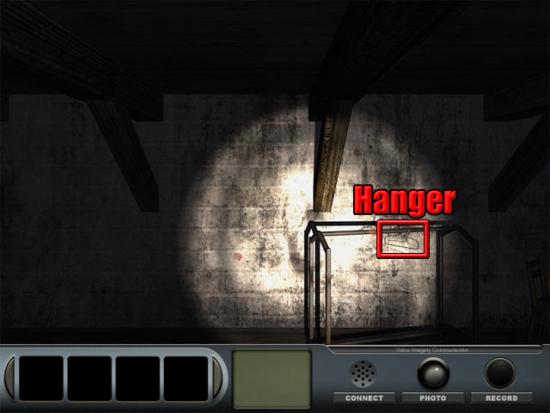
Take the wire hanger. Exit the view of the rack. Turn left. Open the door and move forward. Turn right and move forward twice, turn left and move forward twice. Turn left and select the door again to look down. Use the wire hanger on the key to take it:
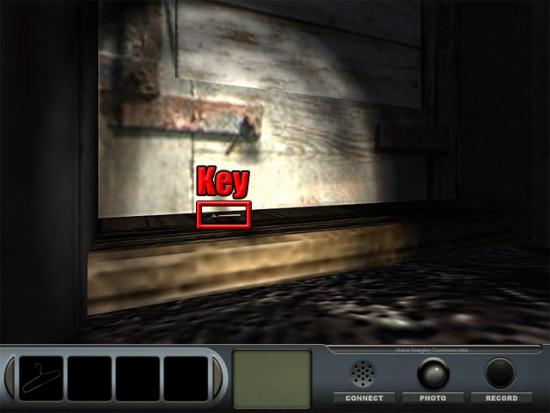
Exit the view of the door. Turn left, move forward twice, turn right, move forward, turn right. Use the key on the door. Open the door and move forward into the room. Examine the wreckage to find the eighth skeleton. Exit the view of the skeleton. Turn back. Open the door and move forward. Turn right and move forward twice to the wall to see it disappear. Move forward, turn right and move forward to see a cutscene where Delaware sees Robert. After the cutscene, move forward four times, turn right and enter the elevator. Turn left and open the door. Move forward to go outside.
Outside
Turn back, move forward four times and forward-left. Examine the gate and then open it. Move forward into the front garden of the house, turn right, move forward and turn left. Examine the hatch. Open the hatch and move forward into the basement to complete the game.
More articles...
Monopoly GO! Free Rolls – Links For Free Dice
By Glen Fox
Wondering how to get Monopoly GO! free rolls? Well, you’ve come to the right place. In this guide, we provide you with a bunch of tips and tricks to get some free rolls for the hit new mobile game. We’ll …Best Roblox Horror Games to Play Right Now – Updated Weekly
By Adele Wilson
Our Best Roblox Horror Games guide features the scariest and most creative experiences to play right now on the platform!The BEST Roblox Games of The Week – Games You Need To Play!
By Sho Roberts
Our feature shares our pick for the Best Roblox Games of the week! With our feature, we guarantee you'll find something new to play!All Grades in Type Soul – Each Race Explained
By Adele Wilson
Our All Grades in Type Soul guide lists every grade in the game for all races, including how to increase your grade quickly!


