- Wondering how to get Monopoly GO! free rolls? Well, you’ve come to the right place. In this guide, we provide you with a bunch of tips and tricks to get some free rolls for the hit new mobile game. We’ll …
Best Roblox Horror Games to Play Right Now – Updated Weekly
By Adele Wilson
Our Best Roblox Horror Games guide features the scariest and most creative experiences to play right now on the platform!The BEST Roblox Games of The Week – Games You Need To Play!
By Sho Roberts
Our feature shares our pick for the Best Roblox Games of the week! With our feature, we guarantee you'll find something new to play!All Grades in Type Soul – Each Race Explained
By Adele Wilson
Our All Grades in Type Soul guide lists every grade in the game for all races, including how to increase your grade quickly!
Dark Parables: The Exiled Prince Walkthrough
Welcome to the Dark Parables – the Exiled Prince walkthrough on Gamezebo. Dark Parables – the Exiled Prince is a hidden object/adventure game played on the PC created by Blue Tea Games. This walkthrough includes tips and tricks, helpful hints, and a strategy guide to how to complete Dark Parables – the Exiled Prince.
Dark Parables: The Exiled Prince – Game Introduction
Welcome to the Dark Parables – the Exiled Prince walkthrough on Gamezebo. Dark Parables – the Exiled Prince is a hidden object/adventure game played on the PC created by Blue Tea Games. This walkthrough includes tips and tricks, helpful hints, and a strategy guide to how to complete Dark Parables – the Exiled Prince.
How to Use this Walkthrough (Please read)
- This walkthrough is meant to be used as a guide to assist in solving mini-puzzles and acquiring all items in order to complete the game. You may explore locations in the order you wish, this walkthrough is written to take the most direct route to the game’s finish.
- Play the tutorial at the beginning of the game!!!! This walkthrough assumes you have as it explains the basic gameplay.
- Inventory objects are written in bold.
- The walkthrough will state, “Use the inventory item on the blah blah,” because it assumes you have the item. If you don’t have the item, on your keyboard, press CTRL+F (at the same time). In the text box, type the name of the item you are looking for and press ENTER. This will scan the page for the appearance of that word.
- Zooming in on areas opens small windows. Once you get the item or information you need, close it by clicking the X in the top right corner or anywhere off the window. The walkthrough will not include this instruction.
Gameplay and Tips
- This is a fragmented hidden object adventure game (FROG). You will move from location to location solving hidden object hunts, mini-puzzles and picking up items to use in order to proceed in the game.
- Hover your mouse over every aspect of a scene and watch for your cursor to change.
- Magnifying glass cursor – Happens when hovering over an area that you can zoom in and investigate further.
- Hand cursor – When this happens, you can collect the item and add it to your inventory or you can interact with it.
- Items collected will be added to your inventory (located at the bottom of your screen). To use an inventory item, click on it and click on the area it needs to be used.
- The fragmented hidden object scenes display the fragments you need to find at the bottom of the screen. Once you’ve found all the fragmented objects for all three pieces, the item will come together. Click on it to add it to your inventory. To leave a hidden object scene, move your mouse to the bottom of the scene until it turns into a down arrow, then click to exit the scene.
- Hint system – You have unlimited hints however it takes time to recharge between use.
- Finding morphing item shortens the amount of time needed for Hint to replenish (see below under Normal vs Expert).
- Mini-puzzles – Skip will complete the puzzle and move you forward. There seems to be no penalty. Click Help for instructions on how to solve the puzzle. Leaving a puzzle and returning to it does not reset it.
- Skipping a puzzle will lock the Hint button for five minutes of game play.
- There is no timer or point system.
- The map will indicate areas that have an active hidden object scene and can give some guidance as to where to go next.
Normal vs Expert
- By default, you must play this game on Normal mode. In Normal mode, you can use the Hint and Skip options.
- Once you are finished the game, you may start over and select Hard mode or you can continue to the bonus game (Collector’s Edition only).
- Expert mode can be chosen from the in-game strategy game. The Hint and Skip options are not available in Expert mode.
- Morphing objects are available in Normal mode. There are 20 morphing objects located throughout the game. Morphing objects are objects that morph or change shape. Keep an eye out in each scene and look for items that change shape. Finding these objects speeds up the time it takes for the Hint and Skip meters to recharge. Note: morphing objects do not always appear the first time you visit a scene. Morphing objects are highlighted by red circles in the screenshots and a list will appear at the end of the walkthrough.
Starting the Game
- When you start the game for the first time, you have to enter a name (your profile).
- Players allows you to select a profile.
- Extras is in the Collector’s Edition only. Once you’ve completed the game, bonus gameplay and content becomes available.
- Play starts or continues the game.
- Options allows you to adjust the sound and music volume. You can also change to/from full screen mode.
- Exit quits the game.
- Credit shows the game’s credits.
- More Adventures from Blue Tea Games (top right corner) allows you to see other games by this developer.
Walkthrough – Tutorial
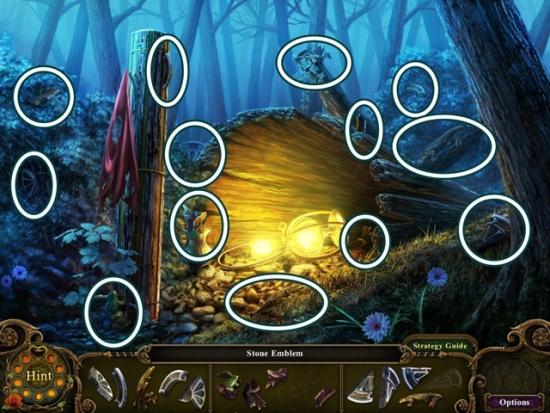
- When you start, you are asked “Would you like a quick tutorial?” Click Yes. As instructed, click on the tree trunk to start a hidden object hunt. Find the first two items as per the tutorial.

- Find the remaining objects. When you are finished, a stone emblem is completed. Click on it to add it to your inventory.
- Go north up the path.
- Pick up the decorated jar (decorated jar collection 1/5), as per the tutorial’s instructions.
- Take the path on the right.
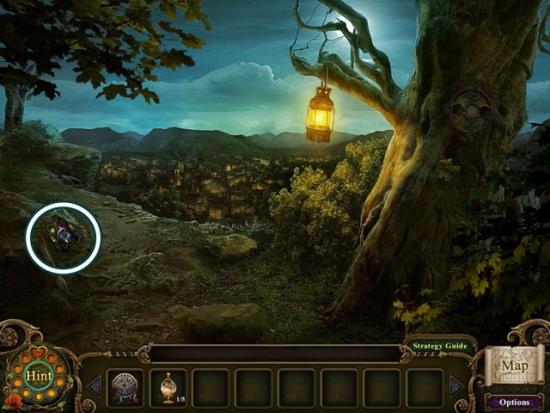
- Click on the sparkling area on the ground to start a mini-puzzle.
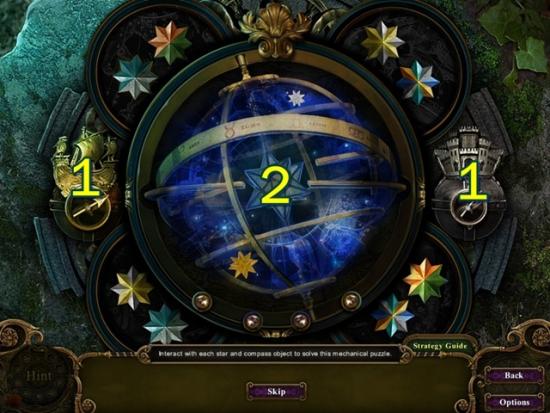
- Click the dials of the two symbols (1 in screenshot above) until they light up, then click the centre star (2). Then click any of the outlying stars and then click its identical match. Continue until all the stars are pressed. When you have completed the puzzle, take the sharp sickle.
- Go south.
- As instructed by the tutorial, use the sharp sickle to clear the vines blocking the left path.
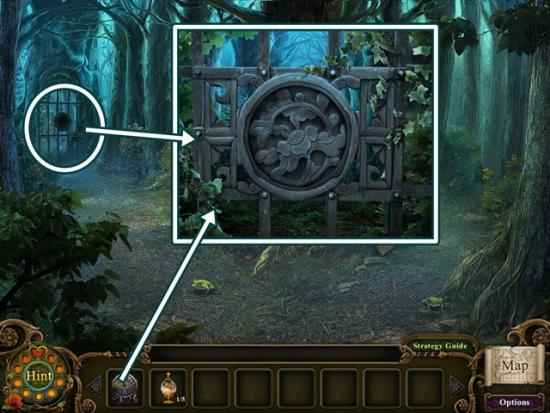
- Click on the gate. Put the stone emblem on the door. Go through the door.
- As instructed by the tutorial, click on the map and read the instructions given. Close it by clicking the red x in the top right corner.
Chapter 1
- Go south two scenes.
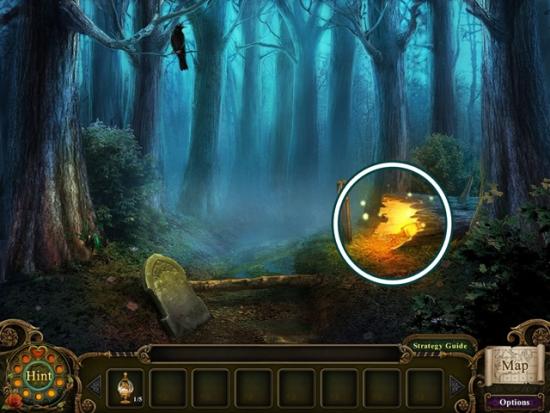
- Click on the log to start a hidden object search.
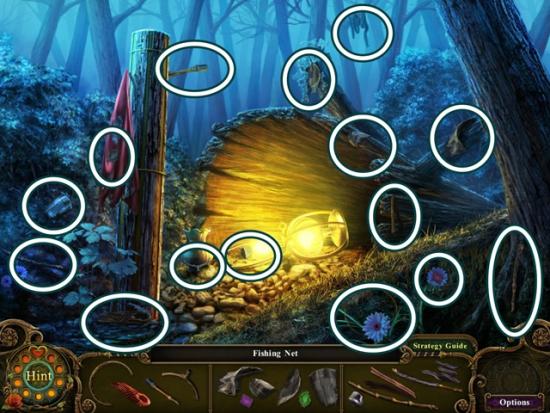
- When you are finished, a fishing net is completed. Click on it to add it to your inventory.
- Go north, then take the left path and continue north to the cottage. Go up to the porch.
- Spider alert: It’s big and cartoonish. Click on it to make it go away.
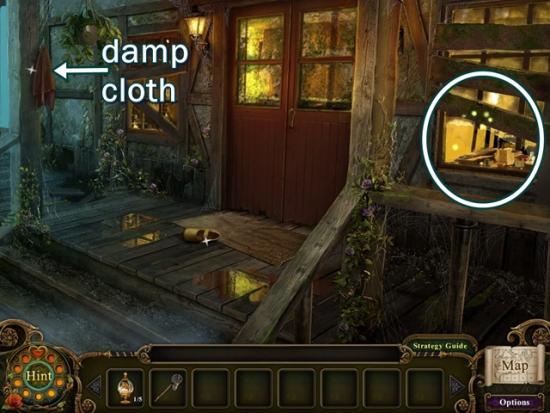
- Take the damp cloth, then click on the window to start a hidden object search.
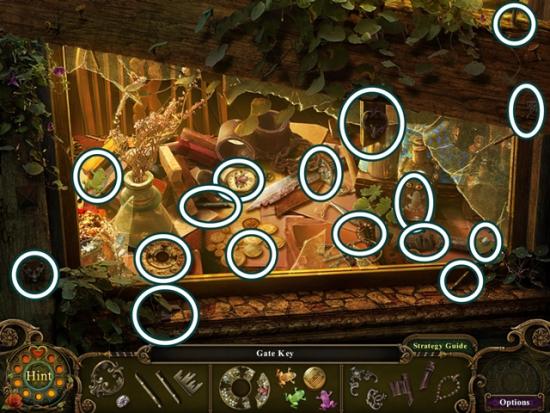
- When you are finished, a gate key is completed. Click on it to add it to your inventory. So south
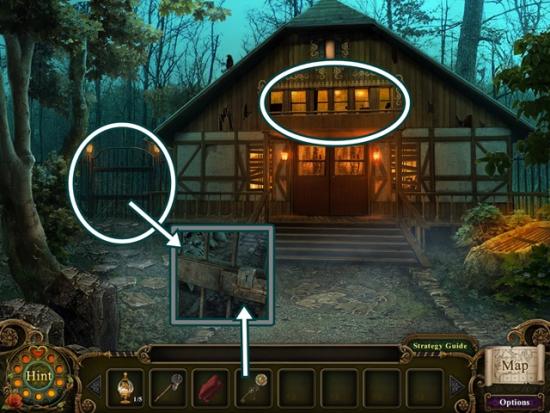
- Click on the upper window to see the man looking at you. Go towards the gate to the left of the cottage. Open the gate with the gate key. Go through the gate.
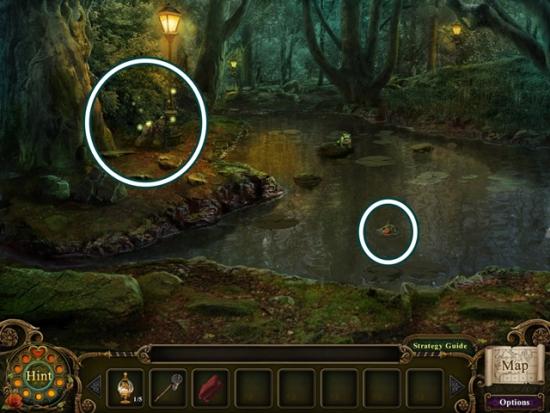
- Use the fishing net on the water, then take the ladybug gem. Click near the lantern to start a hidden object search.
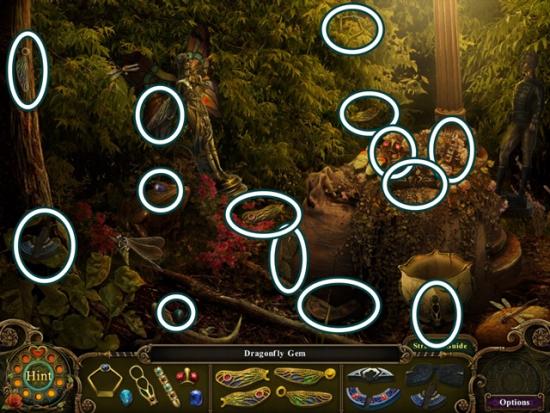
- When you are finished, a dragonfly gem is completed. Click on it to add it to your inventory. Go south three scenes.
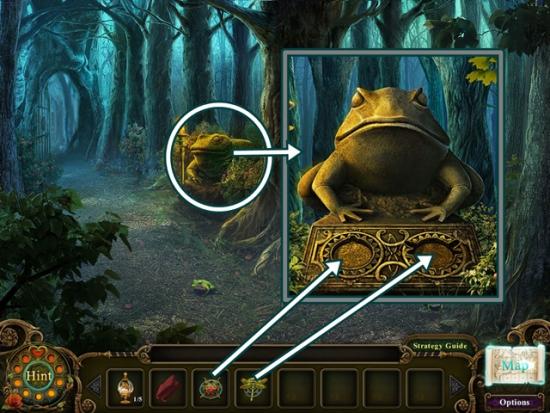
- Click on the frog statue. Clean it with the damp cloth. Place the dragonfly gem and ladybug gem in the appropriate slots. Take the cottage key from its mouth. Notice the toads’ glowing eyes.
- Take the path to the left and go north towards the cottage. Continue north until the video starts.
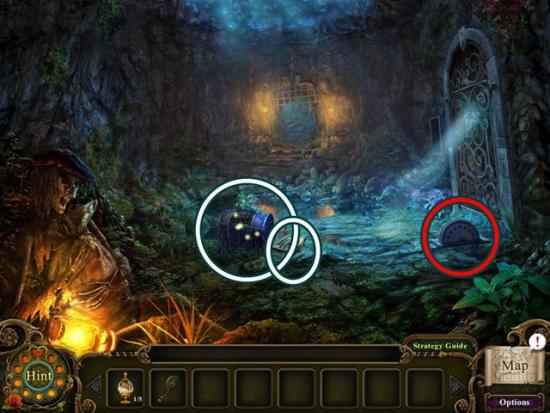
- Click on the mechanism on the ground to take the cursed morphing object (1/20). Read the newspaper. Click on the chest to start a mini-puzzle. Make the dice add up to the number they are attached to. Click on a die to change its number. Note: unlike regular dice, the highest number is 7.
- For the dice on the left-hand side, one die is already in position (it’s locked at 6). To total 10, the adjacent die must be set to 4. Since it’s attached to 9, the adjacent die must be set to 5. Complete the remaining dice. See screenshot below for solution:
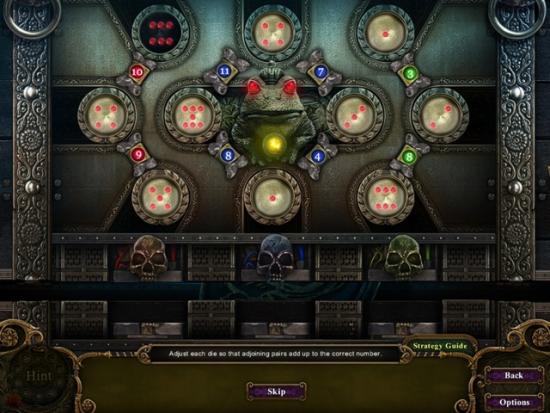
- Take the rose emblem. Go north through the gate.
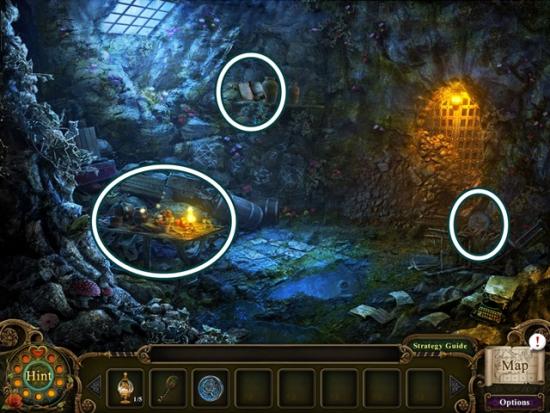
- Take the lakeside disc. Read the book on the shelf. Click on the table to start a hidden object search.
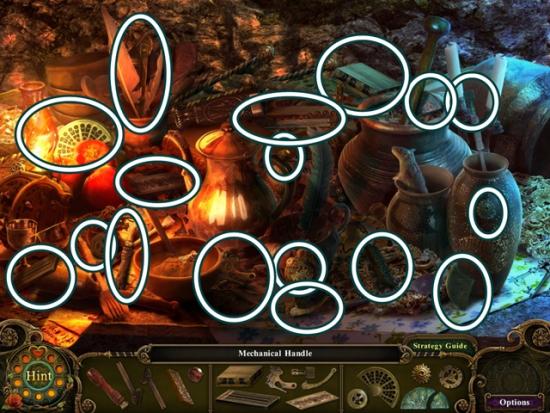
- When you are finished, a mechanical handle is completed. Click on it to add it to your inventory. Go south.
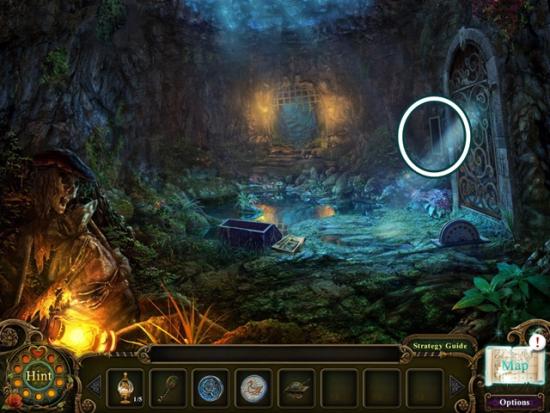
- Put the mechanical handle in the slot on the wall, then lower the lever to raise the gate. Put the rose emblem on the door, then go through it.
- Watch the video.
Chapter 2
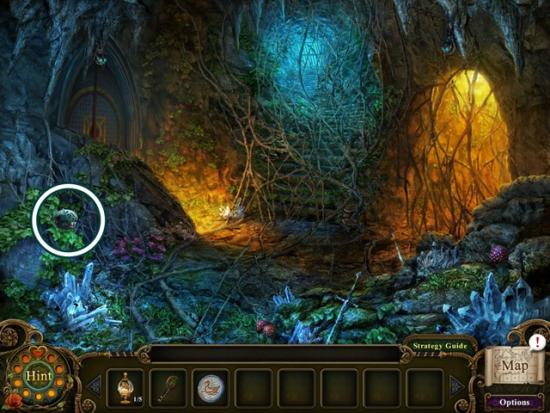
- Take the silver apple. Go south and then north.
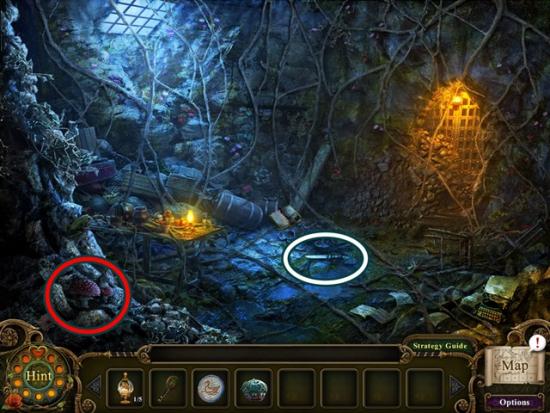
- Click on the mushrooms on the wall (left) to take the cursed morphing object (2/20). Note this cursed morphing object appears for the first time now, it was not there the first time you visited this room. Take the small knife. Go south.
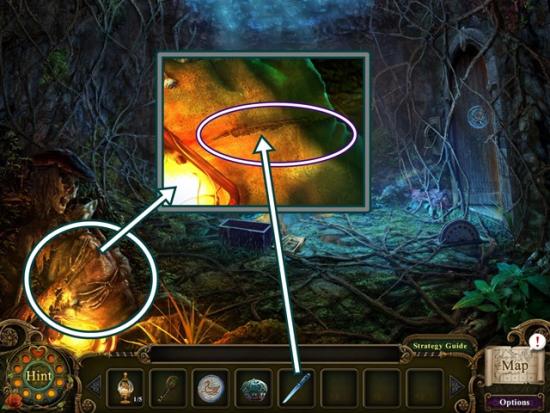
- Click on the bag the skeleton is holding. Cut the stitches with the small knife. Click on the map piece, adding more information to your existing map and opening new areas. Go north.
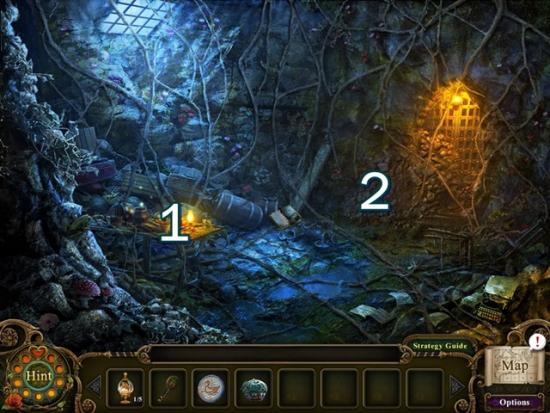
- Click on the table (1) to start a hidden object search.
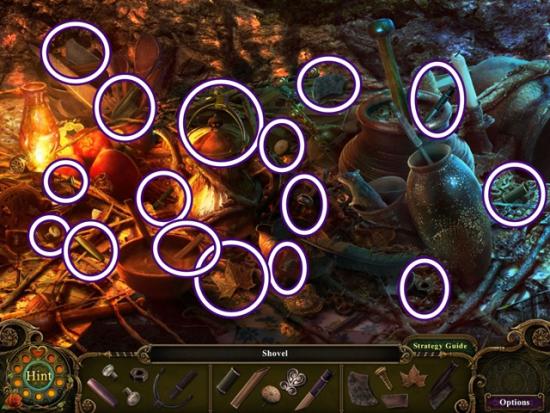
- When you are finished, a shovel is completed. Click on it to add it to your inventory. Use the shovel on the mound of dirt (2) by the gate. Go through the tunnel.
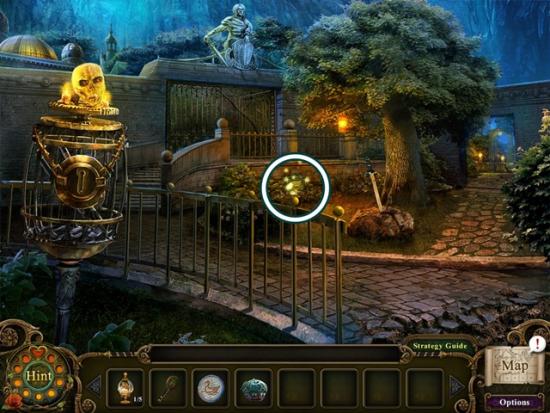
- Click on the sparkling area on the small wall to start a mini-puzzle. Find the tiles and place them in the correct order. It’s the year of death to match the year of birth already written.
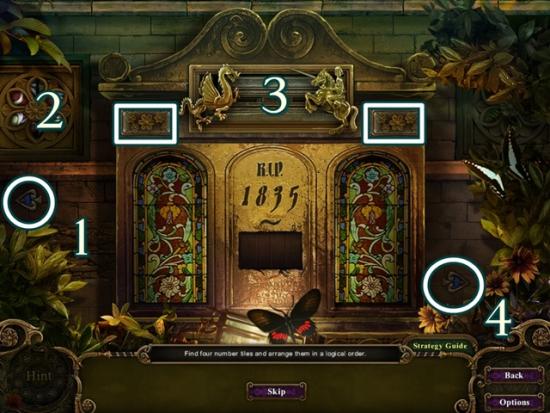
- Click on the wall (1) three times to get a tile. Take it and place it in the middle area. Click the two bricks (highlighted by rectangles) to remove the grate (2). Use the arrows (highlighted by circles) to adjust the design. Note: The design never really looks complete, just go back and forth between the two arrows until it opens. For the next tile (3), click on the dragon to make it move forward. Click on the knight to make him tip forward and slay the dragon with his lance. This takes the correct timing so keep trying. The last tile (4) is already displayed, take it.
- The correct date is 1927. Take the square mirror.
- Go up the stairs and through the gate.
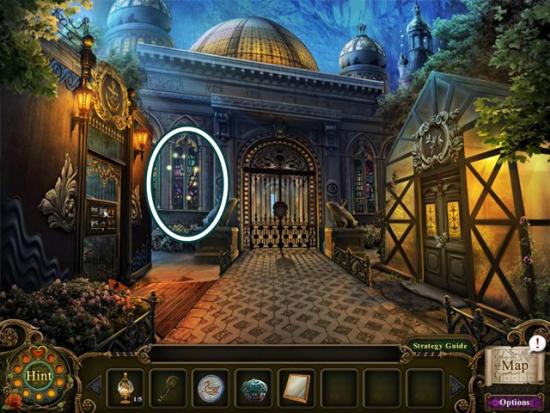
- Click on the ghost to make her disappear. Click the stained glass window start a hidden object search.
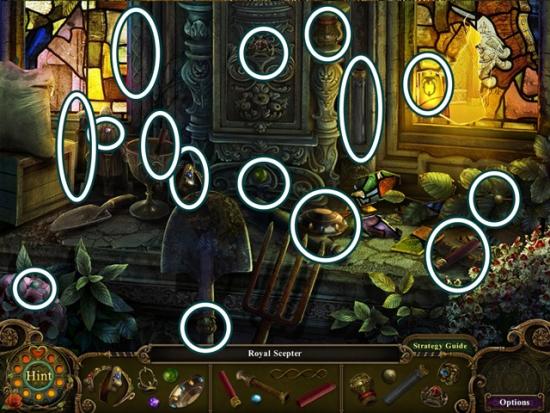
- When you are finished, a royal sceptre is completed. Click on it to add it to your inventory.
- Go south and go out the right gate.
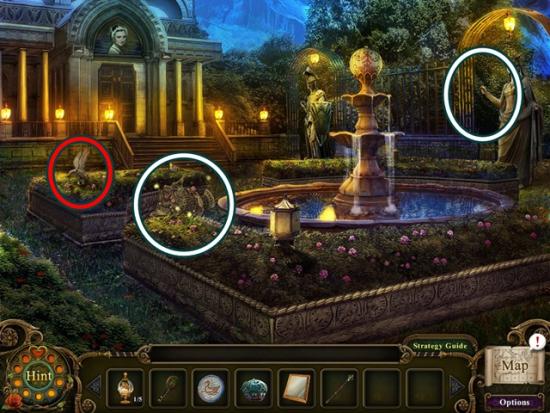
- Give the royal sceptre to the queen statue. Click the lantern/eagle to take the cursed morphing object (3/20). Click on the broken birdcage to start a hidden object search.
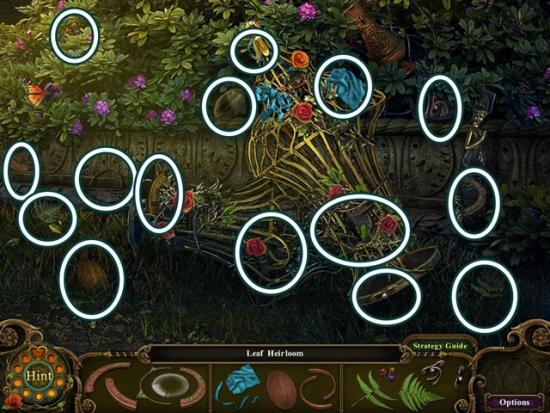
- When you are finished, a leaf heirloom is completed. Click on it to add it to your inventory. Go through the gate the queen had been blocking (far right).
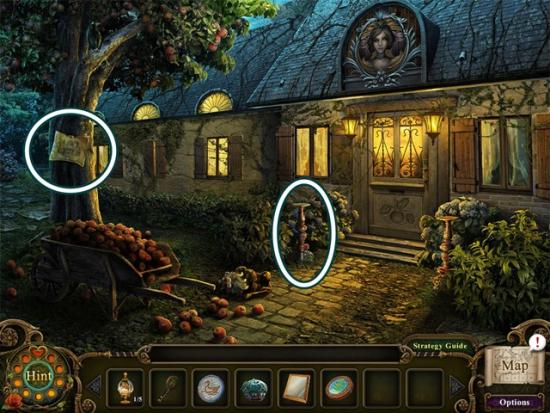
- Put the silver apple on the silver pedestal. Read the note on the tree. Go south.
- Click on the broken birdcage to start a hidden object search.
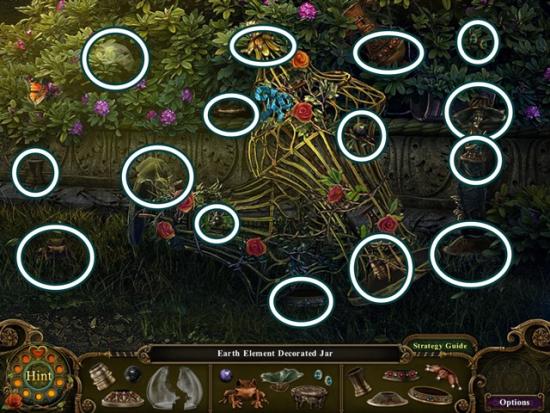
- When you are finished, an earth element decorated jar (decorated jar collection 2/5) is completed. Click on it to add it to your inventory. Go south two scenes.
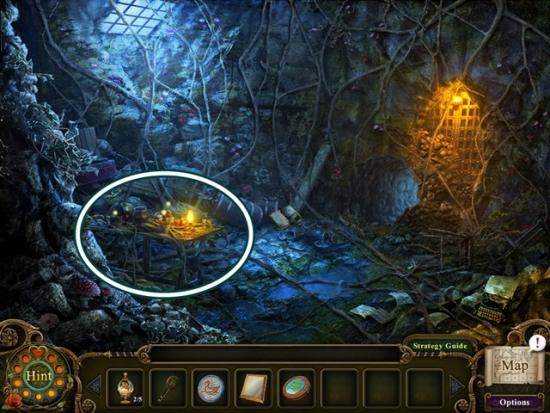
- Click on the table to start a hidden object search.
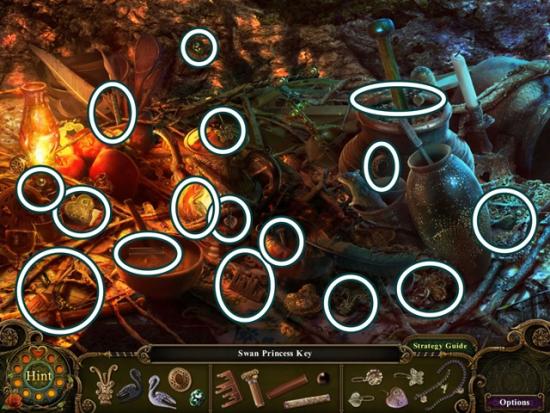
- When you are finished, a swan princess key is completed. Click on it to add it to your inventory. Go through the tunnel (north) and through the gate on the right. Click on the door of the house. Use the swan princess key in the lock, then enter the house.
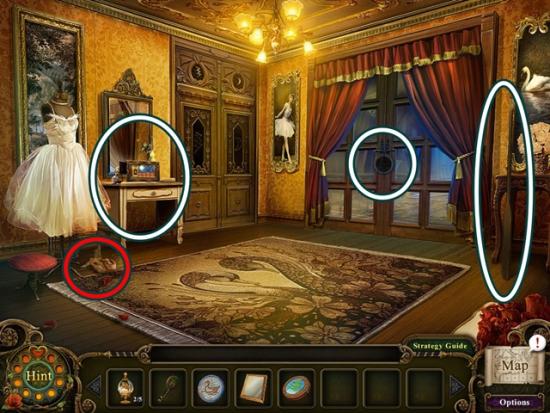
- Take the wooden oar. Click on the ballerina slippers/boots to take the cursed morphing object (4/20). Click on the table to start a mini-puzzle. Use the red buttons to move the tiles until exactly 20 fish are shown. The puzzle involves math. Click the red buttons to see all the tiles for all the columns, taking note of how many fish are shown. Don’t count the boots or the crabs. When the swordfish is complete, it’s counted as one fish. Then figure out the right combination of tiles to equal 20 fish. Or just look at the screenshot below:
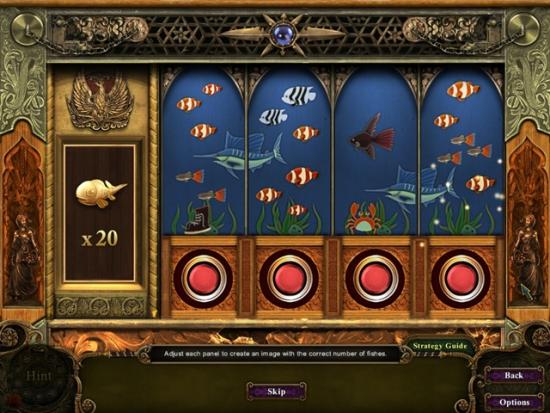
- Take the moon gem.
- Use the lakeside disc to open the double doors, then enter.
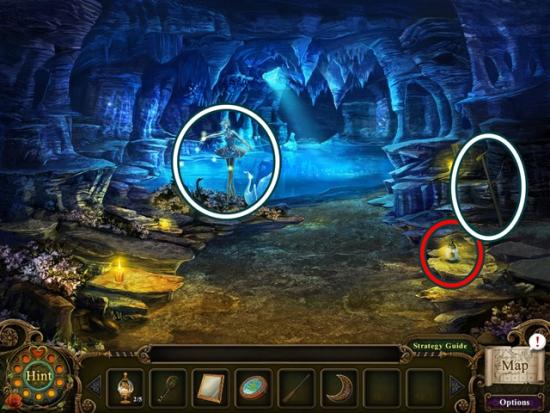
- Take the sledgehammer. Click on the candle/lantern to take the cursed morphing object (5/20). Click on the ballerina figure to start a hidden object search.
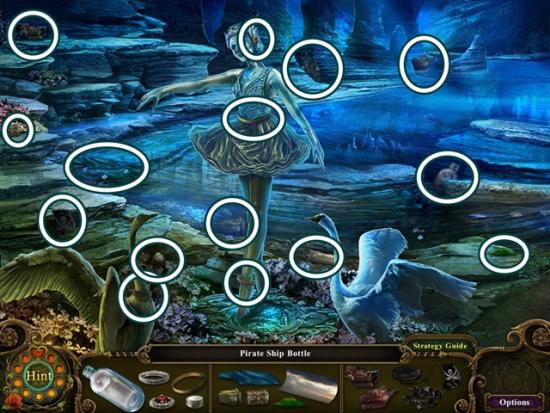
- When you are finished, a pirate ship bottle (ship in a bottle collection 1/5) is completed. Click on it to add it to your inventory. Go south three scenes.
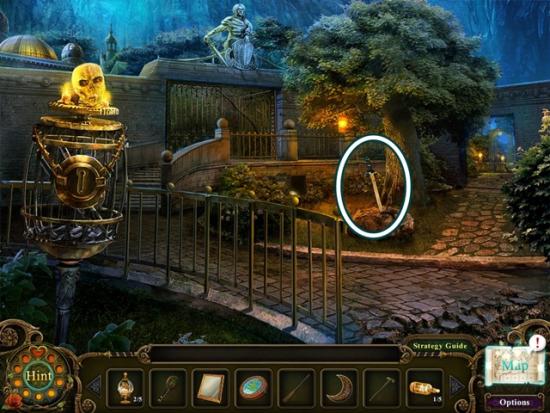
- Use the sledgehammer to break the rock, then take the royal sword. Go through the gate.
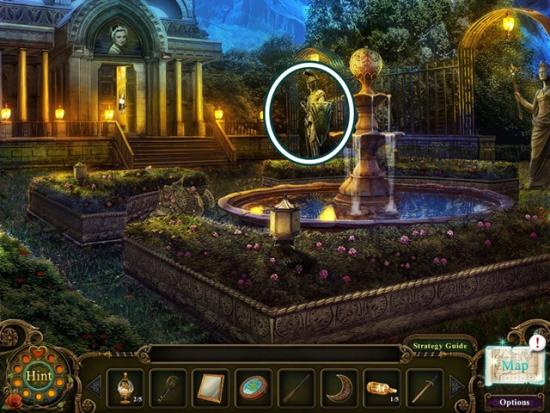
- Give the royal sword to the king’s statue. Go through the gate he unblocks. Watch the video. You receive the greenhouse key.
Chapter 3
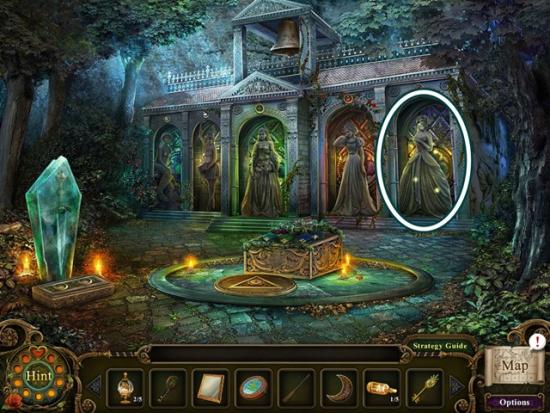
- Click on the Cinderella statue to start a hidden object search.
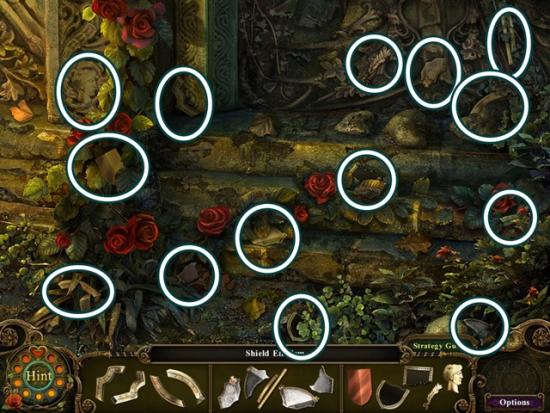
- When you are finished, a shield emblem is completed. Click on it to add it to your inventory. Go south, then enter the Swan Princess’ house and go through the double doors. Click on the ballerina statue to start a hidden object search.
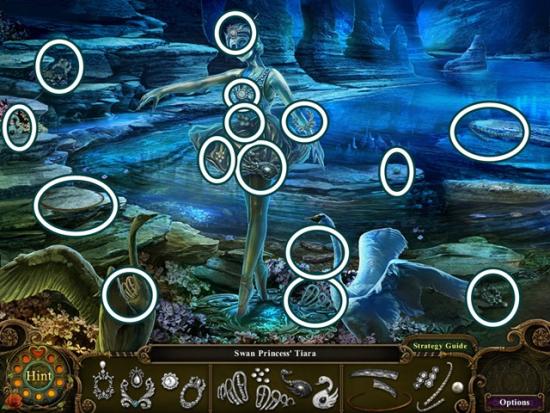
- When you are finished, the swan princess’ tiara (princesses’ tiara collection 1/5) is completed. Click on it to add it to your inventory. Go south three scenes, then go up the stairs and through the gate.
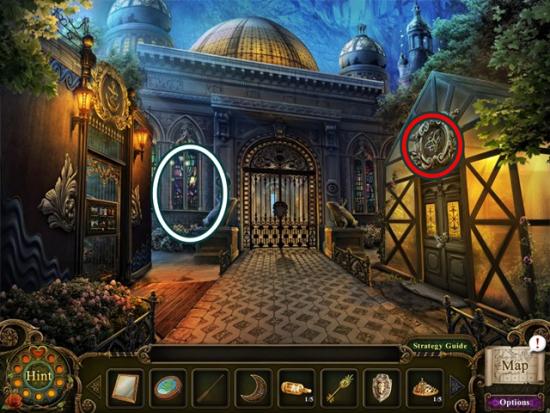
- Click on insignia above the greenhouse door to take the cursed morphing object (6/20). Click on the stained glass window to start a hidden object search.
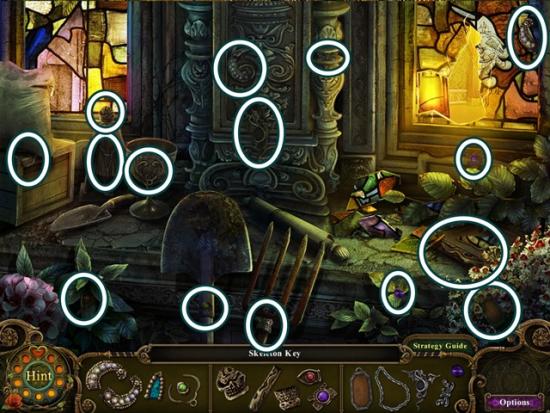
- When you are finished, a skeleton key is completed. Click on it to add it to your inventory. Go south one scene.
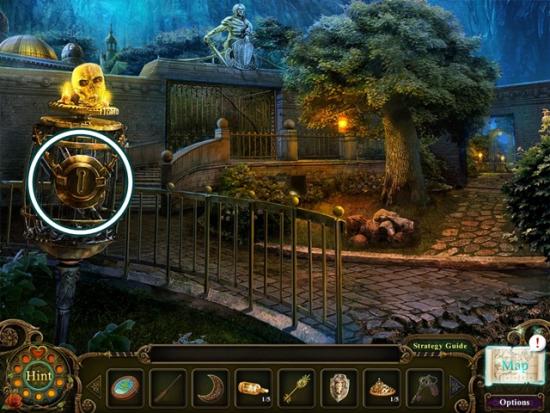
- Use the skeleton key to open the birdcage. Take the bolt cutters. Go up the stairs and through the gate.
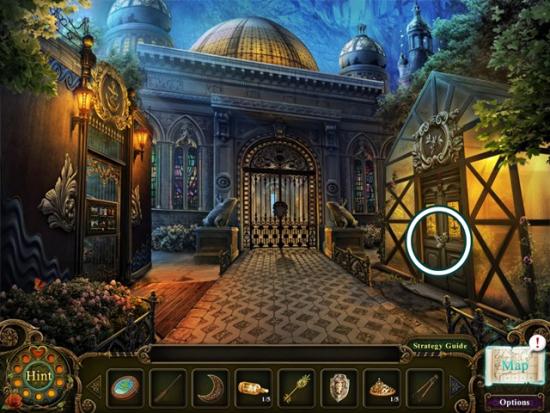
- On the greenhouse door, cut the chains with the bolt cutters, then use the greenhouse key to unlock the door. Enter.
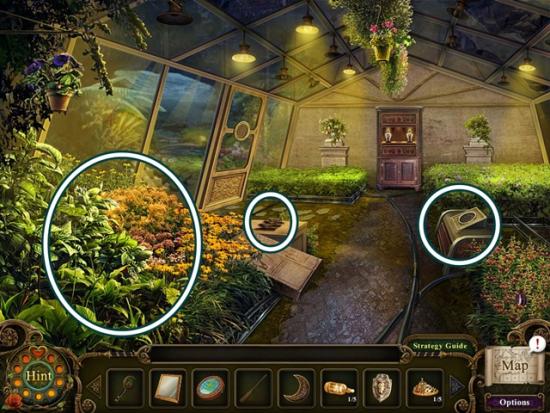
- Take the lightening gem. Put the leaf heirloom on the chest, then take the ship in a bottle (ship in a bottle collection 2/5). Click on the bush (left) to start a hidden object search.
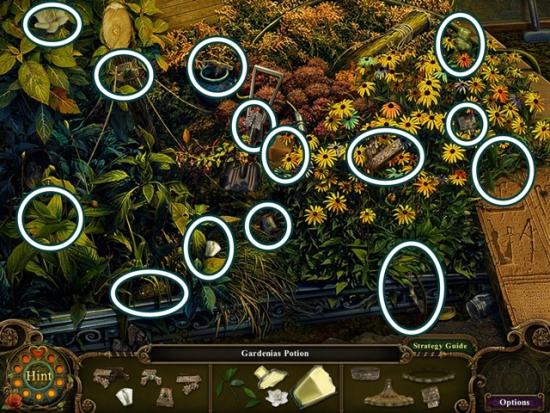
- When you are finished, the gardenia’s potion (plant potion collection 1/6) is completed. Click on it to add it to your inventory. Go south twice, then go through the right gate and enter the Swan Princess’ house.
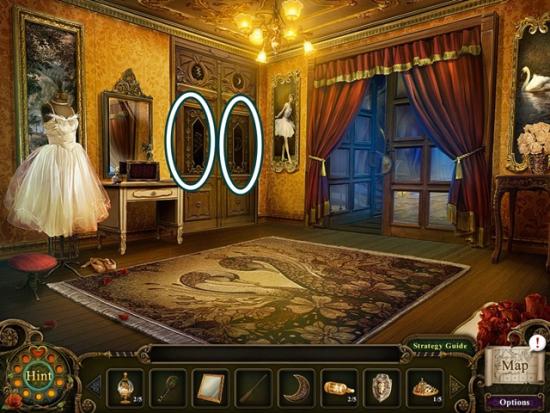
- Put the lightening gem and moon gem in their respective slots on the door (note: you may have to scroll through your inventory using the arrows on either side of your inventory). Enter the room.

- Click on the painting on the wall to take the cursed morphing object (7/20). Click on the dresser to start a hidden object search.
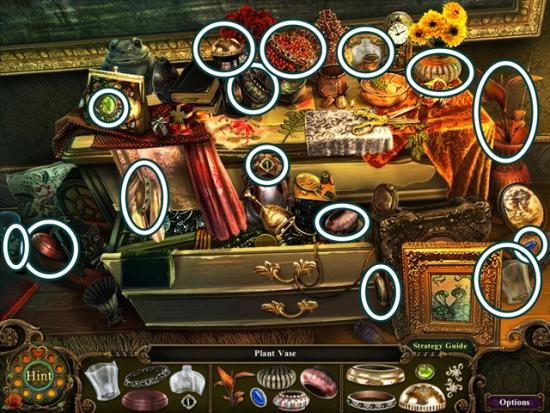
- When you are finished, a plant vase is completed. Click on it to add it to your inventory. Return to the greenhouse.
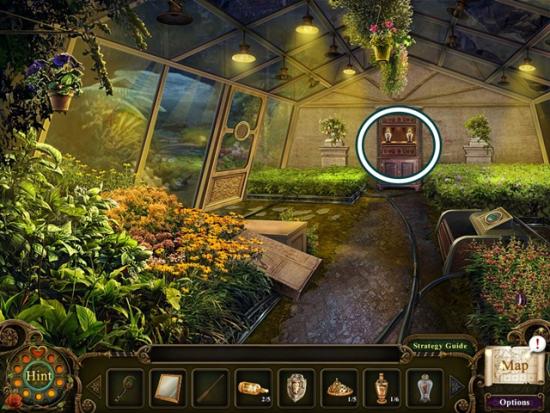
- Put the plant vase on the shelf. Enter the room.
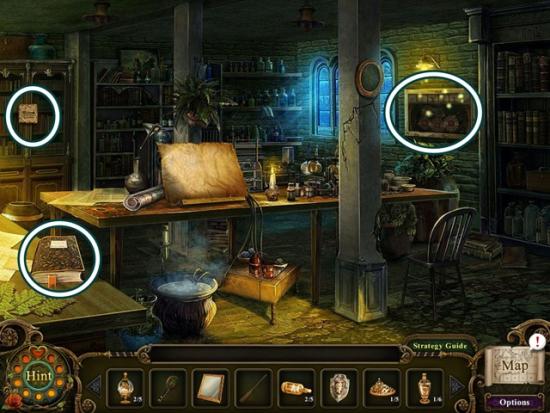
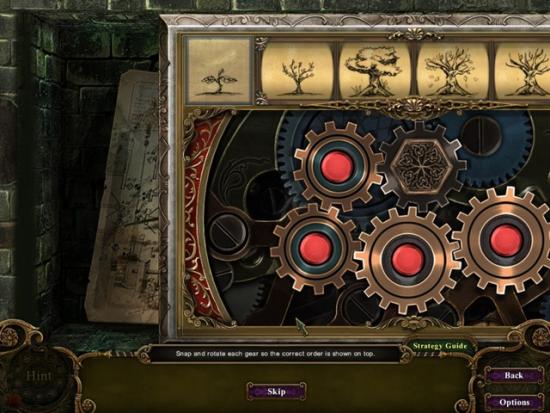
- Open the book and take the silver coin. Read the note on the back shelf. Click on the sparkling area on the wall to start a mini-puzzle. Move the gears to rotate the pictures of the tree so it shows the tree from birth to death.
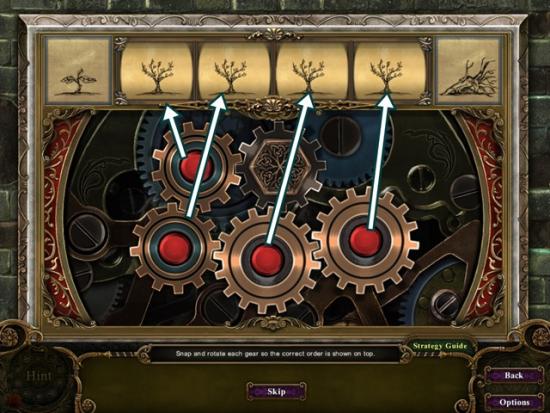
- Click on a gear to move its corresponding picture (screenshot above), click on the red button to lock the picture and gear, then continue to position the tree pictures. Only one gear can be locked at a time. Start from left to right. Solution:
- Read the blueprint. It adds information to your map. Go south three times, then go through the right gate.
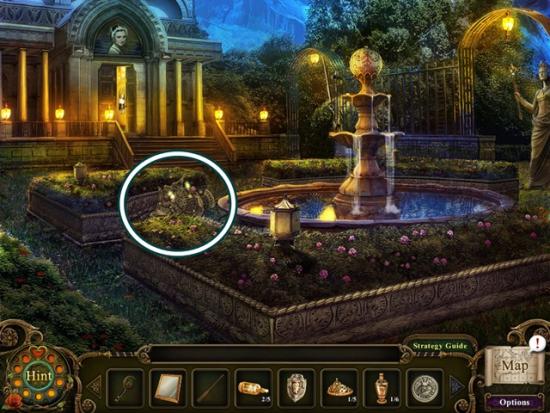
- Click on the broken birdcage to start a hidden object search.
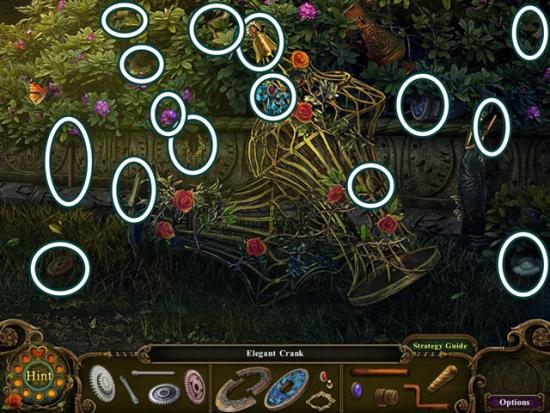
- When you are finished, an elegant crank is completed. Click on it to add it to your inventory. Enter the house and go into the bedroom.
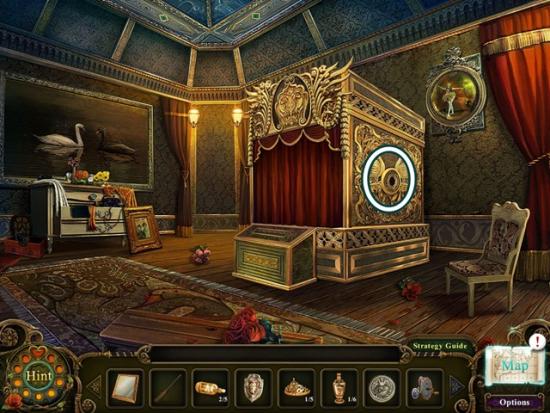
- Put the elegant crank on the side of the marionette theatre.
Chapter 4
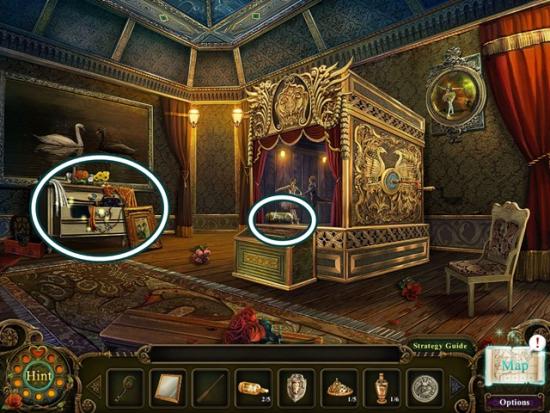
- Take the ship in a bottle (ship in a bottle collection 3/5). Click on the dresser to start a hidden object search.
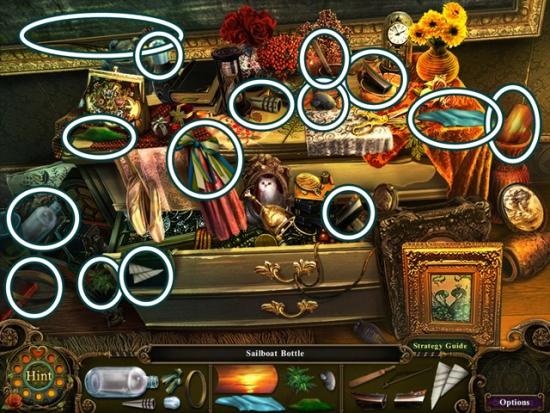
- When you are finished, a sailboat bottle (ship in a bottle collection 4/5) is completed. Click on it to add it to your inventory. Leave the house and go through the gate by the king.
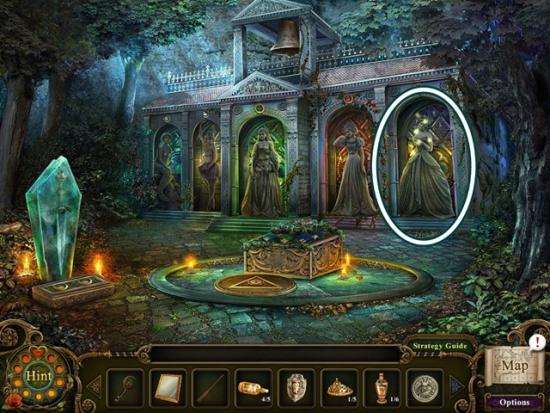
- Click on the Cinderella statue to start a hidden object search.
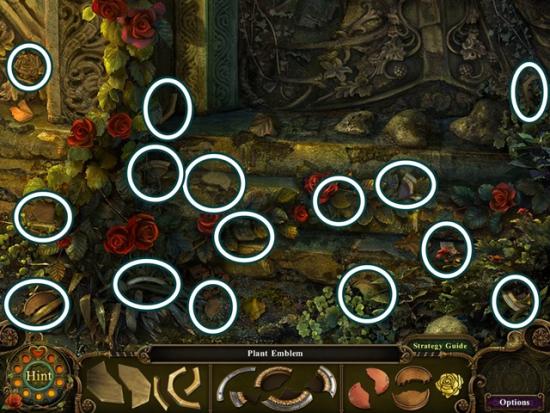
- When you are finished, a plant emblem is completed. Click on it to add it to your inventory. Go back to the greenhouse.
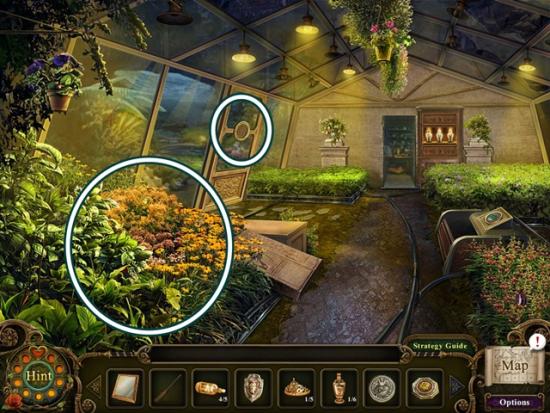
- Put the plant emblem on the door. Click on the bushes (left) to start a hidden object search.
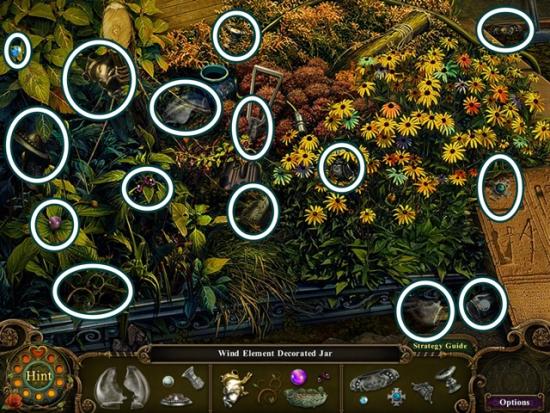
- When you are finished, a wind element decorated jar (decorated jar collection 3/5) is completed. Click on it to add it to your inventory. Go through the door opened by using the plant emblem.
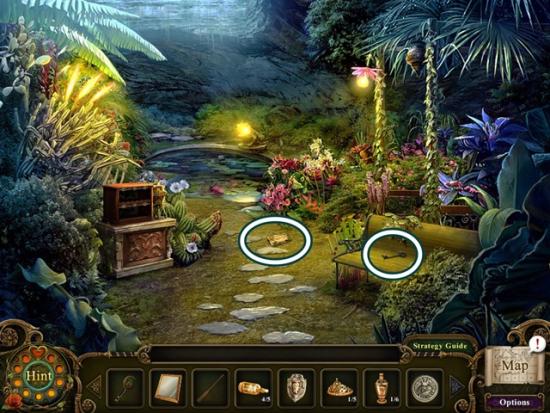
- Take the rusty cave key. Read the note on the ground. Go south twice.
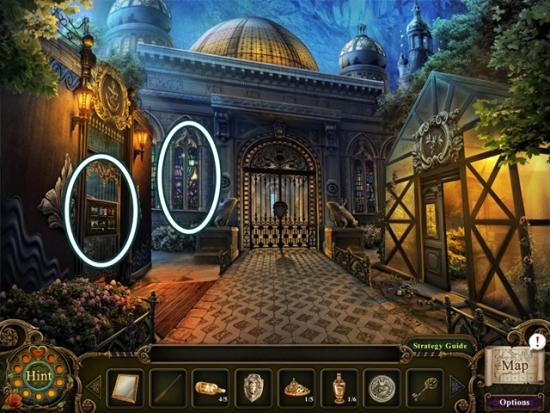
- Click on the stained glass window to start a hidden object search.
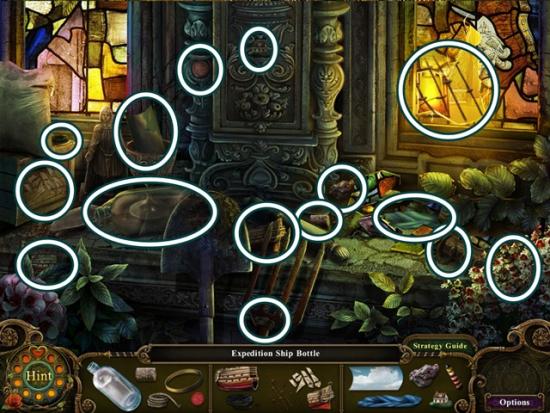
- When you are finished, an expedition ship bottle (ship in a bottle collection 5/5) is completed. Click on it to add it to your inventory.
- Click on the door to the boathouse (across from the greenhouse) to start a mini-puzzle. Place each ship in a bottle so it matches its background. Select two ships to switch their places. When a ship is in its correct position, its lantern will light up. Solution:
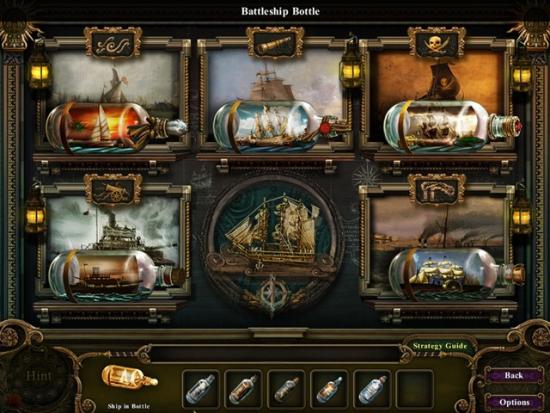
- Enter the boathouse.
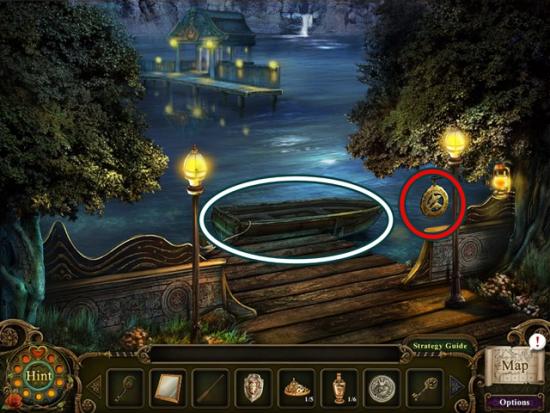
- Click the hanging decoration to take the cursed morphing object (8/20). Use the wooden oar on the boat. Cross the water.
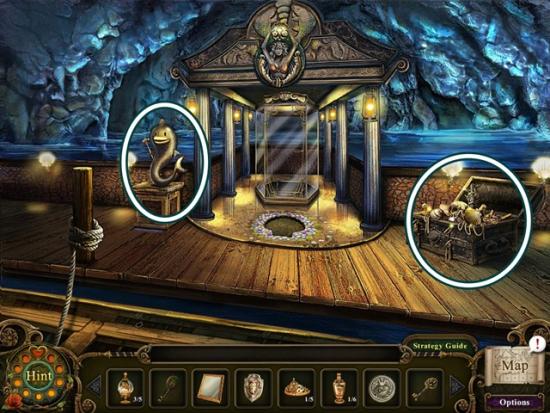
- Click on the treasure chest to start a hidden object search.
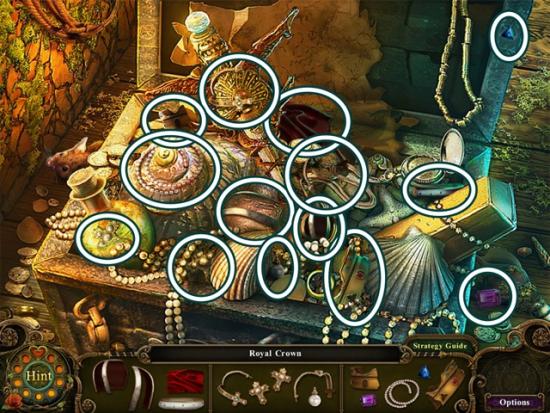
- When you are finished, a royal crown is completed. Click on it to add it to your inventory.
- Put the royal crown on the Big Fish (Felix???). Go down the area he reveals.
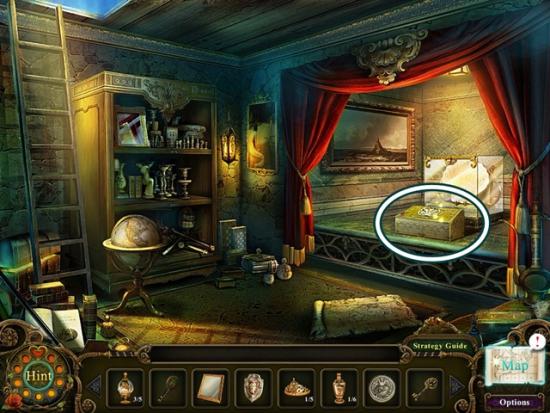
- Click the pedestal in front of the glass display to start a mini-puzzle. Click the red panels to adjust the tiles so all the pieces showing would complete the image at the left. The image consists of a round base, a crescent moon, a sun and the jewels. Solution:
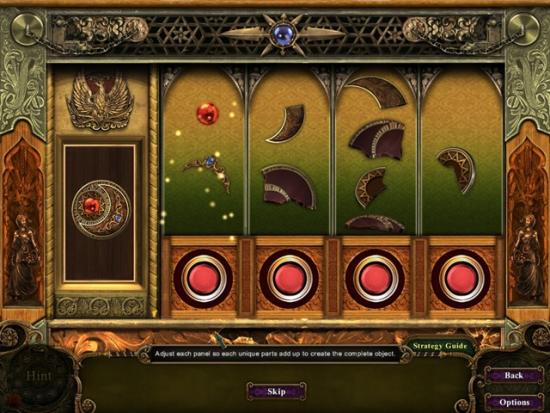
- Take the large seashell from the glass display case. Go up the ladder.
Chapter 5
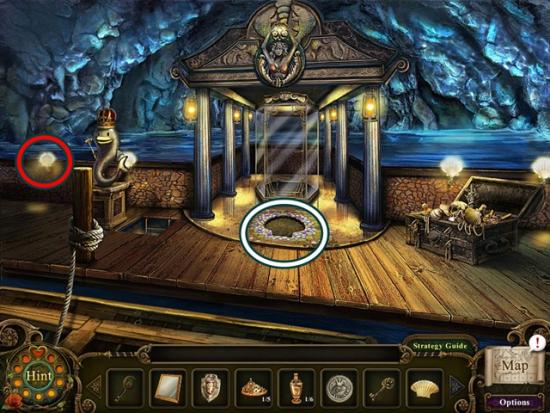
- Click the seashell/crab to take the cursed morphing object (9/20). Place the large seashell in the slot on the floor. Go down the ladder.
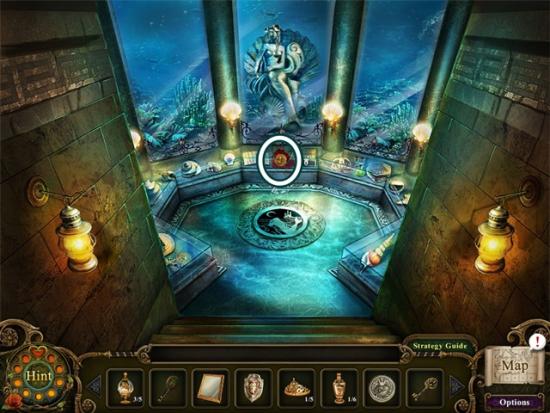
- Take the gold coin. Go south three scenes.
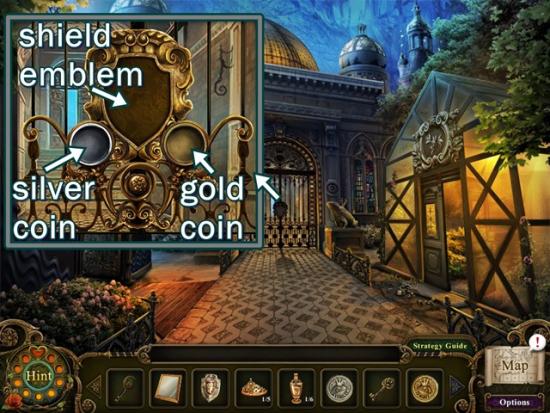
- Click on the gate. Place the shield emblem, gold coin and silver coin in their appropriate slots. Enter the castle.
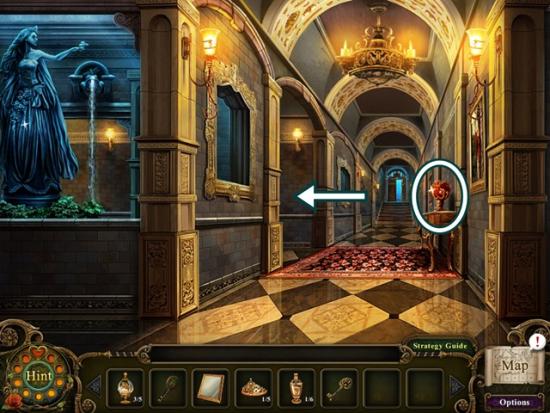
- Take the chemical ink. Go through the door on the left.
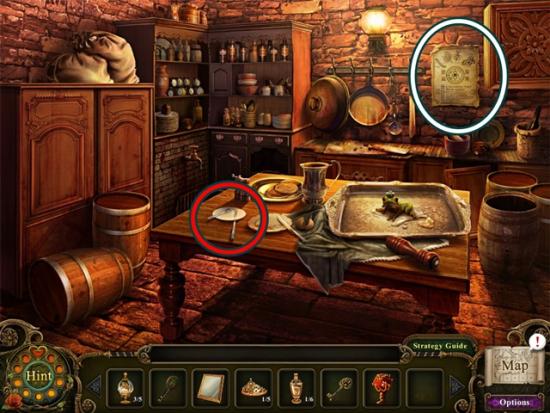
- Click the plate to take the cursed morphing object (10/20). Click the paper hanging on the wall to read the frog potion. Leave the room and go up the stairs (north).
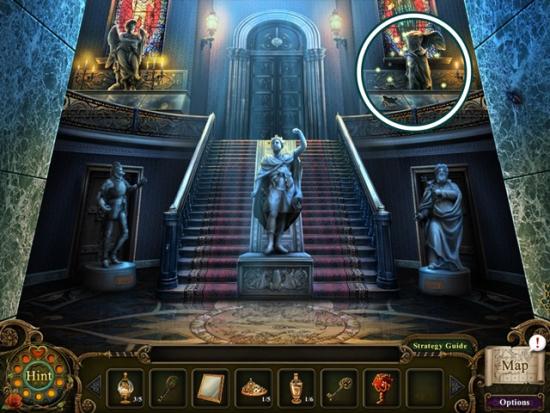
- Click on the headless statue to start a hidden object search.
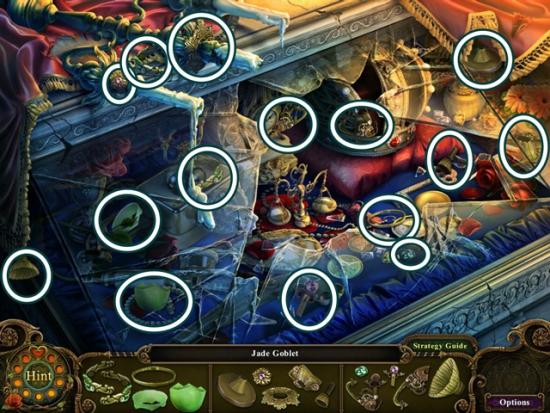
- When you are finished, a jade goblet is completed. Click on it to add it to your inventory. Go south two scenes, enter the greenhouse and go into the backroom.
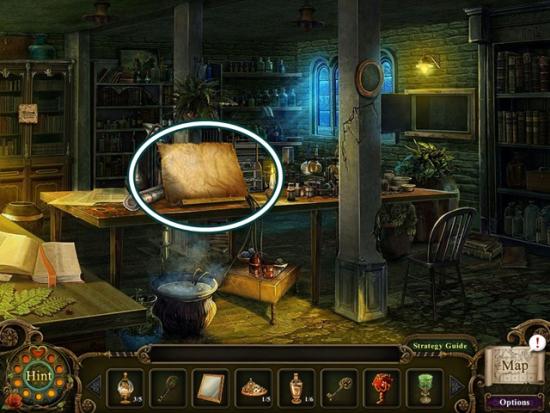
- Pour the chemical ink on the paper, then read the paper. This adds information to your map. Leave the greenhouse, enter the boathouse and cross the water.
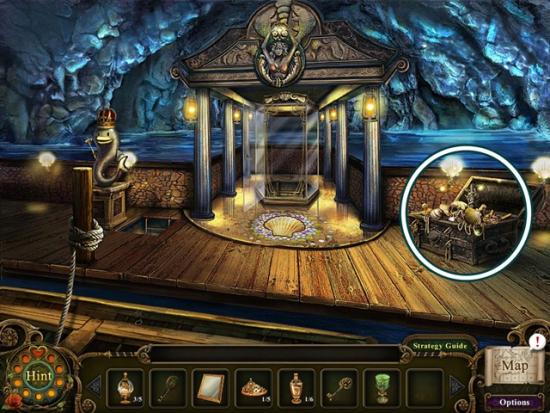
- Click on the treasure chest to start a hidden object search.
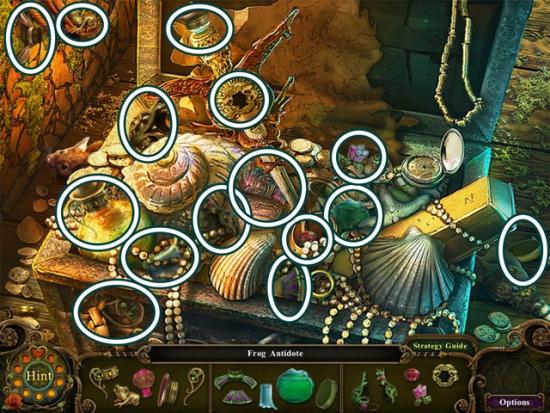
- When you are finished, the frog antidote is completed. Click on it to add it to your inventory. Go south two scenes, then enter the castle and go left into the kitchen.
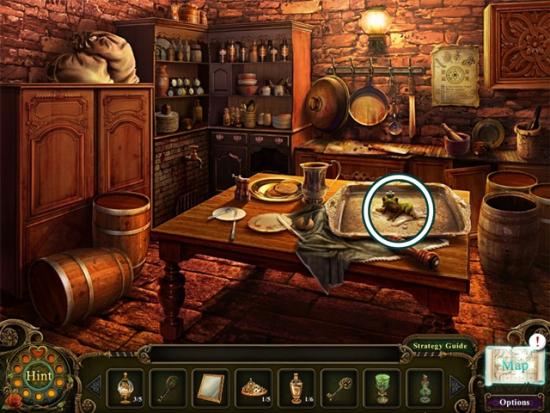
- Give the frog antidote to the frog. Go south two scenes, enter the boathouse and take the boat across the water. Click on the treasure chest to start a hidden object search.
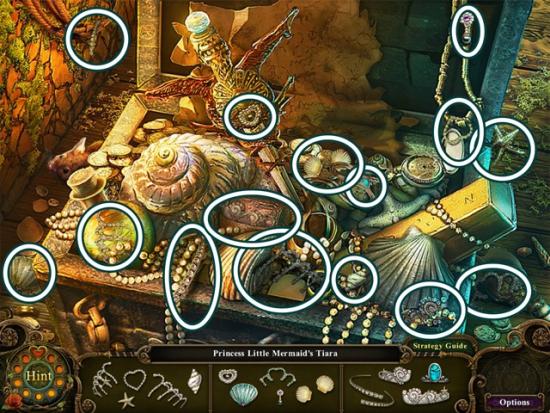
- When you are finished, Princess Little Mermaid’s tiara (princesses’ tiara collection 2/5) is completed. Click on it to add it to your inventory. Go south three scenes, then go through the gate at the right and enter the Swan Princess’ house and go into the bedroom. Click on the dresser to start a hidden object search.
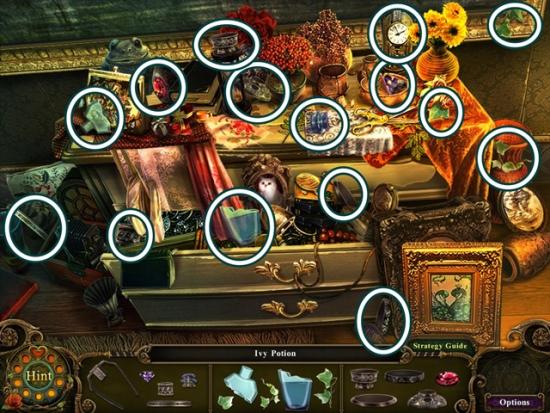
- When you are finished, the ivy potion (plant potion collection 2/6) is completed. Click on it to add it to your inventory. Go south four scenes.
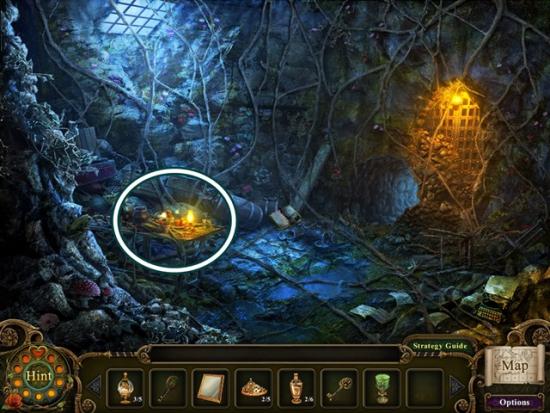
- Click on the table to start a hidden object search.
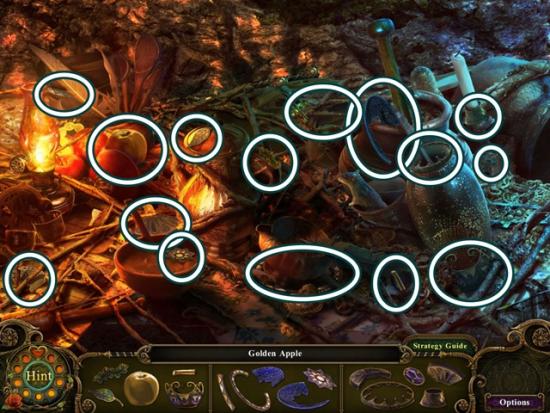
- When you are finished, a golden apple is completed. Click on it to add it to your inventory. Go through the tunnel, take the path to the right, then go through the gate the queen statue was blocking (farther right).
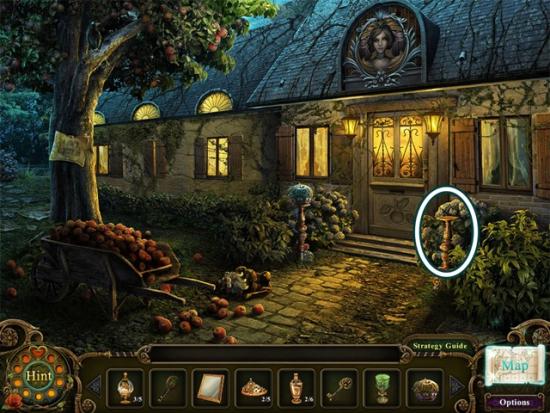
- Put the golden apple on the pedestal. (If you haven’t already, place the silver apple on the other pedestal.) Enter Snow White’s house.
Chapter 6
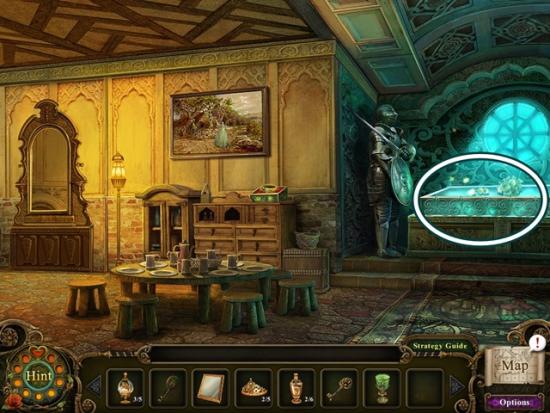
- Click on the glass casket to start a hidden object search.
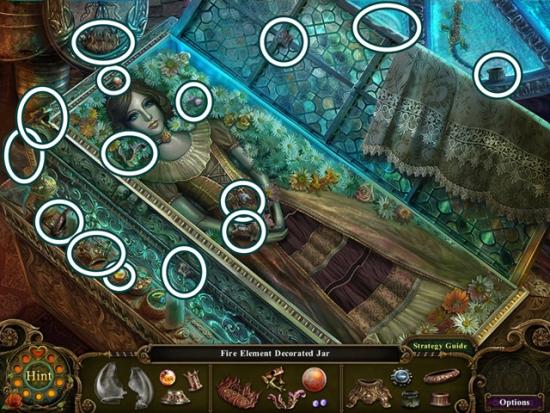
- When you are finished, a fire element decorated jar (decorated jar collection 4/5) is completed. Click on it to add it to your inventory. Go south two scenes, enter the Swan Princess’ house and go through the double doors to the lake.
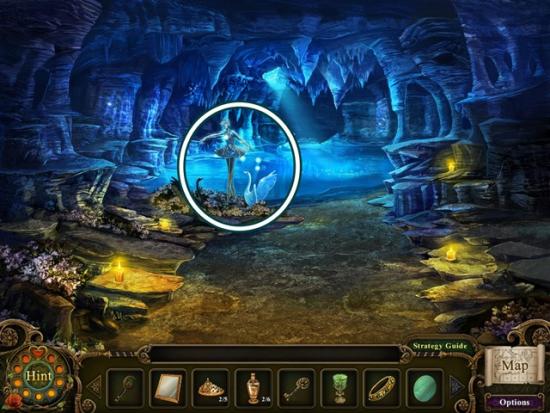
- Click on the ballerina statue to start a hidden object search.
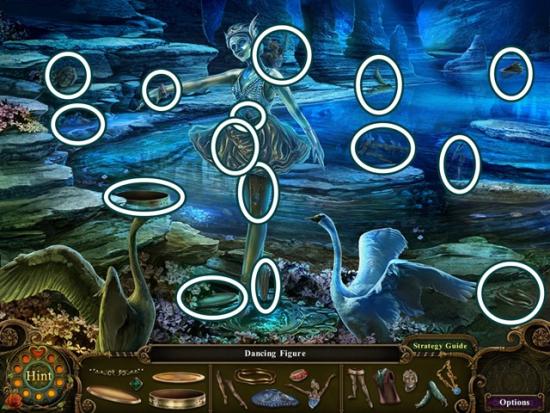
- When you are finished, a dancing figure is completed. Click on it to add it to your inventory. Go south twice, go through the gate the queen statue was blocking (farther right) and enter Snow White’s cottage.
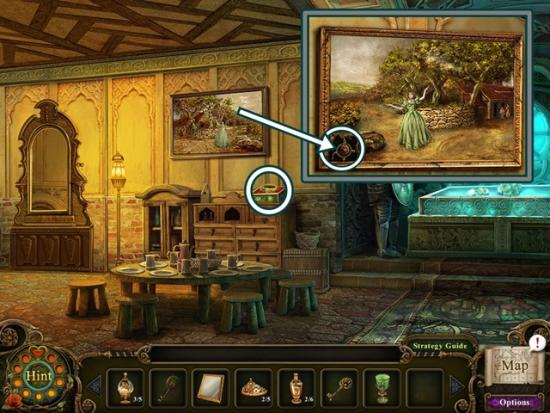
- Take the mysterious bracelet. Click on the painting on the wall. Press the red button in the bottom left corner of the painting. Go through the secret opening.
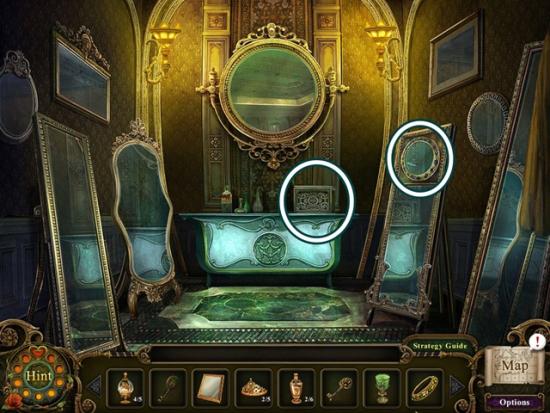
- Take the round mirror. Put the dancing figure on the box to start a mini-puzzle. Adjust the panels so there’s a complete path from the blue tile to the green tile. Solution (sorry about not getting the screenshot right away but at least you know where to place the last three):
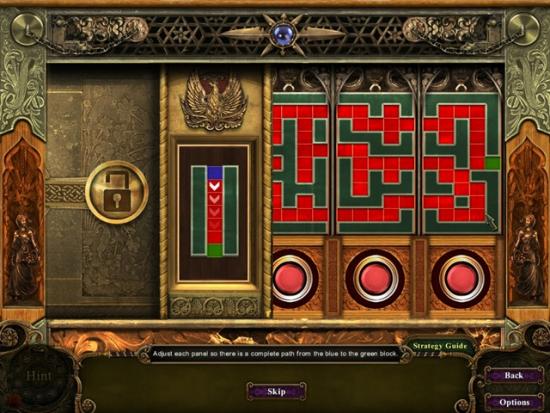
- Click on the piece of evidence that adds more information to your map. Go south four scenes, then up the stairs through the centre gate, enter the castle.

- Click on the wall sconce on the left to take the cursed morphing object (11/20). Enter the kitchen (left).
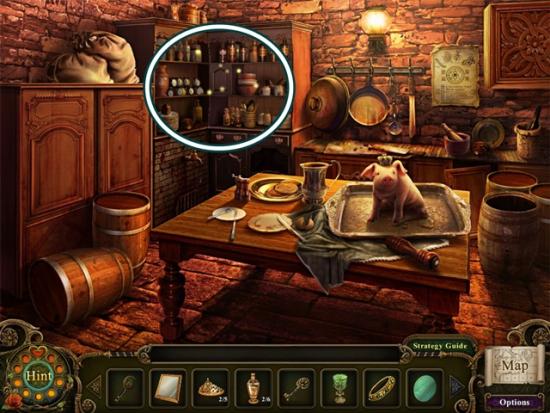
- Click on the shelves to start a hidden object search.
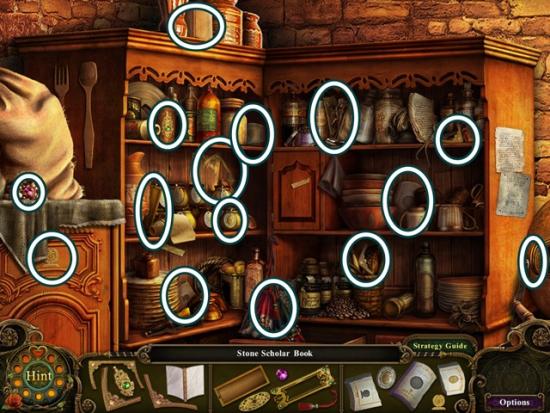
- When you are finished, a stone scholar book is completed. Click on it to add it to your inventory. Leave the room and go up the stairs (north).
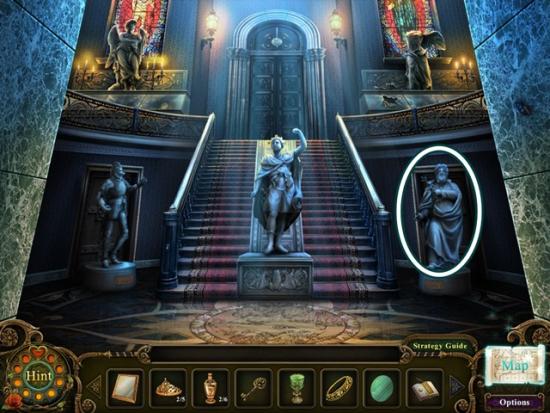
- Give the stone scholar book to the scholar statue. Enter the library
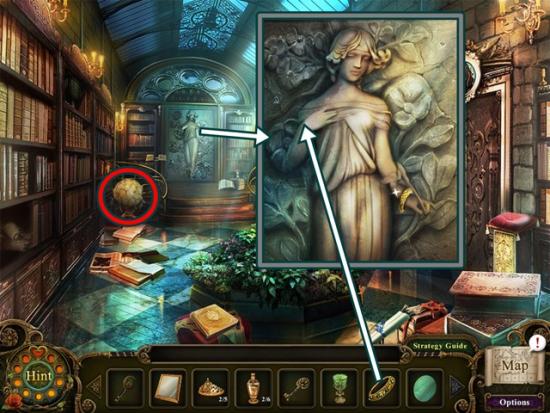
- Click on the globe/bouquet to take the cursed morphing object (12/20). Click the statue at the back of the room. Place the mysterious bracelet on its wrist. Enter the room.
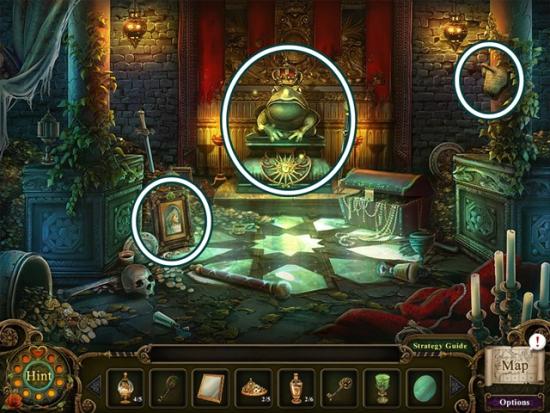
- Take the Princess Portrait, then read the note on the pillar. Click on the frog statue to start a hidden object search.
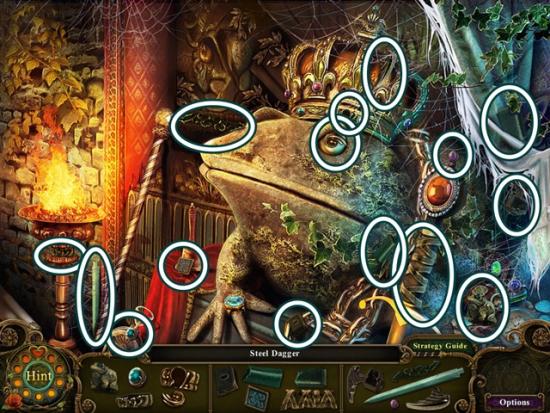
- When you are finished, a steel dagger is completed. Click on it to add it to your inventory. Go south twice.
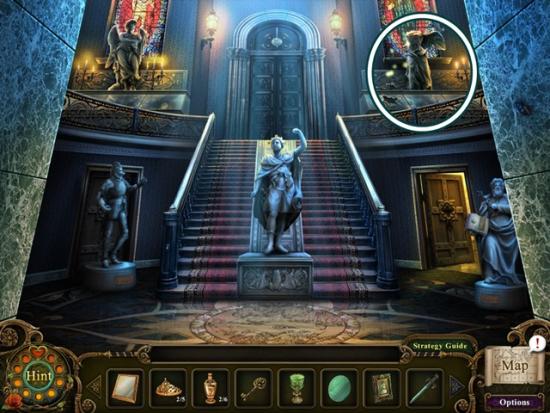
- Click on the headless statue to start a hidden object search.
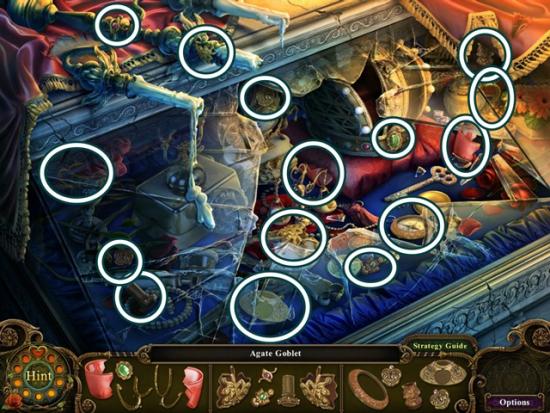
- When you are finished, an agate goblet is completed. Click on it to add it to your inventory. Go south three times, go through the gate the queen statue was blocking (farther right) and enter Snow White’s cottage. Click on the glass casket to start a hidden object search.
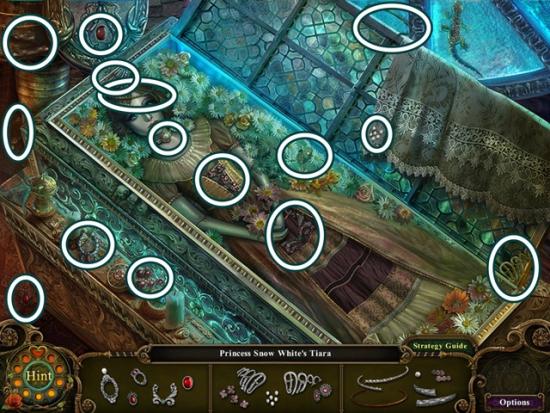
- When you are finished, Princess Snow White‘s tiara (princess’ tiara collection 3/5) is completed. Click on it to add it to your inventory. Go south twice, then go through the gate the king’s statue was blocking.
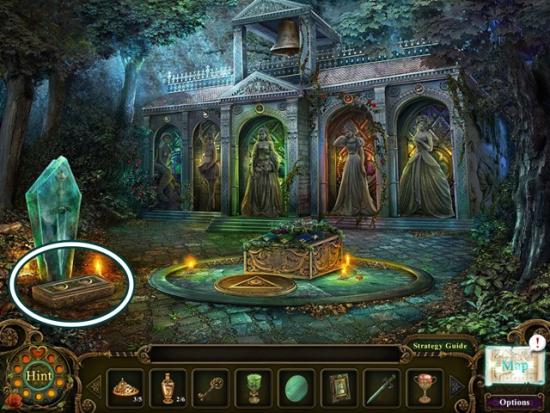
- In front of the frozen sword, place the jade goblet and the agate goblet.
Chapter 7
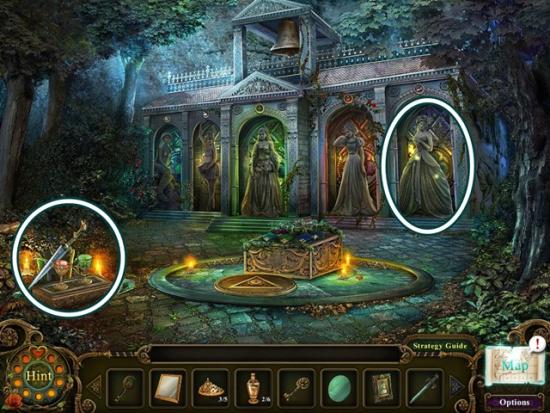
- Take the prince display sword. Click on the Cinderella statue to start a hidden object search.
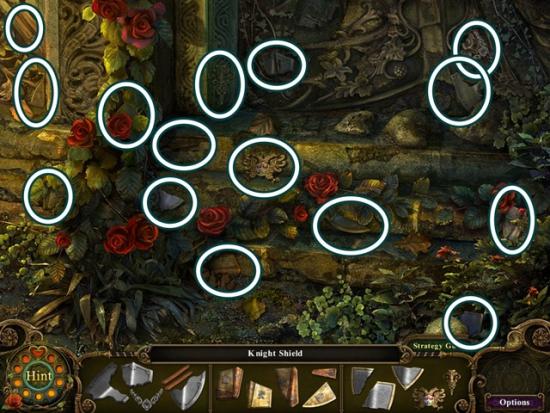
- When you are finished, the knight shield is completed. Click on it to add it to your inventory. Go south two scenes, then north through the gate and enter the greenhouse.
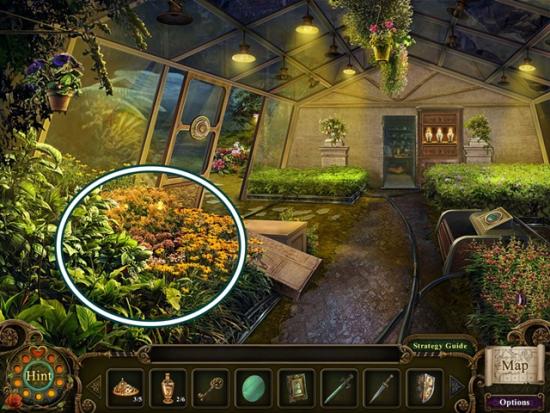
- Click on the bushes to start a hidden object search.
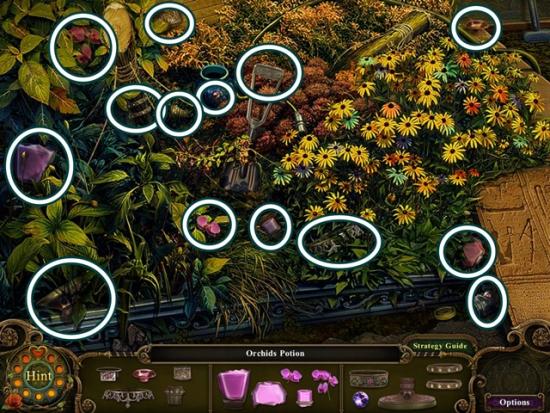
- When you are finished, the orchid’s potion (plant potion collection 3/6) is completed. Click on it to add it to your inventory. Leave the greenhouse and go into the castle and continue up the stairs.
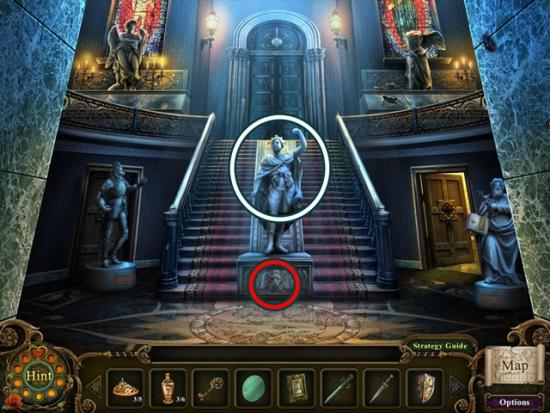
- Click the base of the prince statue to take the cursed morphing object (13/20). Give the prince display sword to the prince. Go up the stairs.
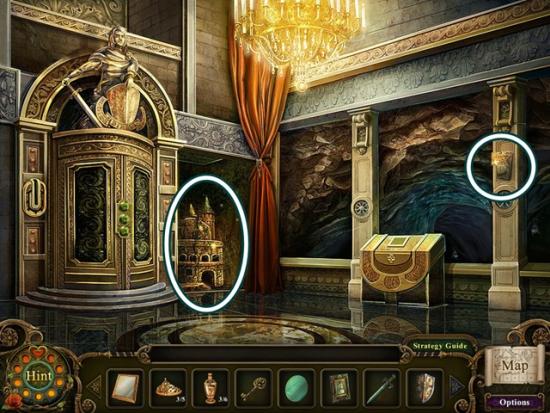
- Read the note on the pillar. Click on the castle replica to start a hidden object search.
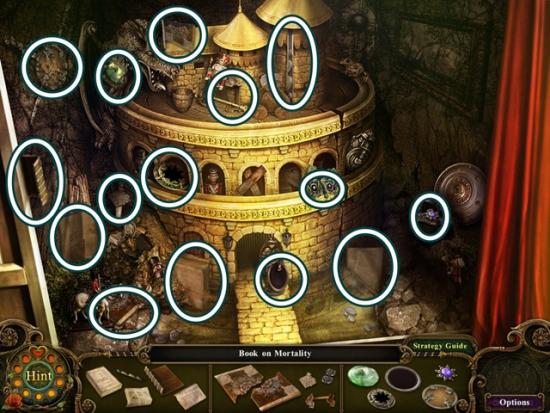
- When you are finished, the book on mortality is completed. Click on it to add it to your inventory. Leave the scene and go into the library (right of staircase).
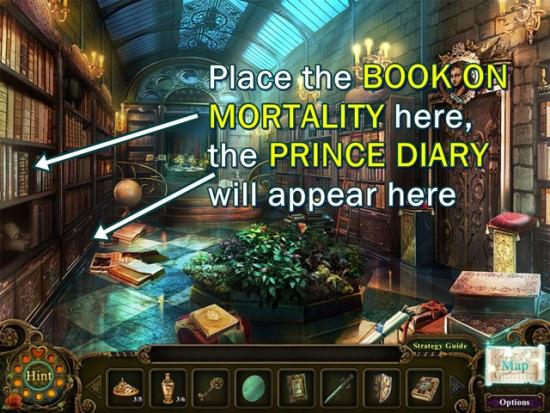
- Click on the bookshelf on the left. Place the book on mortality on the shelf, then take the prince diary. Leave the room and go up the stairs.
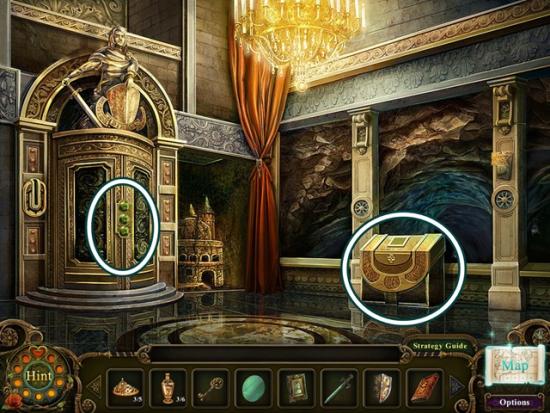
- Put the prince diary on the stand. After you do this, click the large door. Put the steel dagger in the slot. Go through the door.
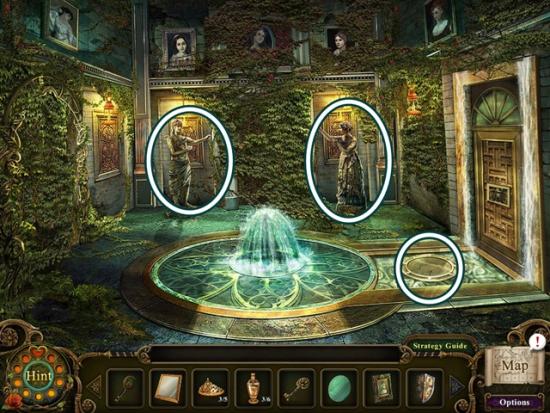
- Examine the statues on missing disc in the fountain. Leave the scene. Click on the castle replica to start a hidden object search.
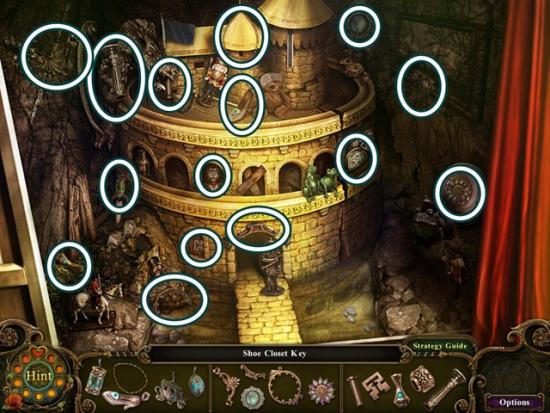
- When you are finished, a shoe closet key is completed. Click on it to add it to your inventory. Leave the scene, enter the library and go into the treasure room.
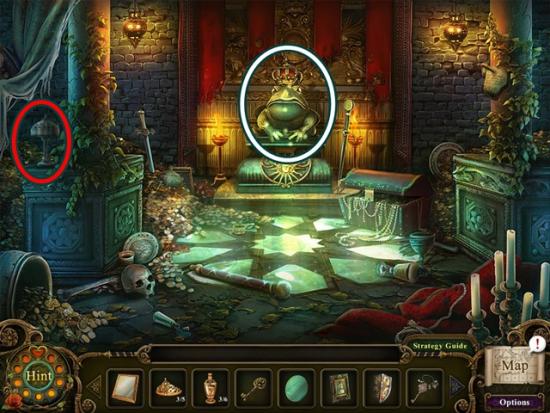
- Click on the lantern/lamp to take the cursed morphing object (14/20). Click on the frog statue to start a hidden object search.
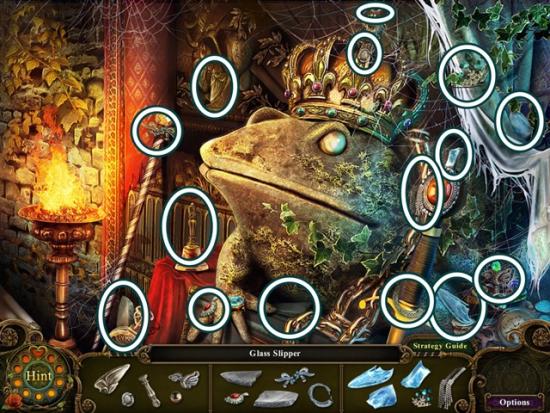
- When you are finished, a glass slipper is completed. Click on it to add it to your inventory. Leave the room.
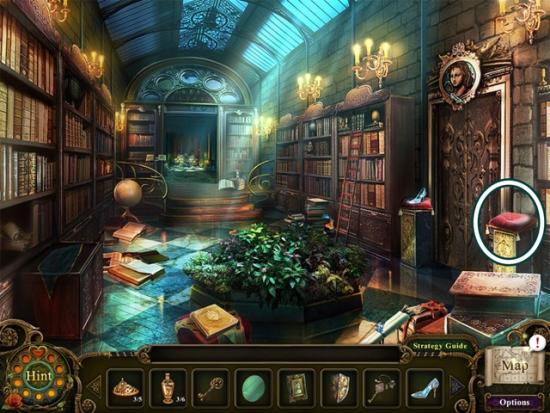
- Put the glass slipper on the cushion. Enter the room.
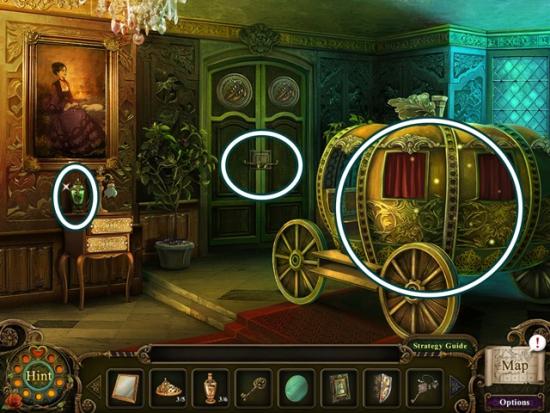
- Take the plant potion (plant potion collection 5/6). Click on the carriage to start a hidden object search.
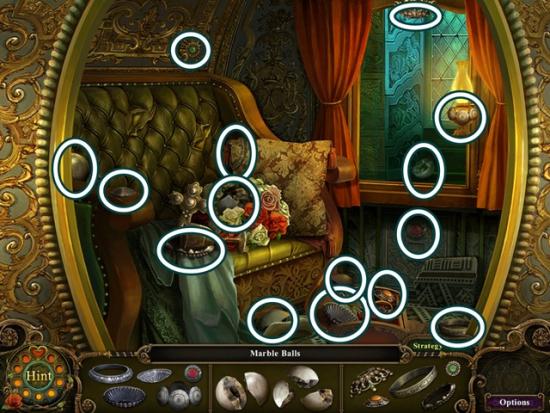
- When you are finished, the marble balls are completed. Click on them to add them to your inventory. Click on the door. Use the shoe closet key to unlock it. Enter the room.
Chapter 8
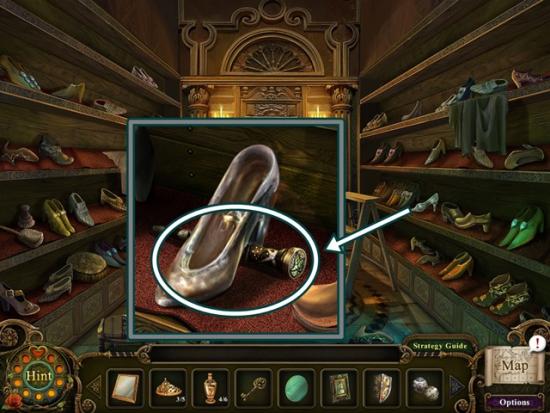
- Click on the glass slipper on the right shelf. Take the golden switch handle. Leave the scene.
- Click on the carriage to start a hidden object search.
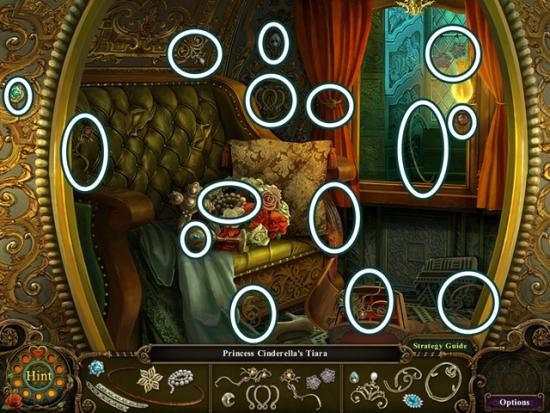
- When you are finished, Princess Cinderella’s tiara (princess’ tiara collection 4/5) is completed. Click on it to add it to your inventory. Go south twice, then up the stairs. Click on the castle replica to start a hidden object search.
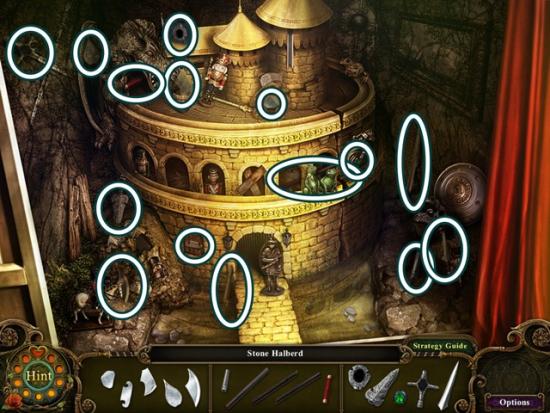
- When you are finished, a stone halberd is completed. Click on it to add it to your inventory. Leave the scene.
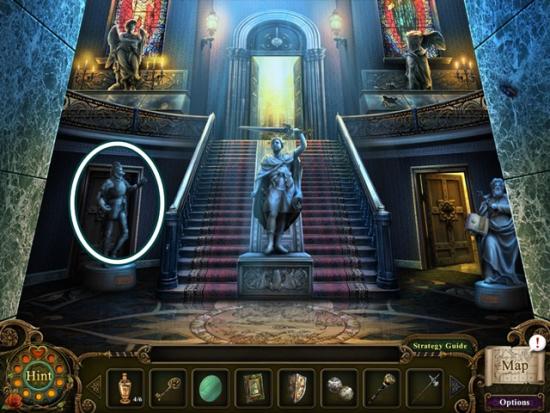
- Give the stone halberd and knight shield to the knight statue. Enter the room.
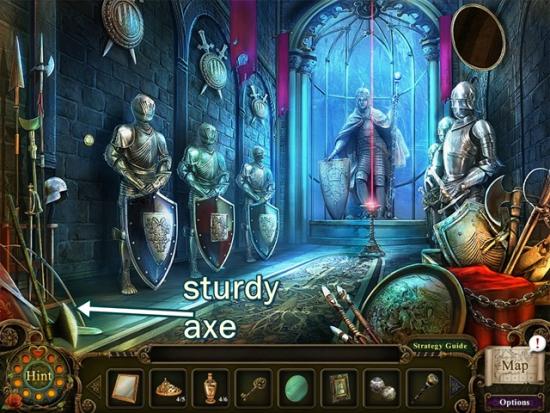
- Take the sturdy axe. Leave the scene, enter the library, go into Cinderella’s room and enter the shoe closet.
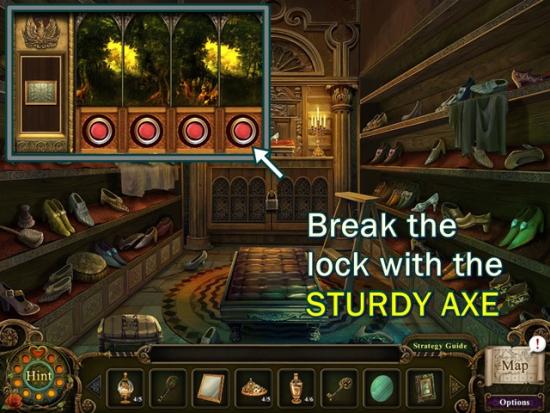
- Use the sturdy axe to break the cabinet. To solve the mini-puzzle, adjust the tiles to complete a picture. Solution is in the screenshot above. Click on the document to add more information to the map. Go south three scenes and then go into the armoury.
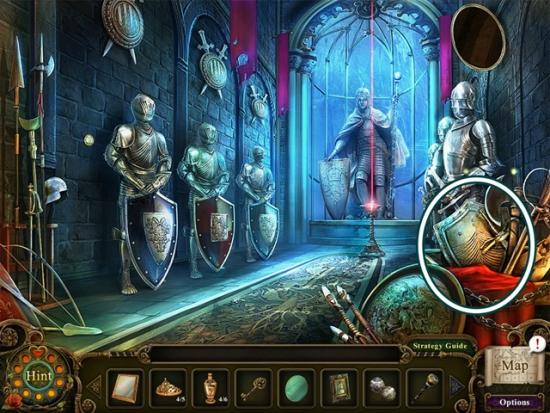
- Click on the pile of weapons (right) to start a hidden object search.
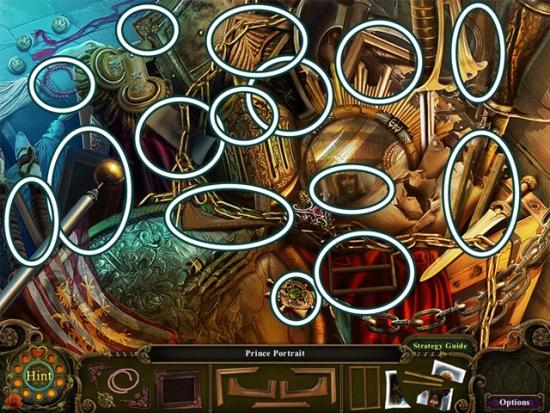
- When you are finished, a prince portrait is completed. Click on it to add it to your inventory. Leave the scene and go up the stairs.
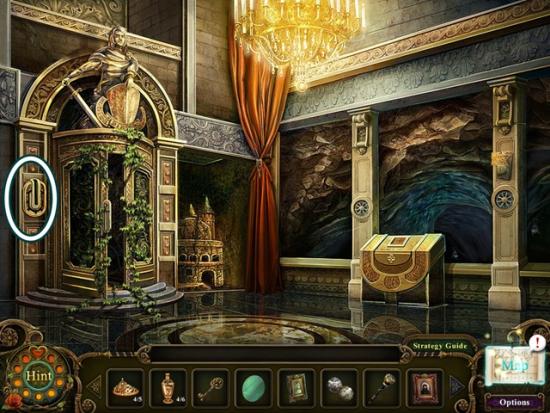
- Put the golden switch handle in the slot, don’t lower the lever. Enter the room.
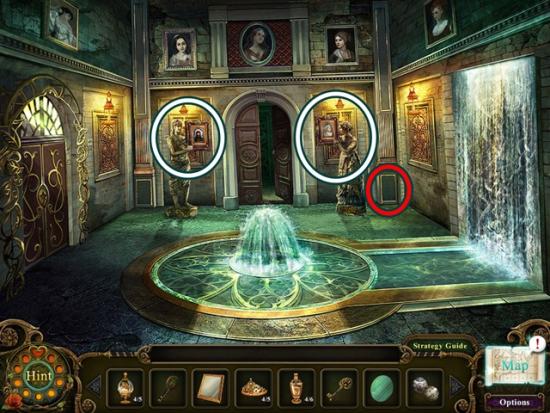
- Click on the emblem on the column beside the female statue (right) to take the cursed morphing object (15/20). Give the prince portrait to the male statue (left) and give the princess portrait to the female statue (right). Note: if the vines are still covering everything, go out of the room (south) and click the lever beside the door.
- Go through the door.
- DP200
- Click on the blue flower to take the cursed morphing object (16/20). Go up the path.
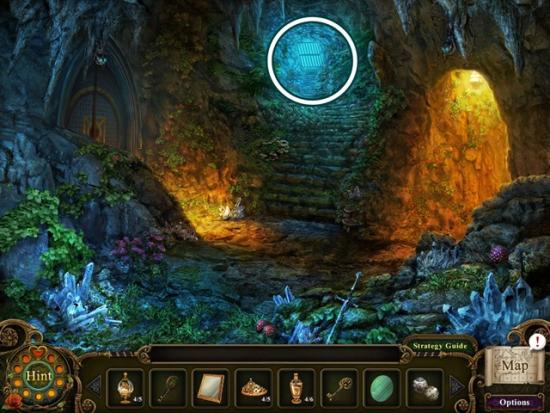
- Use the rusty cave key on the gate. Go through the gate. Go towards the cottage. Click on the window to start a hidden object search.
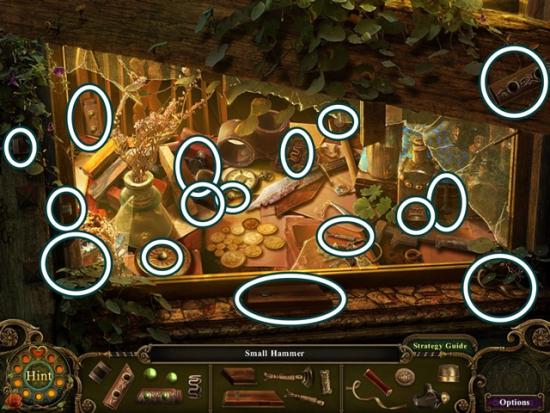
- When you are finished, a small hammer is completed. Click on it to add it to your inventory. Go south. Take the path to the left of the cottage.
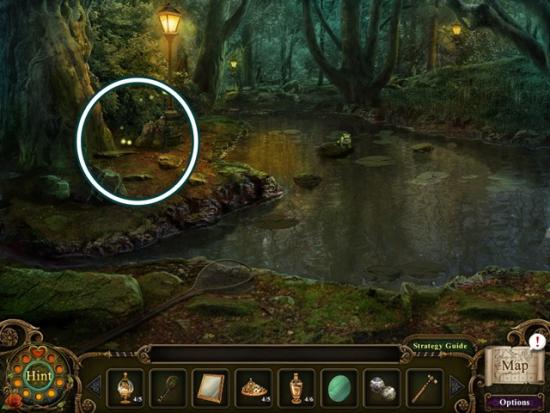
- Click by the tree to start a hidden object search.
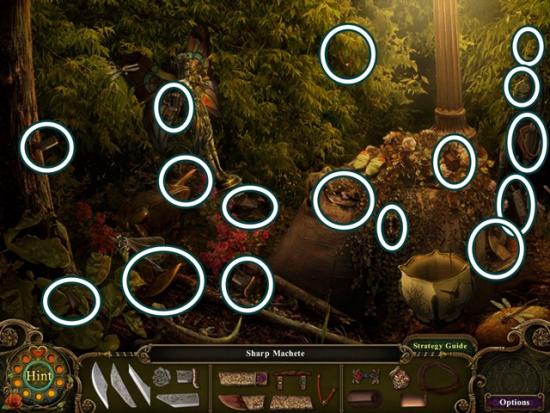
- When you are finished, a sharp machete is completed. Click on it to add it to your inventory. Go south four scenes.
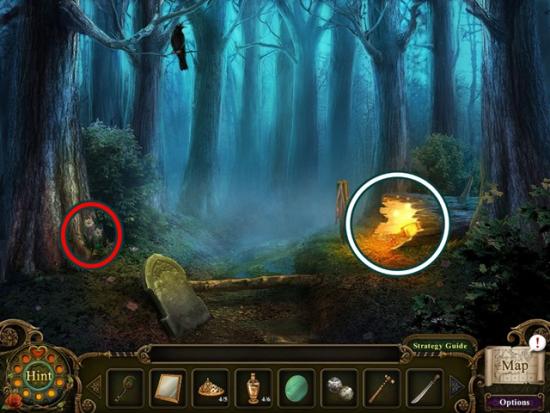
- Click on the flowers in front of the tree to take the cursed morphing object (17/20). Click on the log to start a hidden object search.
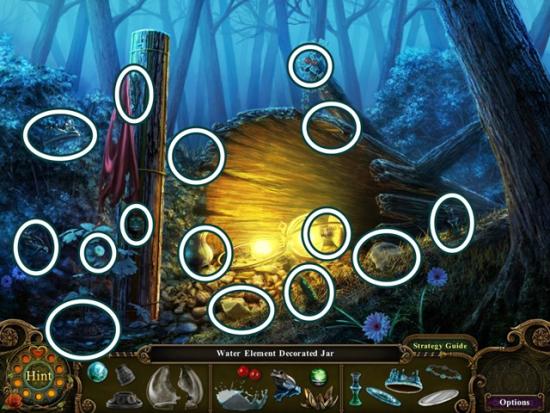
- When you are finished, the water element decorated jar (decorated jar collection 5/5) is completed. Click on it to add it to your inventory. Go north and take the left path.
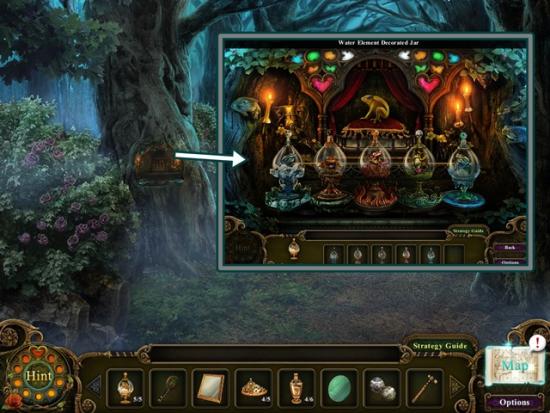
- Click on the tree. All the decorated jars are displayed. You cannot solve this puzzle without all five jars. Match each jar to its proper base. Click two jars to switch their positions. The solution is in screenshot above. When you have completed the puzzle, take the metal frog plating. Head north and go all the way up to the cottage.
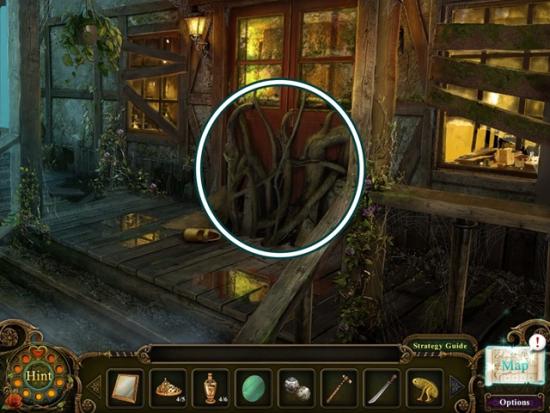
- If you haven’t already, play the hidden object scene to get the small hammer (see screenshot above). Use the sharp machete to clear the vines, then use the cottage key to open the door. Enter the cottage.
Chapter 9
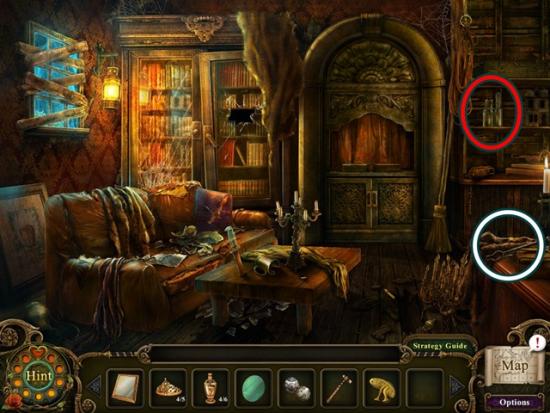
- Click on the bottles/clock on the shelf to take the cursed morphing object (18/20). Take the tongs. Go south twice, then take the path to the left of the cottage. Click on the base of the tree to start a hidden object search.
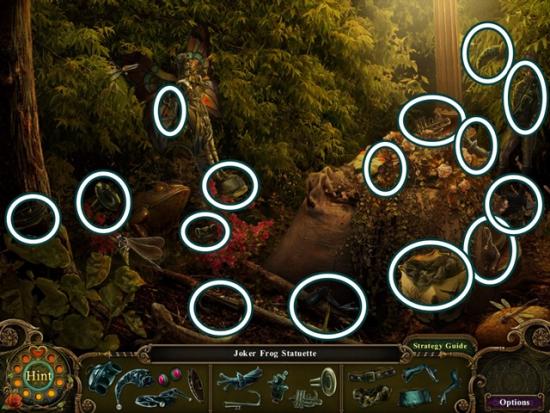
- When you are finished, the joker frog statuette is completed. Click on it to add it to your inventory. Go south three scenes, then take the path to the right.
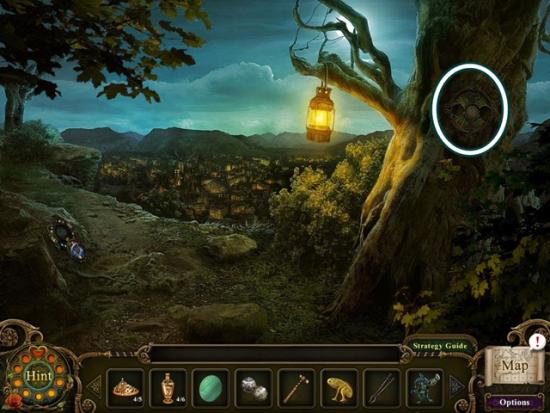
- Click on the design on the tree. Add the metal balls. Use the tongs to reach inside and click on the evidence to add more information to the map. Go back to the cottage.
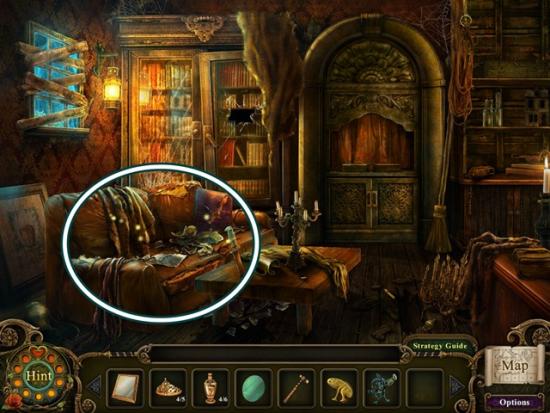
- Click on the couch to start a hidden object search.
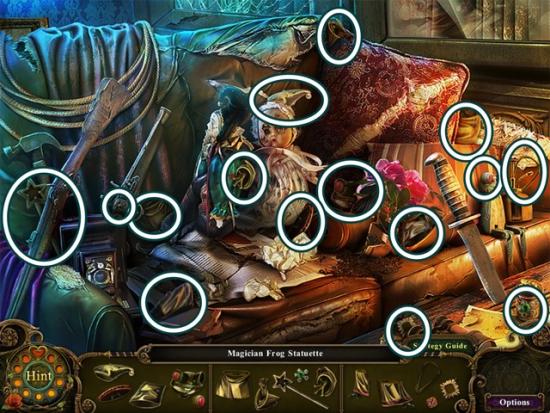
- When you are finished, the magician frog statuette is completed. Click on it to add it to your inventory. On the stage on the back wall, place the joker frog statuette and the magician frog statuette on their respective bases. Go through the door that opens, then go south. This triggers another hidden object puzzle. Click on the couch to start a hidden object search.
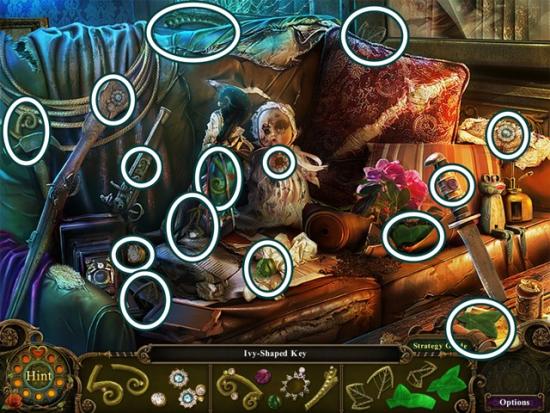
- When you are finished, an ivy shaped key is completed. Click on it to add it to your inventory. Go south. Click on the window to start a hidden object search.
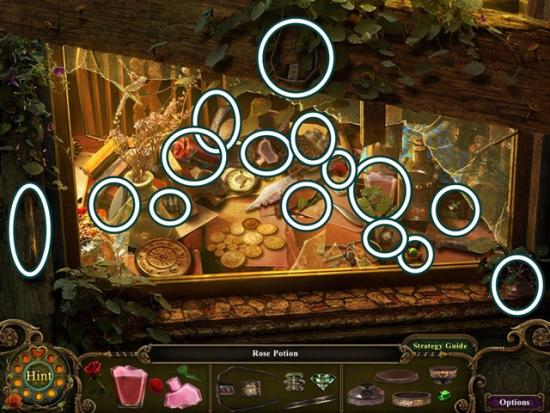
- When you are finished, the rose potion (plant potion collection 5/6) is completed. Click on it to add it to your inventory. Go south.
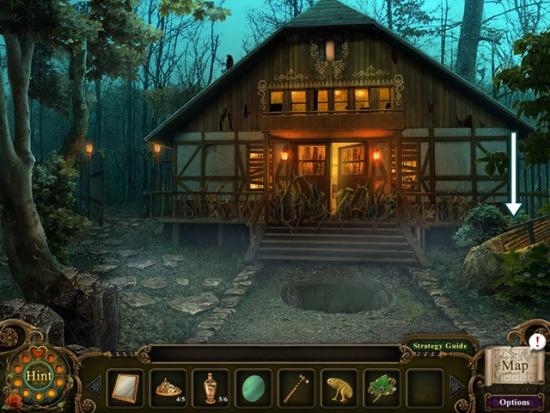
- Go down the opening on the right. Go right into the cave and make your way back to the room with the statues. Click on the headless statue to start a hidden object search.
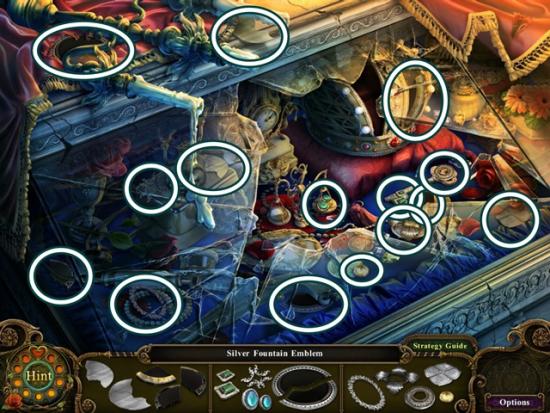
- When you are finished, a silver fountain emblem is completed. Click on it to add it to your inventory. Go up the stairs.
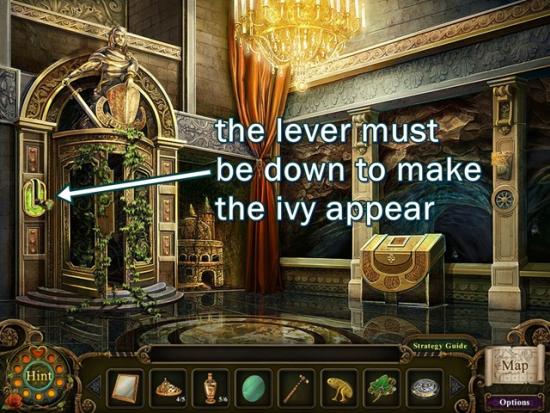
- Lower the lever so the ivy is creeping up the door. If you don’t see the ivy, click the lever so it’s in the down position! Go through the door.
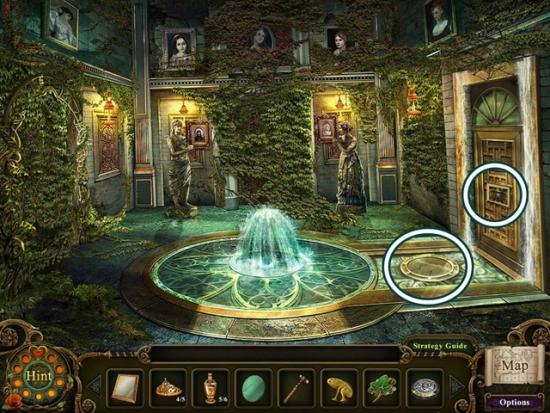
- Place the silver fountain emblem on the slot on the floor. Click on the door on the right to start a mini-puzzle.
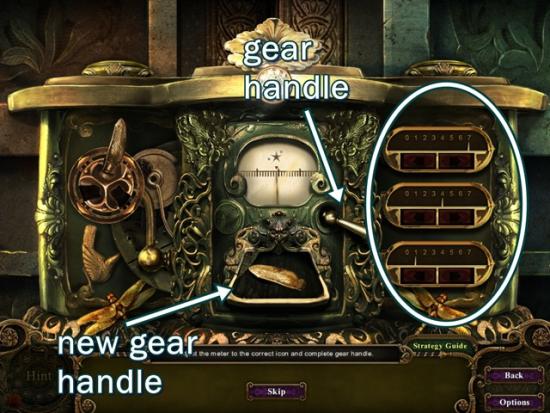
- Click the gear handle to make the items highlighted in white appear. First use these dials to move the centre dial to the star that matches the one in the top left corner. The first dial moves the centre dial one position, the middle dial moves the centre dial five positions and the third dial moves the centre dial 25 positions. Adjust the dials until the centre dial stops on a star. Take the new gear handle that appears. Go again to move the centre dial to the star that matches the one in the top right corner.
- Tip: Use the 25 dial first as it moves the farthest distance.
- When you are finished, go through the door.
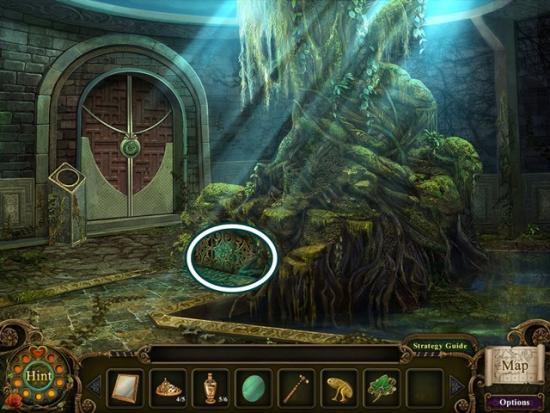
- Use the small hammer to break the grate below the tree. Take the glass orb. Go south twice. Click on the lever to make the ivy disappear. Go back into the portrait room.
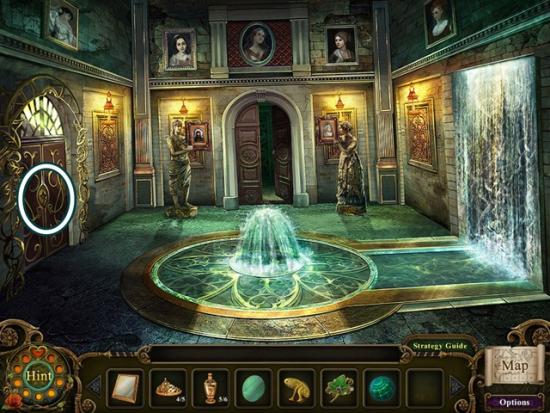
- Use the ivy shaped key to open the door on the left.
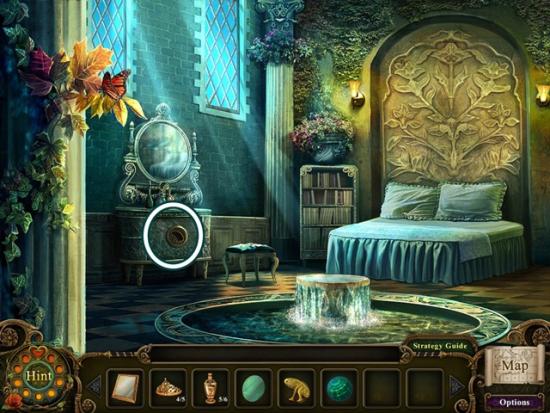
- Put the metal frog plating in the slot on the dresser. Take the armoury key that appears in the mirror. Go south three times, then enter the armoury.
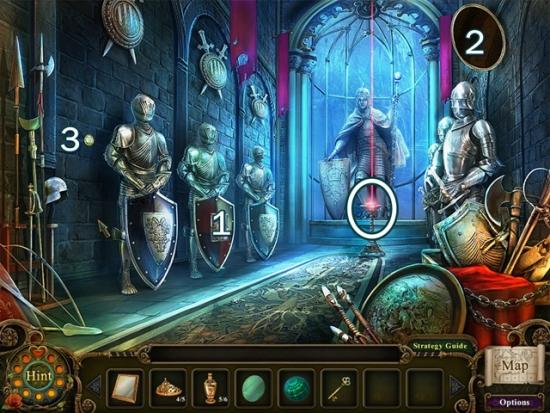
- Place the glass orb on the pedestal, then place the square mirror on the shield of the knight (left-middle) (1), then place the round mirror in the slot on the wall (2). When the laser stops at the hole (3), use the armoury key in the lock. Take the ancient wand. Leave the scene.
Chapter 10
- Go into the armoury room.
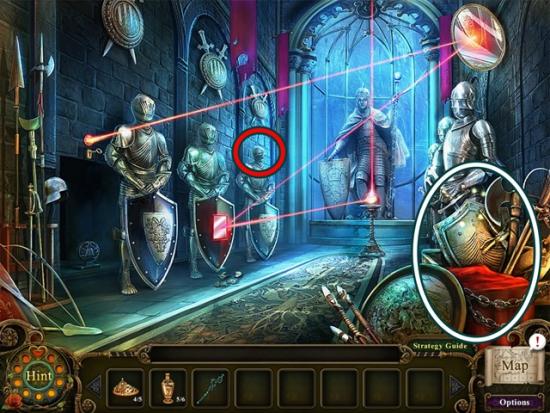
- Click on the knight’s helmet (farthest left) to take the cursed morphing object (19/20). Click on the pile of weapons to start a hidden object search.
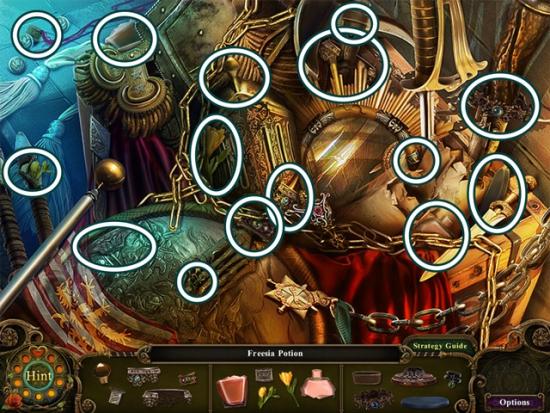
- When you are finished, a freesia potion (plant potion collect 6/6) is completed. Click on it to add it to your inventory. Go south and enter the library and continue to the treasure room. Click on the frog statue to start a hidden object search.
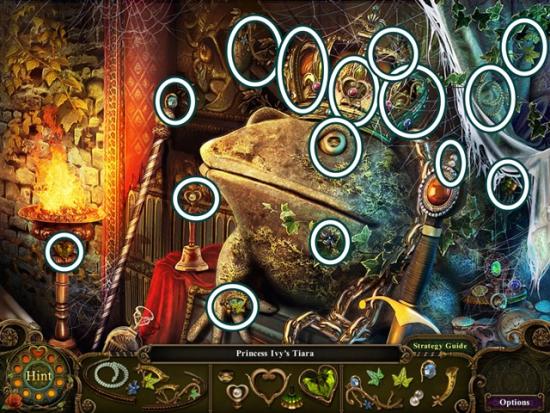
- When you are finished, Princess Ivy’s tiara (princess’ tiara collection 5/5) is completed. Click on it to add it to your inventory. Go south four scenes, then enter the greenhouse and go through the door on the left.
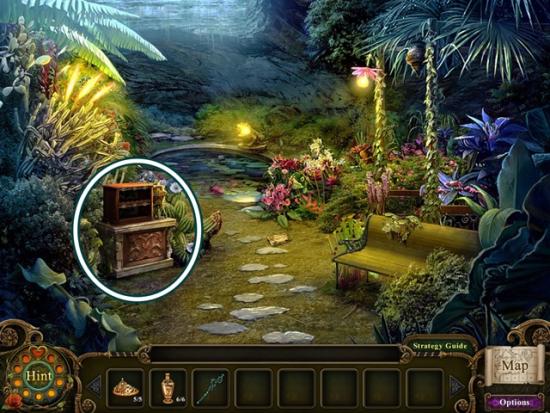
- Click on the chest. This puzzle will only start if you have all six plant potions.
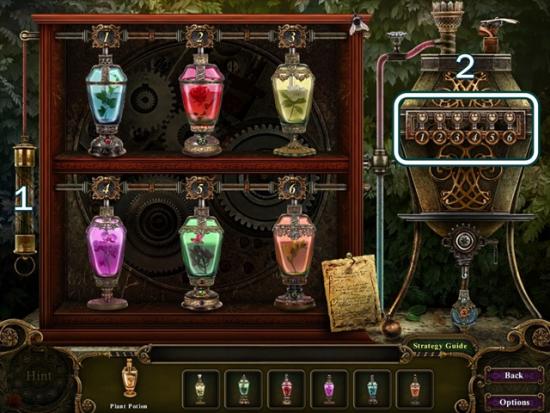
- The potions have to be arranged in a certain order. To begin, pull the handle (1) and then look at the mechanism (2) to see if any of the numbers (highlighted) have lit up. If a number lights up, its corresponding potion is in the correct position. Rearrange the remaining potions until they are all in the correct order. Solution:
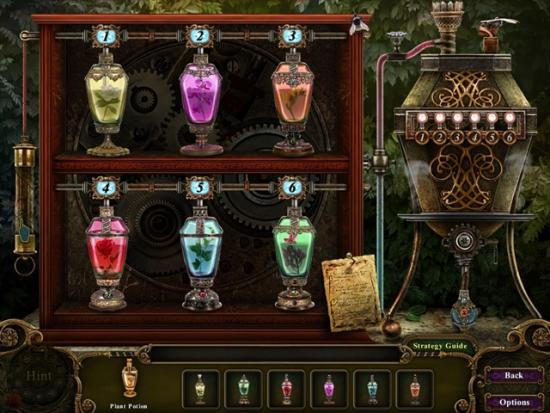
- Take the uncursed potion. Go south three scenes, go through the right gate, take the gate closest to the right and enter Snow White’s house. Click on the glass casket to start a hidden object search.
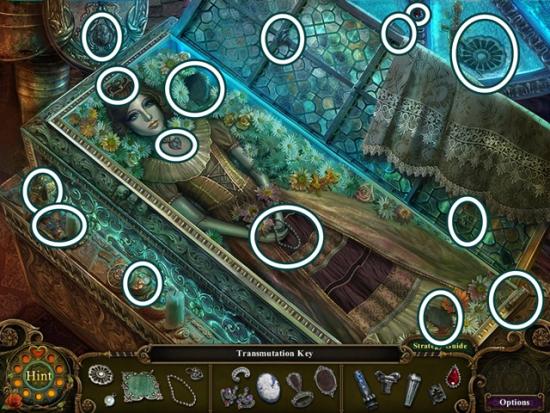
- When you are finished, the transmutation key is completed. Click on it to add it to your inventory. Go south twice, then take the gate closer to the house (that the king statue was blocking).
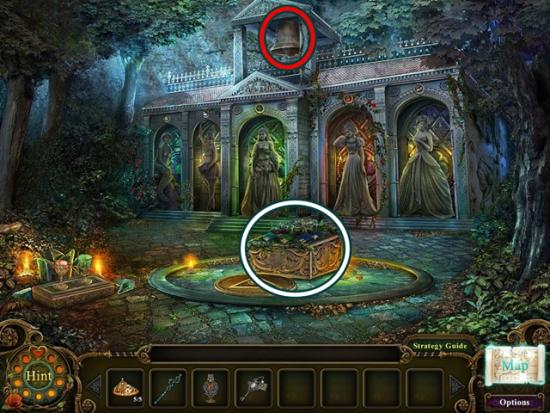
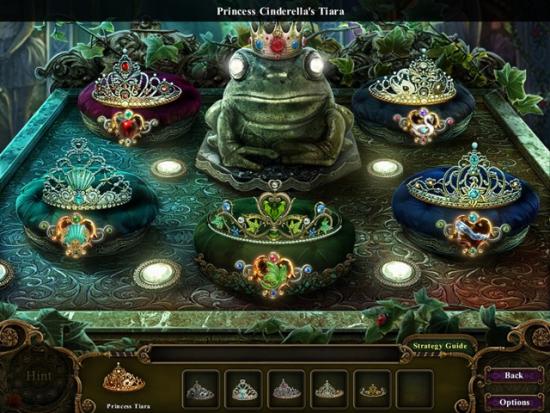
- Click on the bell to take the cursed morphing object (20/20). Click on the tiara display. You must have all the tiaras to start this puzzle. Match each tiara to its appropriate cushion. The design on the cushion will light up when the right tiara is placed on it. Solution:
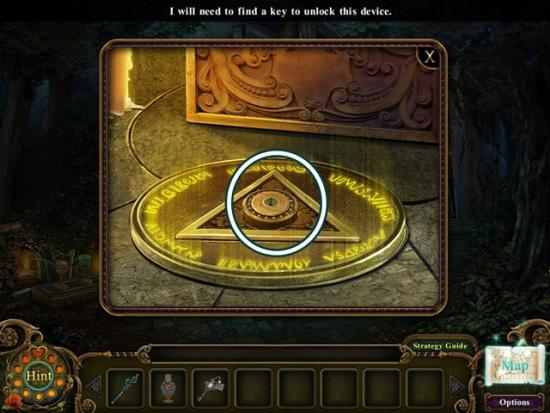
- Use the transmutation key to unlock the device, then place the ancient wand in the opening, then add the uncursed potion. Watch the video. The immortal wand is added to your inventory.
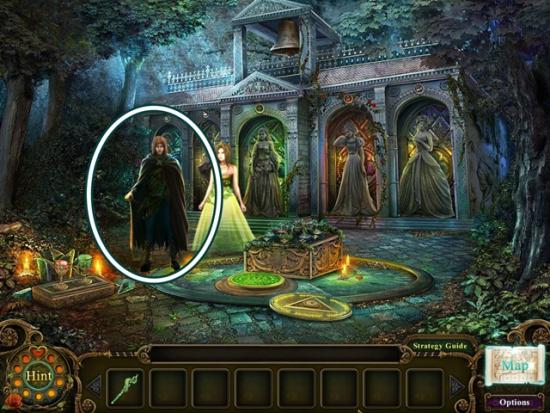
- Use the immortal wand on the prince. Watch the video. The prince locket is added to your inventory. Go south four scenes and east two scenes. From the room with the ivy, (if the door isn’t there, go south and click the lever to remove the ivy), go north six scenes until you get to the back room of the cottage.
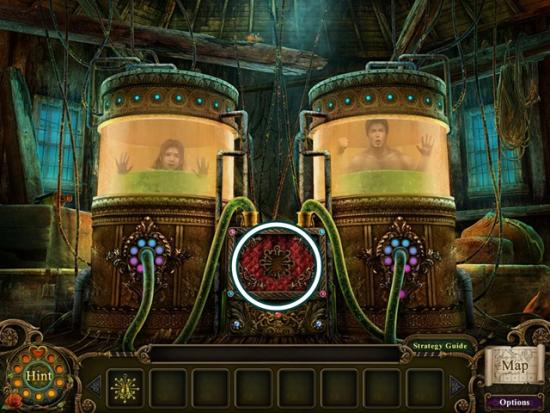
- Put the prince locket in the slot. Click on that area to start a mini-puzzle.
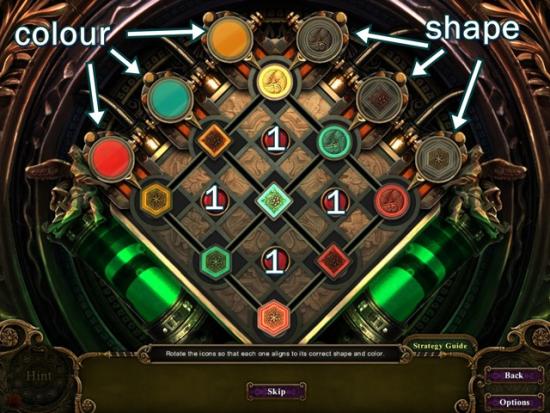
- Line up the icons so each is in its proper position according to its colour and shape. Use the red buttons (1) to rotate the icons. Once finished, watch the video.
The end!!!!
- When told the Hard option is unlocked, click the checkmark. Watch the credits or click Skip.
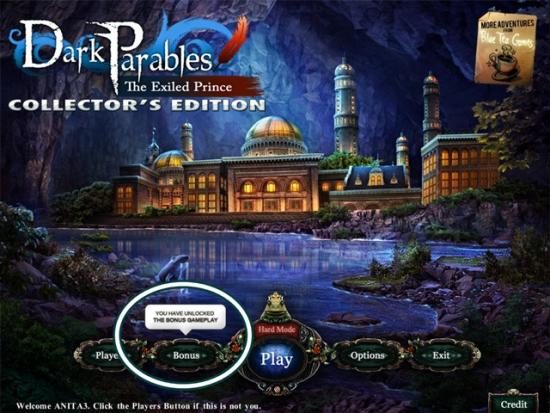
- From the main menu, click the Bonus button.
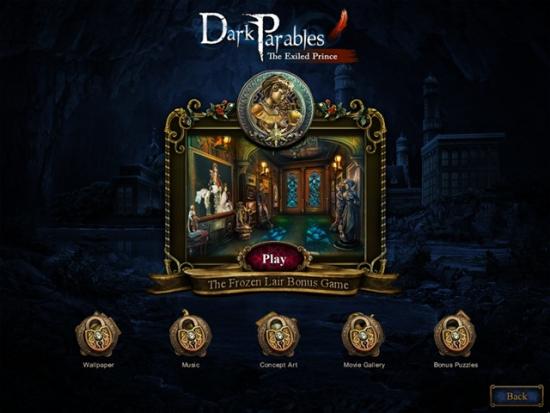
- When offered the Frozen Lair Bonus Game, press Play.
Cursed Morphing Objects
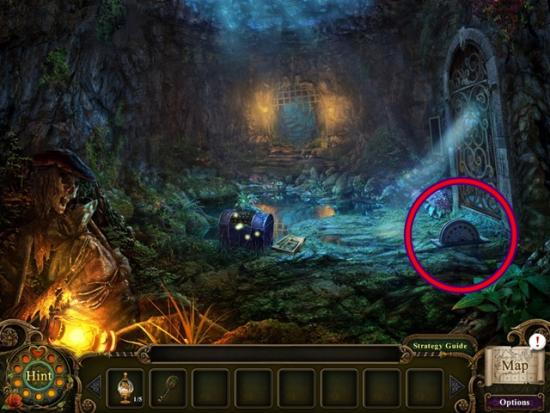
- Cave entrance with the skeleton.
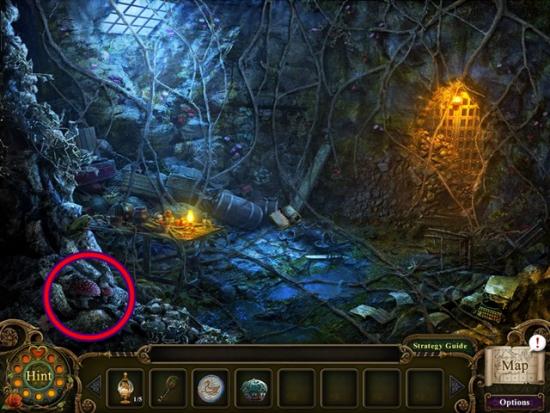
- North of cave entrance (available after the cursed Prince talks to you).
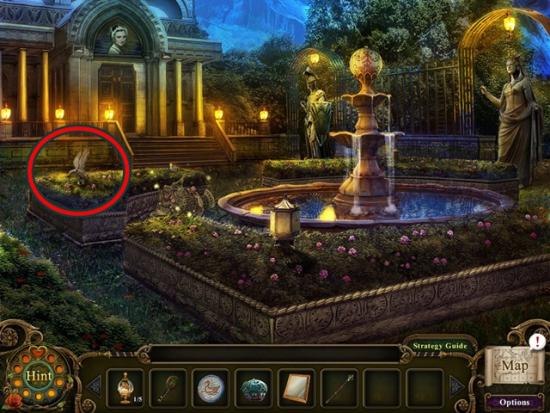
- Lantern/eagle on the grass, in front of the Swan Princess’ house.
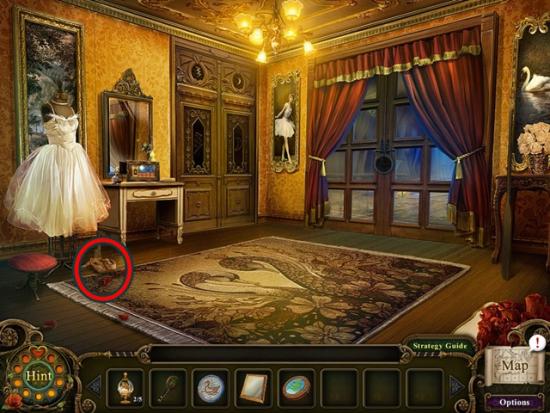
- Swan Princess’ house, front room.
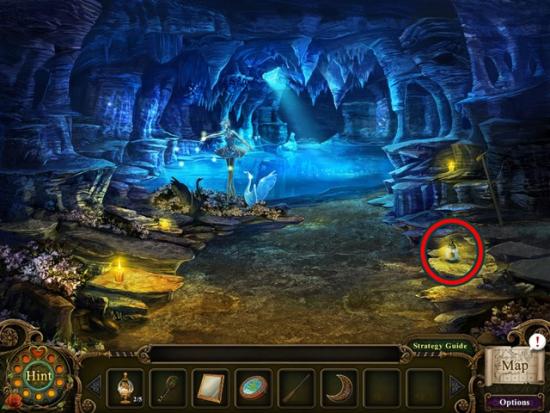
- Swan Princess’ house, through the double doors by the lake.
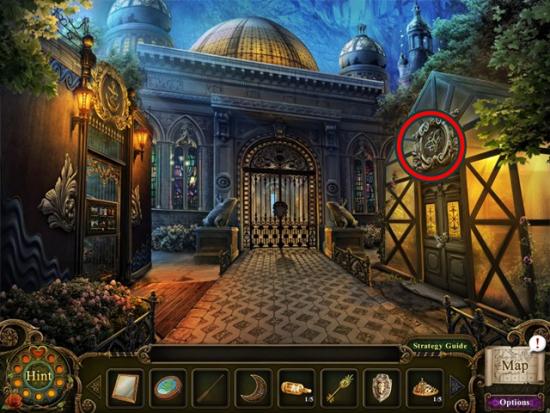
- Insignia above greenhouse door (available in Chapter Three).
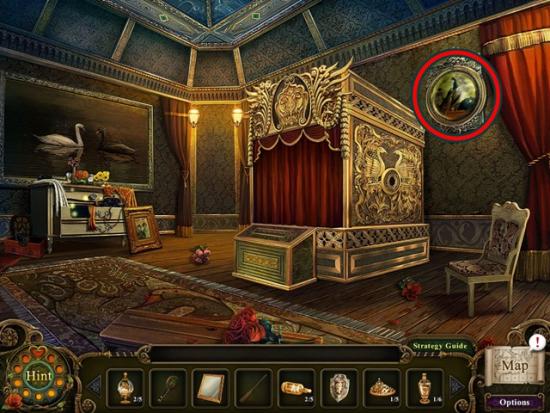
- Swan Princess’ bedroom.
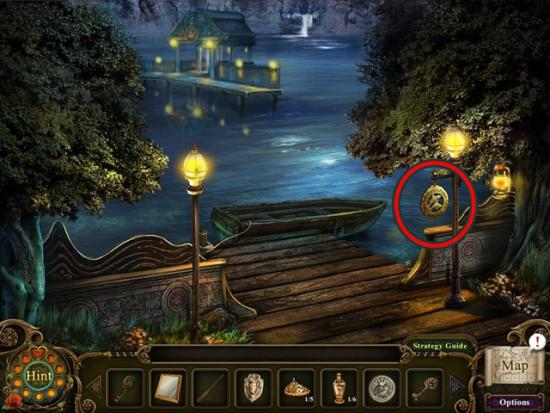
- Dock (solve the ship in a bottle puzzle first).
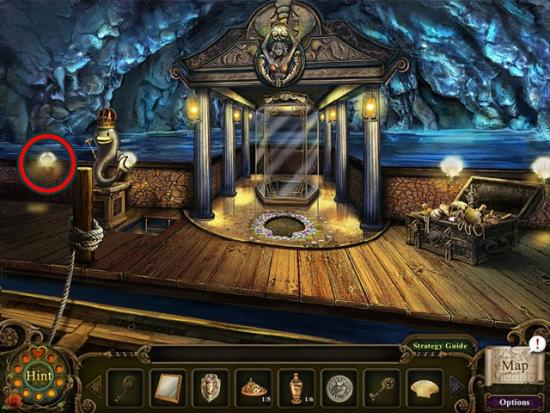
- Pier, beside Big Fish (Felix???).
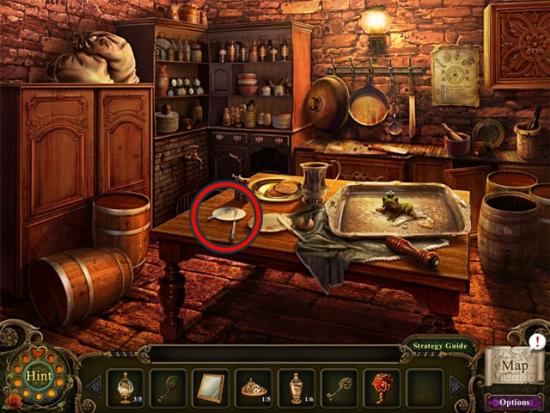
- Castle kitchen.
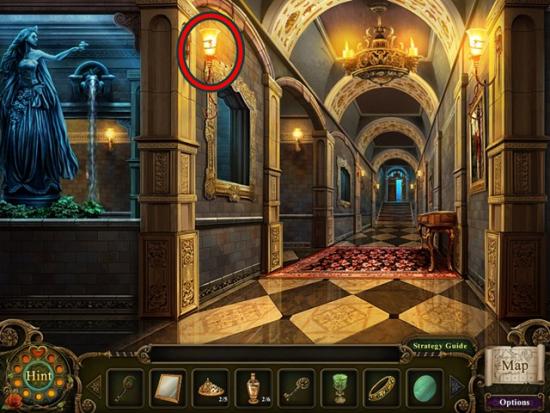
- Castle foyer (available in Chapter Six).
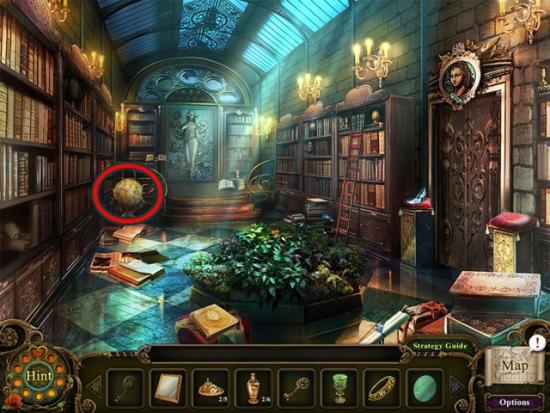
- Castle library.
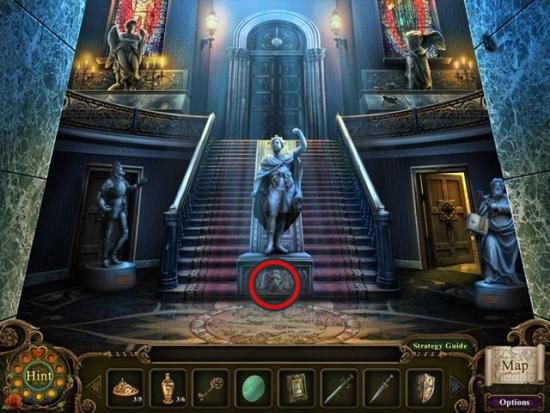
- Statue room in the castle.
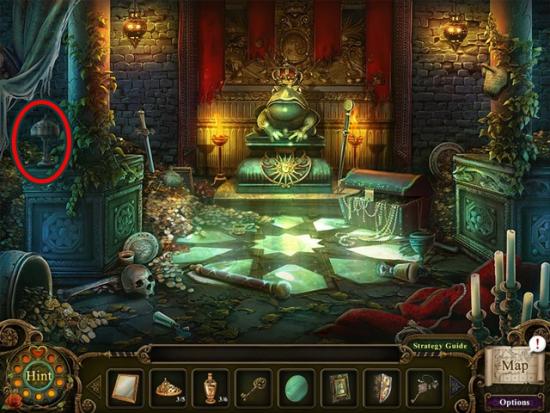
- Castle treasure room (available in Chapter Seven).
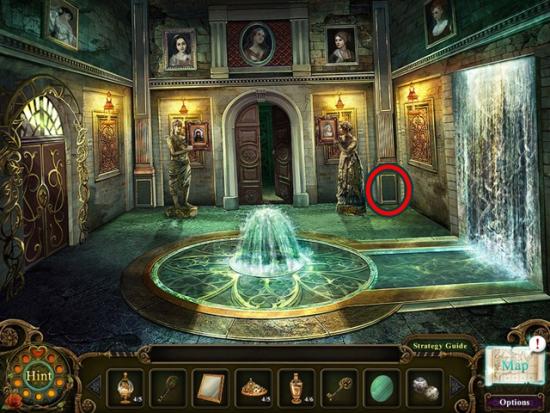
- Ivy covered room in the castle (available in Chapter Eight).
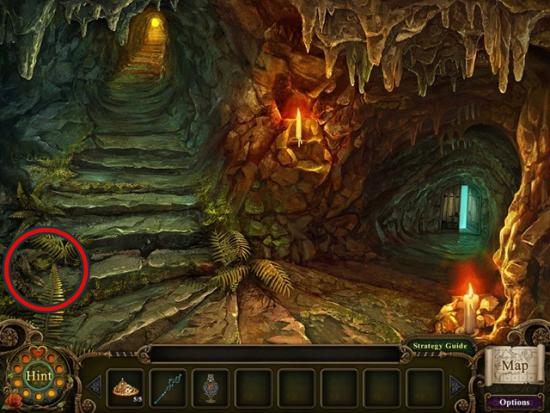
- Cave after the ivy room.
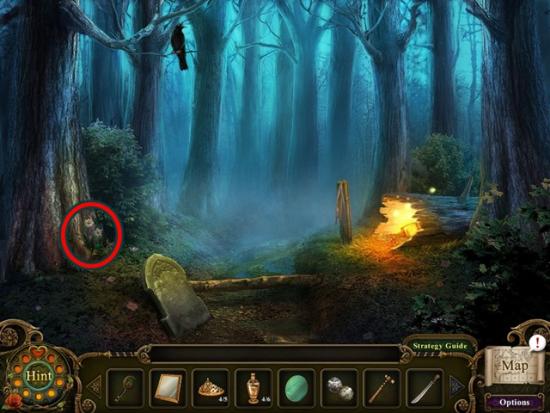
- In the forest, first scene (available in Chapter Eight).
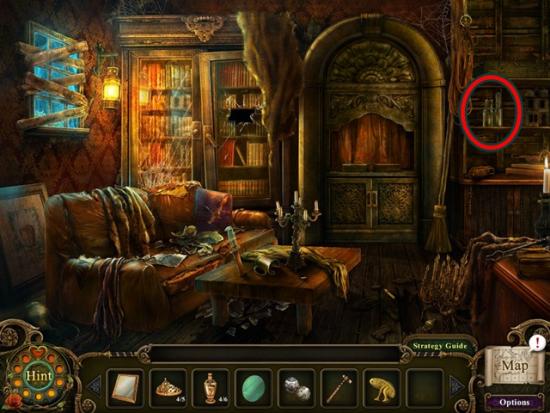
- In the cottage.
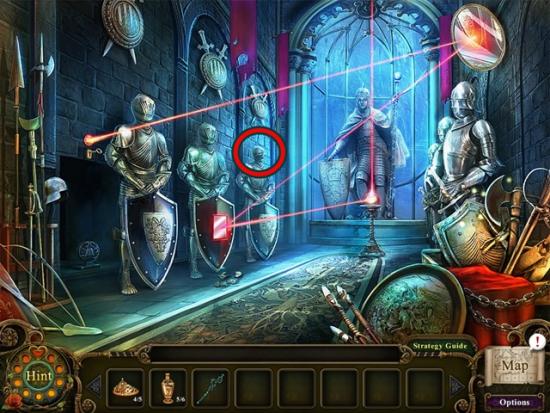
- In the armoury room (available in Chapter Ten).
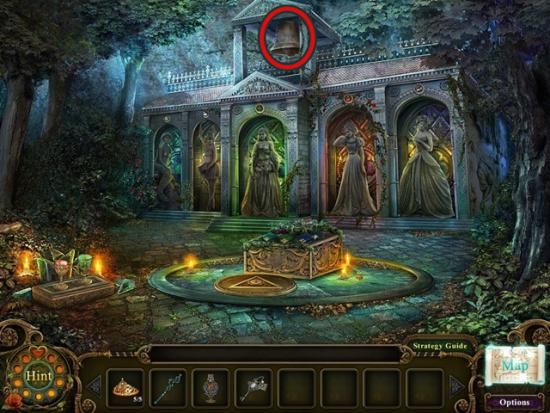
- Princess statues scene (available in Chapter Ten).
Collector’s Edition Bonus Chapter
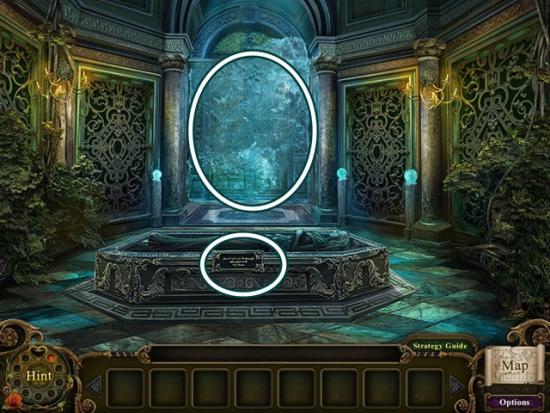
- Click the tomb’s plaque. Click the back wall to trigger a video and open the door.
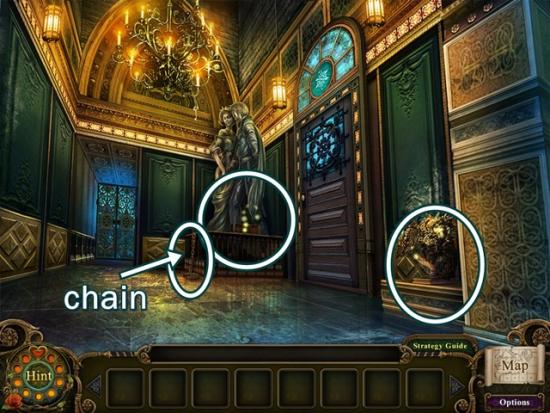
- Take the small chains. Click the flower pot (right) to start a hidden object search.
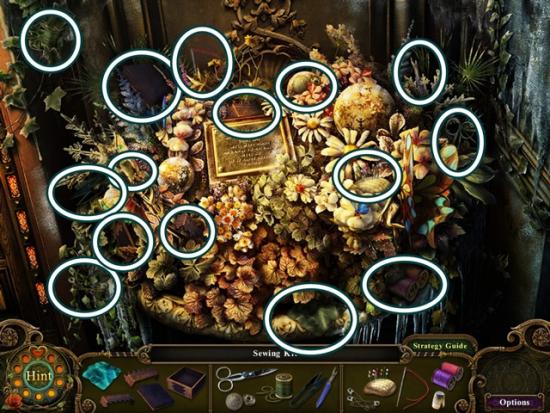
- When you are finished, a sewing kit is completed. Click on it to add it to your inventory.
- Click on the base of the statue to start a mini-puzzle. Click on the disc that corresponds to the symbol in the centre. If you click on the wrong disc, the puzzle restarts. Solution: owl = moon; groundhog = prairie; bird = clouds; bat = cave; fish = waves; crab = shell; spider = web; monkey = tree. Take the brass key.
- Use the brass key to unlock the door (right side of scene).
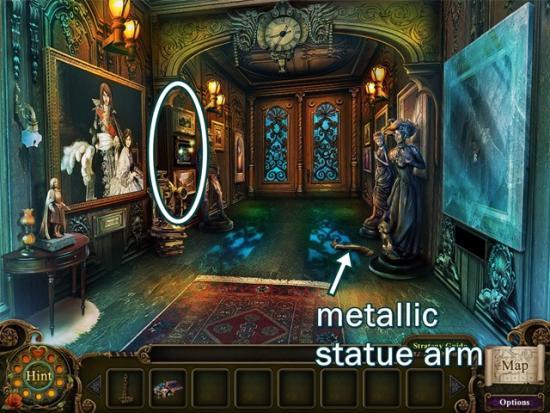
- Take the metallic statue arm. Click the paintings beside the male statue to start a mini-puzzle.
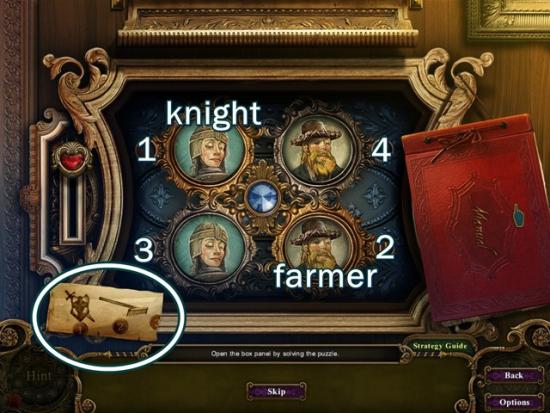
- Match the first two discs so they correspond with the paper at the bottom right of the puzzle. Disc #1 is the knight (to match the shield), disc #2 is the farmer. Use trial and error to determine the proper characters for discs #3 and #4. Note: the discs aren’t numbered in order!!! Take note of which disc is #1, #2, #3, and #4.
- Once you’ve placed the discs in the correct positions, another puzzle starts. Click the red “manual” book. Click on the buttons to change them and have them match the picture in the manual.
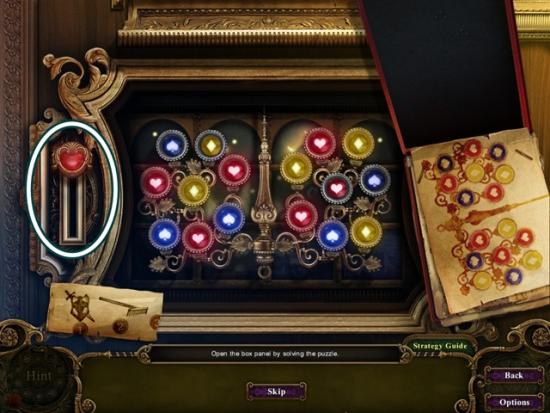
- Pull the red lever. The panel opens and you are returned to the scene. Go south. Click the flower pot (right) to start a hidden object search.
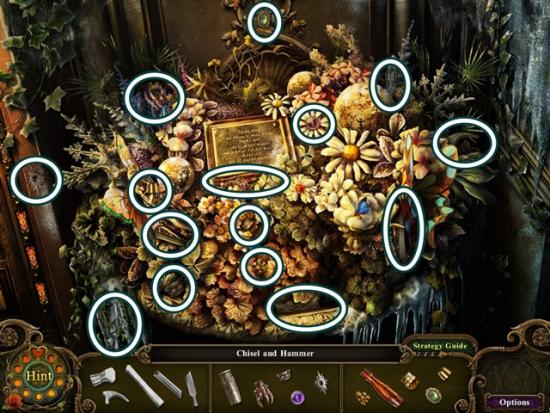
- When you are finished, a chisel and hammer is completed. Click on it to add it to your inventory.
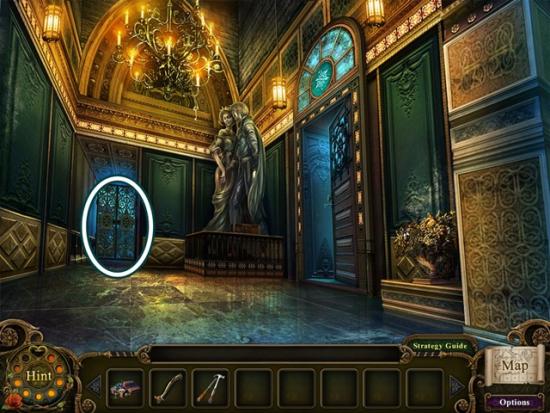
- Click on the back gate. Use the chisel and hammer to break the ice. Go through the gate.
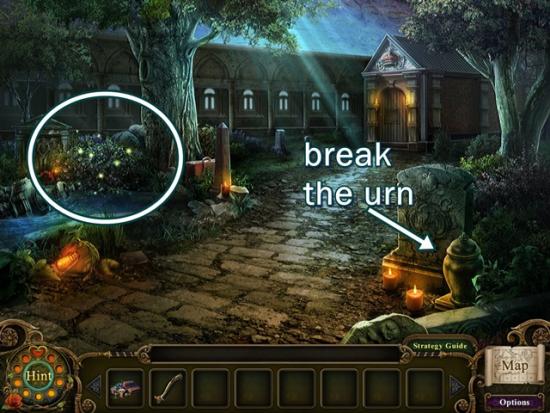
- Use the metallic statue arm to break the urn. Take the painted fabric. Click on the bushes next to the tree to start a hidden object search.
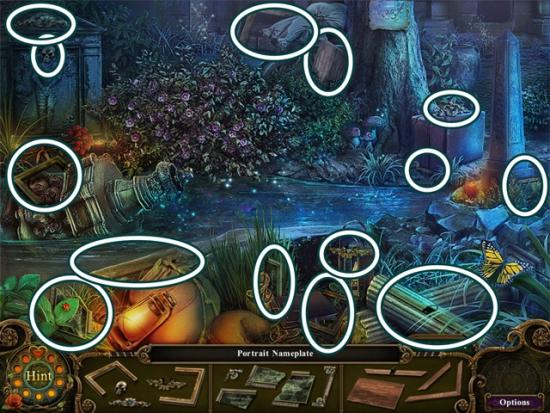
- When you are finished, a portrait nameplate is completed. Click on it to add it to your inventory. Go south, then go through the door on the right.
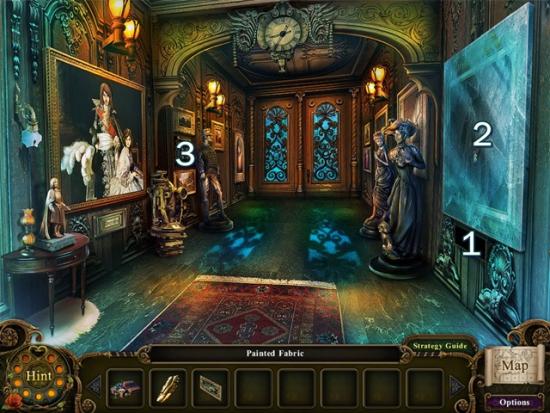
- Put the portrait nameplate in the slot below the portrait (1). Put the painted fabric on the canvas, then use the sewing kit to repair it. Click on the area where the portrait nameplate was. Take the gear wheel and read the note. Close the mini-window. Click on the portraits on the other side of the room (3).
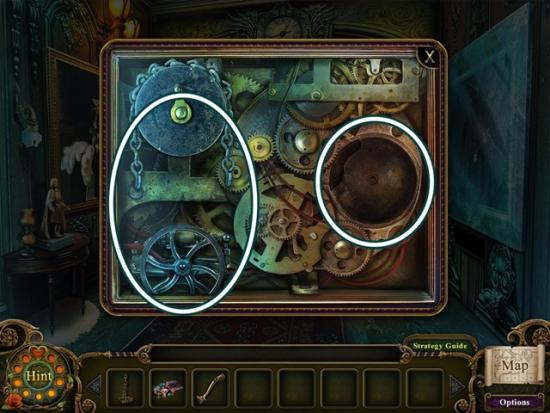
- Add the small chains and the gear wheel. Click the gear wheel’s lever. Go south.
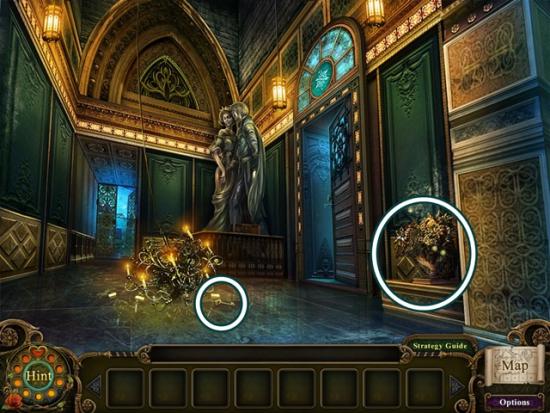
- Take the bedroom key. Click the flower pot (right) to start a hidden object search.
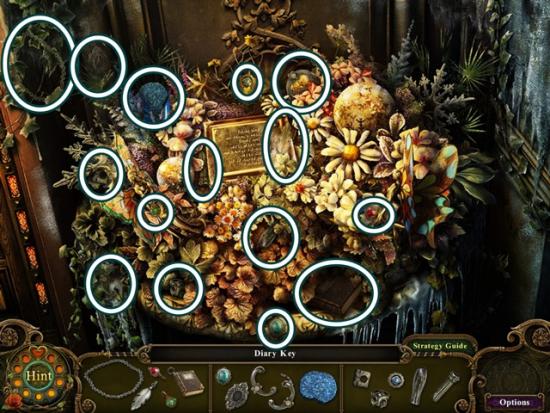
- When you are finished, a diary key is completed. Click on it to add it to your inventory. Go through the door on the right.
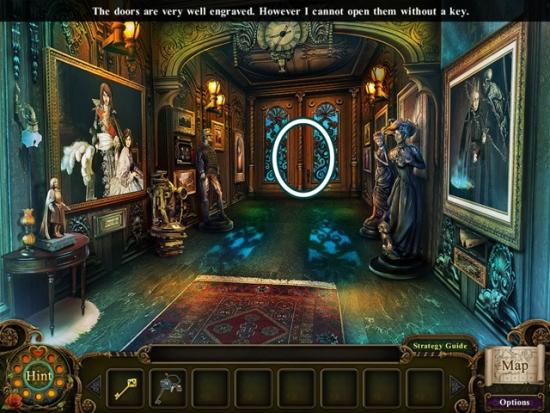
- Use the bedroom key on the back door. Enter the room.
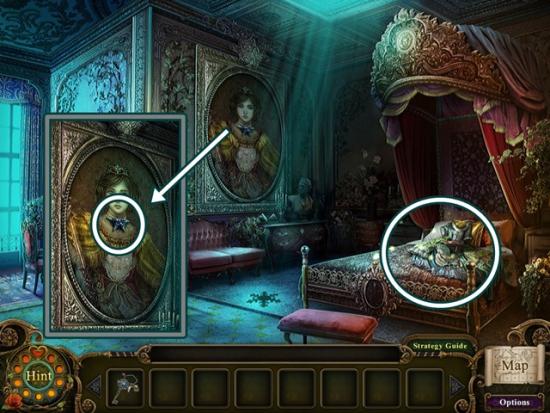
- Click on the portrait. Take the right gemmed snowflake. Click on the bed to start a hidden object search.
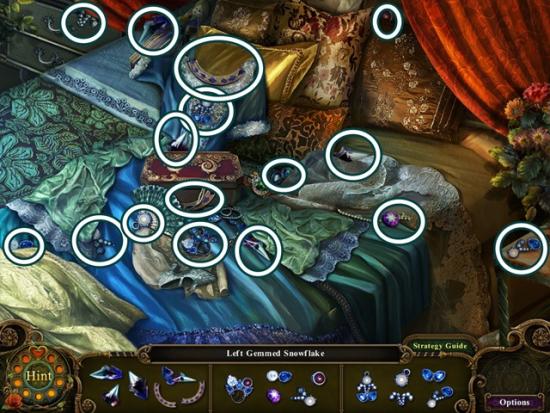
- When you are finished, a left gemmed snowflake is completed. Click on it to add it to your inventory. Go south twice, then through the gate.
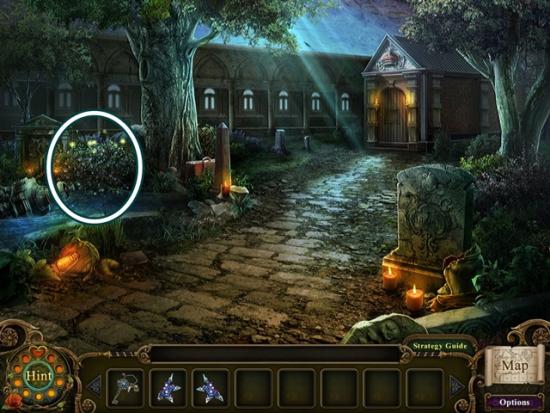
- Click on the bushes next to the tree to start a hidden object search.
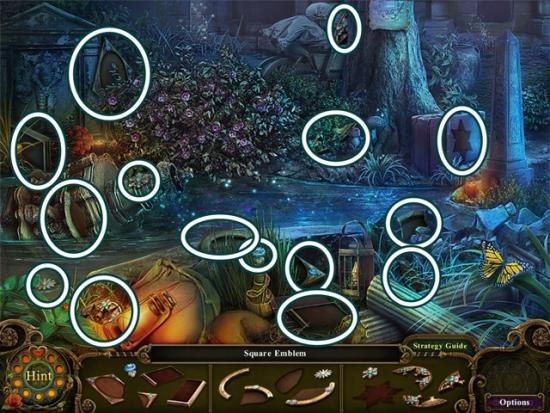
- When you are finished, a square emblem is completed. Click on it to add it to your inventory.
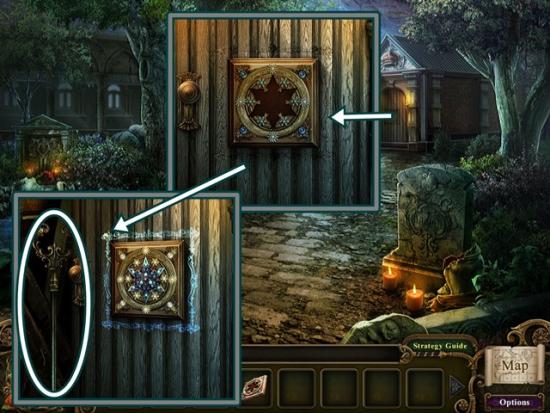
- Click on the shed. Place the square emblem in the slot, then add the left gemmed snowflake and the right gemmed snowflake. Take the metal stand with snowflake symbol. Click on the bushes next to the tree to start a hidden object search.
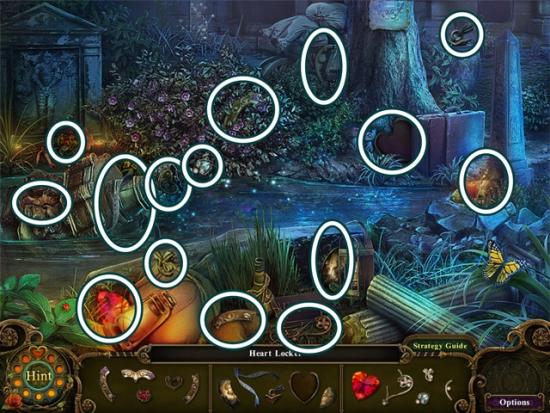
- When you are finished, a heart locket is completed. Click on it to add it to your inventory. Go south, through the right door and go into the bedroom. Click on the bed to start a hidden object search.
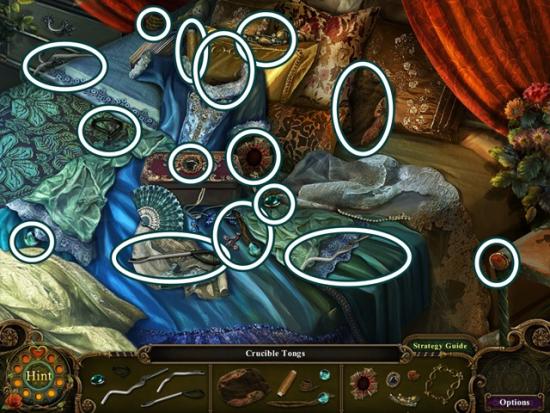
- When you are finished, the crucible tongs are completed. Click on it to add it to your inventory.
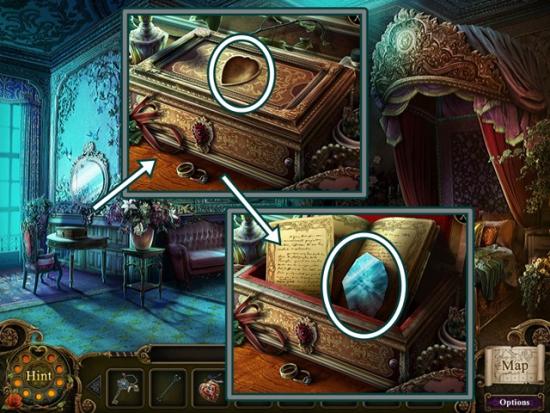
- Click on the jewellery box. Place the heart locket in the slot. Open the diary with the diary key. Use the crucible tongs to take the cursed mirror shard.
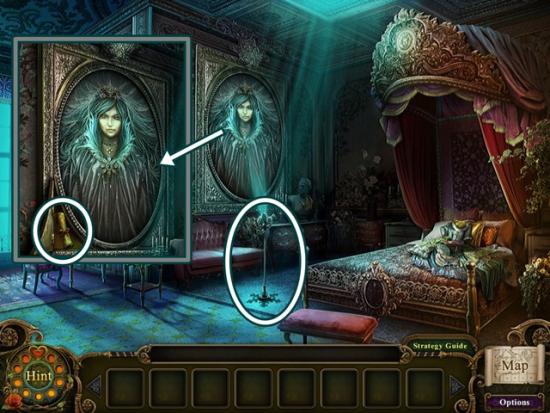
- On the snowflake silhouette, place the metal stand with snowflake symbol, then add the cursed mirror shard. Click on the painting. Take the snowfall kingdom map. Click on the bed to start a hidden object search.
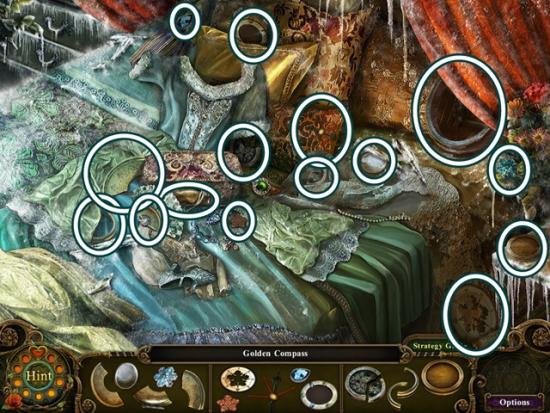
- When you are finished, a golden compass is completed. Click on it to add it to your inventory. Go south twice. Click on the flower pot to start a hidden object search.
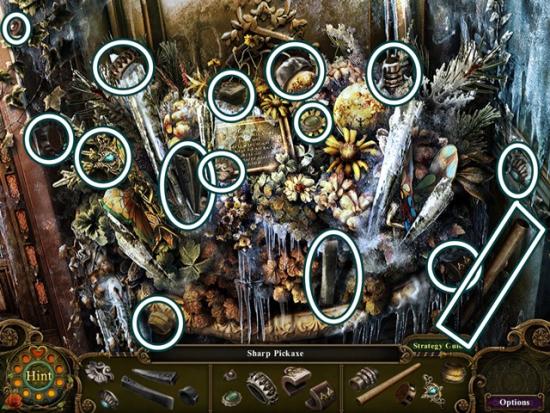
- When you are finished, a sharp pickaxe is completed. Click on it to add it to your inventory. Go through the gate (north).
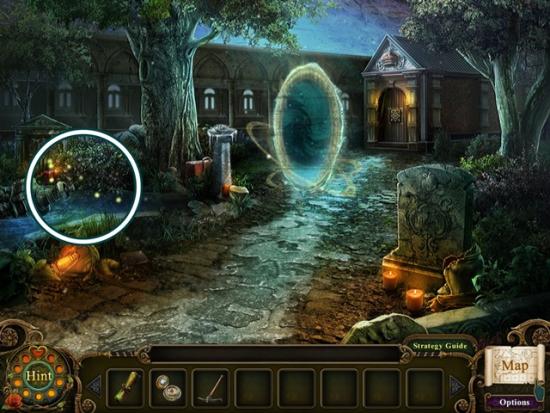
- Click on the bushes next to the tree to start a hidden object search.
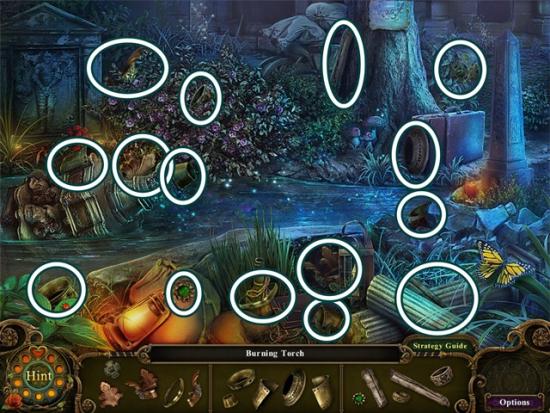
- When you are finished, a burning torch is completed. Click on it to add it to your inventory. Go south and through the right door.
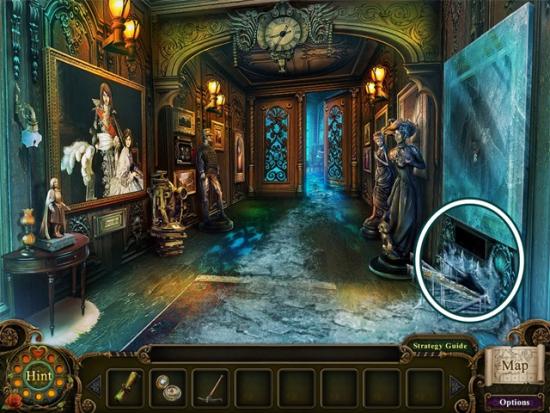
- Use the burning torch on the ice under the portrait. Take the magic wand. Go south then through the gate.
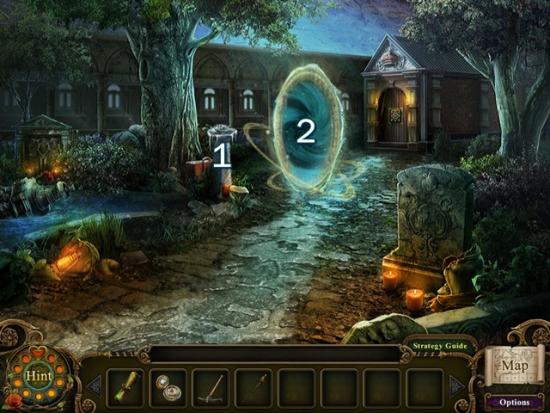
- Break the ice (1) on the pedestal with the sharp pickaxe. Place the golden compass on the pedestal. Use the magic wand on the portal (2). Step through the portal.
The end!!!
More articles...
Monopoly GO! Free Rolls – Links For Free Dice
By Glen Fox
Wondering how to get Monopoly GO! free rolls? Well, you’ve come to the right place. In this guide, we provide you with a bunch of tips and tricks to get some free rolls for the hit new mobile game. We’ll …Best Roblox Horror Games to Play Right Now – Updated Weekly
By Adele Wilson
Our Best Roblox Horror Games guide features the scariest and most creative experiences to play right now on the platform!The BEST Roblox Games of The Week – Games You Need To Play!
By Sho Roberts
Our feature shares our pick for the Best Roblox Games of the week! With our feature, we guarantee you'll find something new to play!All Grades in Type Soul – Each Race Explained
By Adele Wilson
Our All Grades in Type Soul guide lists every grade in the game for all races, including how to increase your grade quickly!


