![Digimon UP Tier List [Supports, Buddies, and Partners]](/wp-content/uploads/2026/07/digimon-up-tier-list.jpg "Digimon UP Tier List [Supports, Buddies, and Partners]")
Digimon UP Tier List [Supports, Buddies, and Partners]
These Digimon will get you UP the leaderboard.


![Haze Seas Boss Drops [Chances, Locations, and How to Spawn]](/wp-content/uploads/2026/07/haze-seas-boss-drops.jpg "Haze Seas Boss Drops [Chances, Locations, and How to Spawn]")

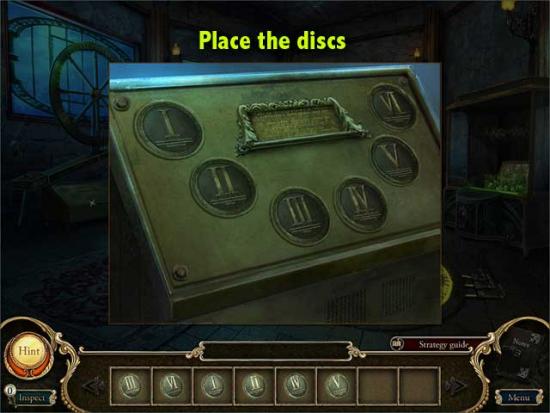
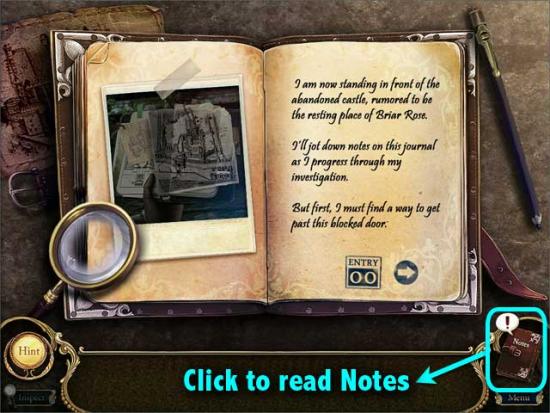
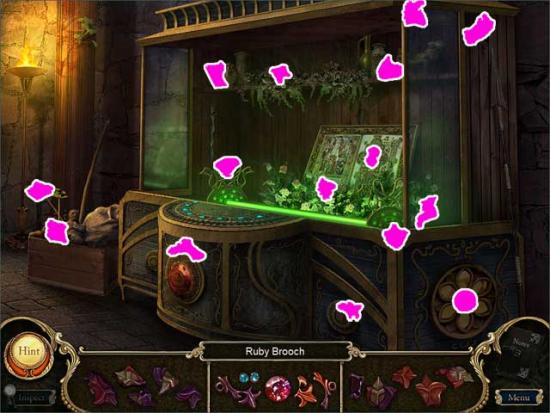
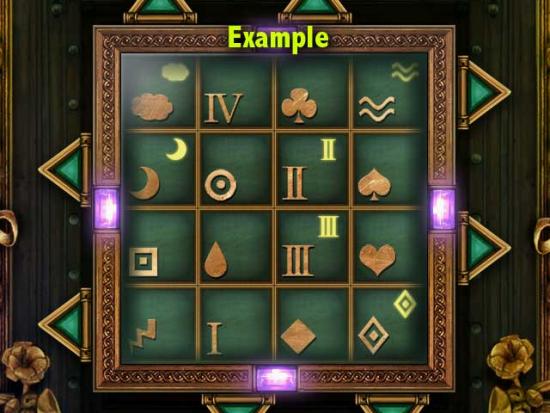
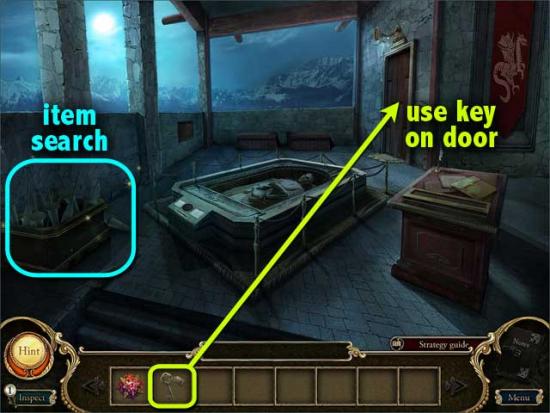
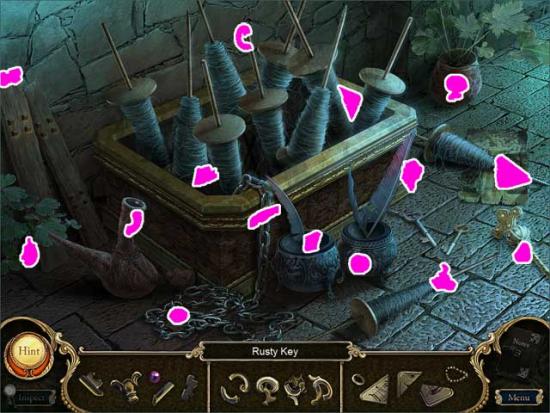
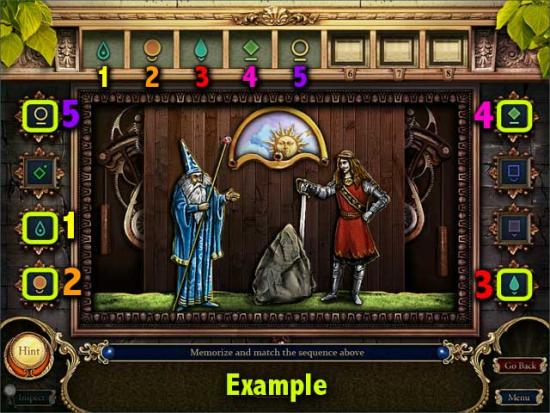
Welcome to the Dark Parables: Curse of Briar Rose walkthrough on Gamezebo. Dark Parables: Curse of Briar Rose is a hidden object adventure game created by Blue Tea Games. This walkthrough includes tips and tricks, helpful hints, and a strategy guide to how to complete Dark Parables: Curse of Briar Rose.
Welcome to the Dark Parables: Curse of Briar Rose walkthrough on Gamezebo. Dark Parables: Curse of Briar Rose is a hidden object adventure game created by Blue Tea Games. This walkthrough includes tips and tricks, helpful hints, and a strategy guide to how to complete Dark Parables: Curse of Briar Rose.
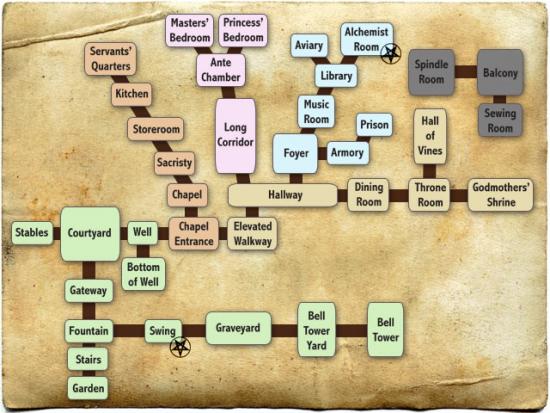
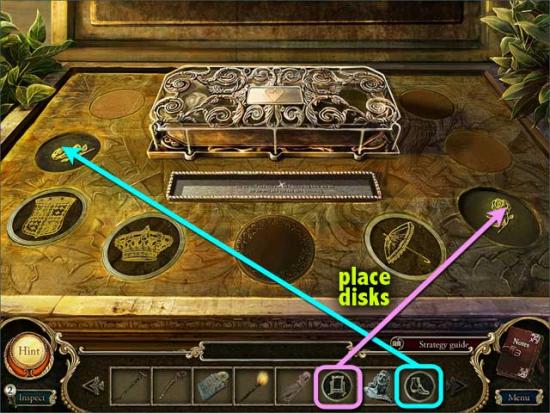
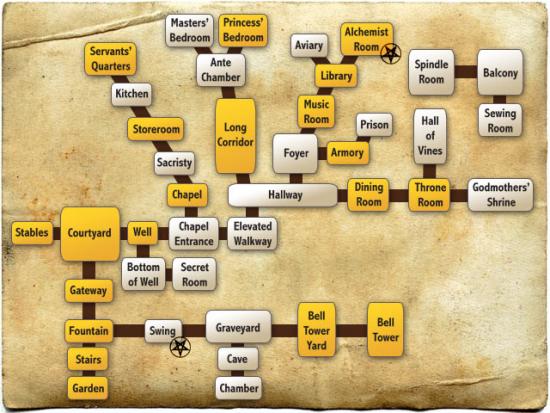
Map


Stairs
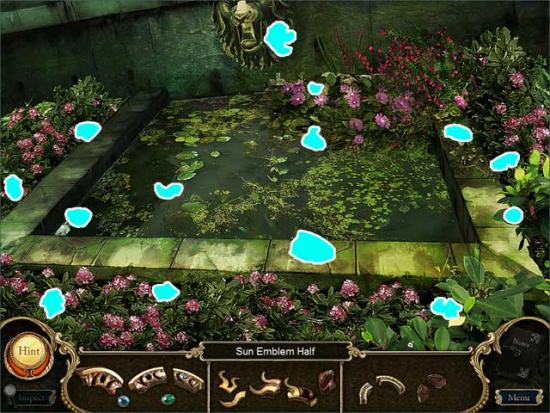
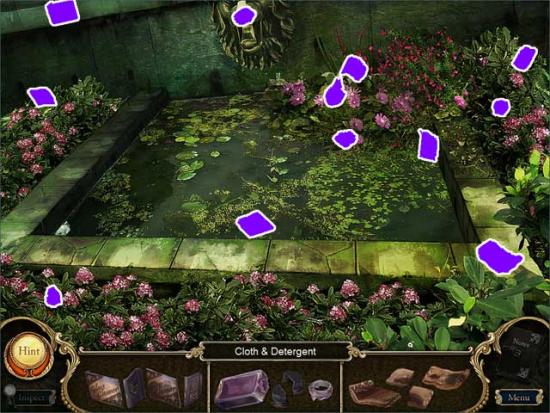
Fountain
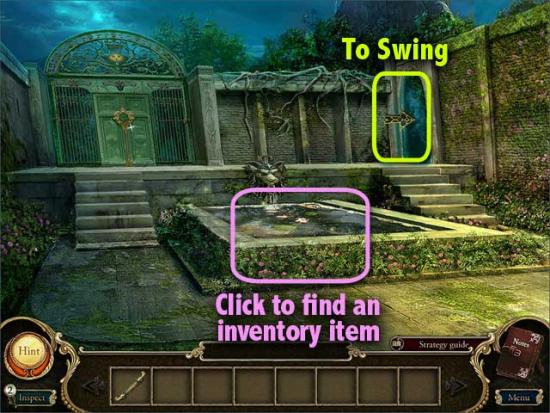
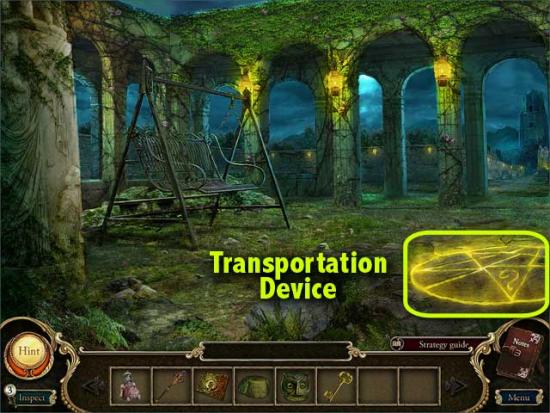
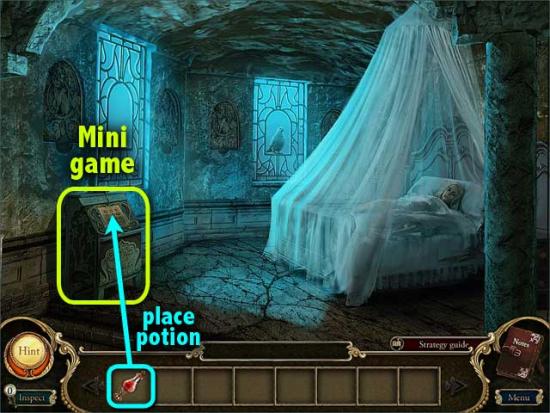
Swing
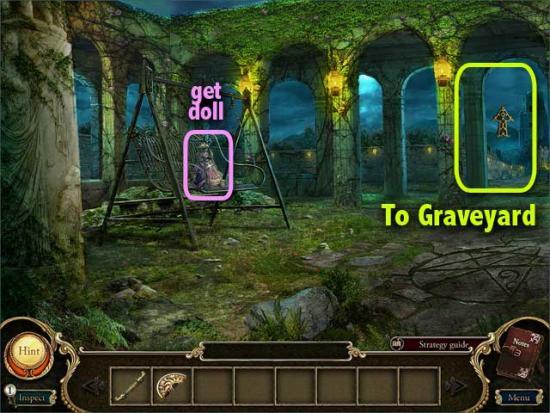
Graveyard

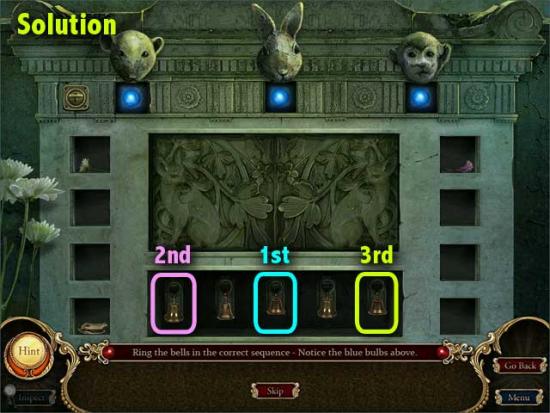
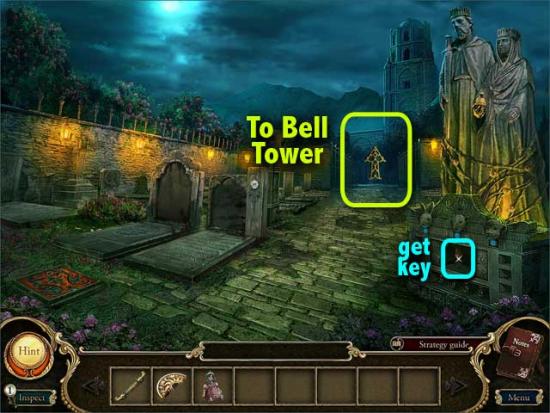
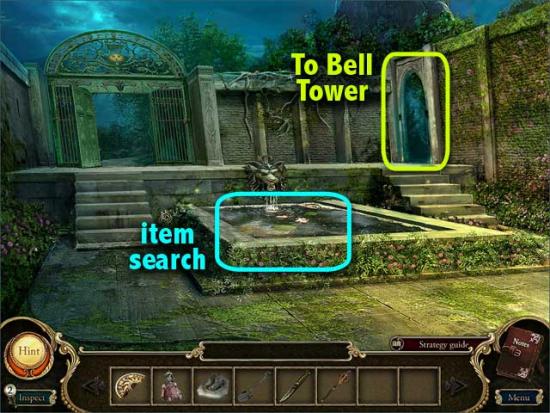
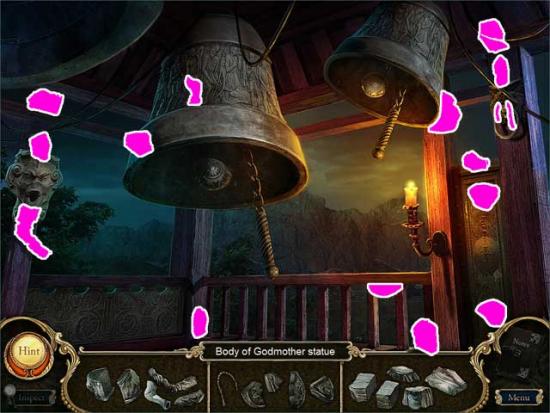
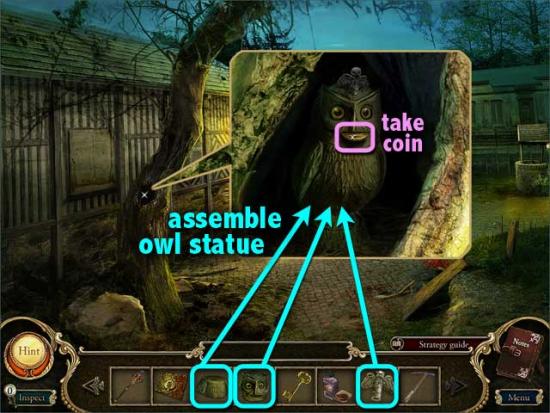
Bell Tower Yard
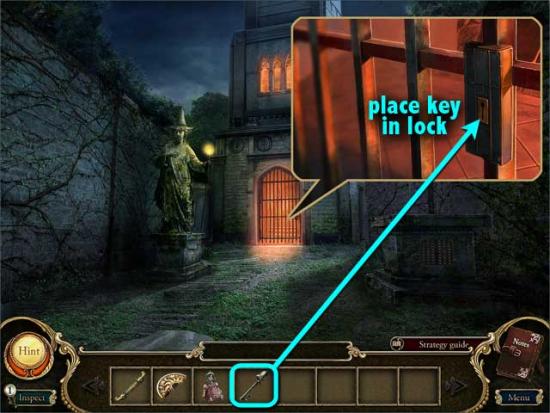
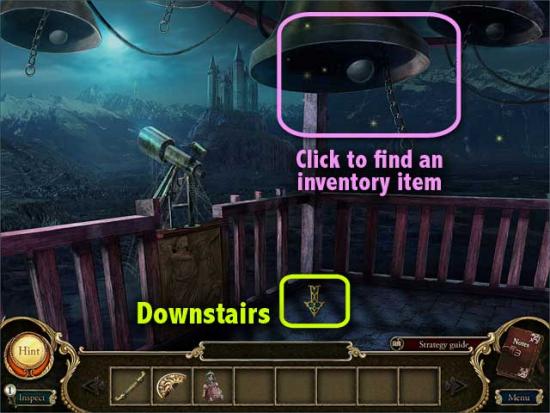
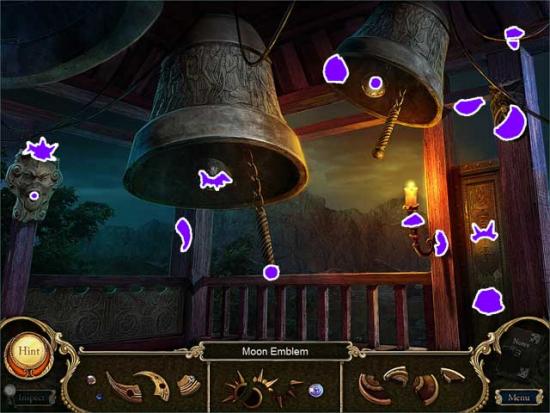
Bell Tower
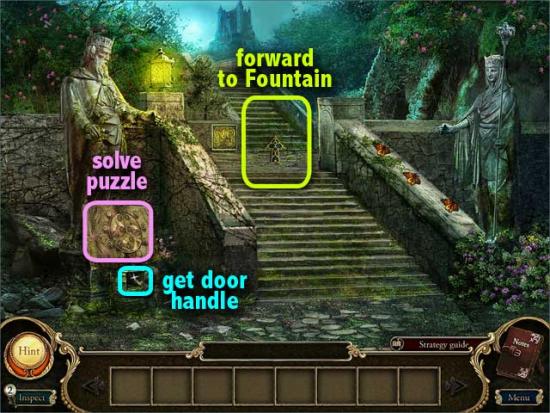
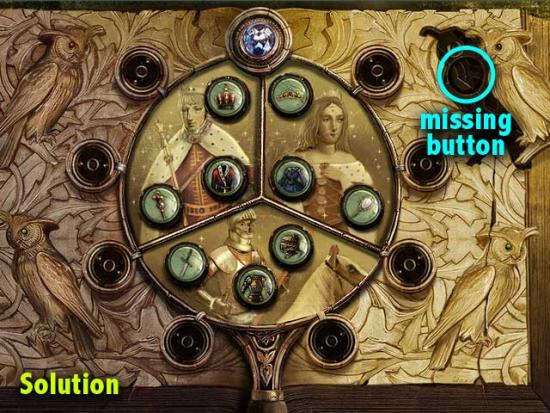
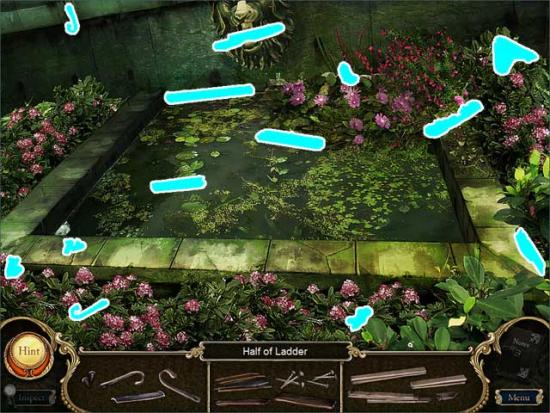
Fountain
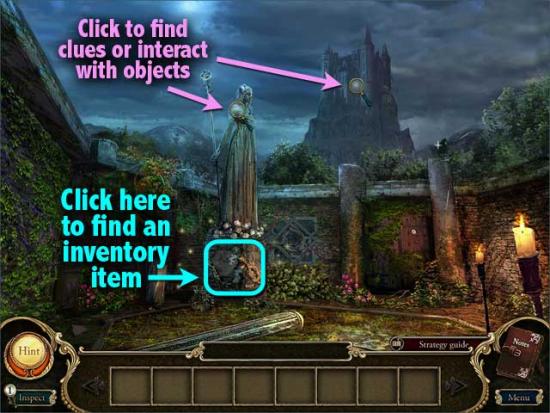
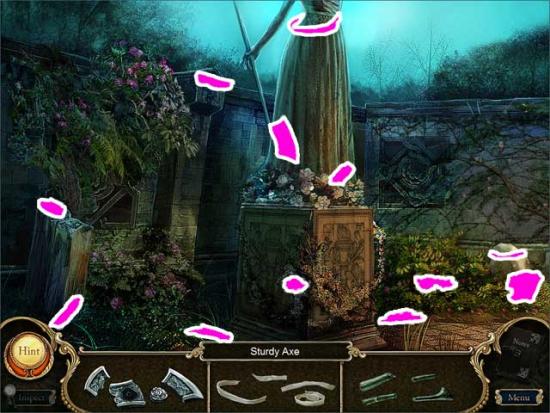
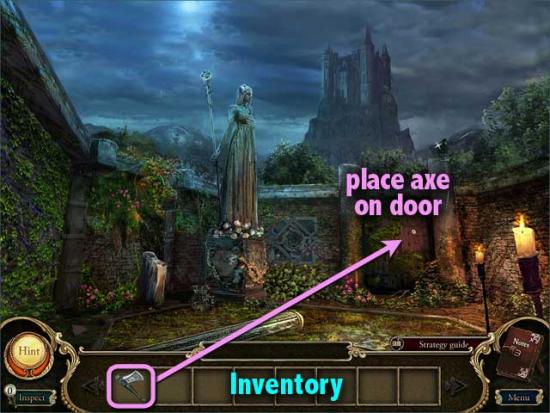
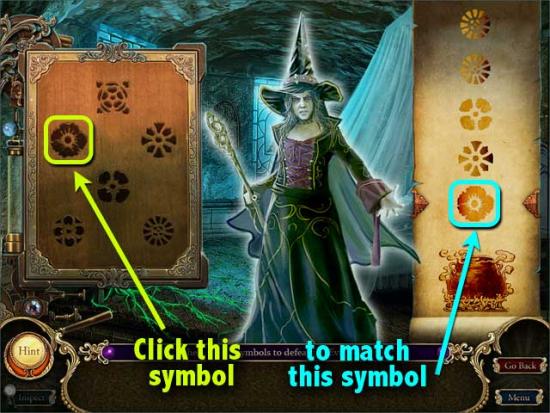
Go through the green doorway.
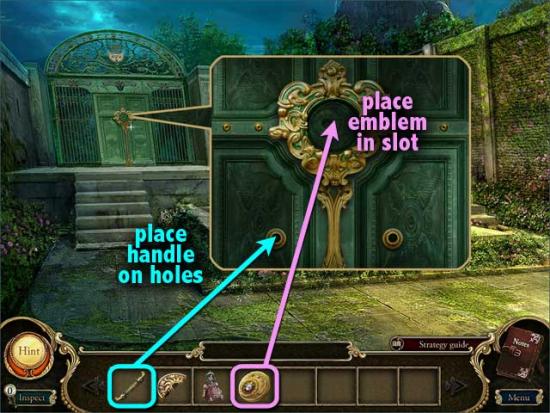
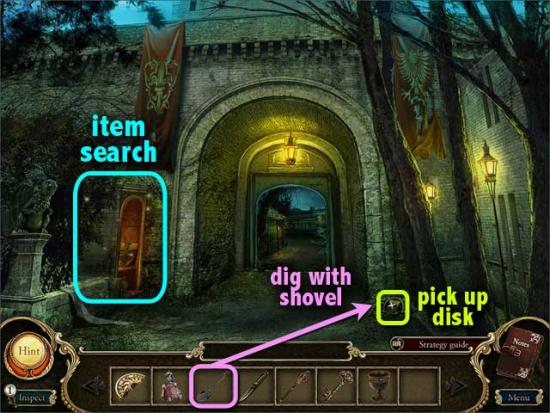
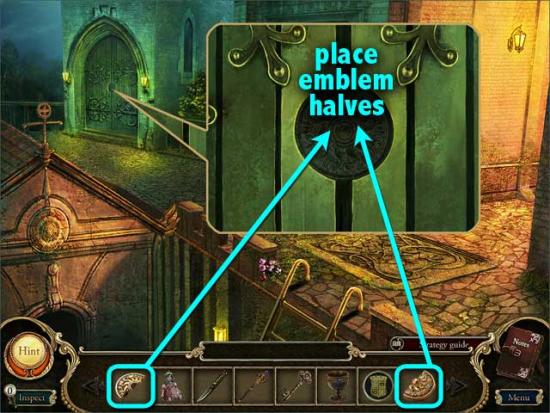
Gateway
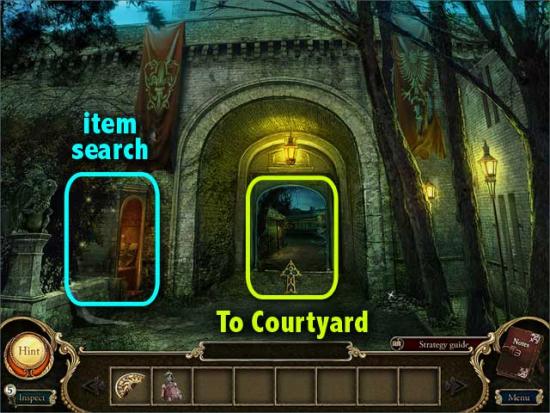
Courtyard

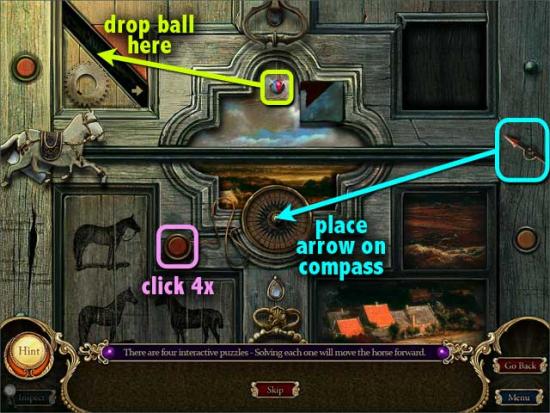
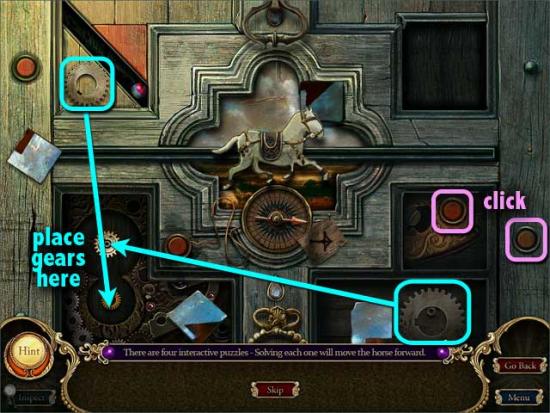
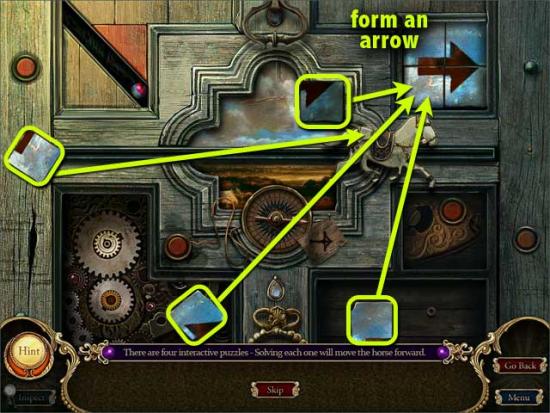
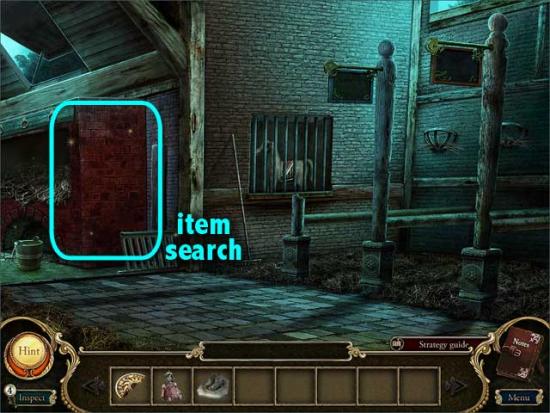
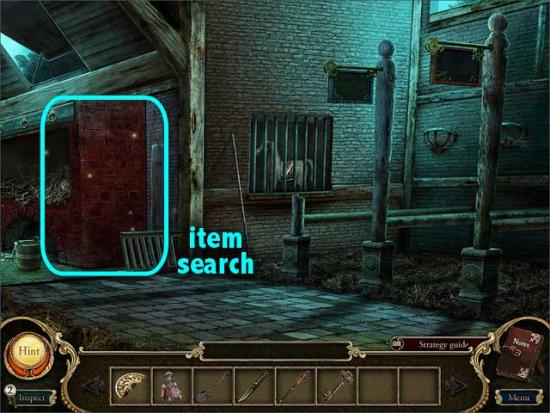
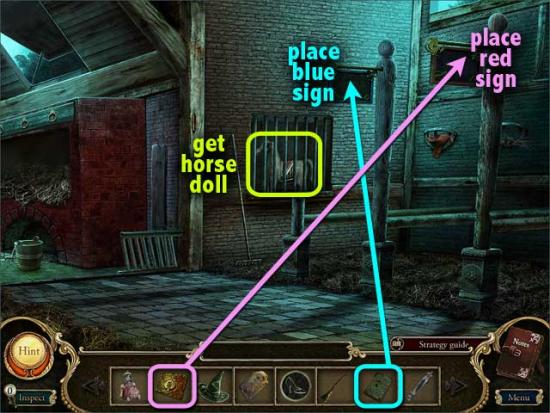
Stables

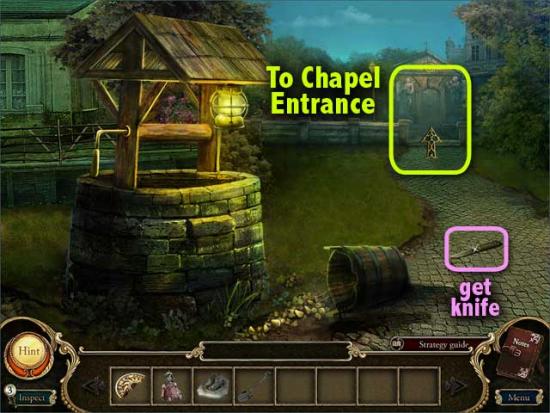
Well
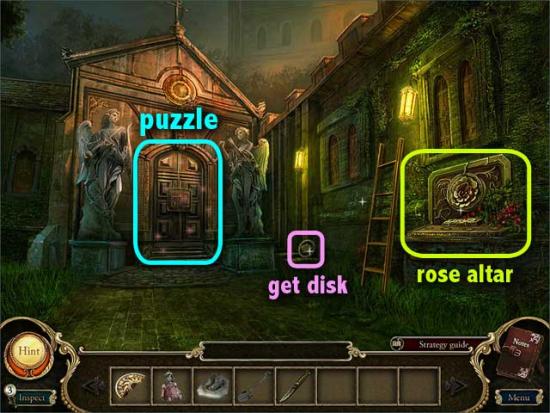
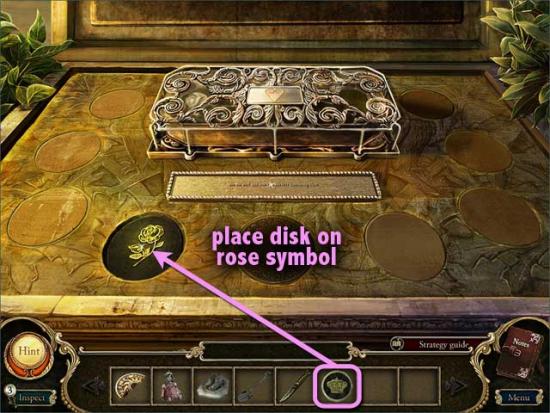
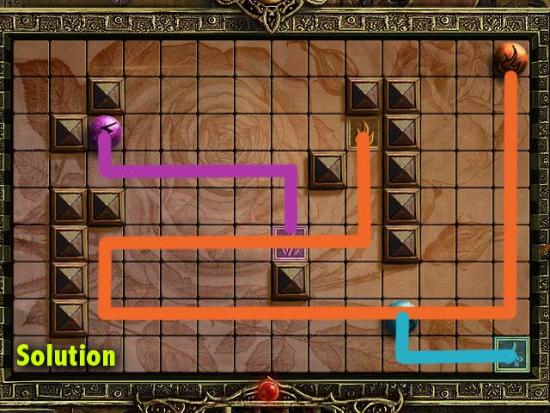
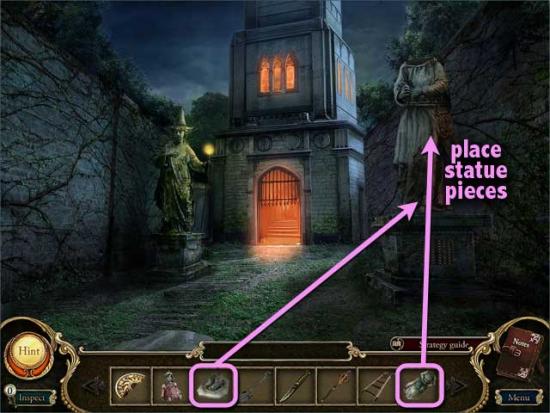
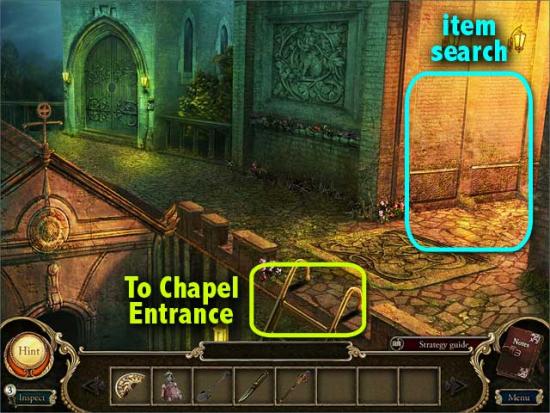
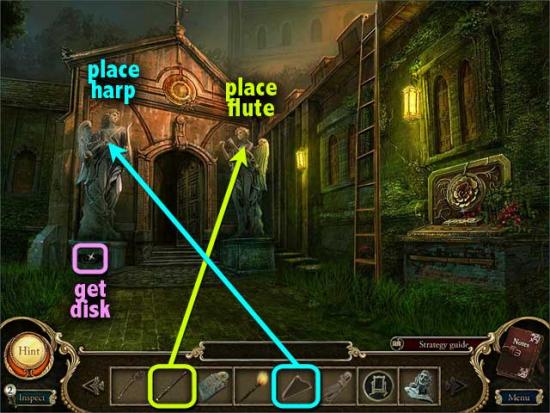
Chapel Entrance
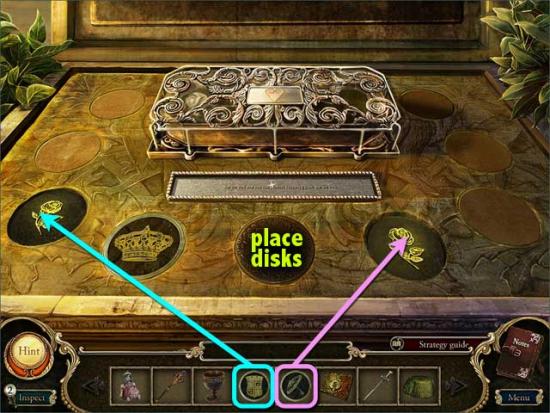
Chapel
Fountain
Bell Tower
Bell Tower Yard
Chapel Entrance

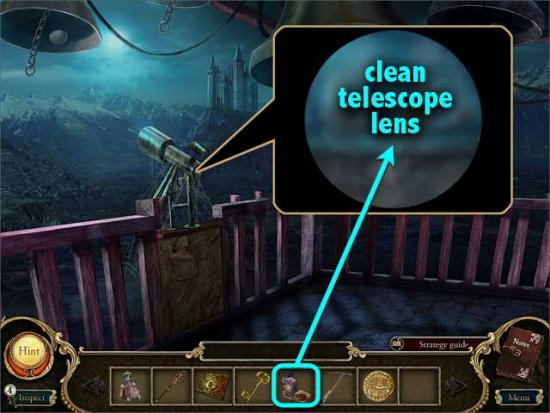
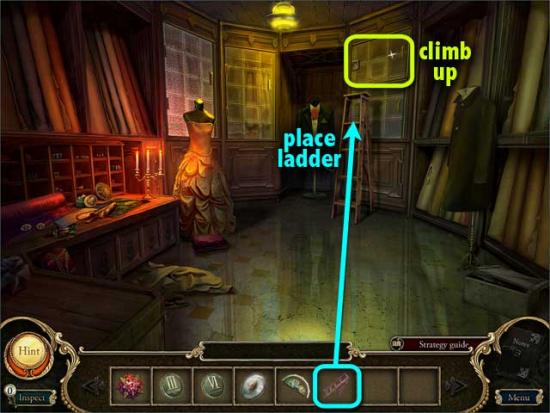
Roof Walkway
Stables
Gateway
Roof Walkway
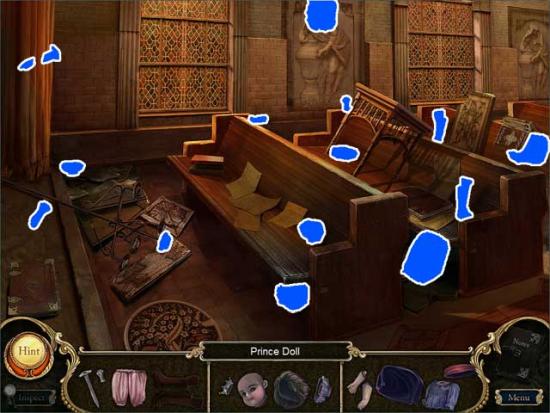
Hallway
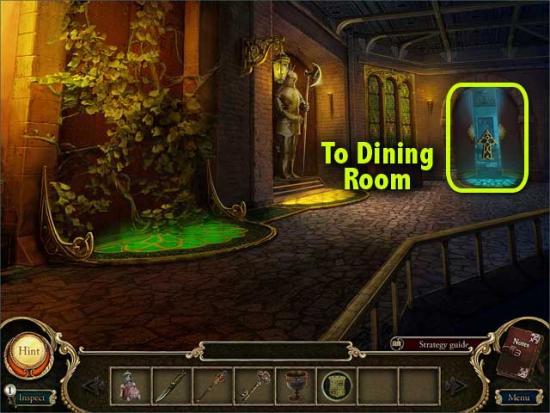
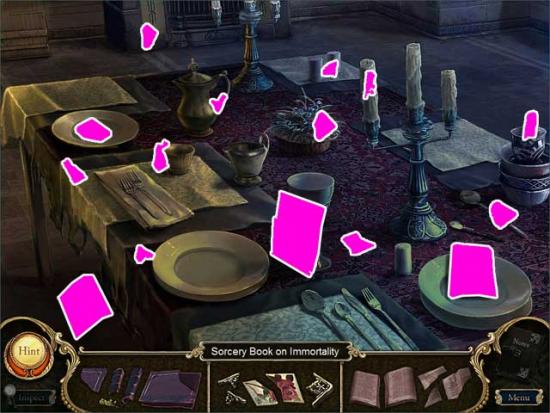
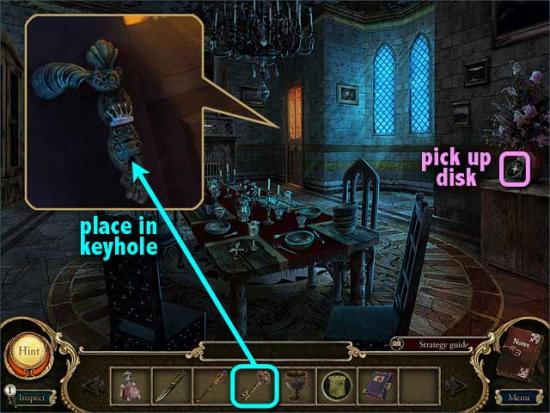
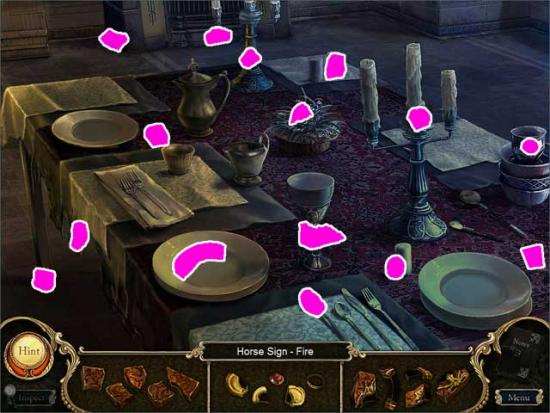
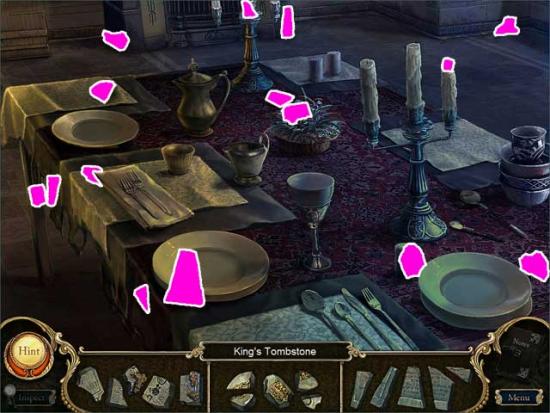
Dining Room
Throne Room
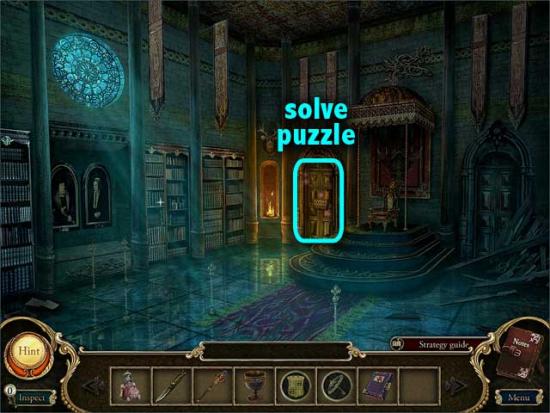
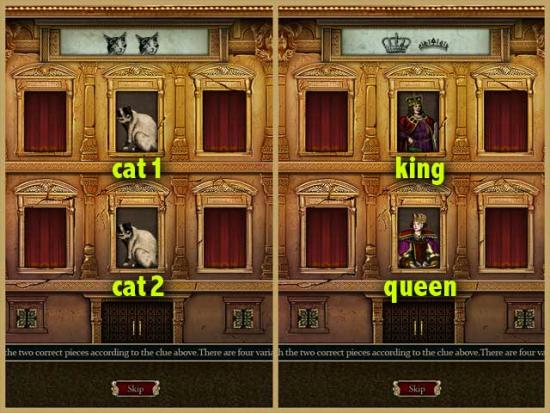
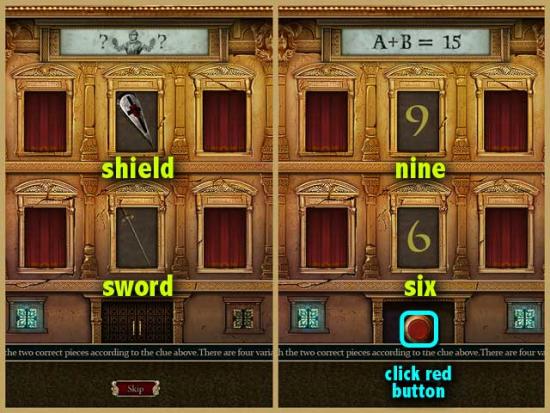
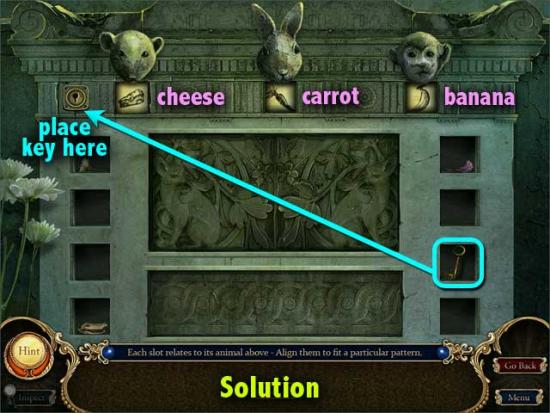
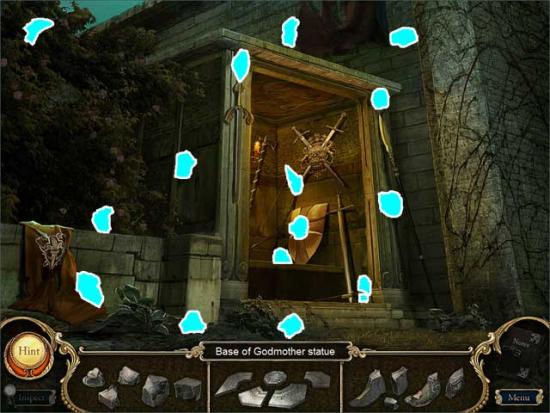
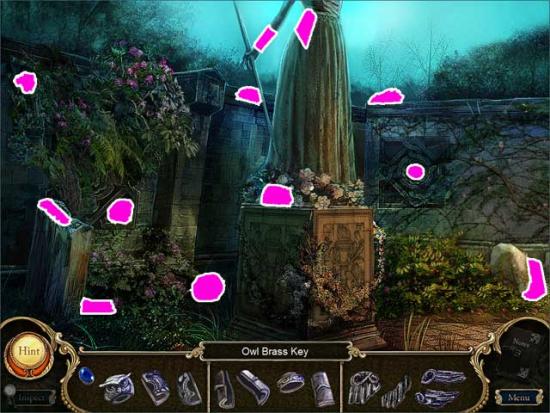
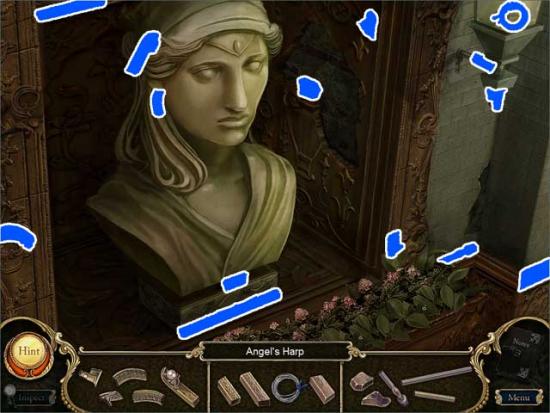
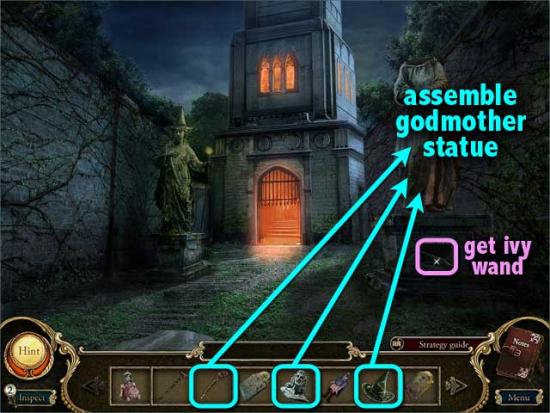
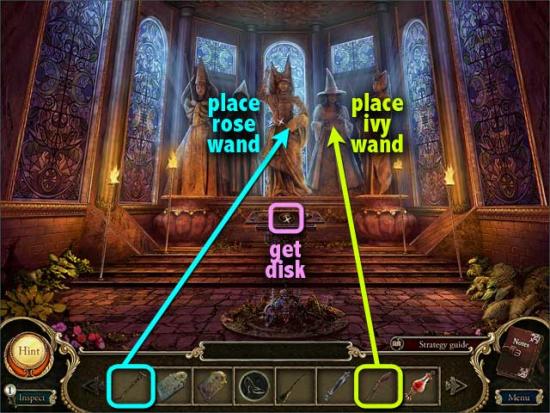
Godmothers’ Shrine
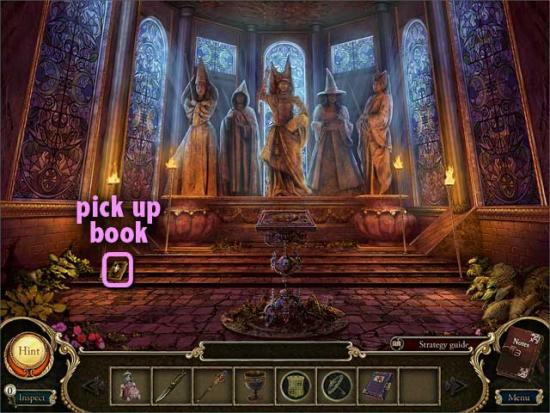
Throne Room
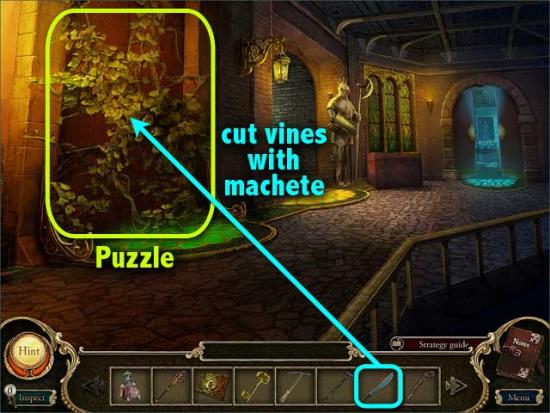
Hallway of Vines
Dining Room
Hallway
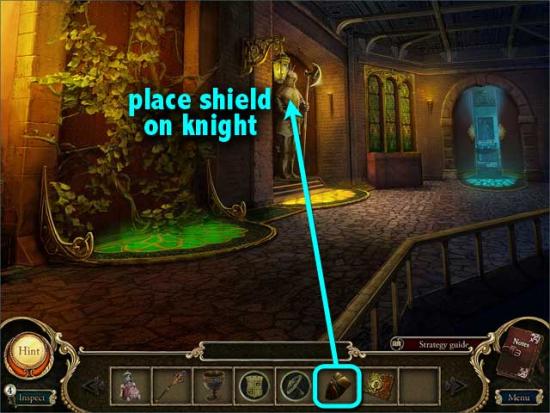
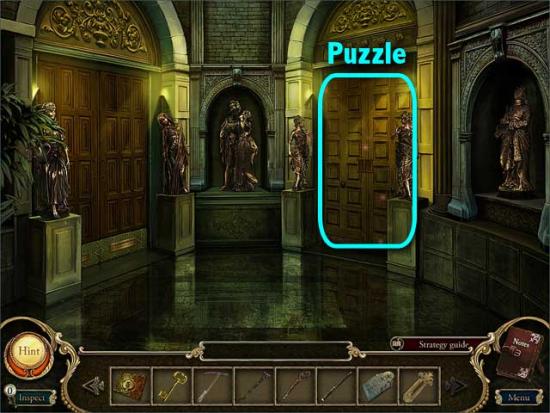
Foyer
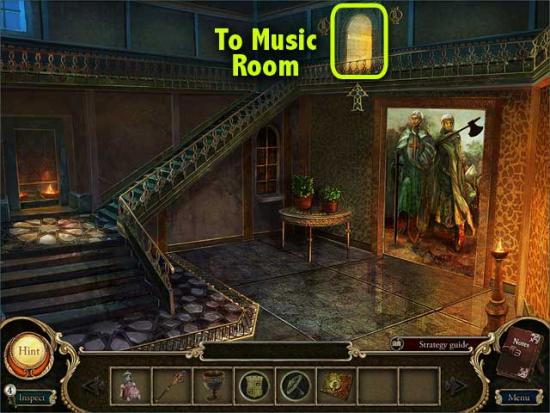
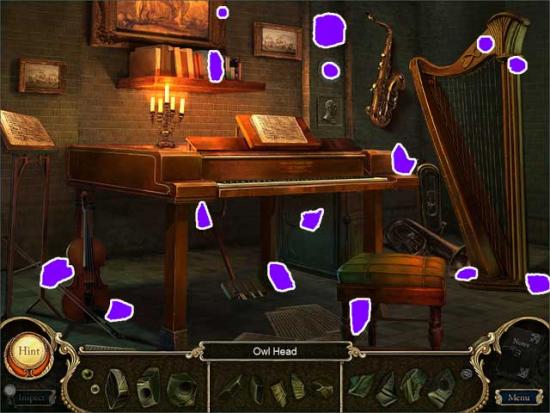
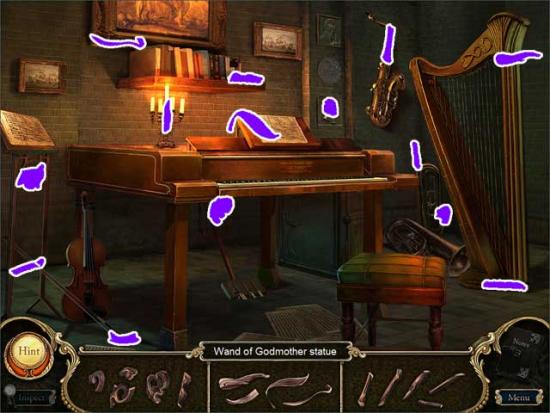
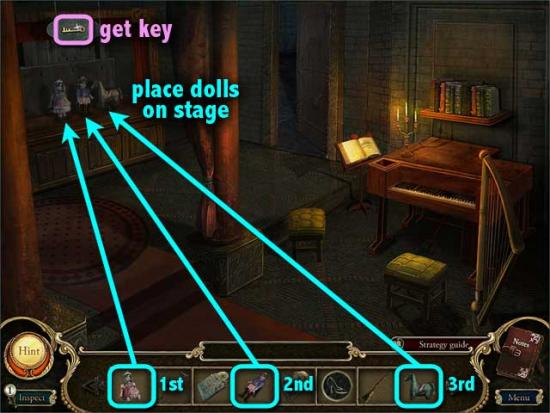
Music Room
Roof Walkway
Chapel Entrance
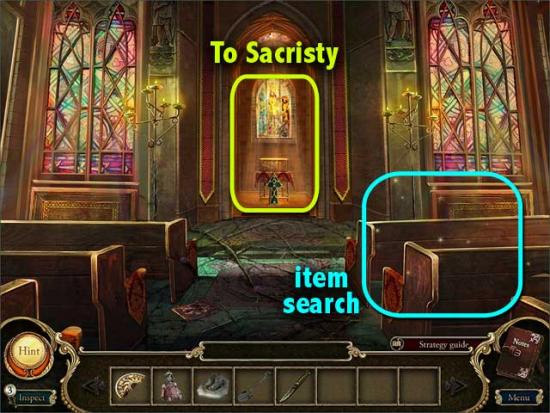
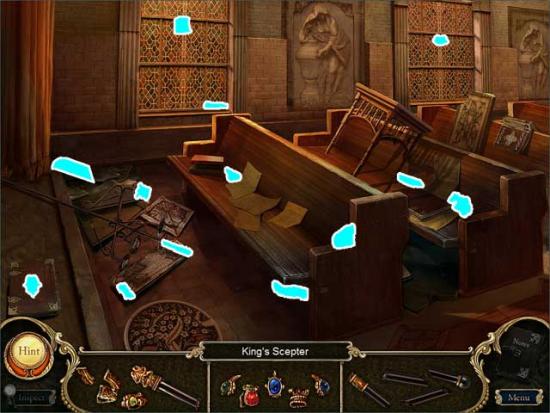
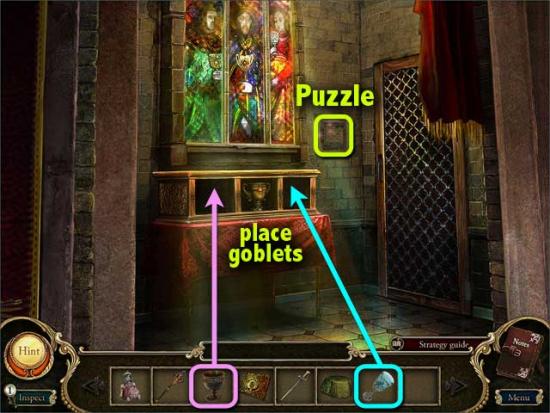
Chapel

Sacristy
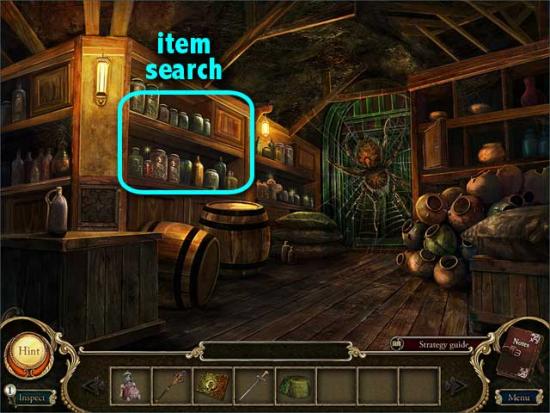
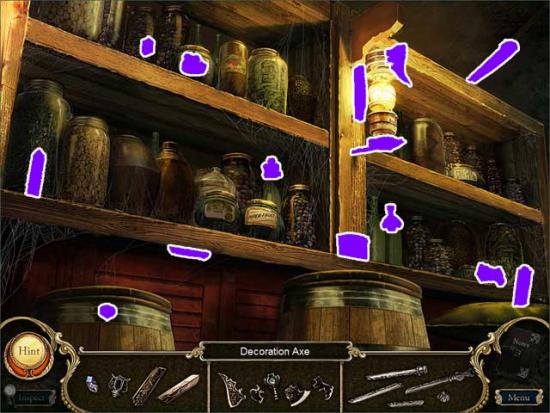
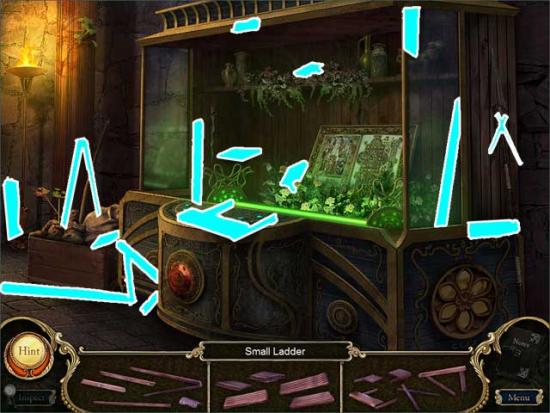
Storeroom
Foyer
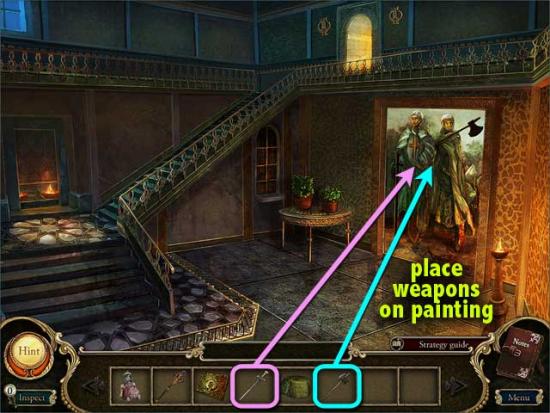
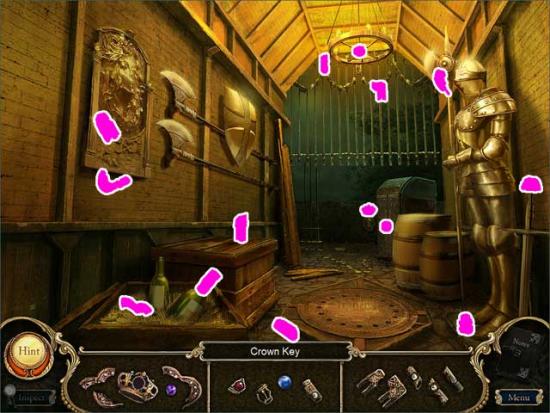
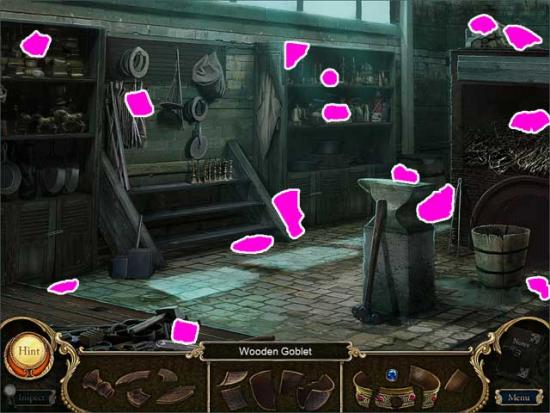
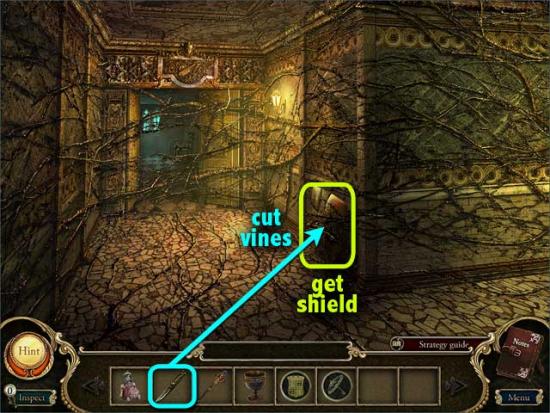
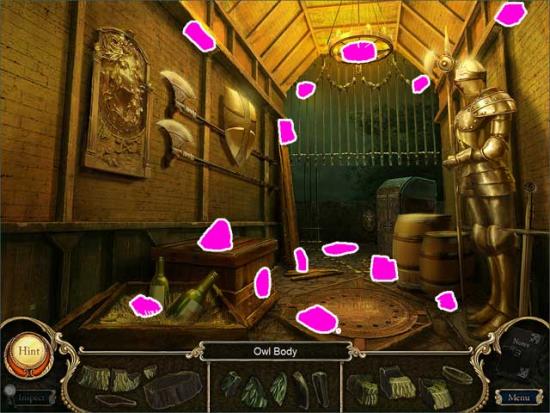
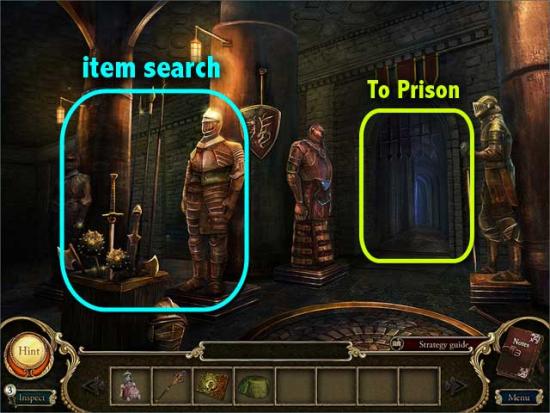
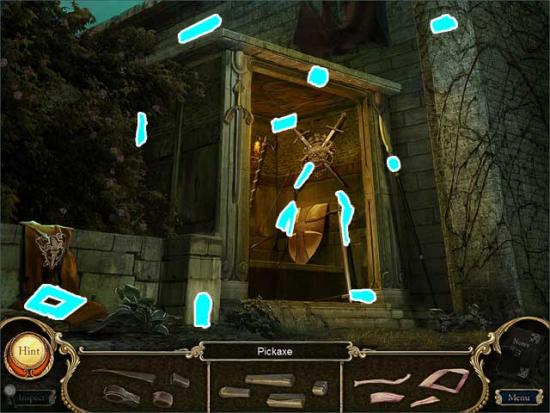
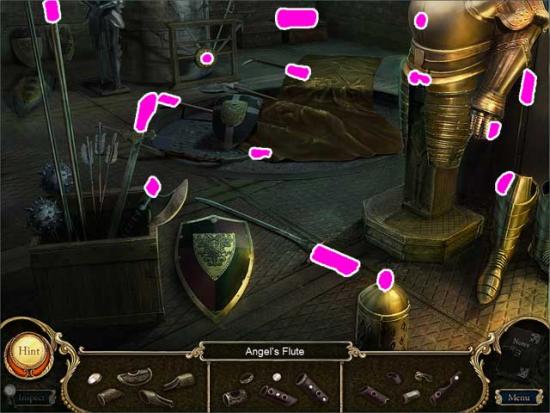
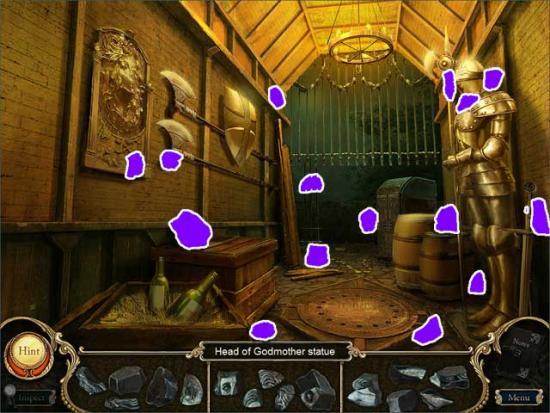
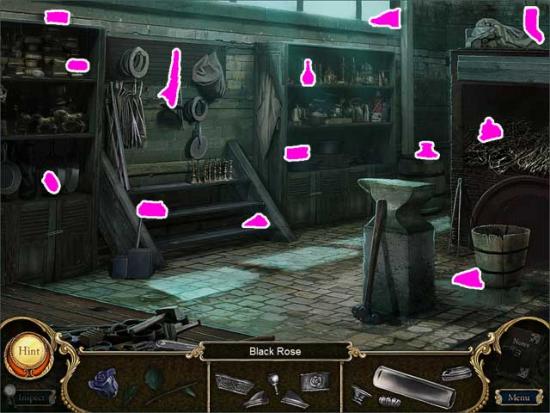
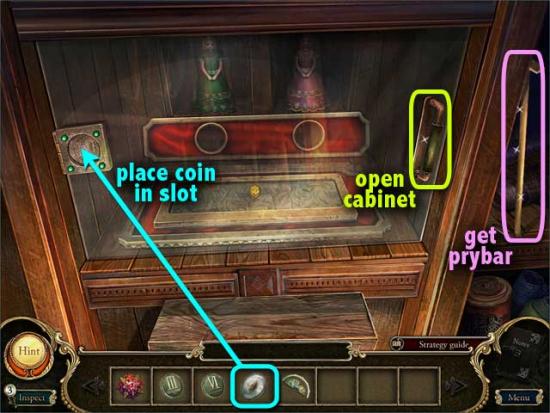
Armory

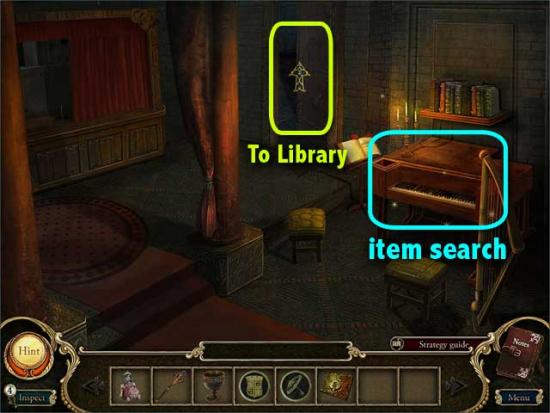
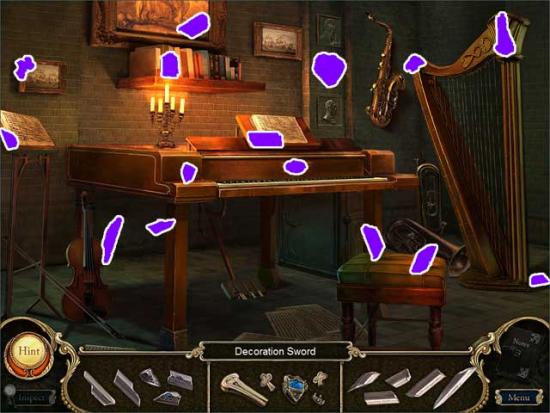
Music Room
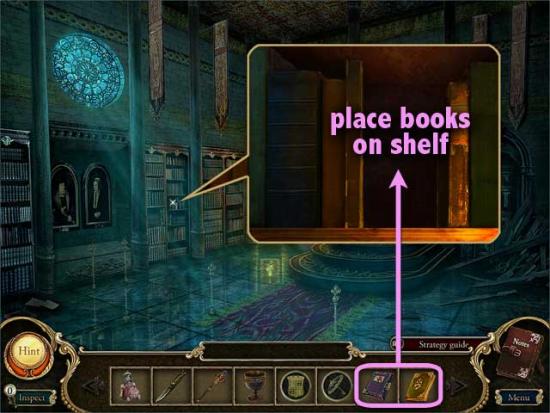
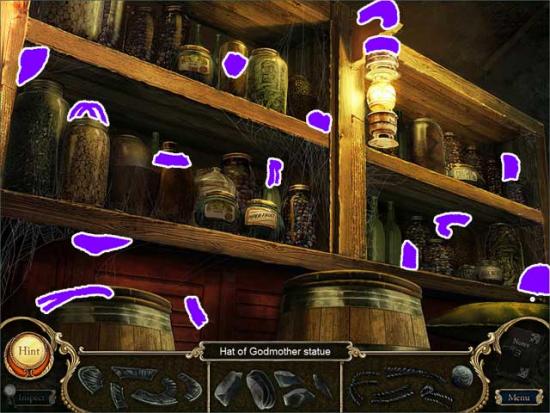
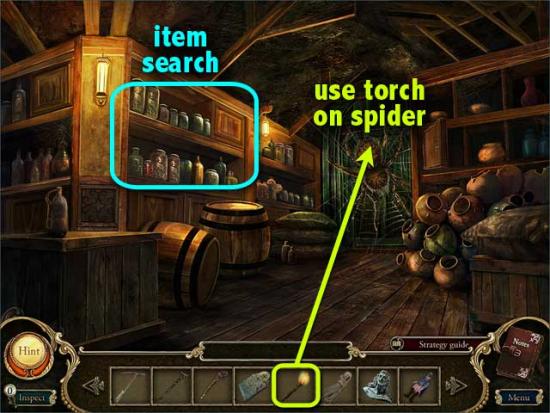
Library
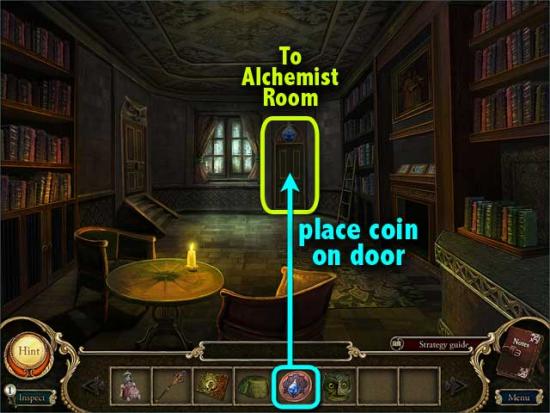
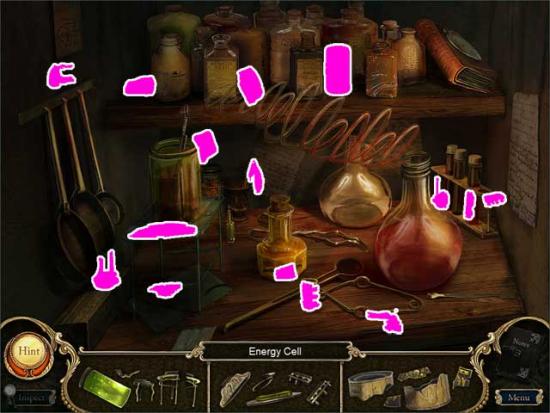
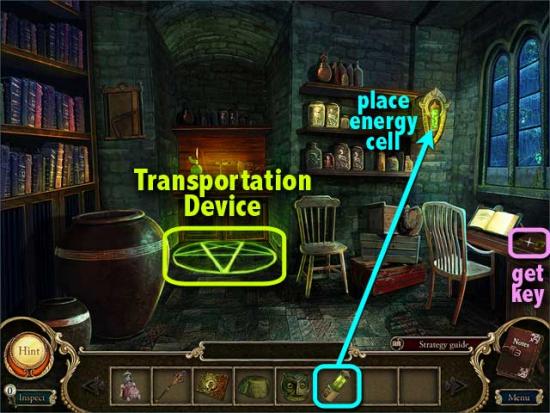
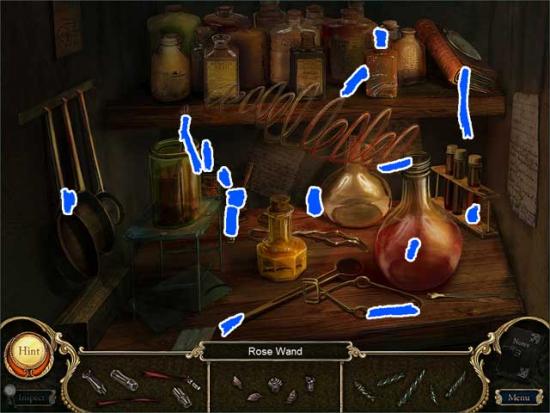
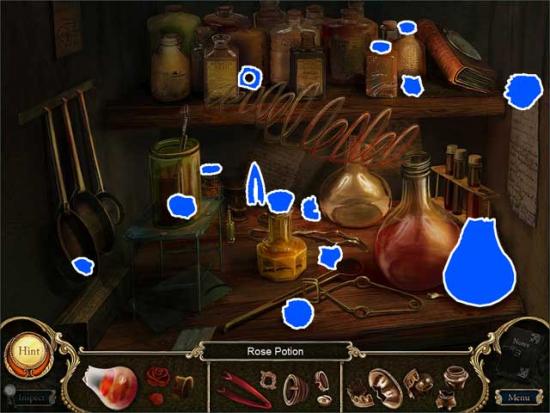
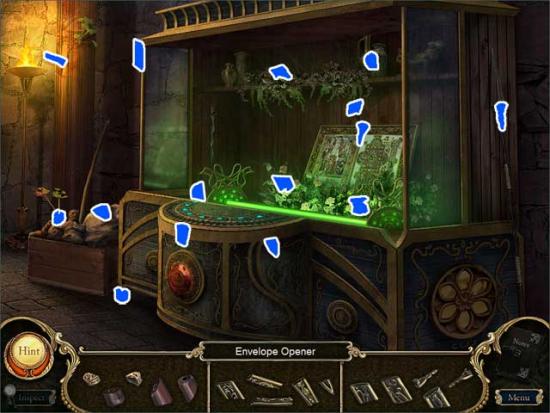
Alchemist Room
Fountain
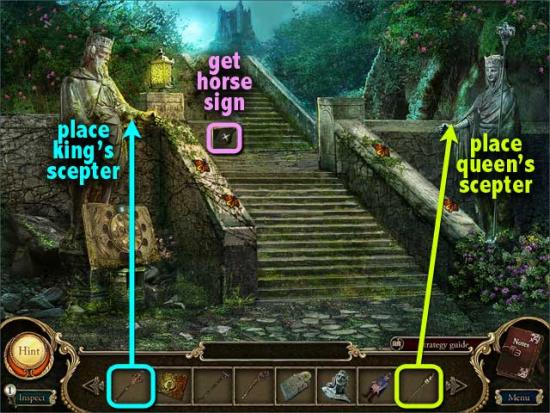
Garden
Gateway
Courtyard
Bell Tower
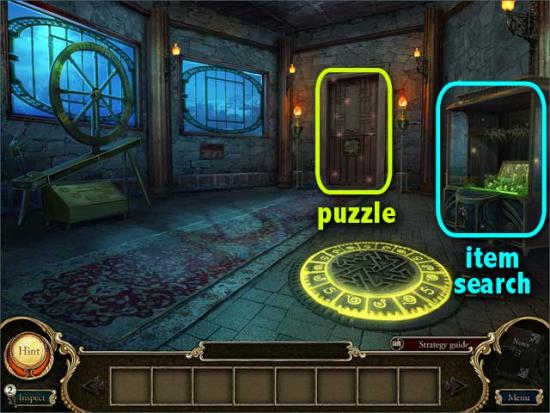
Alchemist Room
Library
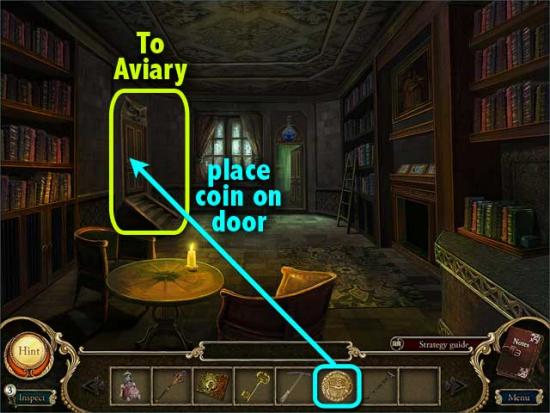
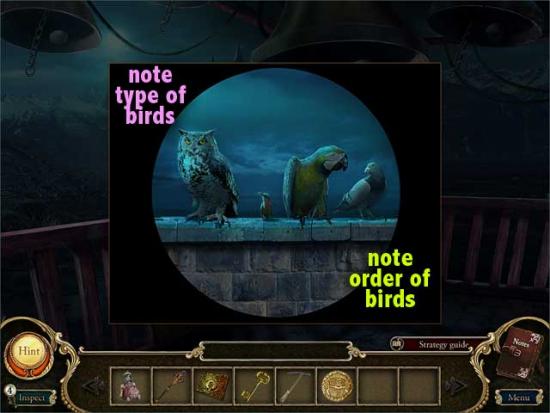
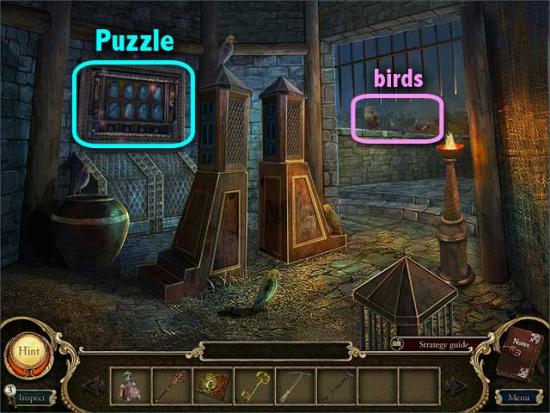
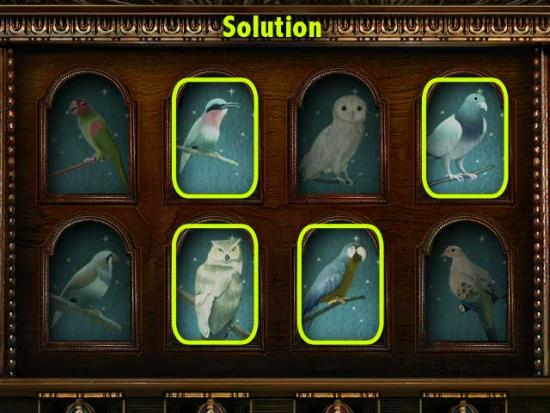
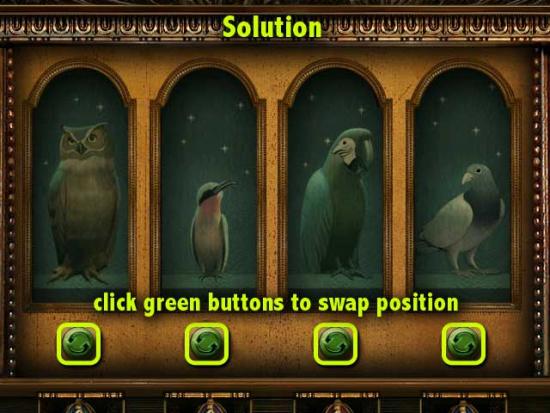
Aviary
Music Room
Armory
Dining Room
Hallway
Long Corridor
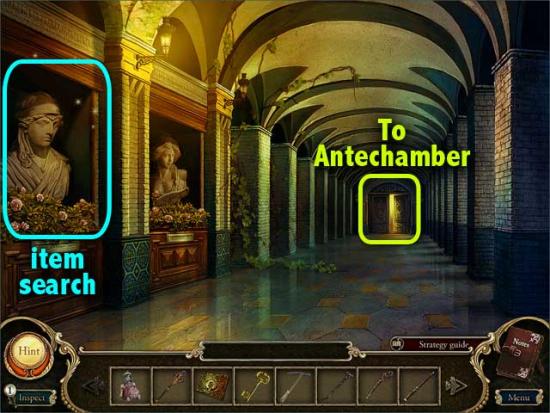
Antechamber
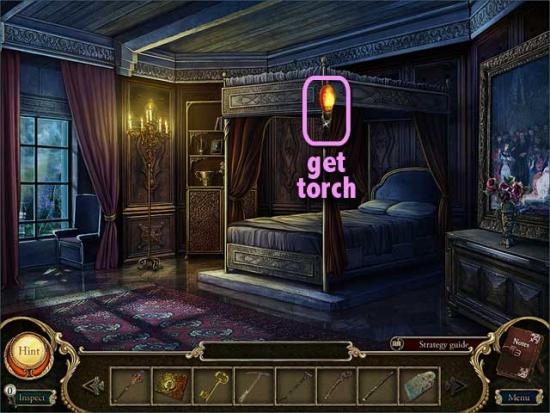
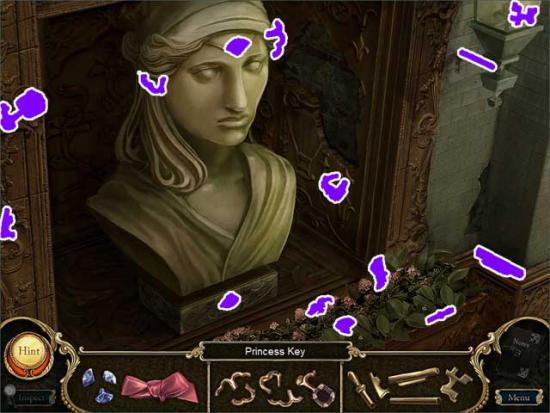
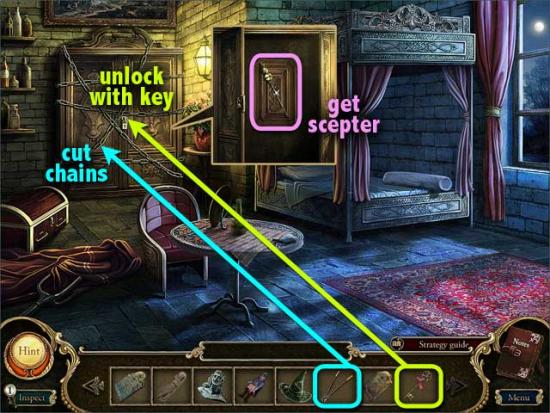
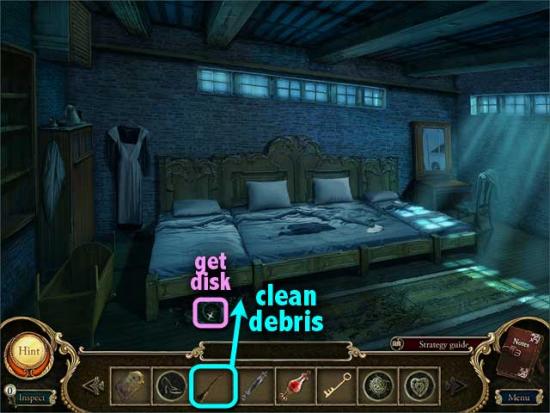
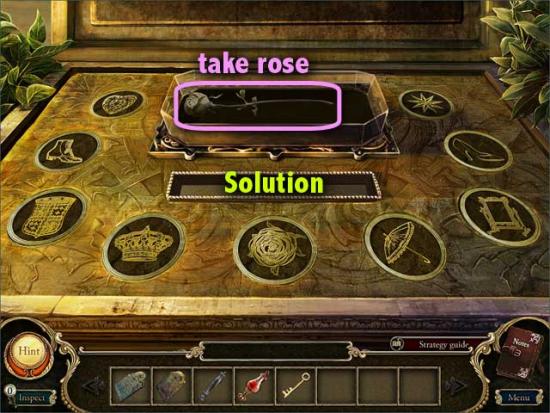
Princess’ Bedroom
Antechamber
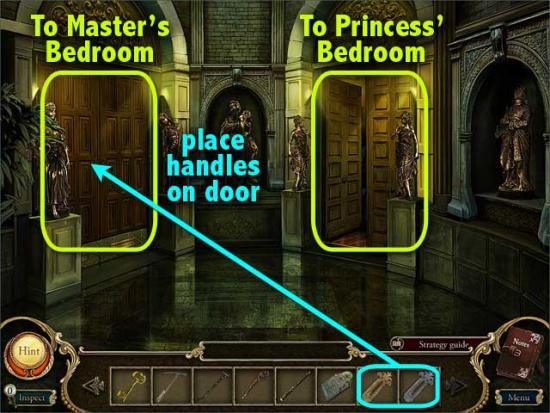
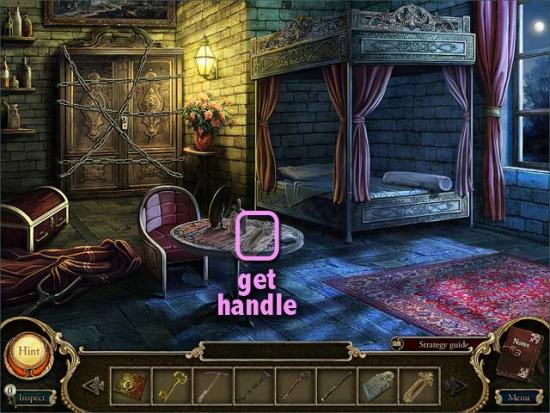
Master’s Bedroom
Long Corridor
Prison

Roof Walkway
Chapel Entrance
Chapel
Storeroom
Storeroom
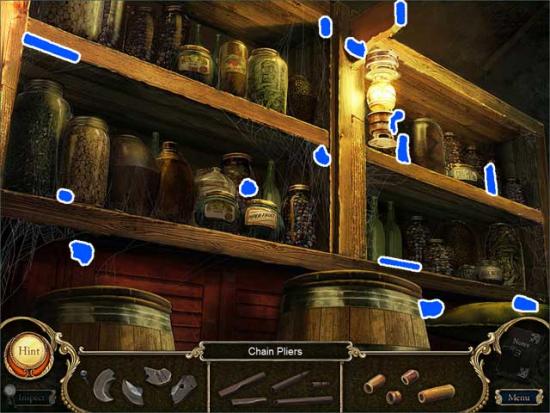
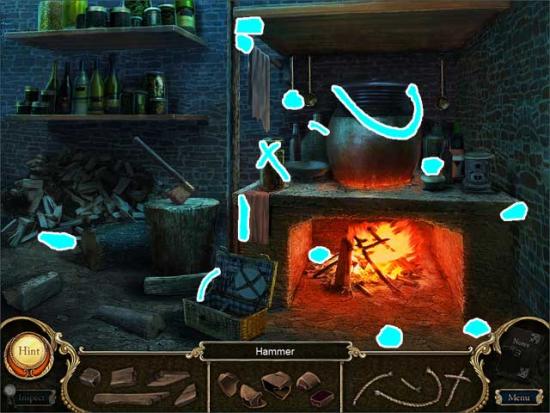
Kitchen
Long Corridor
Princess’ Bedroom
Well
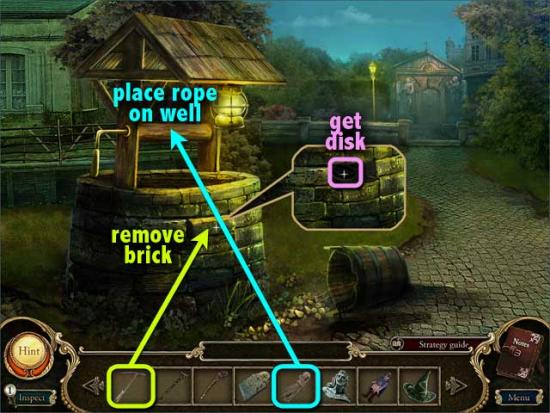
Well Bottom
Stairs
Stables
Bell Tower Yard
Alchemist Room
Music Room
Godmothers’ Shrine
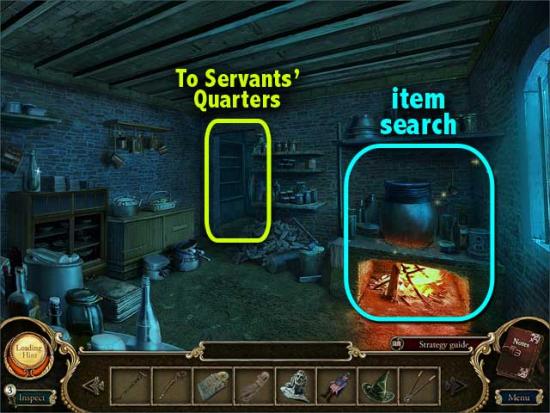
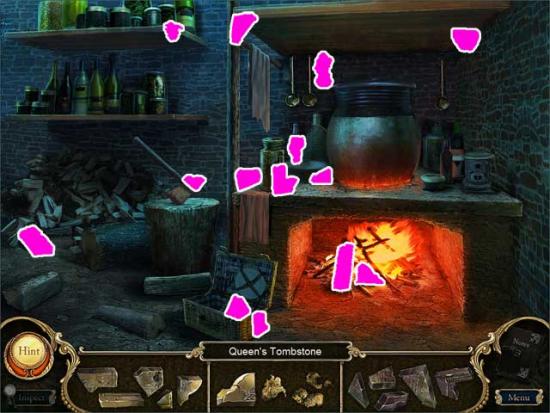
Kitchen
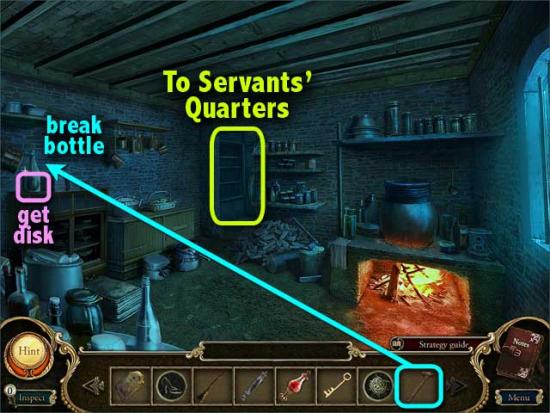
Servants’ Quarters
Chapel Entrance
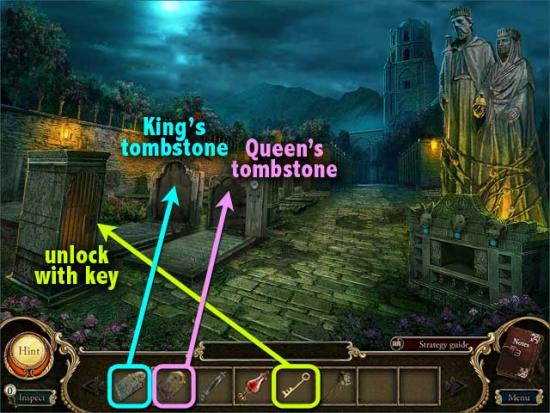
Graveyard
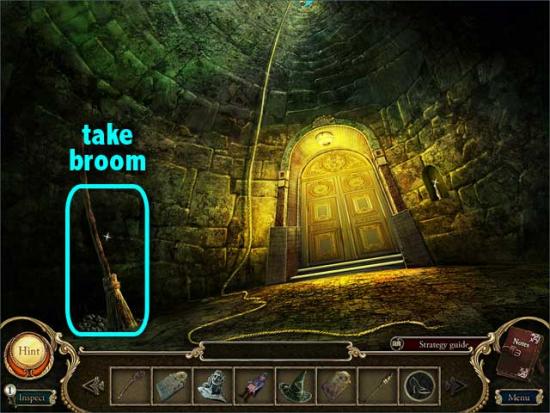
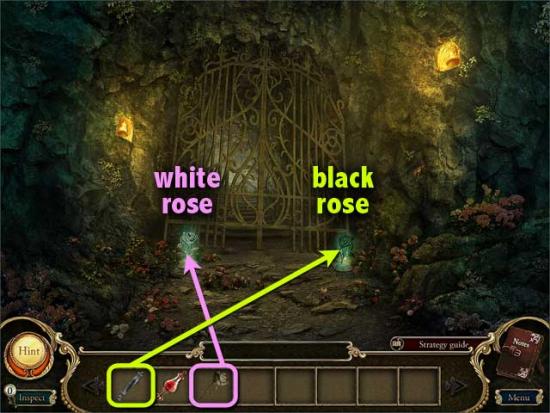
Cave
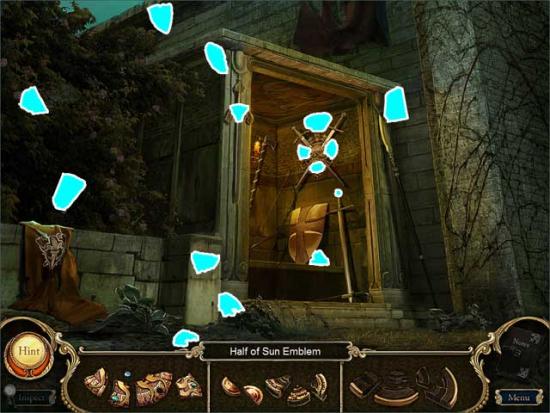
Chamber
Congratulations! You have completed Dark Parables: The Curse of Briar Rose.
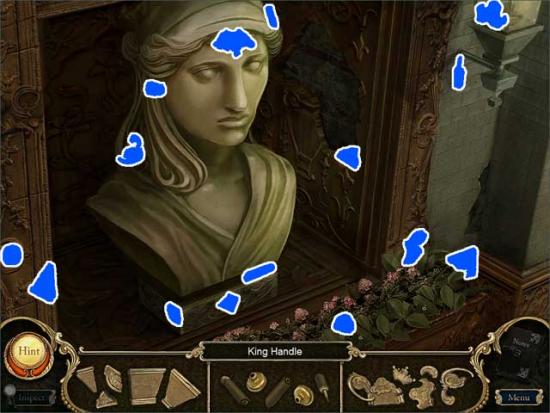
Finding these objects will have no effect on the game. They only serve to speed up recharging of a hint. Here are the locations where they can be found:
This chapter is only available in the Collector’s Edition.
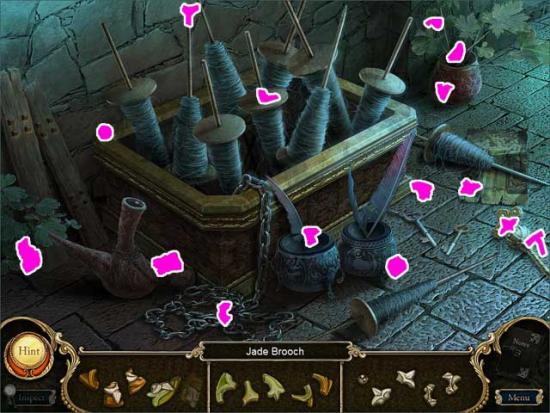
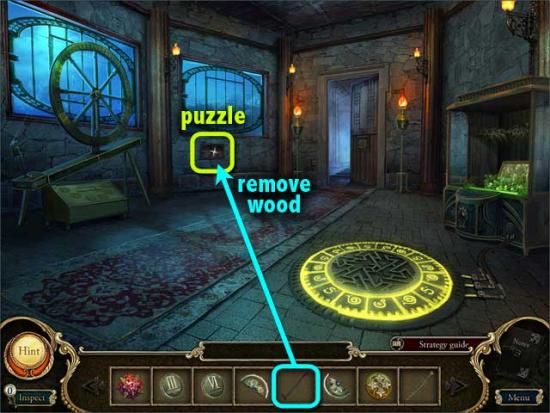
Spindle Room
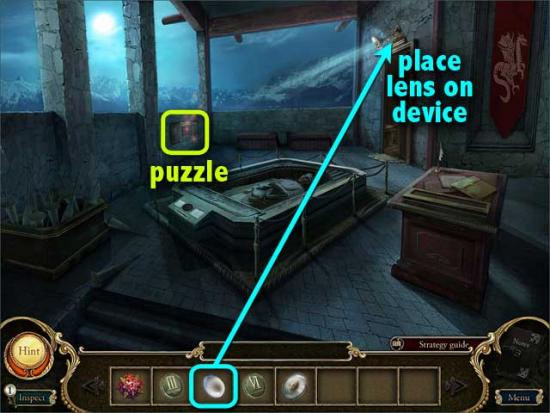
Balcony
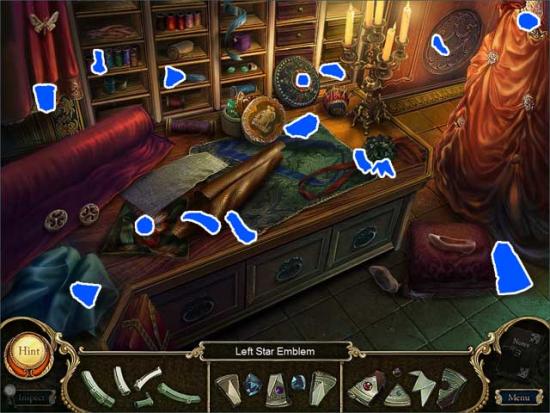
Sewing Room
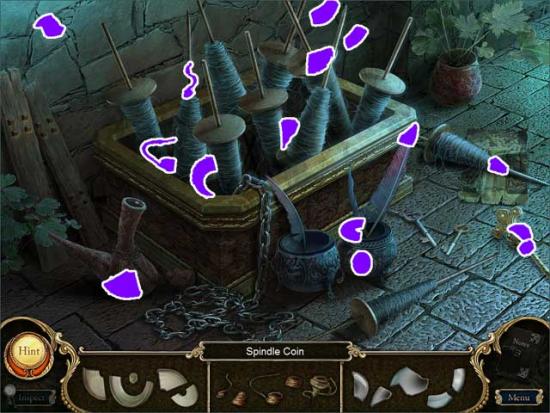

Spindle Room
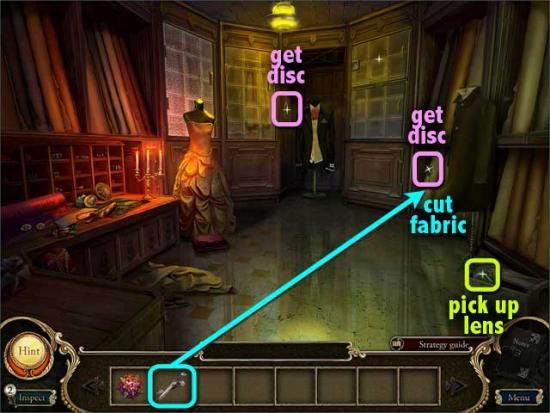
Return to the Sewing Room
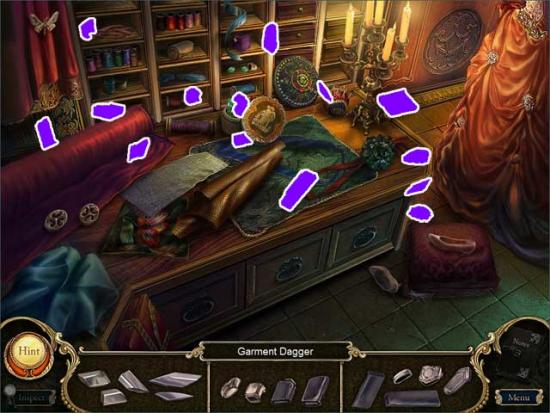
Sewing Room
Balcony
Spindle Room
Balcony
Sewing Room
Spindle Room