![Digimon UP Tier List [Supports, Buddies, and Partners]](/wp-content/uploads/2026/07/digimon-up-tier-list.jpg "Digimon UP Tier List [Supports, Buddies, and Partners]")
Digimon UP Tier List [Supports, Buddies, and Partners]
These Digimon will get you UP the leaderboard.


![Haze Seas Boss Drops [Chances, Locations, and How to Spawn]](/wp-content/uploads/2026/07/haze-seas-boss-drops.jpg "Haze Seas Boss Drops [Chances, Locations, and How to Spawn]")

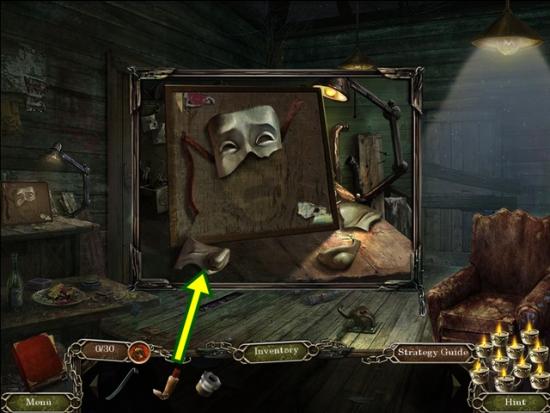
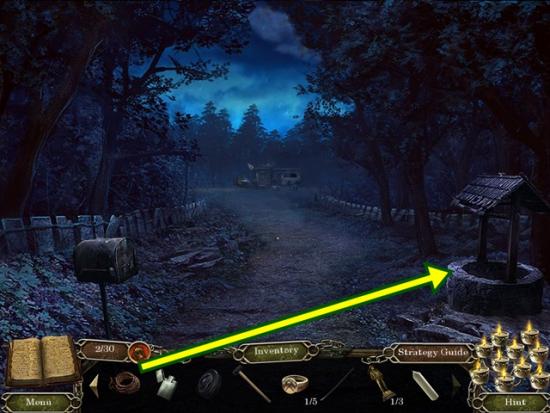
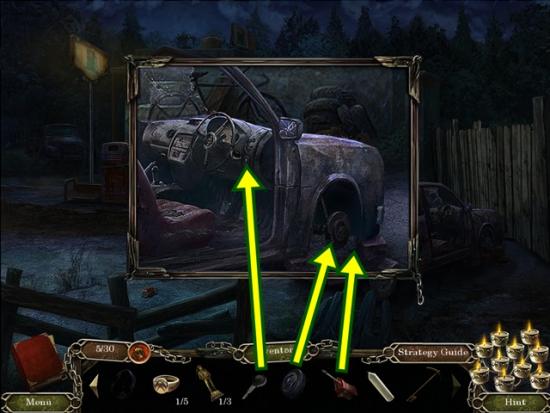
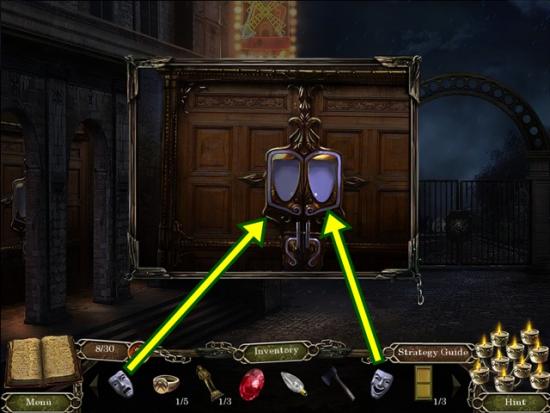
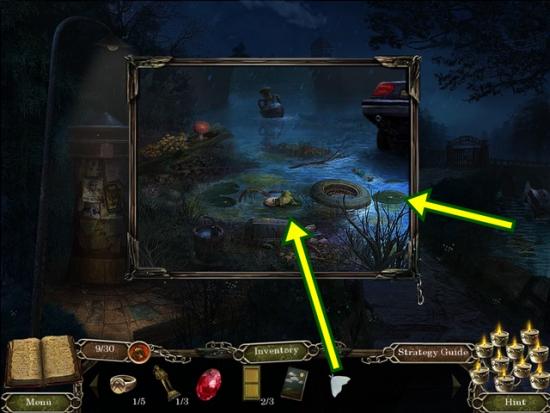
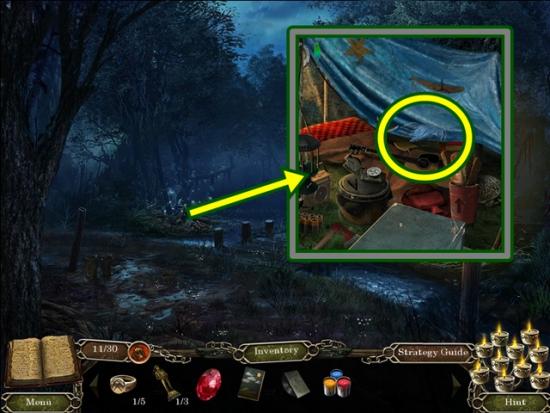
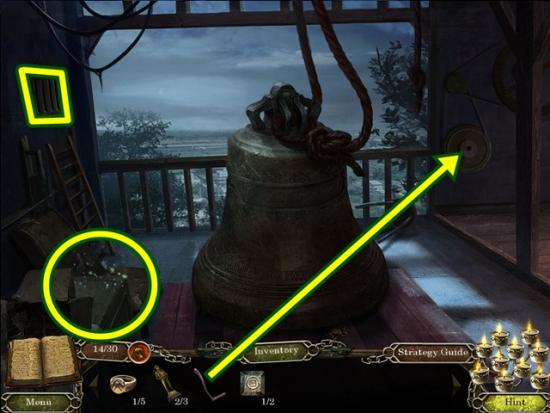
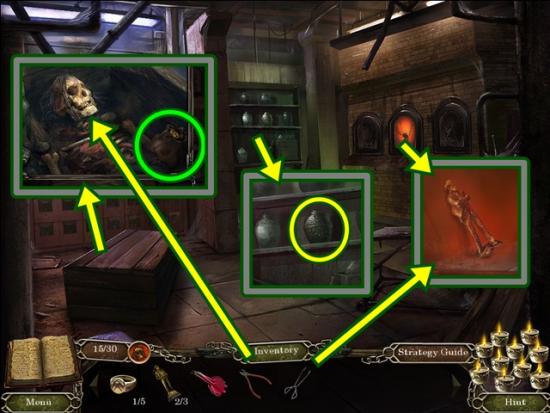
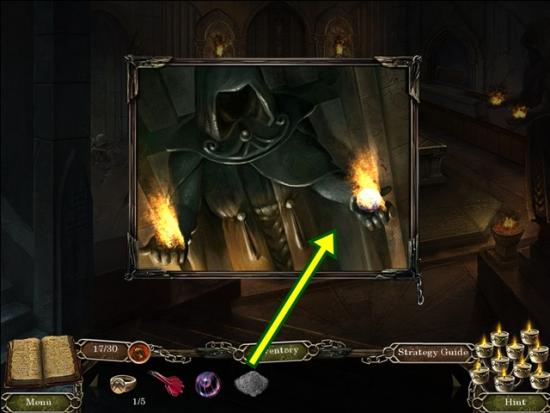
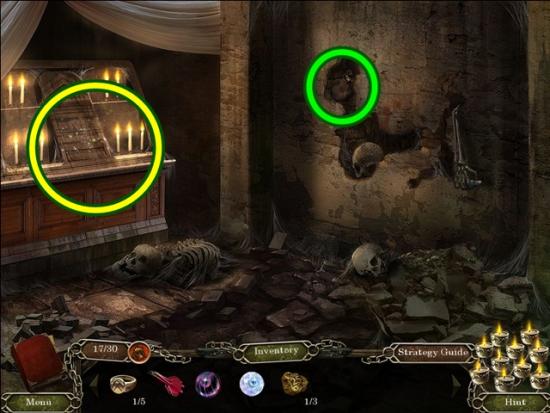
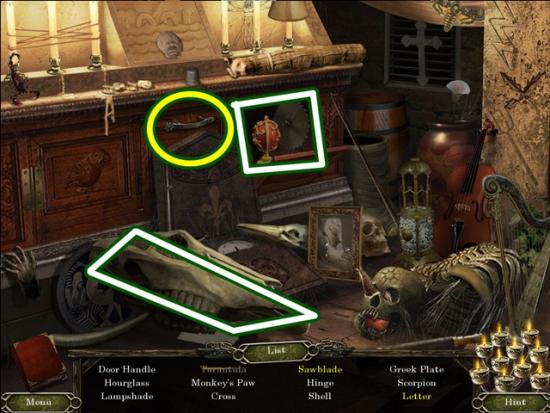
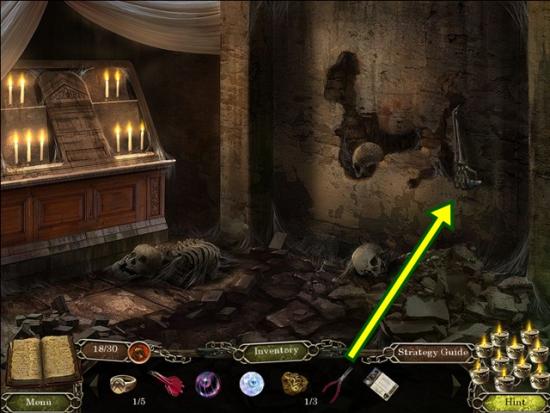
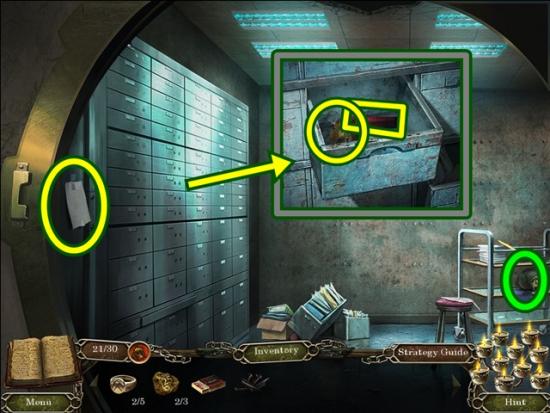
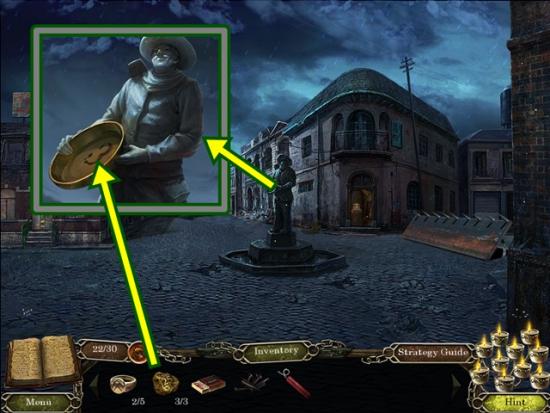
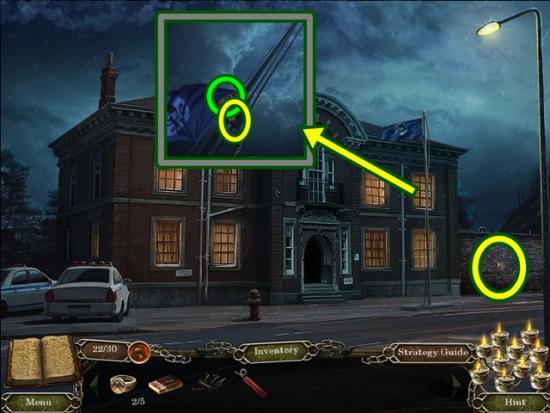
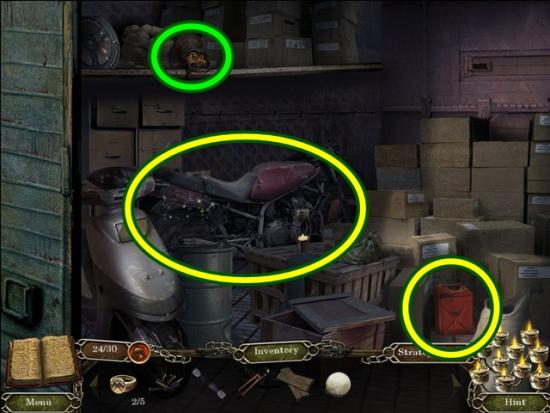
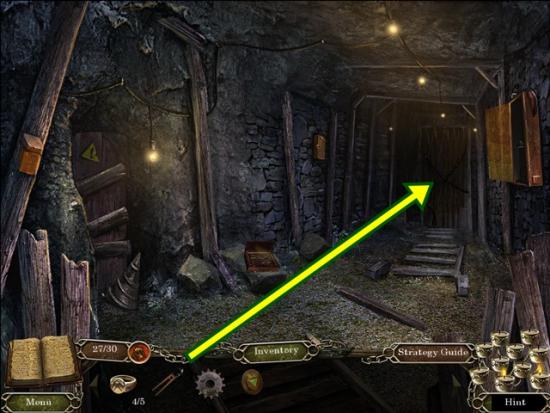
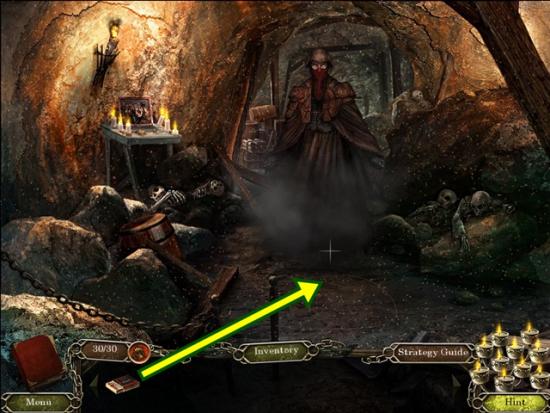
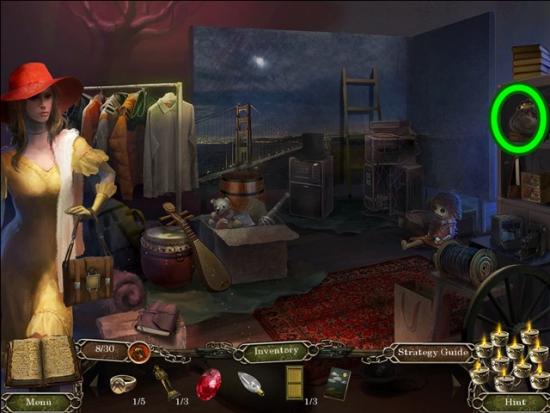
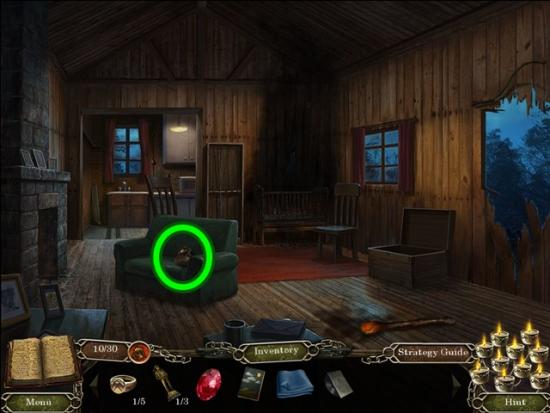
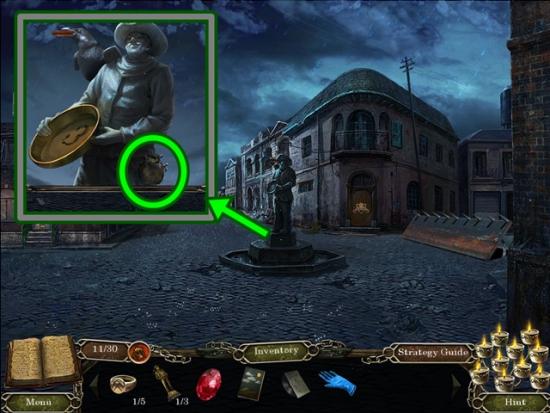
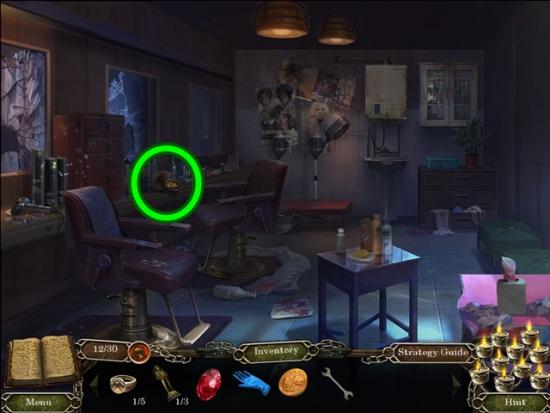
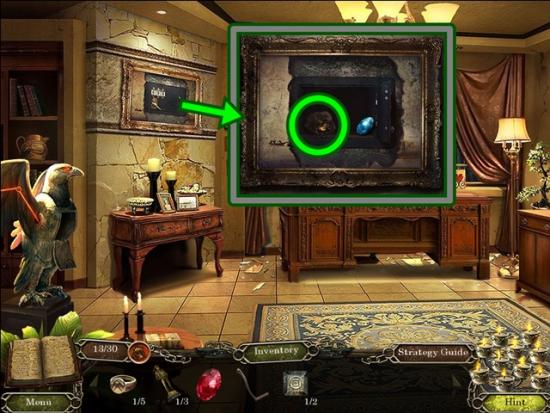
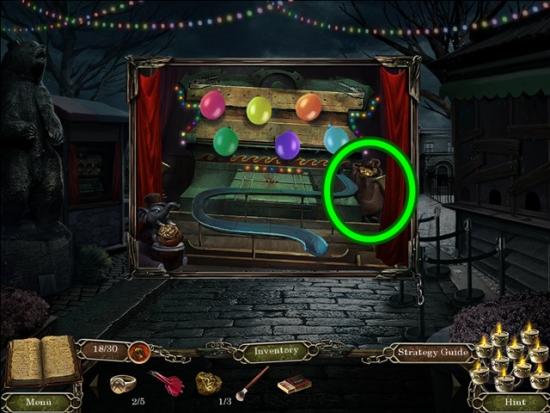
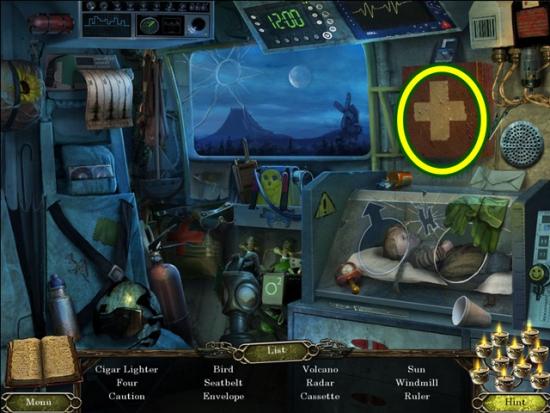
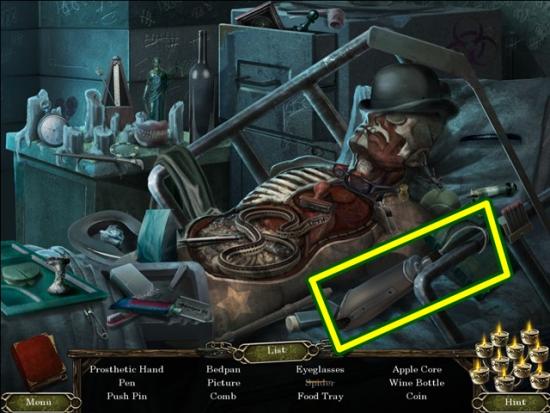
Welcome to the Cursed Memories: Secret of Agony Creek walkthrough on Gamezebo. Cursed Memories: Secret of Agony Creek is a hidden object/adventure game played on the PC created by Vast Studios. This walkthrough includes tips and tricks, helpful hints, and a strategy guide to how to complete Cursed Memories: Secret of Agony Creek.
Welcome to the Cursed Memories: Secret of Agony Creek walkthrough on Gamezebo. Cursed Memories: Secret of Agony Creek is a hidden object/adventure game played on the PC created by Vast Studios. This walkthrough includes tips and tricks, helpful hints, and a strategy guide to how to complete Cursed Memories: Secret of Agony Creek.


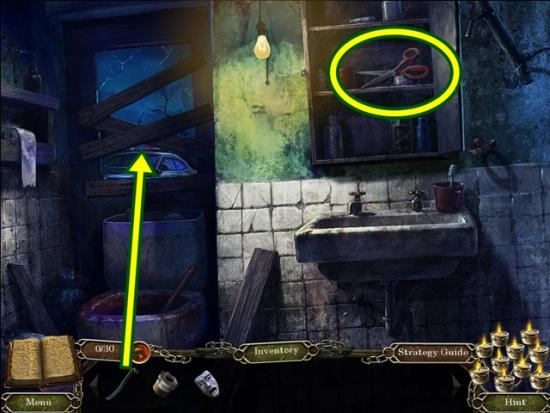
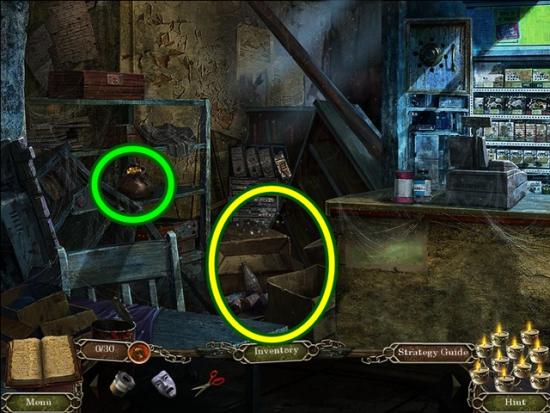
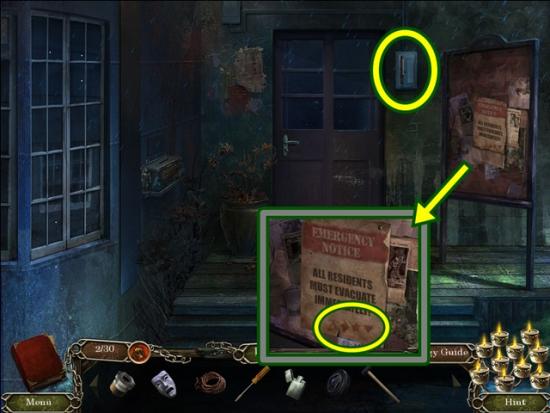
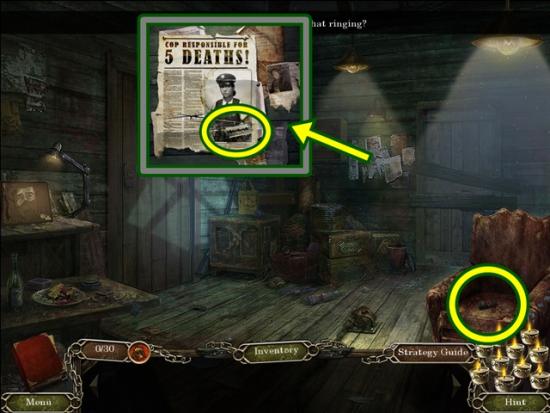
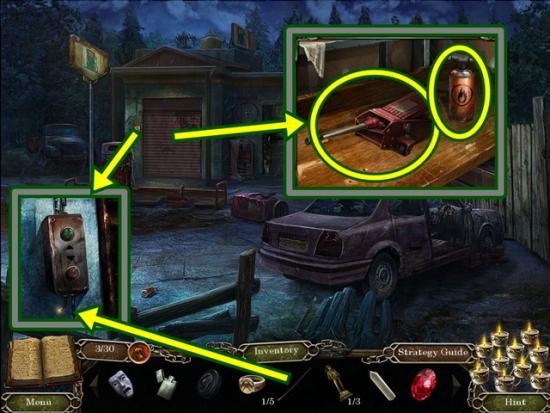
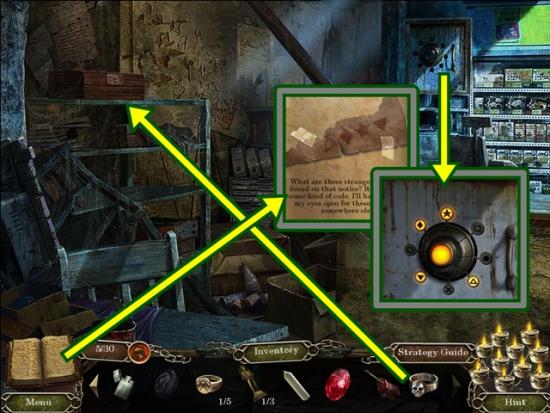
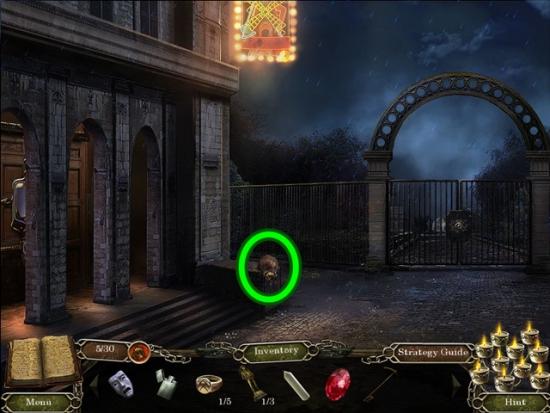
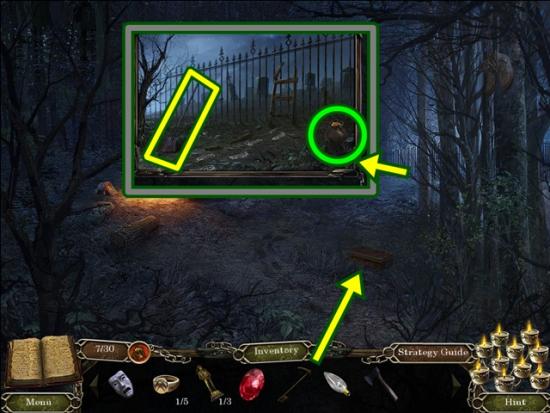
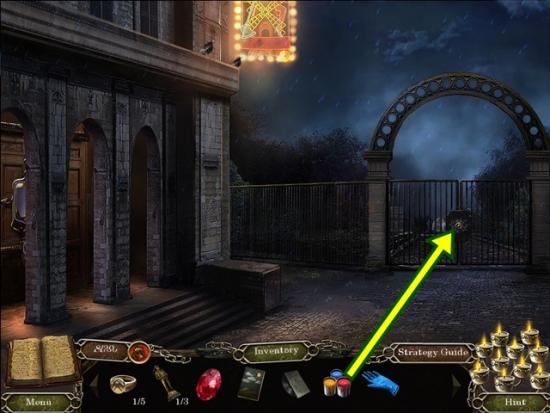
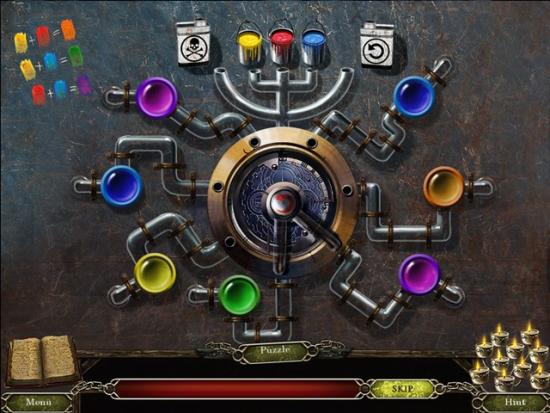
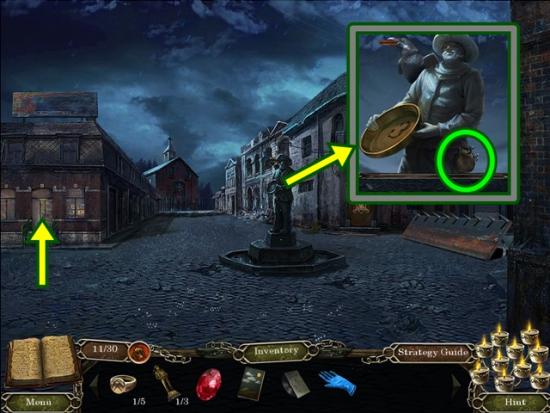
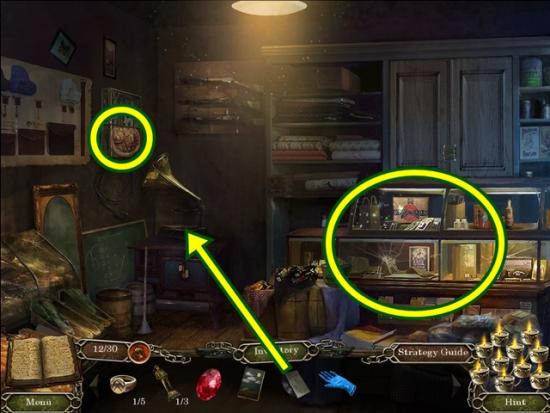
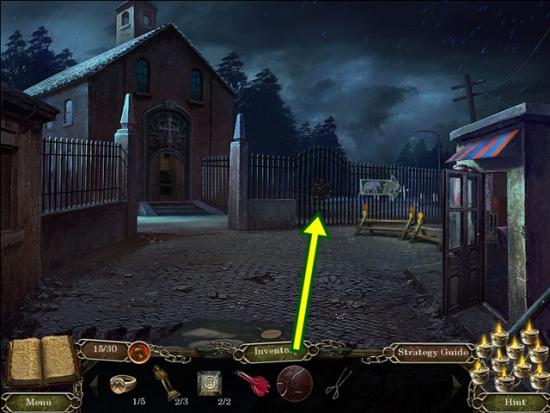
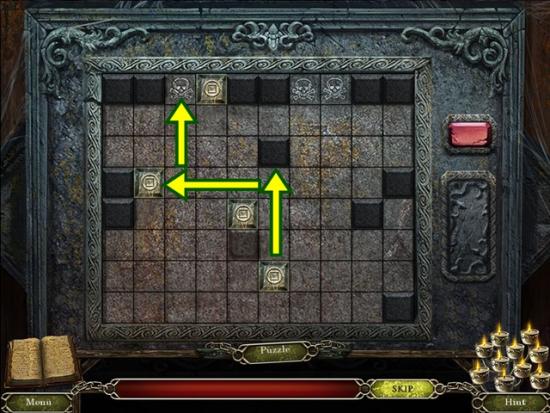
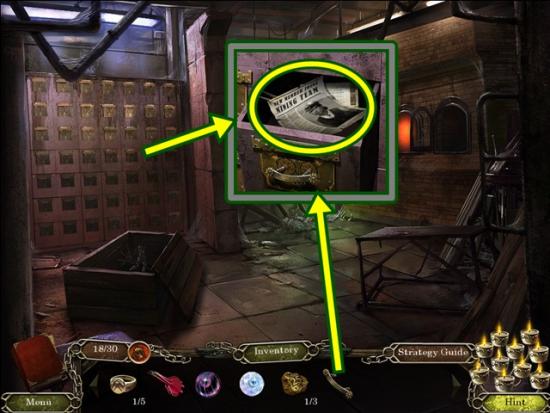
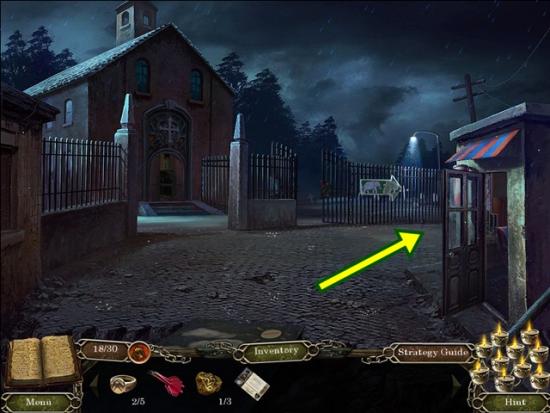
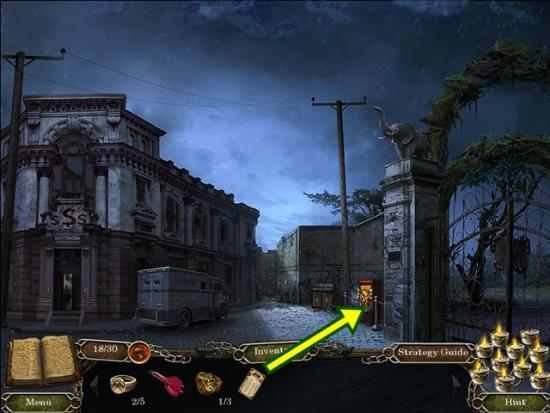
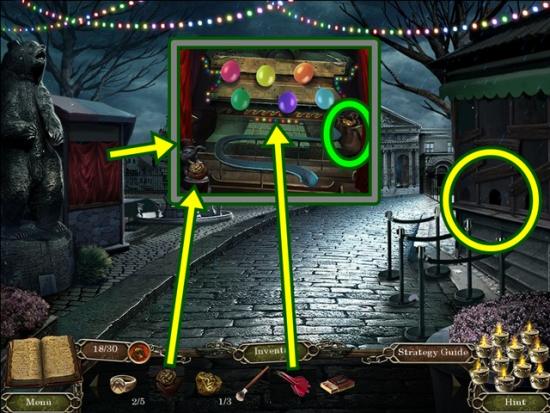
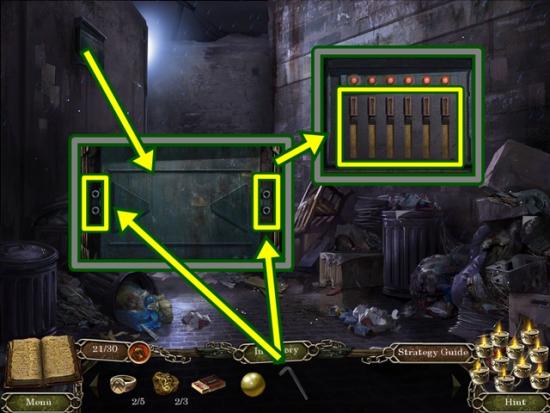
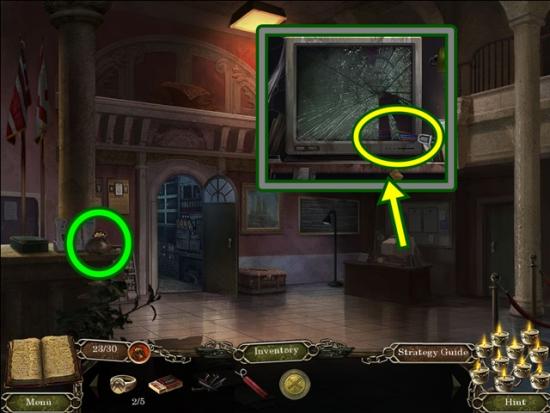
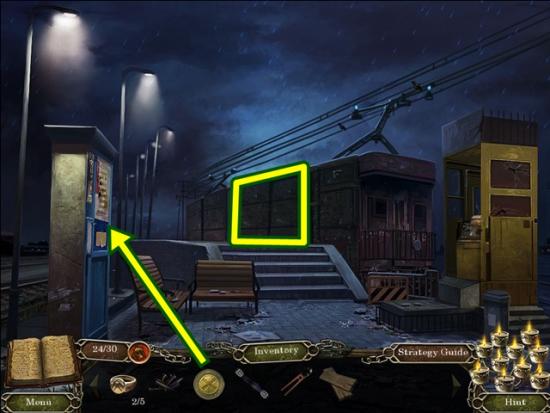
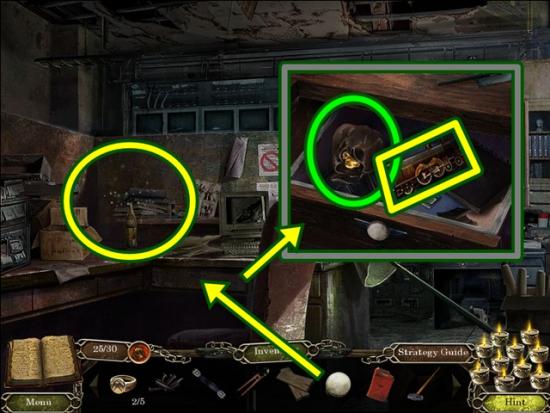
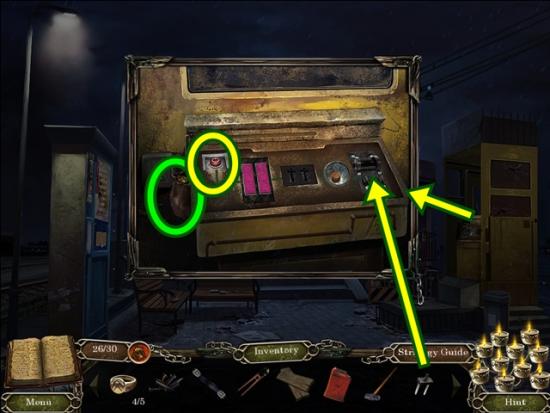
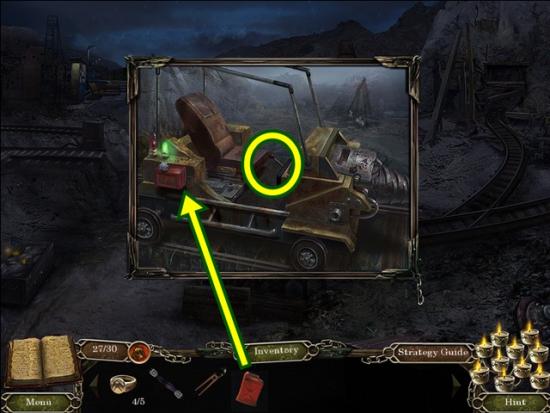
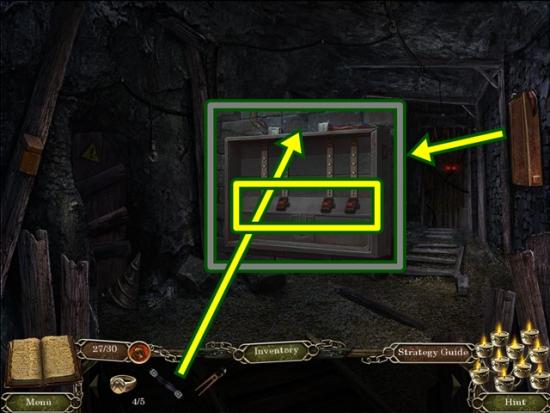
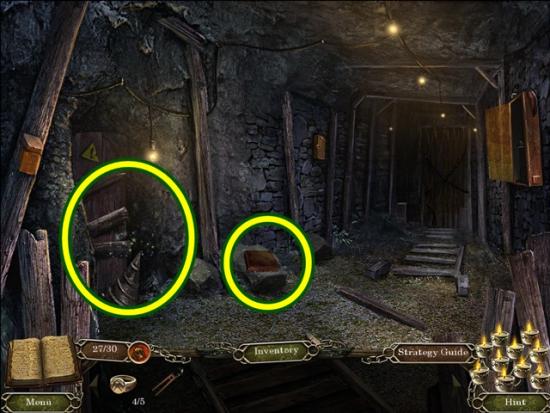
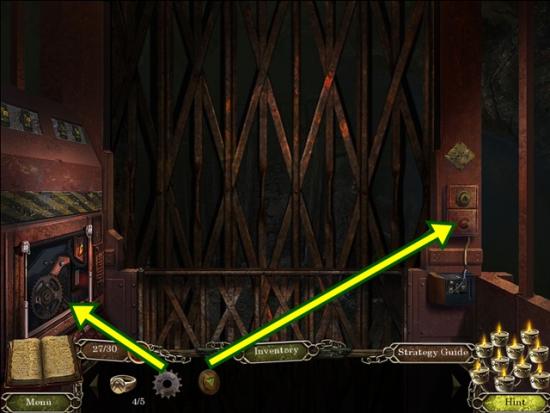
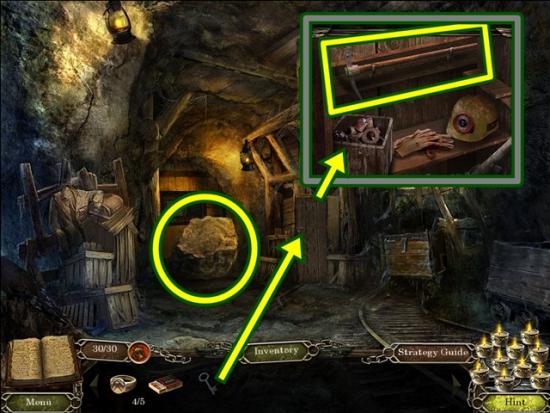
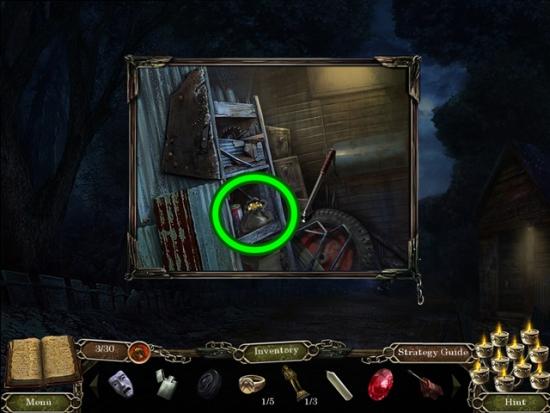
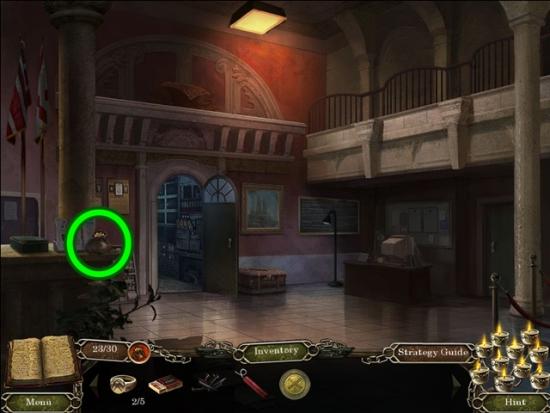
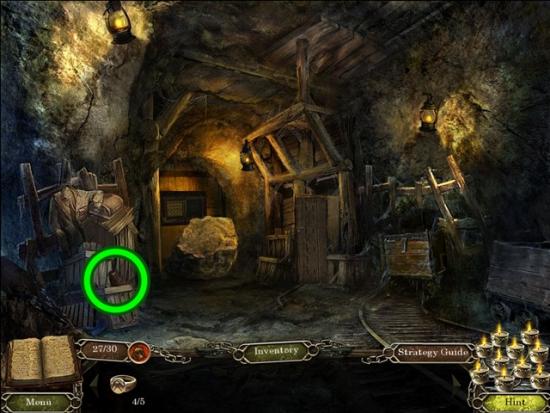
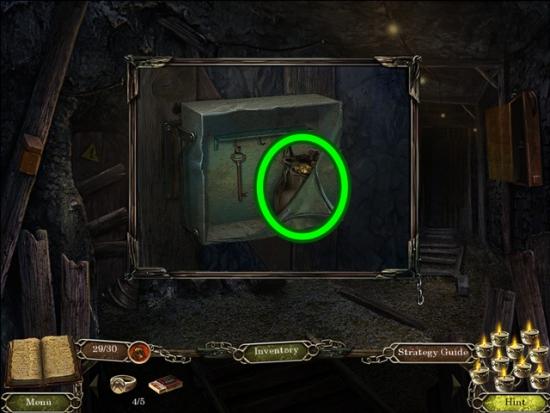
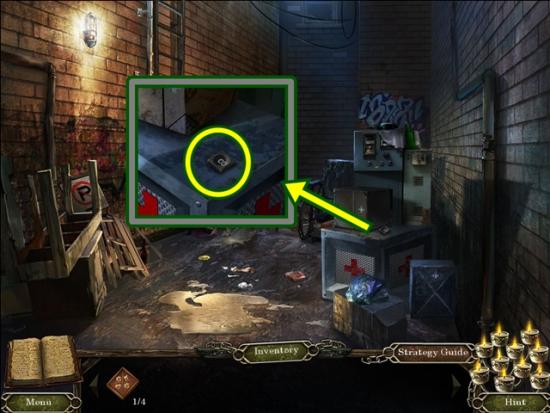
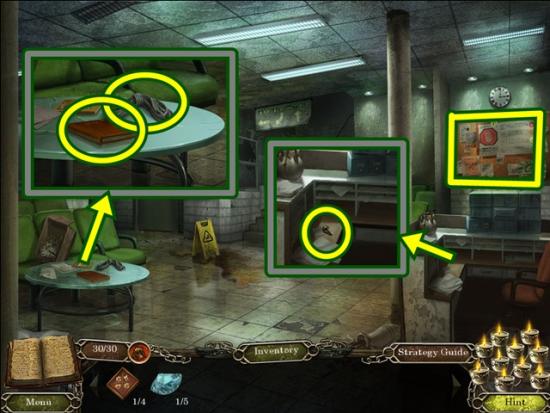
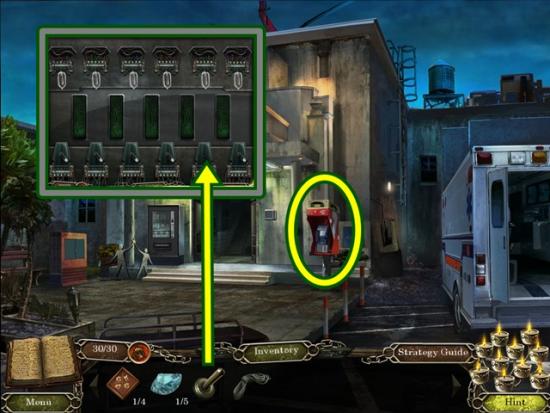
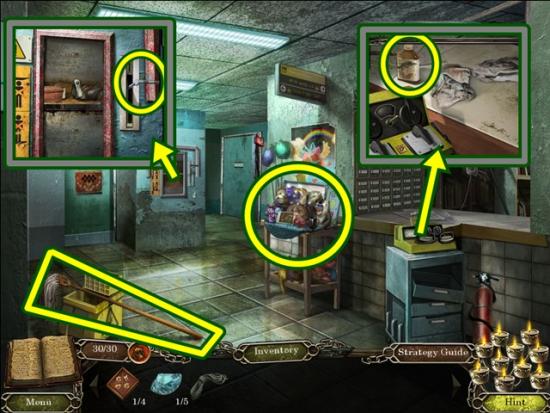
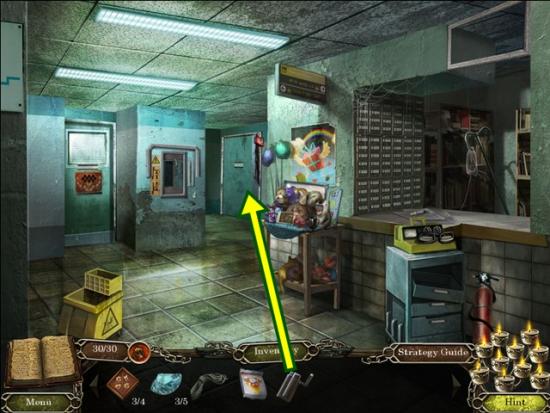
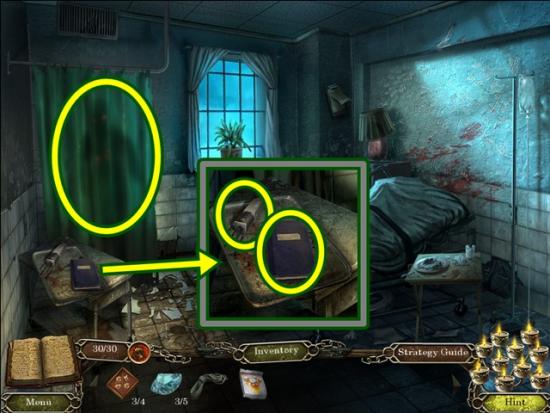
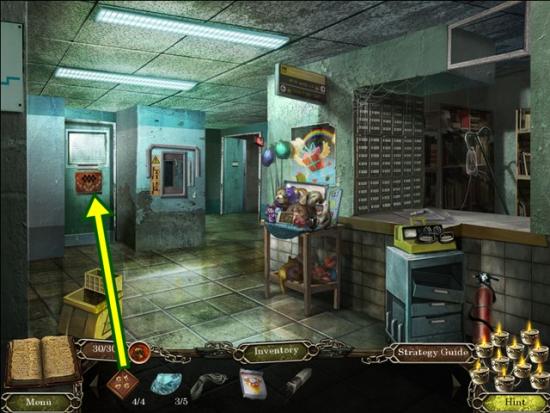
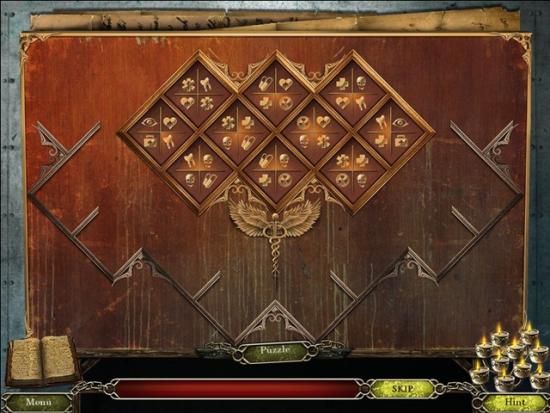
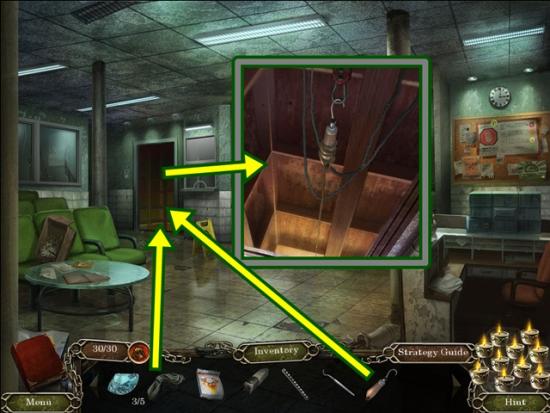
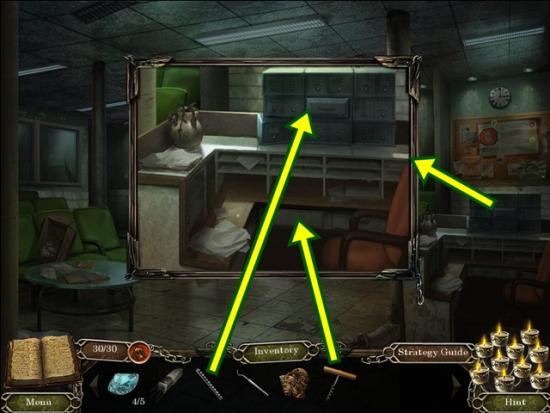
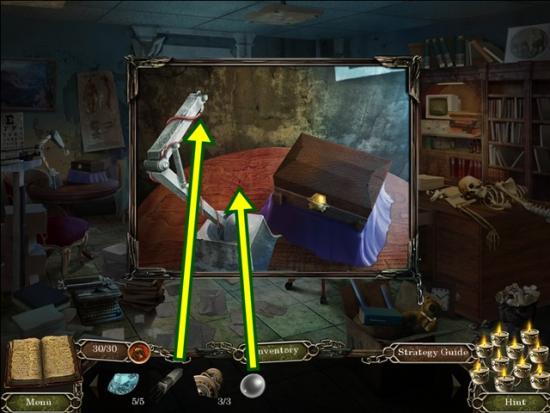
Click on the notice board. Read the emergency notice, then take the symbols drawn on the bottom of it. It’s added to your journal. Click anywhere outside of the window to close it. Click on the fuse box.


The end!


The end!
