- Wondering how to get Monopoly GO! free rolls? Well, you’ve come to the right place. In this guide, we provide you with a bunch of tips and tricks to get some free rolls for the hit new mobile game. We’ll …
Best Roblox Horror Games to Play Right Now – Updated Weekly
By Adele Wilson
Our Best Roblox Horror Games guide features the scariest and most creative experiences to play right now on the platform!The BEST Roblox Games of The Week – Games You Need To Play!
By Sho Roberts
Our feature shares our pick for the Best Roblox Games of the week! With our feature, we guarantee you'll find something new to play!All Grades in Type Soul – Each Race Explained
By Adele Wilson
Our All Grades in Type Soul guide lists every grade in the game for all races, including how to increase your grade quickly!
Crash Club Tips, Cheats and Strategies
Crash Club is an arena-based car-battling multiplayer smash ‘em up by Prettygreat. In this game, players will race around a city and attempt to drive over everything in sight in order to earn points while dodging and attacking other cars …
Crash Club is an arena-based car-battling multiplayer smash ‘em up by Prettygreat. In this game, players will race around a city and attempt to drive over everything in sight in order to earn points while dodging and attacking other cars trying to do the same. Gamezebo’s Crash Club Tips, Cheats and Strategies will help you stay alive long enough to earn a spot on the leaderboard as well as a wizard hat for your antenna.
- Learn the map. When you’re first starting out, it’s best to just drive around and become familiar with your surroundings. Crash Club’s map is quite large, and it will take a while before you learn and remember all the different sections of the city. However, the map does not change between games, so buildings and objects will appear in the same places every time you play.While you’ll automatically absorb the map as you play, we recommend paying special attention to a few things. First, the Stop-N-Go body shops: it’s helpful to remember not only where they’re located, but what direction they face. You have to enter them via the open garage door, and shops that are on corners or nestled in the heart of the city will sometimes face out toward a different road than the one you’re on. The large yellow launching pad is always to the left of the garage door as you’re driving into the entrance, so use these as mental markers for how to get inside.
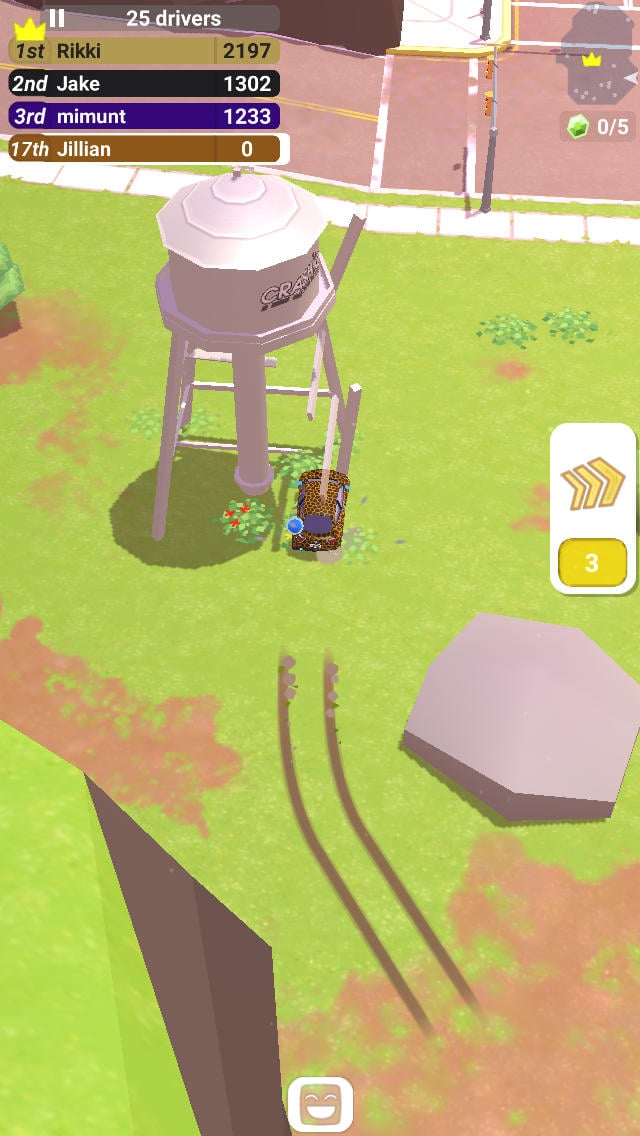
Second, try to note big ticket smashables throughout the city. While there will be items all over that you can drive through for points, there are a few higher reward objects in certain areas. In the southeast corner of the map, near the cliff with the lighthouse, is a water tower. If you drive through two of its opposing support beams, it will topple over and award you 30 points. In the far west side of the map, near the cargo docks and right next to a Stop-N-Go, is a large metal crane that awards 35 points if you smash two of its supports. The gas station near the southern-central border of the map will award 40 points if you blow up all three fuel pumps. The golden statues you’ll see throughout the city—there’s actually one on a hill near the water tower—are always worth 20 points.
- Prioritize smashing the city over wrecking the cars. While you do earn points for wrecking cars, unless you’re destroying someone ranked significantly higher than you on the match’s leaderboard, you’re not going to earn that much. (Note that you earn 10% of the leader’s current score if you wreck them, so destroying a leader with 3,000 points will net you 300 points, for example.) Additionally, it’s easy to lose a kill to another player or simply to someone getting away via turbo or escaping into a Stop-N-Go, resulting in a waste of ammo and time. For getting high scores, your time and energy is better spent focusing on smashing all the stationary objects around you and finding tokens while doing so.
- Save your ammo for the right situation. While smashing should be your priority, you will need and want to wreck cars at times, so try to have a weapon with ammo available whenever possible. Don’t fire on random cars just because: if a car is not smoking at all and likely has full health, don’t waste your ammo on it. If it’s ranked way lower than you, don’t bother. If it’s close to a Stop-N-Go, consider if you can actually kill it before it reaches safety—if not, don’t try.If you pass a car that is smoking or—even better—on fire, shoot it for an easy kill. If you encounter someone higher rank away from a Stop-N-Go and you are in a better position to win, feel free to attack. If someone is chasing you and you want to fight back to scare them off, go right ahead. Cars without weapons on top are also easy targets, but consider if it’s worth your time: is anyone else nearby that might swoop in and steal the kill, or target you while you’re distracted? Wasting all your ammo on a full-health car just to have another opponent drive by and take you down won’t earn you a high score.
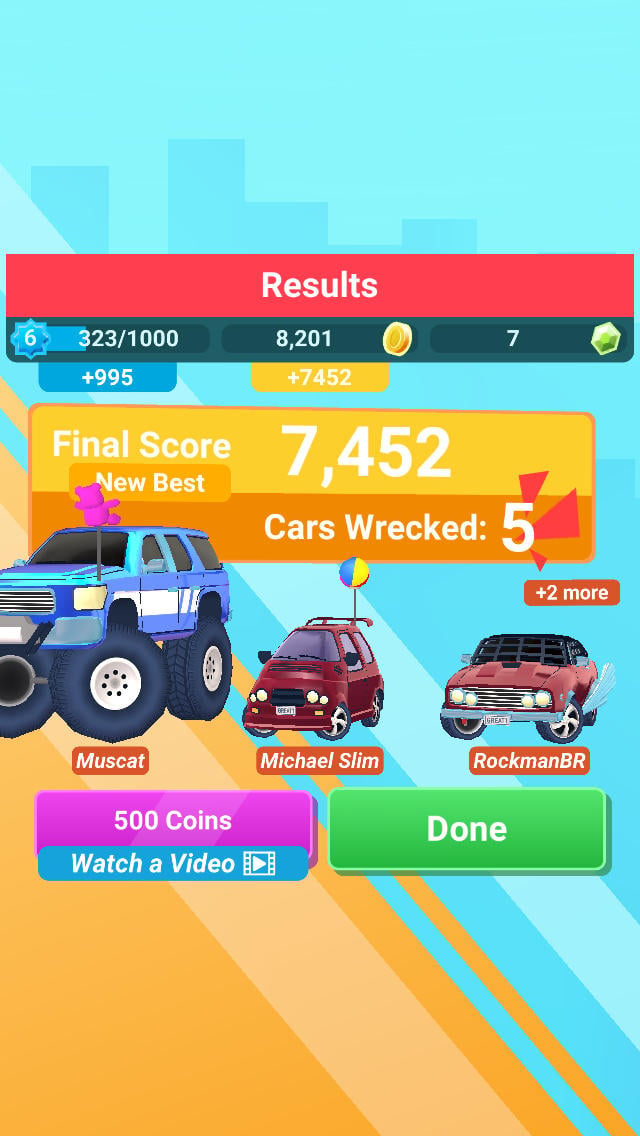
- If your goal is to level up, focus on wrecking cars. The EXP you earn at the end of a match has a fairly straightforward calculation: you get 10% of your final score + 50 points for every car you wreck. So, for example: if your final score was 500 and you wrecked 3 cars, you would earn 200 EXP [(500×10%) + (3×50)]. If your final score was 500 and you wrecked 10 cars, you would earn 550 EXP. You would have to earn an extra 500 points in-game for the equivalent EXP for each car you wreck. Of course, the best games will likely be a combination of smashing score and car wrecking, but if you’re near-death and just want some quick EXP, try to take someone down with you.
- You want to encounter opponents head-on. The colored arrows you come across while driving indicate nearby opponents, and it points in the direction they are currently. The larger the arrow, the closer the opponent. In the image below, you can see we have a car south of us and a slightly closer car northeast of us. (Note: the color of your arrow and your name on the leaderboard simply matches the color of your car. It doesn’t indicate anything else.)If you see an arrow behind you and you think there’s even the slightest chance you’ll have to engage, turn around. Opponents that are behind you have an excellent vantage point to lace you with projectiles while you cannot reach them at all. If you think you can outrun them or get to a Stop-N-Go, head straight away from them: turning or running down back alleys doesn’t really help since weapons fire through obstacles. If an opponent can see you on-screen, even if there are walls between you, they can hit you. And often outrunning someone is not really an option: they may use turbo to catch up or have a higher visibility than you. Some players prefer to physically stop their car while in battle so they don’t have to handle driving maneuvers and attacking. If your opponent does this, you can try to get behind them and slightly out of range so you have an advantage, or simply disengage and drive away while they’re stopped.
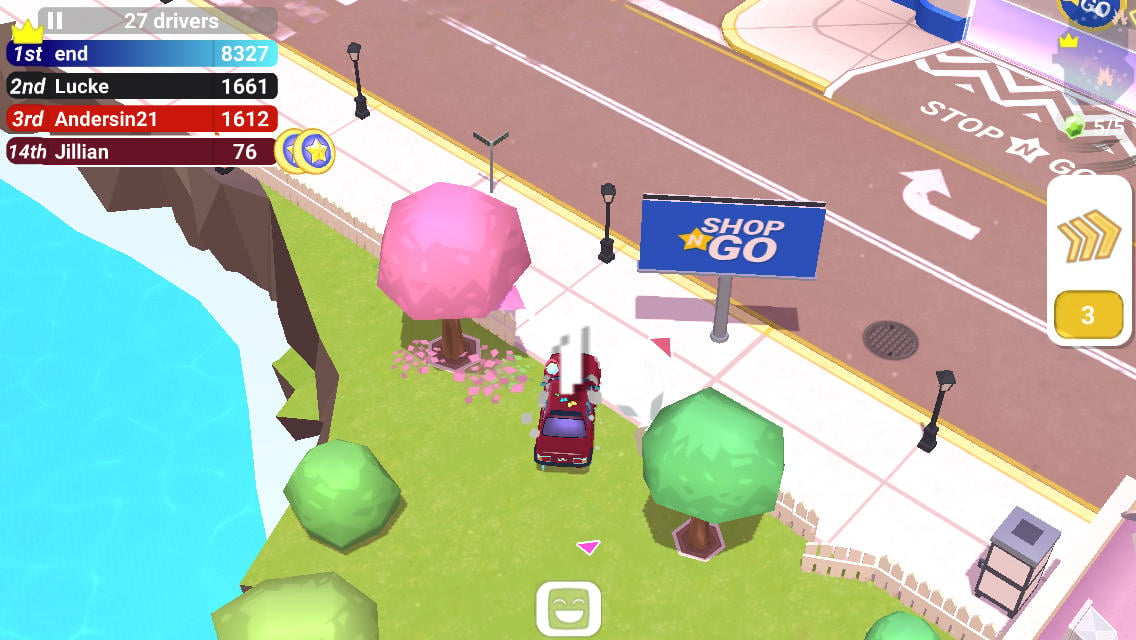
- Use the mini-map. The map in the upper-right corner has valuable information, even though it’s pretty tiny. The white arrow is you and the direction you’re facing. The little white dots are your opponents. The crown is the current leader. And flames are recent destructions. When simply trying to earn a high score, we like to drive away from the enemy white dots, especially groups of two or more. Aim for empty map space for easy smashing points. However, recent destructions can sometimes be areas with easy kills waiting: while it can indicate an opponent that is armed and capable of blowing someone up, it just as often indicates that that opponent has expended some of their ammo and is likely injured. Driving through recent destructions can sometimes provide easy kills as you pick off wounded survivors.
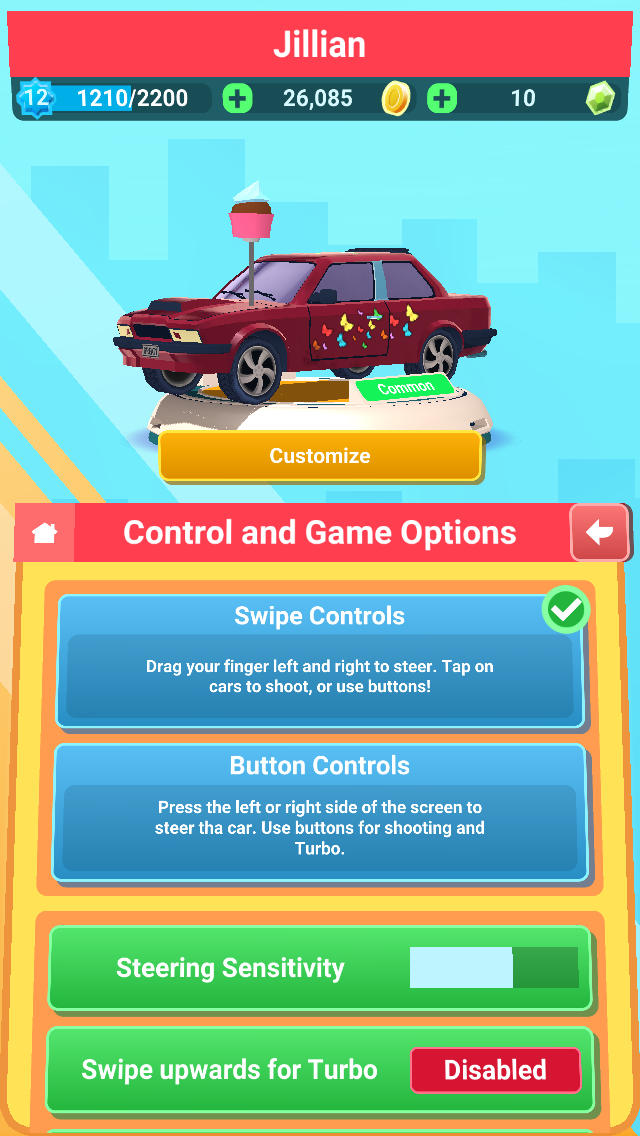
- Try out different control schemes. From the main menu, select “My Career” and then “Control and Game Options.” Here you can change between swipe and button controls (sliding your fingers vs just tapping), as well as adjust steering sensitivity, invert steering, and enable or disable swiping for turbo and brakes. We personally prefer the swipe controls with a mid-to-high sensitivity, no swiping for turbo but swiping for brakes. We found that the slide control would sometimes translate to swiping up accidentally, wasting our turbo when we didn’t need it. If the controls feel off to you, sometimes something as simple as adjusting the sensitivity can make a significant difference.
- Practice quick-turns. To do a handbrake turn, swipe the direction you want to turn quickly and hold your finger down. Swiping too slow will result in a slower turn; swipe fast enough and you should turn on a dime, allowing you to do a 180 if need be. You can also use buildings to turn quickly, although less predictably: running into a wall will bounce you off it, but you’ll briefly lose control while bouncing.
- Don’t forget you can play in landscape or portrait mode. Which orientation you choose will determine your peripheral visibility: portrait mode makes it easier to see cars in front of and behind you while landscape will give you a bit more visibility on your left and right sides.
- You get a warning when someone’s about to shoot you. If your camera randomly pans out slightly, especially when an opponent’s arrow is visible nearby, it means someone is locked onto you and about to attack you. You can use this warning to turn towards them and engage directly, or try to race away, or merely ignore it if you’re at full health and they’re far away.
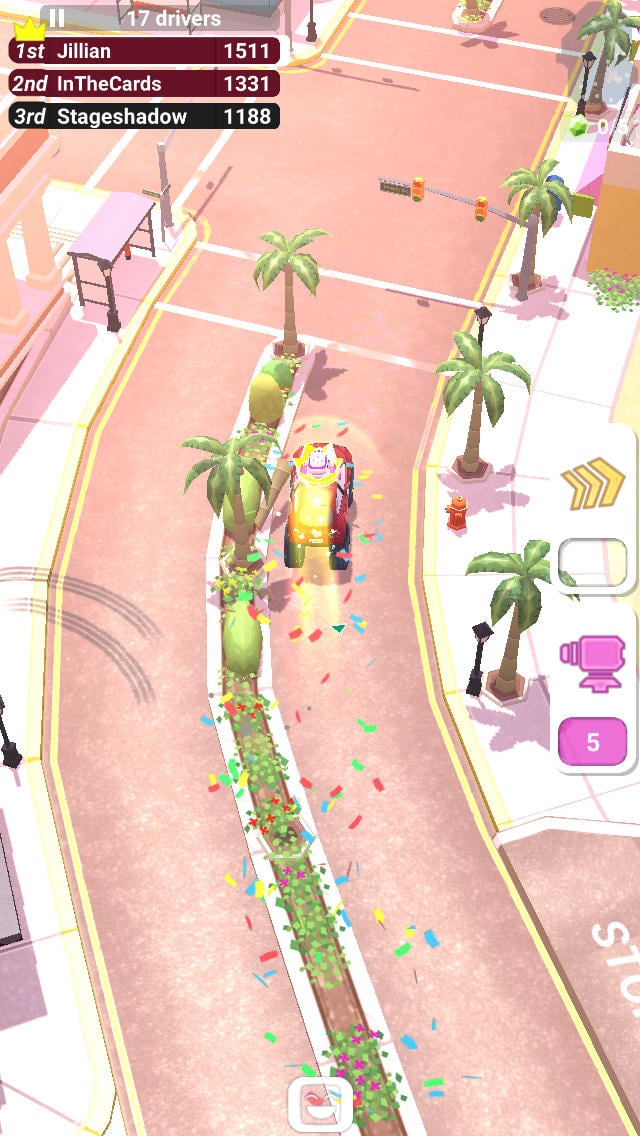
- You earn double points when you’re the leader. If you have the highest score on the match leaderboard, you’ll earn a crown, your car will turn into a monster truck, and all the points you earn will be doubled. This is a great time to focus on those big ticket smashables we talked about earlier: knock down the dock crane as the leader for 70 points or the gas station for 80. The points pile on quick as the leader, but you’re plainly marked on everyone’s mini-map and people can teleport to you directly from Stop-N-Go shops, so you have a huge target on your back. Try to avoid high traffic areas and focus on smashing as many things as possible to maximize your score doubler.
- Pay attention to the gem meter. Just below the mini-map is a gem radar. Every 24 hours, five gems are scattered about the map in hidden locations. If you smash the item a gem is hidden inside, you’ll earn that gem. If you’re near an item with a gem, your gem count will flash. The green meter next to it will fill up the closer you get: if you’re still a bit far away, there will be only a little green visible. If you’re very close, usually within a single block of the gem, the meter will be entirely filled with green. When you get to this point, simply drive around the immediate area and smash everything in sight until you find the gem.
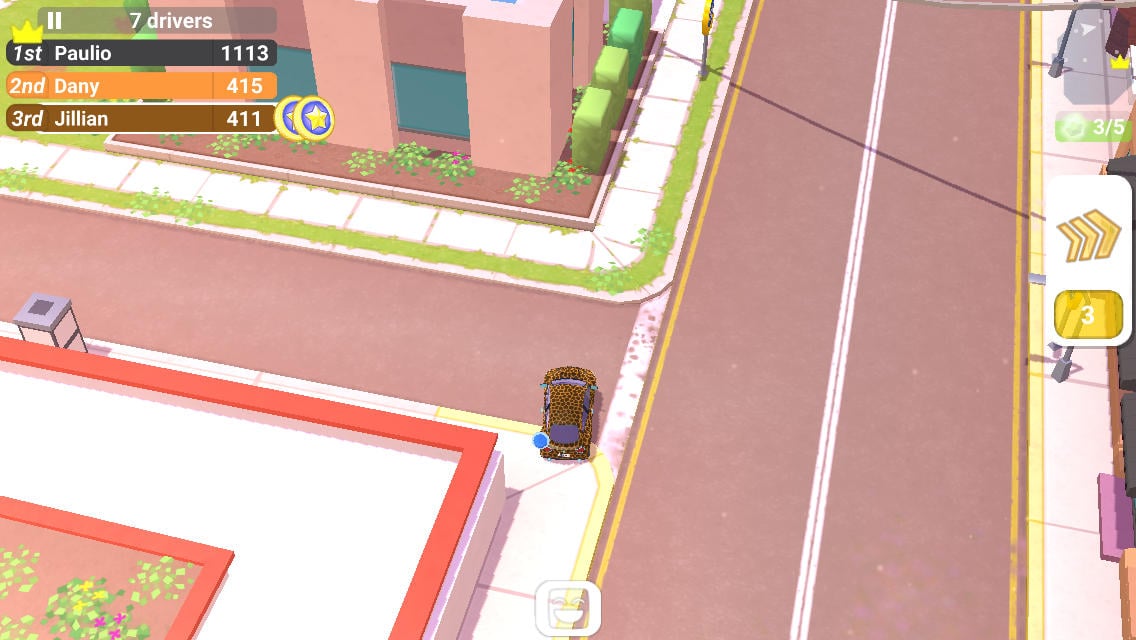
In the image above, we are pretty close to a gem, but not right next to it–the green meter is a little past halfway filled, meaning we’re within a few blocks of the gem.
These five random gems per day are one of the only way to earn gems. The other is to simply earn EXP and level up, which sometimes gives out gems as rewards. Since you must use gems to unlock new cars, we really recommend hunting down the five free map gems every day. Their location remains the same for the entire 24-hour period, so if you narrow down a gem’s location to a specific area but die before you find it, you can return to that area on your next match and continue hunting for the gem.
- Try to keep one token on deck at all times. To enter the Stop-N-Go, you have to have at least one token in hand (your current tokens are visible next to your name in the upper-left corner of each match). If you are out of tokens, you cannot go inside. Saving a token and not buying everything at once will ensure you have an escape route if someone is attacking you and you need to get away. However, keep in mind that if you enter a Stop-N-Go, you must buy something. If you don’t buy anything before the shop’s timer runs out, it will automatically deduct a token and boot you out without any purchase.You can have a maximum of five tokens on deck at one time: this is enough tokens to buy all three items at a shop (shop inventories will always have three items available, with the cost of all three equaling either four or five tokens). If you’ve hit the max, you might as well duck into a shop and make a purchase so you can continue earning tokens while smashing.
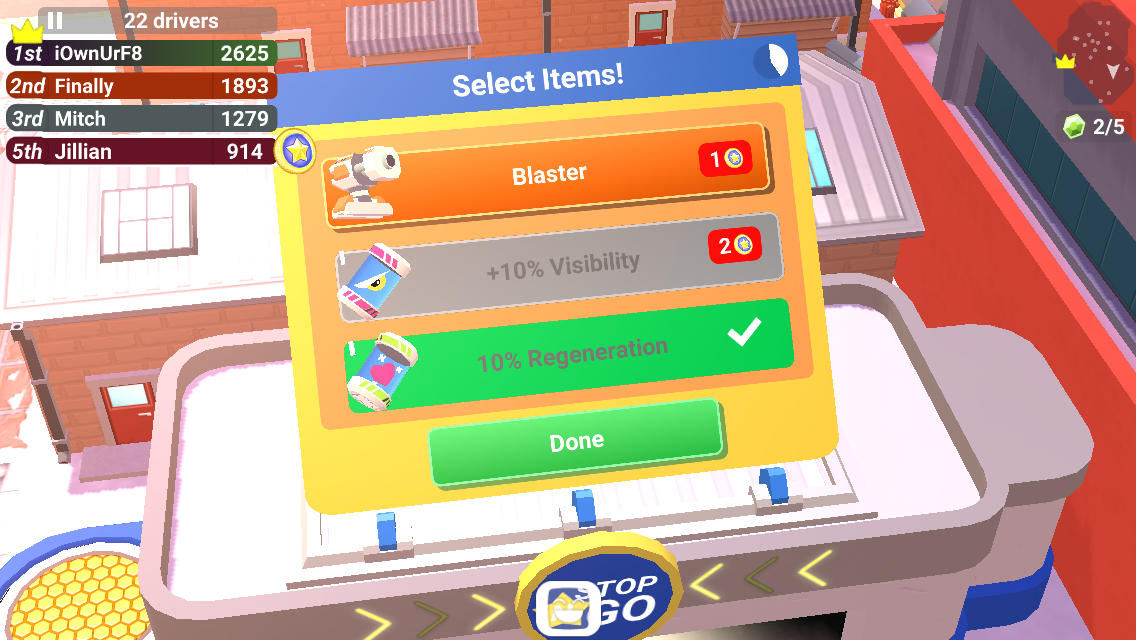
- Prioritize 2-token items at Stop-N-Go shops. All of the weapons you can buy at shops will only cost one token, as will turbo refills and car repairs. However, often you will enter a shop and be offered something that costs two tokens, such as health regeneration or armor. These items are crucial for long-term survival, and we recommend buying them as soon as you are able. Regeneration is our top pick, which slowly refills your health while you are driving around. You can tell you are being regenerated—or another car is—by pink hearts floating around the regen vehicle. Visibility is our second choice: this item essentially pulls back the camera slightly so you can see more of the map around you. This means you can see and attack other cars from farther away. If you’ve ever been hit by a vehicle that isn’t even indicated by an arrow on your screen, they likely have extremely high visibility. Armor is our third pick from the two-token item list: it reduces the damage you take from incoming weapons by a small amount. If you buy armor repeatedly this can add up to a significant damage reduction, but we still recommend regeneration and visibility first if they are available.The items sold in shops are random and change each time you enter a shop—going to the same Stop-N-Go twice in a row will not offer the same items—so finding the recommendations above is a matter of luck.
- Patrol a small area of the map when it’s empty. When items are smashed by you or another player, they disappear briefly and cannot be smashed until they respawn. However, items return extremely fast, so you can often smash a big ticket item, drive a large circle around it and come back to smash it again. When one area of the map is under-populated, we like to just patrol that region and smash and re-smash its items without any threats. Eventually other players will show up, but don’t think that you have to keep driving across the city entirely: you can focus on one section of the map and still rack up points.
- Pay attention to weapon ammo count. There are four different weapons that can be purchased from Stop-N-Go shops (or sometimes started with if you pay a small entry fee before a match begins): Peashooter, Zap Cannon, Rockets, and Blaster. The weapons vary slightly in damage output and maximum ammo: you should be aware of the strength and ammo of your weapon and an opponent’s when engaging in battle. Someone with a Peashooter fighting someone with a Zap Cannon will lose in a straight DPS battle, but the Zap Cannon has considerably less ammo available, so engaging a Zap Cannon user after its already wasted some shots on another car is highly winnable. The different weapons, their initial ammo count (shots), damage, and general mechanics are listed below. Keep in mind that armor and cars’ special powers can affect their weapon power and resistance, so these numbers only apply to standard vehicles.
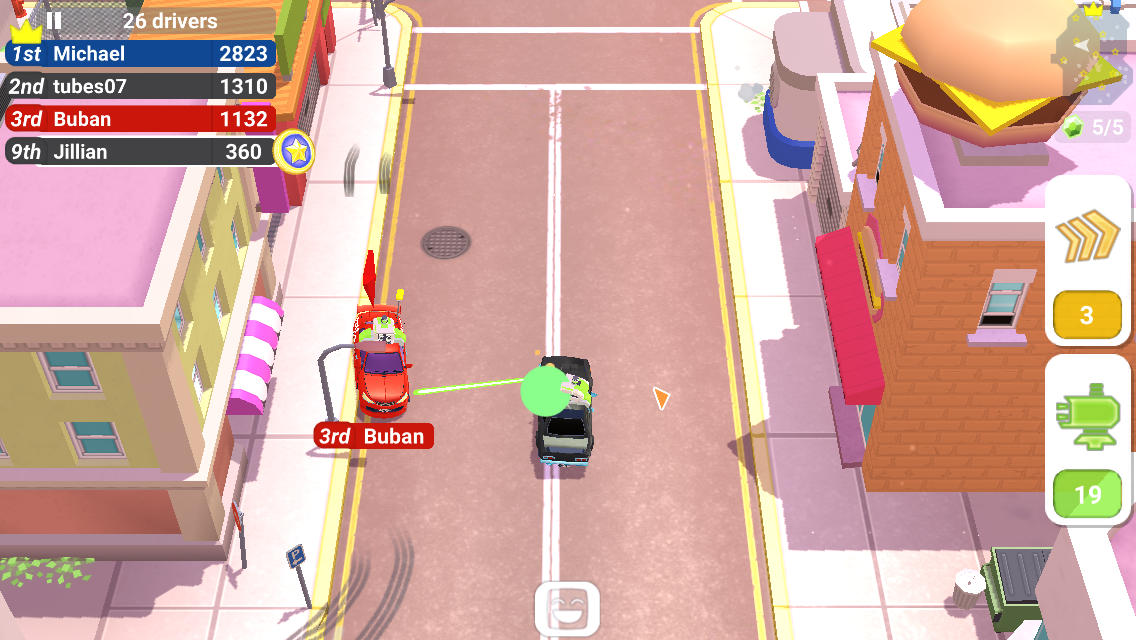
- Peashooter: 20 shots available at max, each shot shoots 4 bullets at once that do 1 damage each (4 damage cap per hit). The Peashooter is like a weaker, more accurate Blaster. While it will only do 4 damage max with each attack, it usually gets all 4 hits from almost any distance, giving you guaranteed damage versus the Blaster’s very strict distance requirements.
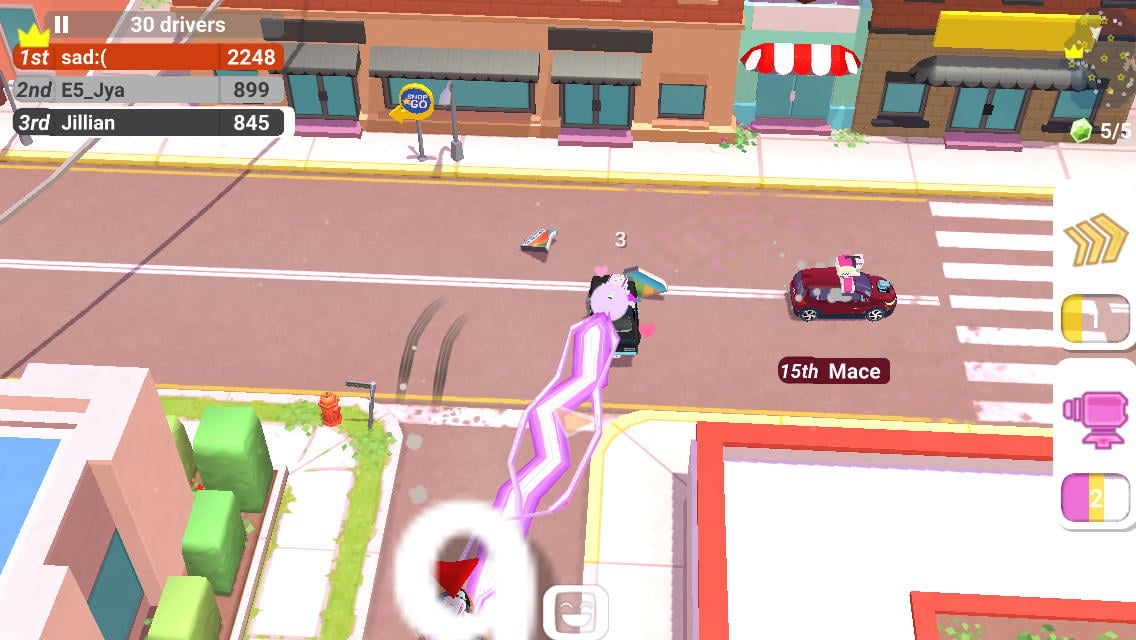
- Zap Cannon: 5 shots available at max, its shots do 9 damage each (9 damage cap per hit). The Zap Cannon is an almost guaranteed hit from any location. It shoots a direct laser beam at your opponent that is not affected by distance and does 9 damage. Its weakness is simply having so few shots, leaving you with little recourse if you finish a fight and are attacked before you can get to a Stop-N-Go to refill. If you see an opponent with a Zap Cannon engaged with another car, swoop in and attack the Zap Cannon user: it will likely be low on shots by the time it has to engage you, making it an easy target.
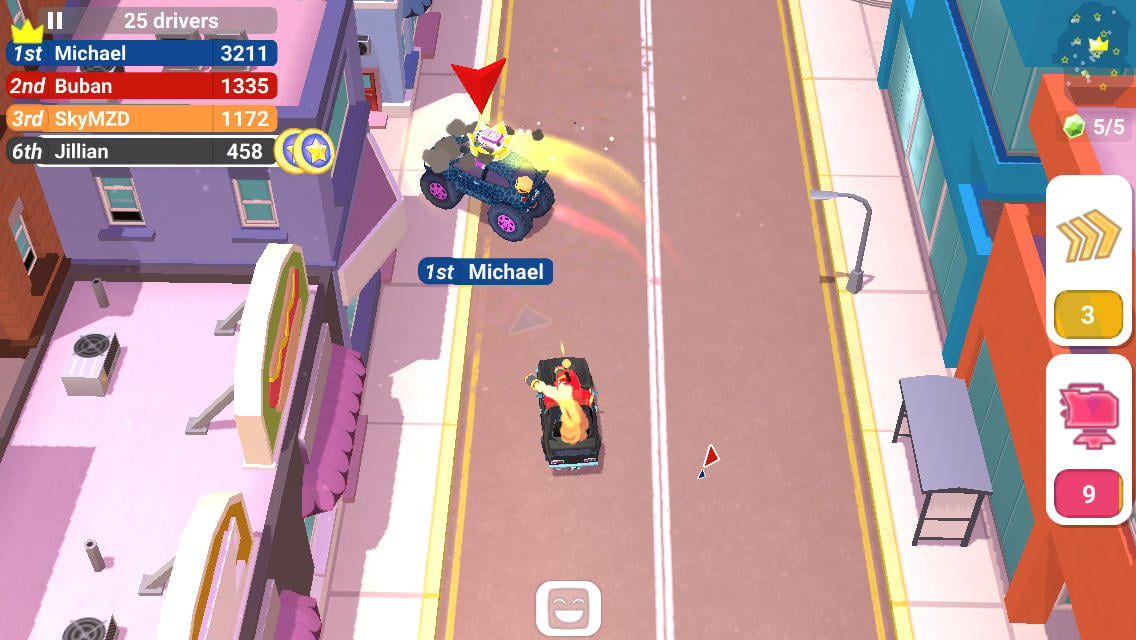
- Rockets: 10 shots available at max, it shoots 2 rockets that do 4 damage each (8 damage cap per hit). The Rockets can hit from a pretty far distance, although if you aren’t shooting head-on, one rocket will often whiff and miss.
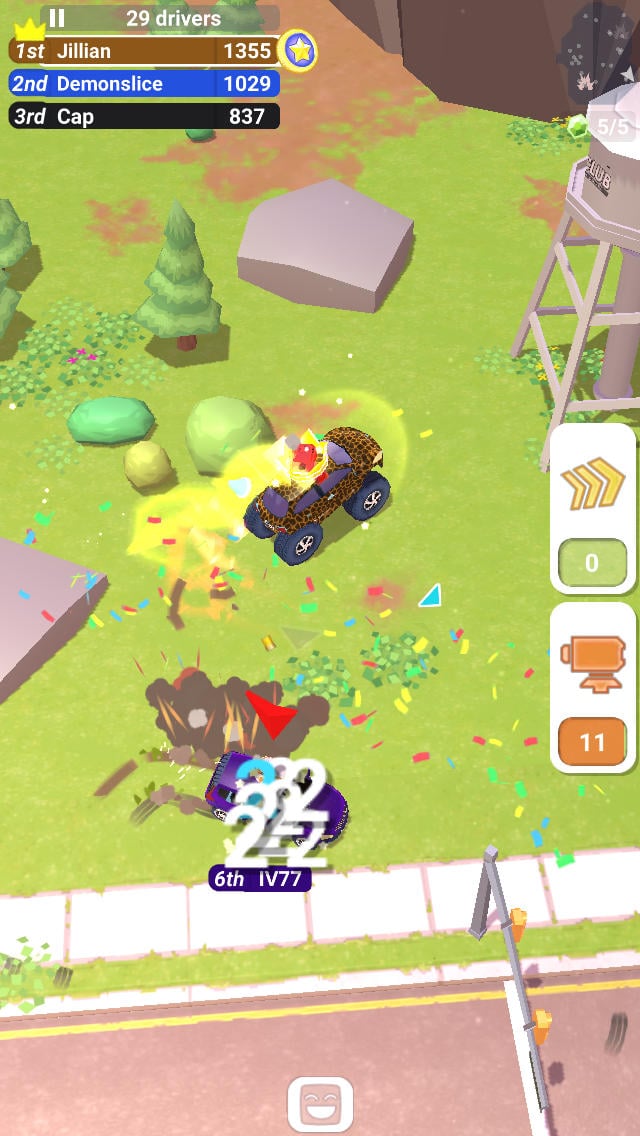
- Blaster: 12 “shots” that shoot up to 8 bullets at a time, which do 2 damage each (16 damage cap per hit). The Blaster has the potential to do the most damage of any weapon with one release—up to 16 versus the Zap Cannon’s 9—but it has shotgun-like spread that makes it very inefficient from a distance. Shoot from too far away and you’ll end up only landing a couple of shots for closer to 4-6 damage. Thus, it’s best used as a very close quarters weapon, attacking opponents that are right on top of you. If you see an enemy with the orange Blaster on their hood, try to keep your distance from them.
So how much health does a car even have? It’s honestly hard to say. Prettygreat has opted to not include any sort of specific health bar or HP meter, and you don’t get a numerical warning or pop-up when being attacked. This makes it tough to measure how much damage you’ve actually taken. We’ve found that four shots from a Zap Cannon usually kills a healthy car that is not smoking, etc. which means 45 damage will destroy a vehicle. We’ve tried testing out various deaths by noting what type of weapon has hit us and trying to calculate the average damage that we believe was done, and it seems like cars probably have 40 HP.
If this is true, this means a non-armored, no-special-powers car will die to 4 Zap Cannon hits, 10 Peashooter hits, 5 direct Rocket hits, and 3 perfect Blaster shots. Of course, the Zap Cannon is the most reliable—if you hit someone 4 times with a Zap Cannon, you know you’ve done 45 damage—and the Blaster is the most variable—you’re rarely going to get 3 perfect, 16-damage-each shots in a row from a Blaster. So the “best” weapon is really up to personal preference, how and where you like to attack opponents, how comfortable you are with low ammo, etc. We personally opt for the Zap Cannon for all-out killing and the Peashooter when we want to ensure we have ammo available and can engage anyone we like without worrying about conserving shots.
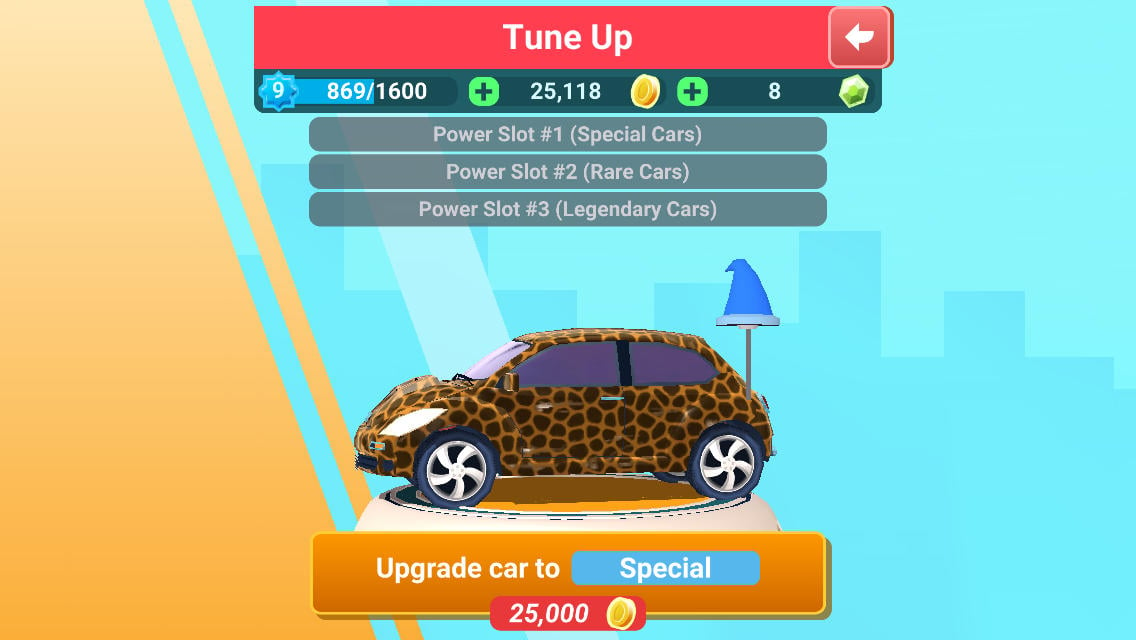
- Don’t stress about winning Special cars too much. Once you reach level 9, you unlock the ability to “tune up” any car. This lets you turn a Common car into a Special one, a Special car into a Rare one, etc. It costs 25,000 coins to make a Common car Special and 50,000 to make a Special car rare, but coins are much easier to come by than gems. Special cars have a unique inherent power, such as earning double EXP for wrecking cars or being able to see all Stop-N-Go shops on the mini-map. Rare cars have two powers and Legendary cars have three. So, instead of spending all your gems buying cars in the hopes they will be Rare, save up coins and tune up cars directly.Check the Career Progress tab from the main menu to see all the different powers available. Just being aware of what abilities other players have can be helpful so you’re not surprised by something different, like a car with Rockets shooting three projectiles or someone only taking half damage from your attacks.
More articles...
Monopoly GO! Free Rolls – Links For Free Dice
By Glen Fox
Wondering how to get Monopoly GO! free rolls? Well, you’ve come to the right place. In this guide, we provide you with a bunch of tips and tricks to get some free rolls for the hit new mobile game. We’ll …Best Roblox Horror Games to Play Right Now – Updated Weekly
By Adele Wilson
Our Best Roblox Horror Games guide features the scariest and most creative experiences to play right now on the platform!The BEST Roblox Games of The Week – Games You Need To Play!
By Sho Roberts
Our feature shares our pick for the Best Roblox Games of the week! With our feature, we guarantee you'll find something new to play!All Grades in Type Soul – Each Race Explained
By Adele Wilson
Our All Grades in Type Soul guide lists every grade in the game for all races, including how to increase your grade quickly!


