![Digimon UP Tier List [Supports, Buddies, and Partners]](/wp-content/uploads/2026/07/digimon-up-tier-list.jpg "Digimon UP Tier List [Supports, Buddies, and Partners]")
Digimon UP Tier List [Supports, Buddies, and Partners]
These Digimon will get you UP the leaderboard.

![Haze Seas Boss Drops [Chances, Locations, and How to Spawn]](/wp-content/uploads/2026/07/haze-seas-boss-drops.jpg "Haze Seas Boss Drops [Chances, Locations, and How to Spawn]")

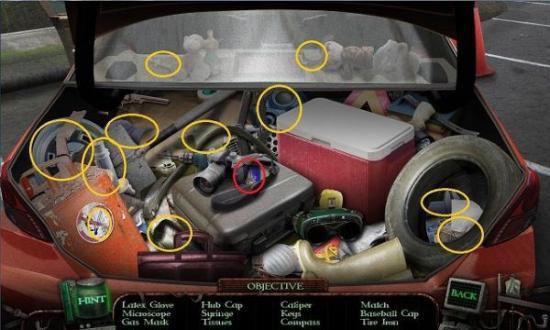
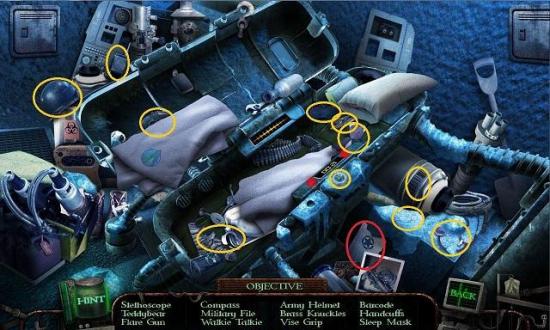
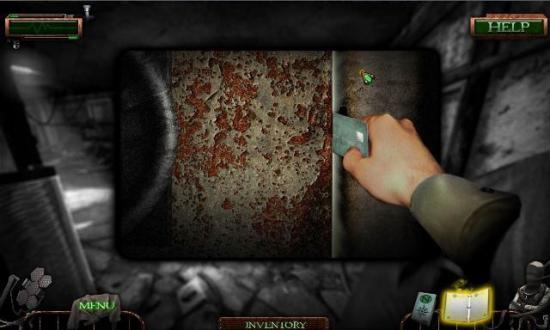
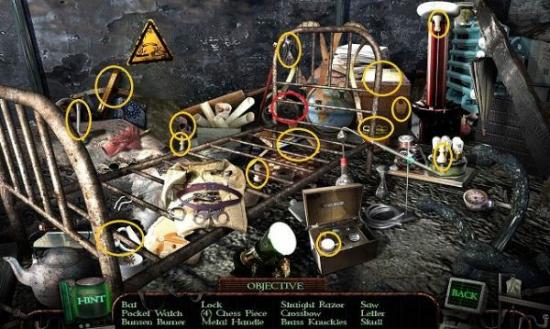
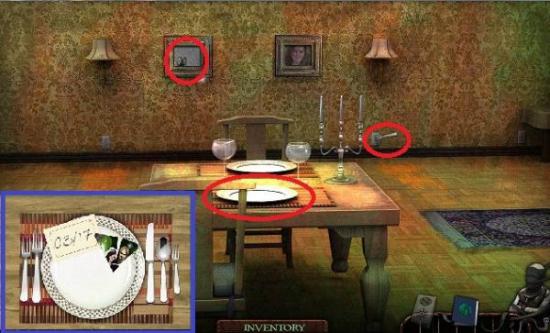
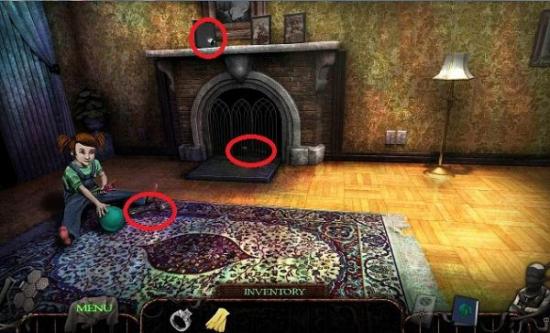
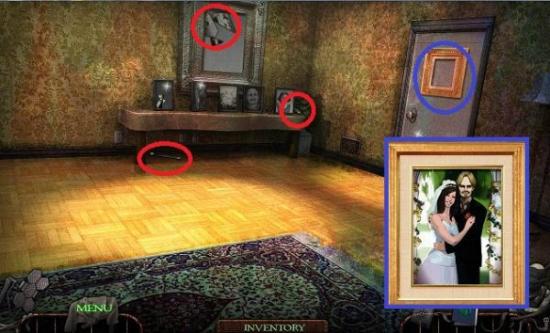
Welcome to the Committed: Mystery at Shady Pines walkthrough on Gamezebo. Committed: Mystery at Shady Pines is a hidden object game played on the PC created by Fugazo. This walkthrough includes tips and tricks, helpful hints, and a strategy guide to how to complete Committed: Mystery at Shady Pines.
Welcome to the Committed: Mystery at Shady Pines walkthrough on Gamezebo. Committed: Mystery at Shady Pines is a hidden object game played on the PC created by Fugazo. This walkthrough includes tips and tricks, helpful hints, and a strategy guide to how to complete Committed: Mystery at Shady Pines.
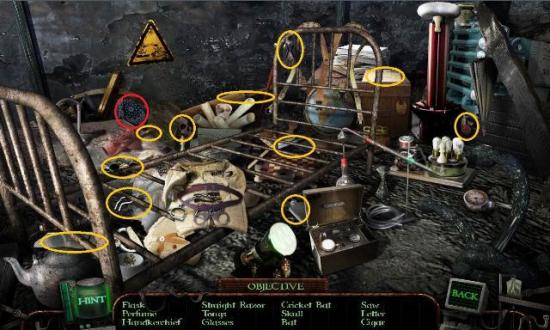
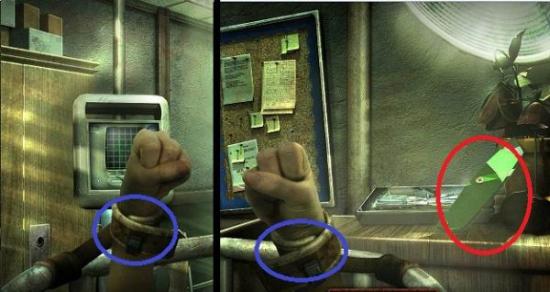
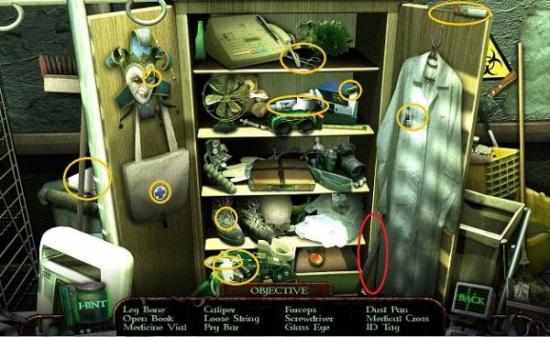
Room 100

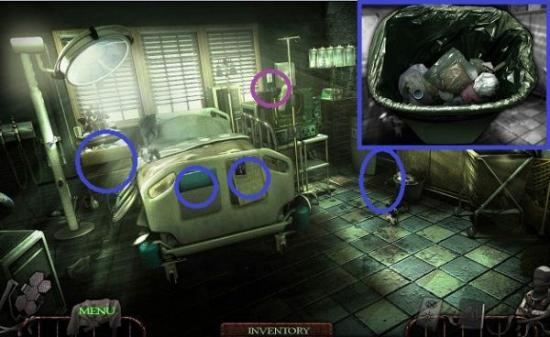
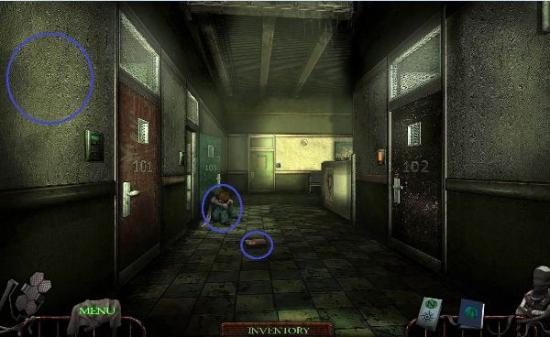
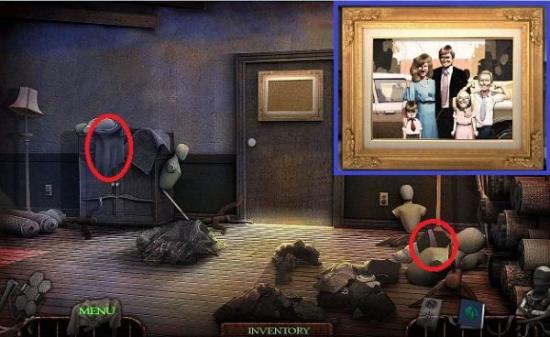
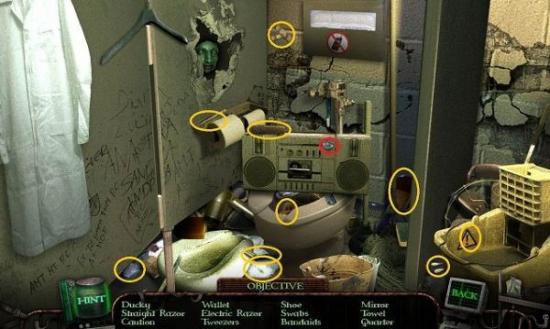
Room 103
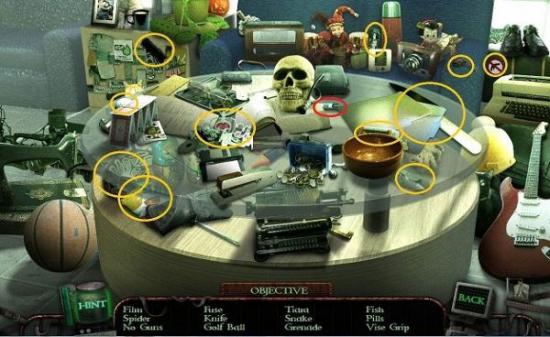
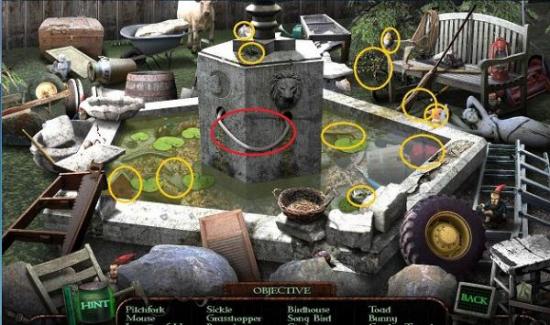
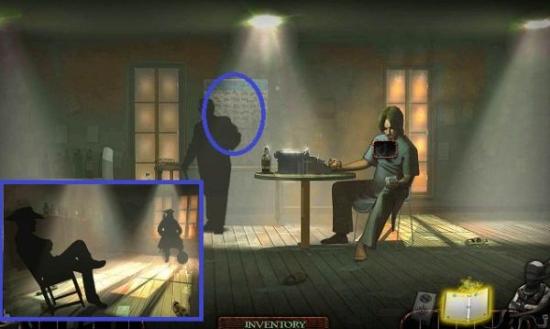
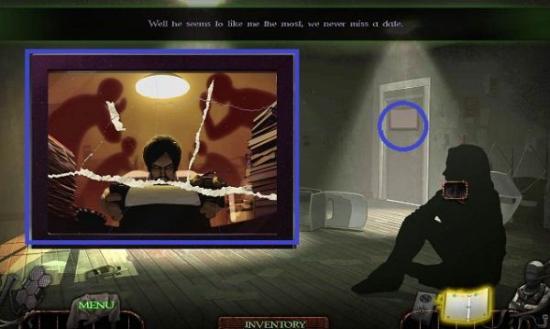
The Mother’s Mind
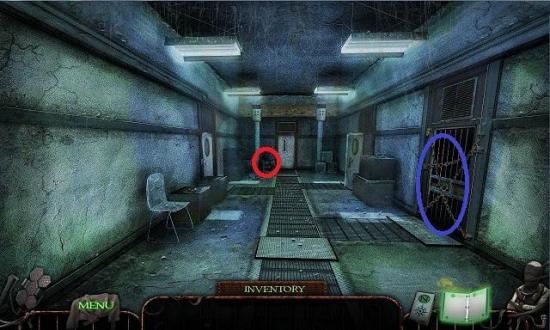
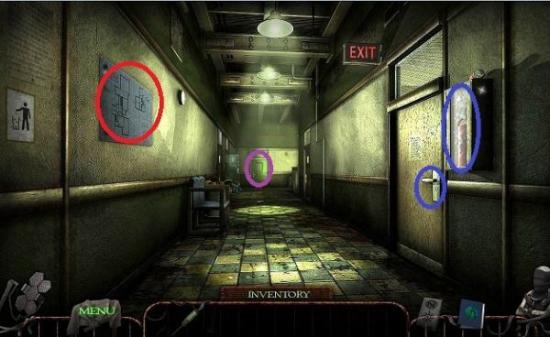
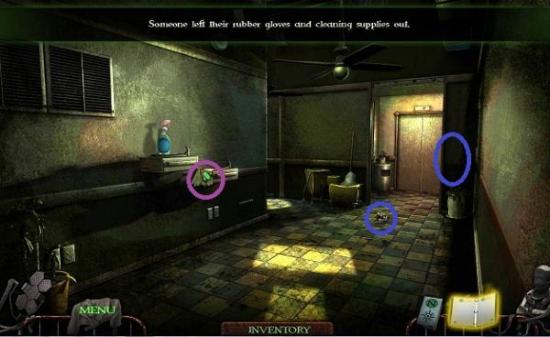
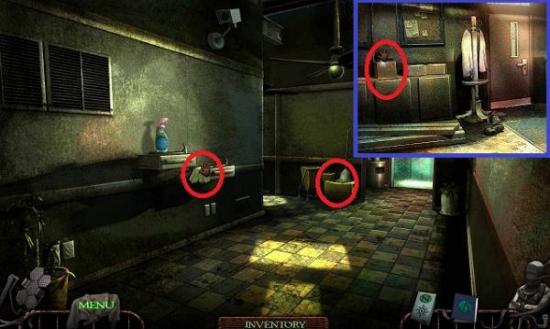
Hallway
Room 101
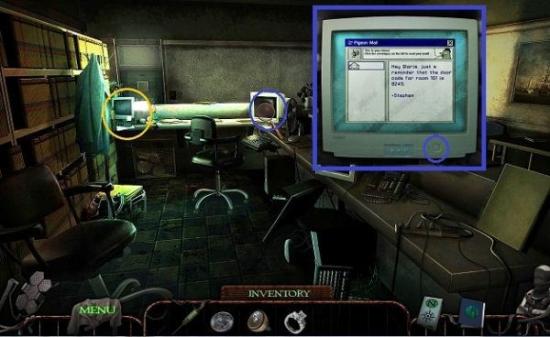
Reception
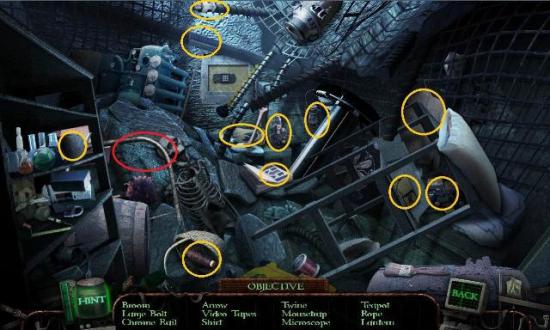
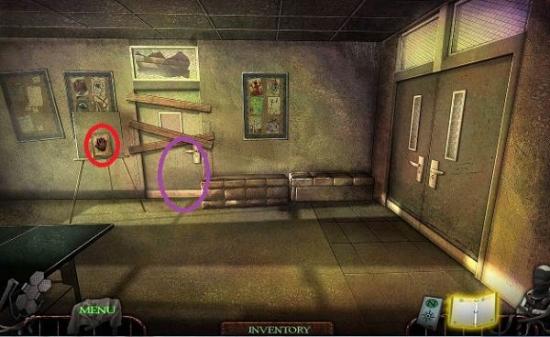
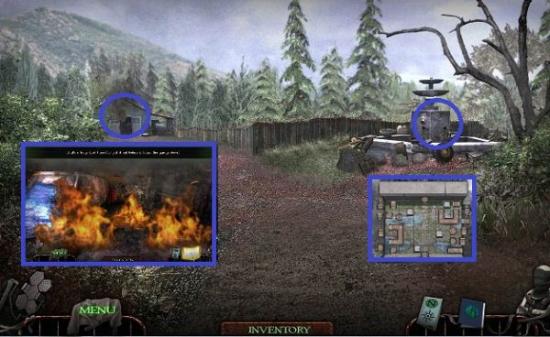
The Back Hallway
The Elevator


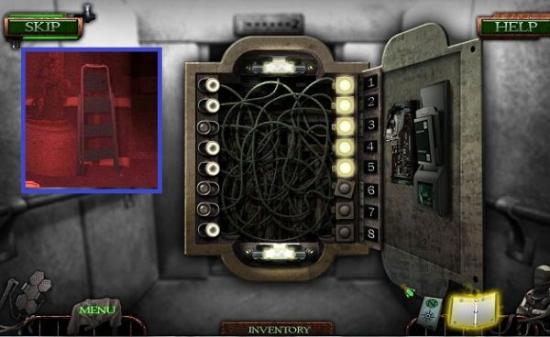
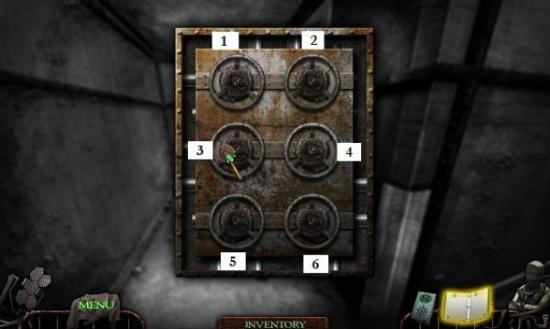
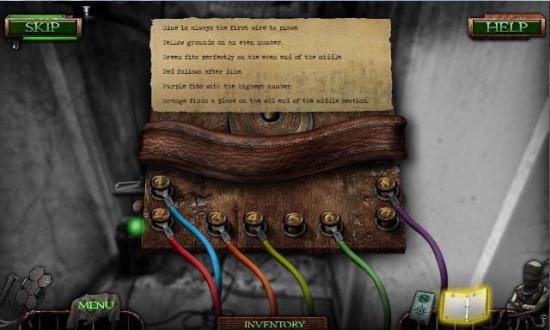
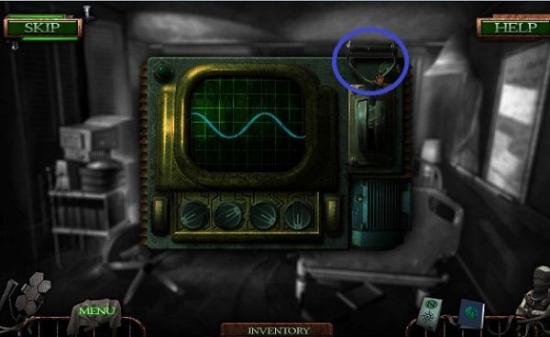
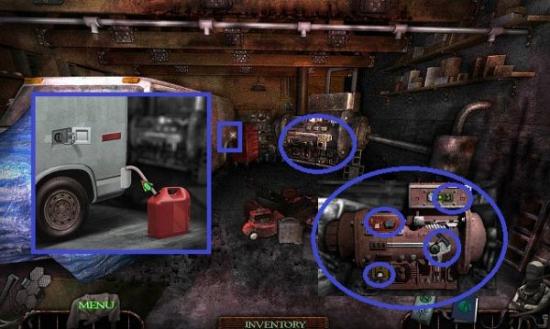
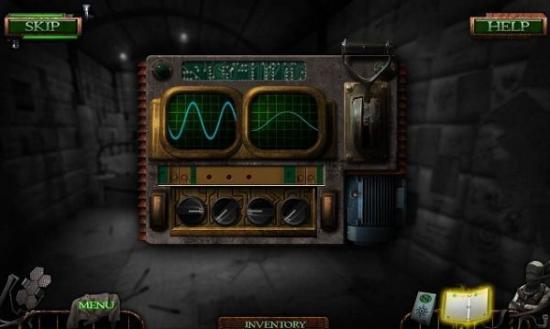
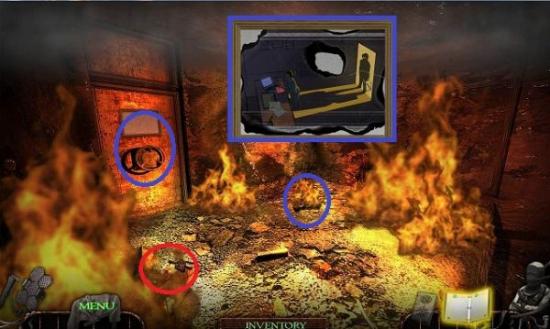
The Generator
The Second Floor
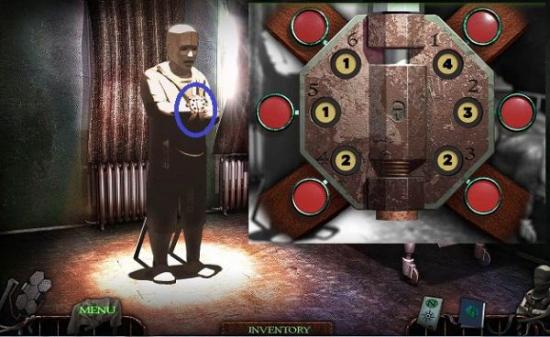
Eight Quarters
Room 201
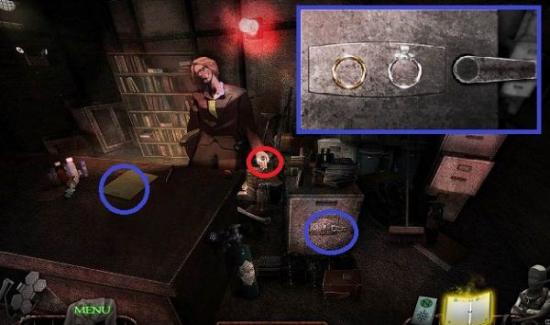
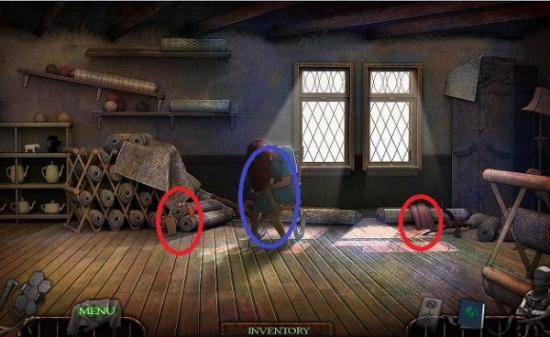
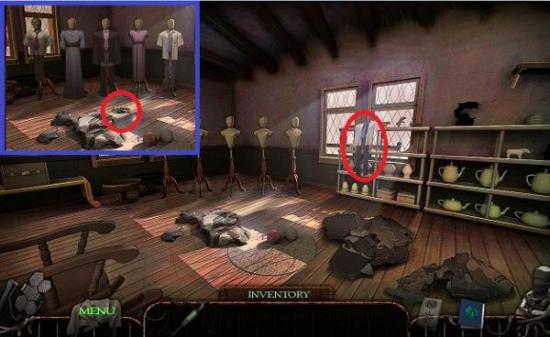
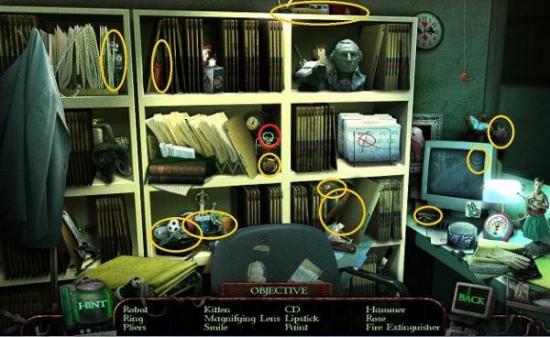
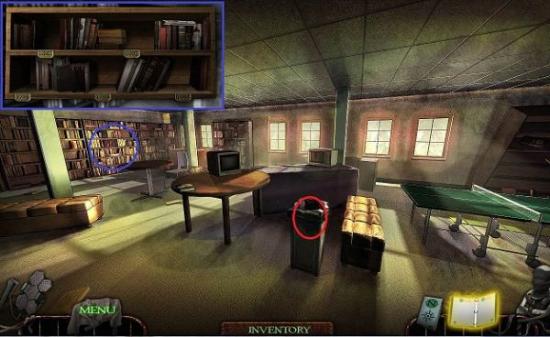
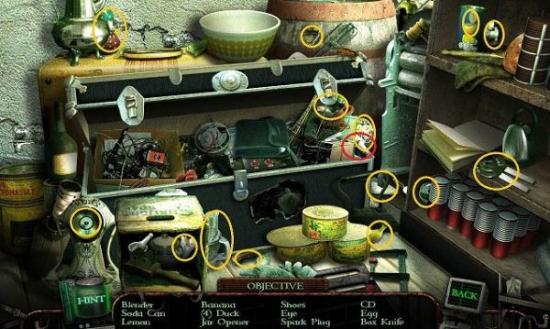
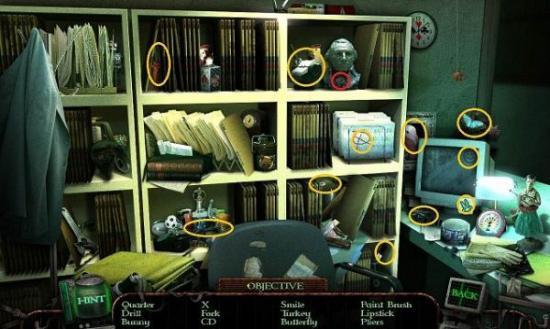
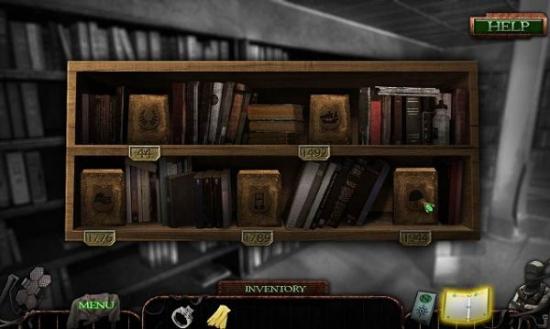
The Bookshelf
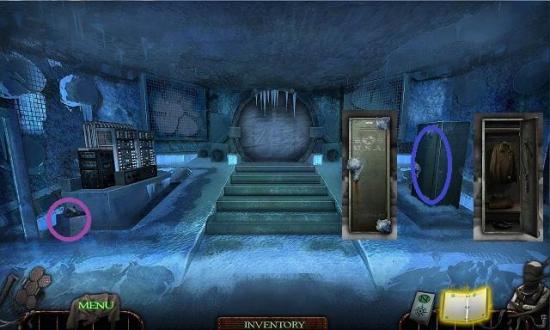
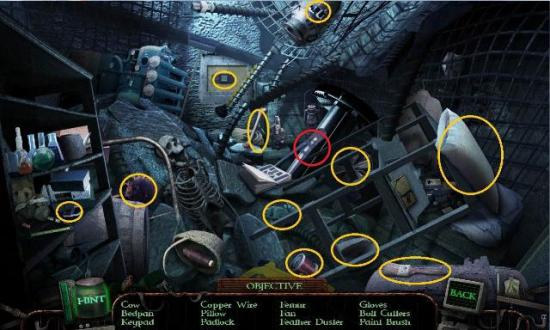
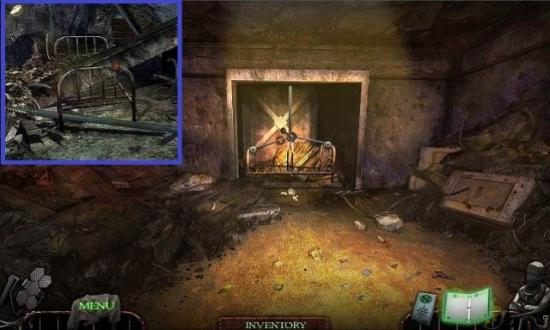
The Basement

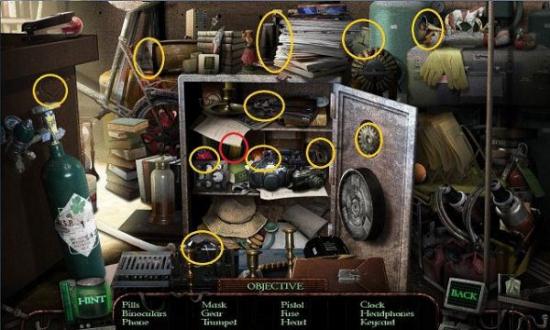
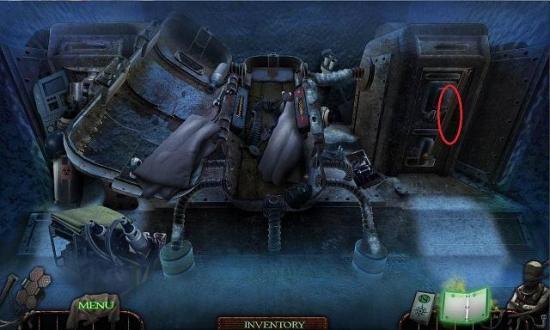
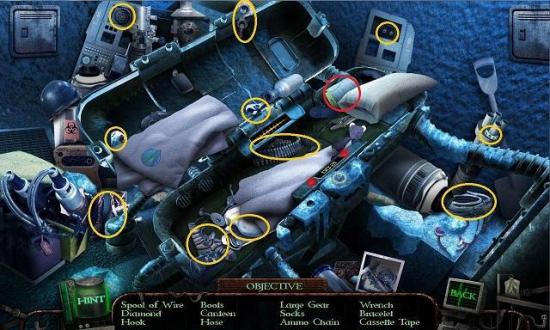
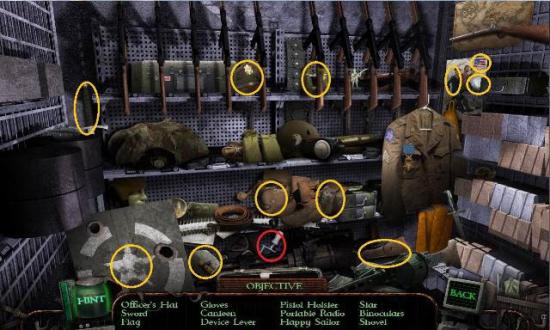
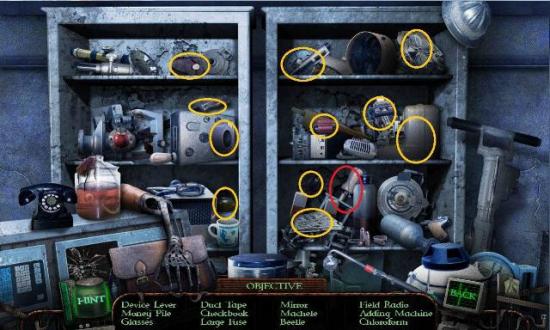
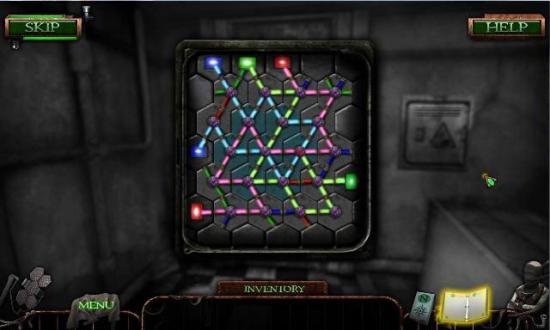
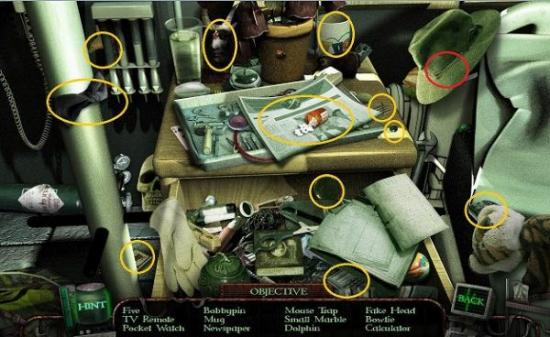
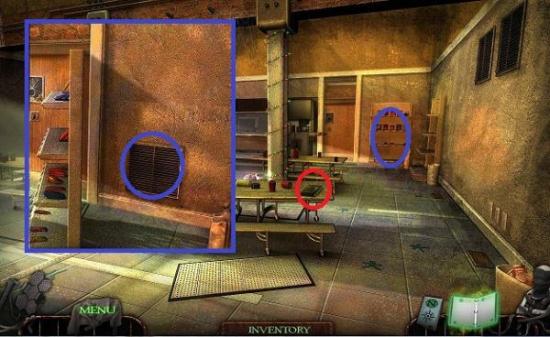
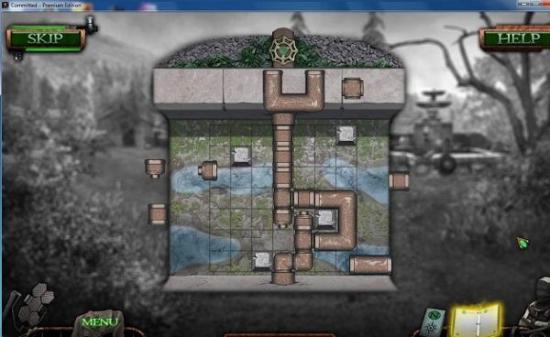
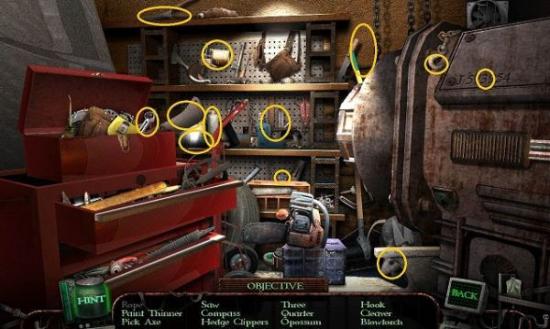
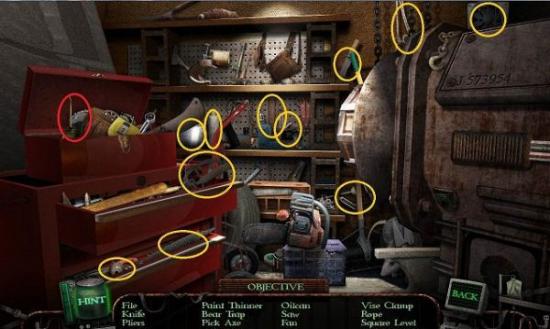
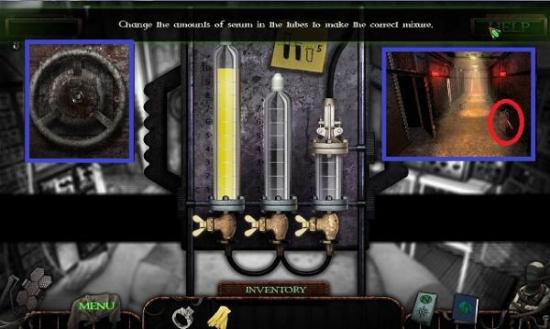
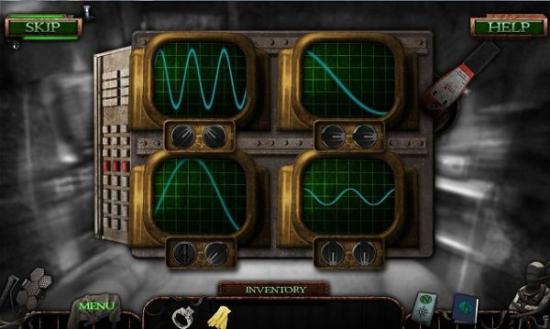
Machine Room
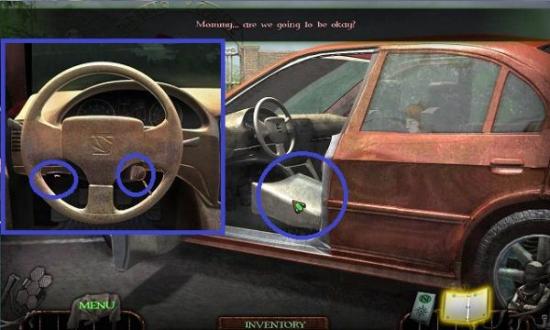
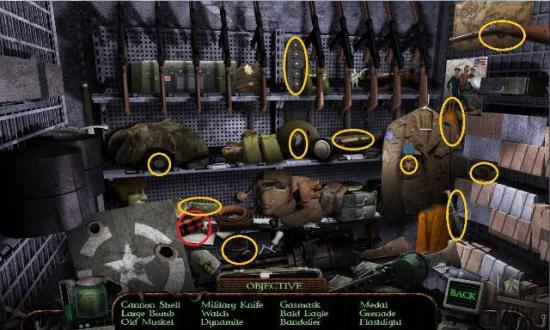
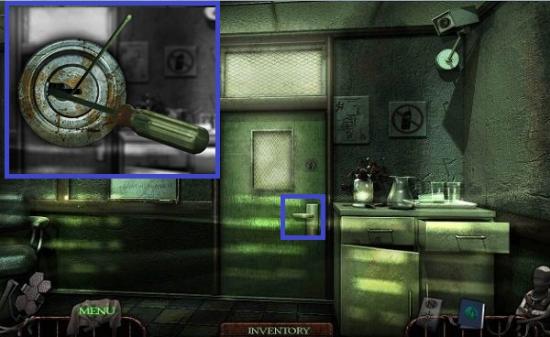
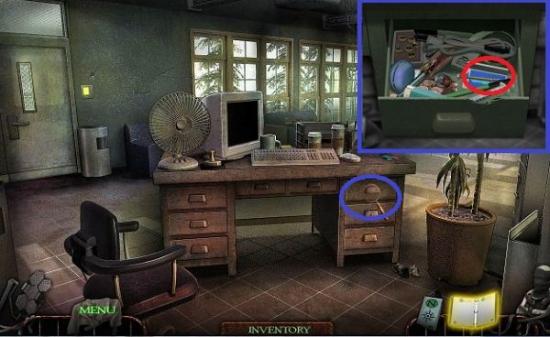
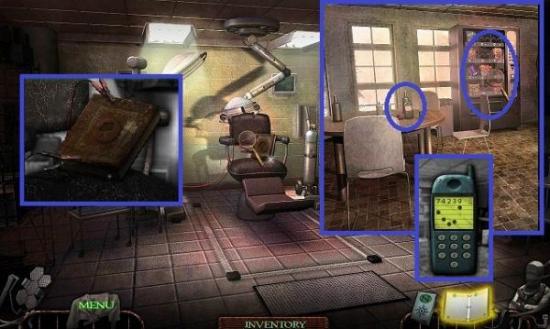
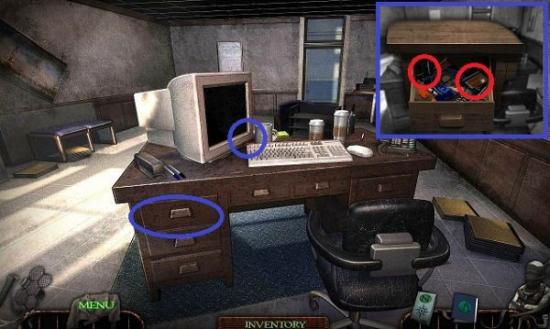
Basement Office