- Wondering how to get Monopoly GO! free rolls? Well, you’ve come to the right place. In this guide, we provide you with a bunch of tips and tricks to get some free rolls for the hit new mobile game. We’ll …
Best Roblox Horror Games to Play Right Now – Updated Weekly
By Adele Wilson
Our Best Roblox Horror Games guide features the scariest and most creative experiences to play right now on the platform!The BEST Roblox Games of The Week – Games You Need To Play!
By Sho Roberts
Our feature shares our pick for the Best Roblox Games of the week! With our feature, we guarantee you'll find something new to play!Type Soul Clan Rarity Guide – All Legendary And Common Clans Listed!
By Nathan Ball
Wondering what your odds of rolling a particular Clan are? Wonder no more, with my handy Type Soul Clan Rarity guide.
Columbus: Ghost of the Mystery Stone Walkthrough
Welcome to the Columbus: Ghost of the Mystery Stone walkthrough on Gamezebo. Columbus: Ghost of the Mystery Stone is an Hidden Object game played on PC, created by Vogat Interactive and available at BigFish Games. This walkthrough includes tips and tricks, helpful hints, and a strategy guide for how to complete Columbus: Ghost of the Mystery Stone.
Columbus: Ghost of the Mystery Stone – Game Introduction
Welcome to the Columbus: Ghost of the Mystery Stone walkthrough on Gamezebo. Columbus: Ghost of the Mystery Stone is an Hidden Object game played on PC, created by Vogat Interactive and available at BigFish Games. This walkthrough includes tips and tricks, helpful hints, and a strategy guide for how to complete Columbus: Ghost of the Mystery Stone.
General Information
- Type in your Player name. Click on the “Not You?” link to create, rename or delete up to a maximum of 9 profiles. Each profile name may contain up to 11 characters (letters and numbers, only).
- Click on Options to adjust the Sound and Music levels and turn your Hardware Cursor and Full Screen on and off. Note that Windowed mode is not available at screen resolutions of less than 1152×864.
- Click on Credits for information about the development team.
- Click on Play More for information about 2 other Vogat Interactive games. If you click on Play, your browser will open at the download/purchase page at BigFish Games for the game you chose.
- Click on Strategy Guide to have your browser open at the download/purchase page, at BigFish Games. This is not the free, blog walkthrough.
- Click on Start Game to begin. At this point you’ll choose whether you want to play in Casual Mode (a tutorial is offered, active areas are highlighted and the Hint and Skip buttons charge in 30 seconds) or Advanced Mode (no tutorial, active areas are not highlighted and the Hint and Skip buttons charge in 60 seconds).
- A “Hand” cursor will let you pick up or manipulate an item, a “Magnifying Glass” cursor will let you zoom into an area, a “Gear” cursor will let you move it or use an item from inventory on it and a “Red Arrow” cursor will let you move to a new area.
- The Inventory is located at the bottom of the screen (lower center), the current location’s Objective is shown below the Inventory, The Book (lower right) contains story elements that you’ve completed and each location’s name is shown, briefly, at the top of the screen, when you enter the location.
- Gameplay consists of object searches from random lists, fragment searches from illustrations, collecting inventory items to use in various tasks and completing minigames/puzzles. Navigation is simple, consists of moving only between a few areas in each chapter and is mostly linear (you’ll be taken to the next chapter or out of areas that you’ve completed).
- When charged, you may use the Solve button (lower right) to skip a puzzle. If you wish, click on the Retry button (lower left) to reset a puzzle and begin again.
- Rapid misclicking will result in the cursor being disabled for 3 seconds.
Gameplay and Guide Tips
- In open areas, using the Hint button will reveal all areas of interest, but won’t discharge. In object or fragment searches, random items are highlighted when you use the Hint button.
- Exit object searches by moving your cursor towards the bottom of the screen and click when you see the Red Arrow.
- Note that you cannot exit most puzzles and minigames. You must either solve them or skip them.
- This guide assumes you’ve read the General Information, used the game’s Tutorial and/or familiarized yourself with the various game functions and icons.
- Item word lists, in object search scenes, are random each time you play and only inventory items will be highlighted in this guide. Fragmented object images are always the same and all parts will be highlighted; occasionally, 1 or 2 pieces may be in a different location than what will be shown in this guide.
Walkthrough
Click on Start Game to begin and watch the opening movie. You begin at the Rocks.
Chapter I: Lost
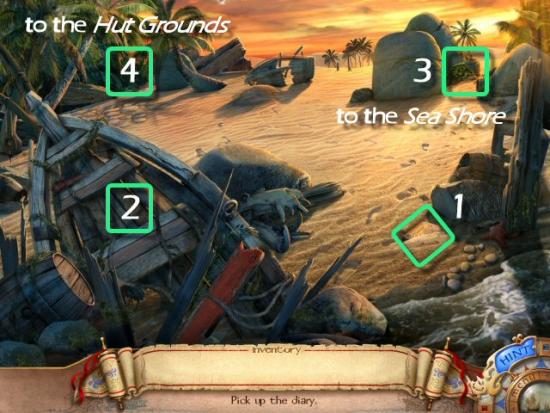
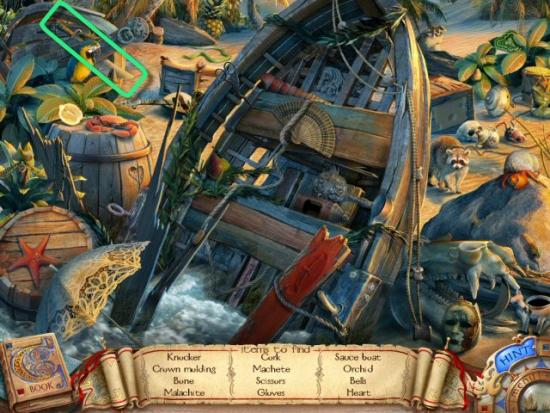
Click on the Diary (1) and then click on the Boat (2). When you’ve completed the object search, click forward to the Sea Shore (3), on the right.

Find all the items in the list. Inventory Item: Machete
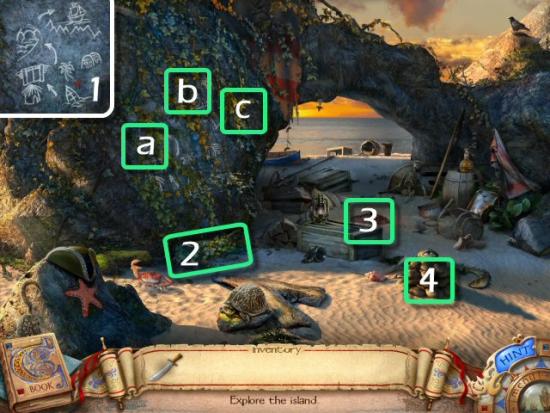
Click 3 times (a, b and c) on the Vines, to remove them and reveal the Treasure Map (1). Click on the Vines (2) to add them to your Inventory, click on the Fire Pit (3) and use the Vines on the Fire. When you’ve completed the object search, click on the Pile of Stones (4).
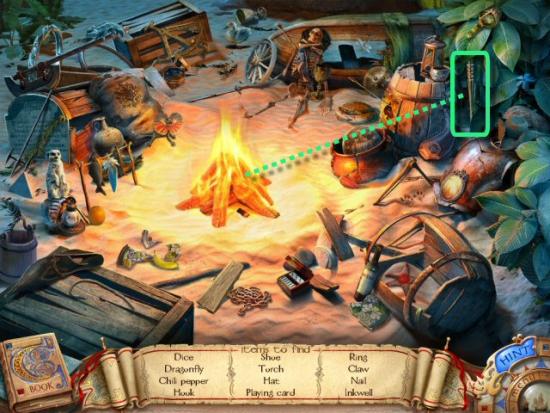
Find all the items in the list. Inventory Item: Torch. Use the Torch (1) on the Fire (2) before exiting the scene.
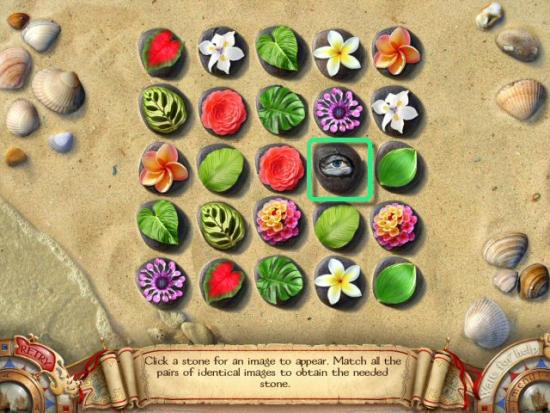
Match pairs of Stones to eliminate all but the Stone Eye and click on it to add it to your Inventory. The solution is always the same.
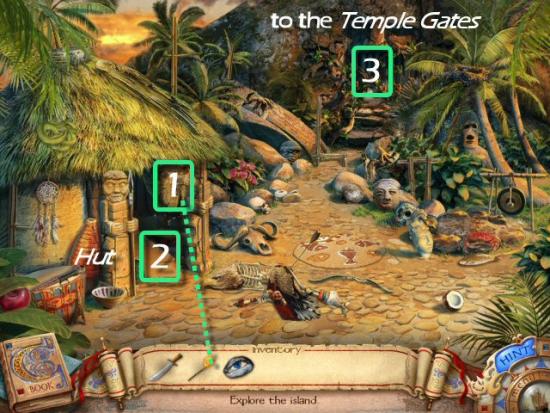
Return to the Rocks then go to the Hut Grounds (4 – see the first screenshot in this chapter). Use the Lit Torch on the Wasps (1) and click on the Doorway (2) to enter the Hut.
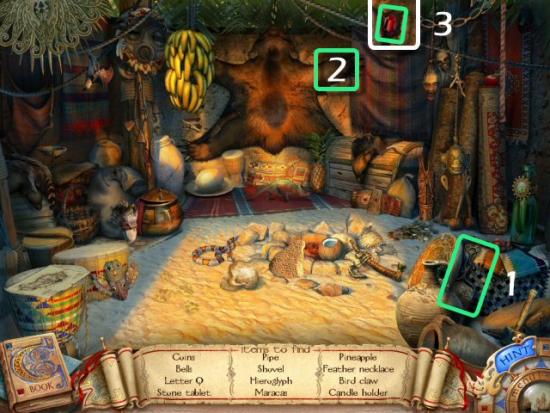
Find all the items in the list. Inventory Item: Shovel (1). Click on the Bearskin (2) and then collect the Ruby (3).
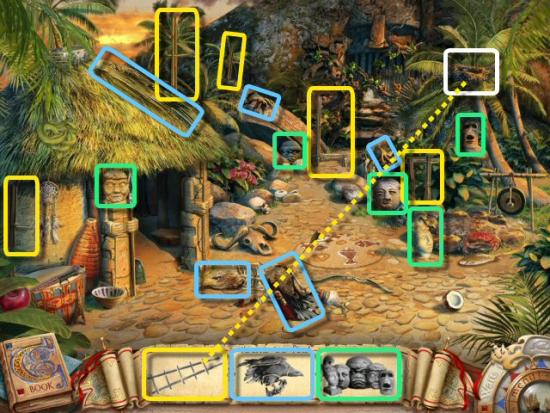
Collect the fragments for the Ladder (yellow), Eagle (blue) and Stone Heads (green). Inventory Item: Ladder. Use the Ladder on the Nest and then click on the Nest (white).
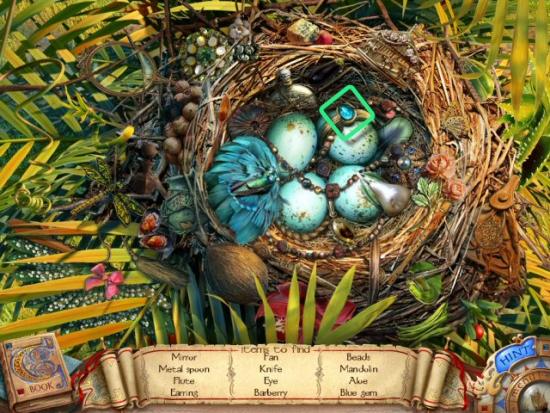
Find all the items in the list. Inventory Item: Blue Gem
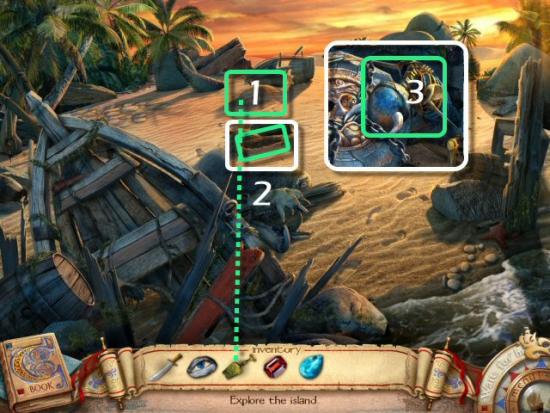
Return to the Rocks; use the Shovel (click twice) on the Sand (1), click on the Hole (2) and then click on the Skeleton (3).
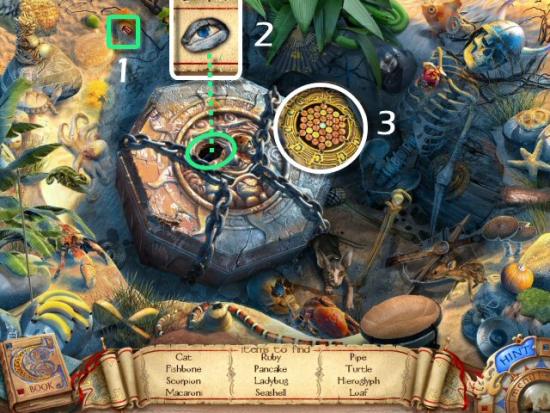
Find all the items in the list. Inventory Item: Ruby (1). Use the Stone Eye (2) on the Chest and then click on the Lock (3).
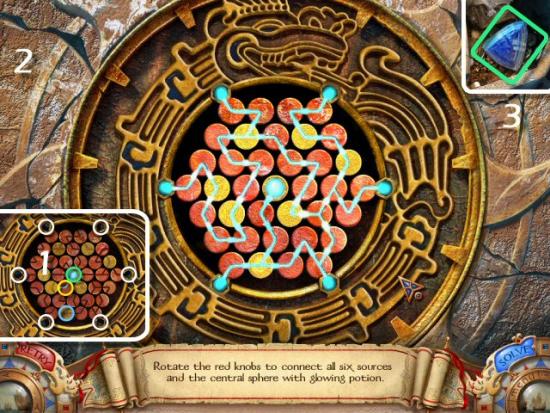
Rotate the Red Circles (click to rotate counter-clockwise; right click to rotate clockwise) until you form complete paths connecting the Center Sphere (green) and the 6 Sources (white) around the outside. Note that the Gold Circles (blue) are fixed and cannot be moved. A good strategy would be to begin with the first Red Circle (yellow) that connects to the Center Sphere (1). Note that your puzzle may begin differently but the solution is always the same. When complete (2), collect the Blue Gem (3).
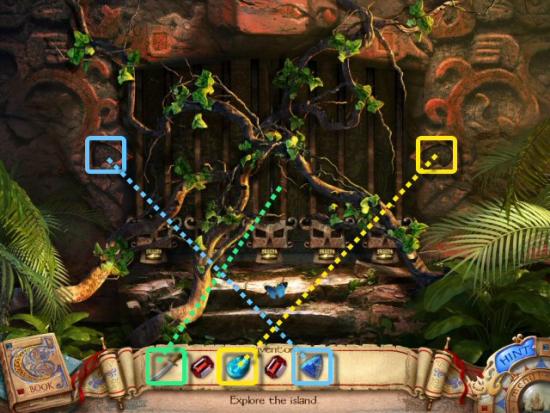
Return to the Hut Grounds and continue to the Temple Gates. Use the Machete (click 3 times; you can click anywhere) on the Vines (green) and then use the Blue Gems (blue and yellow) in the slots at either side.
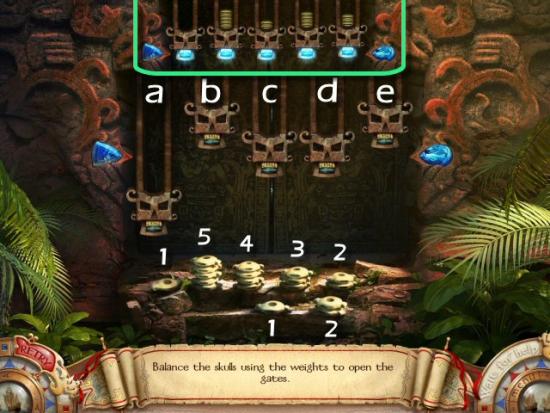
Use the Weights to balance the Skulls so the bottom of their mouths line up with the point of each gem. Skulls b and d are connected to each other and Skulls a, c and e are all connected to each other. Skull b needs one more weight than Skull d and Skull e needs one more weight than Skull c, which needs 2 more weights than Skull a. Note that you do not need to use all the weights, however you can’t use the same size weight on more than one Skull. I found 3 solutions but only Solution 1 is shown. When complete, go through the Temple Gates.
Solution 1:
- Skull a – no weight
- Skull b – 5 weights
- Skull c – 2 weights
- Skull d – 4 weights
- Skull e – 3 weights
Solution 2:
- Skull a – no weight
- Skull b – 1 weight
- Skull c – 2 weights
- Skull d – no weight
- Skull e – 3 weights
Solution 3:
- Skull a – 2 weights
- Skull b – 1 weight
- Skull c – 4 weights
- Skull d – no weight
- Skull e – 5 weights
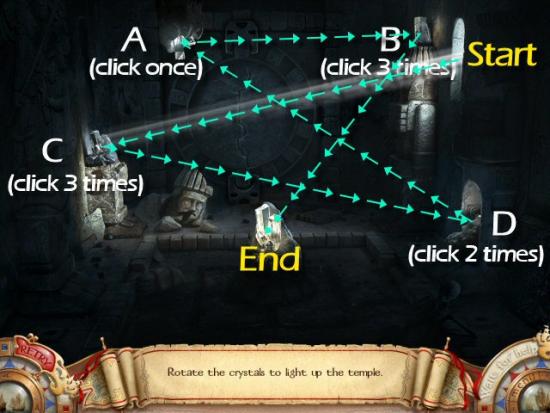
You need to reflect the light coming in through the Window, onto the large, Central Crystal by reflecting it off the other 4 surfaces. There is only one solution and the puzzle begins the same way each time. Click on A once, B three times, C three times and D twice. Note that you can do them in any order and right clicking has no effect.
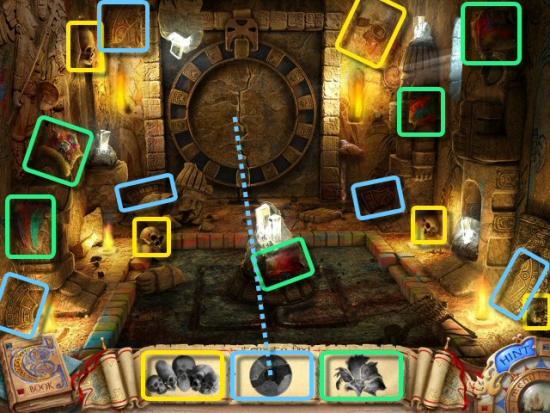
Collect the fragments for the Skulls (yellow), Disk (blue) and Feathered Headdress (green). Inventory Items: Calendar Parts, Skull. Use the Calendar Parts in the Center Circle.
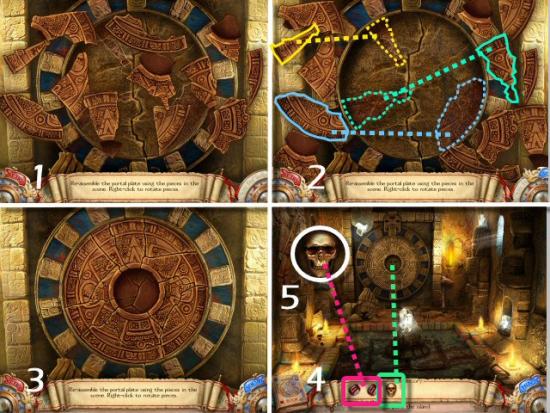
Reconstruct the Broken Calendar. Click to pick up a piece, right click to rotate it and then click to place it. When placed correctly, pieces will lock into place. If you move some pieces out of the way (1), you’ll see outlines where 3 of the pieces belong (2). When complete (3), use the Skull in the center of the Calendar (4), use both Rubies on the Skull (5) and then click forward into the Cave.
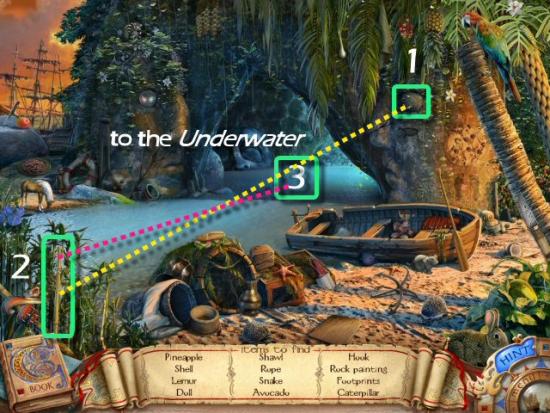
Find all the items in the list. Inventory Item: Sharp Shell (1). Use the Sharp Shell on the Reed (2) and Use the Reed Underwater (3).
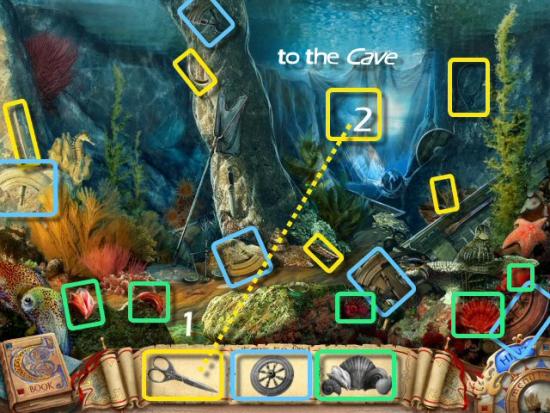
Collect the fragments for Scissors (yellow), Ship’s Wheel (blue) and Shells (green). Inventory Item: Scissors. Use the Scissors (1) on the Net (2) and enter the Cave with Statue.
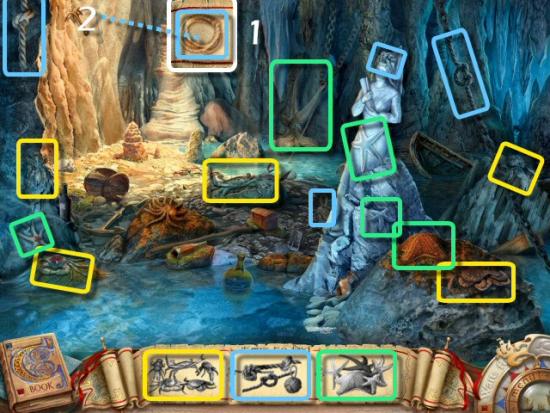
Collect the fragments for the Crabs (yellow), Knots (blue) and Starfish (green). Inventory Item: Rope. Use the Rope (1) on the Way Out (2).
Chapter II: The Pinta
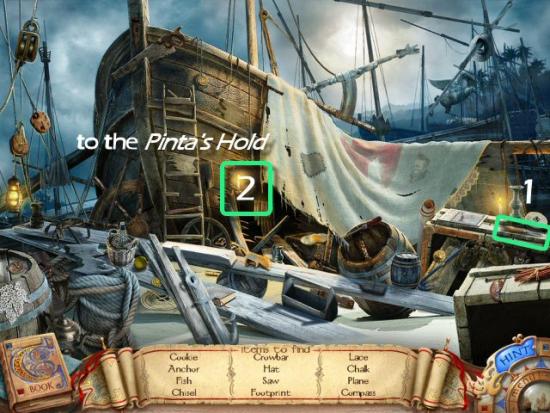
In the Ship Wrecking Yard, find all the items in the list. Inventory Item: Chisel (1). Enter the Pinta’s Hold (2).
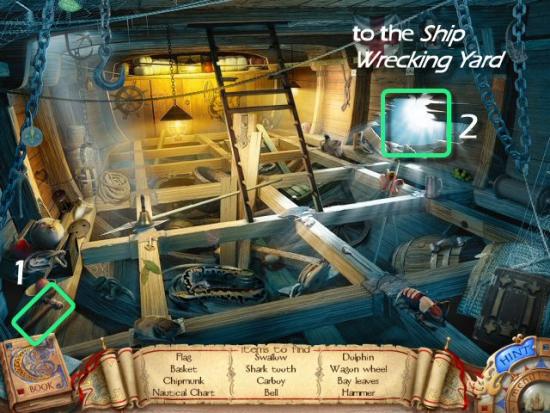
Find all the items in the list. Inventory Item: Hammer (1). Return to the Ship Wrecking Yard.
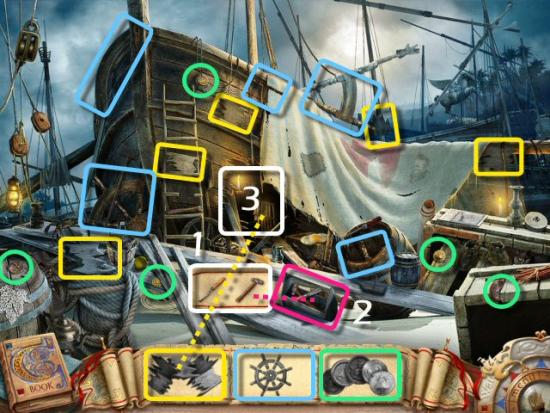
Use the Chisel and Hammer (1) on Toolbox (2) and click on the Toolbox to add it to your Inventory. Collect the fragments for the Wood (yellow), Ship’s Wheel (blue) and Coins (green). Use the Wood on the Hole (3).
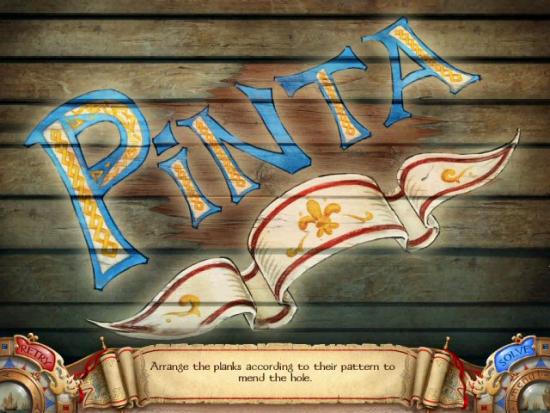
Repair the Hole in the Ship. Click on a piece to pick it up and then click to place it; pieces do not need to be rotated. Once you place a piece correctly, it will lock into place.
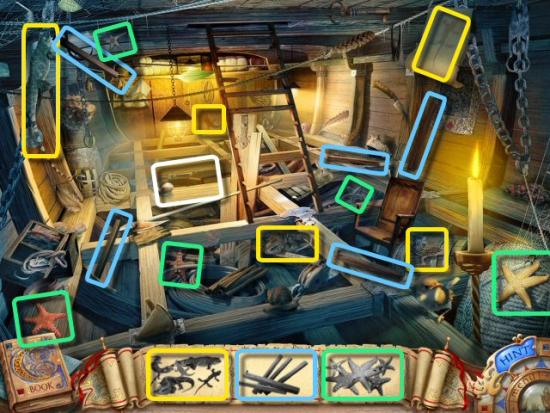
Collect the fragments for the Lizards (yellow), Boards (blue) and Starfish (green). Inventory Item: Boards. Enter the Pinta’s Bilge (white).
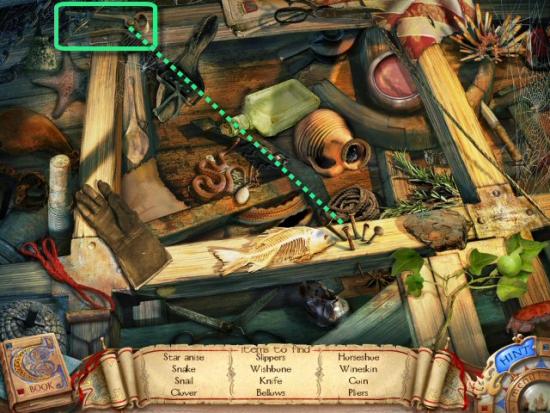
Find all the items in the list. Inventory Item: Pliers. Use the Pliers on Nails.
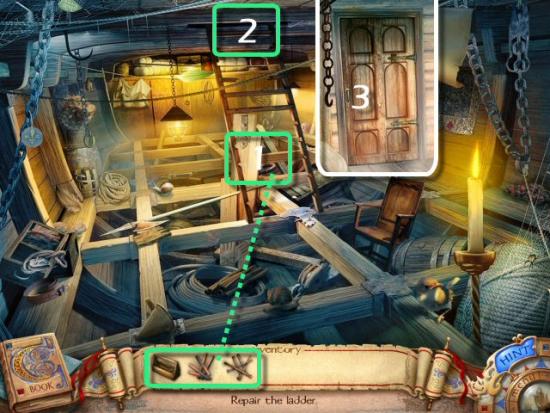
Use the Boards, Toolbox and Nails on the Ladder (1) and then go up the Pinta’s Stairs (2) and forward to the Pinta’s Lower Deck (3).
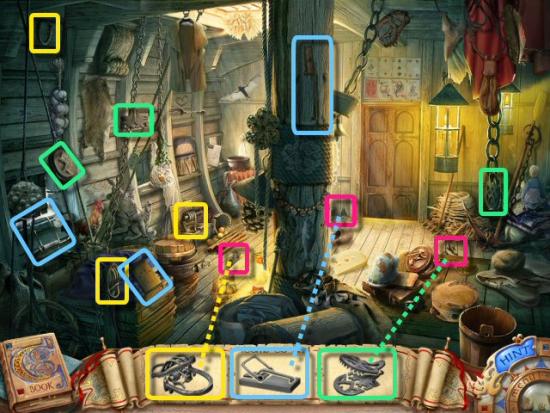
Collect the fragments for the 3 Traps and use them on the Holes (dark pink) where the rats are entering and exiting. It doesn’t matter which trap you use on which Hole.
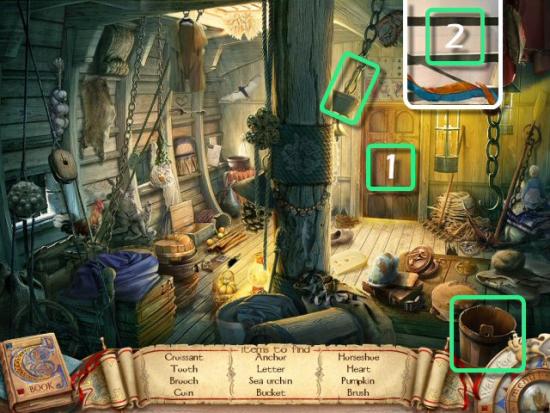
Find all the items in the list. Inventory Items: Bucket and Brush. Return to the Pinta’s Stairs (1) and continue to the Pinta’s Upper Deck (2).
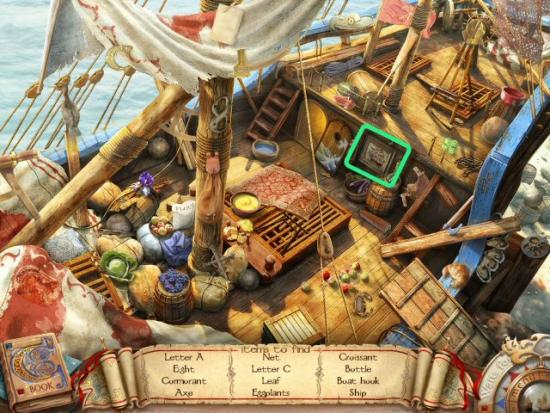
Find all the items in the list. Inventory Item: Painting of Ship
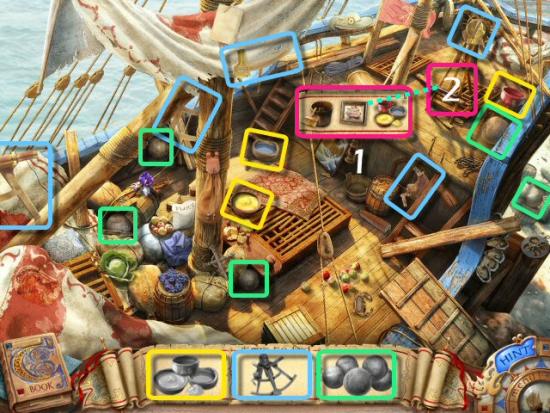
Collect the fragments of the Bowls (yellow), Sextant (blue) and Cannonballs (green). Inventory Items: Paints, Painting. Use the Bucket and Brush, Painting and Paints (1) on the Easel (2).
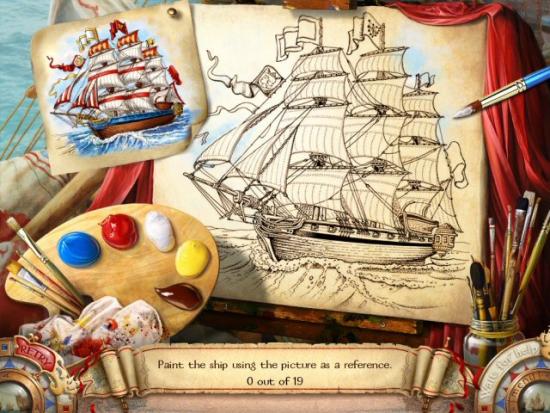
Use the Paintbrush on one of the paint colors and then click on the appropriate area on the canvas, using the diagram for correct placement.
Chapter III: Corsica
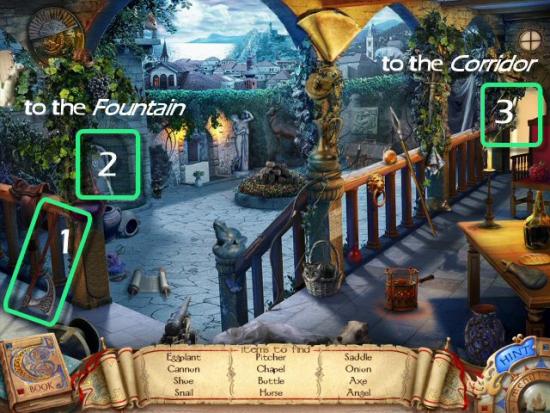
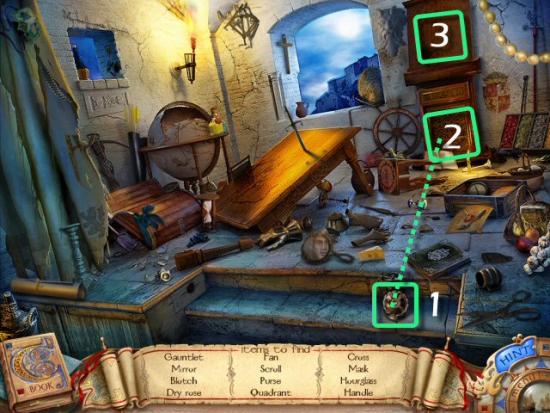
You arrive at Columbus’ House. Find all the items in the list. Inventory Item: Axe (1). Click on the Fountain (2.)
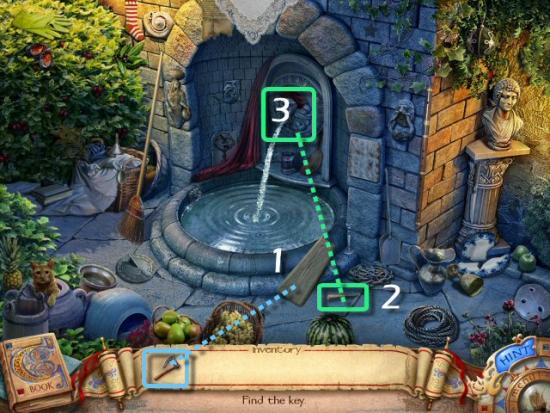
Use the Axe on the Board (1), collect the Splinter (2) and then use the Splinter on the Fountain Spout (3).
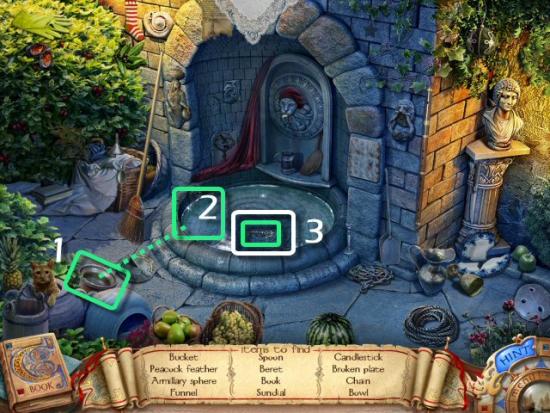
Find all the items in the list. Inventory Item: Bowl. Use the Bowl (1) on the Fountain (2), collect the Key (3) and then enter the Corridor (3 – see the first screenshot in this chapter).
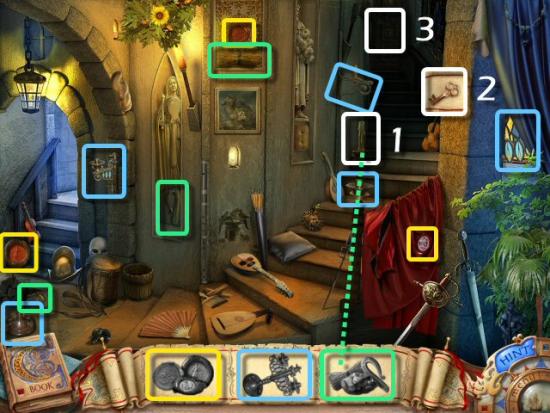
Collect the fragments for the Seals (yellow), Candelabra (blue) and Flint, Firesteel and Hay (green). Inventory Item: Flint, Firesteel, Hay. Use the Flint on the Candle (1), use the Key (2) on the Door (3) and enter Columbus’ Room.
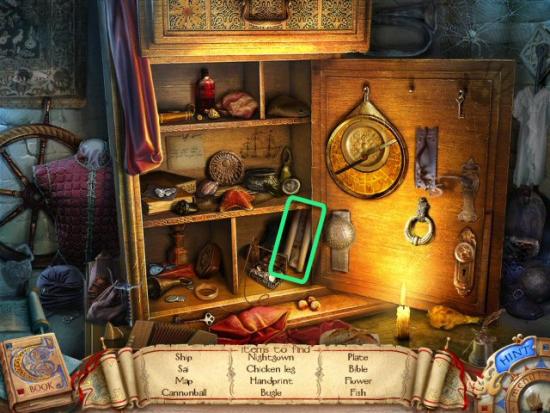
Find all the items in the list. Inventory Item: Handle. Use the Handle (1) on the Cabinet (2) and click on the Shelves.
Find all the items in the list. Inventory Item: Map. Use the Map on the Map Stand (3 – see the previous screenshot).
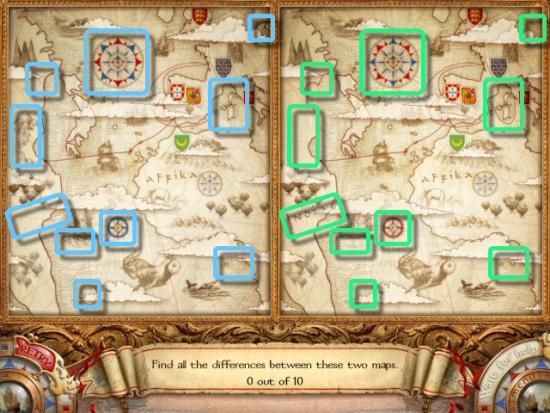
Find all 10 differences in the 2 images. You may click on either image.
Chapter IV: France
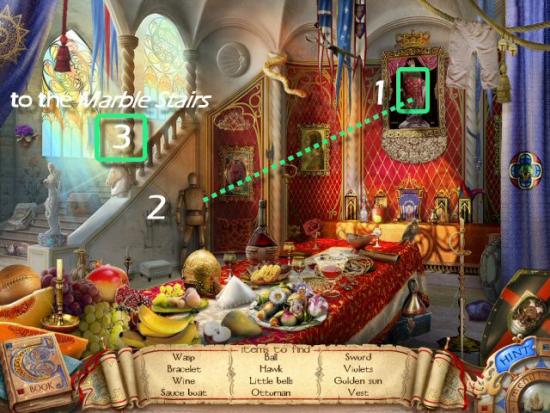
You arrive at the Star House. Head down (1) to the Marble Stairs and down one more flight (2) to the Throne Room.
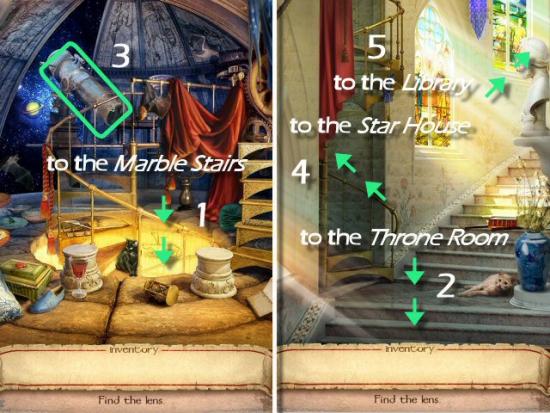
Find all the items in the list. Inventory Item: Vest. Use the Vest (1) on the Mannequin (2).
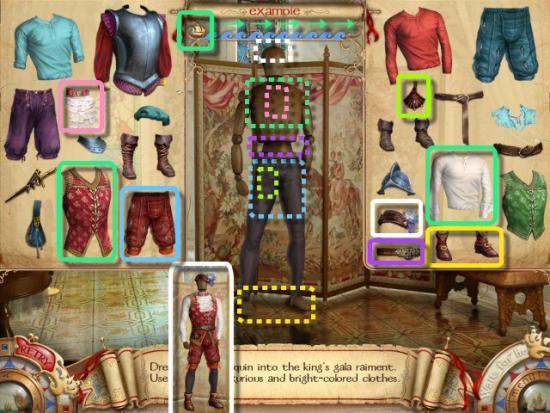
Use the fanciest and most colorful clothing on the mannequin. Click on a piece of clothing, move it to the Mannequin and click to place it. A correct choice moves the Ship (green) to the right, removing an article of clothing moves the Ship to the left and an incorrect choice leaves the Ship where it is. The object is to choose the correct clothing and move the Ship all the way to the right.
Return to the Star House (see the previous screenshots) and use the Lens on the Telescope (3 – see the first screenshot in this chapter).
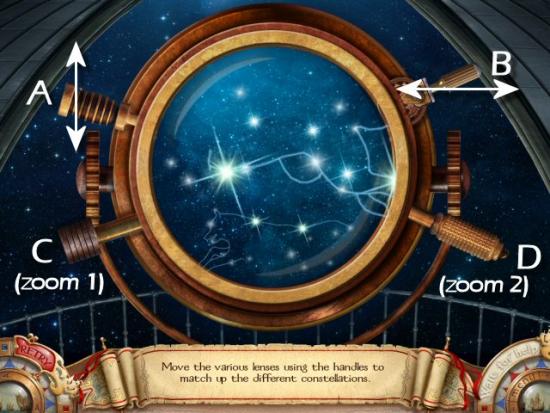
The object is to line up the images to complete each of 4 Constellations. Use the Handles to move and zoom each half of the constellation images. The function for each of the Handles is as follows:
- A – Moves half of the constellation image up and down
- B – Moves the other half of the constellation image to the left or right
- C – Zooms half of the constellation image in and out
- D – Zooms the other half of the constellation image in and out
The image halves may be side by side, or they may be above and below each other, and that determines which Handle does what.
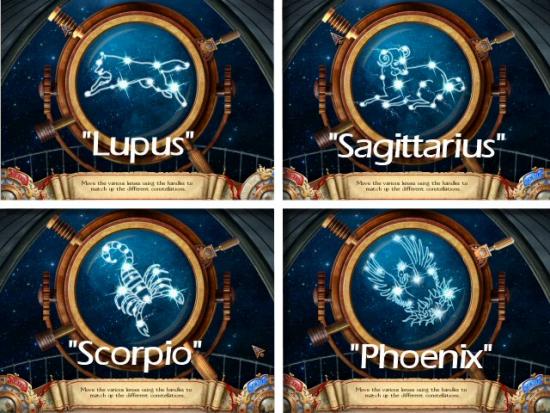
Here are the solutions for all 4 constellations. Note that these are not actual representations of the real constellations.
Click on the following for the video solution
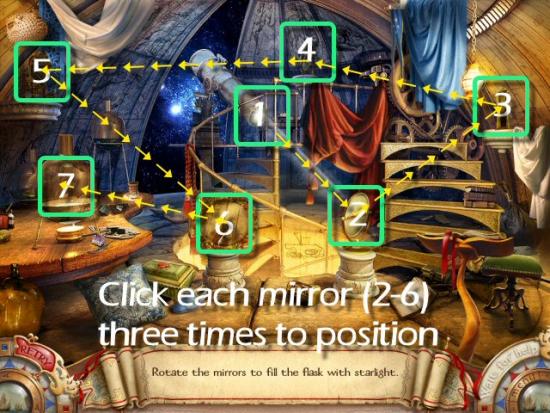
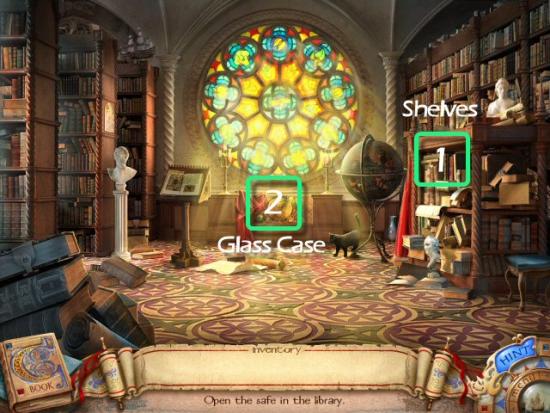
Rotate the Mirrors so that the light entering from the Telescope (1) reflects from Mirror to Mirror (2 – 6) and finally to the Flask (7). Click each Mirror three times to position them properly. Go to the Library (5 – see the first screenshot in this chapter).
Click on the Shelves (1) in the Library.
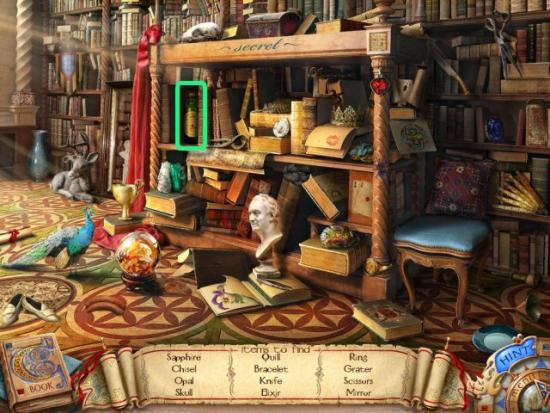
Find all the items in the list. Inventory Item: Elixir. Return to the Star House.
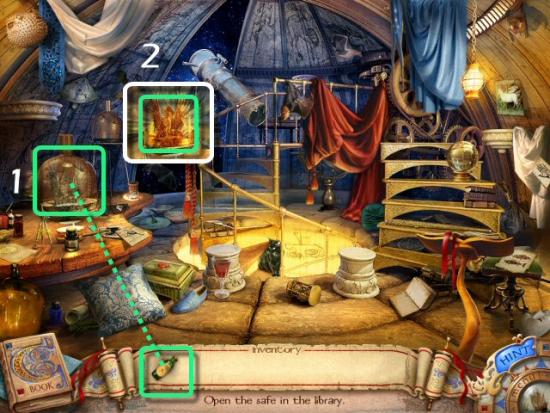
Use the Elixir on the Flask (1), collect the Burning Phoenix (2), return to the Library and then click on the Glass Case (see the previous screenshots).
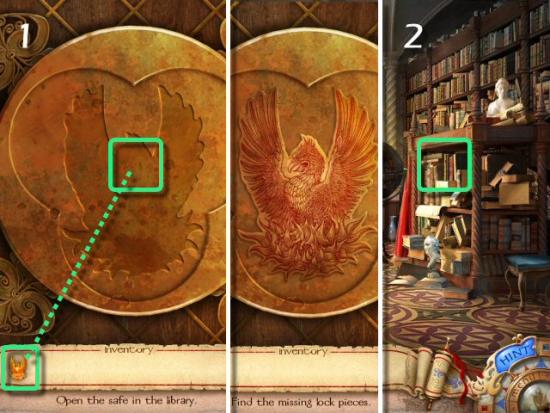
Use the Burning Phoenix in the Slot (1), return to the room and then click on the Shelves (2).
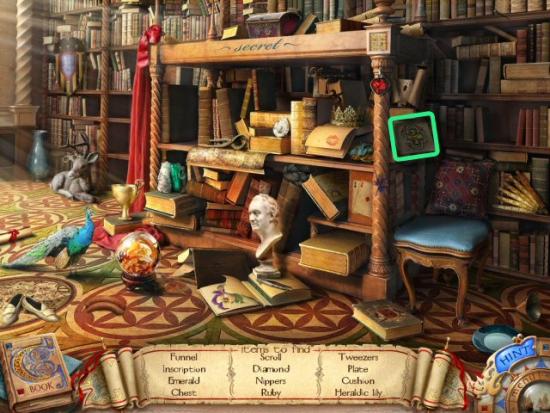
Find all the items in the list. Inventory Item: Heraldic Lily. Return to the Star House.
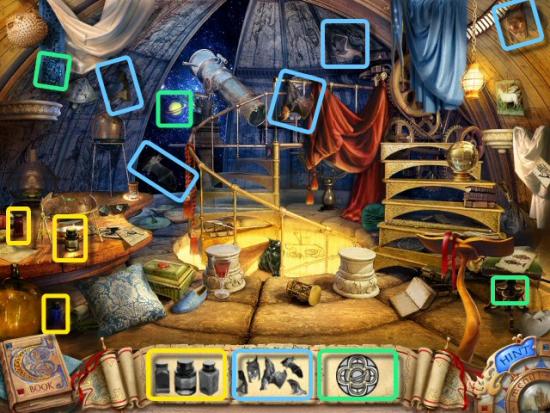
Collect the fragments for the Bottles (yellow), Bats (blue) and Saturn (green). Inventory Item: Saturn. Return to the Throne Room.
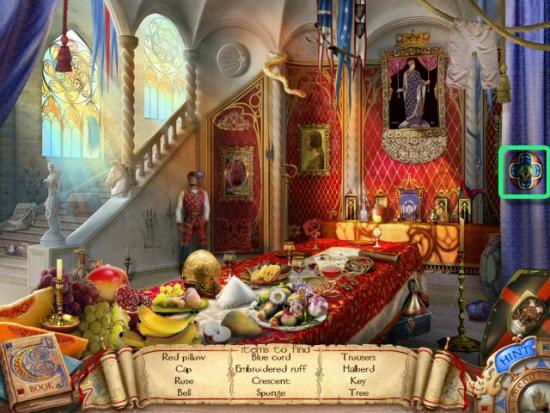
Find all the items in the list. Inventory Item: Tree. Return to the Library and click on the Glass Case.
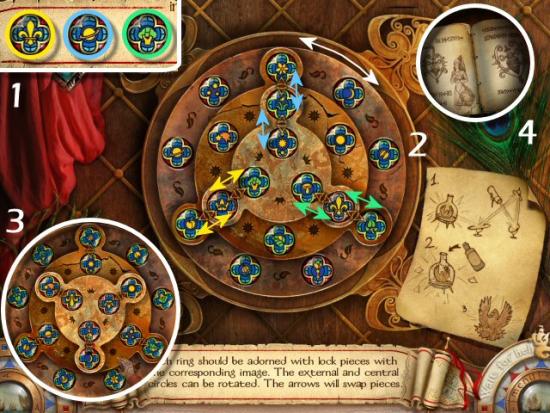
Use the Symbols (1) in the open Slots on the Lock. Rotate each ring, in either direction, by clicking and dragging. Click on the Arrows to switch two Symbols’ positions (2). The object is to end up with Plant related Symbols in the outer ring, Astronomy related Symbols in the middle ring and Royalty related Symbols in the center (3). Collect the Book (4) from the open Safe.
Chapter V: The Market
Click on the Stall (1).
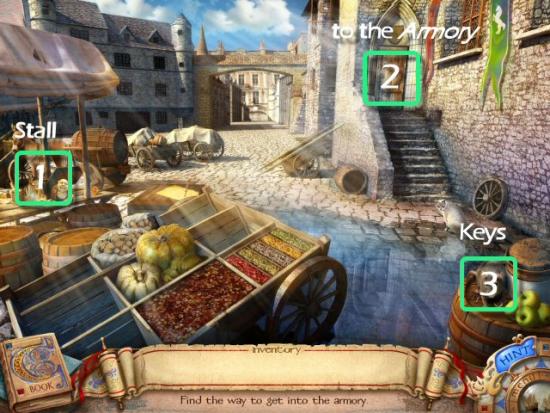
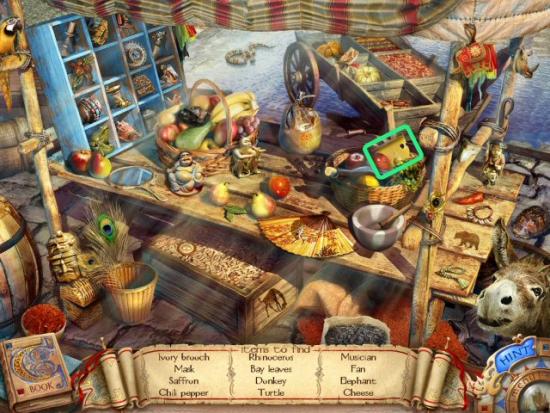
Find all the items in the list. Inventory Item: Cheese. Use the Cheese on the Rat (2 – see the screenshot at the beginning of this chapter), collect the Key, use it on the door to the Armory (3) and then enter the Armory.
Find all the items in the list. Inventory Item: Axe (1). Use the Axe on the Barrel (2), collect the Door Handle (3) and then click on the Door (4).
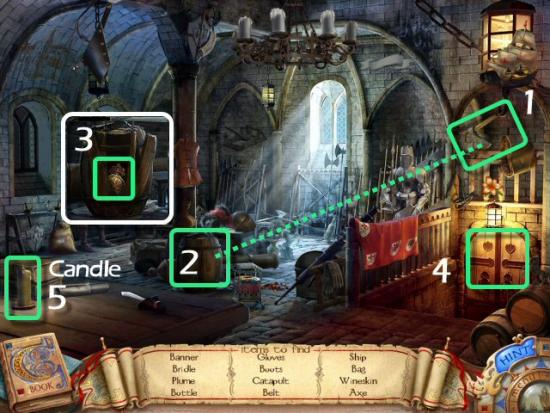
Find all the items in the list. Inventory Item: Door Handle. Return to the Market and click on the Stall (1 – see the screenshot at the beginning of this chapter).
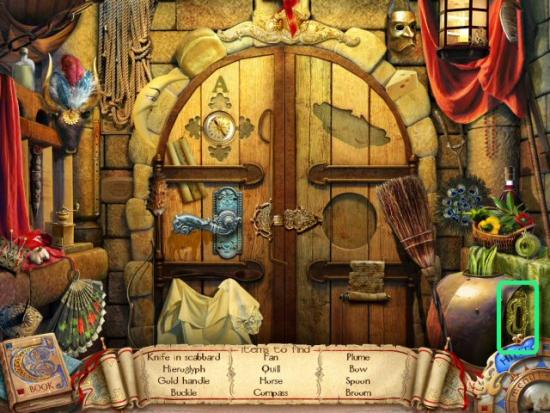
Find all the items in the list. Inventory Items: Flint (1), Firesteel (2). Return to the Armory, use the Flint and Firesteel on the Candle (5 – see previous screenshot) and then click on the Table.
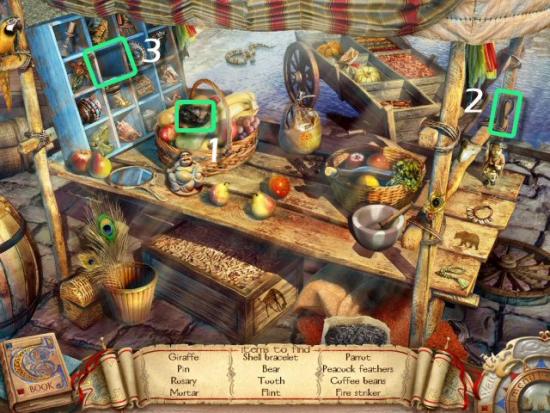
Find all the items in the list. Inventory Item: Souvenir. Return to the Market, click on the Stall and then use the Souvenir in the Cabinet (3 – see preceding screenshot).
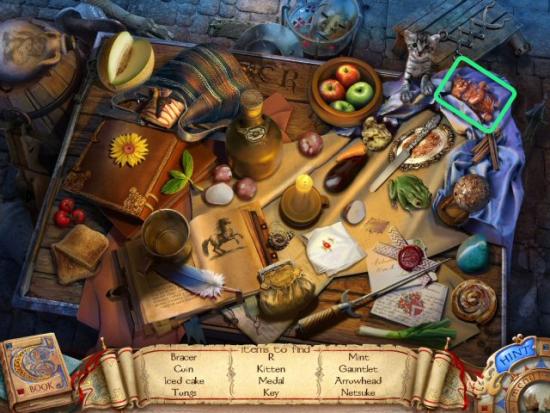
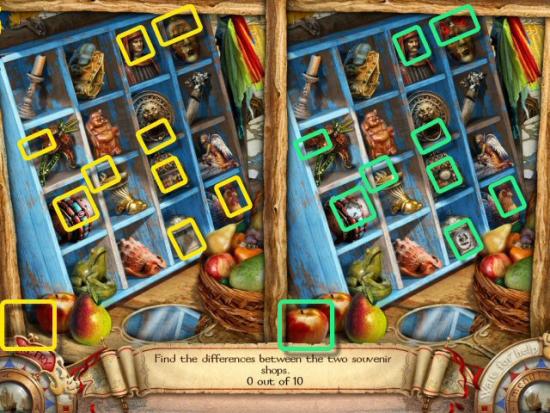
Find all 10 differences in the 2 images. You may click on either image. Inventory Item: Door Handle. Return to the Armory and click on the Door.
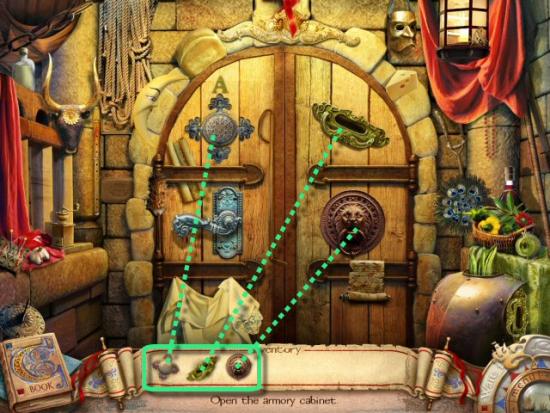
Use the Door Handles in the same-shaped spaces and then enter the Cabinet.
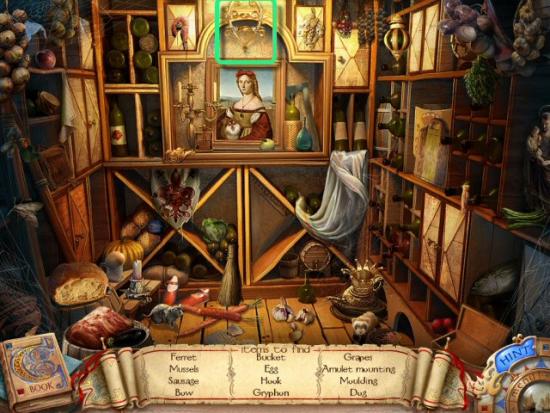
Find all the items in the list. Inventory Item: Amulet Mounting.
Chapter VI: The Santa Maria
Enter the Navigation Room (1).
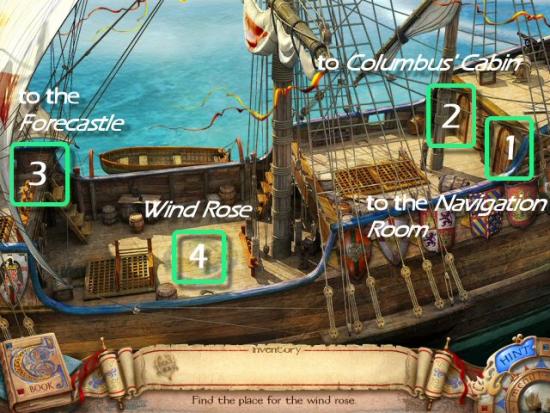
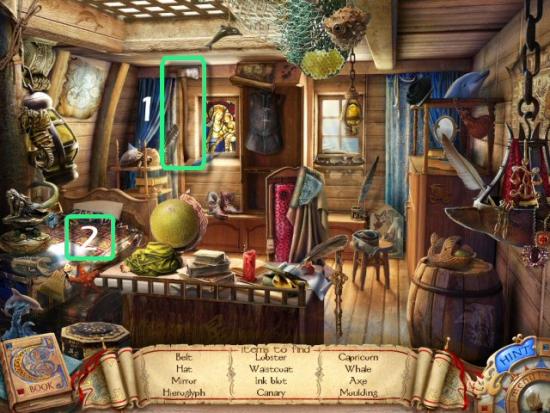
Find all the items in the list. Inventory Item: Hammer (1). Return to the Main Deck and enter Columbus’ Cabin (2 – see the screenshot at the beginning of this chapter).
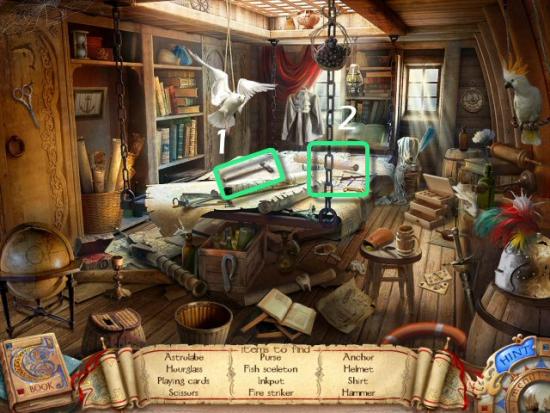
Find all the items in the list. Inventory Item: Axe (1). Return to the Main Deck and go to the Forecastle (3 – see the screenshot at the beginning of this chapter).
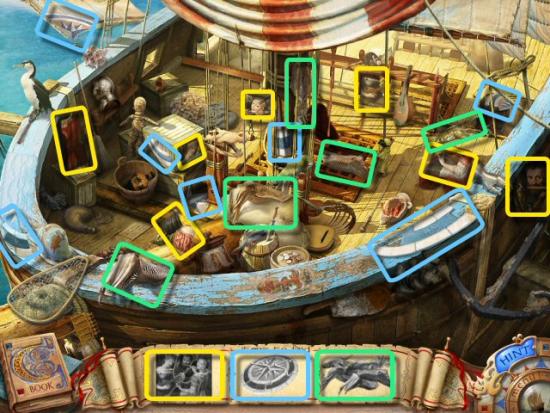
Collect the fragments for the Painting (yellow), Wind Rose (blue) and Squids (green). Inventory Item: Wind Rose. Return to the Main Deck, use the Hammer, Axe and Wind Rose pieces on the Wind Rose (4 – see the screenshot at the beginning of this chapter) and then return to the Forecastle.
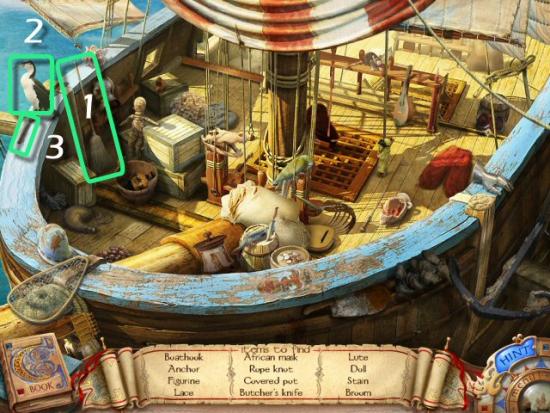
Find all the items in the List. Inventory Item: Broom (1). Use the Broom on the Bird (2) and collect the Chisel (3). Return to the Main Deck and use the Chisel on the Wind Rose.
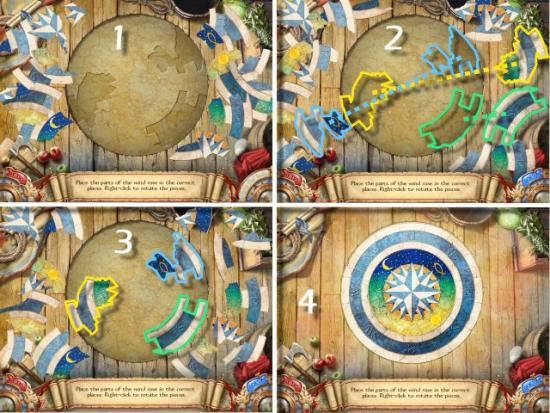
Reconstruct the Wind Rose. Click to pick up a piece, right click to rotate it and then click to place it. When placed correctly, pieces will lock into place. Move some pieces (1) to find the ones that belong in the outlined spaces (2), place them (3) and then place the remaining pieces, rotating if necessary (4).
Return to the Navigation Room and click on the Table (2 – see previous screenshot for this room). Find all the items in the list. Inventory Item: Broken Compass. Return to the Main Deck, return to Columbus’ Room and then click on the Bed (2 – see previous screenshot for this room).
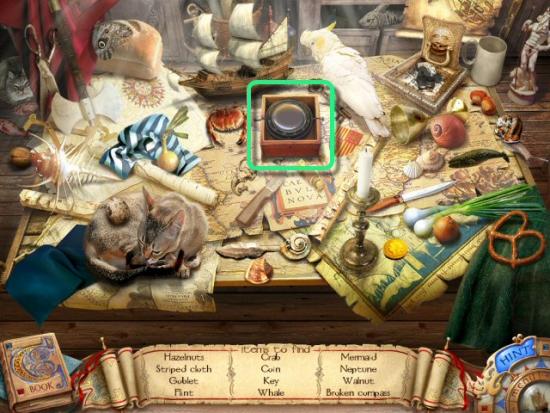
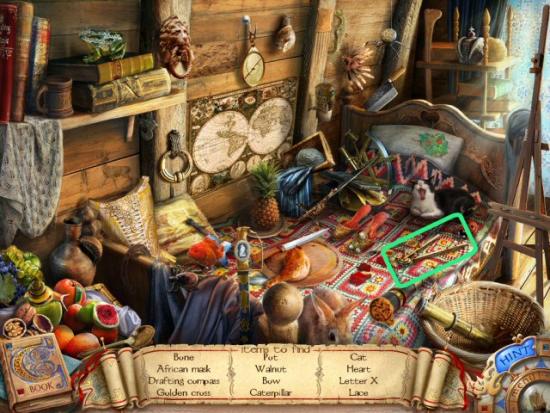
Find all the items in the list. Inventory Item: Divider.
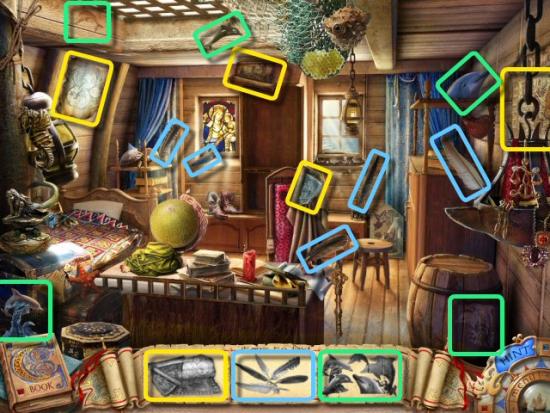
Collect the fragments for the Map (yellow), Feathers (blue) and Dolphins (green). Inventory Item: Map. Return to the Main Deck and use the Broken Compass on the Wind Rose.
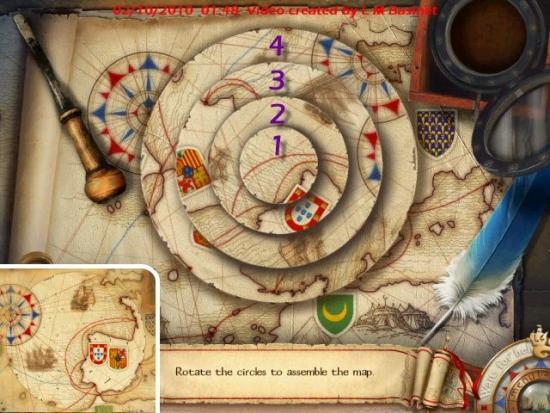
Rotate the rings to line up all the sections to form a complete image of the map. Click and drag the rings, in either direction to move them. Note that rotating one ring affects another and the different rings rotate others at different rates (they move a greater or lesser distance). The movements are as follows:
- 1 also rotates 3 in the opposite direction.
- 2 also rotates 4 in the opposite direction.
- 3 also rotates 2 in the opposite direction.
- 4 also rotates 1 in the opposite direction.
A strategy that worked well was to begin with the outermost ring and work your way to the center. Line up 4 and 3, work on 2 and 1 and then make small adjustments to each one until they all line up. Inventory Item: Fixed Compass.
Click on the following for a video solution. Note that the puzzle begins with the rings in different positions each time you play and each time you reset it.
Return to the Navigation Room and use the Divider, Map and Compass on the Table. Plot the Ship’s route by clicking on the areas that will guarantee safe passage to Northern France. Note that as you begin marking the passage, the visibility will be obscured, within seconds, and you must rely on memory. If you hit an obstacle, you’ll crash and must reset the puzzle by clicking on the Retry button.
A good strategy would be to draw a simple (or as complex as you like) map that will give show you where all the obstacles are (reefs, pirates, shipwrecks, land masses, etc.) and put marks (1) where there will be clear sailing…or you can do what I did, and cheat. I put pieces of tape on my screen and just clicked away, LOL. Once you’ve placed all your marks, click OK (2) to start sailing to France (3).
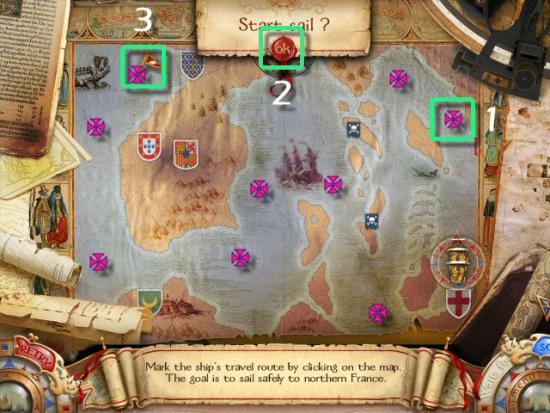
This arcade/skill game is a bit of a challenge and you may need to try more than once (unless you cheat, as I did). You can always click the Solve button if you’d like to skip it.
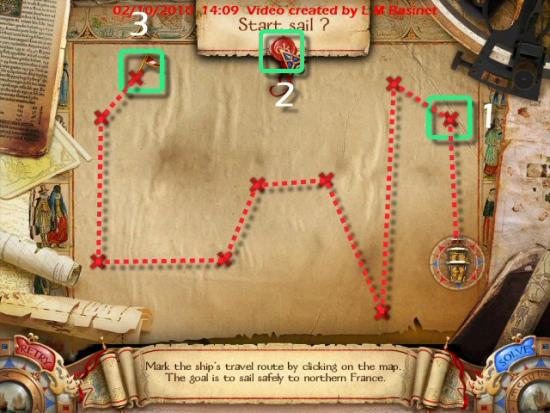
Click on the following for a video solution.
Chapter VII: Spain
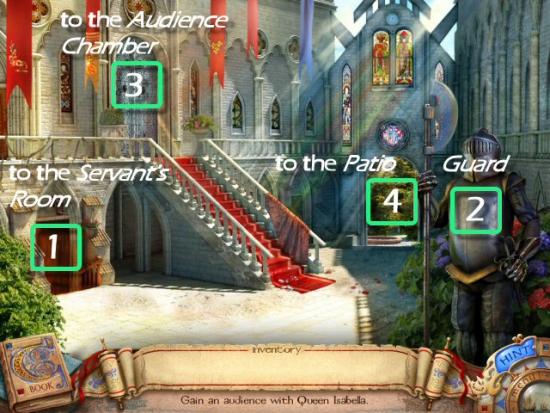
Enter the Servant’s Room (1).
Find all the items in the list. Inventory Item: Spools of Thread (1). Continue to the Kitchen (2).
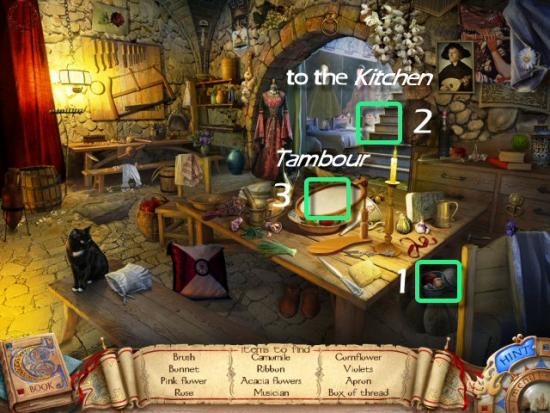
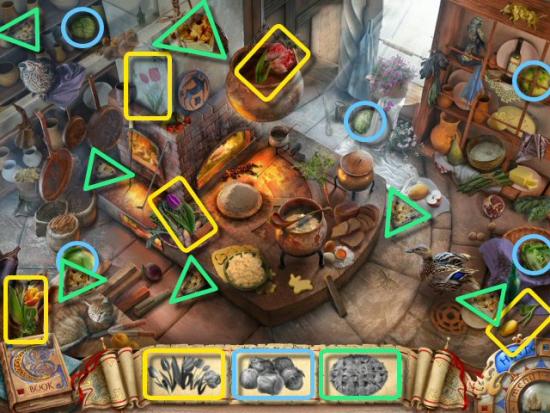
Collect the fragments for the Tulips (yellow), Lettuce and Cabbage (blue) and Pie (green). Inventory Item: Tulips (1). Return to the Servant’s Room and use the Spools of Thread and Tulips on the Tambour (3 – see previous screenshot).
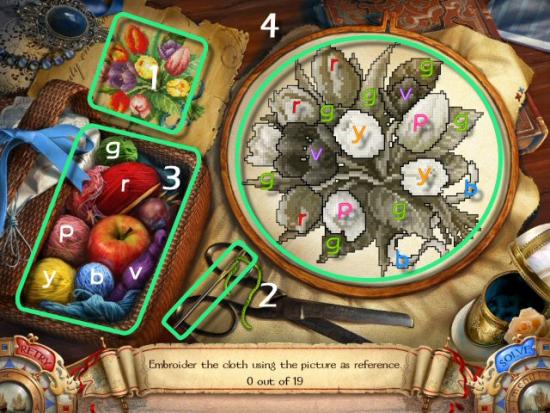
Using the Picture (1) as a guide, embroider the Tulips by clicking the Needle (2) on one of the Thread (3) colors (g = green, r = red, p = pink, y = yellow, b = blue, v = violet) and then clicking on the corresponding area on the Canvas (4).
Click on the following for the video solution.
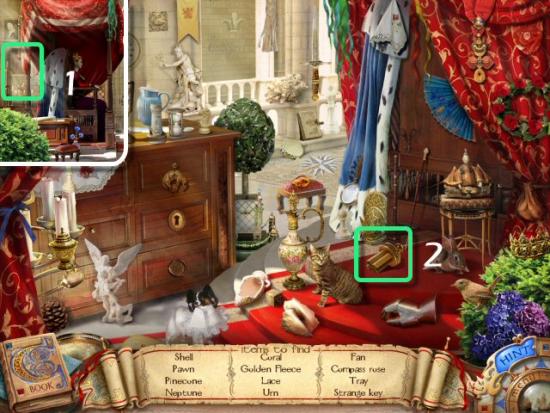
Return outside, use the Embroidery on the Guard (2 – see the first screenshot for this chapter), enter the Audience Chamber (3 – see the first screenshot for this chapter) and then click on the Canopy (1). Find all the items in the list. Inventory Item: Key (2).
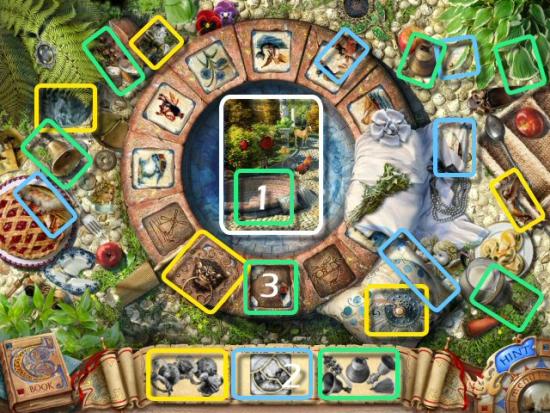
Return outside, enter the Patio (4 – see the first screenshot for this chapter) and then click on the Fountain (1). Collect all the fragments for the Handles (yellow), Tile (blue) and Bells (green). Inventory Item: Broken Tile (2). Exit to the Patio.
Find all the items in the list. Inventory Item: Fruit Bowl Tile. Return to the Servant’s Room.
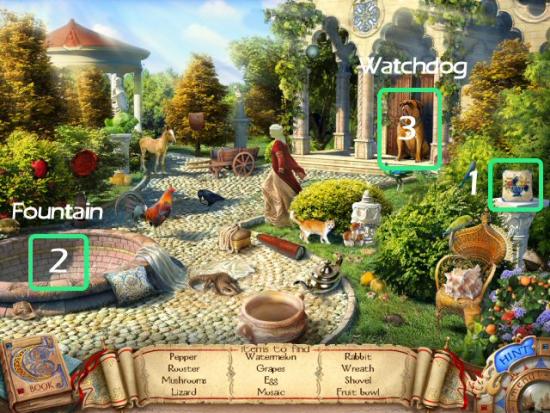
Find all the items in the list. Inventory Item: Windmill Tile (1). Enter the Kitchen (2).
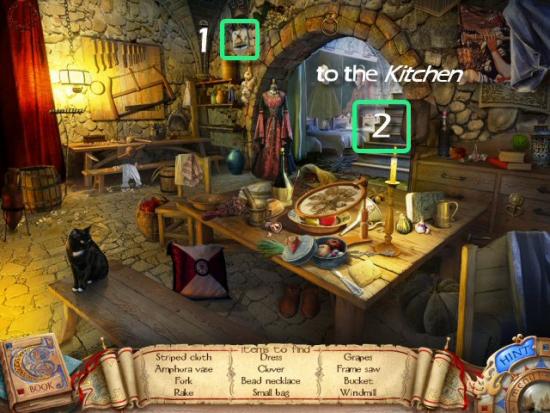
Find all the items in the list. Inventory Item: Flour (1). Use the Flour on the Pot (2).
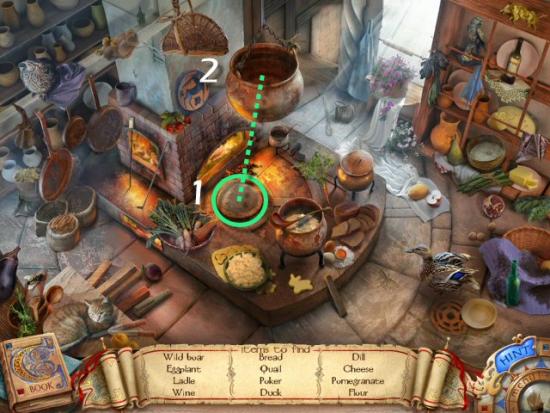
Click on the Recipe (1) and add the Ingredients (2 – click on an ingredient, drag it and then click again to add it) to the Pot (3). The list is always the same and you can add them in any order you wish. Inventory Item: Glue. Return to the Patio and click on the Fountain.
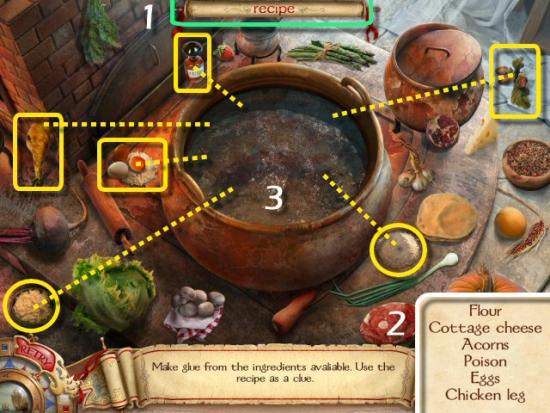
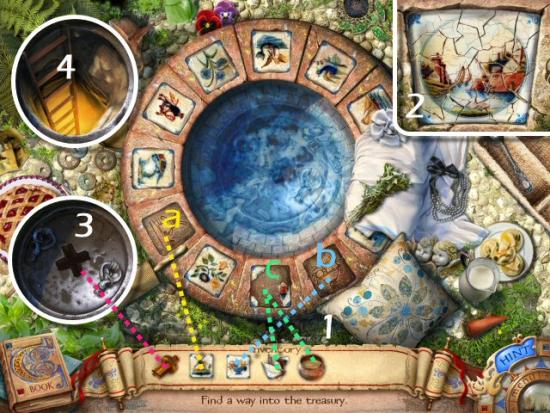
Use all the Tiles in the Empty Spaces (a, b and c) and then use the Glue on the Broken Tile (1). Repair the Broken Tile (2). Click on a piece, right click to rotate it and then click to place it. Use the Key in the Lock (3) and then enter the Treasury (4).
Find all the items in the list. Inventory Item: Jewels. Return to the Audience Chamber, use the Jewels on the Queen and then click on the Canopy area, behind the Throne.
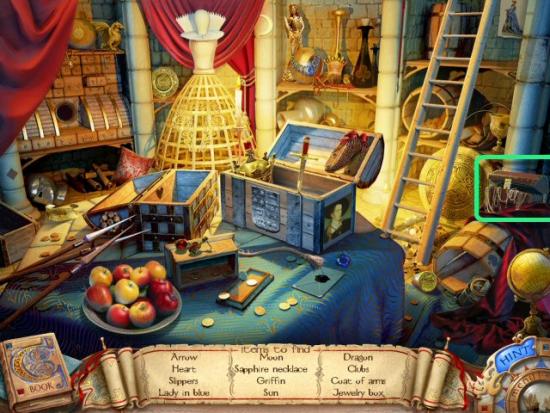
Find all the items in the list. Inventory Item: Meat. Return to the Patio, use the Meat on the Dog (3 – see Fruit Bowl Tile screenshot) and then enter the Boudoir.
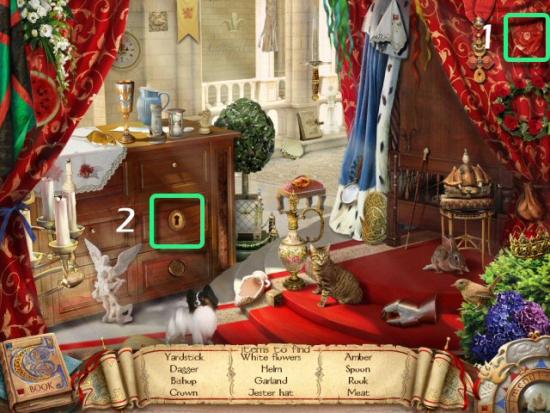
Find all the items in the list. Inventory Item: Key (1). Enter the Bathing Room (2).
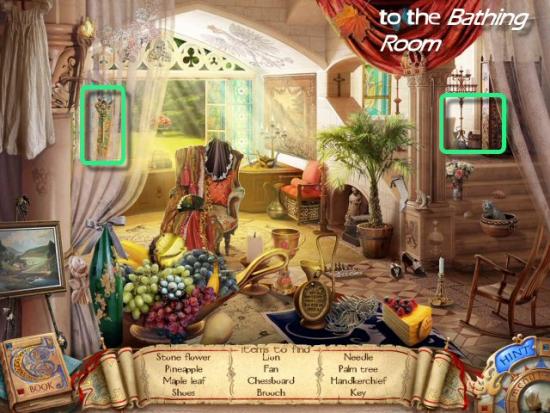
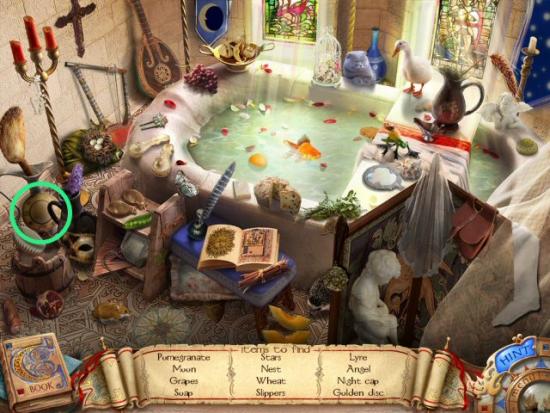
Find all the items in the list. Inventory Item: Golden Disk.
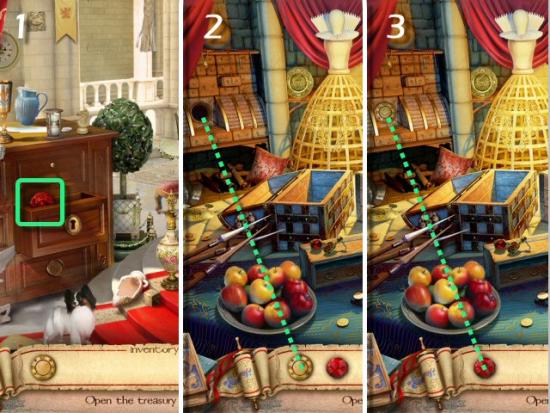
Return to the Audience Chamber and click on the Canopy, behind the Throne. Use the Key on the Lock (2 – see the Meat screenshot) and collect the Red Gem (1). Return to the Patio, click on the Fountain (2 – see Fruit Bowl Tile screenshot) and enter the Treasury. Use the Golden Disk on the Cabinet (2) and use the Red Gem on the Lock (3).
Rotate the rings to line up all the sections to form a complete image and open the Lock. Click and drag the rings, in either direction to move them. Note that rotating one ring affects another and the different rings rotate others at different rates (they move a greater or lesser distance). The movements are as follows:
- 1 also rotates 3 in the opposite direction.
- 2 also rotates 4 in the opposite direction.
- 3 also rotates 2 in the opposite direction.
- 4 also rotates 1 in the opposite direction.
A strategy that worked well was to begin with the outermost ring and work your way to the center. Line up 4 and 3, work on 2 and 1 and then make small adjustments to each one until they all line up. When solved, click on the Cabinet.
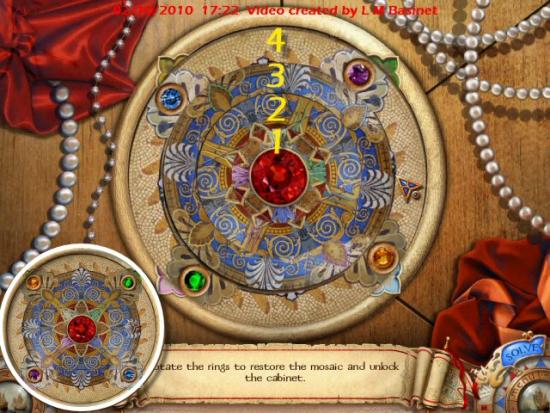
Click on the following for a video solution. Note that the puzzle begins with the rings in different positions each time you play and each time you reset it.
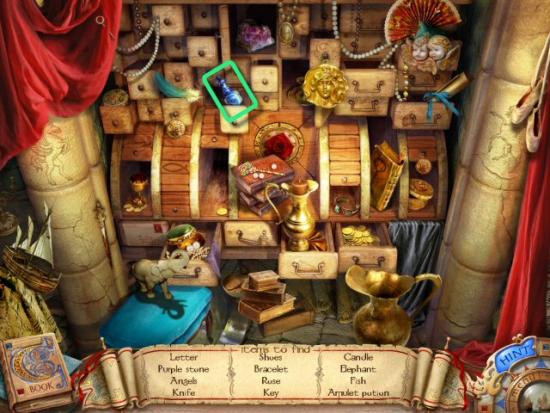
Find all the items in the list. Inventory Item: Amulet Potion
Chapter VIII: Back to the Island
Enter Columbus’ Cabin (1).
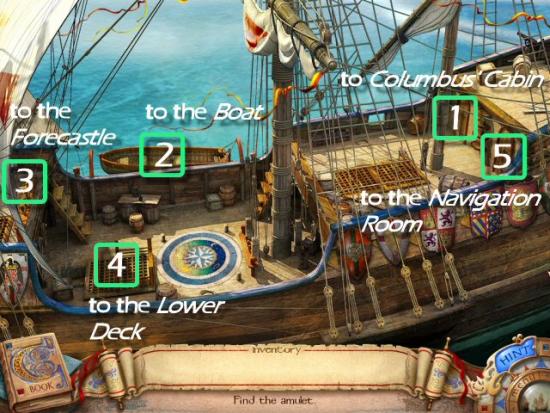
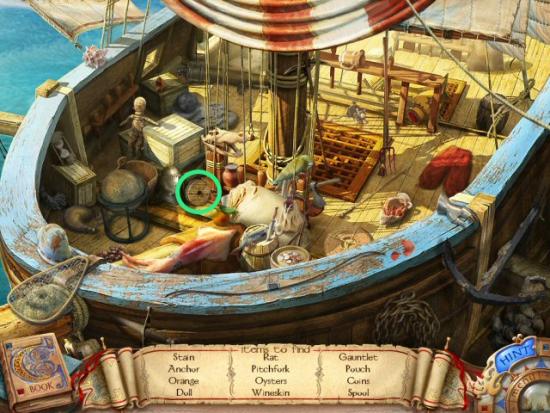
Find all the items in the list. Inventory Item: Amulet Return to the Upper Deck, enter the Boat (3 – see the screenshot at the beginning of this chapter), return (you must do this to trigger the next area) and enter the Forecastle (2 – see the screenshot at the beginning of this chapter).

Find all the items in the list. Inventory Item: Spool. Return to the Upper Deck, enter the Lower Deck (3 – see the screenshot at the beginning of this chapter) and click on the Pump.
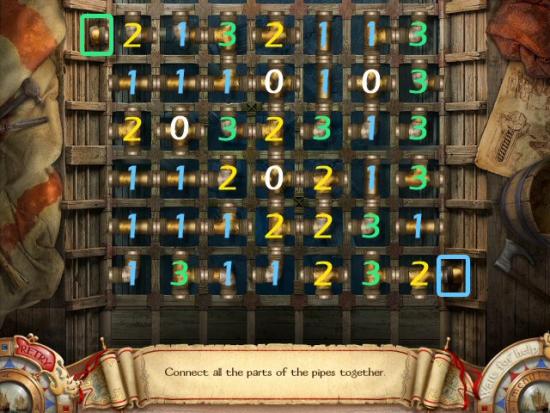
Click on each pipe section to rotate them so that they form a continuous connection from the Inlet (green) to the Outlet (blue). Note that you cannot right click on the pipes to rotate them counter-clockwise and not all the pipes need to be rotated. The numbers indicate how many times you need to click on a pipe to get it into the correct position. When solved, head down, to the Hold Shelf.
Click on the following for a video solution. This puzzle begins the same way, and has the same solution, each time you play (the Retry button has no effect).
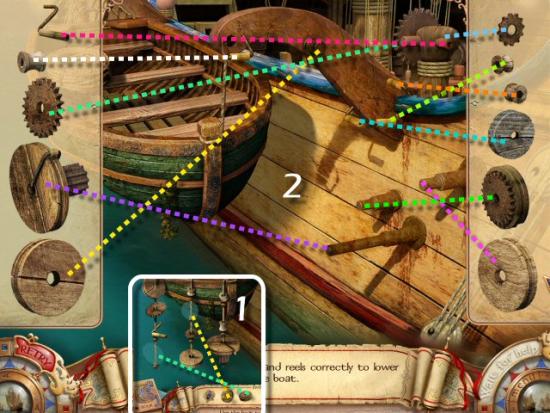
Collect the fragments for the Ropes (yellow), Gear (blue) and Pulleys (green). Inventory Item: Gear. Return to the Upper Deck and enter the Boat (2 – see the screenshot at the beginning of this chapter).
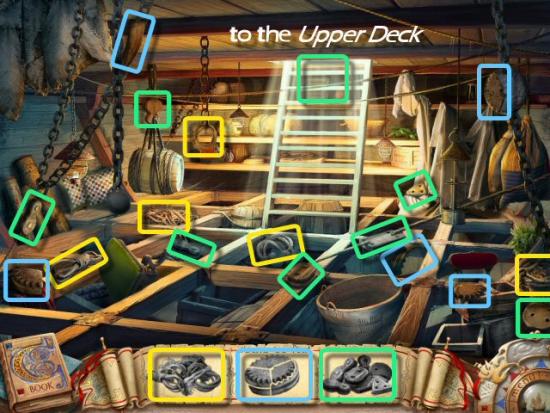
Use the Spool and Gear in the Empty Spaces (1) and place the rest of the Parts in the correct spots (2).
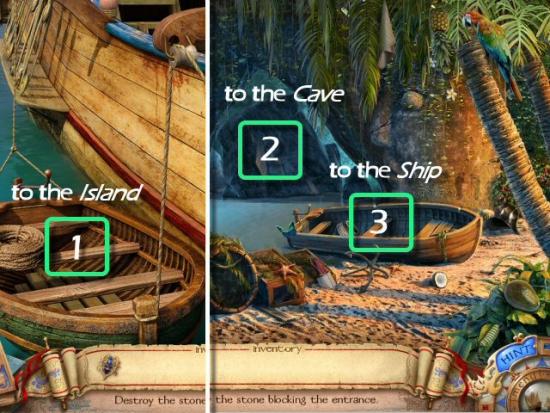
Click on the Boat (1), click on the Rocks (2) blocking the Cave and then click on the Boat (3) to return to the Ship.
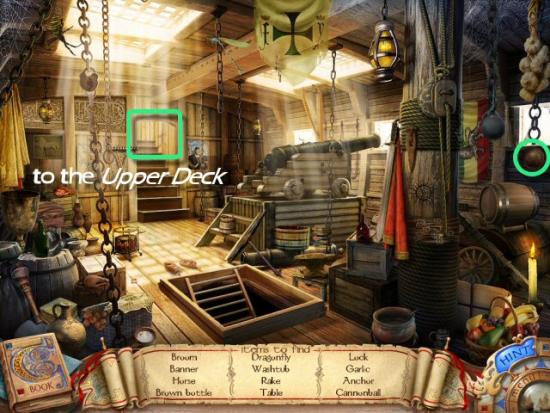
Enter the Lower Deck (4 – see the screenshot at the beginning of this chapter) and find all the items in the list. Inventory Item: Cannonball. Return to the Upper Deck and enter the Navigation Room (5 – see the screenshot at the beginning of this chapter).
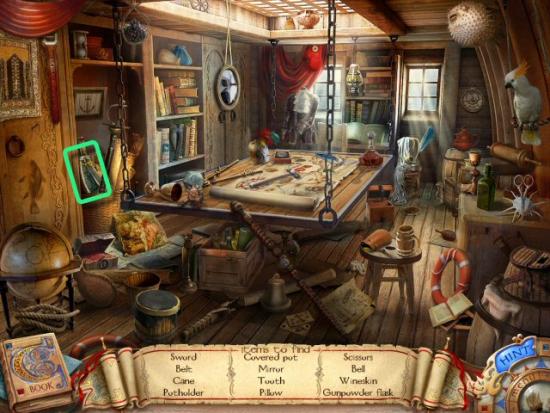
Find all the items in the list. Inventory Item: Gunpowder. Return to the Upper Deck and enter Columbus’ Cabin (1 – see the screenshot at the beginning of this chapter).
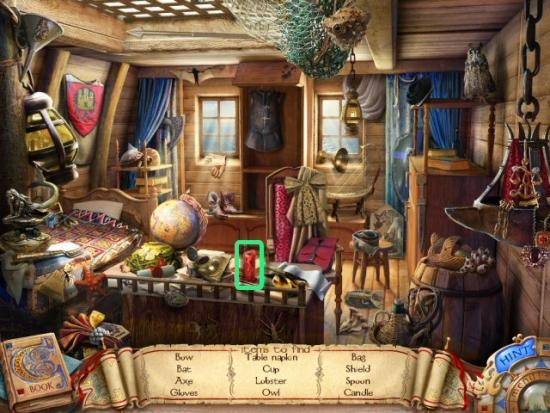
Find all the items in the list. Inventory Item: Candle. Return to the Upper Deck and enter the Lower Deck (4 – see the screenshot at the beginning of this chapter).
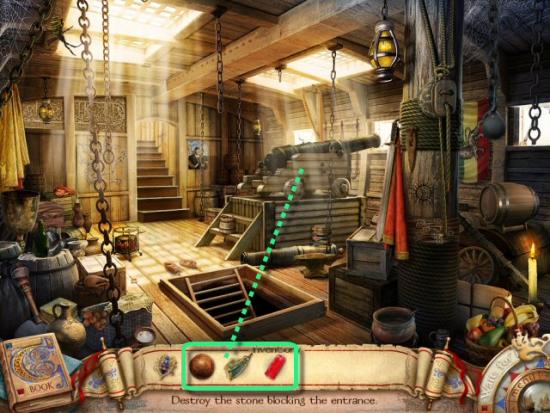
Use the Cannonball, Gunpowder and Candle on the Cannon. Note that you need to use the Cannonball and Gunpowder (it doesn’t matter in which order) before you use the Candle on the Cannon. Return to the Upper Deck, enter the Boat, and click on the Boat to return to the Island.
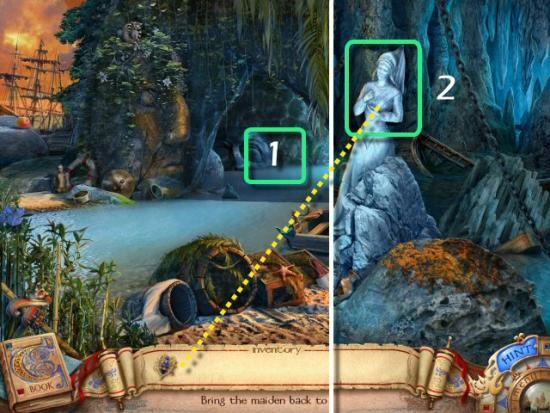
Enter the Cave (1) and use the Amulet on the Statue (2).
Chapter IX: Felipa
Find all the items in the List. Inventory Items: Vase, Tablecloth. Use the Tablecloth (1) and Vase (2) on the Table (3) and then click on the Fountain (4).
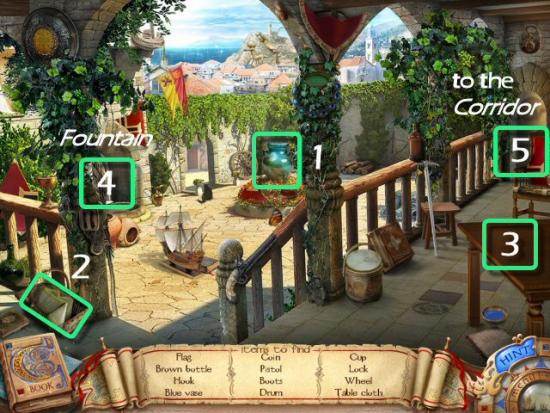
Find all the items in the list. Inventory Item: Scissors (1). Use the Scissors on the Flowers (2).
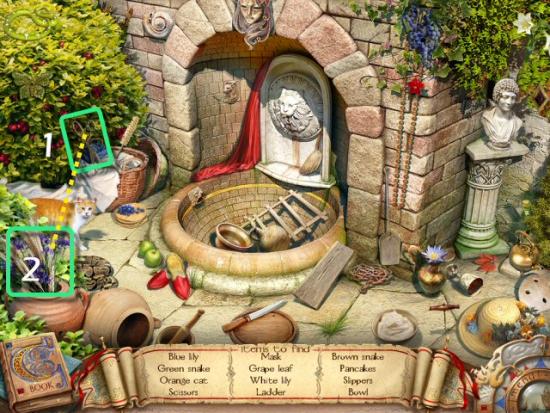
Use the Flowers in the Vase (1) and collect the Brushes (2). Collect the fragments for the Books (yellow), Shield (blue) and Bowls (green). Inventory Item: Paints. Enter the Corridor (5 – see the screenshot at the beginning of this chapter).
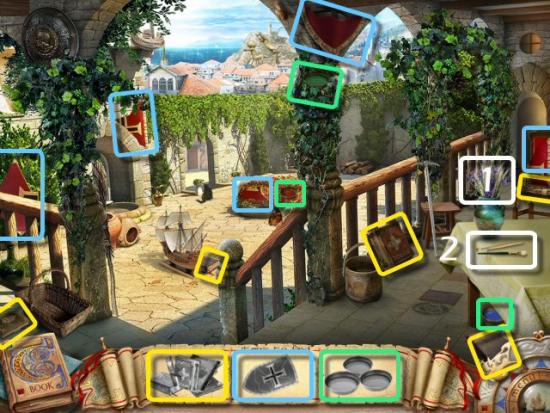
Find all the items in the list. Inventory Items: Firesteel, Flint. Use the Firesteel (1) and Flint (2) on the Candle (3), use the Brushes and Paints on the Stairs (4), return outside and then click on the Fountain (4 – see the screenshot at the beginning of this chapter).
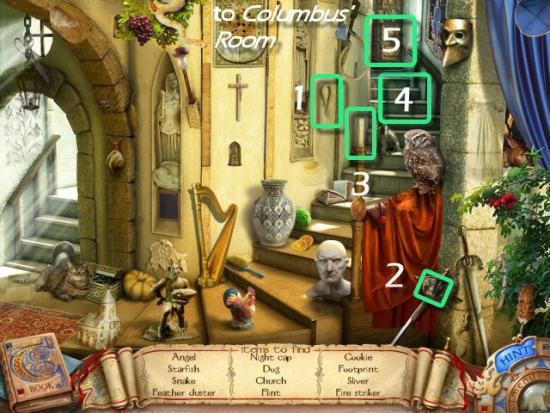
Find all the items in the list. Inventory Item: Brush. Use the Brush (1) on the Spout (2) and collect the Key (3). Return to the Corridor (5 – see the screenshot at the beginning of this chapter), use the Key on the Door (5 – see the Firesteel, Flint screenshot) and then enter Columbus’ Room.
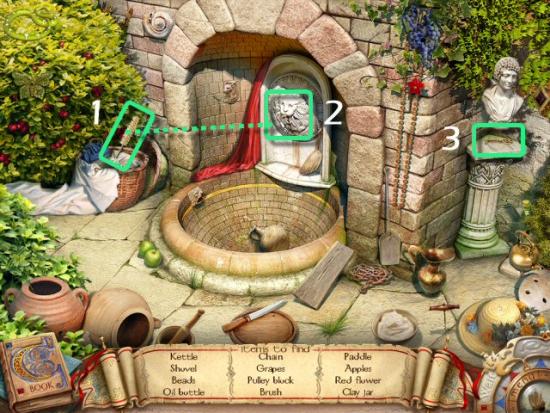
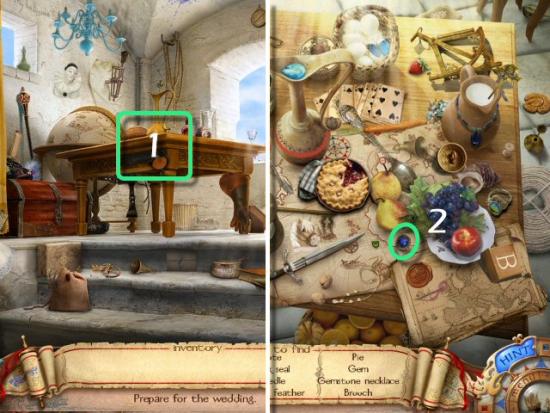
Click on the Table (1) and find all the items in the list. Inventory Item: Brooch (2).
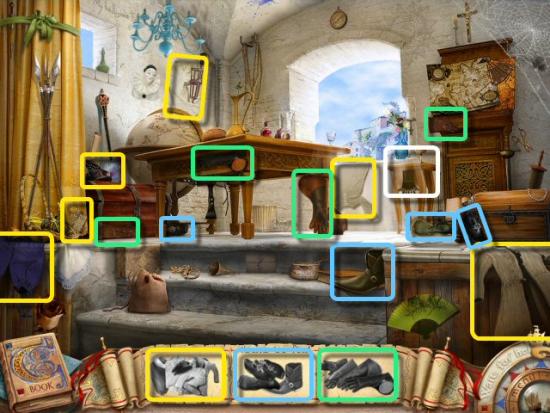
Collect the fragments for the Clothing (yellow), Shoes (blue) and Gloves (green). Inventory Item: Clothes. Use the Clothes and the Brooch on the Small Table (white)
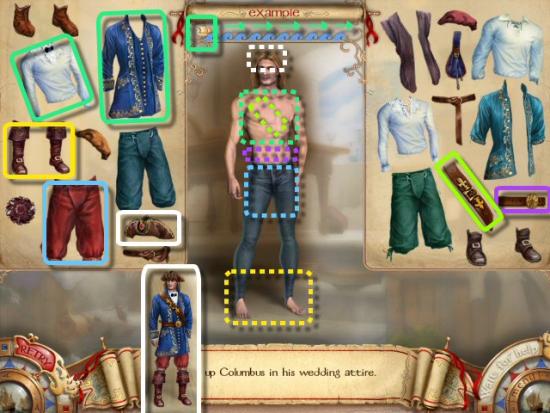
Use the fanciest and most colorful clothing on Columbus. Click on a piece of clothing, move it to Columbus and click to place it. A correct choice moves the Ship (green) to the right, removing an article of clothing moves the Ship to the left and an incorrect choice leaves the Ship where it is. The object is to choose the correct clothing and move the Ship all the way to the right.
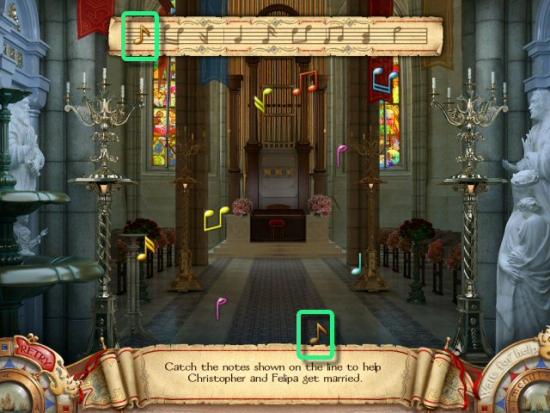
Click on the falling Note that matches the one shown on the Staff at the top of the screen. As you click on a Note, the next one on the Staff will highlight and you keep clicking on them until complete. The staff has 9 Notes and you’ll get 3 Staffs, for a total of 27.
And, they lived happily, ever after…
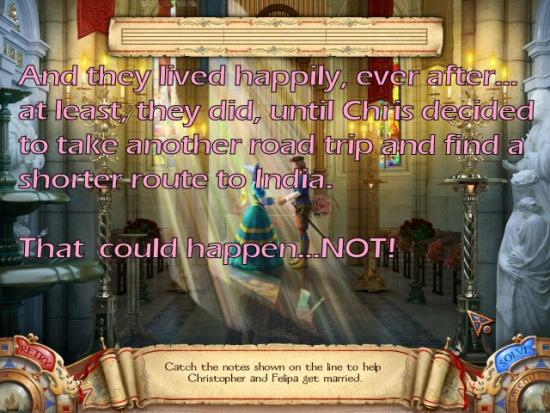
Watch the ending movie and credits. Congratulations! You’ve completed Columbus: Ghost of the Mystery Stone.
More articles...
Monopoly GO! Free Rolls – Links For Free Dice
By Glen Fox
Wondering how to get Monopoly GO! free rolls? Well, you’ve come to the right place. In this guide, we provide you with a bunch of tips and tricks to get some free rolls for the hit new mobile game. We’ll …Best Roblox Horror Games to Play Right Now – Updated Weekly
By Adele Wilson
Our Best Roblox Horror Games guide features the scariest and most creative experiences to play right now on the platform!The BEST Roblox Games of The Week – Games You Need To Play!
By Sho Roberts
Our feature shares our pick for the Best Roblox Games of the week! With our feature, we guarantee you'll find something new to play!Type Soul Clan Rarity Guide – All Legendary And Common Clans Listed!
By Nathan Ball
Wondering what your odds of rolling a particular Clan are? Wonder no more, with my handy Type Soul Clan Rarity guide.


