![All VV Ultimatum Titles [How to Get]](/wp-content/uploads/2026/06/vv-ultimatum-titles.jpg "All VV Ultimatum Titles [How to Get]")
All VV Ultimatum Titles [How to Get]
Do titles provide buffs?


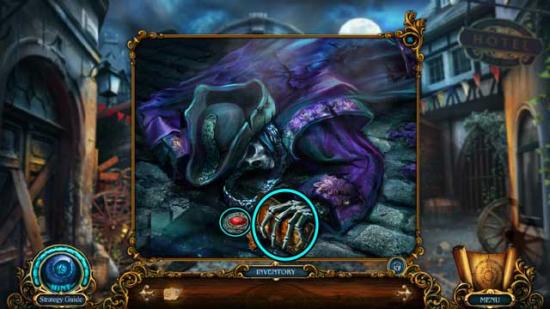
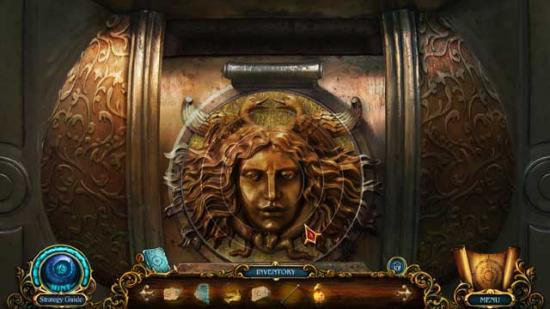
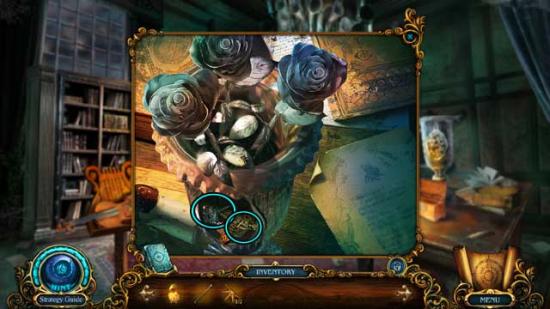
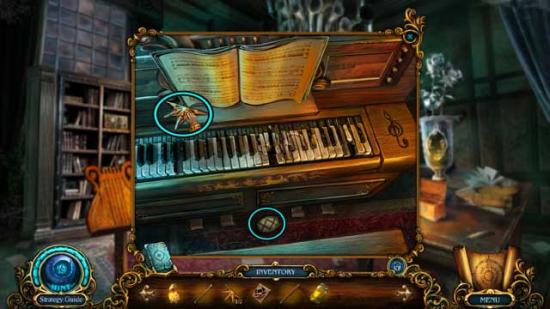
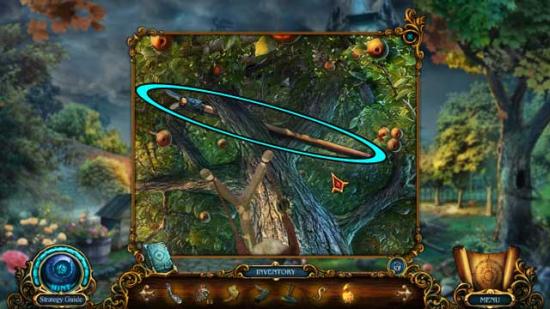
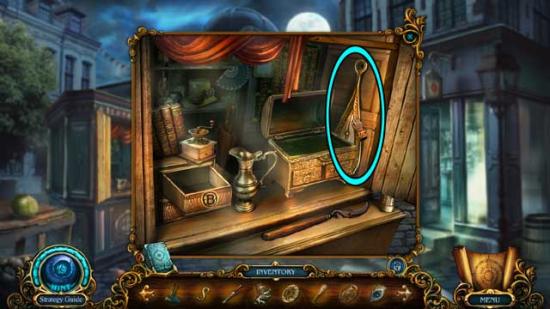
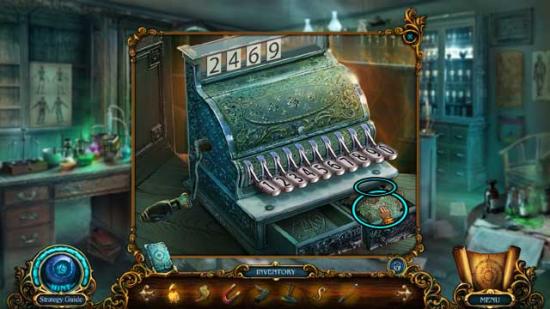
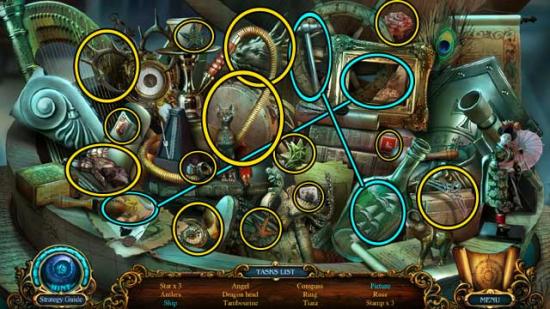
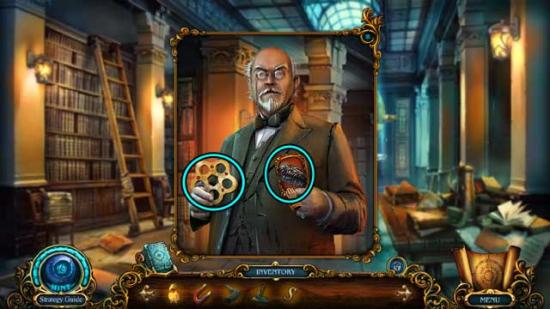
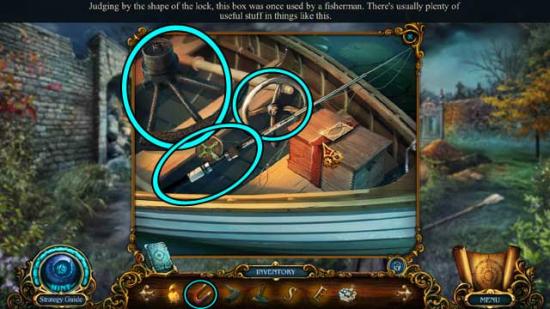
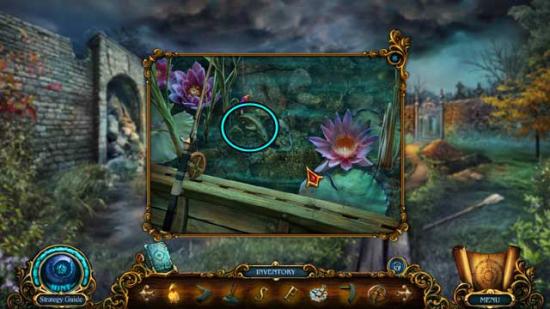
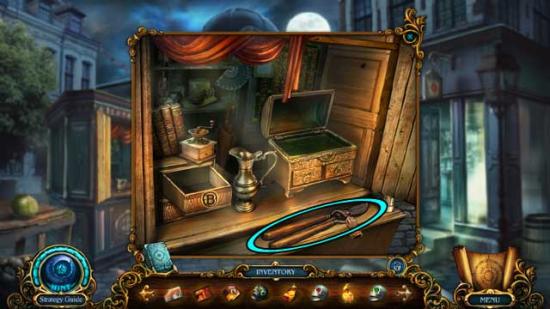
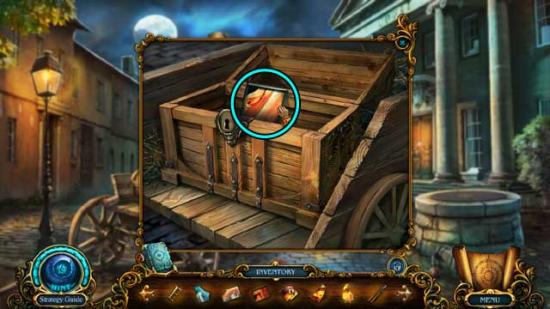
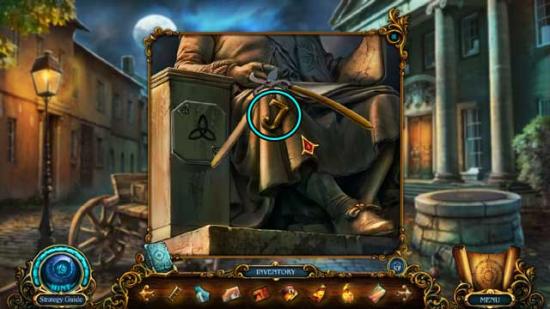
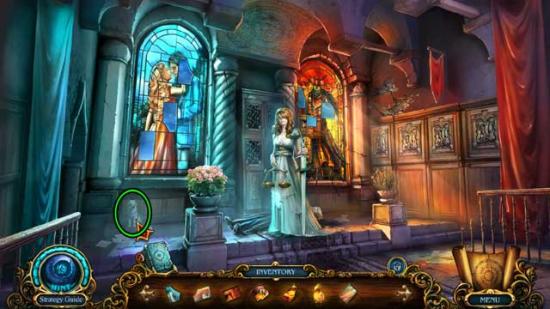
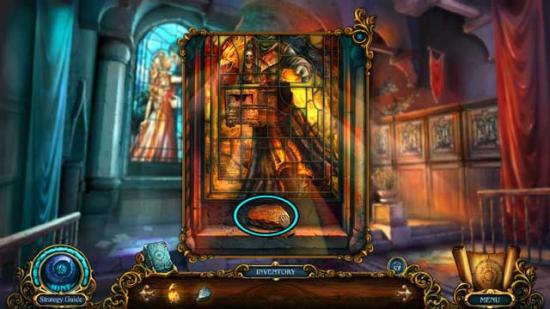
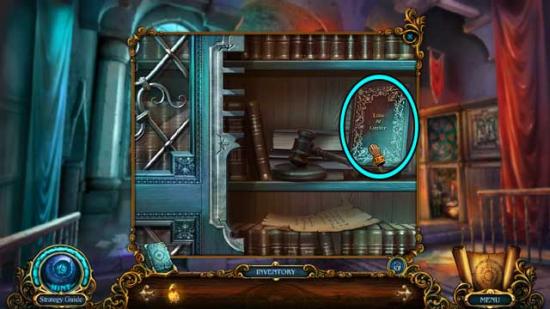
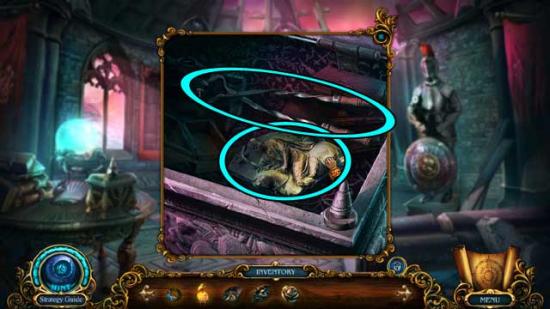
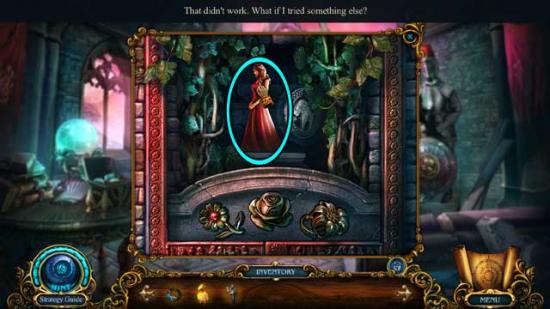
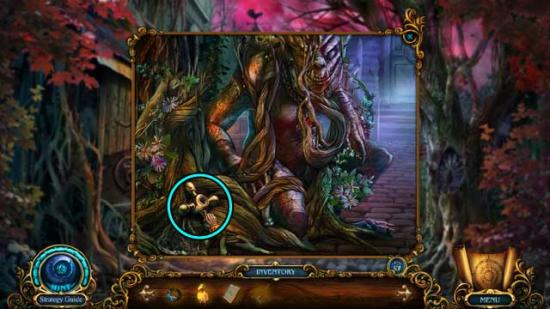
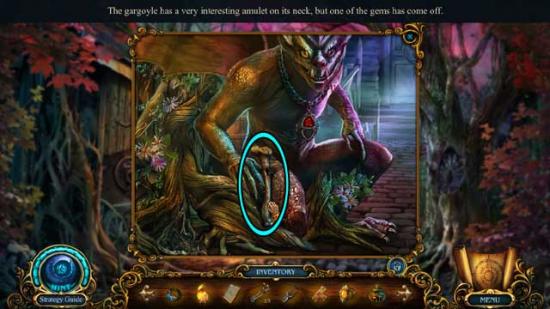
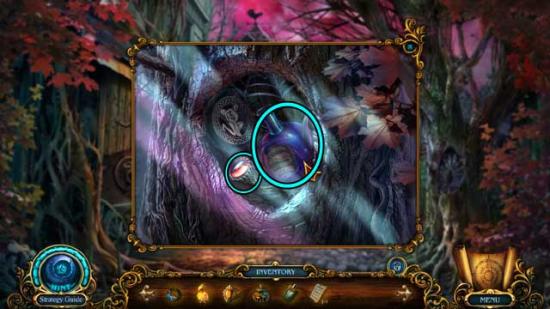
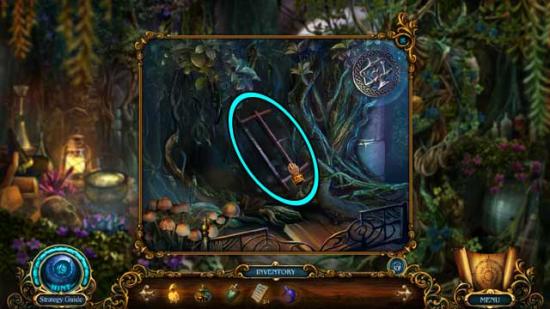
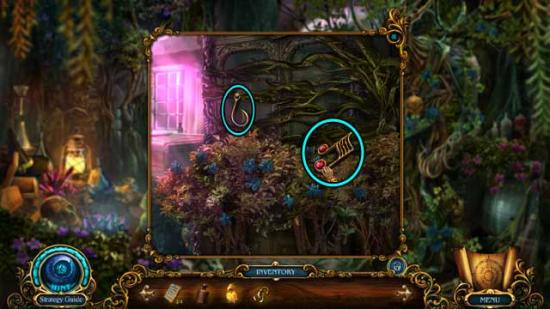
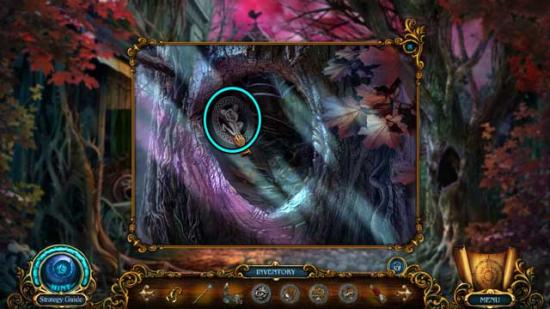
Welcome to the Chimeras: Tune of Revenge walkthrough on Gamezebo. Chimeras: Tune of Revenge is a hidden object adventure game created by Elephant Games. Track down the mysterious organ grinder and reverse the effects of his ill-fated fortune cards on the town of Graysand before it’s too late! Gamezebo’s walkthrough will provide you with detailed images, tips, information, and hints on how to play your best game.
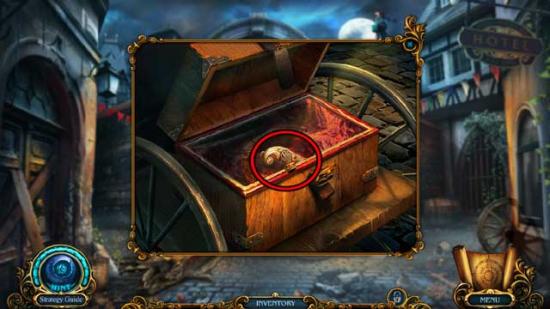
Welcome to the Chimeras: Tune of Revenge walkthrough on Gamezebo. Chimeras: Tune of Revenge is a hidden object adventure game created by Elephant Games. Track down the mysterious organ grinder and reverse the effects of his ill-fated fortune cards on the town of Graysand before it’s too late! Gamezebo’s walkthrough will provide you with detailed images, tips, information, and hints on how to play your best game.
Difficulty
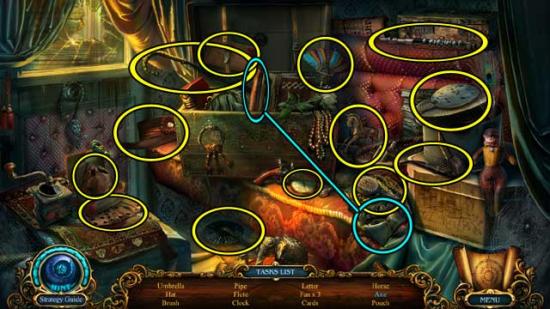
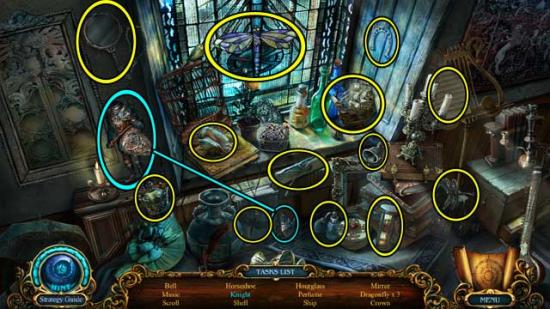
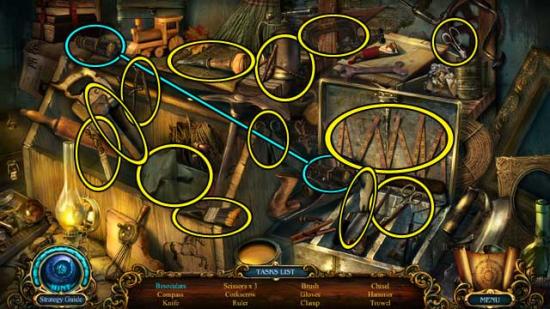
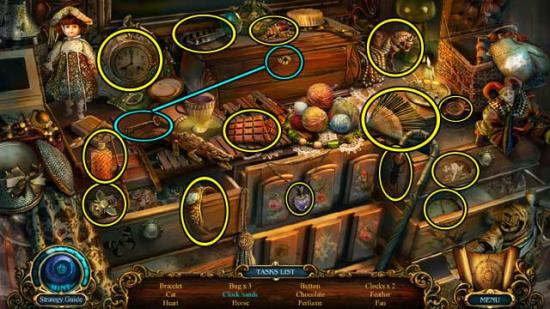
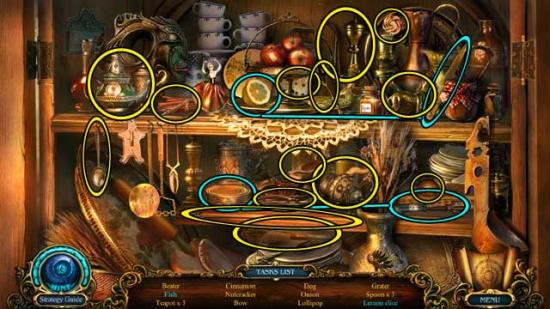
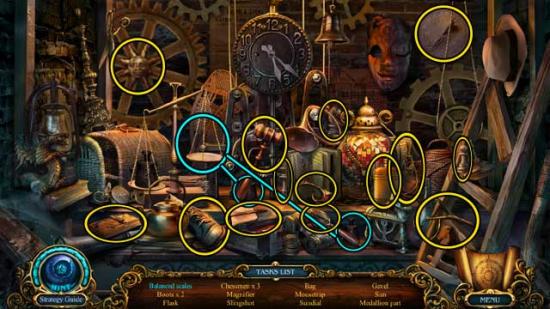
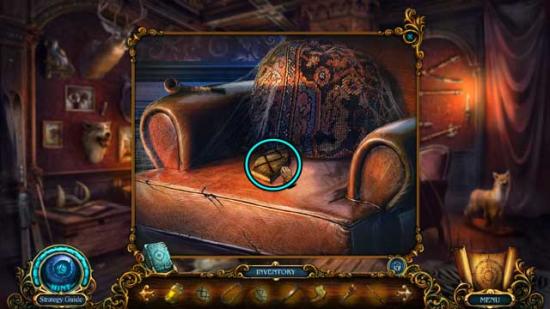
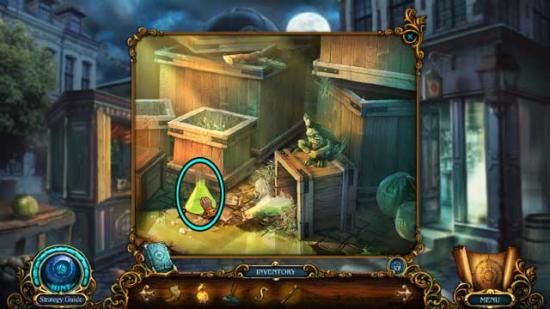
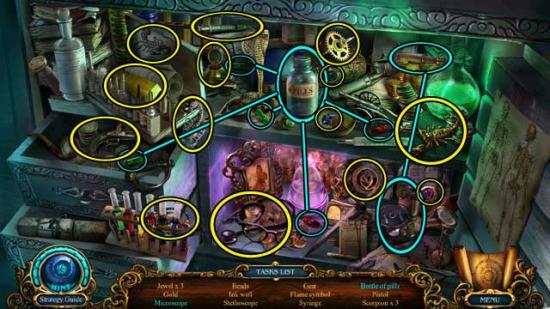
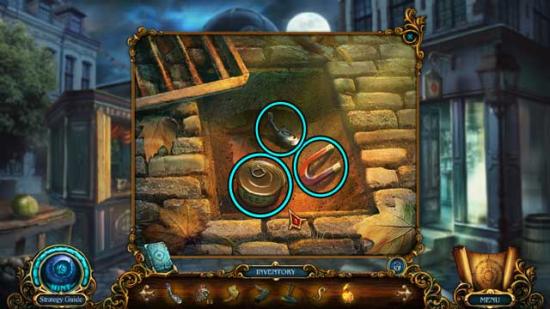
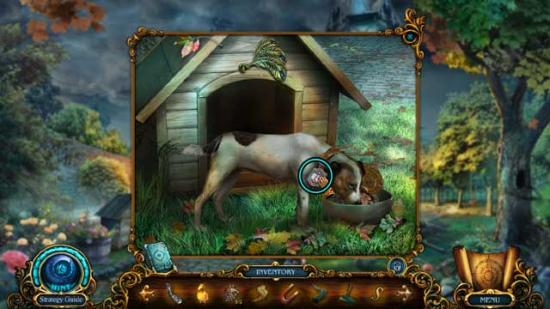
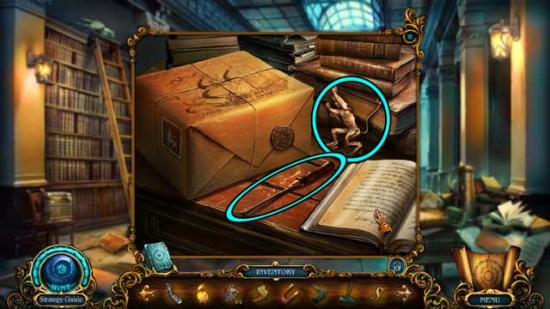
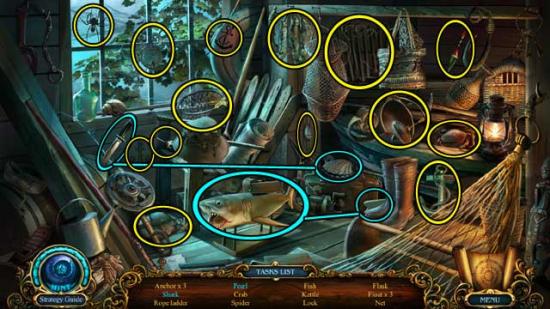
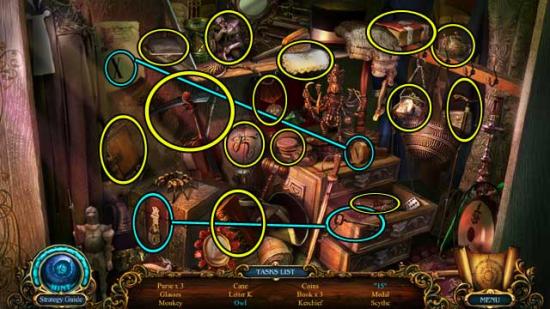
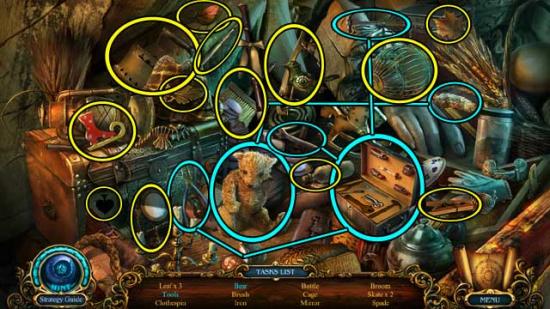
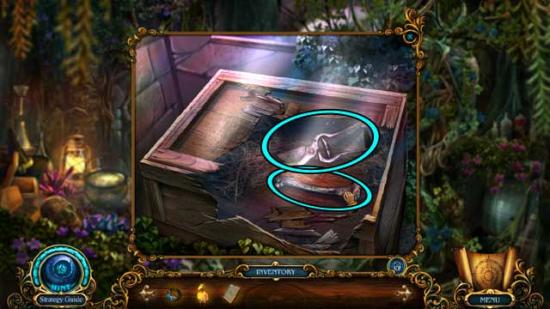
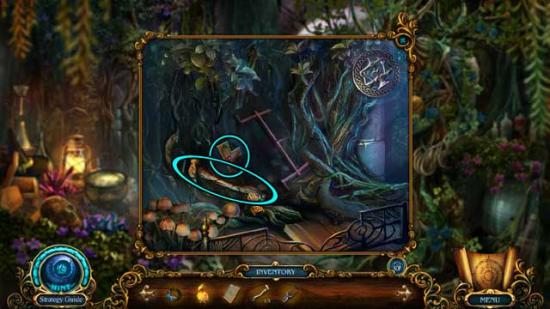
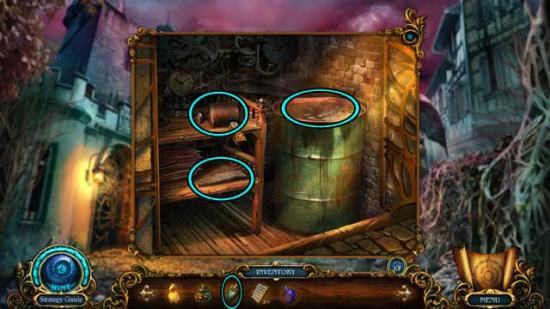
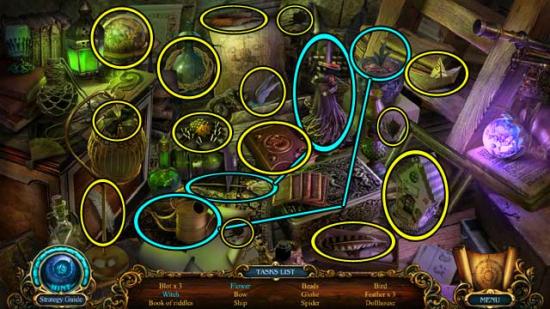
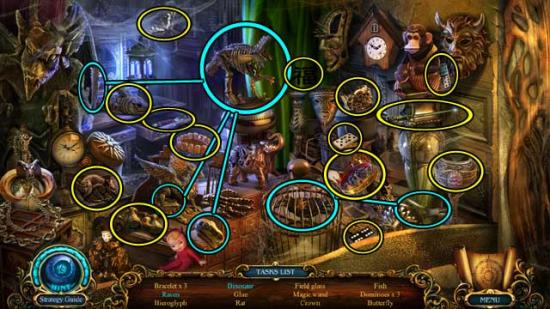
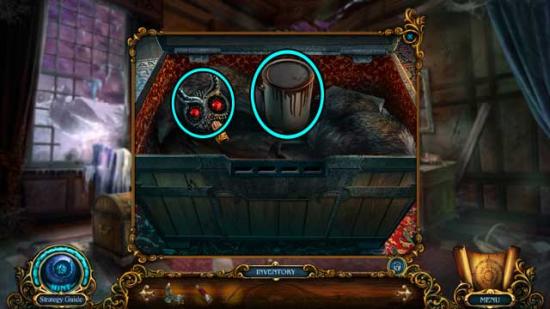
Hidden Object Scenes
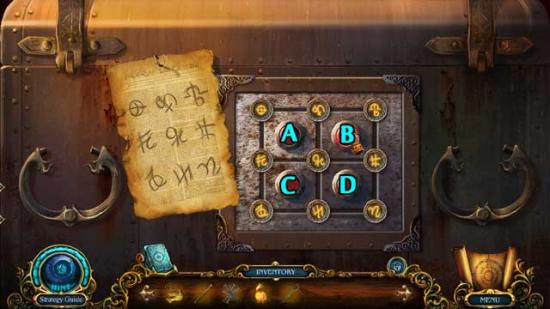
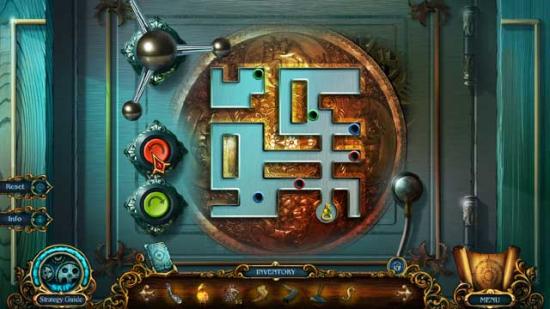
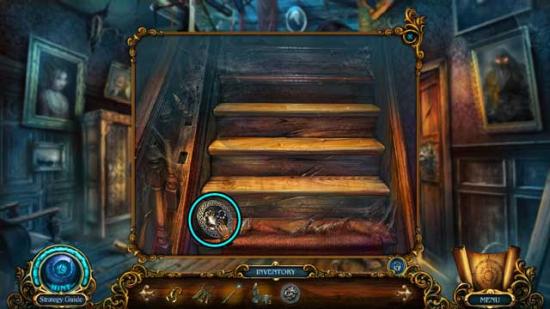
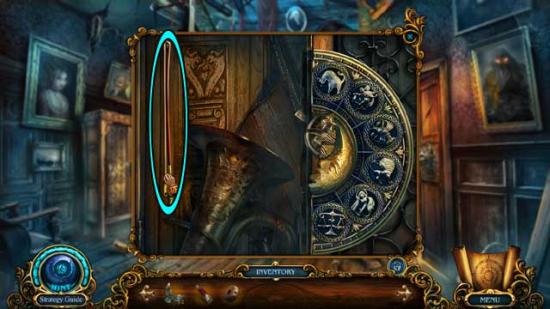
General Layout
Hint, Skip, and Reset Buttons
Collector’s Edition
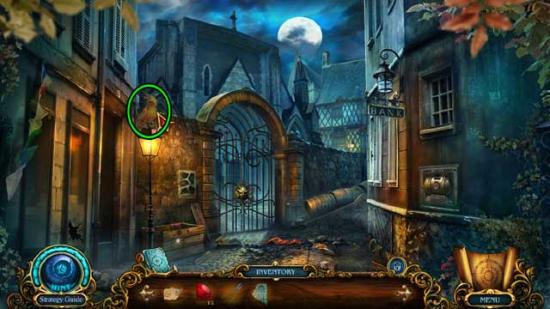
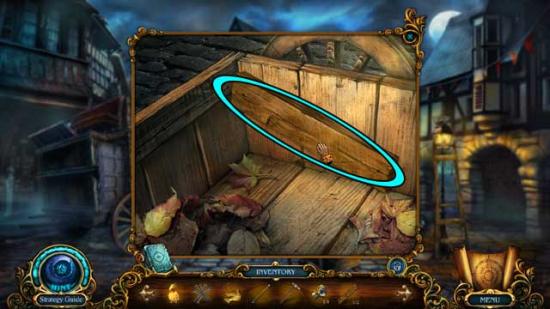
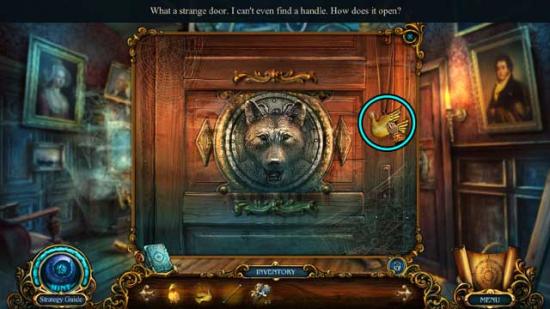
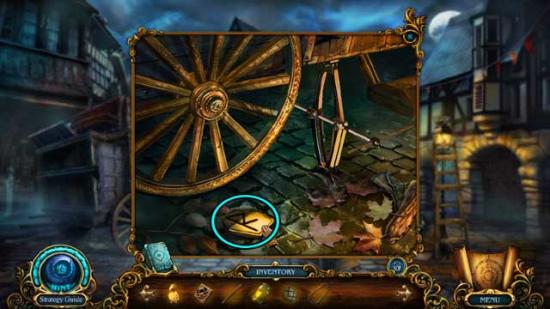
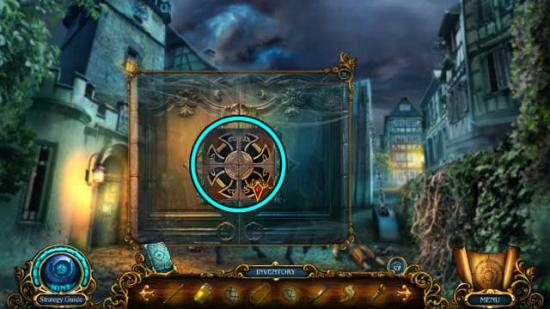
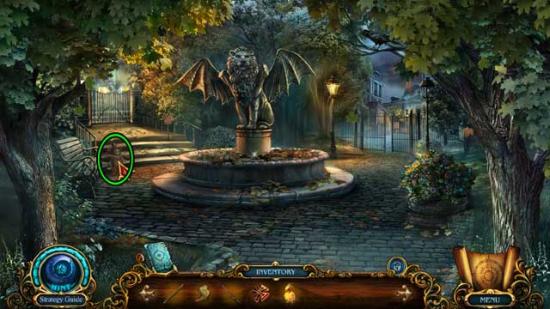
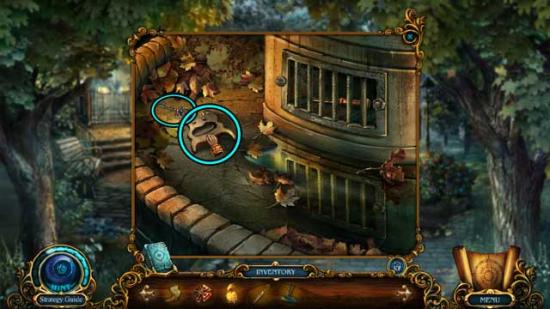
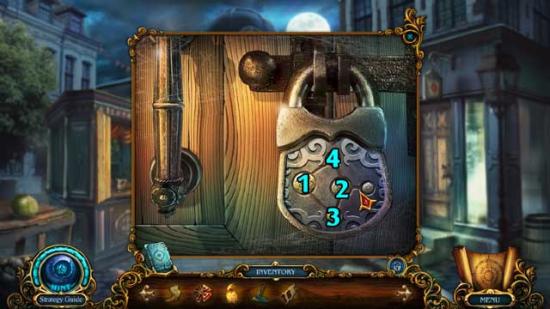
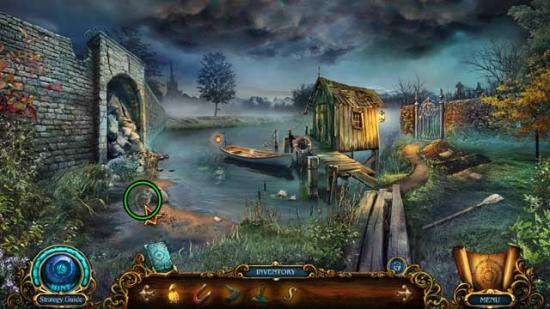
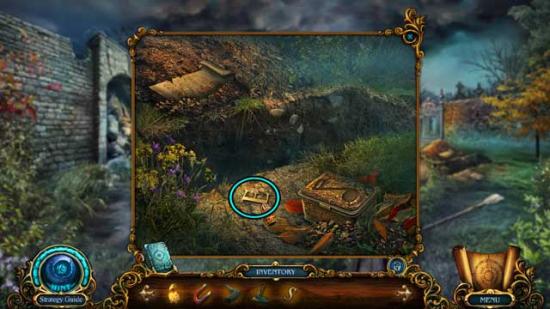
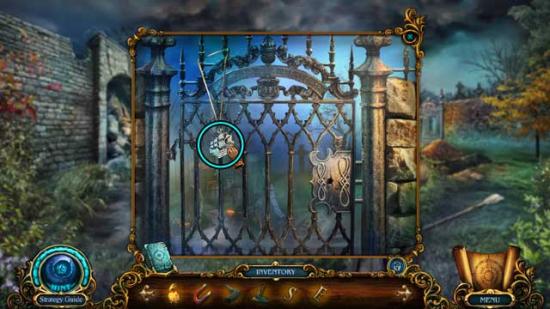
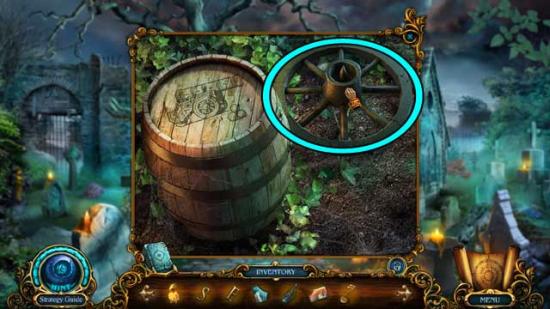
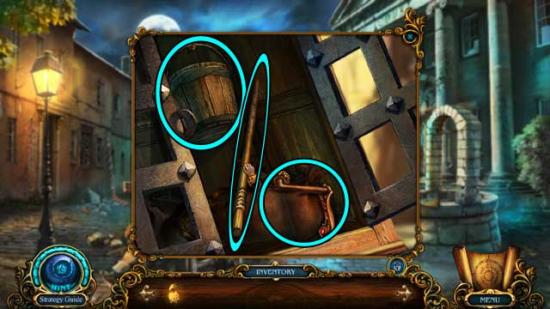
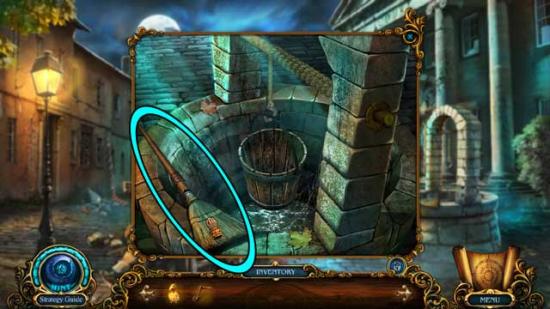
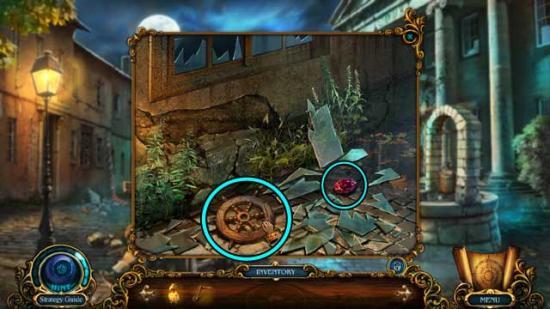
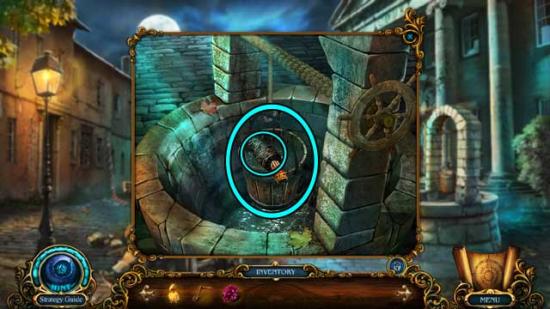
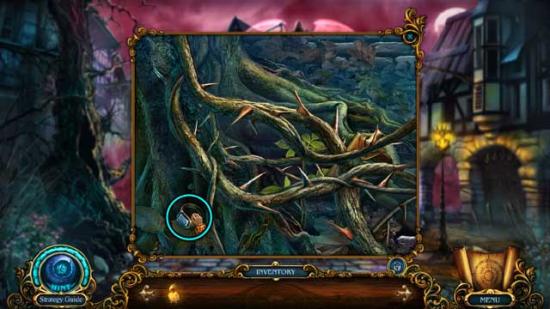
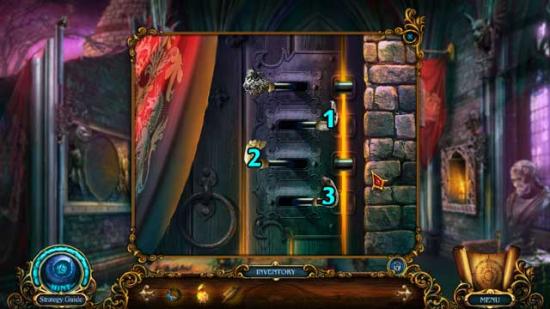
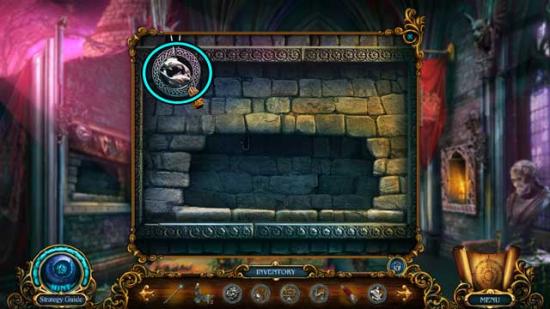
Old Gates

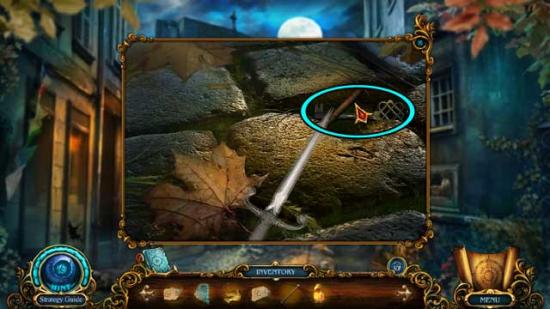
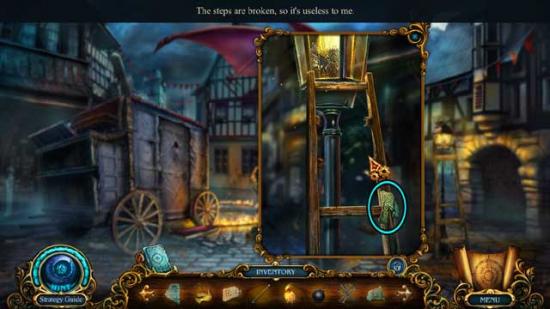
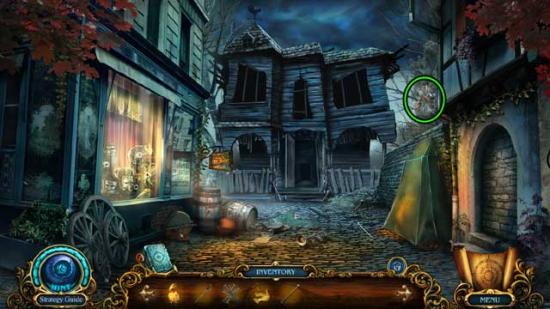
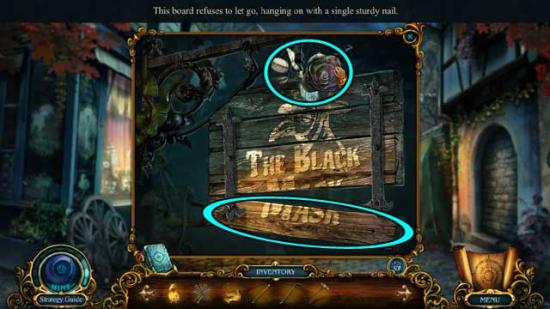
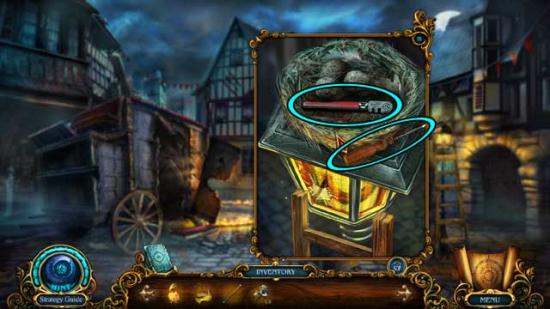
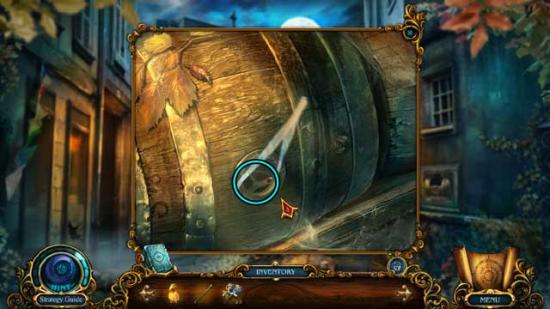
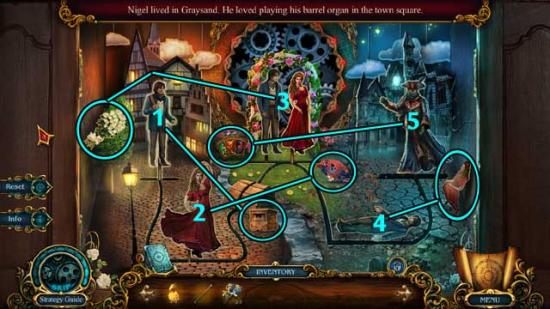
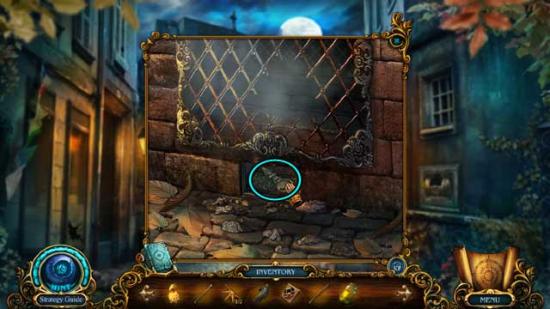
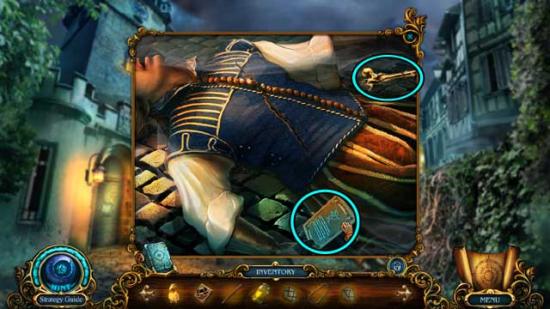
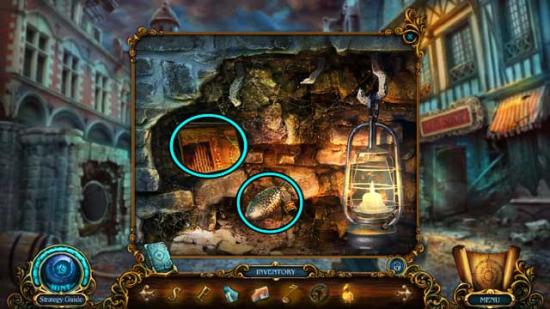
Narrow Street
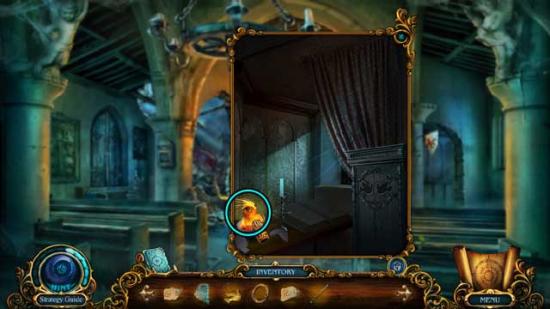
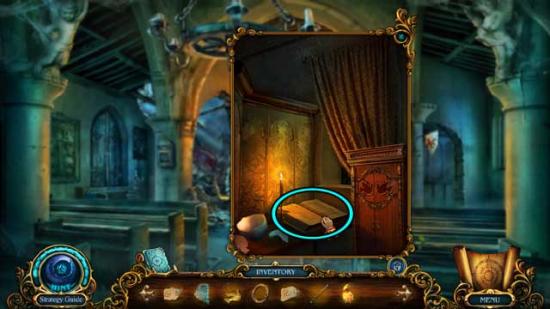
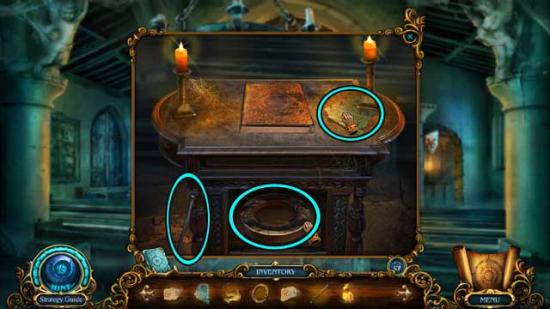
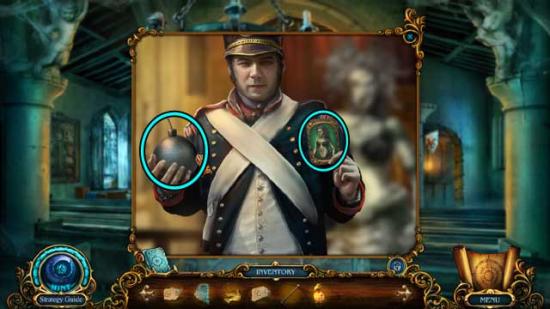
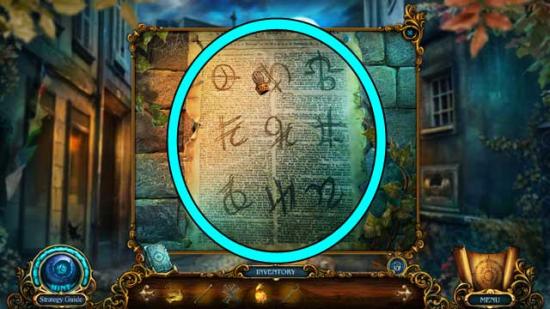
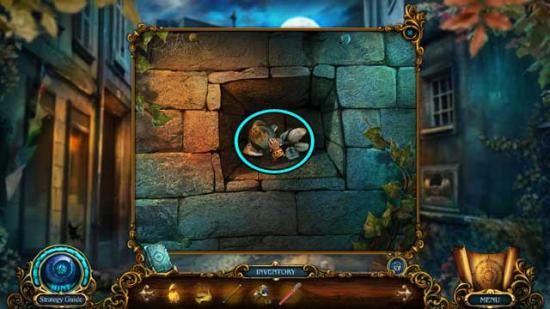
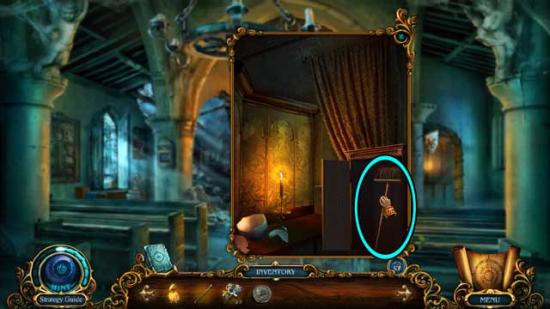
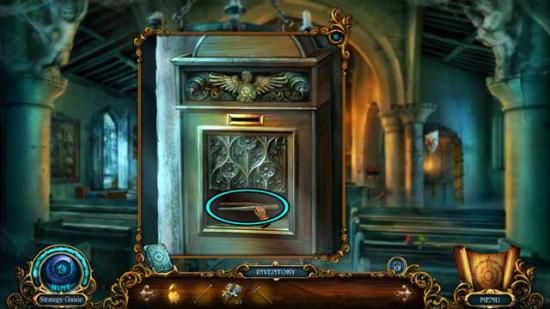
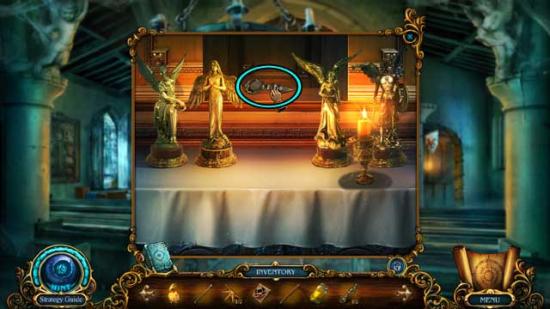
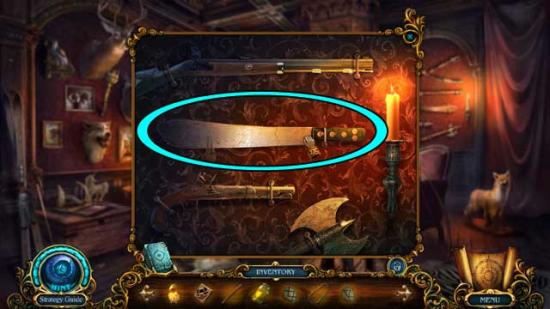
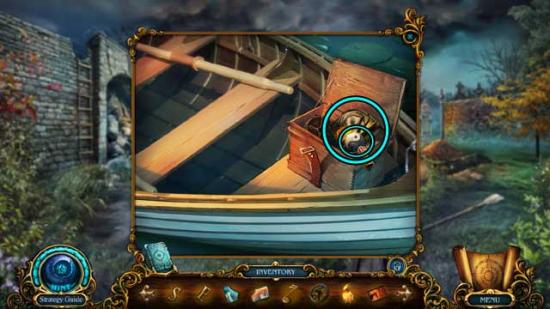
Church
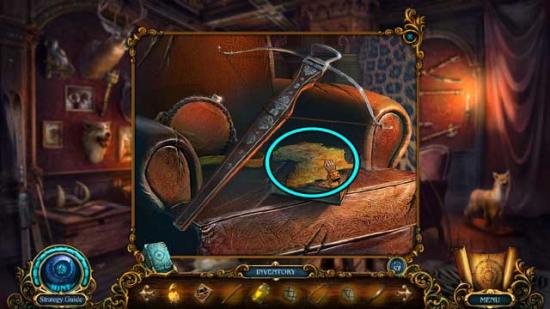
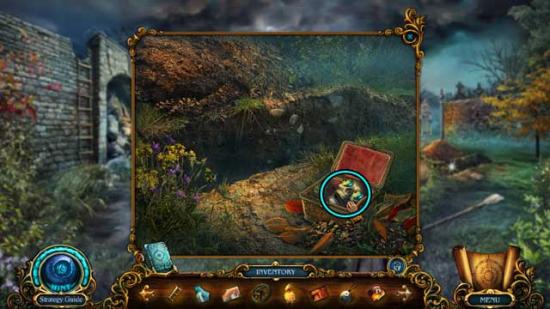
Narrow Street
Church
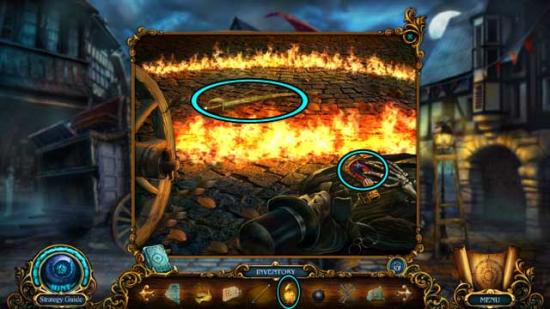
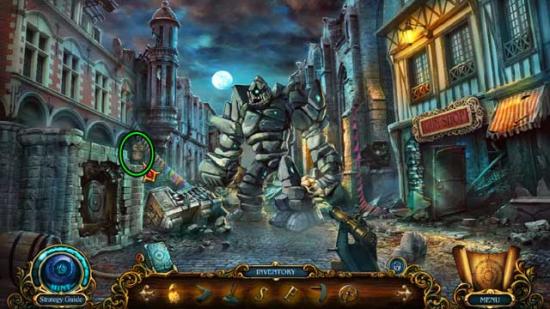
City Square
Narrow Street
City Square
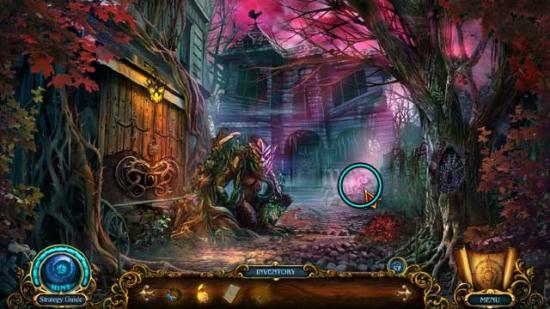
Monster House

City Square
Narrow Street
Monster House
Hall

Church
Narrow Street
Hall
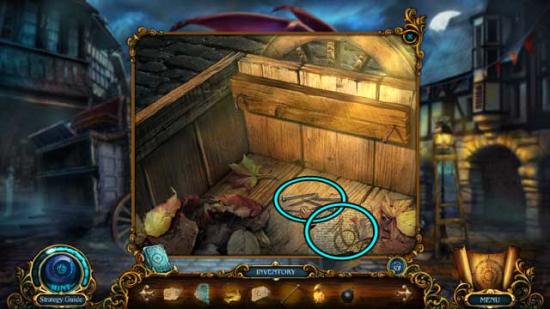
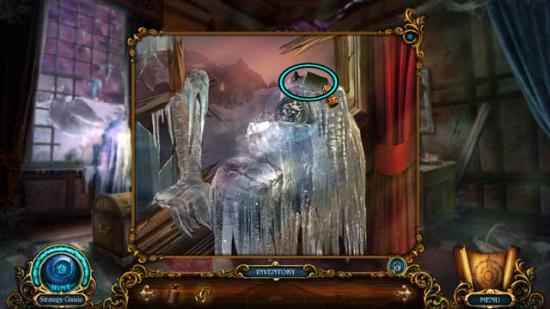
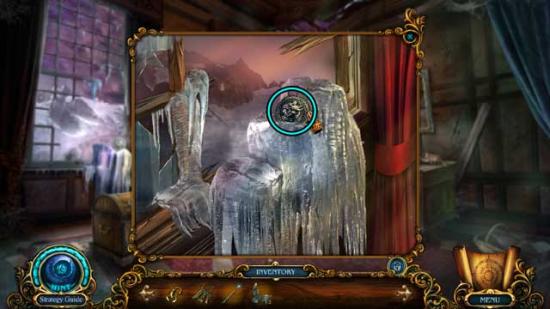
Attic
Hall
Attic
Hall
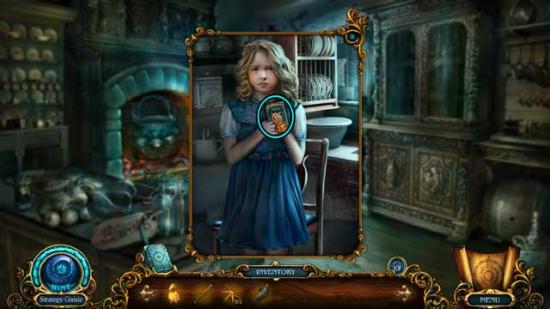
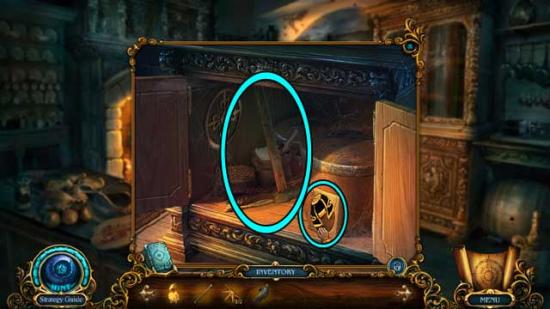
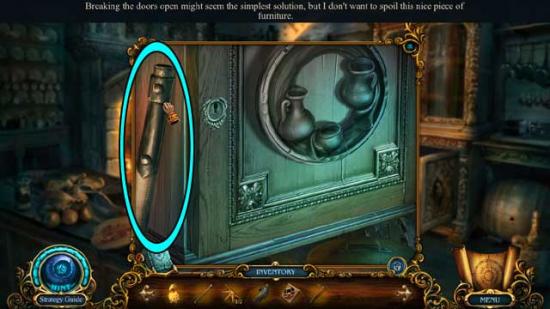
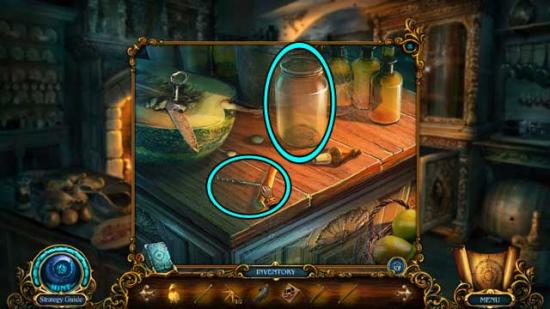
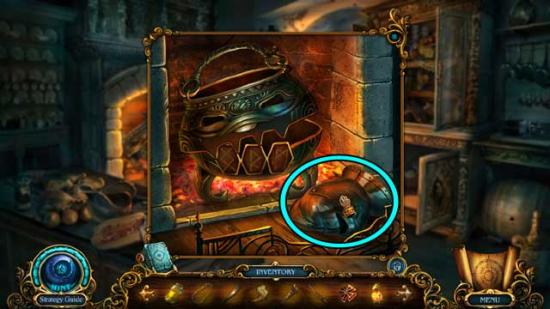
Kitchen
Monster House

Narrow Street
Church
Kitchen
Attic
Narrow Street
Attic
Monster House
City Square
Clock Tower
Hall
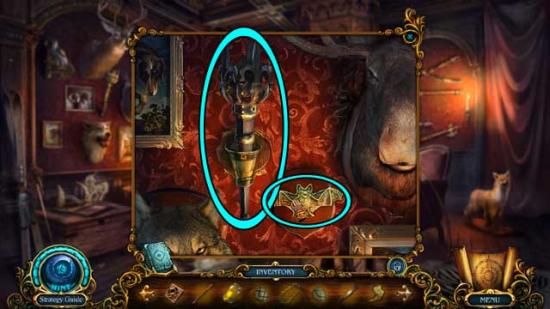
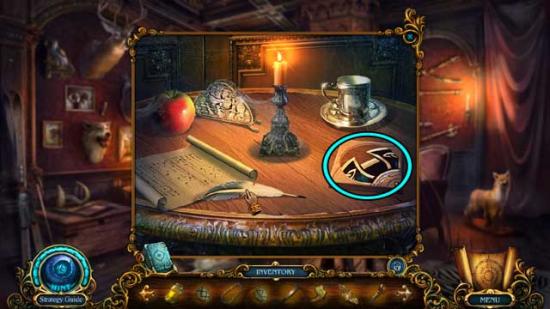
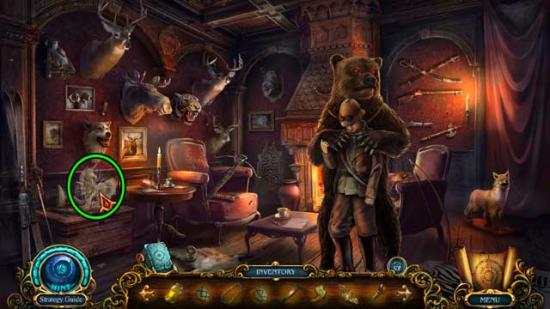
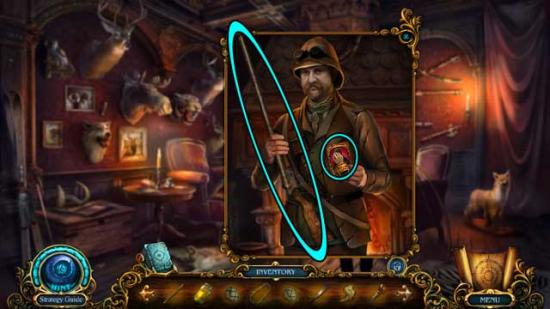
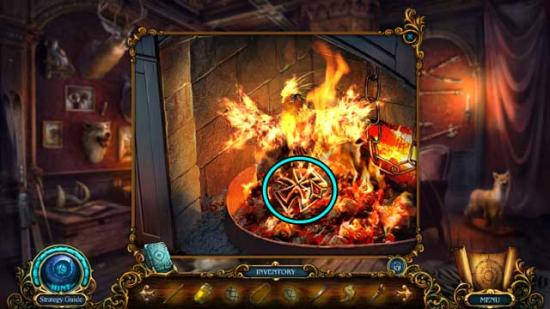
Hunter’s Room
Attic
Clock Tower
Hunter’s Room
Kitchen
Kitchen
Clock Tower
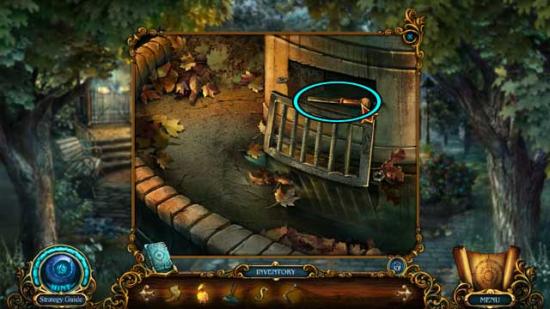
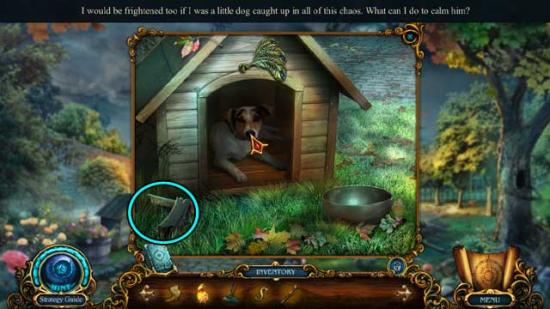
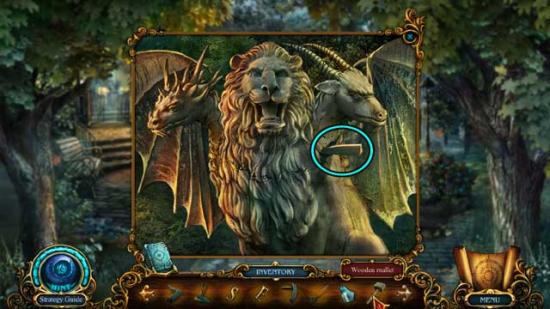
Park
Dead End
Park
Kitchen
Park
Hall
Dead End
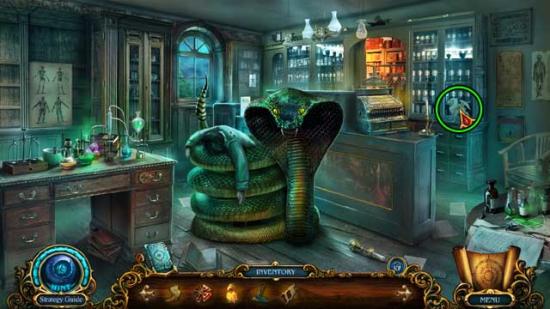
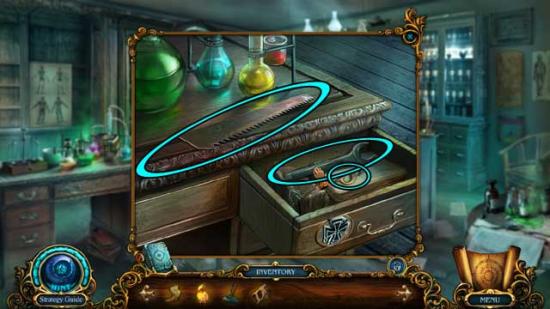
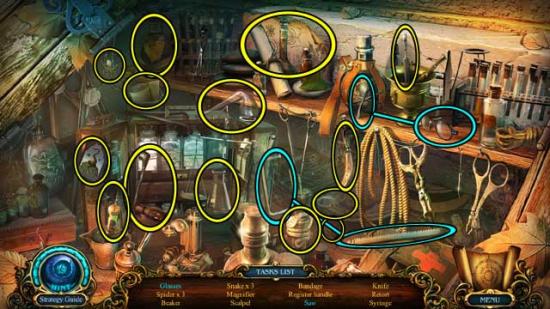
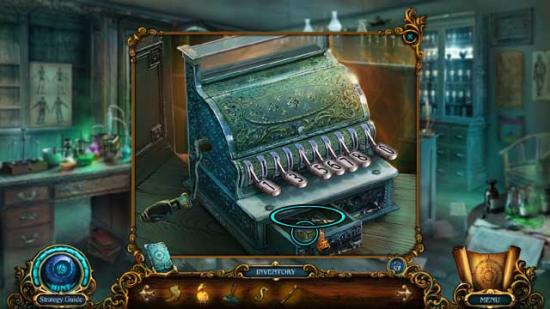
Drug Store
Dead End
Park
Drug Store
Dead End
Clock Tower
Kitchen
Clock Tower
Drug Store
Dead End
Park
Mansion
Drug Store
Dead End
Mansion
Mansion Hall

Dead End
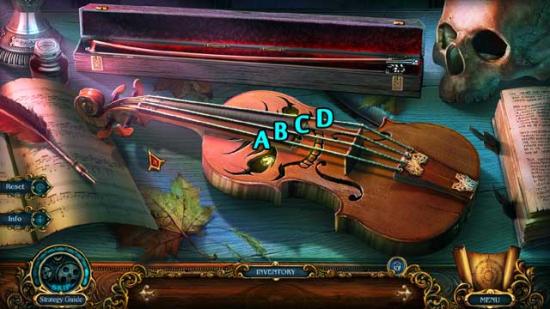
C
Mansion
Dead End
Mansion
Dead End
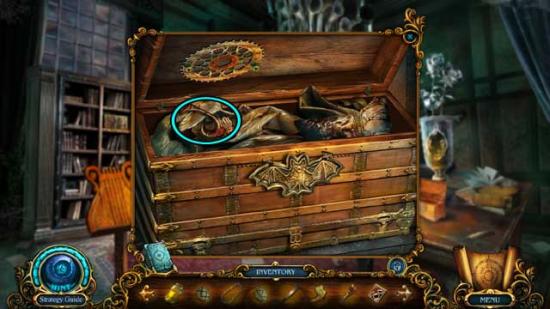
Archive
Attic
Kitchen
Drug Store
Dead End
Mansion
Mansion Hall
Drug Store
Dead End
Hunter’s Room
Mansion Hall
Archive

Mansion Hall
Archive
Park
Archive
Mansion
Lake
Mansion Hall

Lake
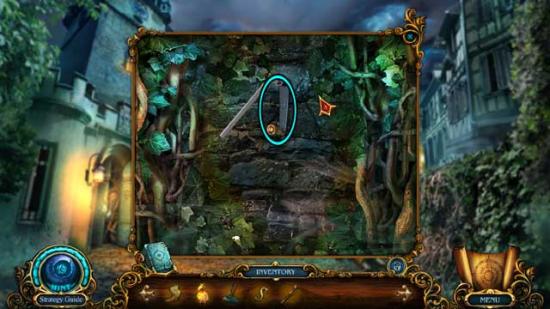
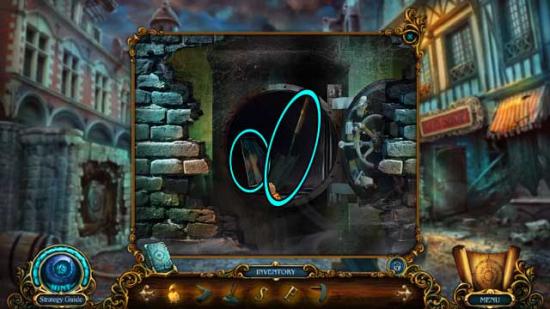
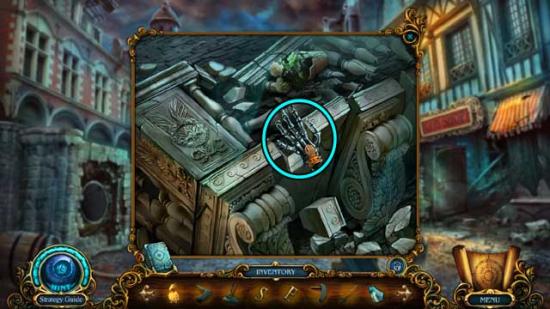
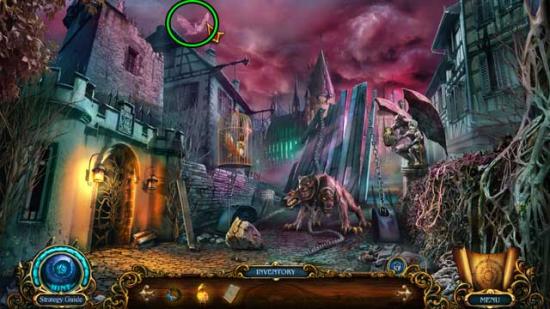
Ruined Street

Park
Ruined Street
Lake
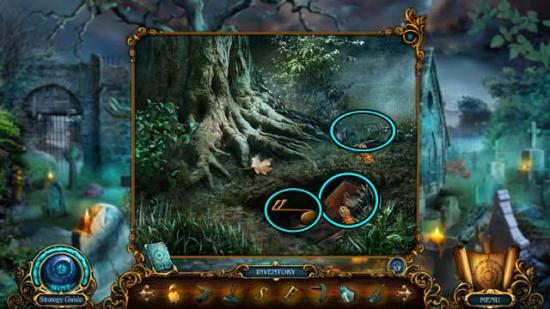
Cemetery
Ruined Street
Lake
Ruined Street
Cemetery

Ruined Street
Courthouse
Dead End
Cemetery


Courthouse
Court

Courthouse
Court
Cemetery
Courthouse
Court
Courthouse
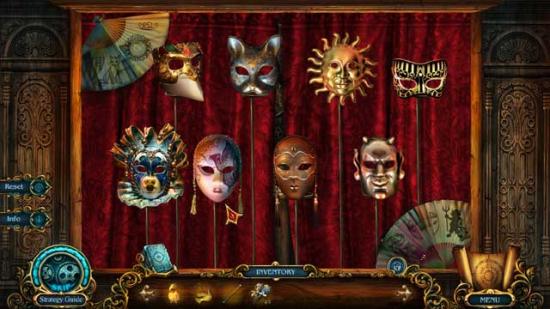
1. Who is like a sun burst and is the Mayor’s punishment?
1. Whose child became your good companion while his parent was a curse?
2. Who is afraid of mirror reflections and became the Gendarme’s torment?
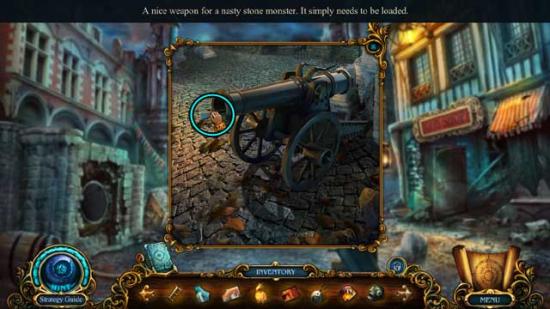
2. Who punishes for nonfeasance and turns into stone?
3. Who inflicts a penalty for bribes and loves the shine of jewelry?
3. Who meted out punishment for a greedy banker?
4. Who came to life and became the fatal mistake for an innocent child?
4. Who was the prison for the one punished by mistake?
5. Who executed the mean one not having a head himself?
5. Who became the atonement of meanness, lies, and blackmail?
6. Who is huge and strong and gave a bashing to a coward?
6. Who became the curse of the boaster and traitor?
7. Who brought vengeance on the one who created poison instead of remedy?
7. Who dealt with an avid breaker of the Hippocratic Oath?
8. Who deprived the cold-blooded murderer of blood?
8. Who punished for jealousy the unprincipled poisoner?
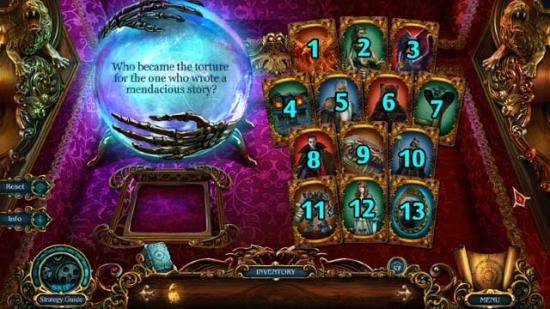
9. Who became the torture for the one who wrote a mendacious story?
9. Who punished the archivist for lying and deceiving?
10. Who inflicted the curse on the one who disrespected the dead?
10. Who brought retribution to the mean grave digger?
11. Who punished the murderer who threw the fatal stone?
11. Who brought destruction but turned into a pile of stones himself?
12. Who taught a lesson to the one who betrayed justice?
12. Who was the curse for the unjust judge taking bribes?
13. Who can reflect the deepest hesitations of the soul?
13. Who showed you your doubts and became your curse?
Congratulations! You’ve completed the main story of Chimeras: Tune of Revenge!
When selecting this option from the Bonus Content menu, you will once again be able to select your game difficulty before starting. See “General Tips” at the top of this guide for more information.
Courthouse
City Square
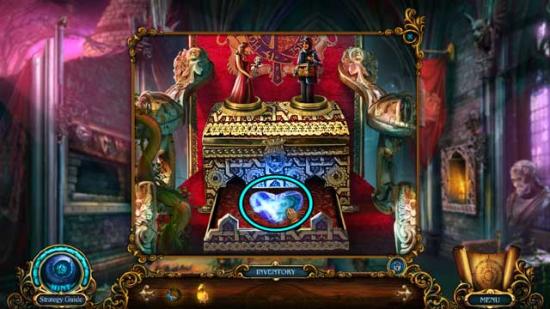
Throne Room
Castle Tower
Throne Room
Castle Tower
Throne Room
City Square
Clock Tower
City Square
Monster House
Clock Tower
City Square
Monster House
Hallway
Kitchen
Hallway
Hunter’s Room
Monster House
City Square

Clock Tower
Hunter’s Room
Monster House
Clock Tower
Hunter’s Room
Monster House
Kitchen
Clock Tower
Hallway
Kitchen

City Square

Kitchen
City Square

Kitchen
Hallway
Hunter’s Room
City Square

Hallway
Attic
Hallway
Clock Tower
Throne Room
Attic
Hallway
Kitchen
Hunter’s Room
Monster House
Clock Tower
Throne Room
Castle Tower
Hunter’s Room
Hallway
Attic
Hunter’s Room
Attic
City Square
Congratulations! You’ve completed the Bonus Chapter of Chimeras: Tune of Revenge!
