- Wondering how to get Monopoly GO! free rolls? Well, you’ve come to the right place. In this guide, we provide you with a bunch of tips and tricks to get some free rolls for the hit new mobile game. We’ll …
Best Roblox Horror Games to Play Right Now – Updated Weekly
By Adele Wilson
Our Best Roblox Horror Games guide features the scariest and most creative experiences to play right now on the platform!The BEST Roblox Games of The Week – Games You Need To Play!
By Sho Roberts
Our feature shares our pick for the Best Roblox Games of the week! With our feature, we guarantee you'll find something new to play!All Grades in Type Soul – Each Race Explained
By Adele Wilson
Our All Grades in Type Soul guide lists every grade in the game for all races, including how to increase your grade quickly!
Broken Age: Act 1 Walkthrough
Broken Age: Act 1 is a point-and-click adventure game developed by Double Fine. In this game, you take on the role of a young, sacrificed woman named Vella and a space station-bound boy named Shay as they face their individual fates in separate, yet somehow connected lives. Gamezebo’s walkthrough will provide you with detailed images, tips, information, and hints on how to play your best game.
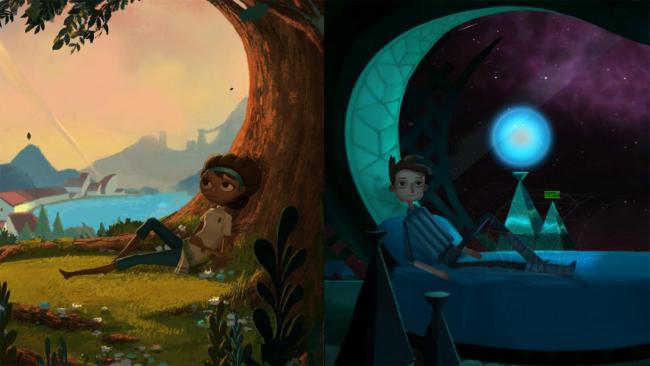
Game Introduction – Broken Age: Act 1
Broken Age: Act 1 is a point-and-click adventure game developed by Double Fine. In this game, you take on the role of a young, sacrificed woman named Vella and a space station-bound boy named Shay as they face their individual fates in separate, yet somehow connected lives. Gamezebo’s walkthrough will provide you with detailed images, tips, information, and hints on how to play your best game.
Complete Playthrough Video
Game Tips
Interacting with the World

- Broken Age utilizes a single-click system of interactivity. Only the left-click mouse function will be used.
- The standard cursor is a cross. This will appear when you are not near an interactive object or area. Clicking when the cursor is a cross will move your character to the location you clicked.
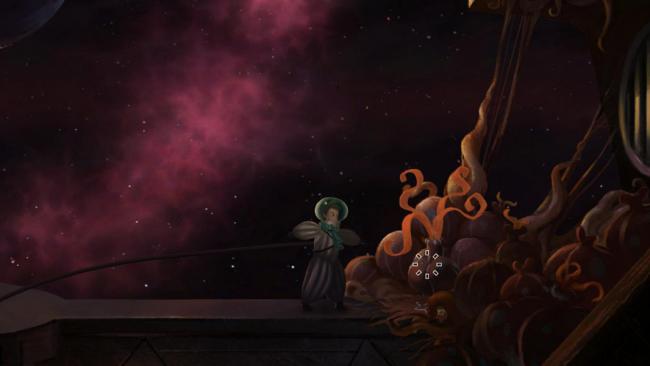
- When you hover over an interactive object, the cursor will change to a dashed circle. This indicates that your character can interact with the object you are near. Left-clicking will automatically perform the related interaction, which may be talking, picking up, examining, or using.

- The final cursor is a black arrow. This appears when you hover over an entrance or exit. Clicking when the cursor is a black arrow will move you to a new location—usually an entirely new screen.
- Clicking once will send your character walking towards the exit (they will continue until they reach the new location). The cursor will also change to a double arrow after the first click. Clicking a second time, when it’s a double arrow, will send your character to the new location immediately without watching them walk there.
- Press the space bar to skip cutscenes or dialogues. You can end a conversation at any time by clicking outside of the dialogue box—a black X appears. Some dialogues will not exit when you click the black X. For these conversations, keep selecting new topics until an “I’ll leave you alone” type option appears at the bottom of the dialogue box, which will allow you to exit.
- Note: Pressing spacebar to skip dialogue will skip the entire conversation—not just the current line that’s being spoken—and return you to the dialogue menu.
Inventory and Using Items
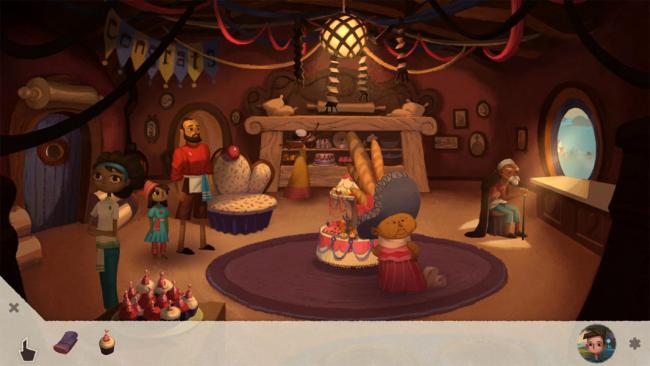
- Items that Vella or Shay pick up will automatically be added to your inventory. This is done very subtly and you might not notice that you received a new item at first. There is a short musical queue when you get a new item, and the inventory tab in the bottom-left corner of the screen will glow a soft yellow.
- To open your inventory, click the gray-bordered arrow in the bottom-left corner of the screen. The arrow will be hidden until you hover your mouse over its corner.
- You can examine an item by simply left-clicking on it.
- To use an item, left-click and hold, then drag it out of your inventory onto the person or object you want to use it on.
- To use an item on another item within your inventory, left-click and hold, then drag it onto the other item within your inventory.
- Note: You cannot access your inventory during a conversation. To give someone an item, drag it onto them outside of conversation.
- The inventory displays all of the items the current character has, as well as the icon of the character not being played, and a gear icon. If you click on the other character icon, you’ll switch to the other story. If you click on the gear icon, it will open the menu options at the top of the screen. (These can also be accessed by pressing Escape in-game.)
Dual Characters

- Broken Age: Act 1 tells two separate stories: that of Vella and that of Shay.
- You can play these stories in any order, and freely switch between them at any time by clicking the other character’s portrait in your inventory menu.
- There is never a need to switch between them to complete a puzzle or progress.
- Once you finish one character’s story and reach their “ending,” you’ll automatically switch to the other character. While you can still switch back, you won’t be able to do anything with the first character since their story is over for the time being.
- After completing both characters’ stories, you’ll see the full ending for Act 1.
- This walkthrough will go through each story in their entirety individually, starting with Vella’s story. It will also cover only what is needed to progress. Feel free to talk to characters and explore beyond what is described here.
Vella’s Story – Chapter 1
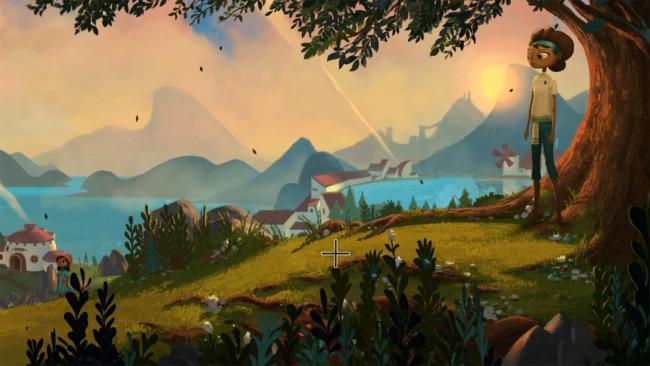
Overview: Vella must prepare for the sacrificial Maidens Feast, which she has been chosen to participate in. Although this is a great honor, Vella is unsure why the village goes along with it every year without fighting back, and decides to take a stand.
- Click on Vella’s side of the screen (left-hand side).
- Click on Vella to wake her up. A young girl (Vella’s sister) is calling to her from down the hill.
- Left-click when the mouse cursor is a cross to walk to a location. Walk Vella toward the young girl.

- Click on the girl (your cursor will change to a dashed circle). Vella will walk down the hill and speak to her.

- Follow the girl down the hill and into your house. When an arrow pointing left appears, it means you’re entering a new area.
- Head inside the house.
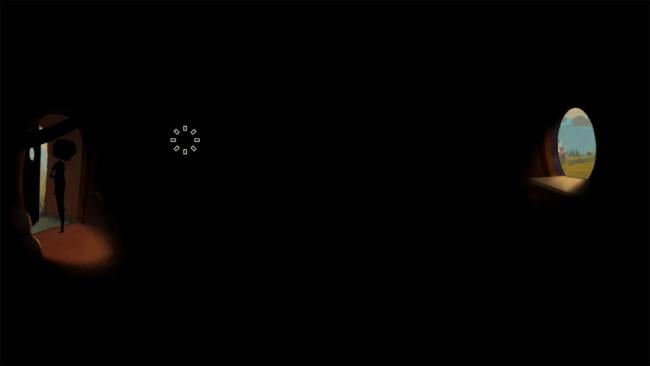
- Flip on the light switch by clicking on the dark wall near Vella.
- Your family is having cake to celebrate the Maidens Feast, but your mom cannot find the ceremonial knife.
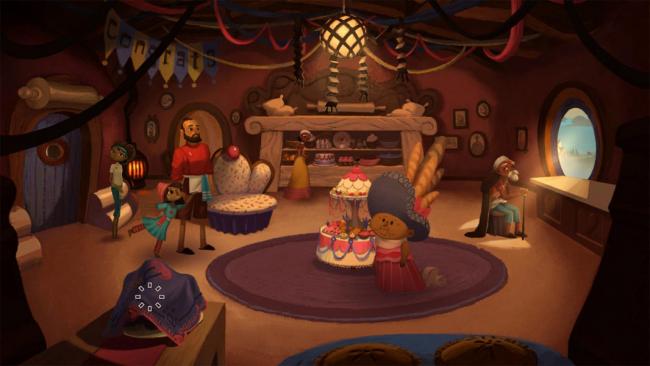
- Examine the purple towel near the bottom of the screen. Vella will get DISH TOWEL and CUPCAKE.
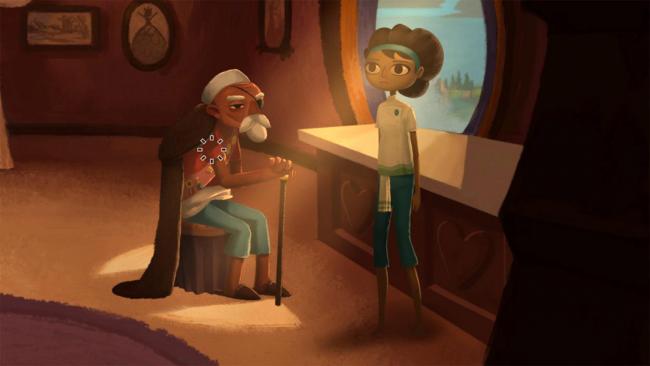
- Talk to Grandpa. Ask him if he knows where the knife is.
- Ask him if he’d like a cupcake.
- Exit the conversation. You’ll remain in a close-up with Grandpa.
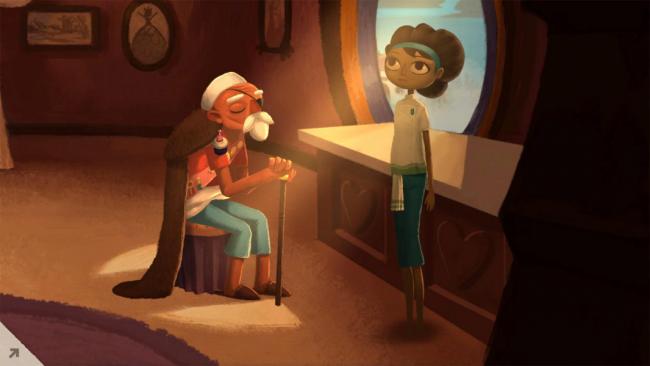
- Enter your inventory. From your inventory, drag the CUPCAKE onto Grandpa.
- He asks, “For me?”
- Respond, “Split it with you?” Grandpa pulls out the ceremonial knife, splits the cupcake, and tosses the knife onto the counter.
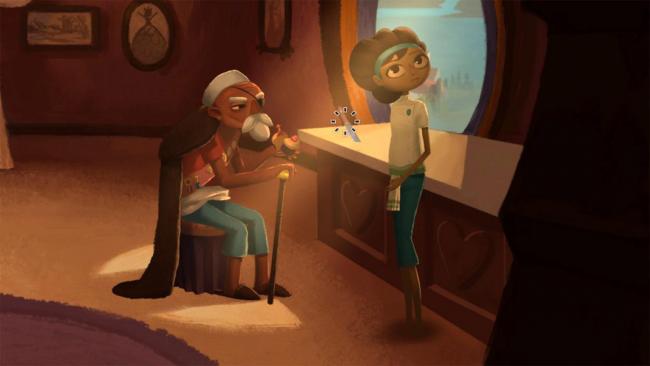
- Pick up the knife; Vella tells Grandpa he can have the whole cupcake.
- Walk away from Grandpa to exit the close-up.
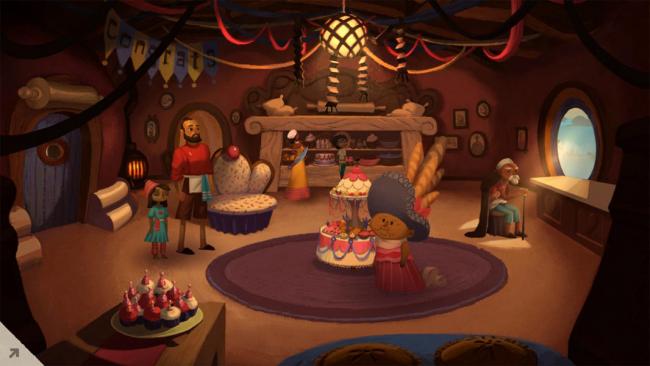
- From your inventory, drag the CEREMONIAL KNIFE to your mother.
- After a short cutscene, you’ll be standing on the shore with the other female offerings to Mog Chothra, waiting to be chosen.
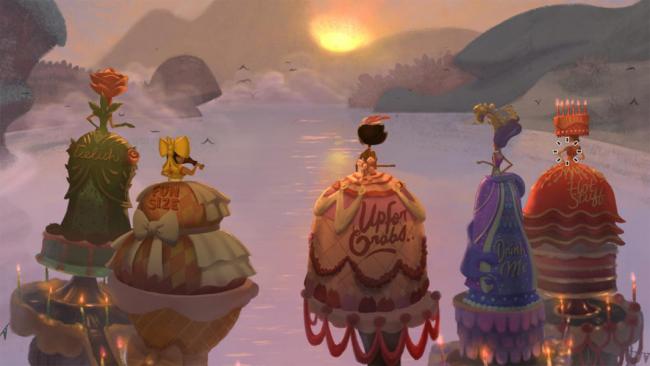
- Once you are in control, speak to each of the girls at least once. Eventually, after talking to them long enough, Mog Chothra appears.
- He eats the girl in red first.
- Talk to the girl in blue and ask for a drink of her water. She offers to trade for your corset, but then immediately trades back. You now have CORSET in your inventory.
- Mog Chothra eats the girl in green.
- Speak to the girl in blue again and select “Can I borrow that bottle one more time?”
- She tells you to keep it; you now have BOTTLE in your inventory.
- Mog Chothra eats the girl in blue.
- Speak to the girl in yellow.
- Select “Wanna trade something for a bite of that drumstick?” She asks “Whaddya got?”
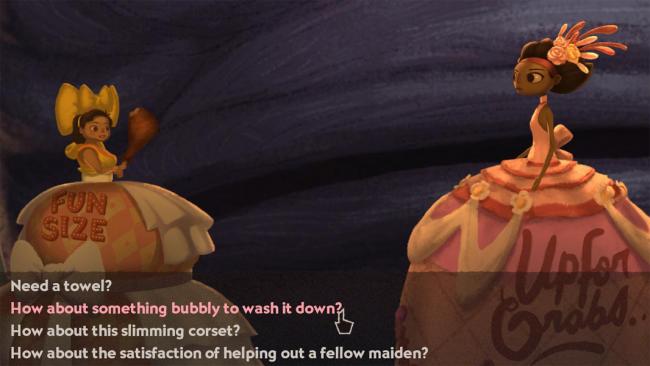
- Select “How about something bubbly to wash it down?”
- The girl in yellow opens the bottle and it sprays all over her.
- Speak to the girl in yellow again. Select “Wanna trade something for a bite of that drumstick?”
- Select “Need a towel?” Vella throws the girl the towel, who tosses her drumstick into Vella’s dress. The girl in yellow is eaten.
- The blue bird flies down to try and eat the drumstick which is stuck in your dress-icing.
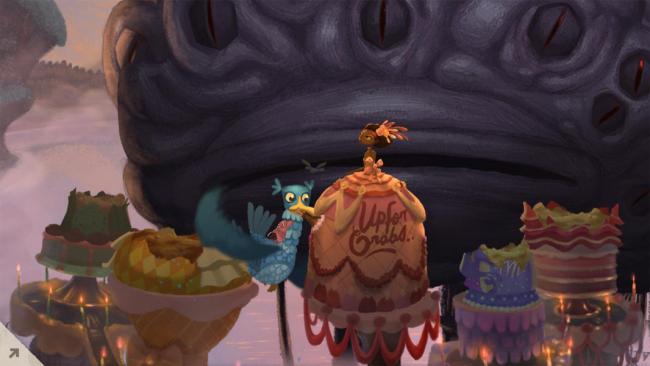
- From your inventory, drag CORSET onto the blue bird. Vella lassoes him and he tries to fly away, but she’s stuck in her cake-dress.
- From your inventory, drag KNIFE onto your dress. Vella will cut herself free and fly away from Mog Chothra on the bird’s back.
- Vella falls off the blue bird and lands in some strange bird village in the clouds.
Vella’s Story – Chapter 2
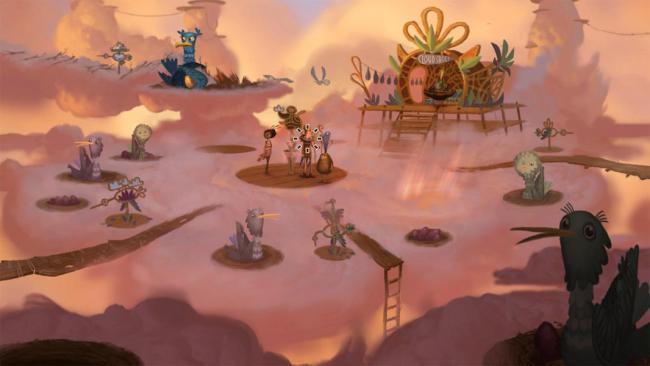
Overview: Vella arrives in Meriloft, a floating village in the clouds. She needs to get back to the ground to continue her fight against Mog Chothra. Since most of this city is populated by birds or weirdoes, though, no one is very helpful in suggesting a way out of the city.
- Note: If you stand on the clouds too long in Meriloft, you’ll fall through. Vella will be rescued by a bird while falling and placed back where she started—to prevent this, stand on the wooden areas instead of the clouds and keep walking when crossing the clouds.
- Speak to the man to the right of Vella.
- Select “Who are you guys?”
- Select “Who’s Jessie?”
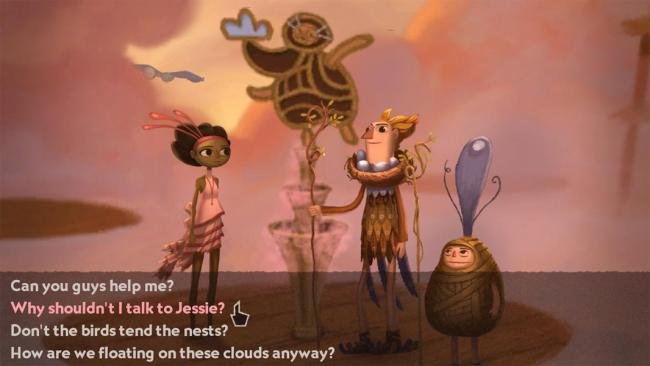
- Select “Why shouldn’t I talk to Jessie?”
- Select “Poor Jessie! Where did her egg go?”
- Select “Any idea where I can find Jessie’s egg?”
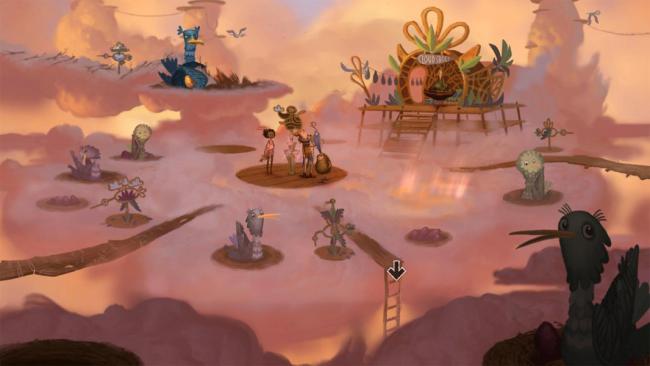
- Head down the ladder south of the Preeners.
- Speak to the girl in green.
- Select “I really like your outfit!”
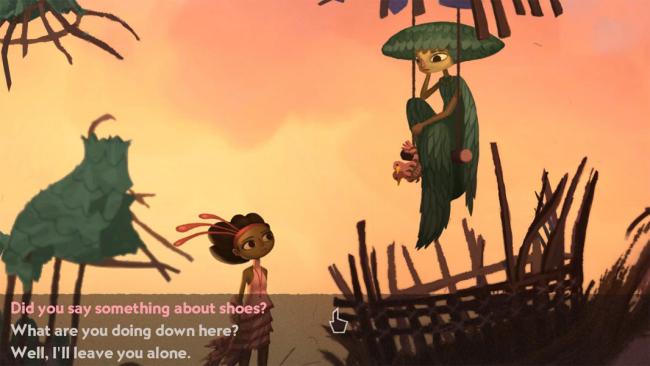
- Select “Did you say something about shoes?”
- She gives you BIRD SHOES. Exit the conversation and head back up the ladder.
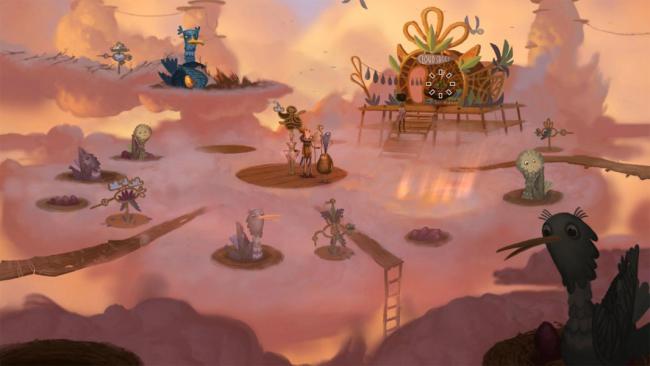
- Walk over to the Cloud Shoes shop and speak to the woman. (She is Car’l.)
- She drops a knife through the clouds when you approach.
- Select “Sorry!”
- Select “You can’t make hats without a knife?”
- Select “You make shoes out of clouds?”
- Select “Area?”
- Select “Hey, can you make ME a pair of cloudshoes?” The shoemaker confirms she cannot without her knife. Exit the conversation.
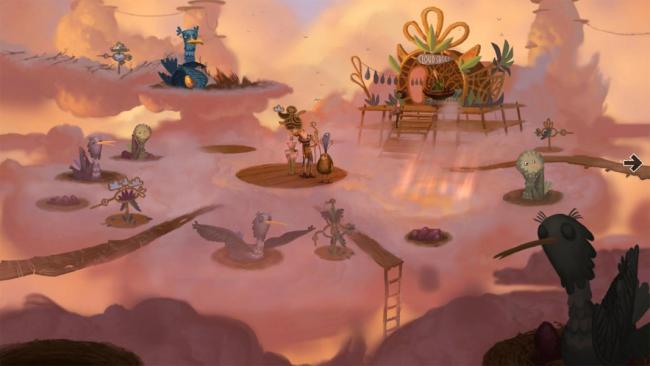
- Move to the east to enter a new screen.
- Speak to the girl in brown. (She is M’ggie.)
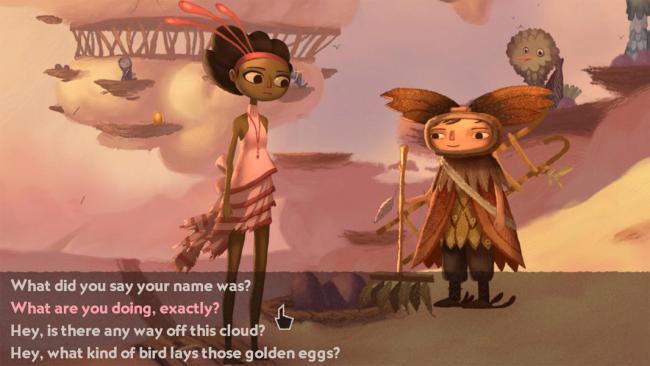
- Select “What are you doing, exactly?”
- Select “How do you get to the eggs in the high nests?”
- Select “Hey, can I borrow your ladder?” She’ll give you SHORT LADDER. Exit the conversation.
- Click on the shiny knife on the right side of the screen. Vella walks towards it—it’s her knife.
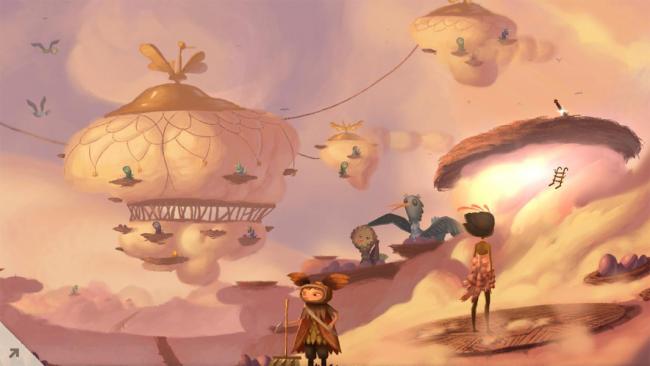
- From your inventory, drag SHORT LADDER onto the cloud just below the knife.
- Vella will climb up the ladder and stand next to the knife. Click on it to retrieve CEREMONIAL KNIFE.
- Click on the nest or ladder to climb back down. Vella will put the SHORT LADDER back in your inventory automatically.
- Head west to the first screen and move back towards the cloudshoes maker.
- From your inventory, drag CEREMONIAL KNIFE onto the shoemaker.
- The shoemaker gives you a pair of LARGE CLOUDSHOES. They’re too big for Vella’s feet.
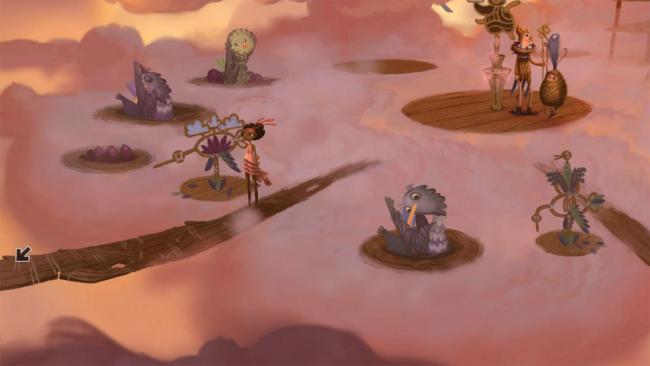
- Exit the conversation and head west to another screen.
- Walk towards the man standing near the birds’ nests. (He is F’ther.)
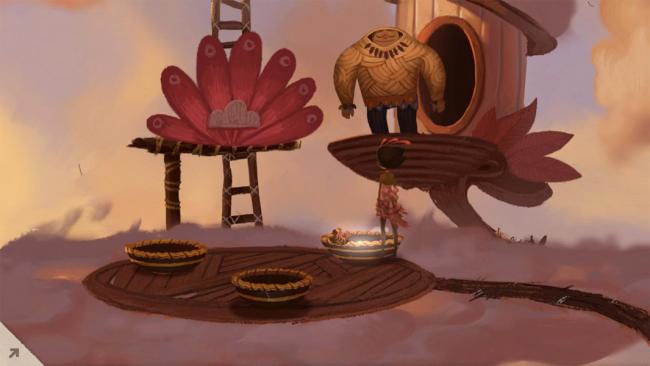
- From your inventory, drag BIRD SHOES into one of the nests. The man opens the way to the ladder leading up toward Harm’ny.
- Go up the ladder. After a long climb, you’ll emerge on Harm’ny’s cloud—he’s asleep.
- Select “Hi!” to wake him up.
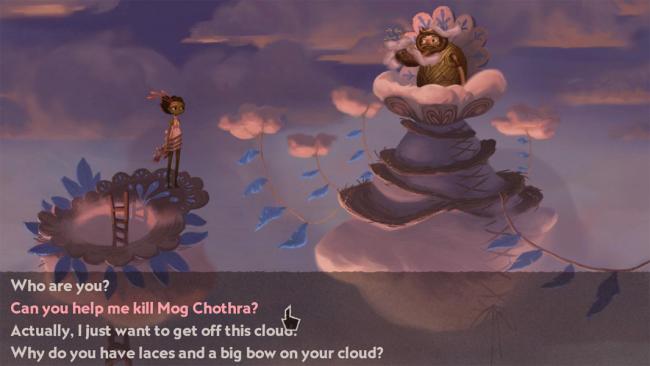
- Select “Can you help me kill Mog Chothra?” Harm’ny is shocked and lays a golden egg.
- Select “Hey, are you done with that golden egg?”
- You cannot exit the conversation with Harm’ny until the option to exit appears, so ask him two other questions until “Thanks for the help! See you later!” appears.
- Vella climbs back down; F’ther has been knocked out by the golden egg.
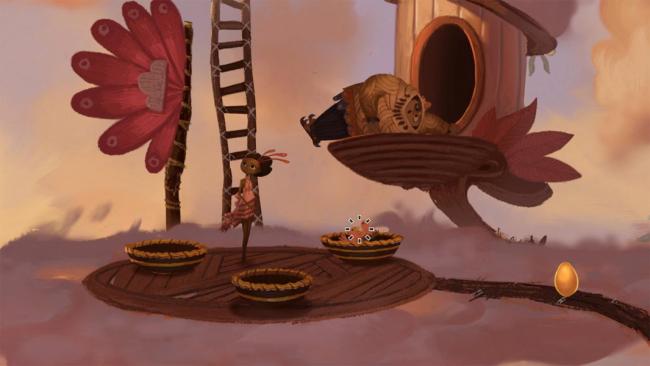
- Pick up the BIRD SHOES from the nest and the GOLDEN EGG from the wooden walkway.
- From your inventory, drag BIRD SHOES onto Vella. She’ll slip them on.
- Head east, back to the central area.
- Head east again, to M’ggie’s screen.
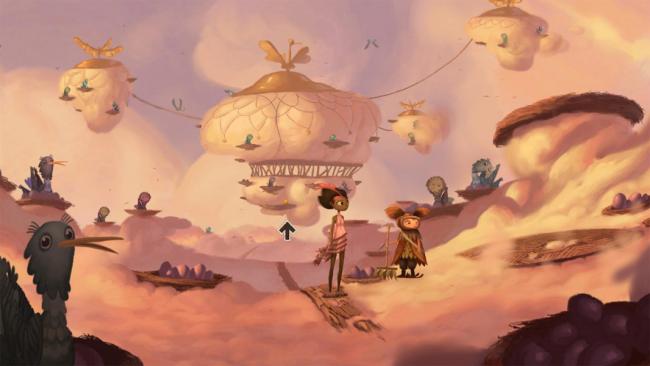
- Head north, towards the floating balloon. You’ll emerge in a cloudy area with even more birds.
- Use your SHORT LADDER on the nest containing the golden egg. A bird appears and knocks the ladder off; Vella realizes that the hooks keep the ladder from sinking.
- In your inventory, use LARGE CLOUDSHOES on SHORT LADDER. Vella puts the shoes on the ladder.
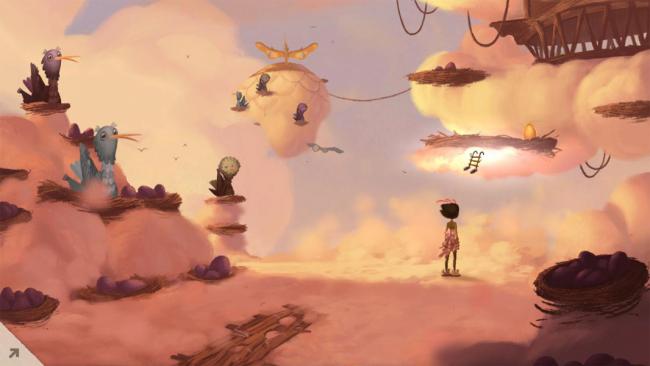
- Use the SHORT LADDER WITH CLOUDSHOES on the nest again.
- Pick up the golden egg in the nest. You now have two GOLDEN EGGs.
- Head south and then west, back to the central screen.
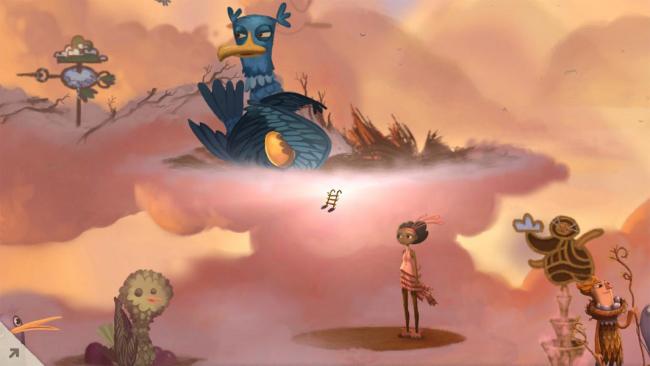
- Use your SHORT LADDER WITH CLOUDSHOES on Jessie’s nest. Climb up and walk west to the screen with a tree.
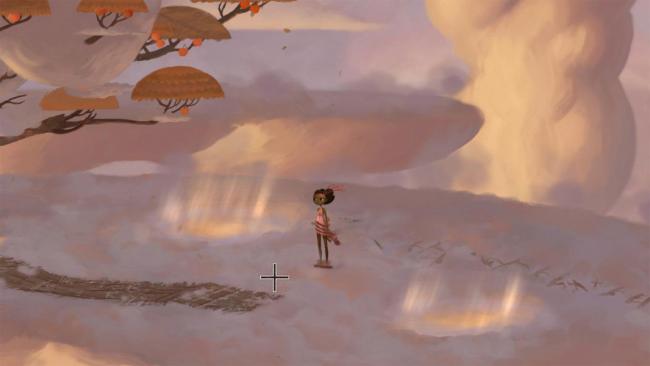
- Walk west towards the tree, being careful to avoid the whirlpools in the clouds (you’ll fall right through these).
- Walk to the far west side of the tree, where there’s a low-hanging branch.
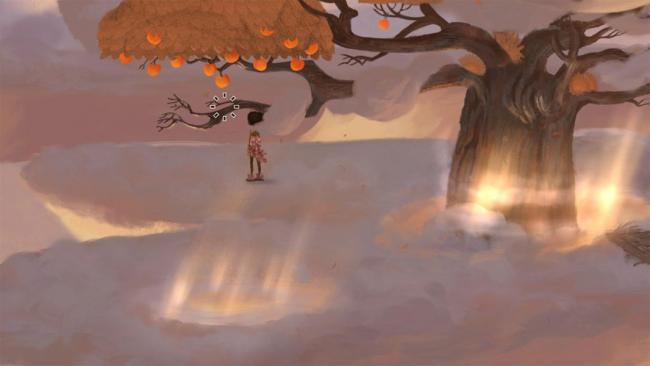
- Click on this branch—Vella will shake it and a piece of fruit falls down.
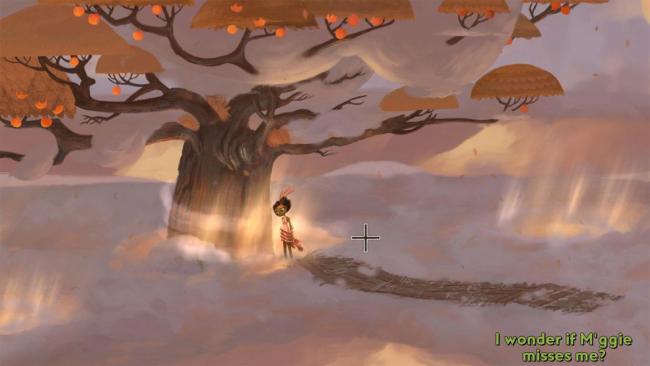
- Now walk back east and right up to the tree—there’s a whirlpool at its base that you do want to fall into. Once you get close enough, Vella will fall through and land on the lower section of the tree.
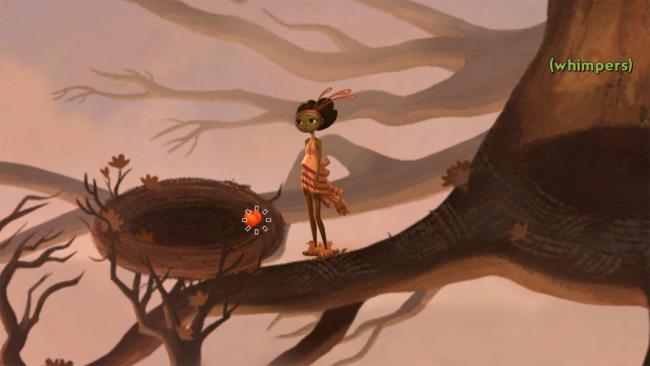
- Walk west and pick up the fruit you just dropped down.
- A man is calling out from the roots of the tree. Walk east towards his voice. (This is Gus.)
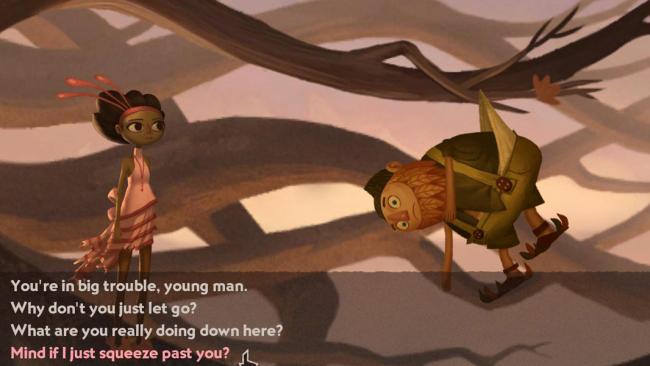
- You can talk to him to learn he was cleaning Jessie’s egg, and then fell down while trying to get some fruit from the tree.
- If you try to walk past him, he’ll grab Vella and she’ll fall off the branch, then is caught by the Whoopsy-Birds and returned up top. Feel free to do this—we want to go back up top briefly.
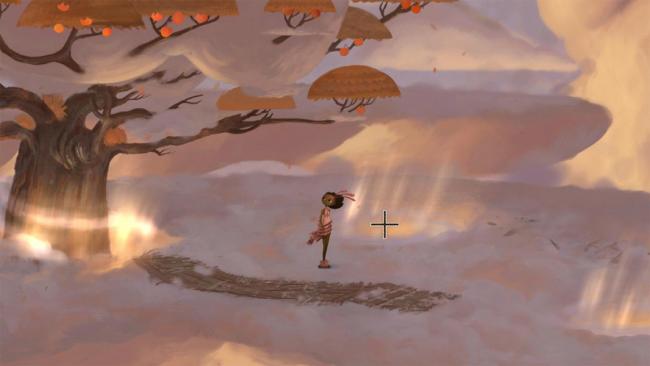
- Walk to the second whirlpool nearest the tree (marked by the cursor in the image above) and fall in—you’ll drop onto Gus and knock him off the branch, and then be dropped back off up top.
- Return to the lower roots of the tree by falling in the whirlpool nearest the trunk.
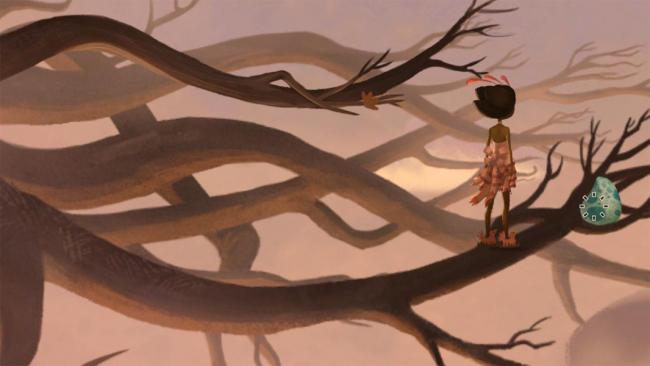
- Walk back to where Gus was hanging and collect Jessie’s egg.
- Walk back east (avoiding the whirlpools) and return to Jessie.
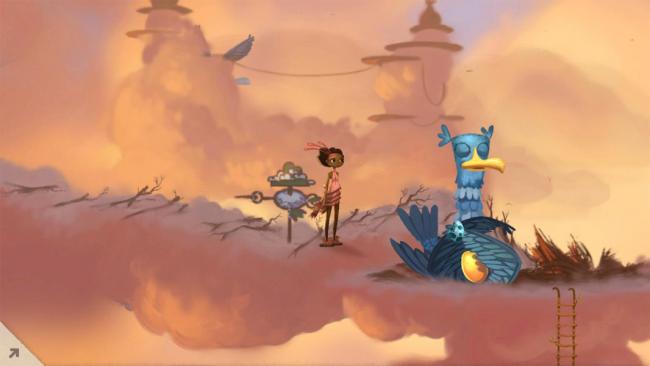
- From your inventory, drag JESSIE’S EGG onto Jessie.
- Jessie is extremely grateful and she relinquishes the golden egg. Take GOLDEN EGG. You now have three.
- Walk back down the ladder (Vella will pick it up).
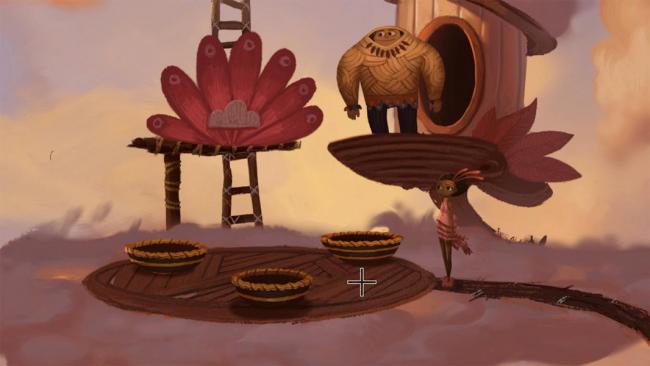
- Head west, back to the screen with F’ther. He’s awake now and guarding the ladder to Harm’ny again.
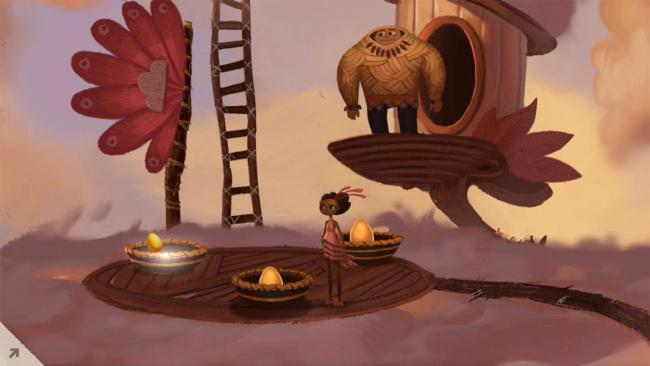
- From your inventory, drag each GOLDEN EGG into a nest.
- Once all three eggs are placed, climb the ladder. Vella shakes the ladder and it crashes through the clouds. She lands in someone’s house.
Vella’s Story – Chapter 3
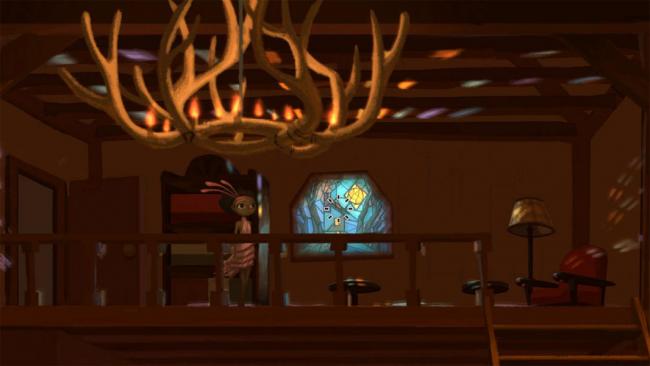
Overview: Vella’s made it back down to earth, and needs to get to Shellmound before their Maidens Feast begins. Conveniently, the woodsman’s home she just destroyed is located quite close to Shellmound, where a helpful surprise awaits.
- Note: The door / exit to the left of where Vella begins leads back up to Meriloft. If you need or want to return to the village in the clouds at any time, just go through this door.
- In the woodsman’s house, examine the stained glass window to receive STAINED GLASS SUN.
- Walk down the stairs.
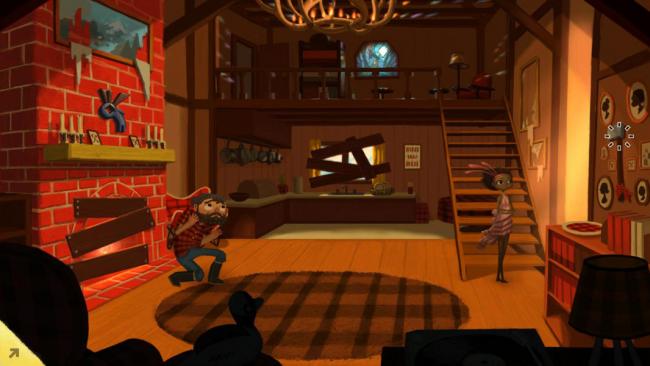
- Examine the axe on the wall; Vella receives AXE.
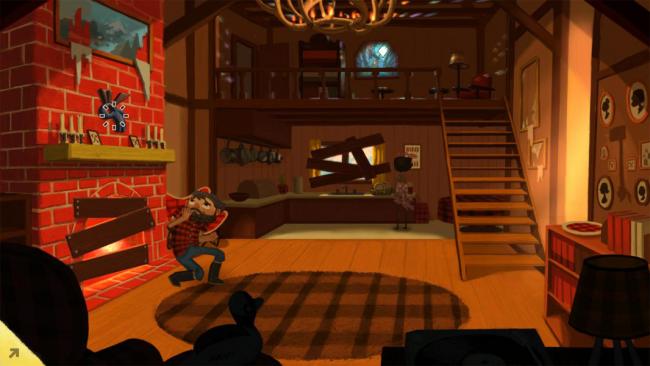
- Examine the piece of art over the mantelpiece.
- Talk to the extremely nervous woodsman. (This is Curtis.)
- Select “What’s the matter with you?”
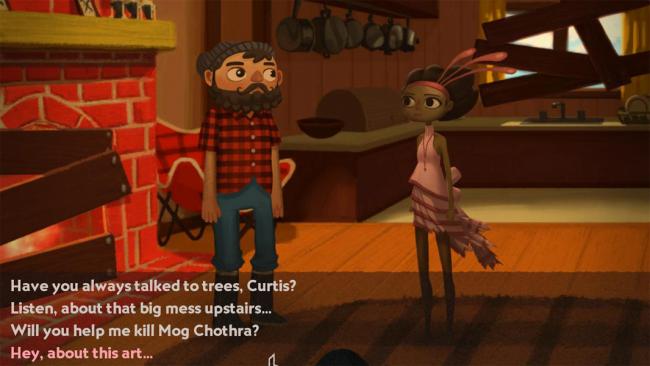
- Select “Hey, about this art…”
- You need to select any two dialogue options to make the correct one appear, so for instance…
- Select “Aren’t you bothered by its elitist themes?”
- Select “How do you know it’s hanging right side up?”
- You should now have the option “I like how it matches your décor.” Select this. Curtis says he only had it hanging up ironically and you can have it.
- Select “Have you always talked to trees, Curtis?”
- Select “What are they screaming at you?”
- Select “So you’re a woodworker? Can you make me something?”
- Select “Something practical, but unique.”
- Select “Okay, make me a stool.” Curtis would, but he has no wood. Exit the conversation for now.
- Take the piece of art from the mantelpiece. You now have KOKOPELLI.
- Exit the door to the east. You’ll emerge in front of the house.
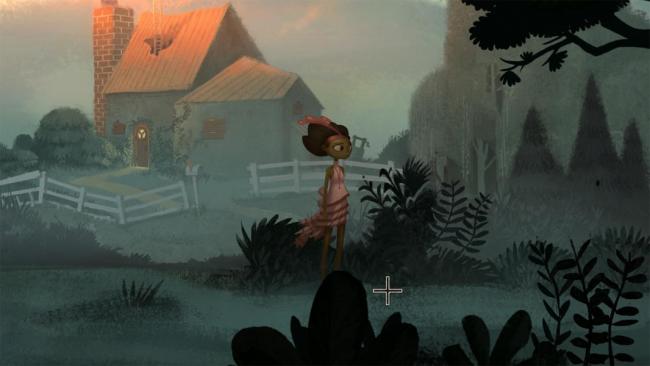
- Walk down the path, past the mailbox, until you emerge in the trees. Walk east.
- On the next screen, you’ll come across a tree that’s trying to talk, but doesn’t have a mouth.
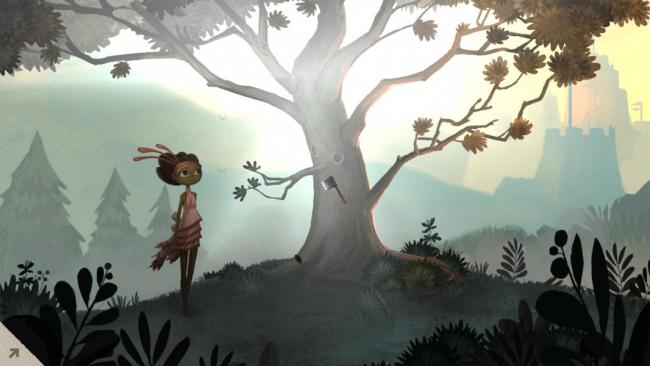
- Use your AXE on the tree to give it a mouth. Vella tosses the AXE away after this.
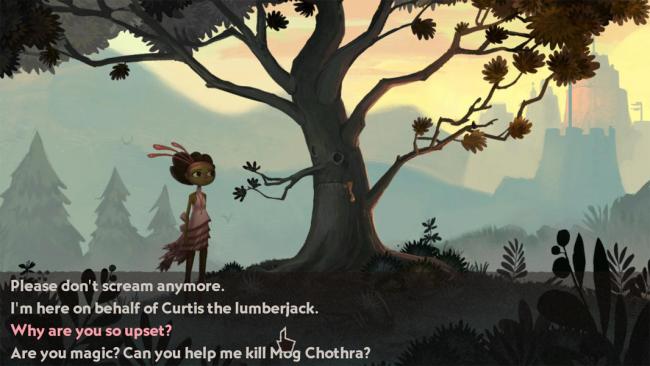
- Chat with the tree: select “Why are you so upset?”
- Select “You got a little something in the corner of your mouth.”
- Select “Hey, can I have some of your sap?”
- The tree refuses, although if Vella could get him to barf, she might get some sap…
- For a hint on what might make the tree vomit, select “I’m here on behalf of Curtis the lumberjack!”
- Then select “Say it! What did Curtis do to the old spruce?” He turned her into a stool.
- Exit the conversation for now and keep heading east.
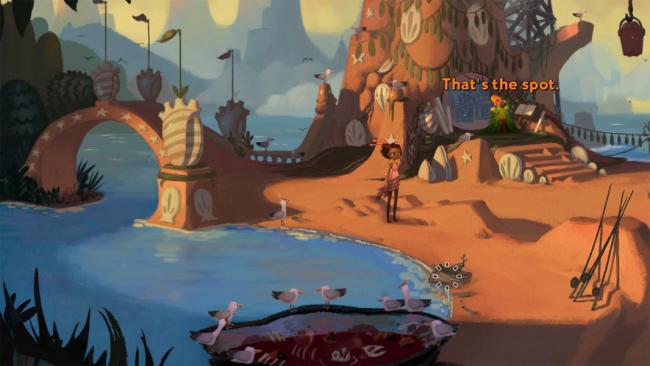
- You’ll emerge at the city of Shellmound. Walk east towards the city.
- There’s a piece of driftwood floating near the shore; pick this up to get DRIFTWOOD.
- Walk northeast and speak to the man in green. (This is Dune.)
- Select “Because you look like a mayor!”
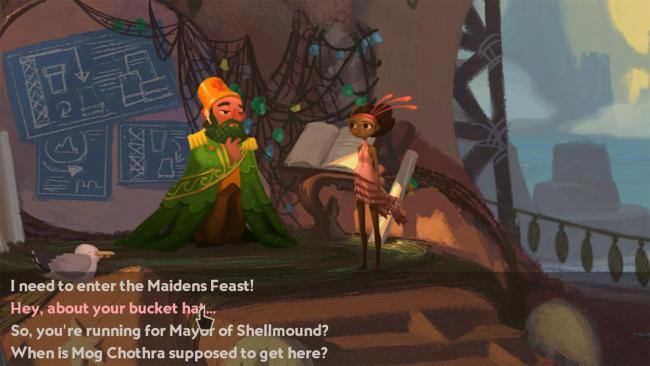
- Select “Hey, about your bucket hat…”
- Select “It looks great on you! Very fancy.” You will get BUCKET HAT.
- Select “I need to enter the Maidens Feast!”
- Select “Are you saying I smell bad?” Vella needs to smell more fishy for the Shellmound feast.
- Let’s return to Curtis. Head back west two screens to his house.
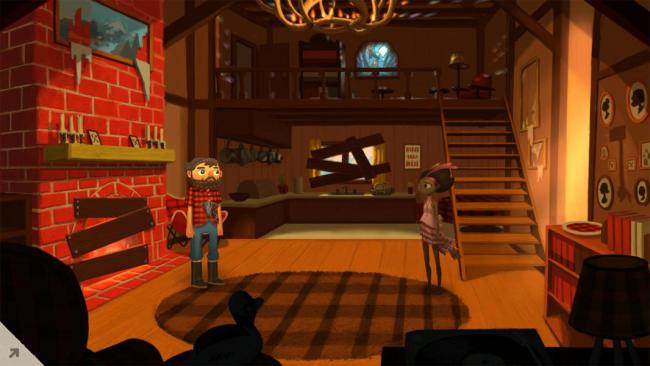
- From your inventory, drag DRIFTWOOD onto Curtis. He’ll make Vella a stool.
- Return to the talking tree in the woods.
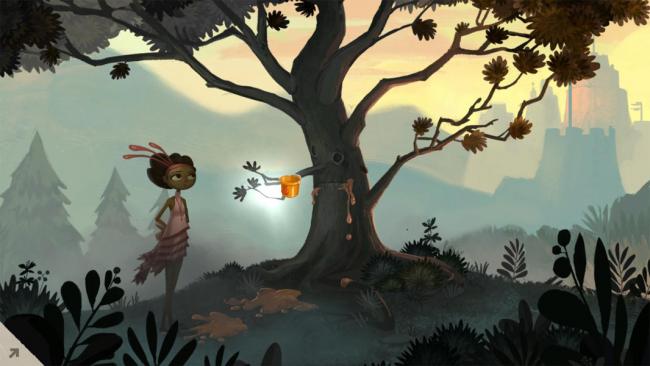
- From your inventory, drag BUCKET HAT onto the small branch that acts as the tree’s nose.
- From your inventory, drag STOOL onto the tree. Vella describes how the stool was made and the tree vomits sap into the bucket, giving you BUCKET HAT WITH SAP.
- Return to Shellmound and Dune. Drag BUCKET HAT WITH SAP onto Dune. The sap allows the sand to stick together and now the altar can be completed.
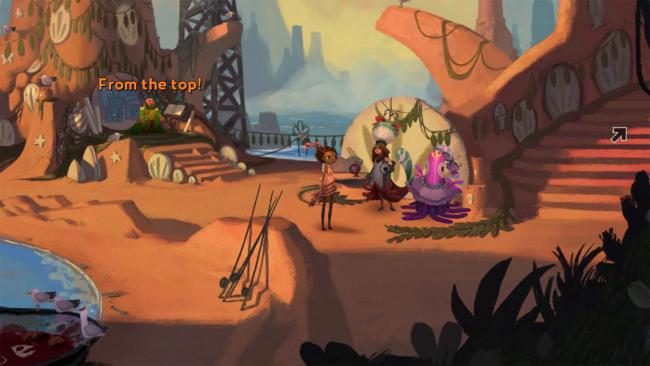
- Speak to the two maidens standing near Dune.
- Select “Hey, can I have some of that perfume?” The maiden says it’s called “Beast Hooker.”
- Select “Hey, can I have some of that Beast Hooker?”
- Select “I want to be in the Maidens Feast!”
- Head up the stairs to the east.
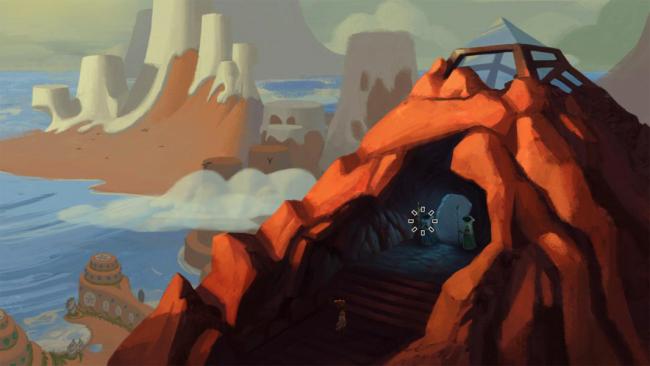
- Speak to the guards at the tomb.
- Select “Can I go inside?”
- Select “Because you guys are guarding it. So it must be cool.”
- Select “Um, can you remind me how the Riddle of Yorn goes one more time?”
- Select “Hey, can I get you guys something?”
- Select “Some more holy tear gas?” The guard will give you the FISH GUN.
- Exit the conversation.
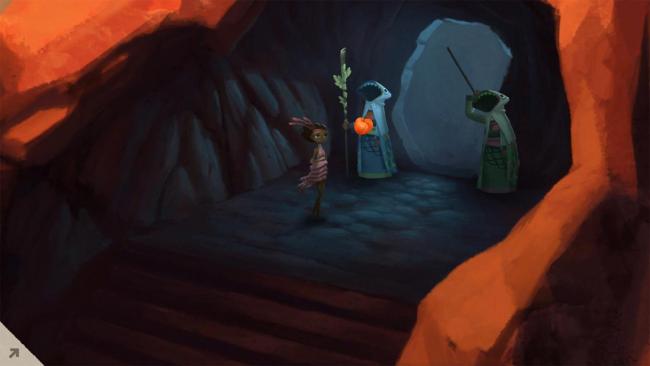
- From your inventory, drag the FRUIT onto one of the guards. This answers the riddle and you can go inside.
- Note: It’s possible to have given your FRUIT away or eaten it prior to now. If you lost your FRUIT, you can return to Meriloft and get another one. Return to the woodsman’s house and head upstairs. The far left door upstairs leads back up the ladder to Meriloft. Walk back east, then northwest (past Jessie) to the tree, shake the fruit off and collect it as you did before, and then head back to Shellmound
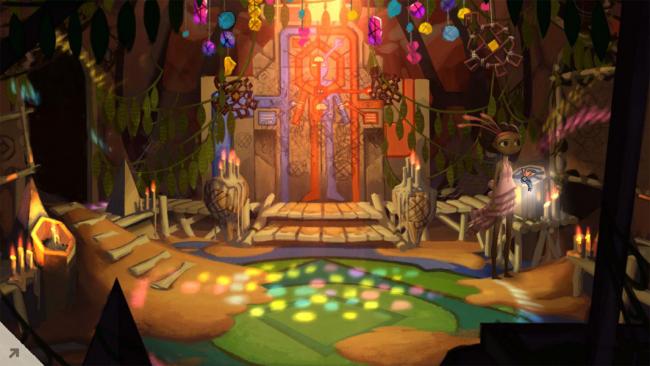
- Enter the pyramid. Use the KOKOPELLI on the recessed socket on the right side of the screen.
- A man appears. (This is Alex.)
- Select “Does the ship you mention have any weapons?”
- Select “Can I help?”
- Exit the conversation—speak to him again and select “Any luck so far?” He says he’s looking for missing parts and if you think of anything that could be used as a weapon, to let him know. Exit the conversation again.
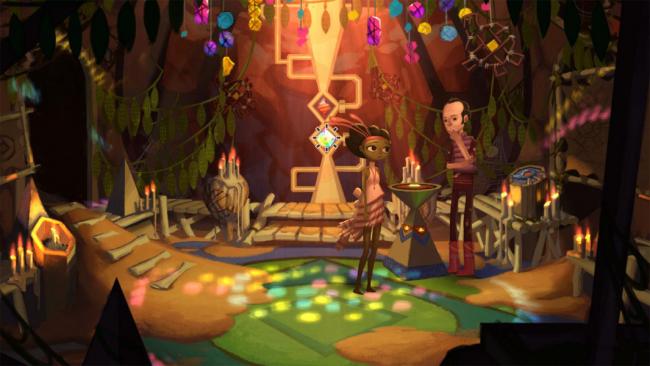
- Examine the rainbow, diamond-shaped object behind Vella. She breaks it.
- Examine the red diamond-shaped item above it. Vella takes the LASER COIL.
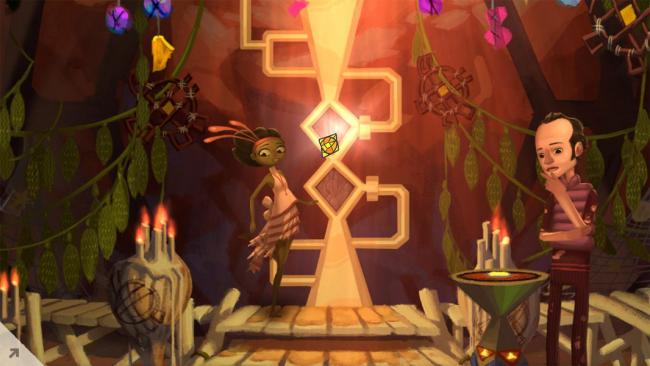
- Place the STAINED GLASS SUN in the spot where the LASER COIL was.
- Place the LASER COIL in the spot below the STAINED GLASS SUN.
- Turns out this is a dangerous hack that makes the ship’s search beam into a death ray. Vella leaves the ship with a DEATH RAY REMOTE for the weapon that she’ll use on Mog Chothra.
- You’ll be back in the town center, near the maidens.
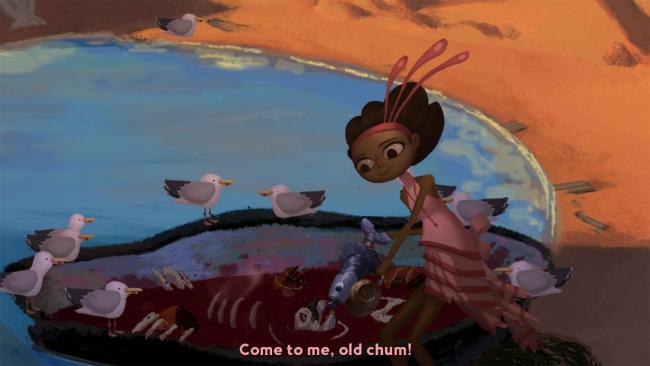
- Walk west past the maidens and use FISH GUN on the red bowl of gunk the seagulls are eating.
- Walk over to the maidens. Use FISH GUN WITH CHUM on either maiden.
- Seagulls begin attacking them.
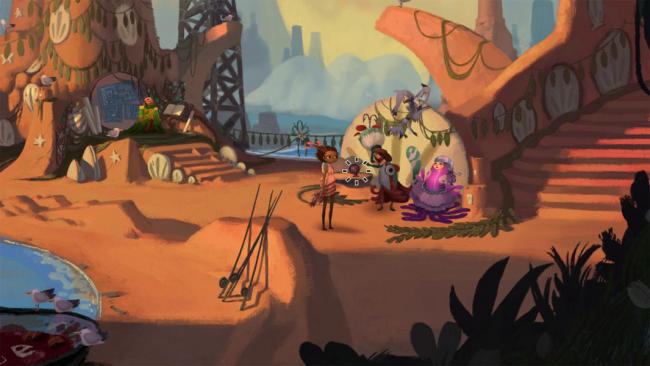
- Pick up the PERFUME while they’re being attacked.
- Use PERFUME on Vella.
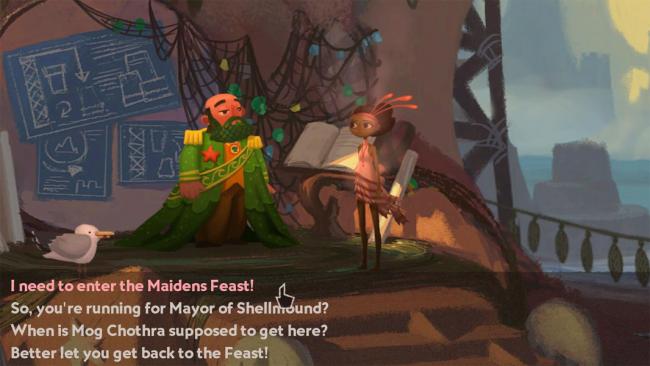
- Speak to Dune again. Select “I need to enter the Maidens Feast.” Smelling like that, Dune lets you in.
- The feast begins and Mog Chothra appears. He quickly devours the two maidens from Shellmound.
- Vella jumps off her pedestal and a sort of boss battle begins.
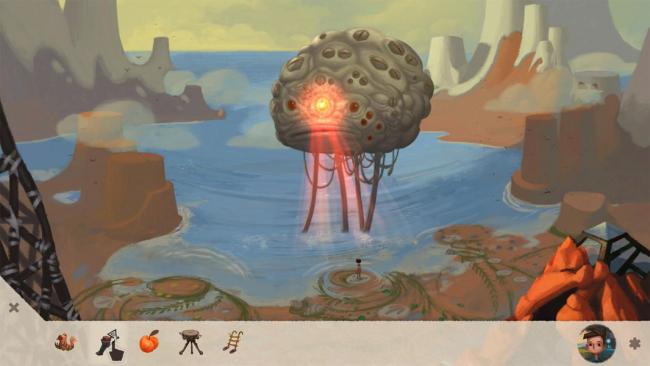
- In your inventory, use the DEATH RAY REMOTE you received from Alex.
- The laser creates a red triangle when you hover over Mog Chothra. After firing, it becomes black for a short period of time while recharging.
- Vella can move freely—walk her away from the water so Mog Chothra comes closer to the pyramid.
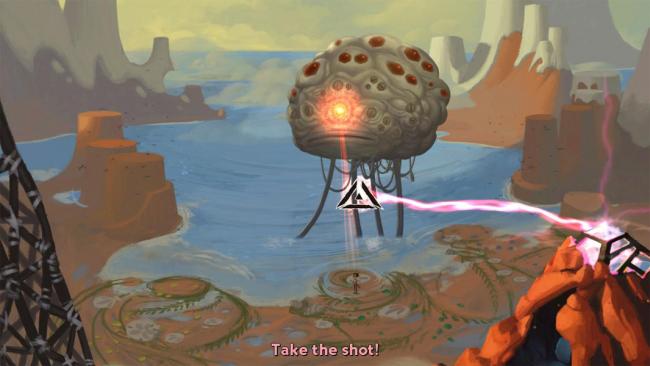
- Hover your mouse over one of Mog Chothra’s tentacles / legs and click so the laser burns off his tentacles. Do this for three of his four legs/tentacles.
- When he’s down to just one leg, he should pick Vella up and bring her near his mouth.
- From your inventory, drag SHORT LADDER onto his mouth. Vella will prop it open with the ladder and he’ll release her.
- Shoot the laser into Mog Chothra’s mouth to defeat him.
- After a brief cutscene, you’ll immediately begin Shay’s story.
Shay’s Story – Chapter 1
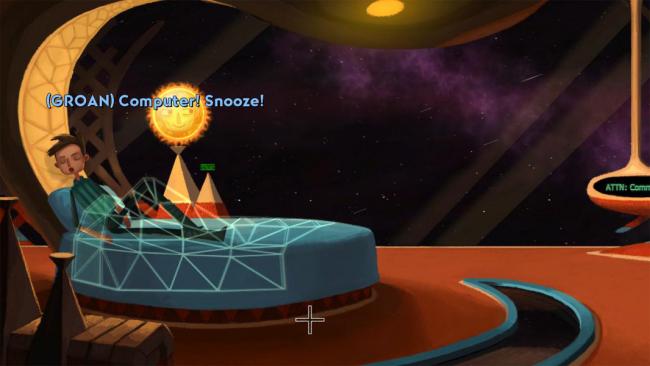
Overview: Shay lives seemingly alone aboard a spaceship, save his “mother and father” Computers. His life is a series of never-ending, unimportant missions and he craves a change.
- Shay is awoken by the mother-Computer, showered, and dressed, then plunked down at the breakfast table.
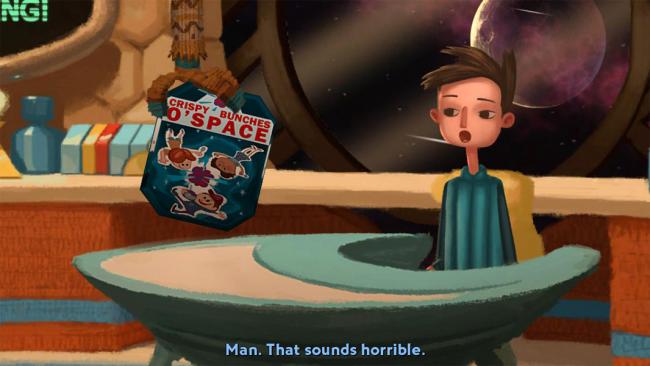
- Feel free to eat whatever cereal you like. Turning down a cereal brings up another option until you eventually are forced to eat the final one, SPLARGH.
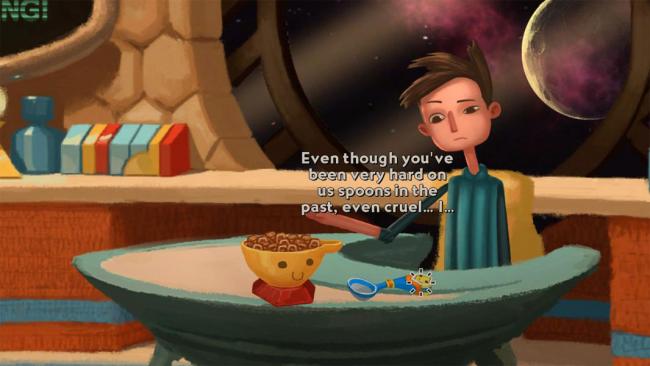
- Pick up the very desperate TALKING SPOON.
- From your inventory, drag TALKING SPOON onto the bowl of cereal.
- After breakfast, Shay goes to the bridge and is alerted to a number of emergencies that need to be handled.
- You can complete three of these missions per “day,” and Shay will continue completing them over and over—the fastest way to move forward without looping is below. Feel free to explore the missions you want and then progress as below.
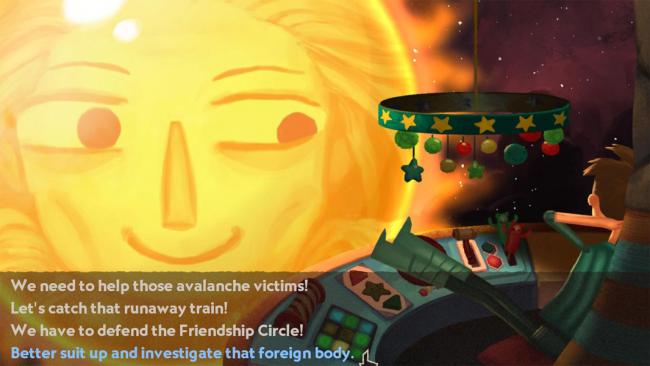
- Start with the fourth one: select “Better suit up and investigate that foreign body.”
- Shay emerges outside the ship; walk east and investigate the foreign body.
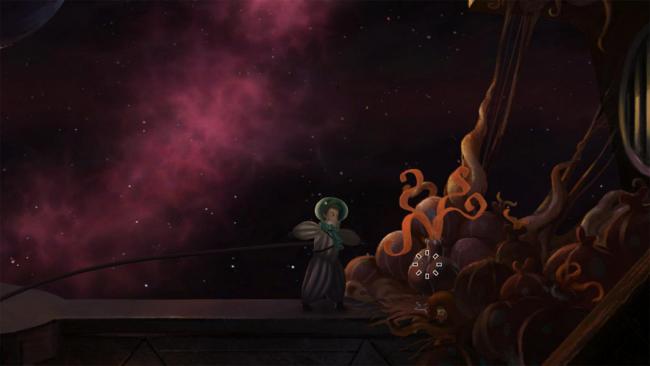
- Shay is “attacked” by the creature—a present wrapped with a bow, which is added to his inventory.
- You’ll return to the bridge and must select another emergency to resolve.
- Select “Let’s catch that runaway train!”
- Shay and some of the cuddly yarn creatures are stuck on a toy train that’s about to fall into a ravine.
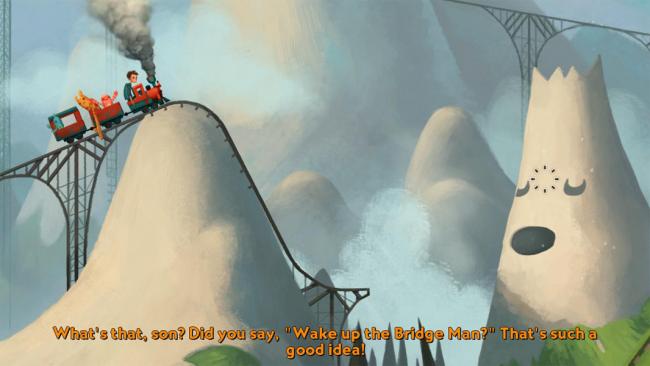
- Click on the “bridge man” (white mountain) to wake him up and create a path.
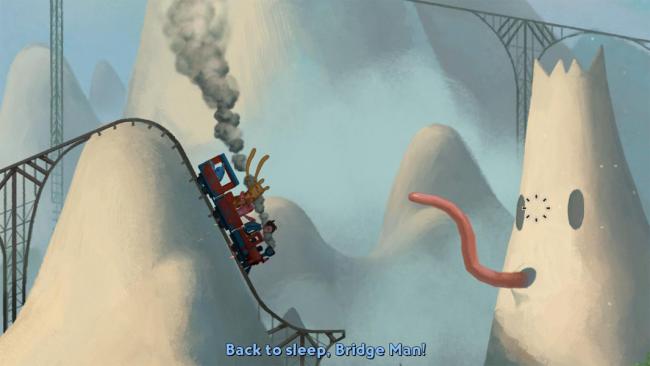
- As soon as the yellow alien lets go of the tracks, click on the bridge man again to retract the bridge. The train and everyone on board falls into the ravine.
- A wolf appears and tells Shay to come find him whenever he’s ready for “real danger.” He gives Shay a key.
- Shay is sent to bed and all missions are cancelled.
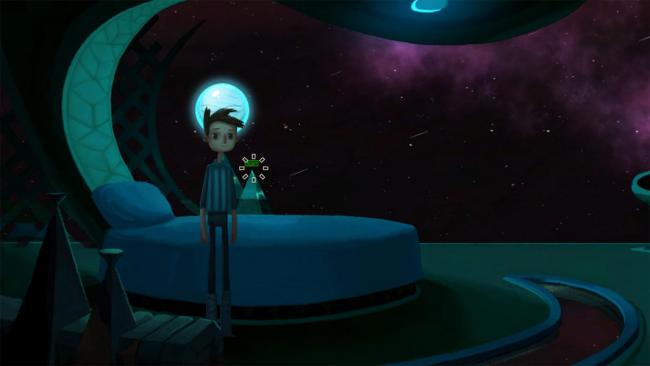
- You’ll gain control of Shay at night, in bed, pretending to sleep.
- Click on Shay and he’ll get out of bed. He notices there are still no missions, so he can do…whatever he wants?
- In your inventory, click on your present to open it—it’s a GRABBIN’ GARY robot.
- Walk east, toward the flashing screens.
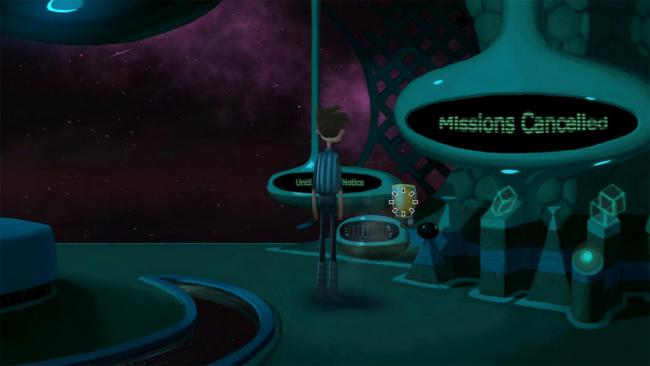
- Take the TANK OF COMPRESSED AIR from on top of the “humidifier.”
- Walk slightly farther east, until you see a brown grate.
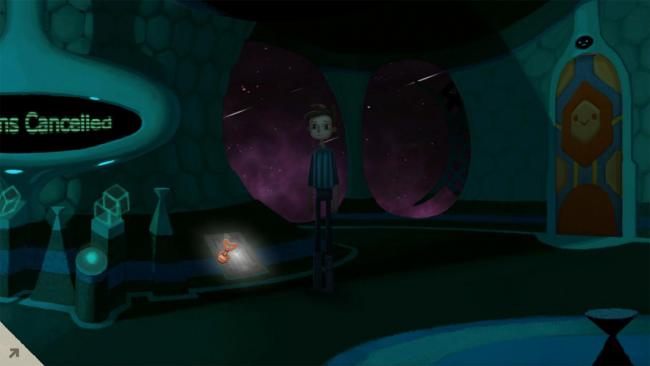
- From your inventory, drag the KEY the wolf gave you onto the grate. It will unscrew the grate.
- Take the INFLATABLE RAFT from inside the grate.
- In your inventory, use TANK OF COMPRESSED AIR on the INFLATABLE RAFT.
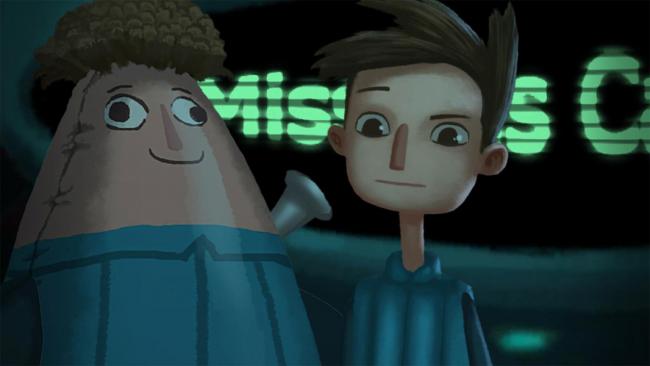
- The raft is actually BLOW UP DOLL SHAY.
- Move back to your bed. From your inventory, drag BLOW UP DOLL SHAY onto the bed.
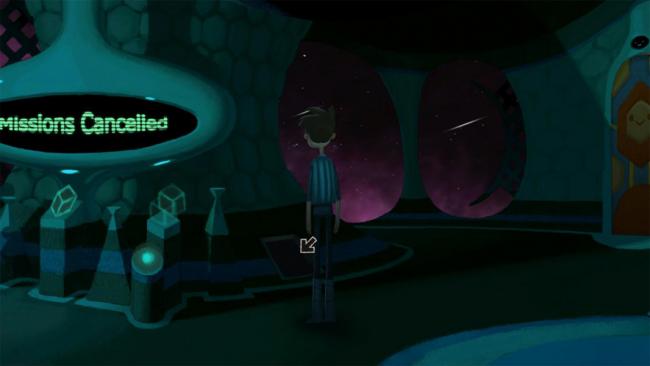
- Return to the vent and enter it.
- You’ll emerge in a new part of the ship, where the wolf is waiting. (His name is Marek.)
- Marek tells Shay that a war is waging across the universe and they need to help protect the weak who are at risk. He gives Shay a STAR CHART and ear piece. Shay needs to take the STAR CHART to the navigation room.
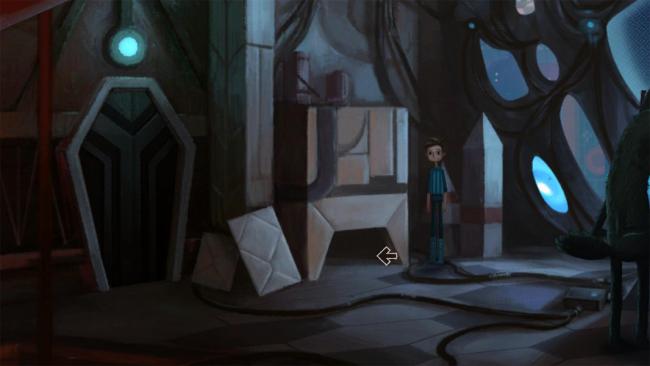
- Head west and enter the air vent. You’ll emerge in the navigation room where the robot Space Weaver works.
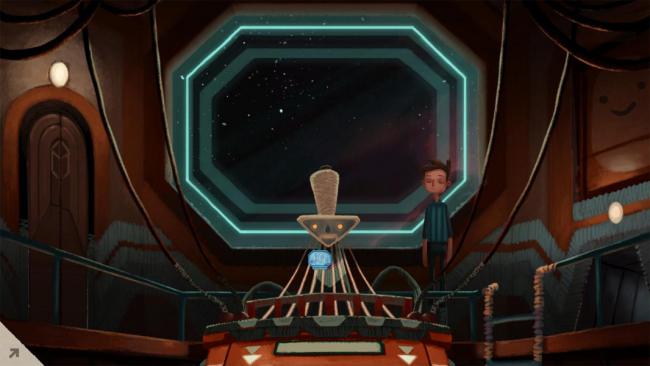
- From your inventory, drag STAR CHART onto Space Weaver. He’ll take you to your new destination.
- Head east back through the air vent.
- Talk to Marek. He’ll ask you to help lower the shields so he can extend the ship’s boom arms. You’ll enter a close-up of a strange computer screen.
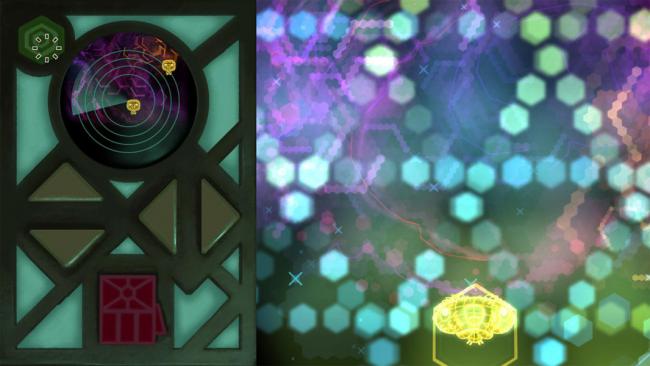
- For the first creature extraction, you just need to press the flashing green button in the top-left corner.
- The pink boom arm will move back and forth over the yellow creature on the screen. When the arm is directly over the creature, press the pink button to grab it. This is sort of like a claw machine / crane arm game.
- After this, Marek asks you to collect more creatures. This time, you’ll need to reposition the ship to find them.
- Use the flashing arrow keys to move the ship and the radar above the arrow keys to locate the creatures.
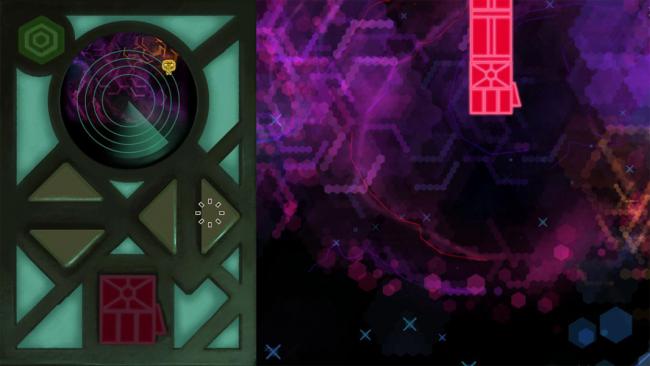
- Press the right arrow, then the up arrow. You’ll be positioned over a creature.
- Press the pink button when the arm is directly over it.
- Shay saves the second creature, but the enemy returns. They have to pull out before saving the final creature.
- Another distress signal appears. Marek gives Shay another STAR CHART.
- Return to Space Weaver through the air vent to the west.
- From your inventory, drag STAR CHART onto Space Weaver.
- Exit east through the vent again; you’re now in Danger System 5. Shay immediately goes to the computer screen.
- Press the green button to lower the shields.
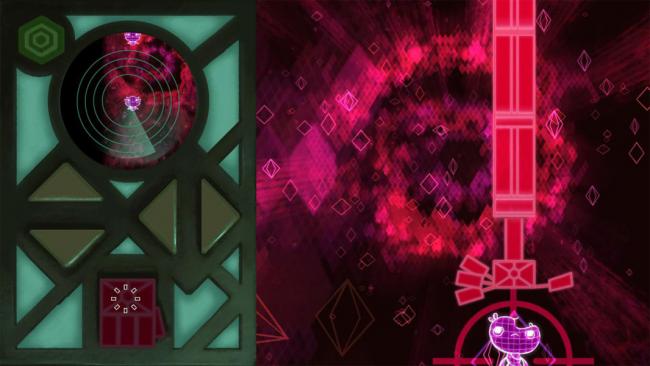
- Wait for the pink arm to be over the purple creature, and then press the pink button.
- You can see the second creature on the navigation map—press the left arrow, then the up arrow. Press the pink button when the arm is over the creature.
- The third creature is directly above you. Press the up arrow twice. Press the pink button when the arm is over the creature.
- Press the up arrow and then the right arrow twice to find a fourth creature. Press the pink button when the arm is over the creature.
- Marek warns Shay to stop as an enemy vessel is approaching—Shay insists on saving the final creature.
- Press the down arrow twice from your current location and grab the final creature with the pink arm, although it wriggles free.
- An enemy ship attacks and Shay returns to his quarters just in time to fool the mother-Computer.
Shay’s Story – Chapter 2
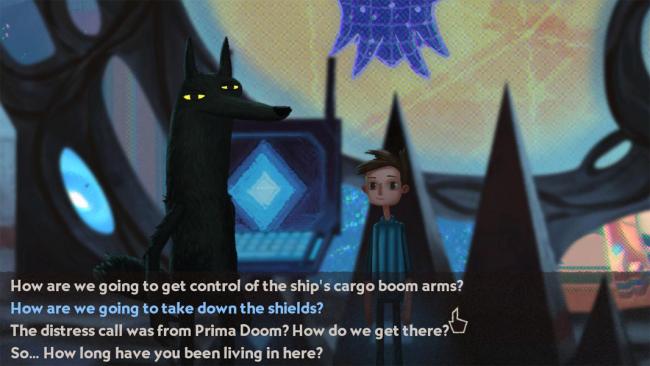
Overview: Shay and Marek’s missions have been interrupted by the ship-wide lockdown. Shay will need to complete a series of objectives before they can conduct their next crucial mission.
- You gain control of Shay back in his bedroom the next “morning.”
- Move east and enter the vent again to return to Marek’s deck.
- Walk west and speak to Marek.
- Ask “How are we going to take down the shields?” Marek gives you an INHIBITOR to help accomplish this.
- Select “How are we going to get control of the ship’s cargo boom arms?” Marek says he has opened up a path to the manual override for you.
- Select “The distress call was from Prima Doom? How do we get there?” Marek will give you a new STAR CHART.
- Exit the conversation. You now have three objectives to complete and free reign to wander the ship.
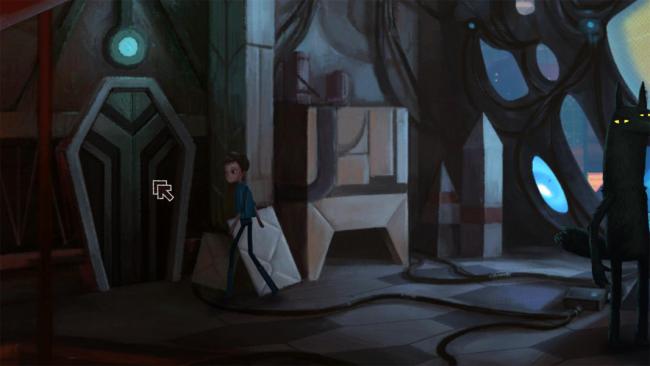
- Head west through the door near the air vent (this was locked previously).
- You’ll be in a small room—this is Marek’s bedroom / the quarantine room for the creatures.
- Head west through an air vent. You’ll be in a trophy room.
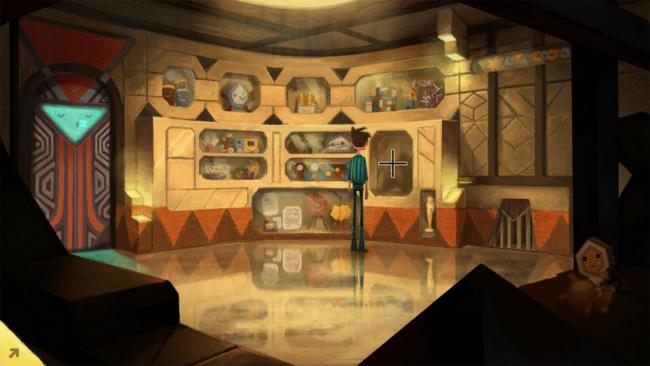
- Examine the blue and white suit on the right-hand side of the trophy case. It’s Shay’s radiation suit and helmet.
- Enter the door to the west (it’s a teleporter).
- When Shay emerges, his head is smaller. The teleporter says it will go back to normal when he makes a teleporter return trip.
- Head west and exit the teleporter room.
- You’ll be on the bridge. The mother-Computer appears and reminds you of the story of the “sacrificed girl.”
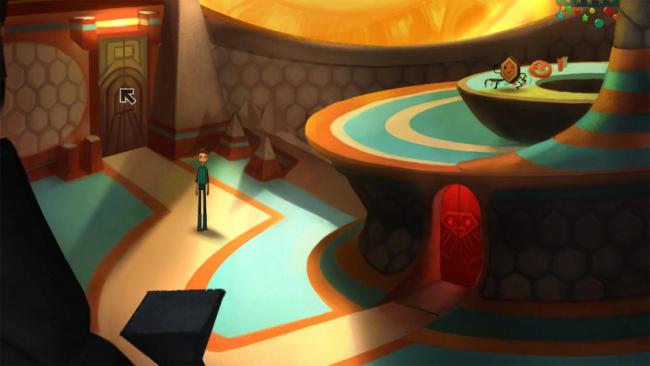
- Walk around the commander’s chair and head northwest through the brown door.
- You’ll be in a hallway near the kitchen; enter the kitchen.
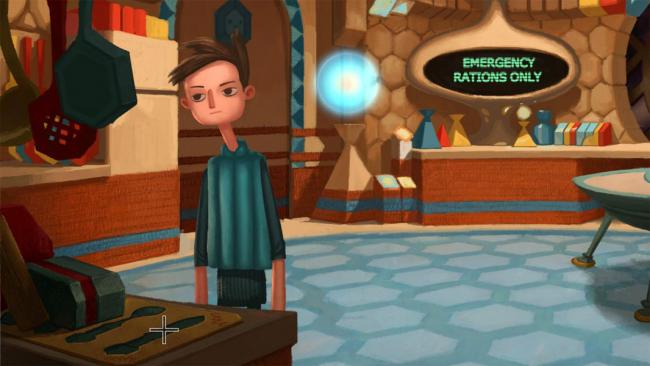
- Take the TALKING KNIFE from the counter.
- Go back into the hallway and head west.
- If you try to go in the next door, the mother-Computer stops you and says she’s “Working on a surprise” for you inside.
- Head back east out of this hallway to the bridge again (going west will take you to your bedroom).
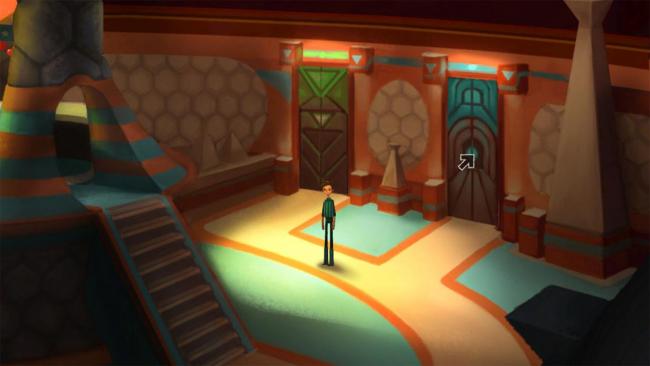
- Walk back around the commander’s chair and enter the blue door.
- Enter the first door you come across—this takes you to the ice cream avalanche room.
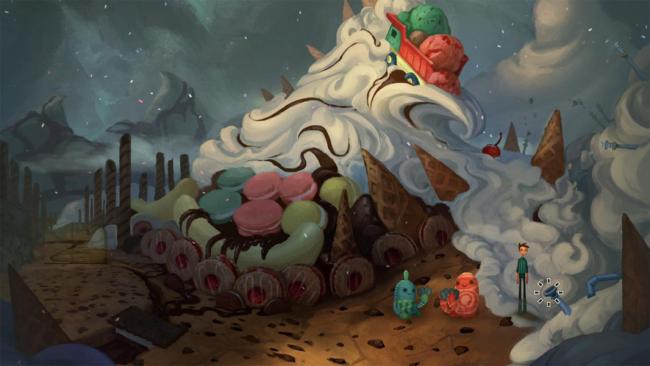
- Examine the spraying hose on the far east side of the room. Shay gets WHIPPED CREAM GUN.
- Exit back to the hallway and head east until you reach the next door.
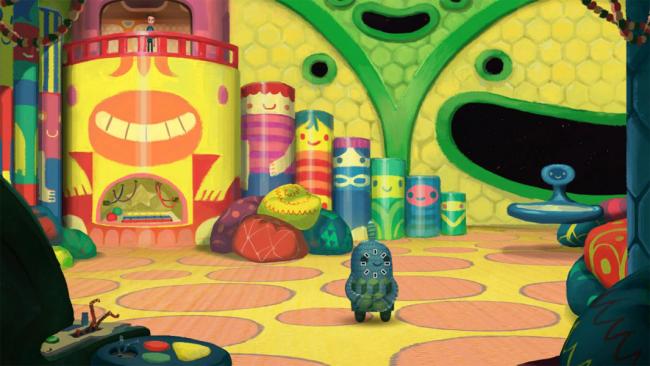
- This is the “hug attack” protocol room.
- Note: if you did not do the “hug attack” mission at the beginning of Shay’s story, you’ll need to do it now.
- Speak to the green yarn friend.
- Select “Hey, can we run the attack mission protocol?”
- During the “attack mission,” just speak to the green yarn friend again.
- You’ll reappear back in the room with the lights on after the mission is over.
- Speak to the green yarn friend one more time.
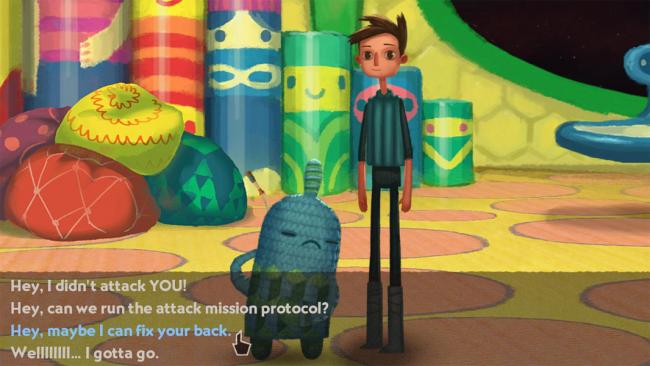
- Select “Hey, maybe I can fix your back.” Shay pulls out CROCHET HOOK.
- Exit the conversation and return to the hallway.
- Head east until you reach the last door. Go inside to enter another hallway.
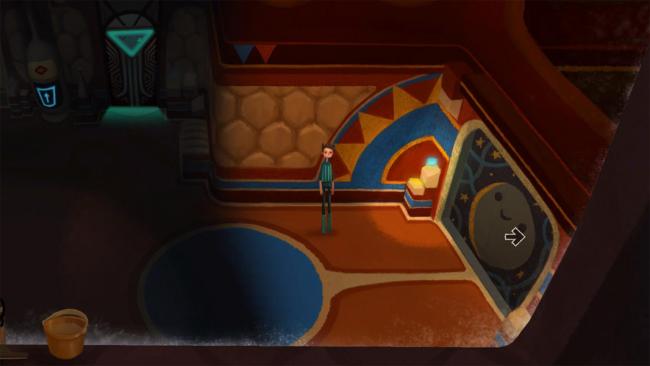
- Keep walking east until you reach the door with a moon on it. Go inside and out the “airlock.”
- Use the WHIPPED CREAM GUN on Shay; he’ll put it on his back like a rocket tank.
- Use TANK OF COMPRESSED AIR on Shay. He attaches it to his helmet.
- Use TALKING KNIFE on the hose connecting you to the ship.
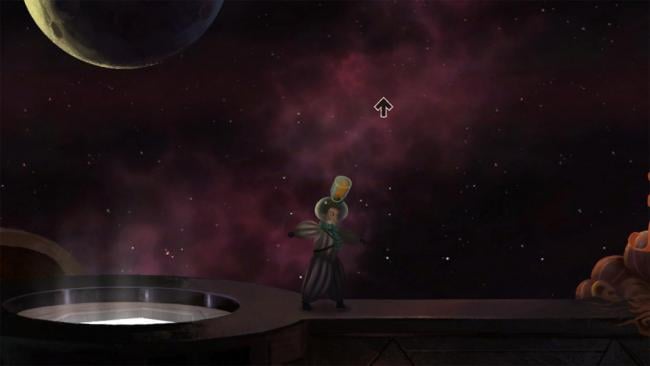
- Click above Shay when an arrow pointing up appears; he’ll jump up into space.
- Shay will now be floating in space just above the ship. You can move him around by clicking just as if he were walking.
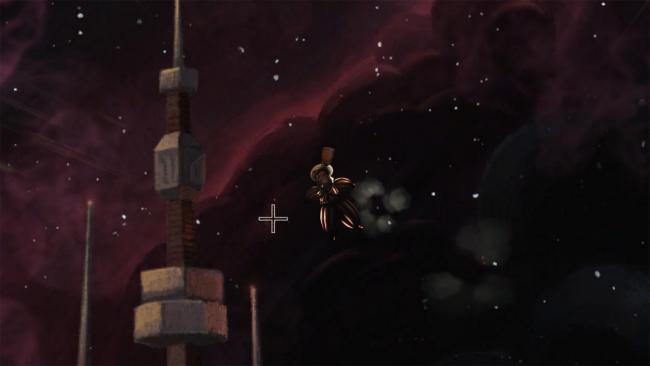
- Move Shay up and around the pointy antennae in the middle of the screen. You want to get to the top-left corner of the screen.
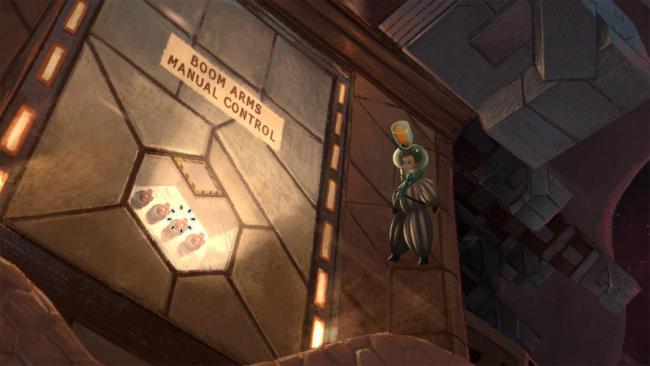
- When Shay gets close enough to the boom arm control, he’ll enter a close-up with it.
- Float closer to the controls, and then use the TALKING KNIFE on the yellow-taped glass at the top of the control panel. Shay will pry it off and the TALKING KNIFE goes floating away.
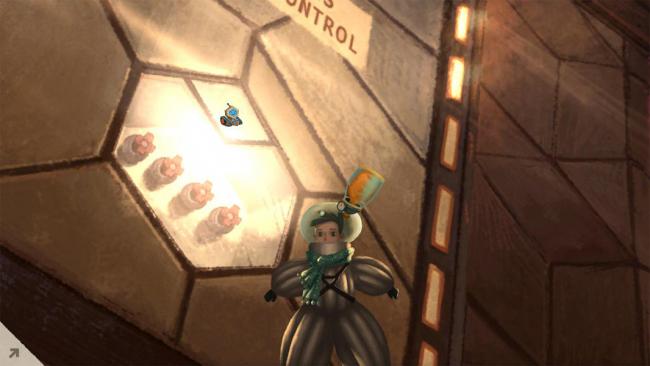
- Use GRABBIN’ GARY on the now-open glass section.
- Shay will put Gary into place and take his remote control. You can now control the boom arms once it’s time for the mission.
- Head back inside the ship—float away from the controls and then down. You don’t have to go back around the antennae.
- One of our three objectives is now complete. Head back inside and away from the airlock room.
- Go through the blue teleporter in this hallway, near the trash can. Shay’s head gets even smaller.
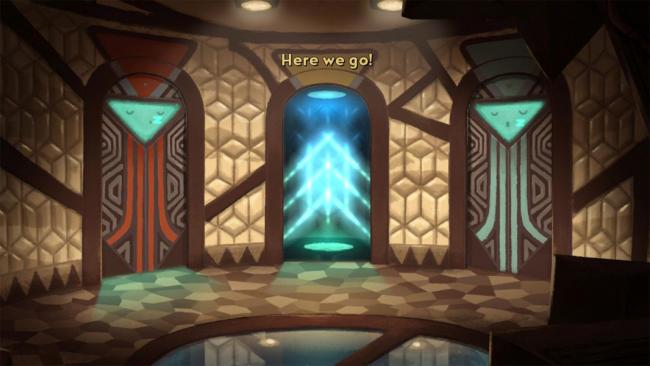
- You’ll be in the teleporter nexus. Go through the yellow-doored teleporter in the center.
- Your head will now be super tiny and you’ll emerge in the Fusion Orb Containment facility.
- From your inventory, drag RADIATION HELMET onto Shay. His head is now small enough to wear it.
- Enter the fusion core. Shay gets suited up.
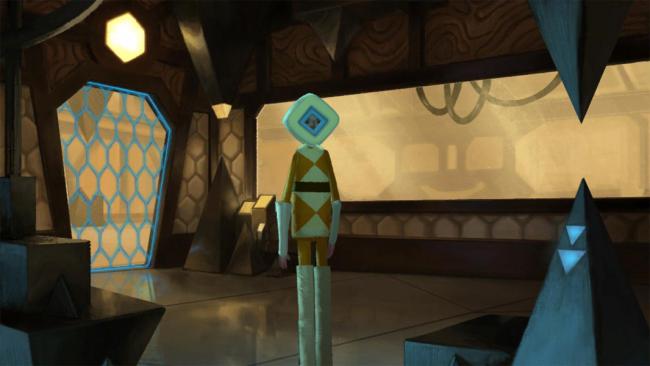
- Walk through the see-through blue door and head south.
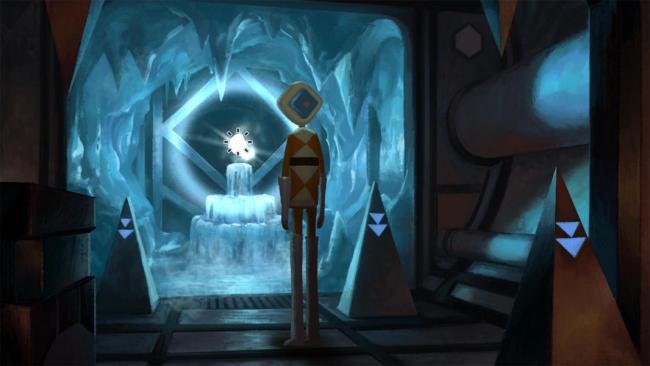
- You’ll be at the core. From your inventory, drag the INHIBITOR onto the core.
- This takes care of our second objective. Now we need to get the ship to Prima Doom.
- Exit the core and go back through the teleporter. The RADIATION HELMET breaks into pieces when Shay’s head returns to its normal size.
- Exit the teleporter nexus by heading west out the door to the bridge.
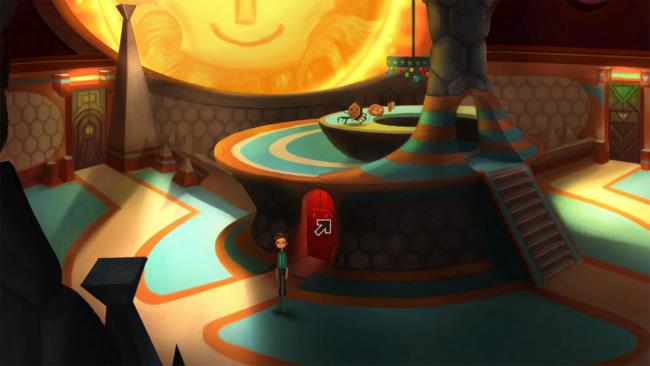
- Walk around the bridge and enter the red door that leads to Space Weaver.
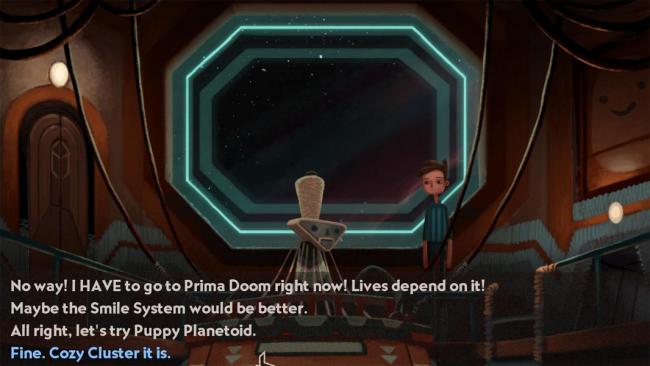
- Speak to Space Weaver. He refuses to take you to Prima Doom, but offers other, safer options.
- Select “Fine. Cozy Cluster it is.”
- As soon as Space Weaver begins speaking and you regain control of Shay, go down the ladder.
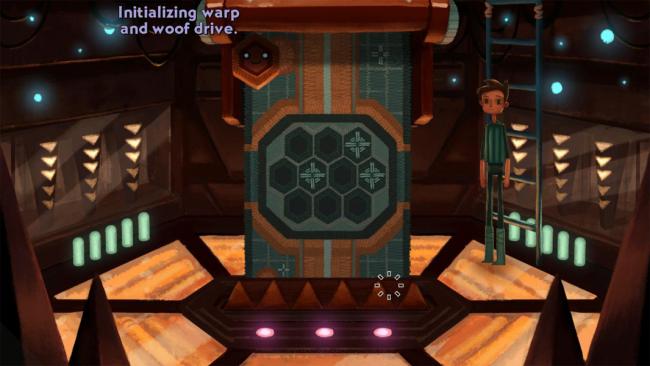
- You’ll be next to the weaved star chart.
- Use CROCHET HOOK on the weaving.
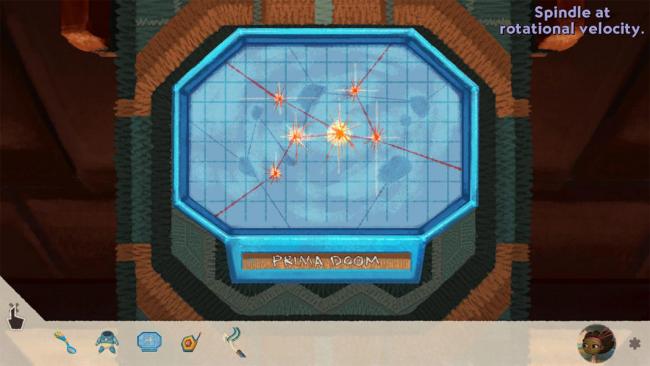
- You need to add some marks on the chart to change it to match the Prima Doom chart in your inventory. The Prima Doom chart is above.
- You have a limited amount of time to do this—only until Space Weaver stops counting down—so you have to be quick.
- If you mess up, you can retry as many times as you like.
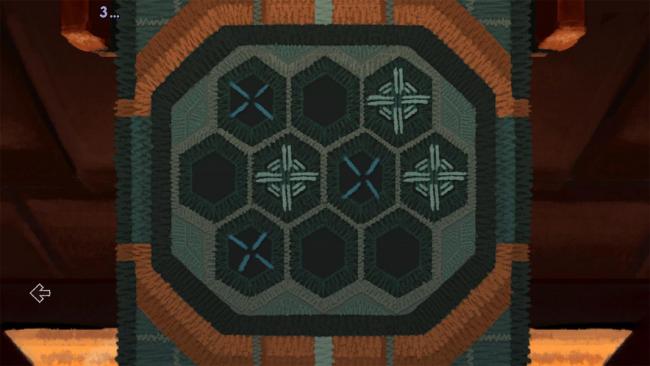
- Make the marks as shown in the image above by the blue X’s. You need to make three marks (just click on their slots) top-left, middle-right, bottom-left.
- You’ll arrive in Prima Doom and Space Weaver will have a meltdown.
- Head east through the air vent, back to Marek.
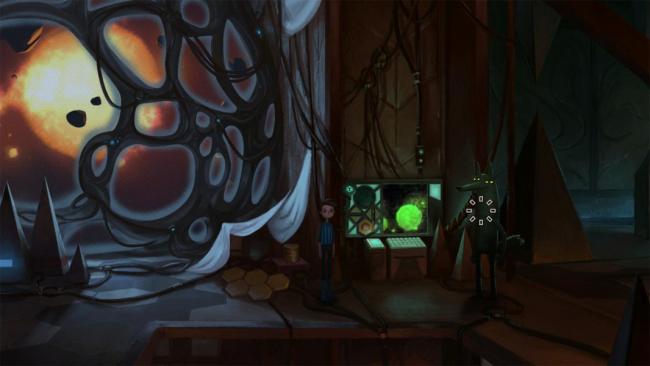
- Walk east to Marek, who’s standing next to the computer screen again.
- The controls are the same as last time, except the green button is now the INHIBITOR and the pink button is GRABBIN’ GARY. They control the same items.
- Push the green button to turn off the shields. You’ll be near a creature; when the pink arm is over it, press the pink button to grab it.
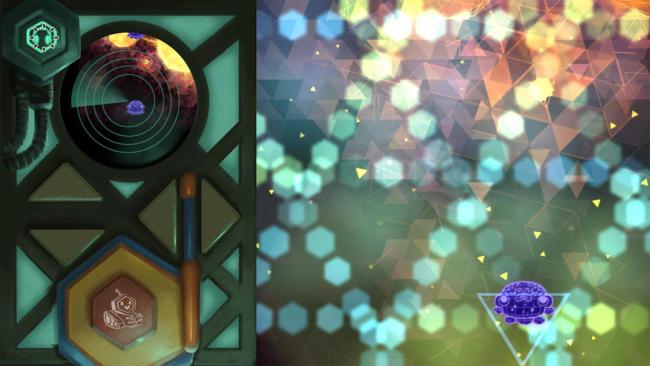
- These creatures move much faster, so you’ll have to anticipate their moves ahead of time. Try grabbing where they’re going to be rather than where they are. You have unlimited tries to grab them, so take your time.
- After you get the first creature, press the up arrow twice. Use the pink button to grab the second creature.
- Marek says that’s enough, but Shay insists on saving the final creature.
- Press the right arrow three times, then the down arrow once. Use the pink button to rescue the final creature.
- Once Shay rescues the creature, the final cutscene begins. You’ll see the end of Shay’s story, then the full ending to the game (which appears only after both Vella and Shay’s stories are complete).
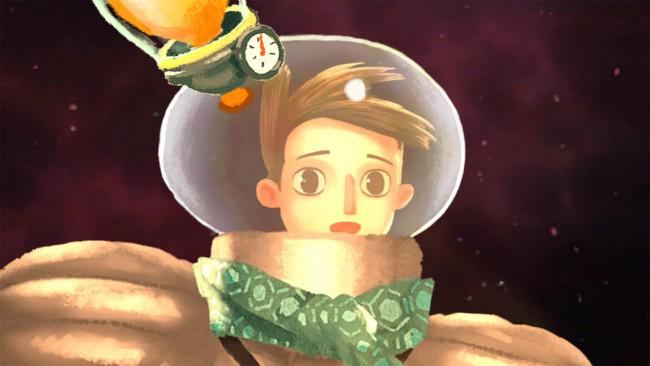
- Of course, this is only the end of Act 1!
Congratulations!
You have completed Gamezebo’s walkthrough for Broken Age: Act 1. Be sure to check back often for game updates, staff and user reviews, user tips, forums comments, and much more here at Gamezebo!
More articles...
Monopoly GO! Free Rolls – Links For Free Dice
By Glen Fox
Wondering how to get Monopoly GO! free rolls? Well, you’ve come to the right place. In this guide, we provide you with a bunch of tips and tricks to get some free rolls for the hit new mobile game. We’ll …Best Roblox Horror Games to Play Right Now – Updated Weekly
By Adele Wilson
Our Best Roblox Horror Games guide features the scariest and most creative experiences to play right now on the platform!The BEST Roblox Games of The Week – Games You Need To Play!
By Sho Roberts
Our feature shares our pick for the Best Roblox Games of the week! With our feature, we guarantee you'll find something new to play!All Grades in Type Soul – Each Race Explained
By Adele Wilson
Our All Grades in Type Soul guide lists every grade in the game for all races, including how to increase your grade quickly!


 “
“