- Wondering how to get Monopoly GO! free rolls? Well, you’ve come to the right place. In this guide, we provide you with a bunch of tips and tricks to get some free rolls for the hit new mobile game. We’ll …
Best Roblox Horror Games to Play Right Now – Updated Weekly
By Adele Wilson
Our Best Roblox Horror Games guide features the scariest and most creative experiences to play right now on the platform!The BEST Roblox Games of The Week – Games You Need To Play!
By Sho Roberts
Our feature shares our pick for the Best Roblox Games of the week! With our feature, we guarantee you'll find something new to play!Type Soul Clan Rarity Guide – All Legendary And Common Clans Listed!
By Nathan Ball
Wondering what your odds of rolling a particular Clan are? Wonder no more, with my handy Type Soul Clan Rarity guide.
Brink of Consciousness: Dorian Gray Syndrome Walkthrough
Welcome to the Brink of Consciousness: Dorian Gray Syndrome walkthrough on Gamezebo. Brink of Consciousness: Dorian Gray Syndrome is a hidden object/adventure game played on the PC created by Magicindie Softworks. This walkthrough includes tips and tricks, helpful hints, and a strategy guide to how to complete Brink of Consciousness: Dorian Gray Syndrome.
Brink of Consciousness: Dorian Gray Syndrome – Game Introduction
Welcome to the Brink of Consciousness: Dorian Gray Syndrome walkthrough on Gamezebo. Brink of Consciousness: Dorian Gray Syndrome is a hidden object/adventure game played on the PC created by Magicindie Softworks. This walkthrough includes tips and tricks, helpful hints, and a strategy guide to how to complete Brink of Consciousness: Dorian Gray Syndrome.
How to Use this Walkthrough (Please read)
- This walkthrough is meant to be used as a guide to assist in solving mini-puzzles and acquiring all items in order to complete the game. You may explore locations in the order you wish, this walkthrough is written to take the most direct route to the game’s finish.
- Inventory objects will be written in bold. The walkthrough will state, “Use the inventory item on the blah blah,” because it assumes you have the item. If you don’t have the item, on your keyboard, press CTRL+F (at the same time). In the text box, type the name of the item you are looking for and press ENTER. This will scan this page for the appearance of that word.
Gameplay and Tips
- This is a hidden object adventure game. You will move from location to location solving hidden object hunts, mini-puzzles and picking up items to use in order to proceed in the game.
- There are two difficulty settings.
- Regular mode has a quicker filling Skip and Hint meter, plus active areas are indicated by sparkles.
- Expert mode has a longer filling Hint and Skip meters and active areas are not indicated by sparkles.
- Move your cursor over every aspect of a scene, especially if you are playing in Expert mode. It’s the only way to find everything.
- The Menu button at the bottom right of the screen will bring you back to the main screen.
- Items collected throughout the game go into your inventory, located at the bottom of your screen.
- Closing a window – To close the zoom-in windows, click anywhere outside of the window. Tip: If you can zoom in on the area again, you likely haven’t found everything you needed to find.
- Journal – Your journal is located at the bottom right of the screen. It records the story’s progress and can contain clues to solve puzzles.
- Map – The map is located beside the journal. It names each room and contains an icon if there is something to do in that room, a puzzle is waiting to be solved or a hidden object scene is available. You cannot jump from room to room using the map.
- Mini-puzzles can be skipped once the Skip button fills. Click on the question mark in the top left corner to get instructions on how to solve the puzzle.
- Hint system – Hints are available in the bottom left of the screen.
- Hints used in the hidden object scenes will point out an object to be found.
- Hints used during the adventure mode will point out something to do in that room. It will not guide you as to where to go next.
- Hidden object hunts provide either a list of items to find. Click on items in the scene to cross them off the list. Items listed in orangey-red require an action to be found. Once you have found all the hidden objects, an item is added to your inventory.
- Hidden object scenes are different each time you play. Hidden objects screenshots will only highlight (yellow circles) the items added to your inventory and actions (green circles) needed to find items.
- Naming convention – This walkthrough will use the names of the rooms as seen on the map. Because the game world is huge, I will do my best to guide you back to the room.
- Audio – The villain in this game follows your progress through the house and surrounding areas and taunts you the whole way. If you don’t want to hear the audio, click on the text at the top of your screen.
Walkthrough
- From the main menu screen, click Play to start the game. Select your difficulty setting (see above for description). Watch the introduction video. Regular mode will ask if you want to play with the tutorial. If you are new to this type of game, click Yes as it explains all facets of gameplay.

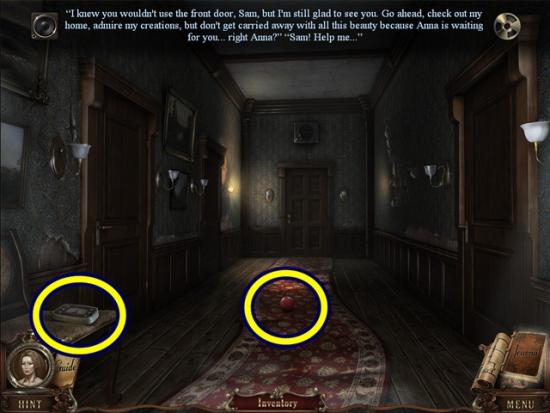
- Take the guitar tuner and the #3 cue ball. Enter the door on the right to the music room.
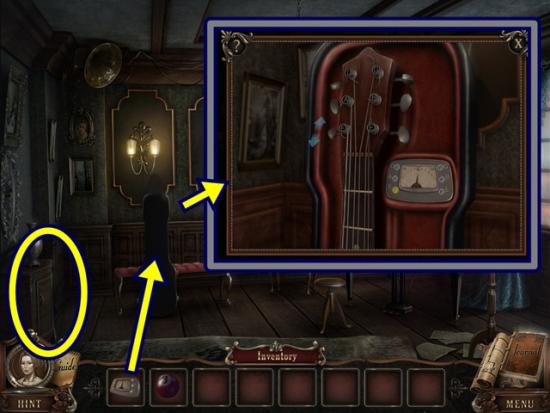
- Click on the guitar case. Open it and add the guitar tuner. A mini-puzzle starts. Tune the guitar. The guitar has six strings, on the left is D, A and E. On the right is G, B and E. To start, select any tuning peg so arrows appear beside it. Now pluck the guitar strings. Watch the guitar tuner. The goal is to pluck the strings and have the guitar tuner’s dial stop in the centre of the arc. Click the up arrow to move the dial towards the right of the arc and click the down arrow to move the dial towards the left of the arc.
- Continue until all the strings are tuned. Once you are finished, take the key that appears.
- Click on the small at the left. Unlock it with the key. Take the flashlight.
- Leave the music room and enter the door on the left to the makeup room.
- Pull out the flashlight and click to turn it on. Locate the lamp at the left of the room, then click to turn it on.
- Move the curtain on the right side of the room.
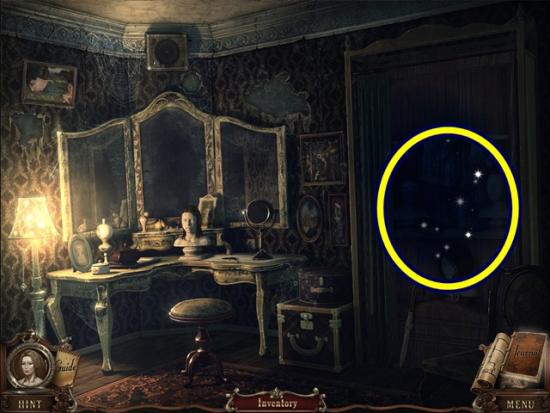
- Click on the shelves to start a hidden object hunt.
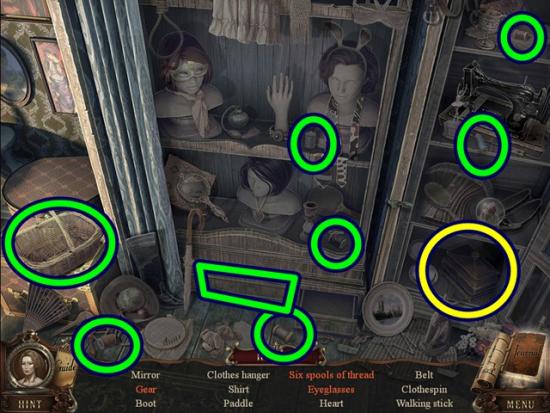
- Find all the objects. Click on the six spools of thread to add them to the basket. Open the drawer to reveal the eyeglasses. Open the small chest to reveal the gear. A gear is added to your inventory.
- Leave the room.
- Click on the door at the end of the hall. Add the gear, then turn the handle. Go through the door.
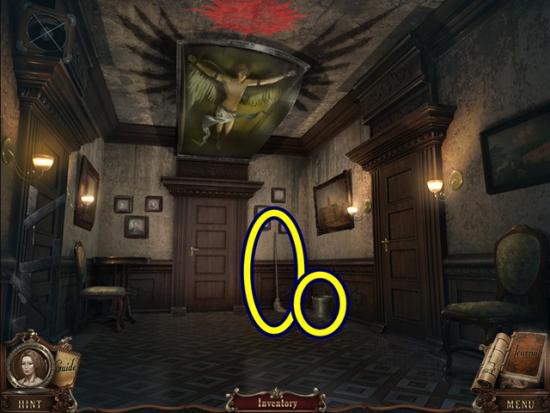
- The map labels this scene as “Icarus.”
- Take the mop and empty bucket. Enter the door on the right to the game room.
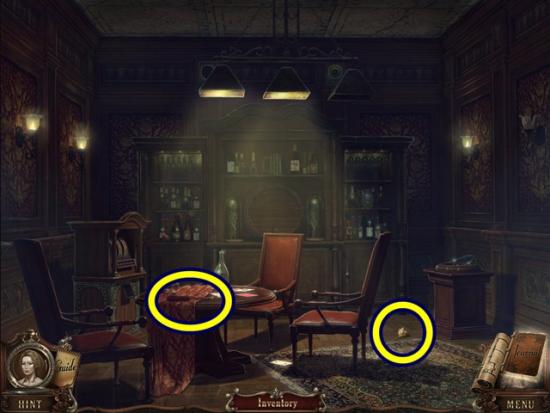
- Take the screwdriver from the table. Read the paper on the floor.
- Leave the room and go through the door at the end of the hall.
- The map labels this scene as fire trap.
- Take note of the combination Oscar gives, +11 -3 +8 (entered into your journal).
- Enter the room on the right to the trophy room.
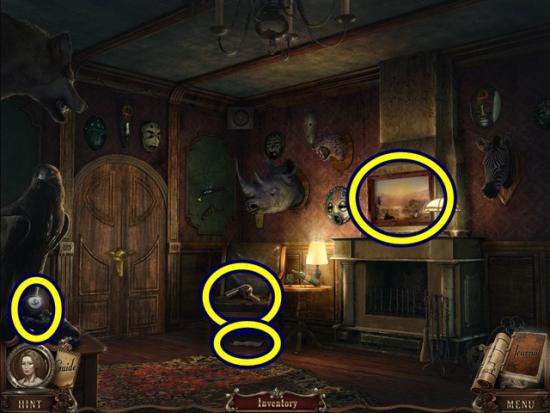
- Take the hairdryer and the #9 cue ball. Read the newspaper article found below the chair.
- Click on the painting above the mantle. Click on the safe. Enter the combination Oscar just told you. Move (click and drag) the dial to 11 (+11), then to 8 (-3), then to 16 (+8). Take the mechanical eye.
- Leave the room.
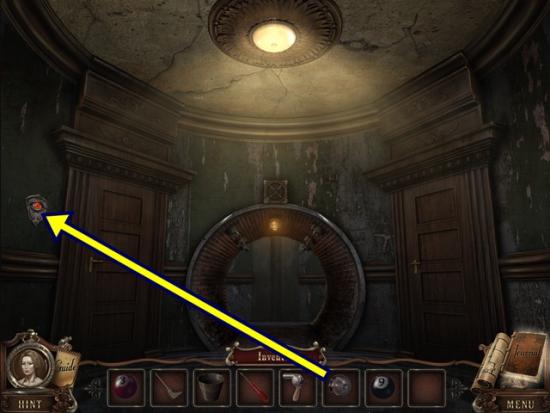
- Click on the eye scanner. Add the mechanical eye. Enter the storeroom.
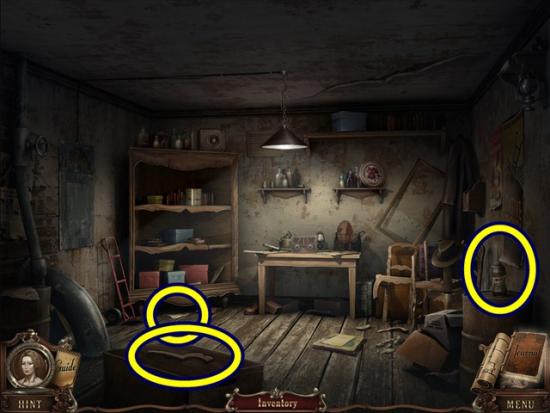
- Take the wooden mosaic part and the rust remover. Read the note below the shelf. Return to the makeup room (move down three times, then go through the door on the left).
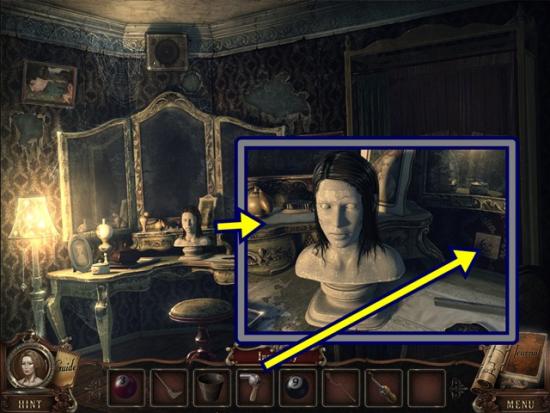
- Click on the makeup table. Plug in the hairdryer and dry the mannequin’s hair. When the face panel opens, take the scissors. Return to the storeroom.
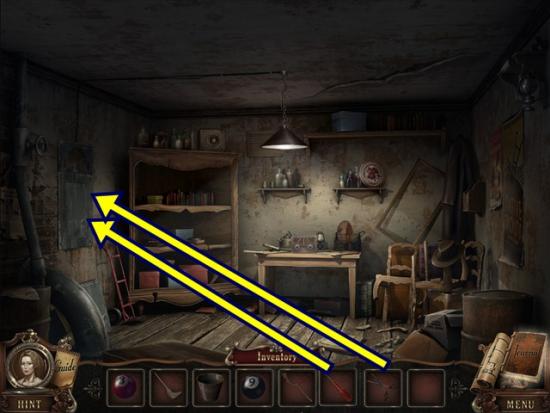
- Click on the metal panel on the wall. Remove the panel with the screwdriver (click on the centre of the panel). Cut the wires with the scissors.
- Leave the room.
- Go through the fire trap into the elevator.
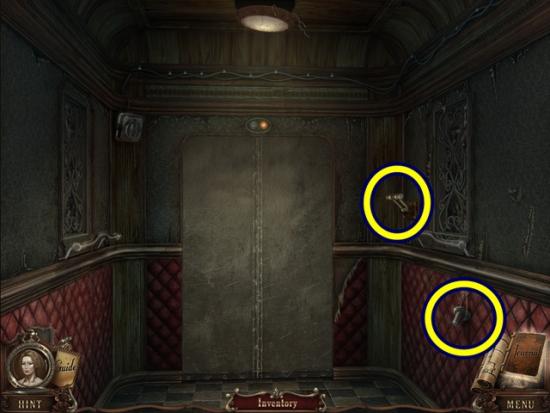
- Take the radio knob. Pull the lever to move the elevator.
- When the elevator stops, exit to the well.
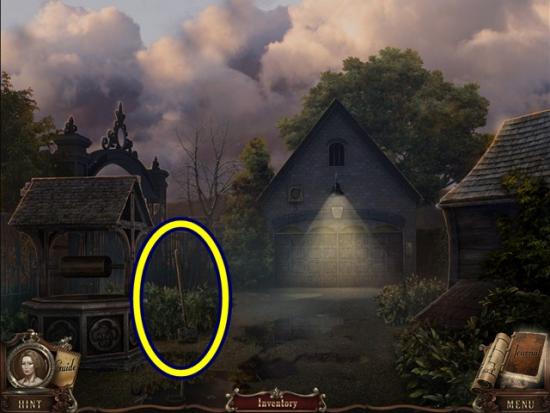
- Take the shovel. Move forward to the collapsed archway.
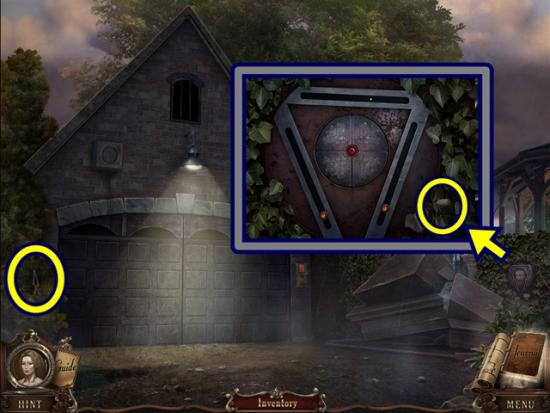
- Take the wooden mosaic part. Click on the panel beside the archway. Take the radio knob. Return to the storeroom (go down twice, when you get to the elevator, click the lever, then leave the elevator by clicking down and go into the left door.
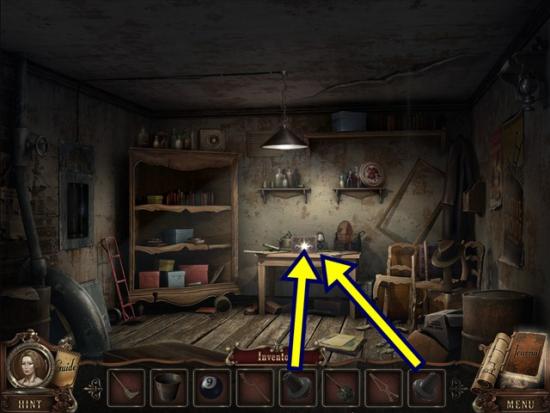
- Click on the radio on the table. Add the two radio knobs. A mini-puzzle starts. Adjust the left dial so its elements match with the right dial’s elements. Press the red central button to match up the elements. If they match up, they will be removed from the dials. If not, keep trying.
- The easiest and laziest way to solve this puzzle is to only move one dial. Rotate only one dial. Each time you rotate the dial, press the red central button. Eventually you will match up all elements.
- When the panel opens, take the key. Return to the well (leave the storeroom, go forward onto the elevator, click the lever, then when the elevator stops, exit the elevator).
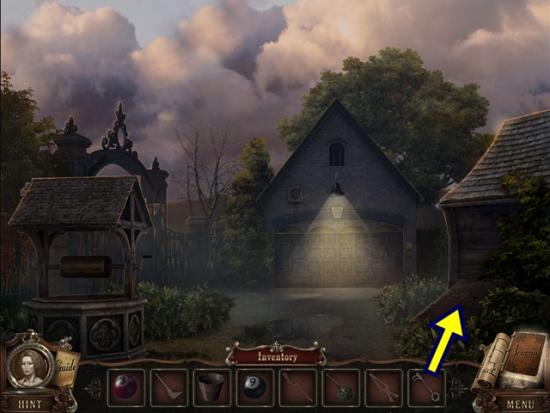
- Click on the cellar door. Unlock it with the key. Click on the cellar door to start a hidden object hunt.
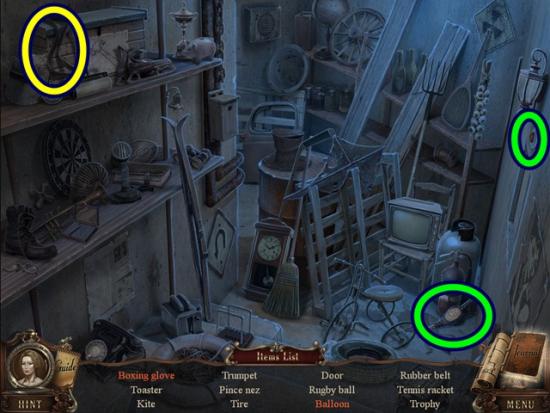
- Find all the objects. Press the red button to reveal the boxing glove. Press the pump five times to inflate the balloon. A rubber belt is added to your inventory.
- Move forward to the collapsed archway.
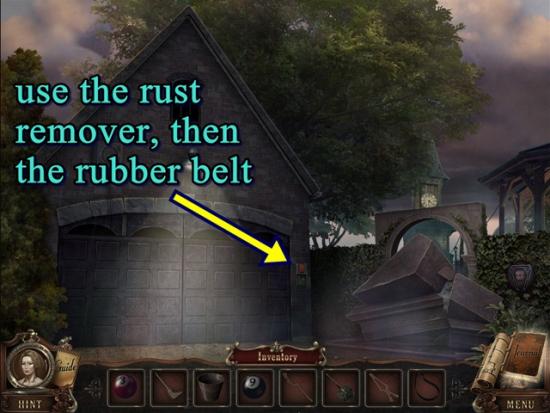
- Click on the panel beside the garage door. Add the rust remover. Open the small door and add the rubber belt. Press the big red button. Enter the garage.
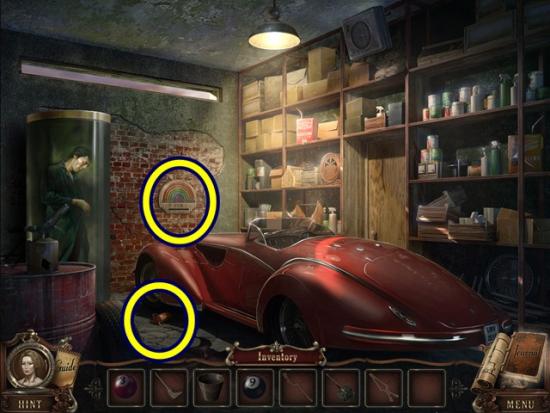
- Take the oiler. Click on the rainbow panel. A mini-puzzle starts. Move the coloured balls from the left to its matching coloured slot on the right. The key to solving this puzzle is to make use of the upper empty slot under the violet arch. To move the balls, click and drag them. The colours of the arcs are, from left to right, red, orange, yellow, green, blue, indigo and violet.
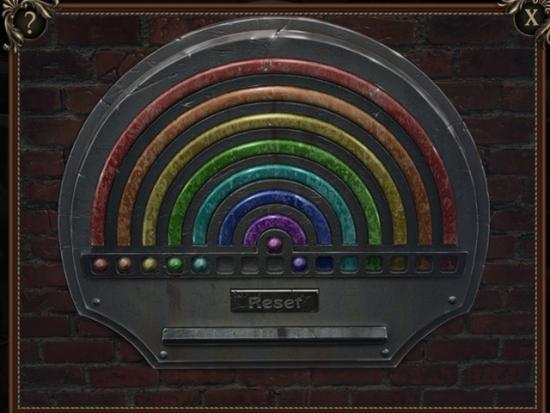
- To begin, move the violet ball to the upper empty slot, then move the indigo ball past it to the right, as shown in the screenshot above.
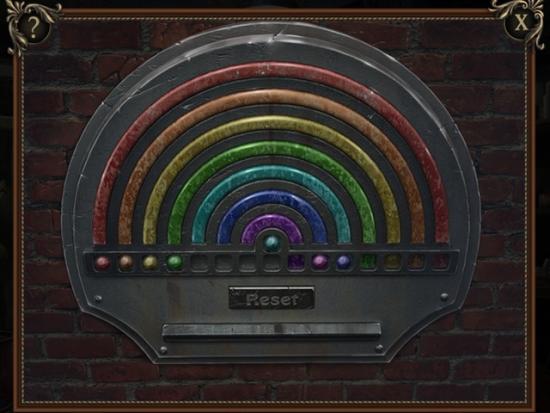
- Move the violet ball down and move the balls further to the right, then move the blue ball to the upper empty slot as shown in the screenshot above.
- Move the violet and indigo balls back to the left, then move the blue ball down beside them.
- Now move the blue, indigo and violet balls to the right and move the green ball to the upper empty slot. Move the violet, indigo and blue balls back to the left and move the green ball down and further to the right.
- Now move the violet, indigo, blue and green balls to the right and move the yellow ball to the upper empty slot. Move the green, blue, indigo and violet balls back to the left and move the yellow down and further to the right.
- Continue in this matter to rearrange all the balls.
- When you are finished, take the slide that appears. Go through the door to the gazebo.
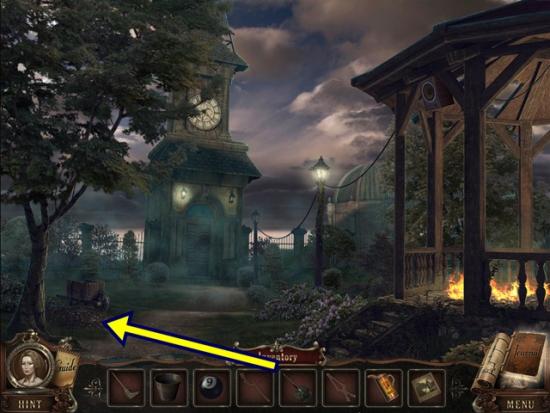
- Click on the cart. Dig up the earth with the shovel (four clicks) and take the sledgehammer.
- Enter the tower.
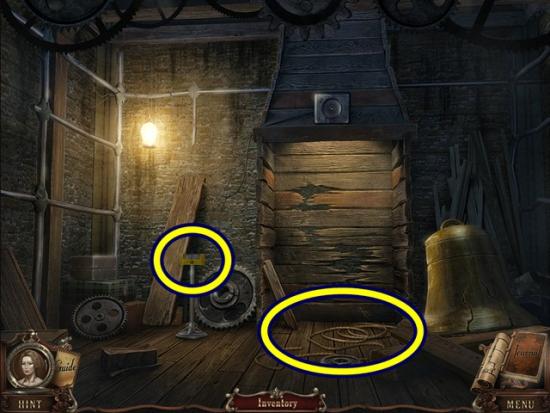
- Take the rope. Click on the control mechanism. Take the key. Return to the garage (move down two scenes)
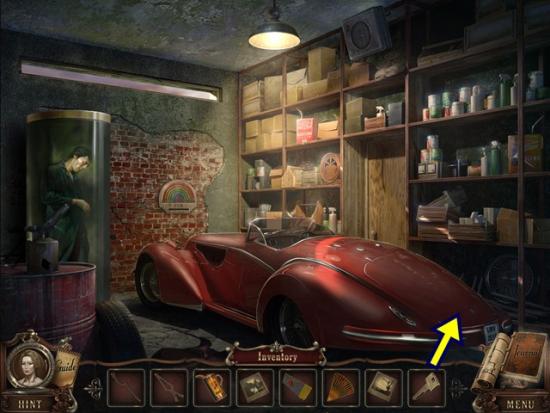
- Click on the trunk. Use the key to unlock it. Take the #7 cue ball. Open the suitcase and take the toy house part. Return to the well (move down two scenes).
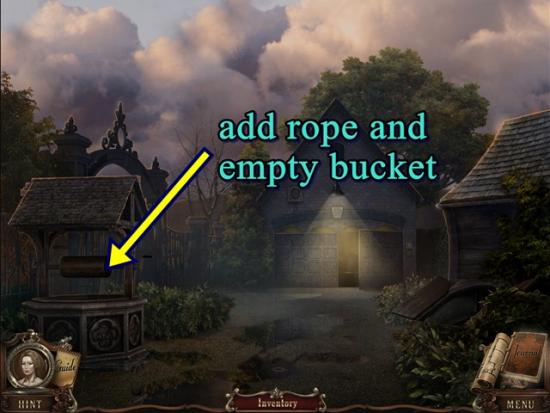
- Put the rope and the empty bucket on the well. Knock the bucket into the well, then turn the handle four times to get the bucket of water. Return to the gazebo (go through the garage).
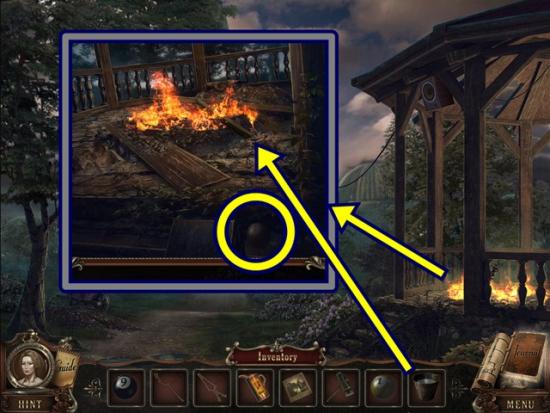
- Click on the gazebo. Take the #1 cue ball. Put the fire out with the bucket of water. Take the medallion.
- Return to the music room (move down four scenes, then click the lever to move the elevator, after the dialogue move as far down as you can go and enter the door on the right).
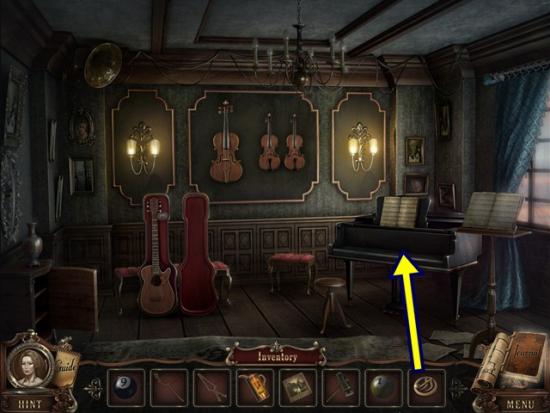
- Click on the piano. Add the medallion. Take the control panel. Leave and enter the makeup room (door on the left).
- Click on the shelves to start a hidden object hunt.
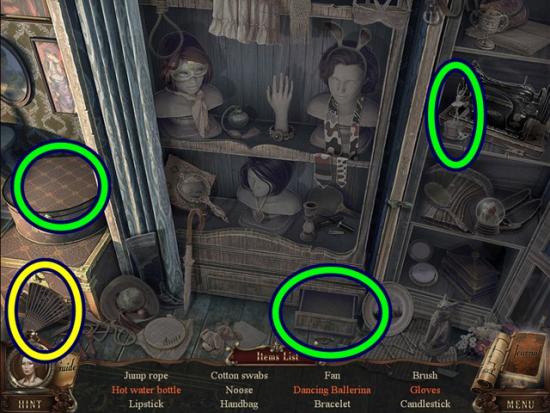
- Find all the objects. Close the open drawer to reveal the hot water bottle. Click on the ballerina seven times to get the dancing ballerina. Open the suitcase to reveal the gloves. A fan is added to your inventory.
- Leave the room.
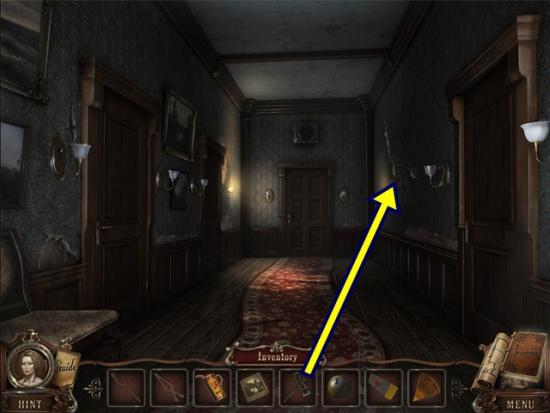
- Click on the right wall. Smash it with the sledgehammer. Take the slide. Return to the game room (forward through the door, then through the door on the right).
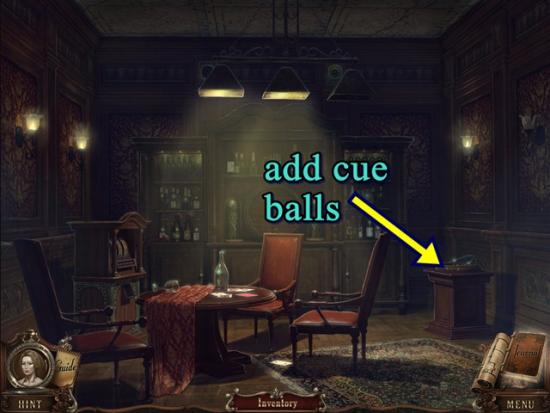
- Click on the game. Add the four cue balls. A mini-puzzle starts. Move the cue balls to their matching numbered slot. Click on a ball to see what slots it can move to. There is no reset button so you may have already moved balls so a step-by-step solution cannot be given.
- Once you are finished, a panel opens. Take the golden antler.
- Return to the tower (leave the room, go forward two scenes into the elevator, pull the lever, when the elevator stops, go forward five scenes).
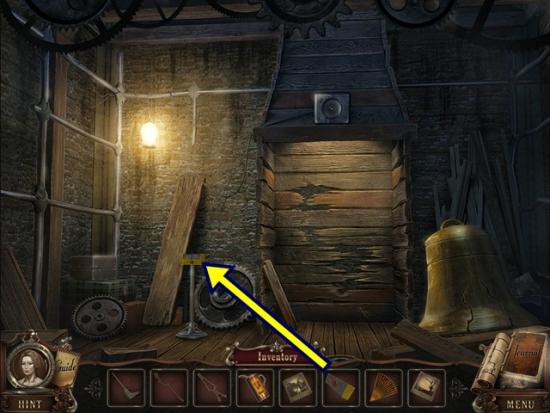
- Click on the control mechanism. Add the control panel. Press the large red button. Climb the ladder.
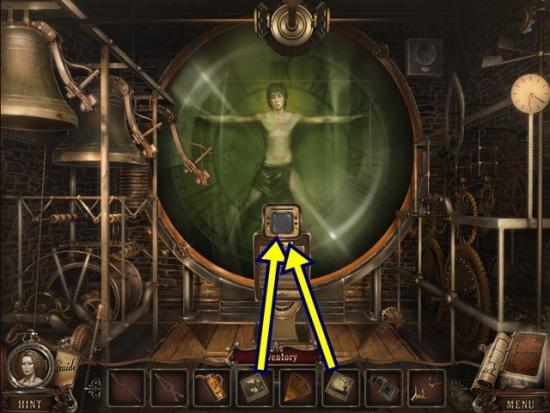
- Click on the monitor. Add the two slides. A mini-puzzle starts. Rearrange the slides to match the image on the monitor.
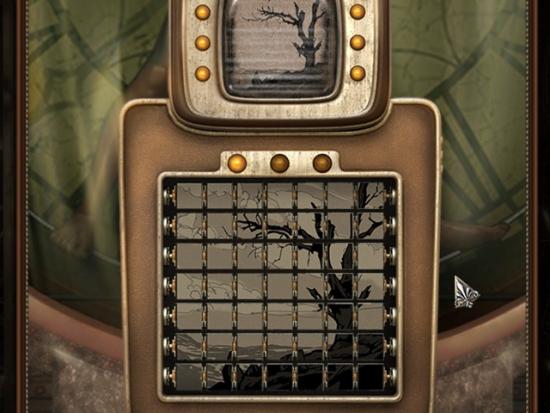
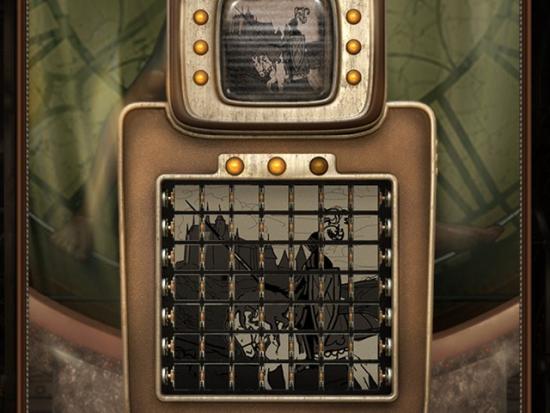
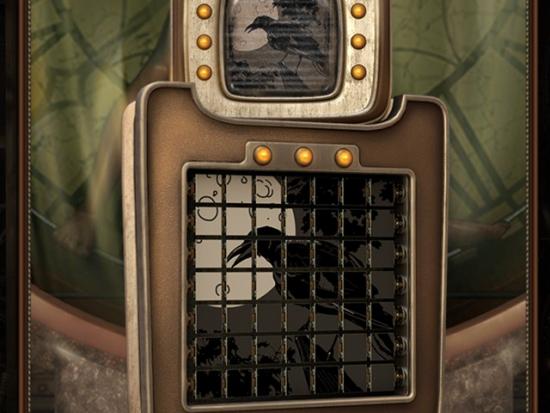
- When you are finished, take the golden antler. Return to the trophy room (move down six scenes to the elevator, click the lever, when the elevator stops, go through the door on the right).
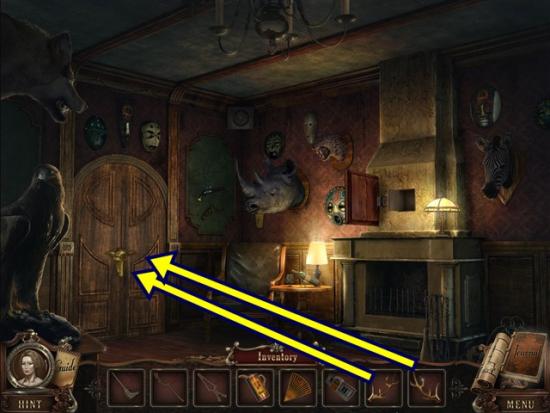
- Click on the door. Add the two golden antlers. Go through the door.
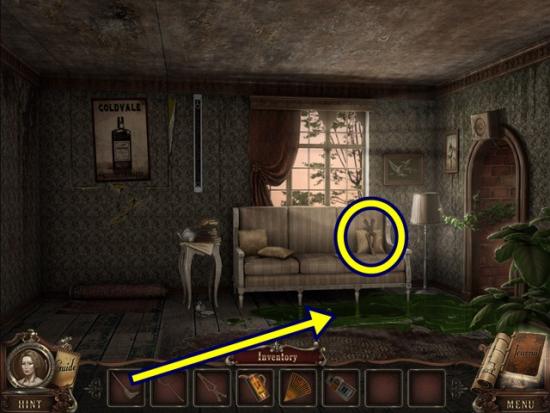
- Take the wooden mosaic part. Clean up the toxic sludge with the mop. Go through the doorway on the right to the flower girl.
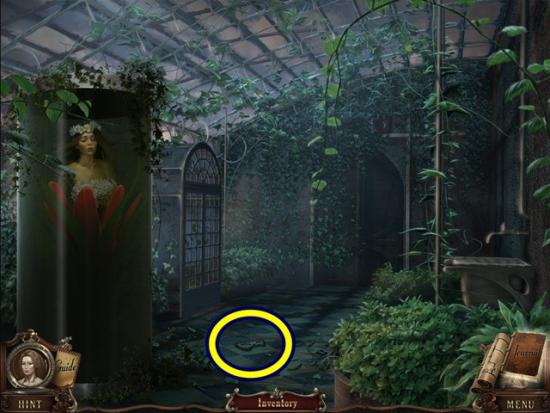
- Take the mask. Go through the door on the left to the balcony.
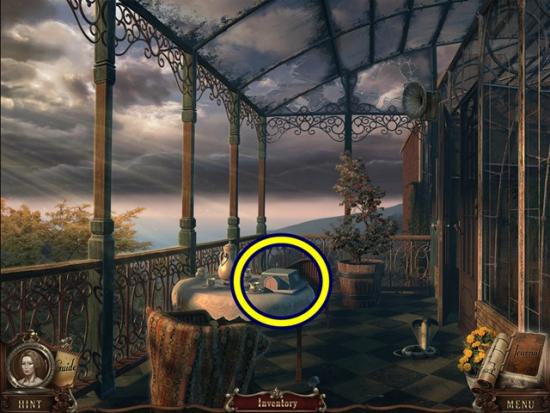
- Take the toy house roof. Return to the first hallway you visited (move down six scenes).
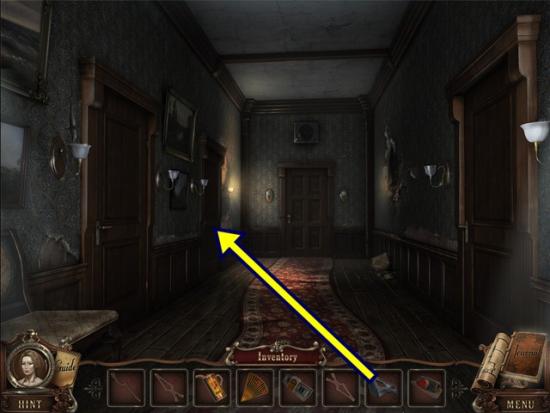
- Click on the second door on the left. Add the mask. Enter the theatre.
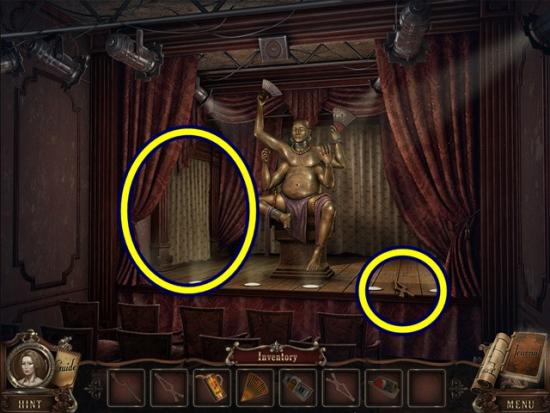
- Take the wooden mosaic part. Move the curtain and enter the theatre workroom.
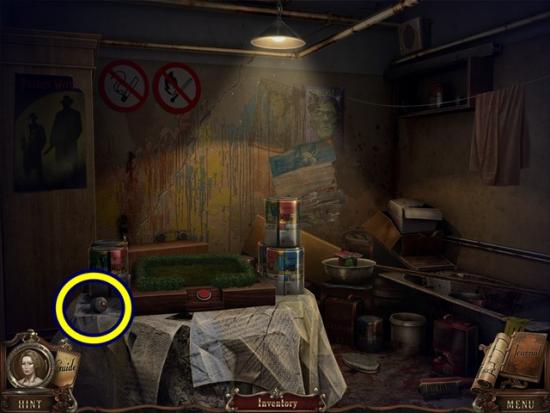
- Take the puzzle slider. Return to the well (move down two scenes, then forward three scenes, then pull the lever in the elevator).
- Click on the cellar door to start a hidden object hunt.
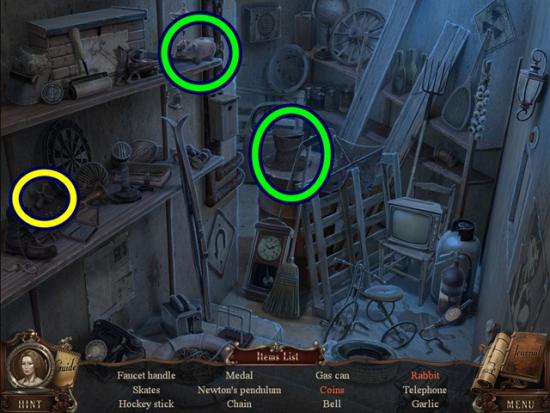
- Find all the objects. Knock the piggy bank off the shelf to get the coins. Click on the top hat to get the rabbit. A faucet is added to your inventory.
- Move forward to the collapsed archway.
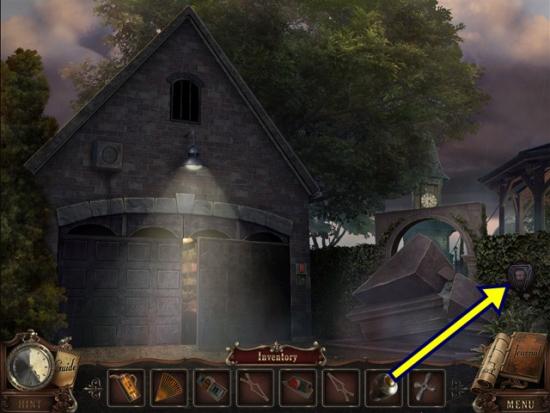
- Click on the panel beside the archway. Add the puzzle slider. A mini-puzzle starts. Adjust the sliders to the lasers create an equilateral triangle. An equilateral triangle is a triangle in which all three sides are equal. To solve the puzzle, click and drag the sliders so each is in the middle of its rail.
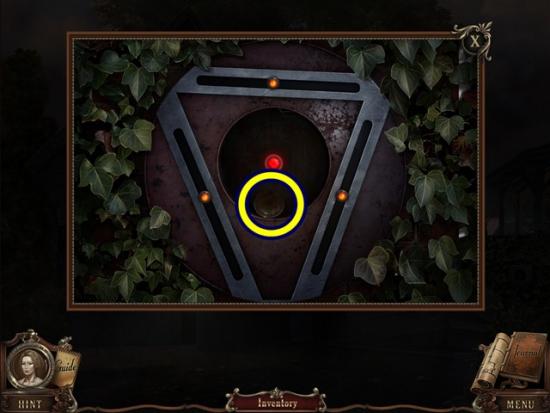
- Move the sliders so they are in the same position as the screenshot above. Take the coin. Return to the game room (down two scenes, pull the lever in the elevator, then down one scene and enter the room on the right).
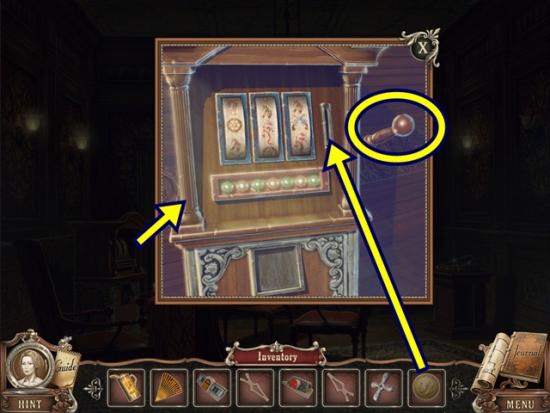
- Click on the slot machine. Add the coin and pull the lever. Take the net. Return to the theatre (down two scenes, then take the second door on the left).
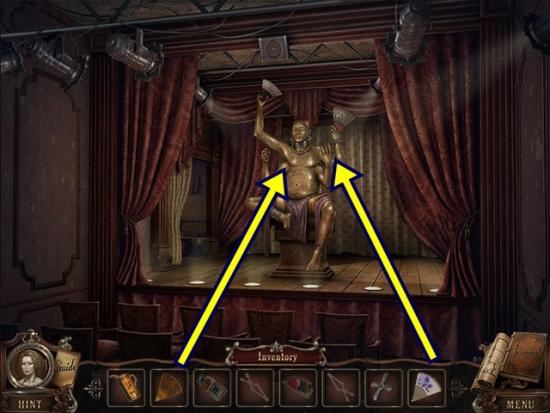
- Click on the statue. Add the two fans. Take the net. Return to the flower girl (leave the room, move forward two scenes and enter the room on the right, then continue through the doors to the flower girl).
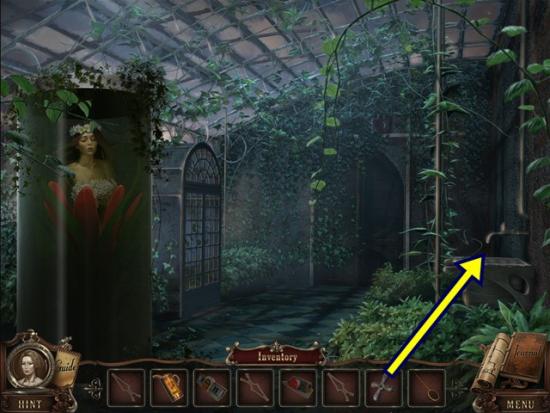
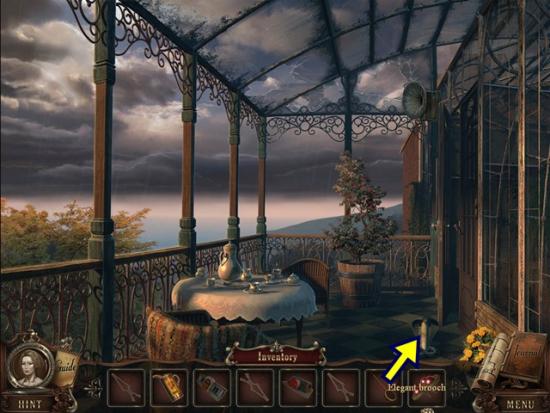
- Click on the sink. Add the faucet. Turn the faucet and when the water is finished rising, take the elegant brooch. Go through the left door to the balcony.
- Capture the snake with the net to get the captured snake. Go through the far right door.
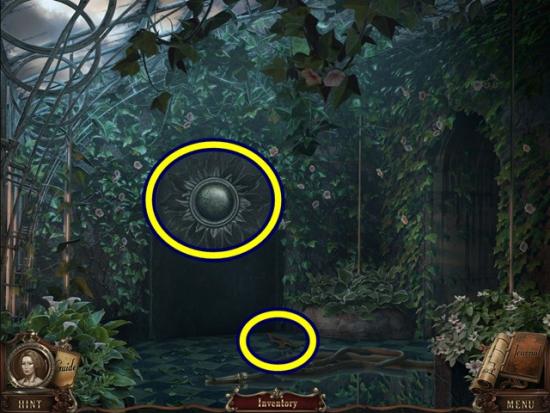
- Take the wooden mosaic part. Click on the flower inlay. A mini-puzzle starts. Adjust the petals so they each fit in their appropriate slots. Click and drag a petal and release the mouse button to position it. When a petal is properly positioned, it will lock and you can no longer move it. Continue until all petals are locked.
- Solution:
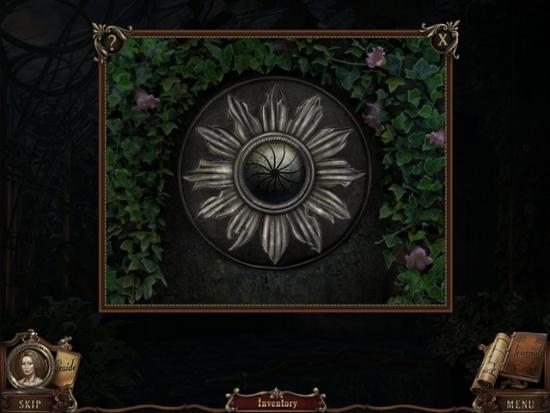
- Once you are finished, take the wardrobe tag. Go through the right doorway.
- After the dialogue, go through the first door on the left.
- Go through the left door to the bathroom.
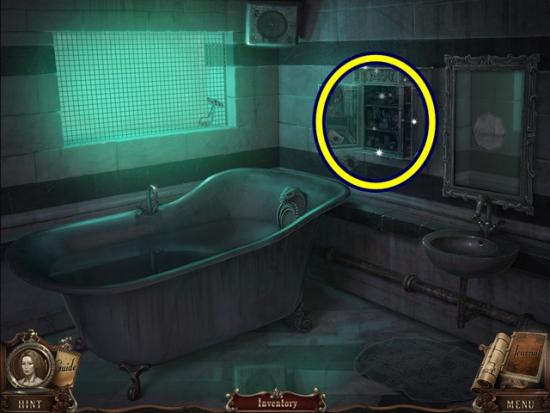
- Click on the medicine cabinet. Click on the medicine cabinet again to start a hidden object hunt.
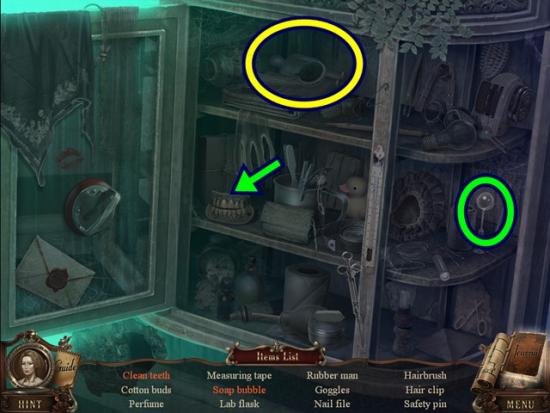
- Find all the objects. Open the side panel. Click on the bubble maker to get a soap bubble. Use the toothbrush on the fake teeth to get the clean teeth. A rubber man is added to your inventory.
- Leave the room and go down one scene.
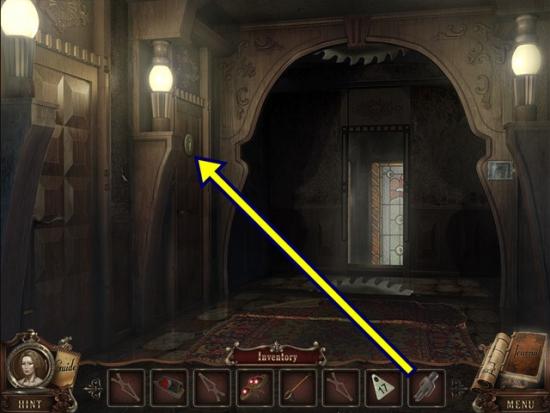
- Click on the second door on the left. Add the rubber man. Enter the room.
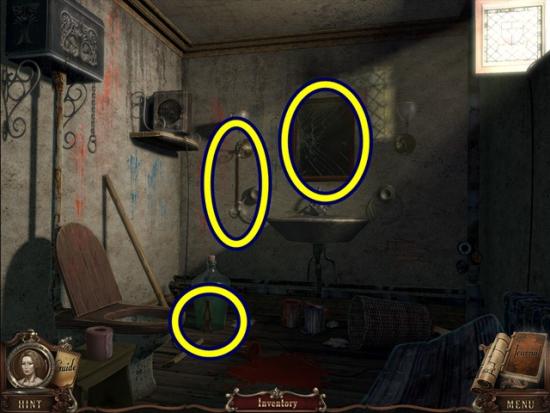
- Take the wooden mosaic part and the bar with hooks. Click on the mirror to loosen the shards. Click on the mirror again and read the note. Click anywhere outside the window to close it.
- Move down five scenes.
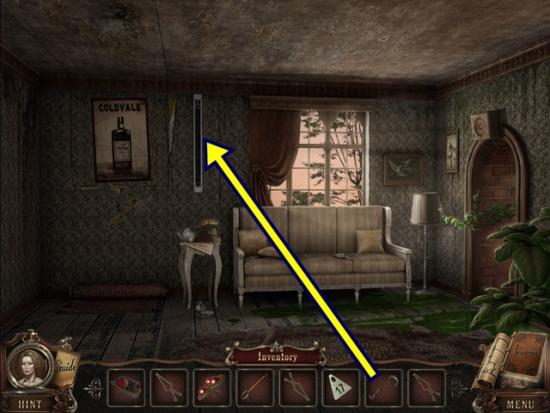
- Click on the spring panel. Add the bar with hooks. To connect the bottom hook, click at the very top of the spring and click and drag very slowly downwards until the bottom hook attaches.
- Go up the stairs.
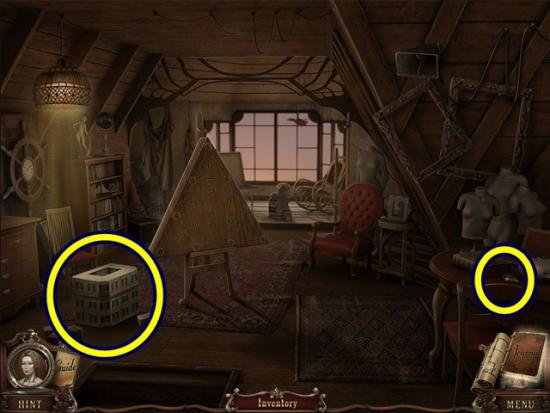
- Take the toy house part and the toggle switch. Return to the theatre workroom (go down five scenes, then through the second door on the left and through the left side door).
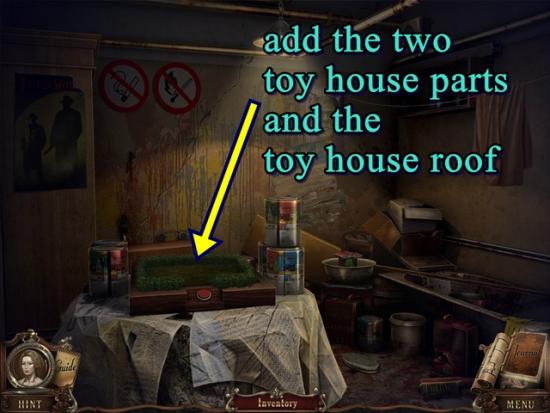
- Add the two toy house parts and the toy house roof. If the first toy house part doesn’t fit, use the other toy house part. Add the toy house roof last. When you have placed the three pieces, click the large red button. Take the snake eye.
- Return to the bathroom (move down two scenes, then forward two scenes, through the door on the right, forward, then right, left, right two scenes, take the first door on the left, then go left again).
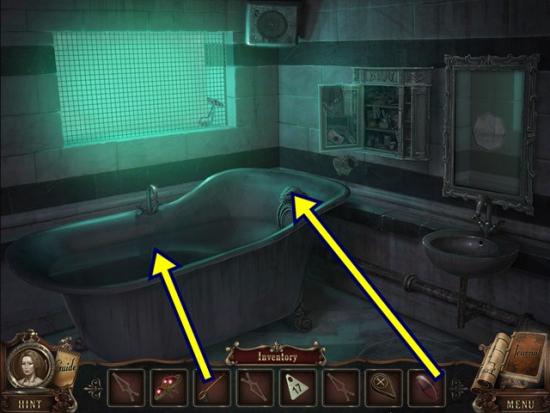
- Click on the snake idol in the bathtub. Add the snake eye. Click anywhere outside the window to close it. Add the captured snake to the bathtub.
- When the panel opens, take the branding iron. Leave the bathroom and go forward into the bedroom. Go through the door on the left into the nursery.
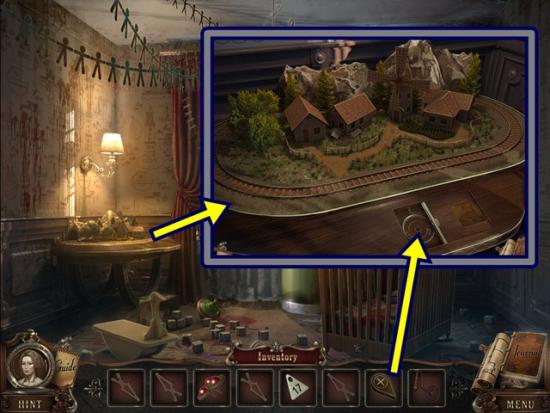
- Click on the model railroad in the corner. Open the panel. Add the toggle switch and click and drag it to the On position. A mini-puzzle starts. Create a continuous circuit of power. Click on a disc to rotate the discs around it.
- Once you’ve solved the puzzle, the train comes around. Take the glass cutter. Move down four scenes.
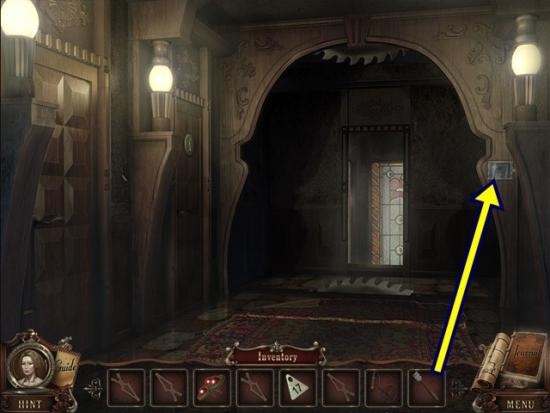
- Click on the panel beside the moving saws doorway. Use the glass cutter. Click on the orange button.
- Move forward to the stairs.
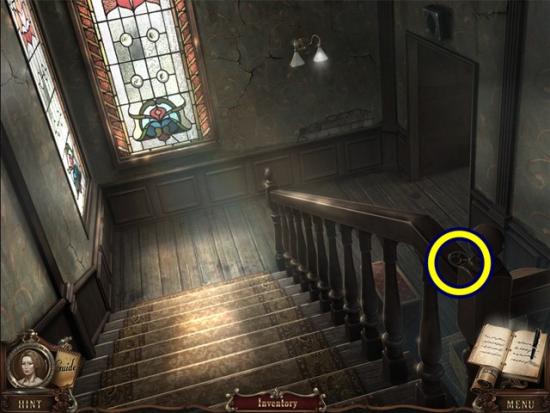
- Take the Taurus sign.
- Go through the door to the mechanical check room.
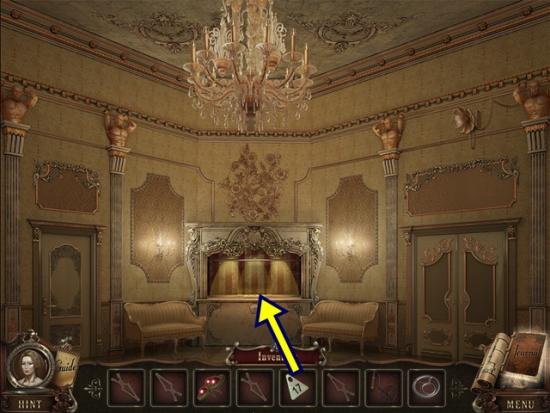
- Click on the counter. Add the wardrobe tag. When the panel arrives, take the can opener. Go through the door on the left to the dining room.
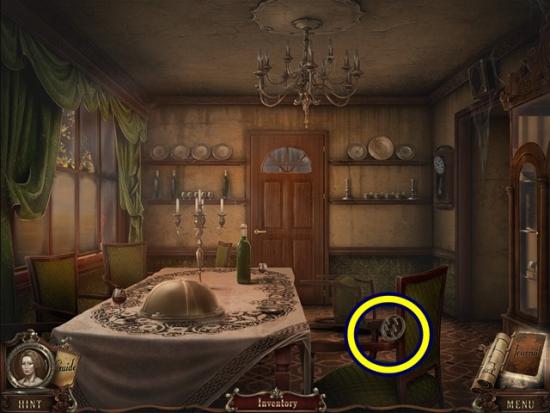
- Take the Aquarius sign. Move forward into the kitchen.
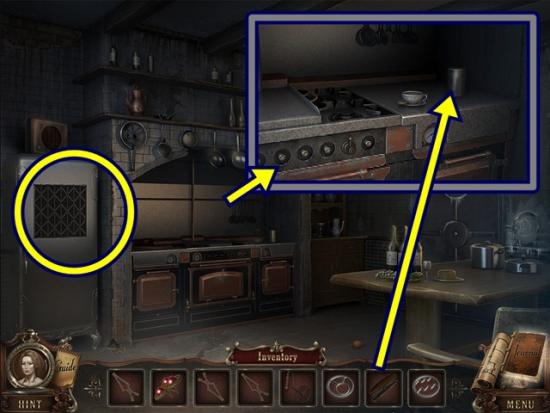
- Click on the stove. Open the can with the can opener and take the key. Click anywhere outside the window to close it.
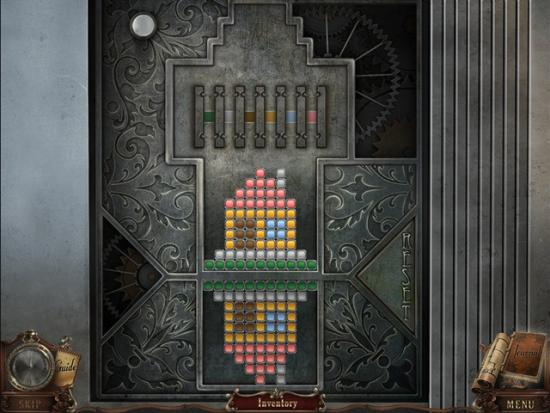
- Open the refrigerator (click twice). A mini-puzzle starts. Move the uncoloured tiles down to mirror the pattern of the coloured tiles. Colour tiles by moving (click and drag) them through the coloured aisles. Note: The coloured tiles at the bottom that look white are actually grey. You will use all the tiles to recreate the image. To recolour a tile, just move it through another aisle.
- Solution:
- Click on the refrigerator to start a hidden object hunt.
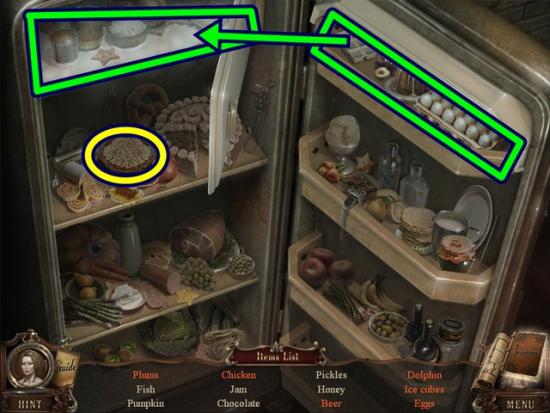
- Find all the objects. Open the freezer and the flap on the door to reveal more items. Empty the bowl of oats to reveal the dolphin. Put the ice cube tray in the freezer to make ice cubes. A dolphin is added to your inventory.
- Move down and go through the door on the right to the area labelled “code door.”
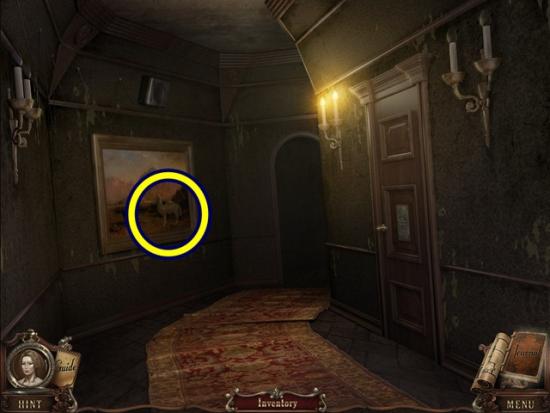
- Click on the painting. Take the camel. Move forward to the area labelled “the butler.”
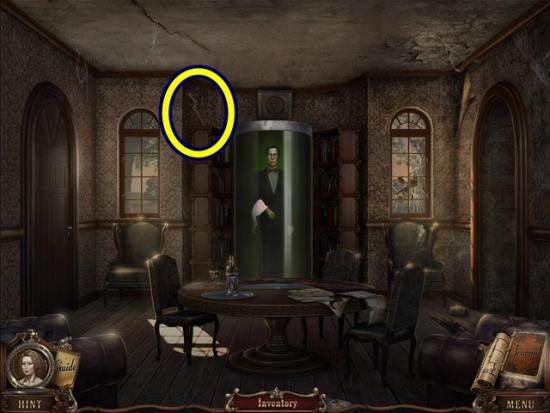
- Take the wooden mosaic part. Go through the door on the left to the butler’s room.
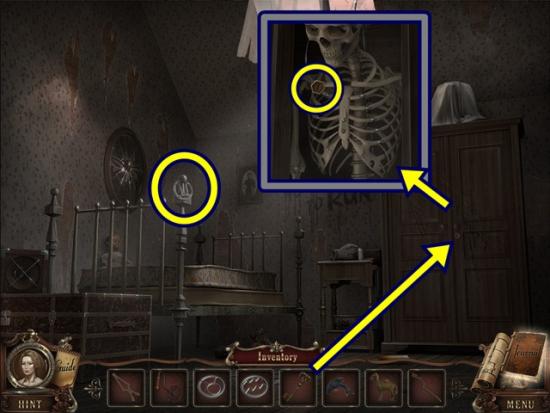
- Take the Gemini sign. Click on the wardrobe. Unlock it with the key. Take the wooden cell.
- Go to the bedroom (move down six scenes, then take the door on the left, then go forward through the door).
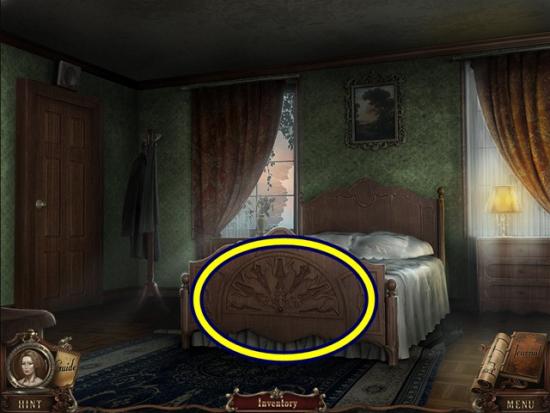
- Click on the foot of the bed. Add the seven wooden mosaic parts. Take the steel rose.
- Return to the attic (move down six scenes, then go up the stairs).
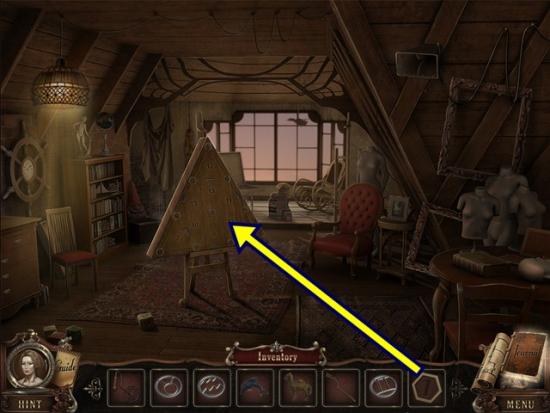
- Click on the triangle. Add the wooden cell. A mini-puzzle starts. Rearrange the wooden cells so the number of the three surrounding cells equal the number in the centre of the triangle. Click on two adjacent cells to swap their position.
- Solution:
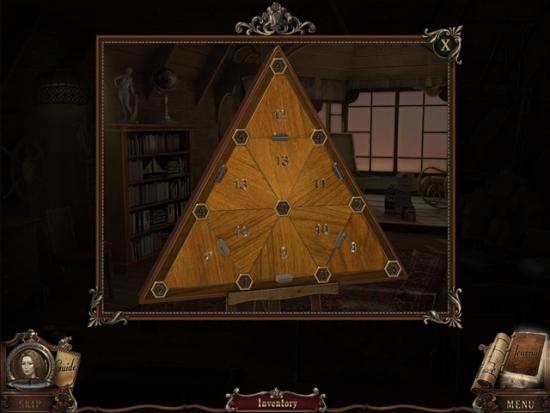
- When the panel opens, take the wardrobe tag.
- Return to the mechanical check room (go down one scene, then take the door on the right, left door, right door, right door, move forward, then take the door on the right).
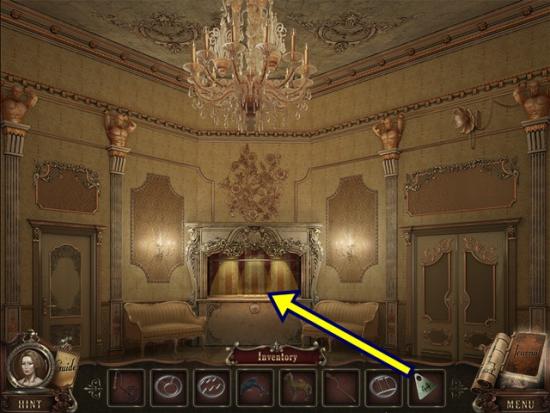
- Click on the counter. Add the wardrobe tag. When the panel arrives, take the door knob. Take the left door, then the right door, move forward, then take the door on the right.
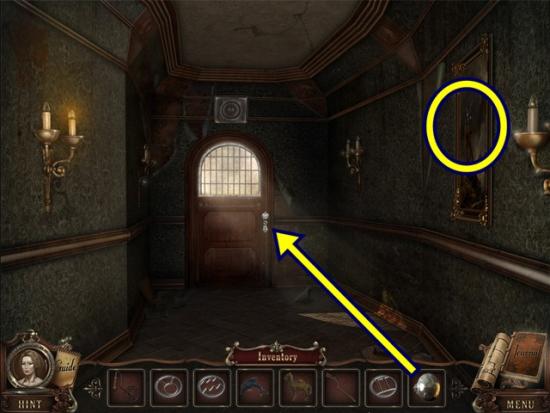
- Click on the painting. Take the eagle. Click on the door. Add the door knob. Turn the knob. Go through the door into the rose garden.
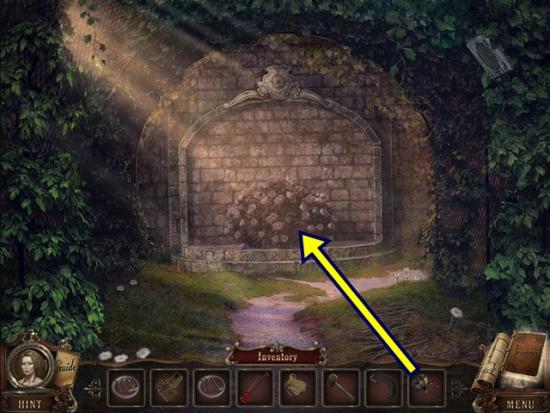
- Click on the steel rose garden. Add the steel rose. Take the fish statue.
- Take the path to the right to the “mermaid.”
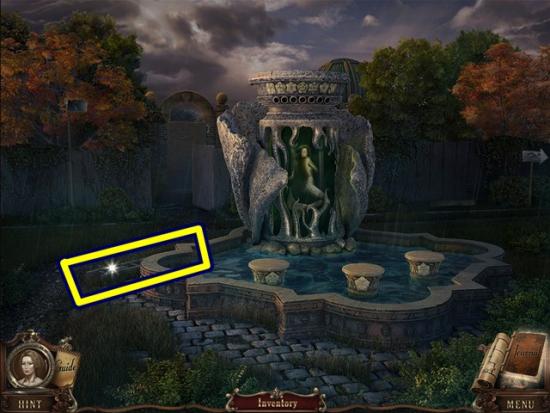
- Take the ladder. Move forward through the archway.
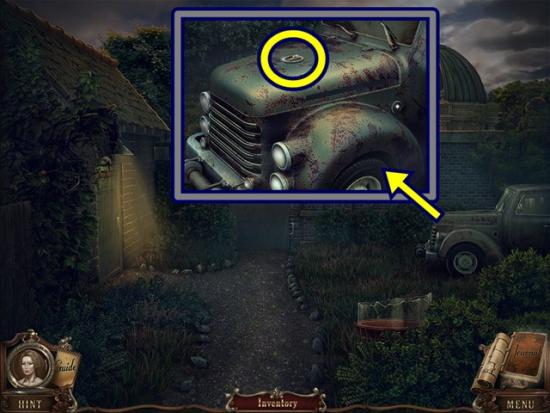
- Click on the old truck. Take the Aries sign. Click anywhere outside the window to close it. Go through the door on the left into the shed.
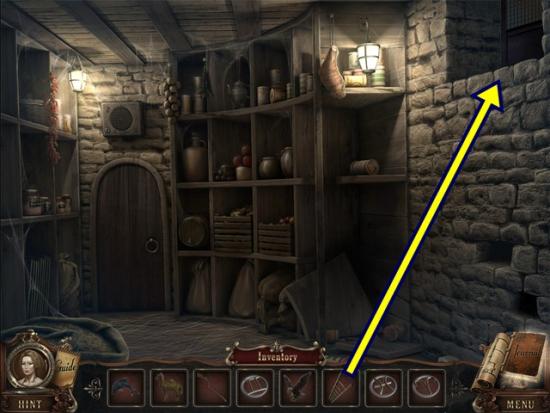
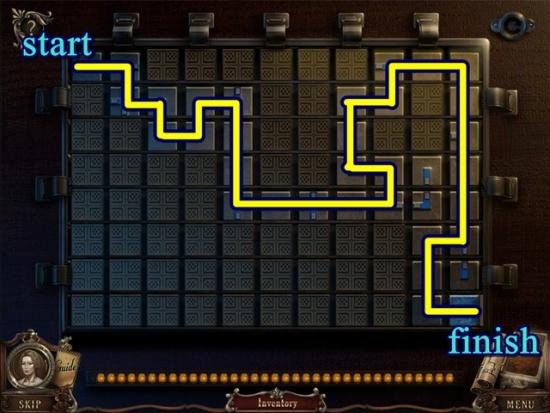
- Put the ladder against the wall. Click on the top of the ladder. A mini-puzzle starts. Click on the tiles to create a path to the “exit.” Click on the edge of a tile to open up the path. You must do this in 34 moves.
- Solution:
- Take the mirror fragment. Go forward through the door into the wine cellar.
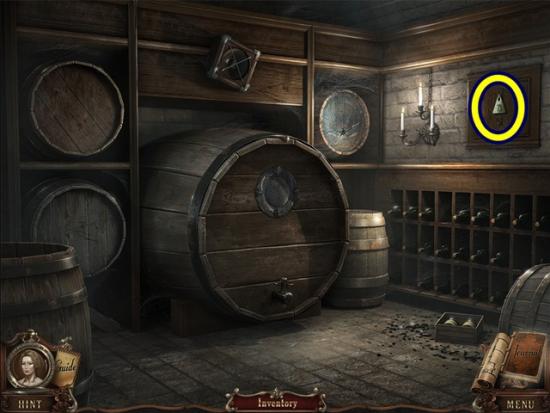
- Take the wardrobe tag.
- Return to the mechanical check room (move down nine scenes).
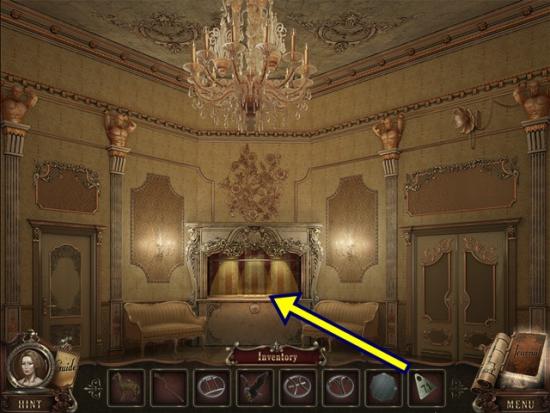
- Click on the counter. Add the wardrobe tag. When the panel appears, take the round handle.
- Move down two scenes, then take the first door on the left, then take the left door into the bathroom.
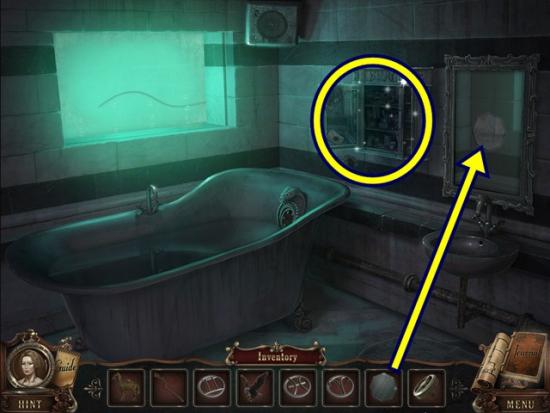
- Add the mirror fragment to the mirror. When it flips, take the lock pick and the dish handle. Click on the medicine cabinet to start a hidden object hunt.
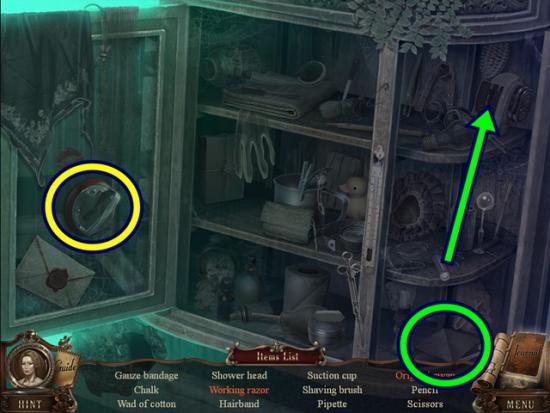
- Find all the objects. Open the side panel to reveal everything. Click on the paper five times to get the origami swan. Put the battery in the shaver to get the working razor. A suction cup is added to your inventory.
- Leave the scene, then click on the door on the right.
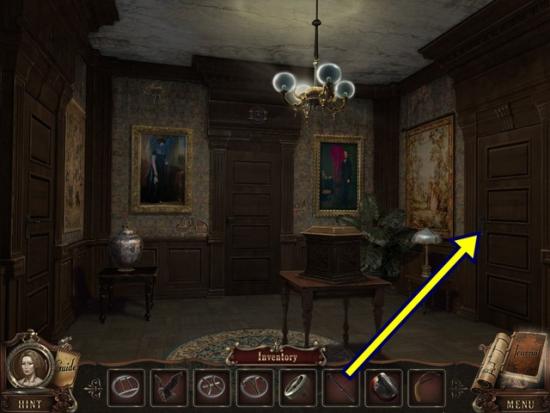
- Use the lock pick. Click and drag the lock pick to line up the slots to open the door. Enter the library.
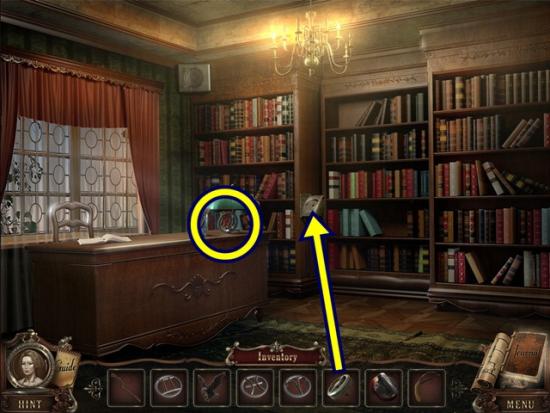
- Take the Virgo sign. Click on the middle bookshelf. Add the round handle to the panel. Use the round handle to move through the shelves. There are six in total (labelled). Move your mouse along the rows of books and every time your mouse turns into a hand, click to further examine the book. There are many books to examine. Two books contain inventory items.
- Shelf #3, 4th shelf contains the elegant brooch.
- Shelf #5, 1st shelf contains the cross shaped plate.
- Leave the scene.
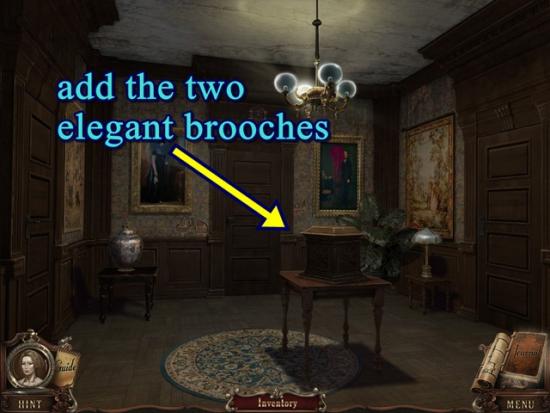
- Click on the wooden box on the table. Add the two elegant brooches. A mini-puzzle starts. Launch the coloured marbles into the puzzle so they fall into their matching coloured hole.
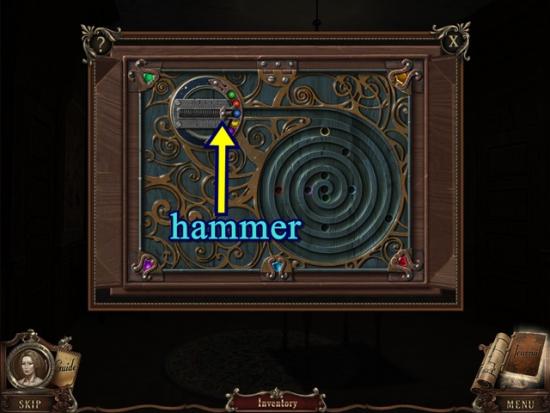
- Pull back the hammer in order to strike the coloured ball with just the right amount of force to propel it towards its hole. Notice the hammer has measured increments. Click and drag the panel with the balls.
- To sink the red ball, pull the hammer to 3.
- To sink the yellow ball, pull the hammer to 2.
- To sink the blue ball, pull the hammer to 6.
- To sink the purple ball, pull the hammer to 7.
- To sink the green ball, pull the hammer to 8.
- When you are finished, take the lighter.
- Return to the dining room (move down one scene, forward one scene, through the right door then through the left door).
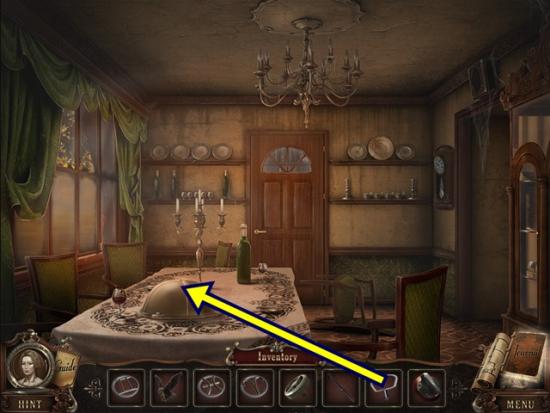
- Click on the covered dish. Add the dish handle. Click on the cake three times, then take the hacksaw. Go to the pool (go through the door on the right, then move forward, right door, forward, right door, then right door again).
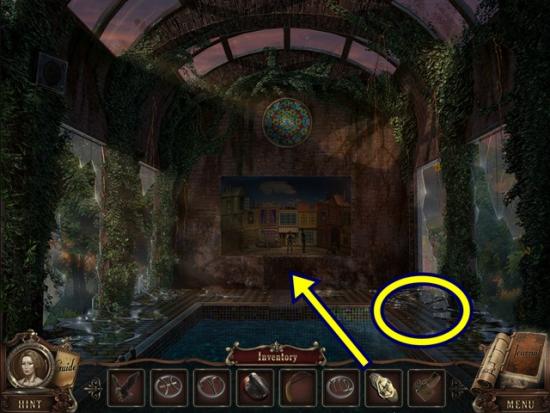
- Click on the broken glass on the right. Take the Pisces sign. Click on the vignette in the centre. Add the cross shaped plate to the inset.
- A mini-puzzle starts.
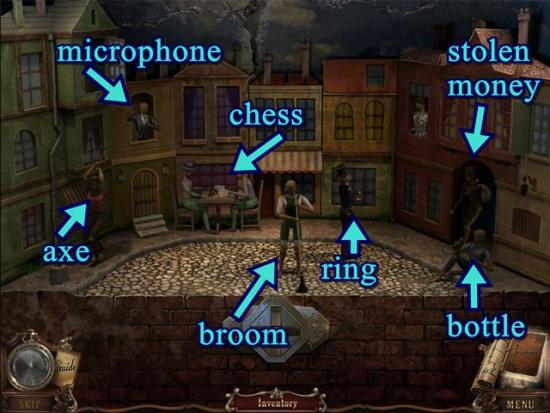
- Use the cross shaped plate to control the various characters in the scene. Use the right and left buttons to control a character. Use the up and down buttons to adjust the tool the character is using. Use logic to dictate the tool each character should use.
- From left to right, give the puppets the: axe, microphone, chess, broom, ring, stolen money and bottle.
- When the pool drains, go through the door into the catacombs.
- Move forward. After the video, move forward.
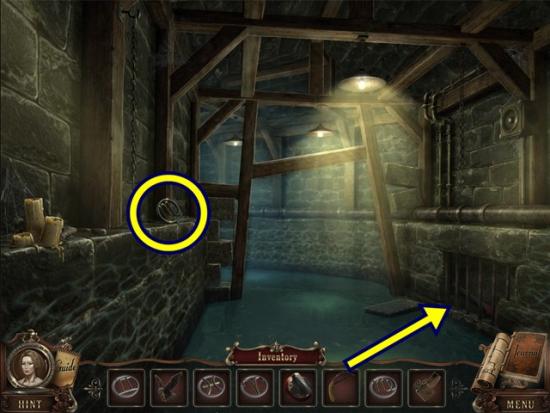
- Take the Scorpio sign. Click on the grate. Cut the bars with the hacksaw and take the jack. Move forward.
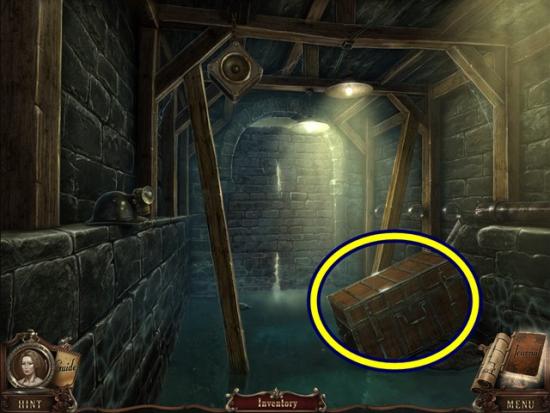
- Click on the trunk. Open the latches and take the gas handle.
- Return to the kitchen (move down eight scenes, the forward into the kitchen).
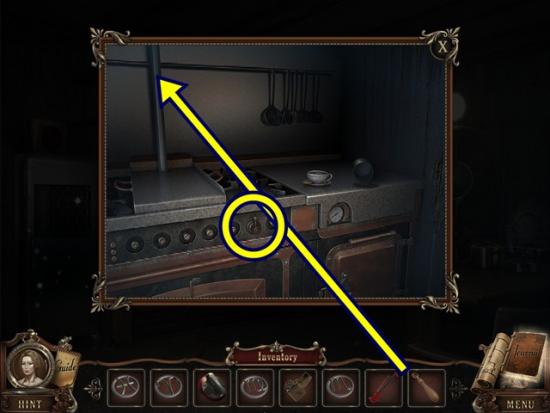
- Click on the stove. Add the gas handle and turn it. Turn on the burner. When the fire starts, add the branding iron, then take the red-hot branding iron.
- Click on the refrigerator to start a hidden object hunt.
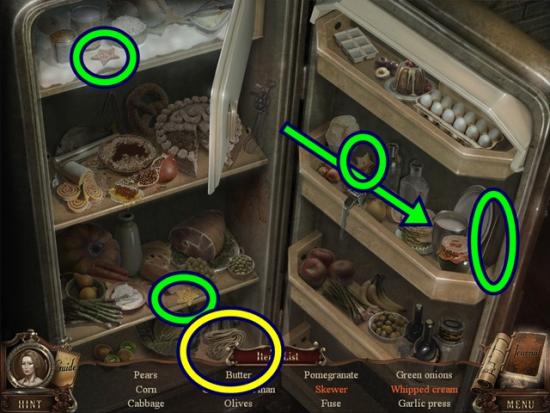
- Find all the objects. Put the beater in the pot of cream to get whipped cream. Take the skewer and pick up three star fruit slices to get the skewer. A fuse is added to your inventory.
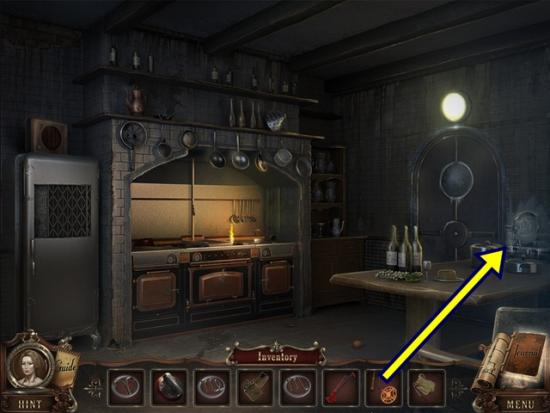
- Click on the door. Add the red-hot branding iron, then open the door and enter the area labelled “snow queen.”
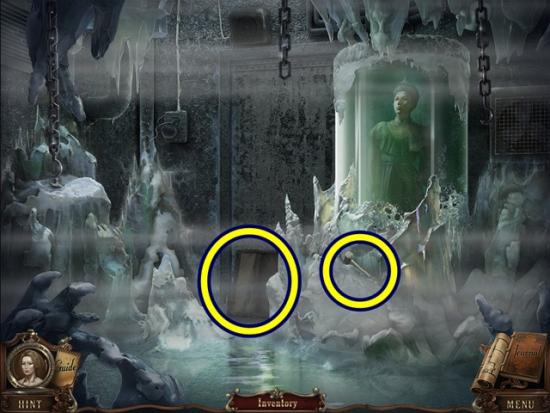
- Take the mallet. Click on the painting on the ground. Take the bear.
- Return to the butler (move down two scenes, then through the right door and move forward).
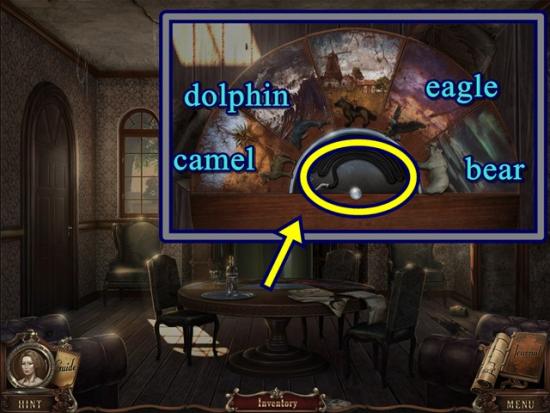
- Click on the table. Add each creature to its natural habitat. Moving clockwise, starting from the far left, place the camel, dolphin, the dog is already placed, eagle and bear. Take the towing cable.
- Return to the old truck (go right, then forward, right and forward).
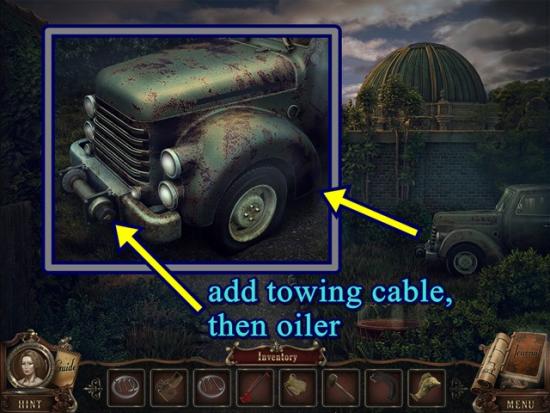
- Click on the old truck. Add the towing cable, then the oiler. Click on the winch.
- Move forward.
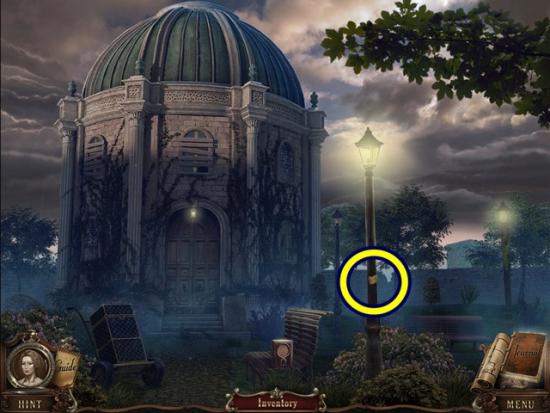
- Click on the note on the lamppost. Take note of the number “127530” (it’s added to your journal). Click anywhere outside the window to close it.
- Move to the right.
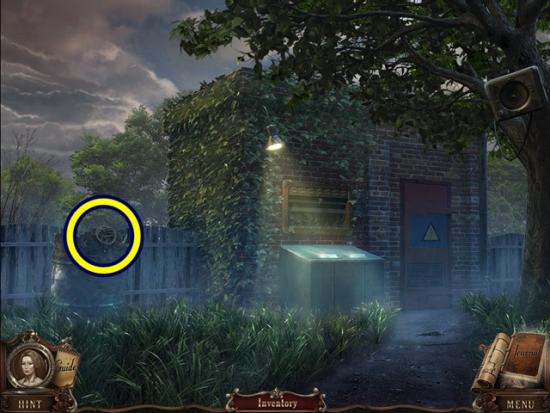
- Take the Capricorn sign. Enter the generator room.
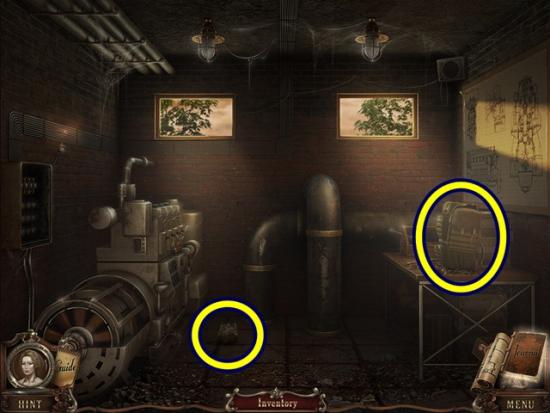
- Read the note on the floor. Click anywhere outside the window to close it. Click on the bag on the table. Remove the top flap and take the ice pick.
- Return to the snow queen (move down nine times, then forward into the kitchen and go into the freezer).
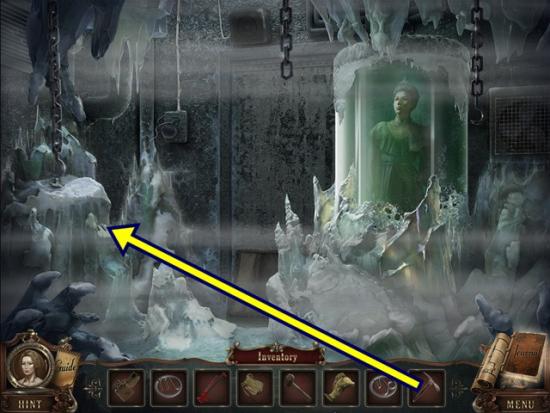
- Click on the ice at the left of the scene. Use the ice pick. Press the large silver button and take the keycard.
- Return to the area labelled “code door.”
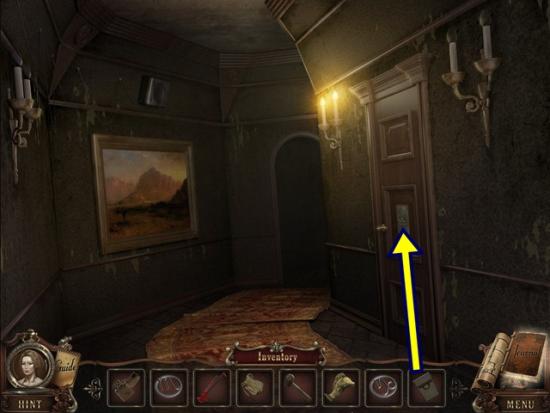
- Click on the door. Add the keycard and enter the combination you saw on the lamppost (it’s in your journal). 127530
- Enter the padded cell. Move forward. After the audio, move forward again into the area labelled “the deadly tasting.” Go through the door on the left into the study.
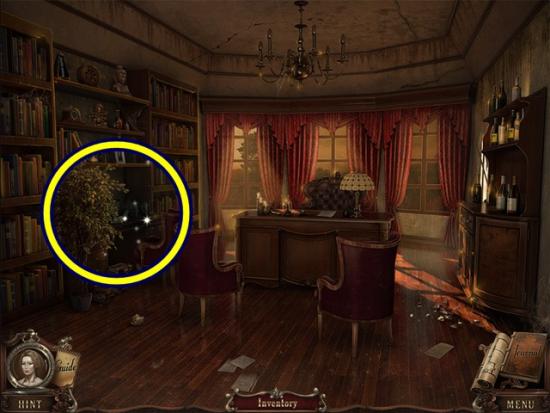
- Click on the shelves to start a hidden object hunt.
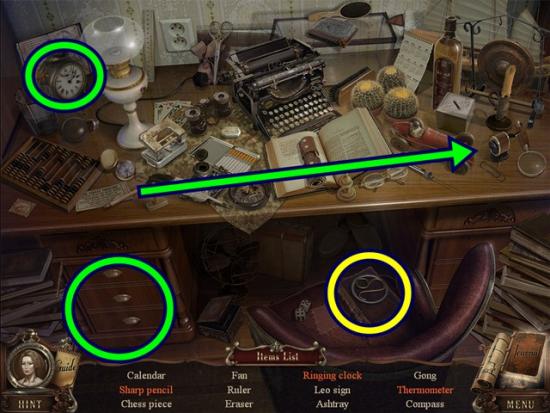
- Find all the objects. Add the pencil to the sharpener to get the sharp pencil. Click on the clock to get the ringing clock. Open the drawer to reveal the thermometer. A Leo sign is added to your inventory.
- Leave the study and go through the door on the right.
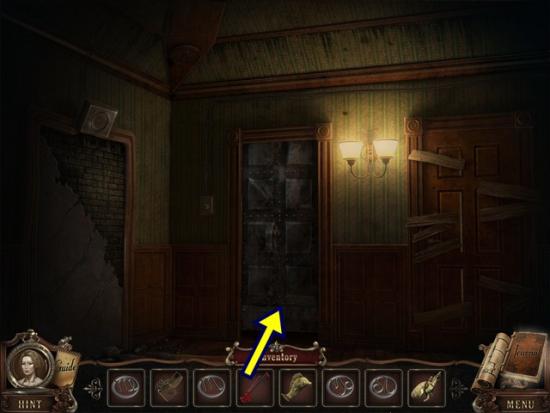
- Place the jack in front of the door. Click on the jack until it raises the door enough for you to enter the boiler room.
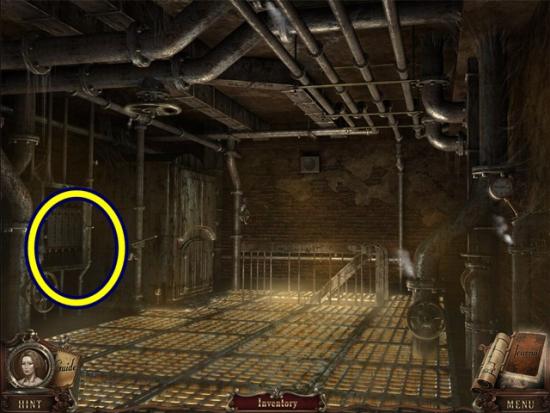
- Click on the panel on the left wall. A mini-puzzle starts. Adjust the pressure in each tube so the pressure reaches the orange marker. Use the numbered buttons to the left of each tube to adjust the pressure. The number on each button indicates how many spaces the pressure will adjust. Click on the up arrow to increase the pressure by that number, click the down arrow to decrease it by that number. You can only use each button once.
- Starting from left to right, +1 +3 +4.
- +7 -5 +1
- +6 -5 +1
- +5 +3 -2
- +7 -5 +2
- When the pane opens, take the hose and the empty gas can. Move forward into the sewer.
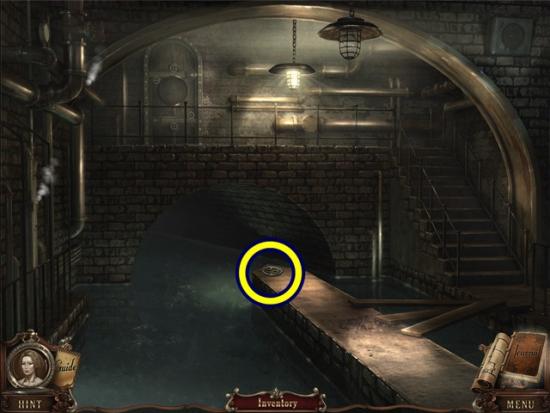
- Take the Cancer sign.
- Return to the old truck (move down five scenes, then forward, right, forward, right then forward again).
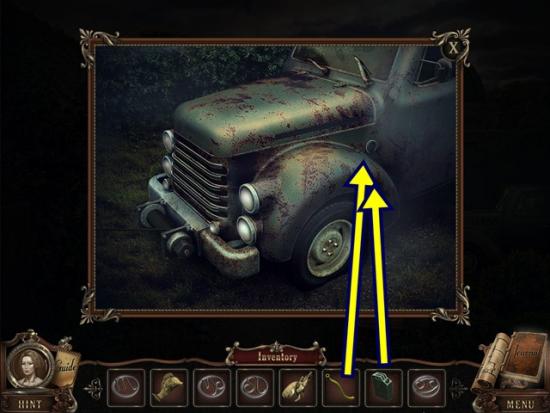
- Click on the old truck. Add the hose and the empty gas can. Wait for it to fill, then take the can of gas. Return to the wine cellar (left then forward).
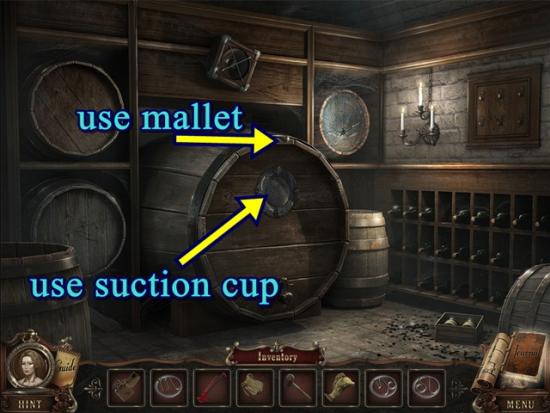
- Click on the barrel. Hit the pin with the mallet. Add the suction cup to the metal plate and pull it off. Take the crab statue.
- Return to the generator room (move down two scenes, then forward, right then enter the room).
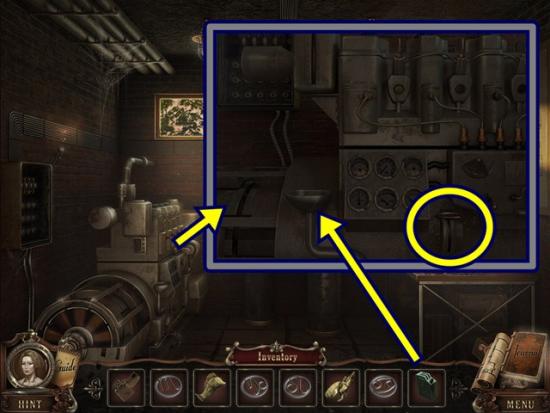
- Click on the generator. Pour in the can of gas, then pull the starter code.
- Go to the Planetarium (move down two scenes, then enter the Planetarium).
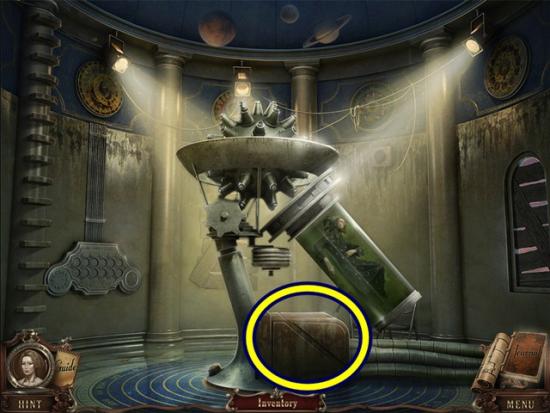
- Click on the panel. Open the door and take the four elements.
- Return to the catacombs (move down three scenes, then right and go into the pool.
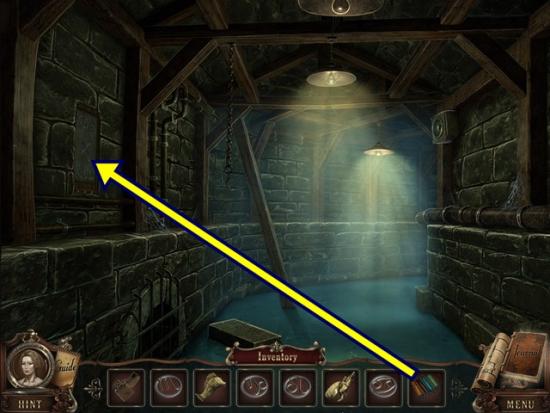
- Click on the panel on the left. Add the four elements. A mini-puzzle starts. Move the coloured elements from the bottom to the their matching slot at the top. To move an element, click on an end (note the cursor turns into a hand) and drag it to a peg. The coloured elements cannot pass through a grey element. Move the grey elements to clear a path for the coloured elements.
- When you are done, take the dynamite. Move forward two scenes.
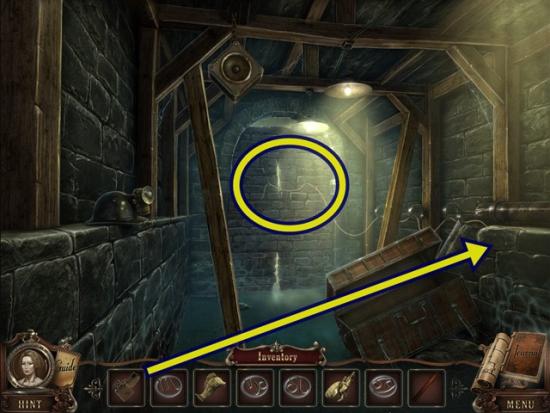
- Click on the back wall. Add the fuse and the dynamite. Light the fuse with the lighter.
- After the explosion, move forward to scenes into the crypt.
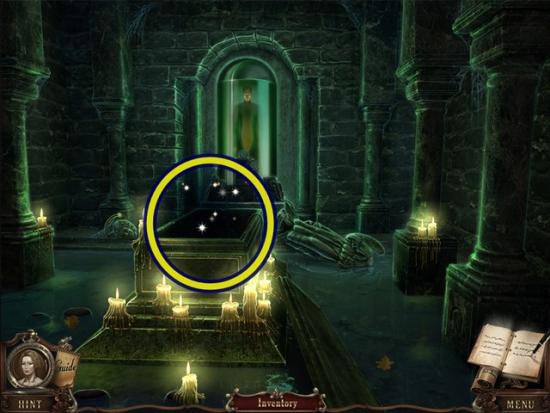
- Click on the coffin to start a hidden object hunt.
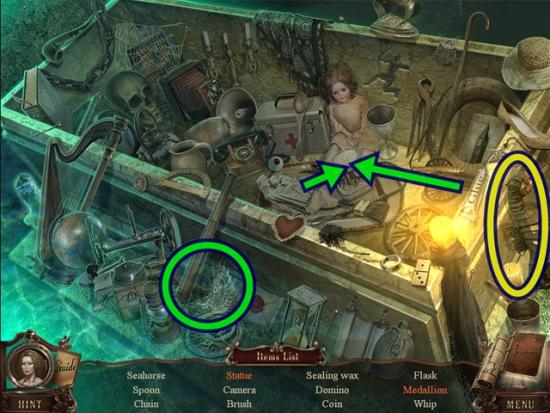
- Find all the objects. Use the glue to put the statue back together. Wipe away the cobwebs to get the medallion. A seahorse statue is added to your inventory.
- Return to the mermaid.
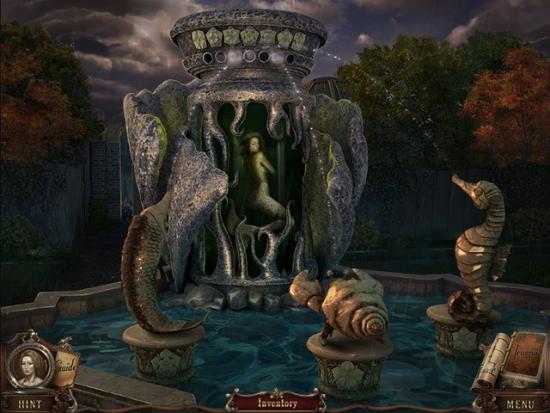
- Click on the mermaid fountain. Add the crab statue, the fish statue and the seahorse statue. Note the symbol on each pedestal. Note the symbols at the top of the mermaid. Click on the statue to move it so its stream of water sprays into the hole under the matching symbol.
- When you are finished, take the red cross.
- Return to the padded cell (move down four scenes, then go through the door on the right).
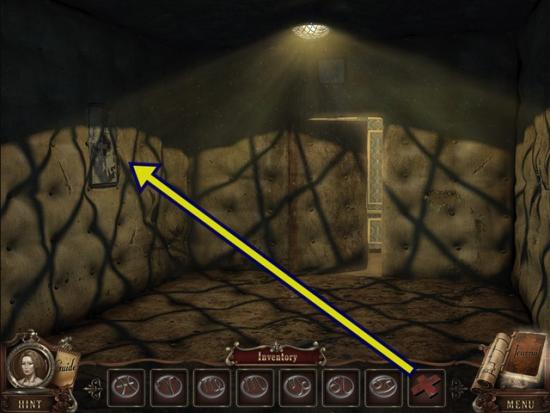
- Click on the panel on the left wall. Add the red cross. Take the vinyl needle. Move forward through the door.
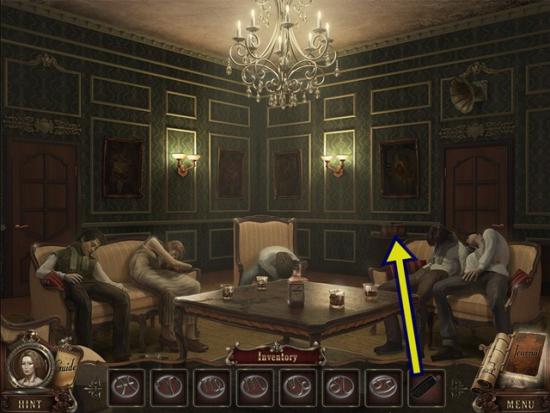
- Click on the gramophone. Add the vinyl needle. A mini-puzzle starts. Adjust the moveable switches to guide the needle to the centre of the record. The orange switches can be moved. The shadow beside the switch shows the direction it will move. After adjusting the switches, move the lever to Start to move the needle. If the needle gets stuck, move the lever to Reset.
- Solution:
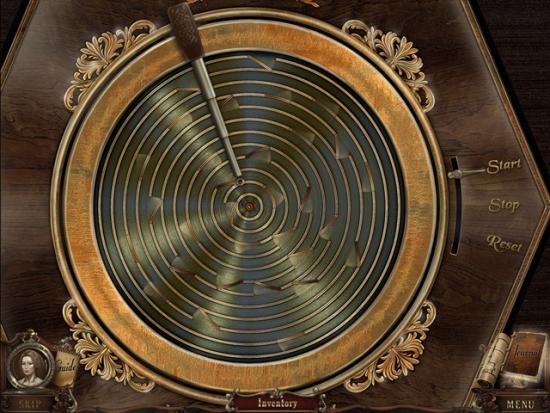
- When the panel opens, take the Libra sign. Go through the door on the left into the study.
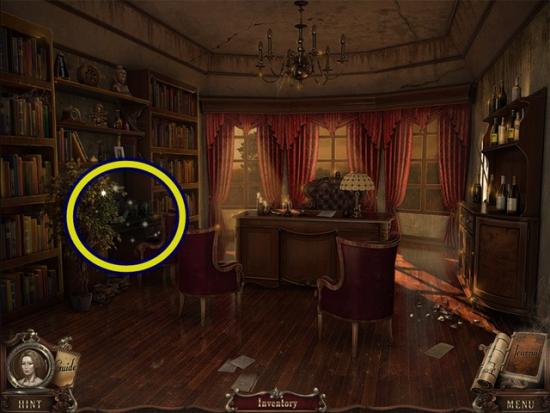
- Click on the shelves to start a hidden object hunt.
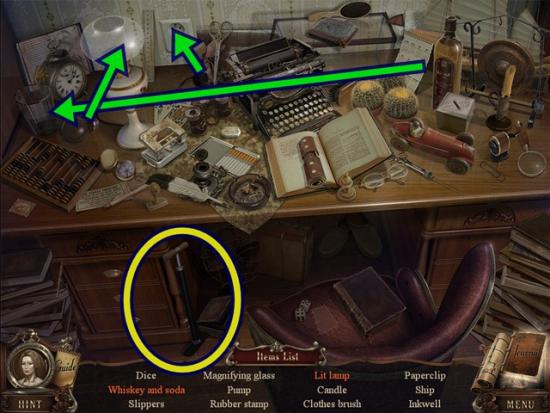
- Find all the objects. Add whiskey to the glass to get whiskey and soda. Plug in the lamp, add the light bulb, then click to turn on the lamp to get the lit lamp. A pump is added to your inventory.
- Return to the mermaid (down three scenes, then go forward, right, then forward again).
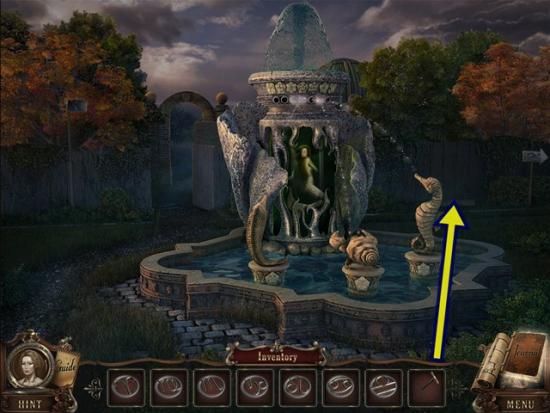
- Click on the area to the right of the mermaid fountain. Add the pump, then click to inflate the tire. Take the cartridge.
- Return to the area outside the generator (move forward twice, then go right).
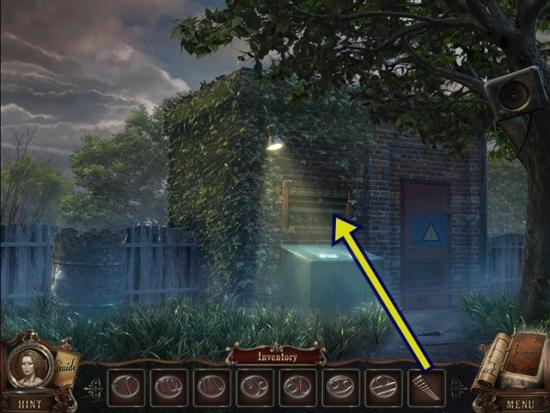
- Click on the panel. Add the cartridge. A mini-puzzle starts. Add the weights from the top to the bottom so the side by side scales equal the number in red. Click on a weight at the top to add it to the centre module. Then click on a scale at the bottom to add the weight.
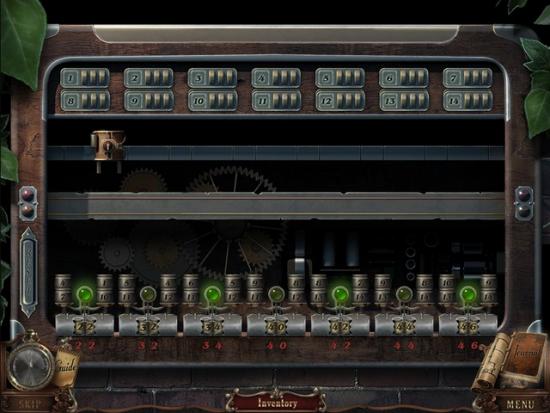
- The screenshot above shows one possible solution.
- When you are finished, take the star. Move down one scene.
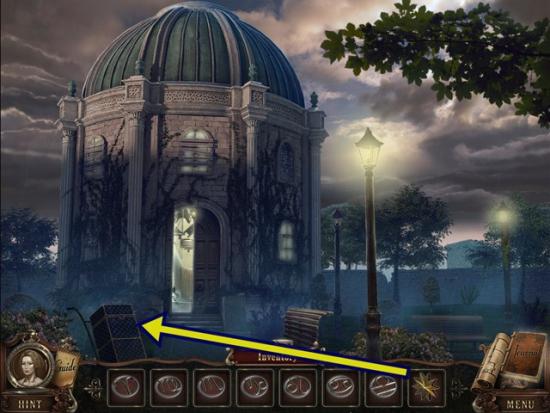
- Click on the suitcase. Add the star. Take the horseshoe.
- Return to the crypt (move down two scenes, then go right, into the pool, then move forward three scenes).
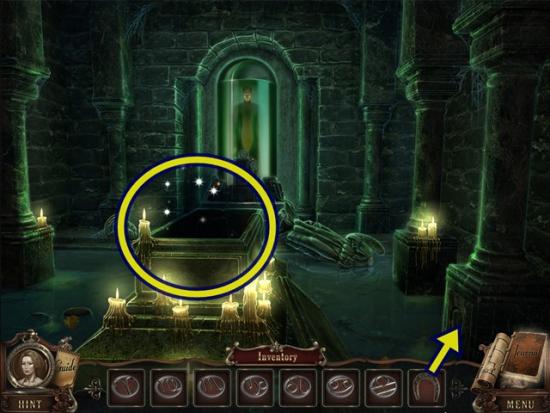
- Click on the base of the pillar. Add the horseshoe. Take the horse figurine.
- Click on the coffin to start a hidden object hunt.
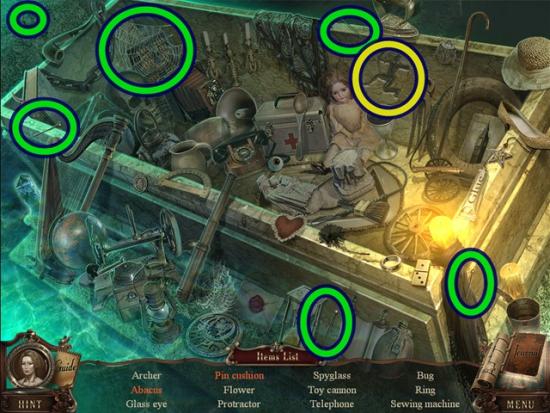
- Find all the objects. Click on the five pins to get the pin cushion. Wipe away the cobwebs to get the abacus. An archer figurine is added to your inventory.
- Return to the area outside the Planetarium (down five scenes, then forward two scenes).
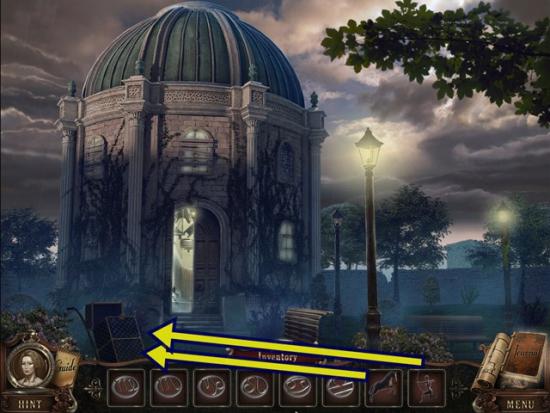
- Click on the suitcase. Add the horse figurine and the archer figurine. Take the Sagittarius sign. Enter the Planetarium.
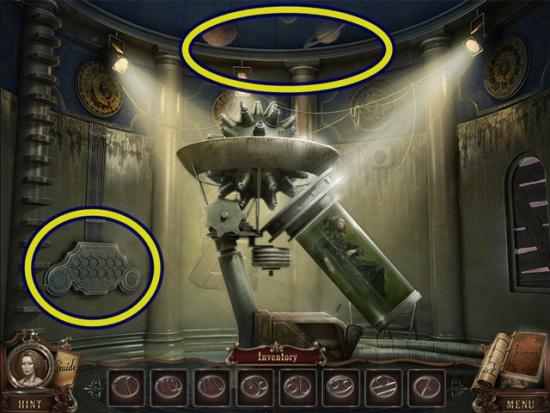
- Click on the panel on the left. Add the 12 zodiac signs. Once you have placed all 12 signs, click on the top area of the Planetarium. A mini-puzzle starts. Move the zodiac discs from the outer ring into their appropriate slot on the inner ring. Click and drag to move the inner ring. There is no reset button for this puzzle so a step-by-step solution cannot be given as you’ve likely already moved the rings before visiting this walkthrough.
- When you are finished, take the solid gold disc.
- Return to the sewer (move down seven scenes, then move right, forward, then through the right door, then forward two scenes).
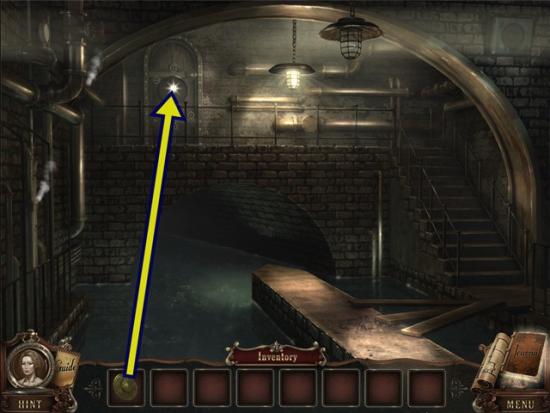
- Click on the door. Add the solid gold disc. Go through the door. After the audio, move forward.
- Watch the cutscene.
The end!
Bonus Chapter (Collector’s Edition)
- If you are playing the Collector’s Edition, you can now play the Bonus Chapter. From the main menu, click Bonus Chapter.
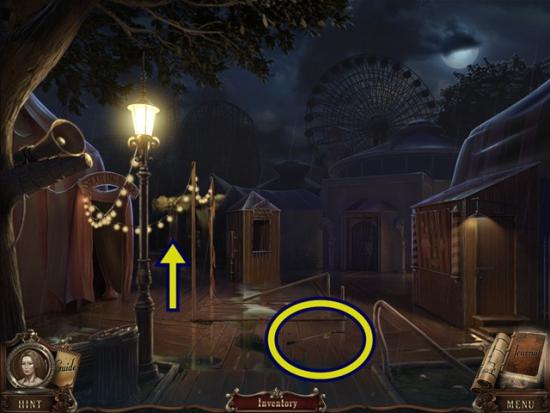
- Take the golf club. Move forward (don’t enter a tent).
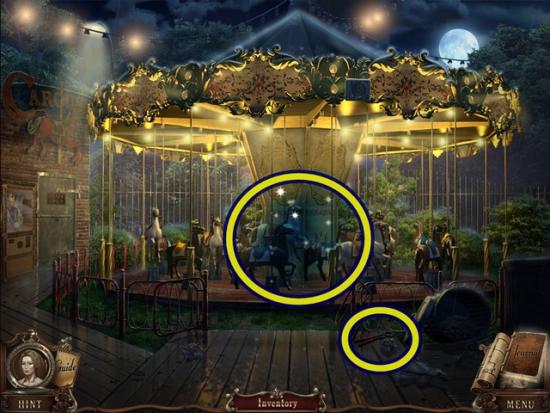
- Take the pincers. Click on the carousel to start a hidden object hunt.
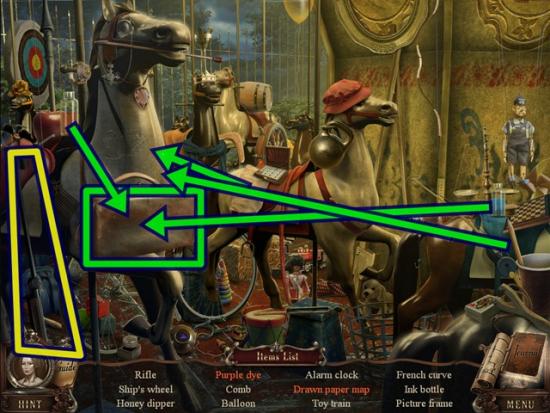
- Find all the objects. Put the piece of paper on the horse’s neck, then use the pencil on it to get the drawn paper map. Open the suitcase and pour the red and blue dyes into the flask to get the purple dye. Asmall-calibre rifleis added to your inventory.
- Move down and enter the shooting range tent (on the left).
- Take the wooden fragment. Click on the shooting range. Add the small-calibre rifle. A mini-puzzle starts. Shoot three targets. The reticle moves slightly so you have to be patient. Once you’ve shot the three targets, take the playing cards. Leave.
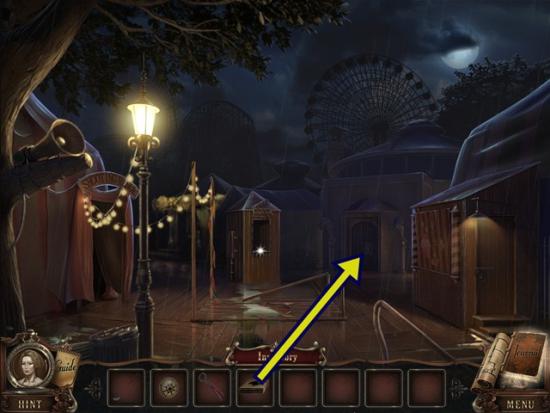
- Click on the second door from the right. Add the playing cards. A mini-puzzle starts. Solve the visual riddles. Hint: If you want the lazy way out, just click on the cards until you click the right one.
- 1st set:
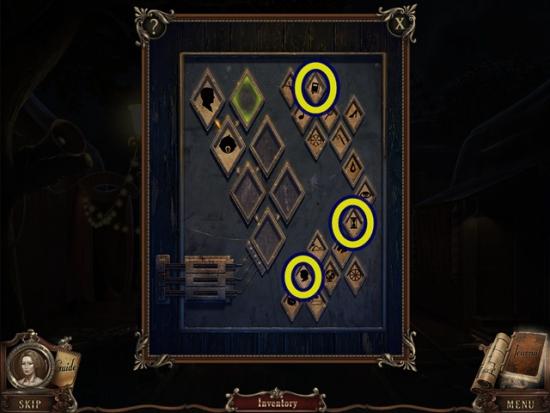
- Man + what = baby? Answer: woman
- Baby + what = boy? Answer: time
- Boy + what = graduate? Answer: books
- 2nd set:
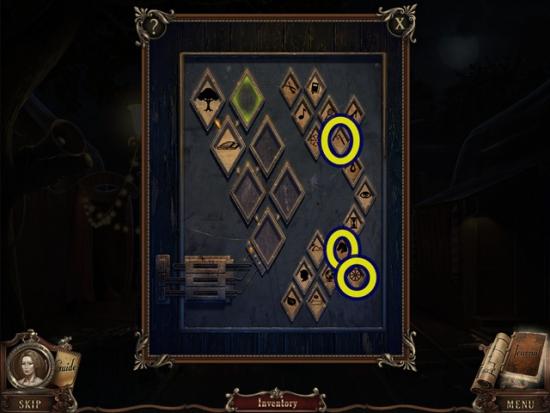
- Tree + what = logs? Answer: axe
- Logs + what = cart? Answer: wheel
- Cart + what = horse and cart? Answer: horse
- 3rd set:
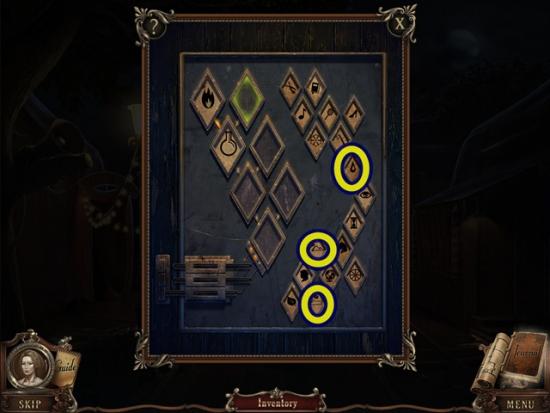
- Fire + what = glass? Answer: sand
- Glass + what = full flask? Answer: water
- Full flask + what = labelled flask? Answer: paper
- Enter the under water tunnel.
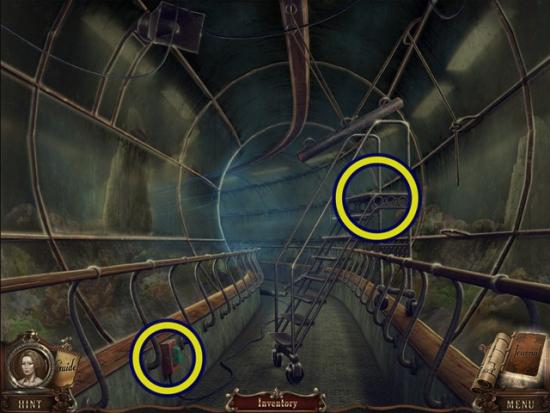
- Click on the plug. Use the pincers to remove the screws. Take the latch handle. Click on the top of the stairs. Take the wooden element. Click anywhere outside the window to close it. Move forward.
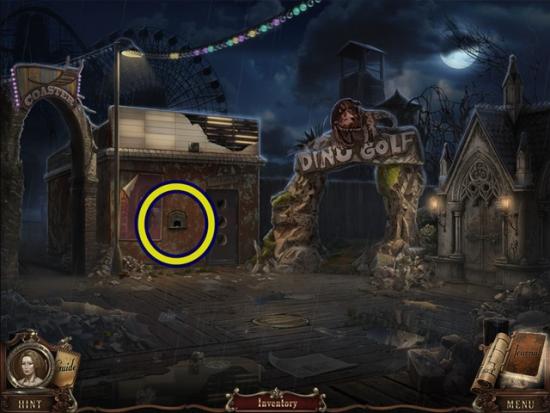
- Click on the cinema entrance. Take the wooden element. Click anywhere outside the window to close it. Go into the Dino Golf.
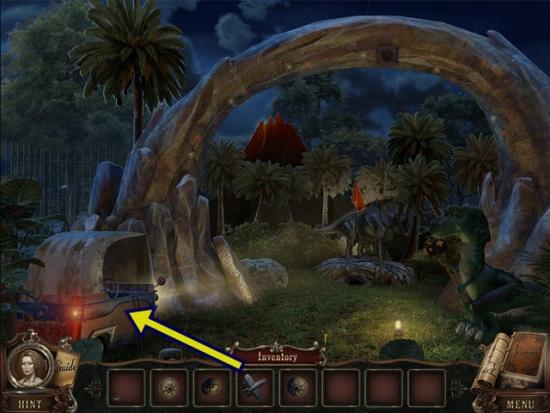
- Click on the cart. Add the latch handle. Rotate the two latches and open the panel. Take the switch lever.
- Leave and go towards the roller coaster (left path).
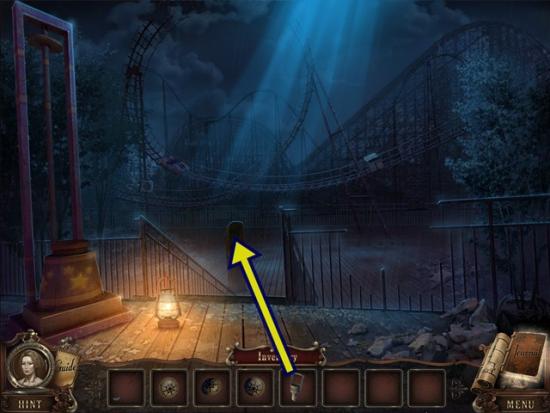
- Click on the control mechanism. Add the switch lever and pull it. When the roller coaster stops, click on the box that flies off. Take the wooden fragment and the pinion wheel. Click anywhere outside the window to close it. Return to the carousel.
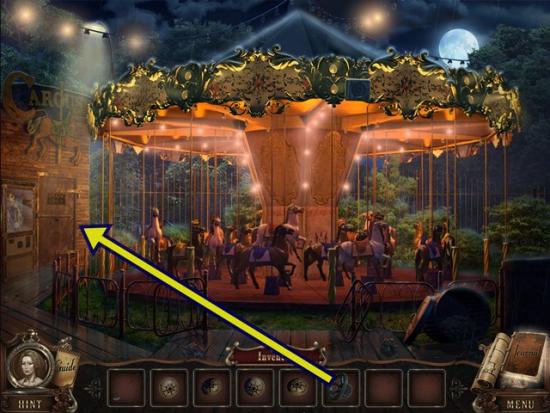
- Click on the engine room door. Add the pinion wheel, then turn the wheel. Enter the engine room.
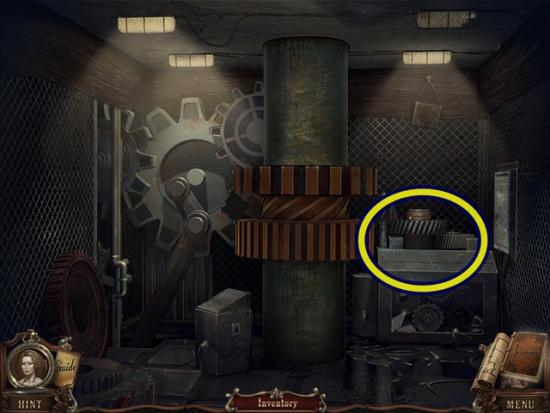
- Click on the gears on the right. Take the wooden fragment and the electrical panel handle. Return to the plaza.
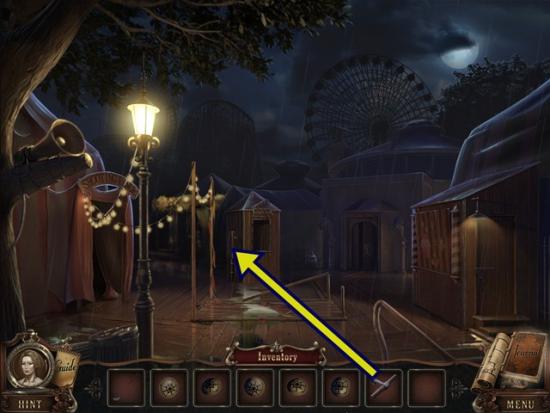
- Click on the panel on the side of the ticket booth. Add the electrical panel handle. Pull the handle down and take the manhole hook. Go through the underwater tunnel.
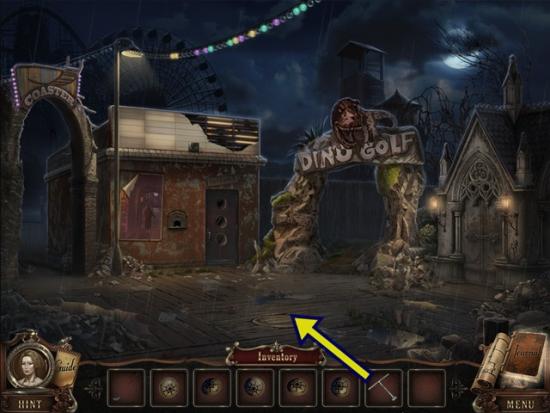
- Use the manhole hook to lift the manhole cover. Click on the manhole to start a hidden object hunt.
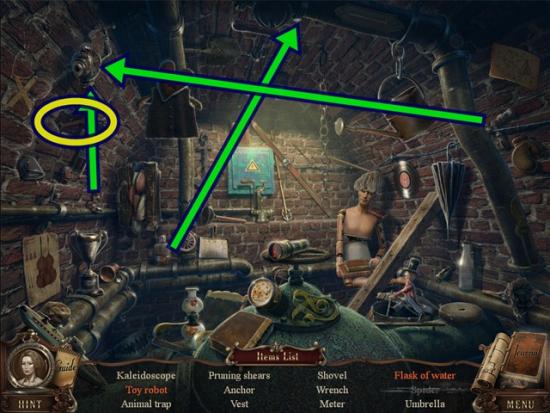
- Find all the objects. Put the flask under the dripping water to collect enough water for the flask of water. You don’t have to click, just hold the flask under the drip and it will start to fill. If it doesn’t, move the flask until it does. Reassemble the toy robot. Awrenchis added to your inventory.
- Return to the shooting range.
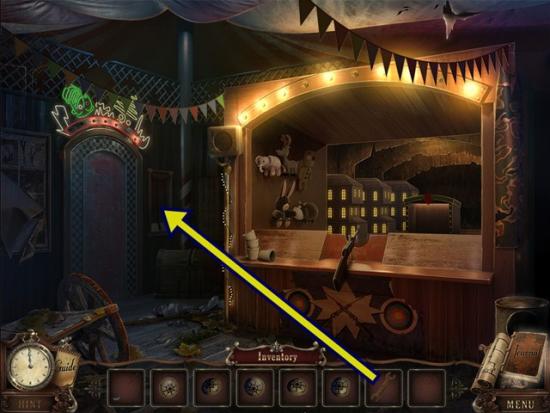
- Click on the panel beside the door. Pull the lever to break it off, then use the wrench to remove the panel. Pull the pin and enter the bumper cars area.
- Click on the centre bumper car. Add the five wooden fragments. A mini-puzzle starts. Use the wooden fragments on the right to create the images on the left fragments (they are all the same). There are already two fragments with each image to start you off. When you correctly recreate the image, the fragment on the left presses in.
- Solution:
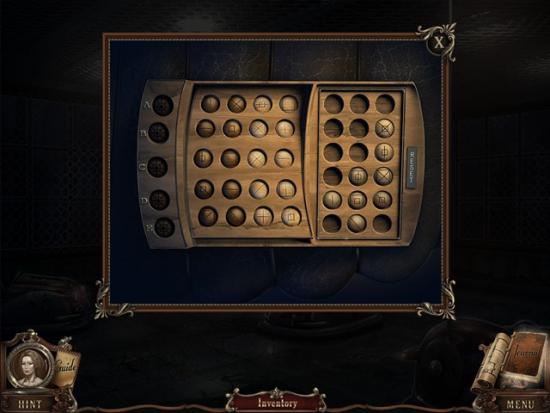
- Take the candy shop key. Return to the plaza.
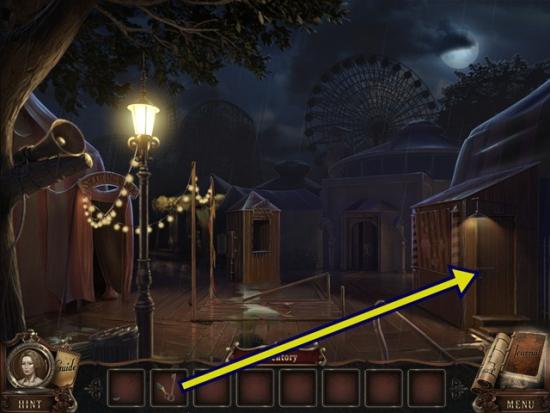
- Click on the door on the far right. Unlock it with the candy shop key. Enter the candy shop.
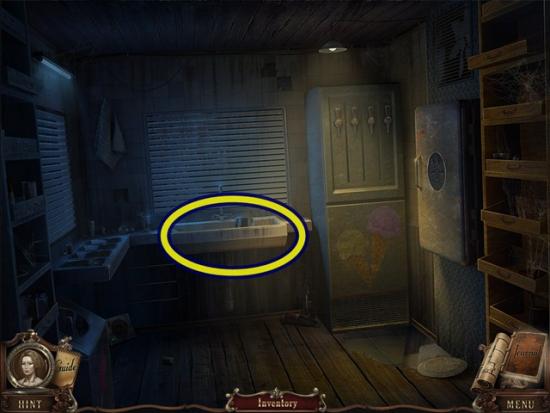
- Click on the sink. Take the knife. Return to the underwater tunnel.
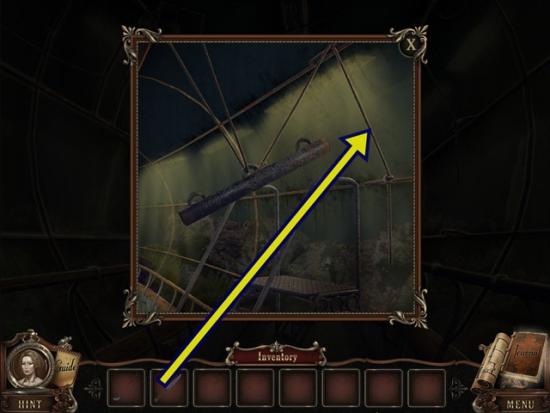
- Click on the top of the stairs. Cut the rope with the knife. Take the golf ball. Return to Dino golf.
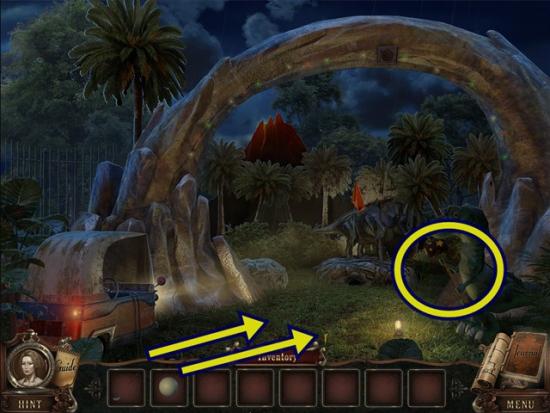
- Put the golf ball on the tee, then hit the ball with the golf club. Take the wooden hammer. Return to the roller coaster area.
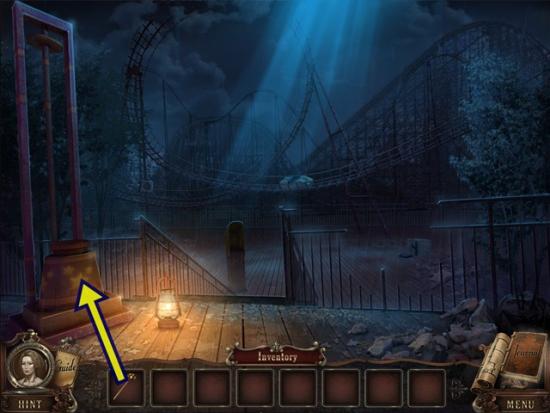
- Use the wooden hammer on the strongman machine. Watch the meter that appears. When it’s close to the top, hit the machine. Once you’ve hit it hard enough, take the coin.
- Return to the plaza.
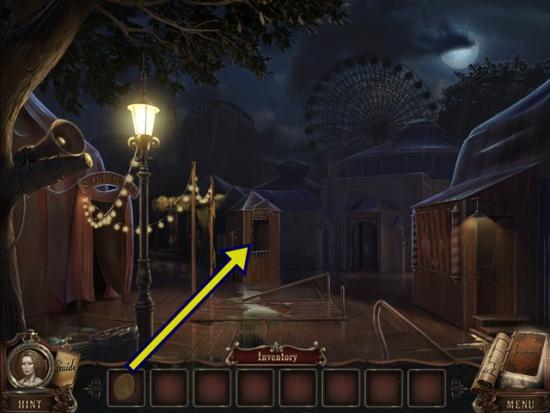
- Click on the ticket booth. Add the coin and take the cinema ticket. Go to the cinema entrance.
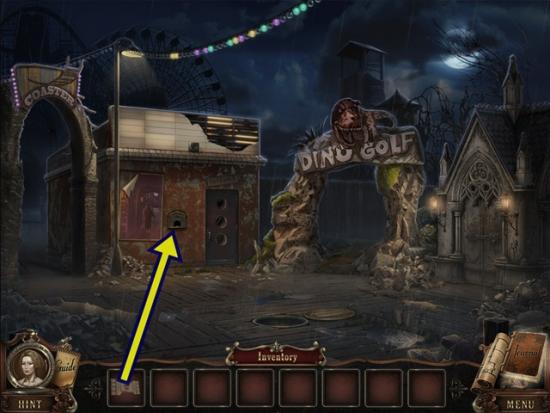
- Click on the cinema ticket window. Add the cinema ticket. Enter the cinema.
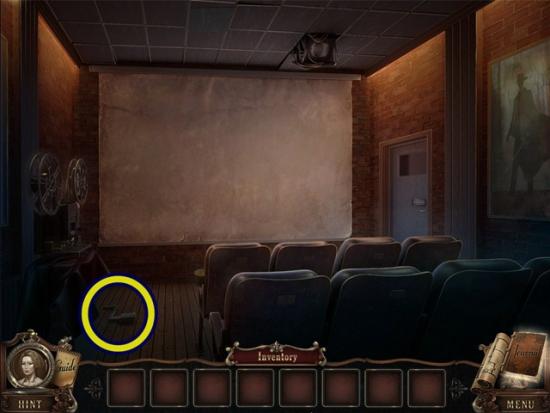
- Take the crank handle. Return to the carousel.
- Click on the carousel to start a hidden object hunt.
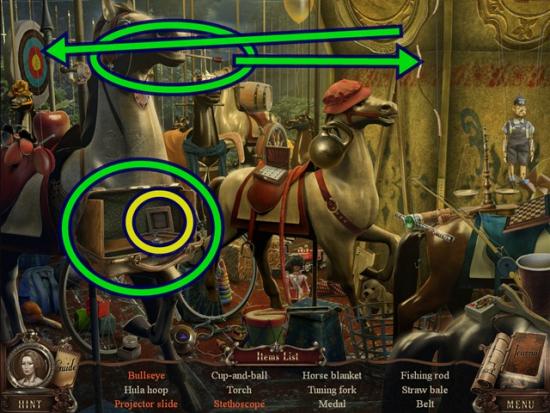
- Find all the objects. Open the suitcase to reveal objects. Put the arrow in the bow to shoot it to get the bullseye. Aprojector slideis added to your inventory.
- Enter the engine room.
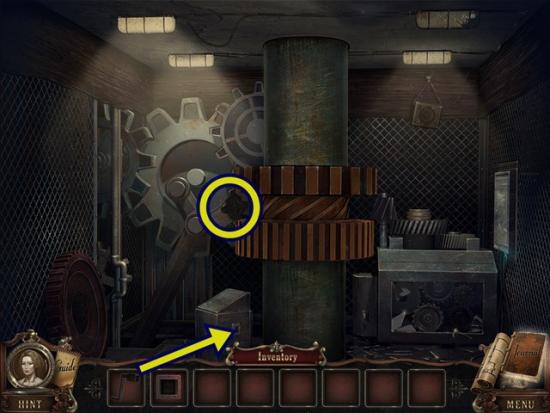
- Click on the control panel. Add the crank handle. Turn the handle, then take the stone shaped fragment. Return to the cinema entrance scene.
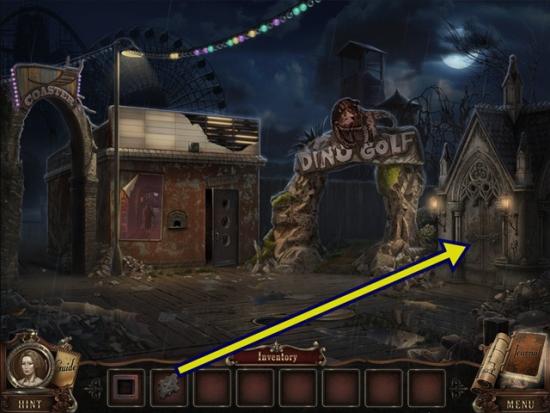
- Click on the door on the right. Add the stone shaped fragment. Enter the haunted house.
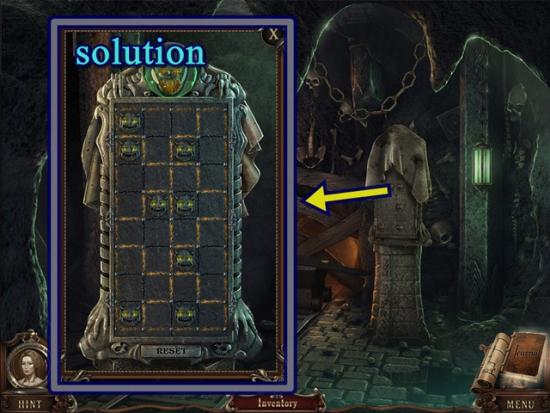
- Click on the pedestal. A mini-puzzle starts. Click on the lines to get each demon a “plot of land.” When you’ve given a demon a plot of land, its eyes turn green. Each demon must be in its own plot and each plot must be the same size and shape.
- Solution is in the screenshot above.
- Take the light bulb. Return to the cinema.
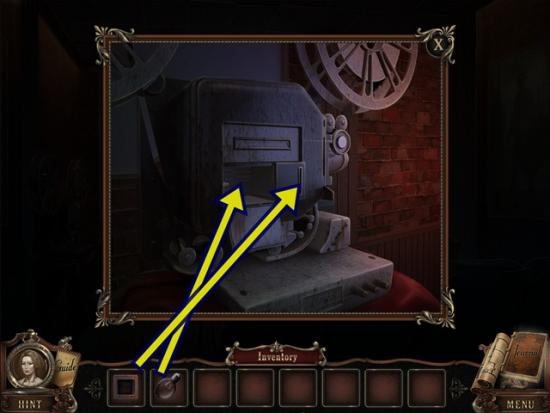
- Click on the projector. Add the projector slide and the light bulb. Take note of the numbers on the screen. Click on the door and enter the combination you just saw on the screen. Go through the door and continue through the next door.
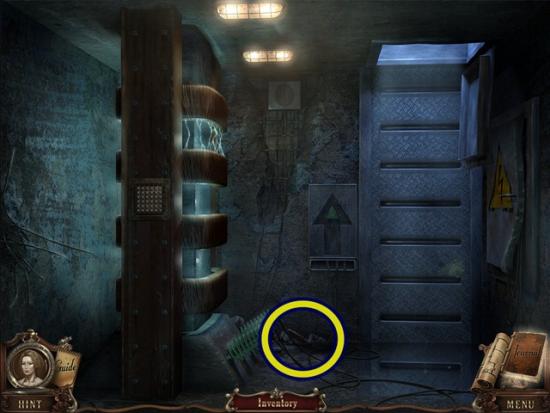
- Take the container handle. Go down one scene to the alley.
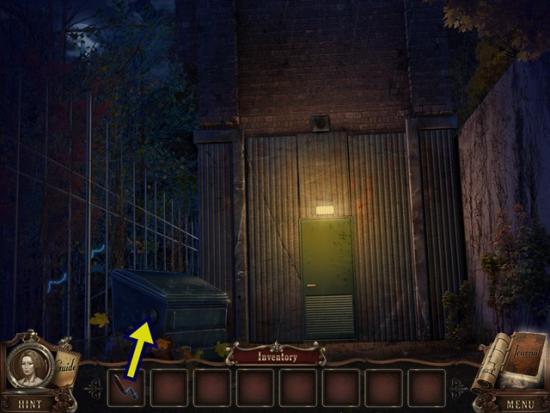
- Put the container handle on the container, then look inside. Take the auxiliary circuit breaker and the reel of rope.
- Return to the scene with the manhole.
- Click on the manhole to start a hidden object hunt.
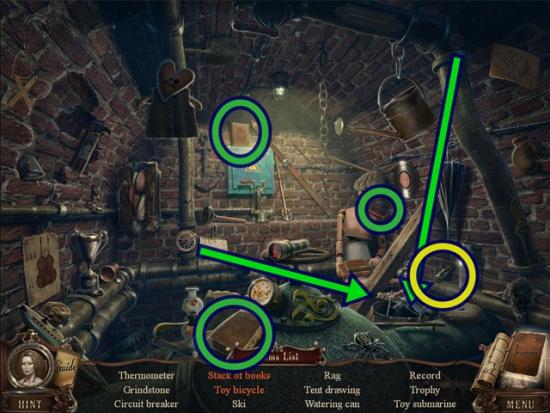
- Find all the objects. Click on the three books to make a stack of books. Add the two wheels to get the toy bicycle. An auxiliary circuit breaker is added to your inventory.
- Return to the underwater tunnel.
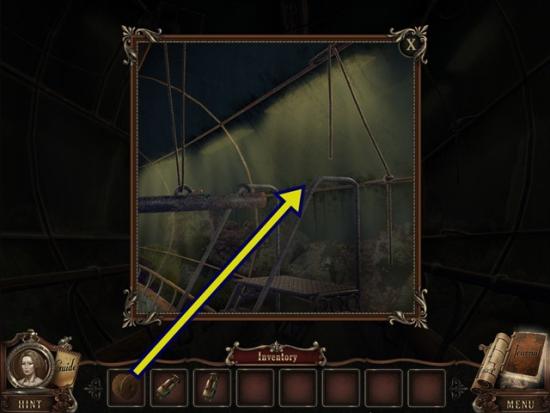
- Click on the top of the stairs. Add the reel of rope. Click on the area you just broke. Take the magnet. Return to the area with the bumper cars (left of the shooting gallery).
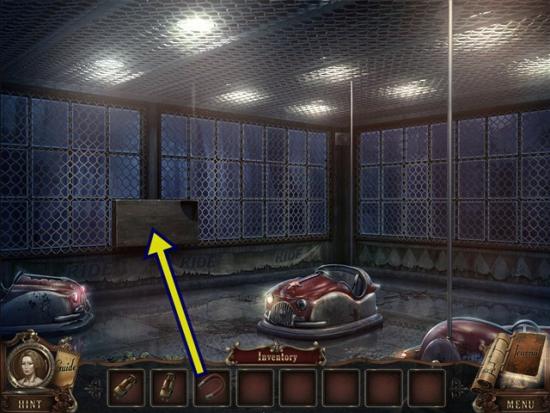
- Click on the wooden panel. Add the magnet. Move the magnet around until it shakes a little. This means something is stuck to it. Drag the magnet to the opening and take the auxiliary circuit breaker, then do it again and take the iron snowflake.
- Go to the candy shop.
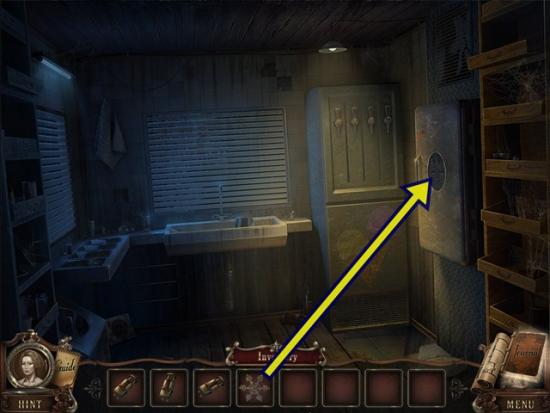
- Click on the freezer. Add the iron snowflake. Take the jawbone.
- Return to the haunted house.
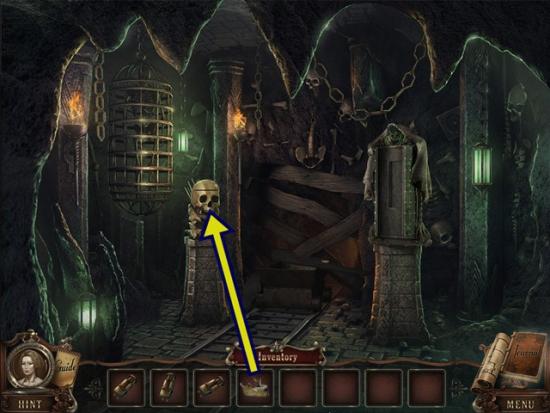
- Click on the skull. Add the jawbone. Take the auxiliary circuit breaker and the box shim.
- Go to the roller coaster.
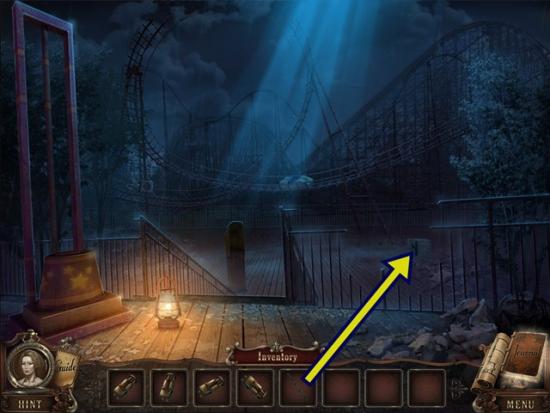
- Click on the box. Add the box shim. Take the iron arrow.
- Return to the cinema, go through the door and enter the building.
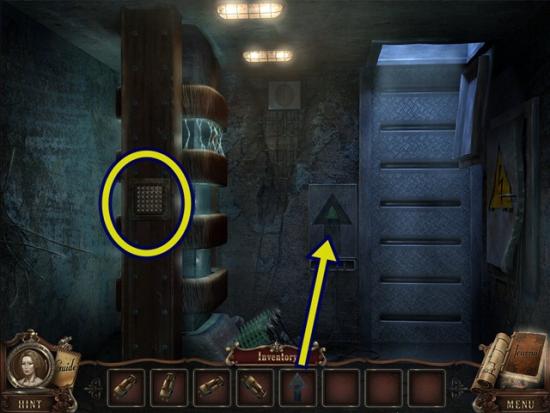
- Click on the electrical panel. Add the four auxiliary circuit breakers. A mini-puzzle starts. Rearrange the marbles so each colour appears once in each row and column (diagonal doesn’t count).
- Solution:
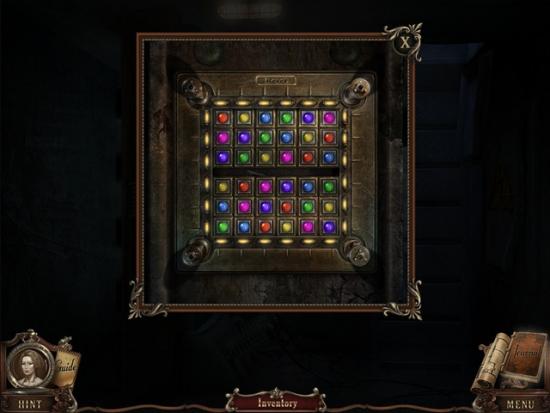
- Take the main circuit breaker.
- Add the iron arrow to the inlay. Climb the ladder.
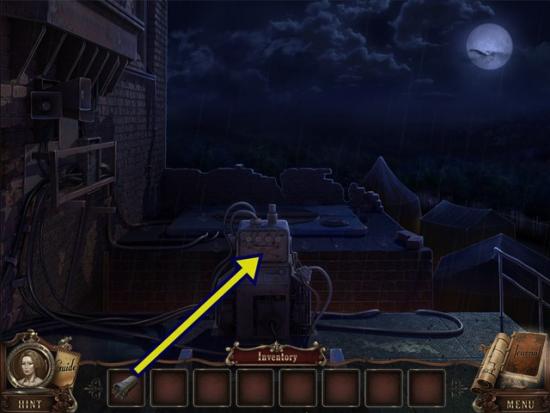
- Click on the device. Add the main circuit breaker. Drag the four sliders towards the circuit breaker.
- Watch the video.
The end!
Wooden Mosaic Parts Locations
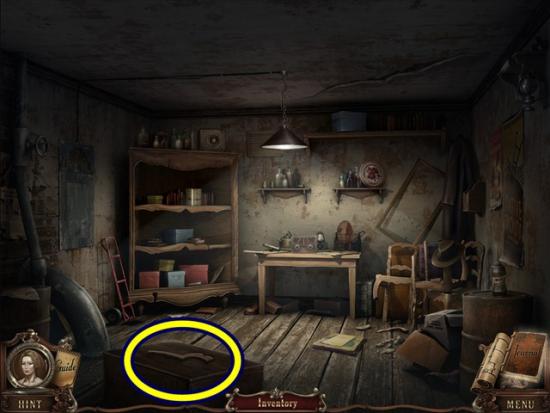
- Storeroom
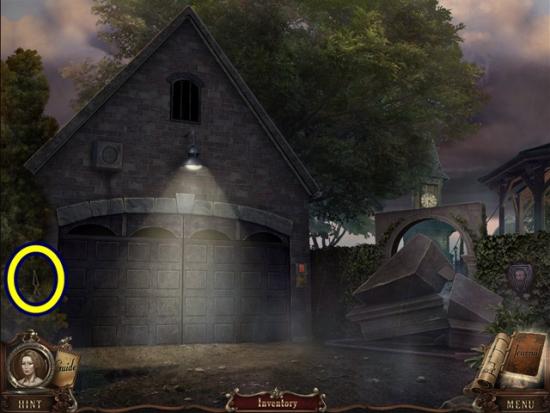
- Collapsed archway
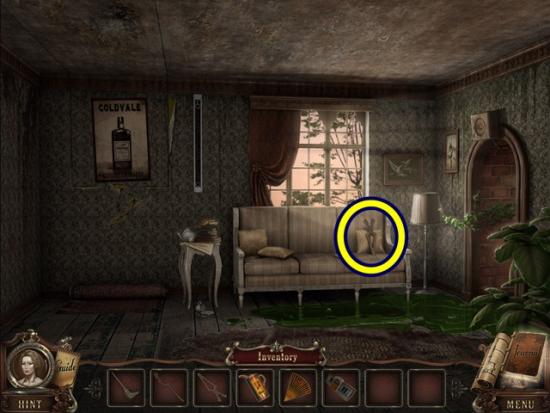
- Room between trophy room and flower girl
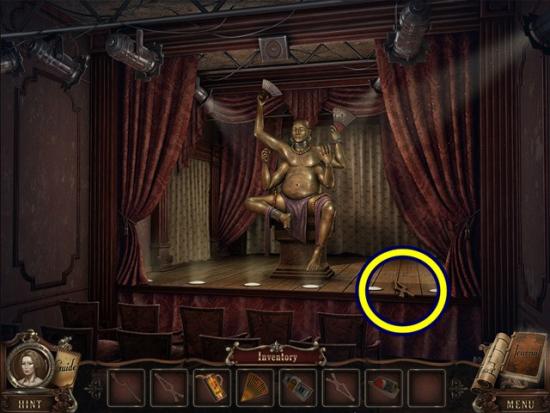
- Theatre
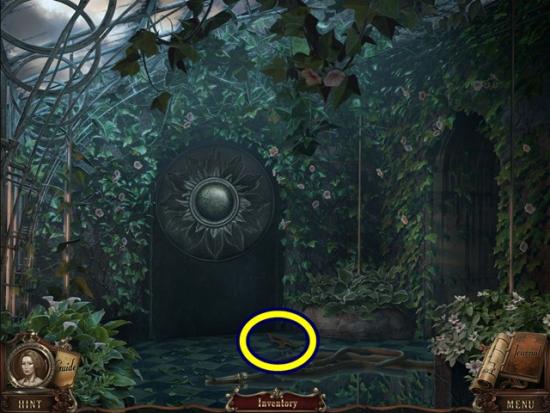
- Room off the balcony
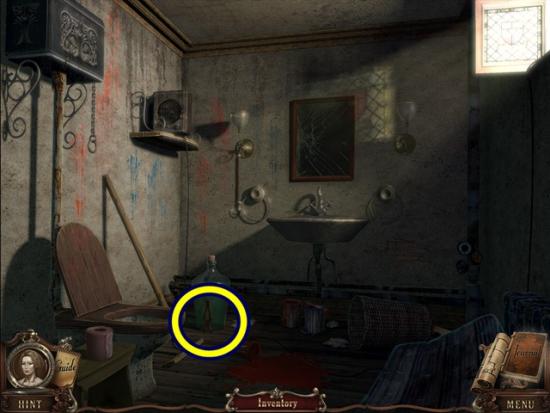
- Second door on the left where the moving saws are

- Area with “the butler”
Astrological Sign Locations

- Stairs

- Dining room
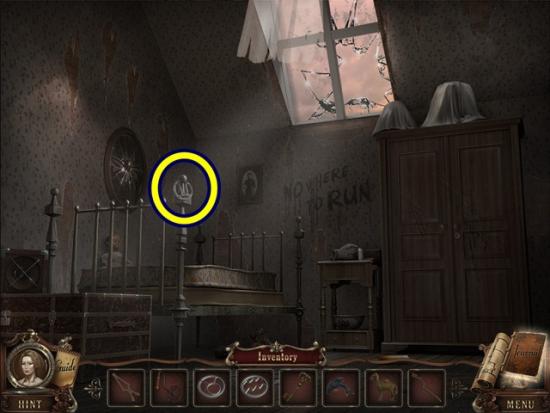
- Butler’s room
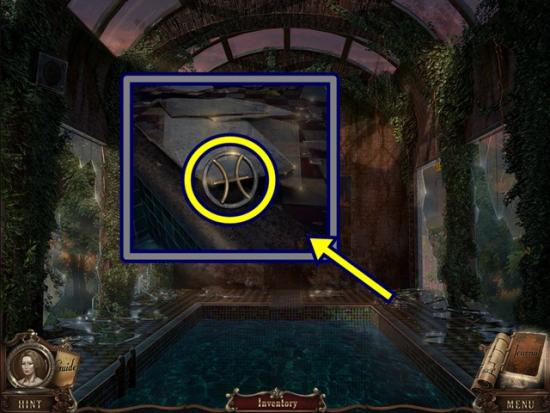
- Pool

- Old truck
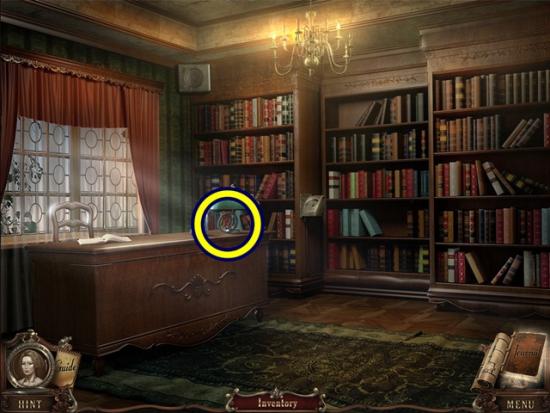
- Library
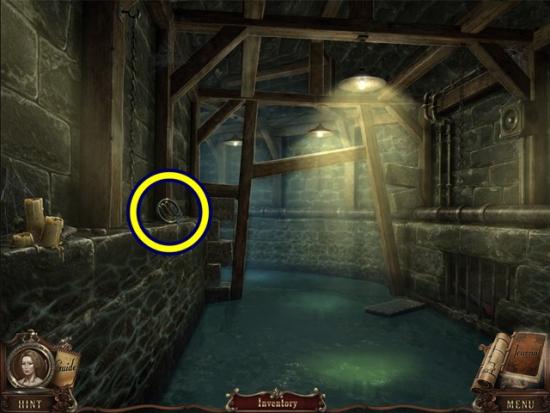
- Catacombs (second scene)

- Area outside of generator room (to the right of the Planetarium)
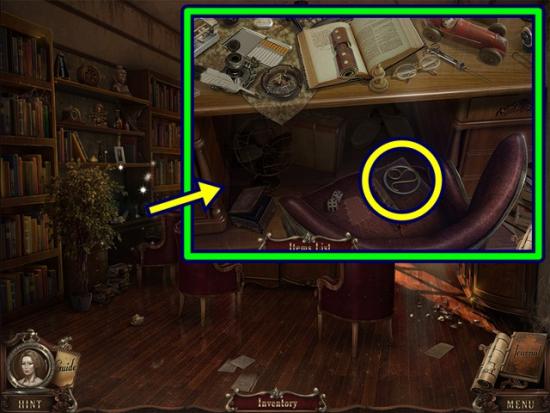
- Study (hidden object scene)

- Sewer

- The deadly tasting gramophone puzzle

- Suitcase outside the Planetarium
More articles...
Monopoly GO! Free Rolls – Links For Free Dice
By Glen Fox
Wondering how to get Monopoly GO! free rolls? Well, you’ve come to the right place. In this guide, we provide you with a bunch of tips and tricks to get some free rolls for the hit new mobile game. We’ll …Best Roblox Horror Games to Play Right Now – Updated Weekly
By Adele Wilson
Our Best Roblox Horror Games guide features the scariest and most creative experiences to play right now on the platform!The BEST Roblox Games of The Week – Games You Need To Play!
By Sho Roberts
Our feature shares our pick for the Best Roblox Games of the week! With our feature, we guarantee you'll find something new to play!Type Soul Clan Rarity Guide – All Legendary And Common Clans Listed!
By Nathan Ball
Wondering what your odds of rolling a particular Clan are? Wonder no more, with my handy Type Soul Clan Rarity guide.


