![Digimon UP Tier List [Supports, Buddies, and Partners]](/wp-content/uploads/2026/07/digimon-up-tier-list.jpg "Digimon UP Tier List [Supports, Buddies, and Partners]")
Digimon UP Tier List [Supports, Buddies, and Partners]
These Digimon will get you UP the leaderboard.


![Haze Seas Boss Drops [Chances, Locations, and How to Spawn]](/wp-content/uploads/2026/07/haze-seas-boss-drops.jpg "Haze Seas Boss Drops [Chances, Locations, and How to Spawn]")

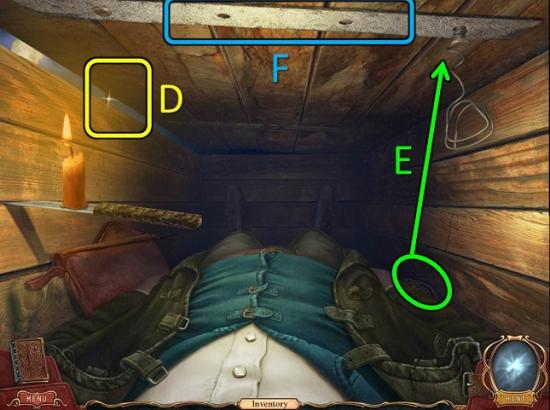
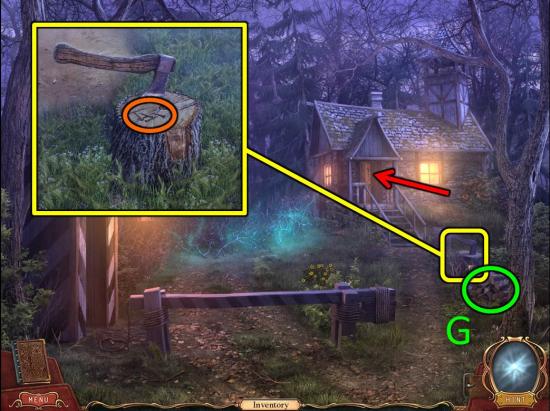
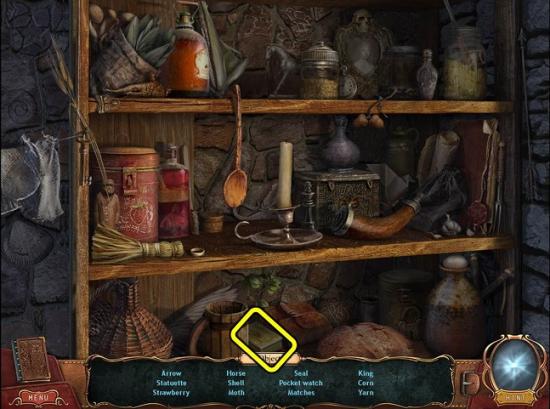
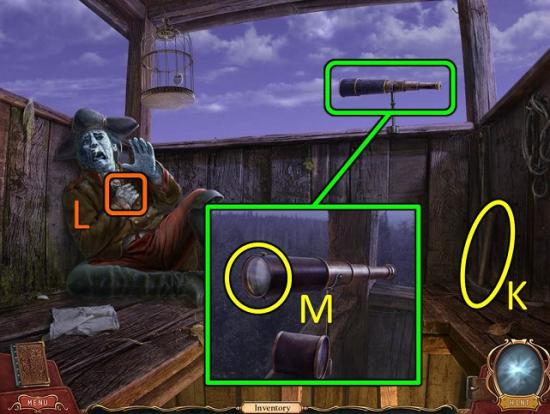
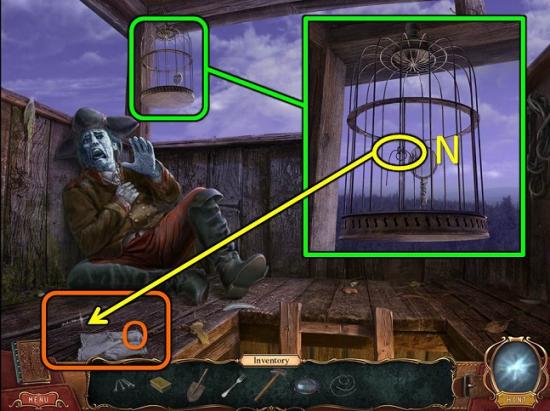
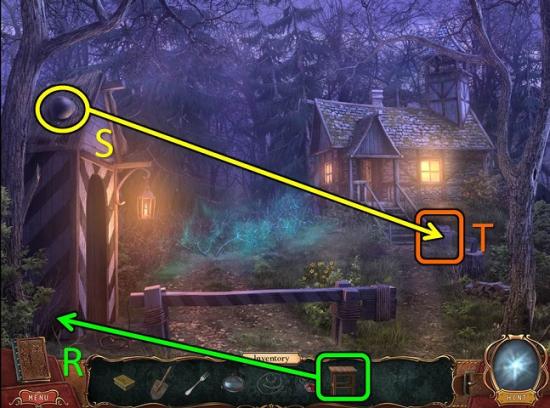
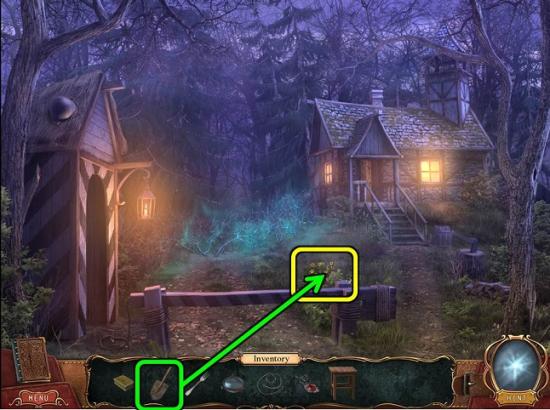
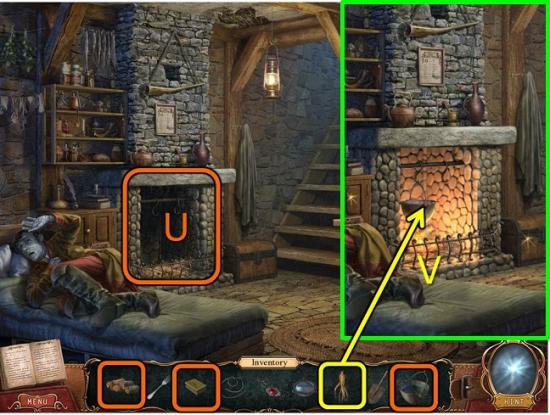
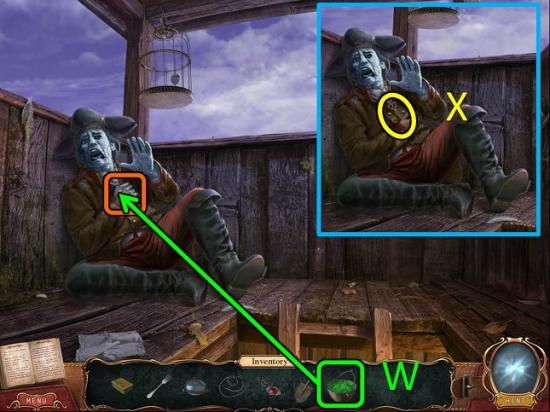
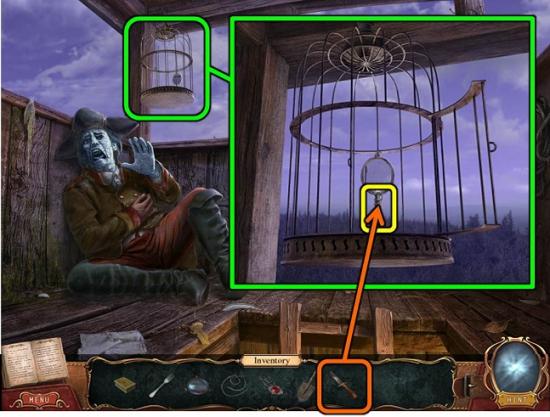
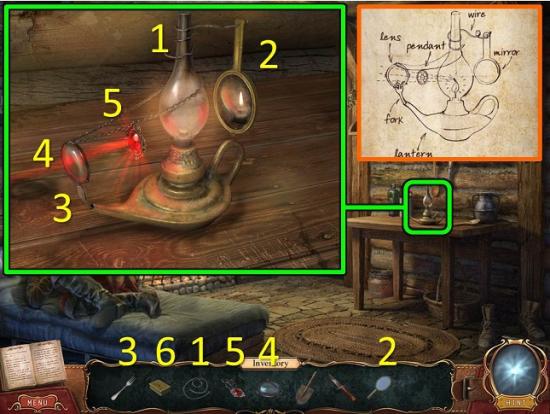
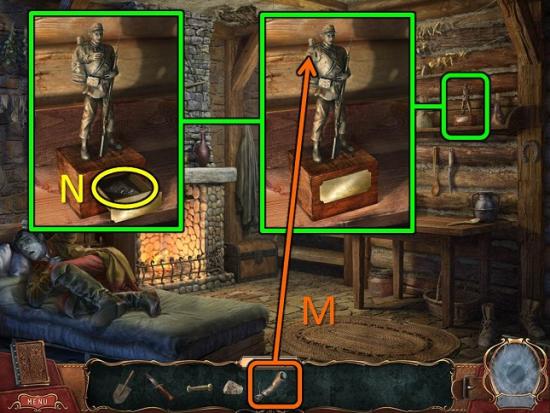
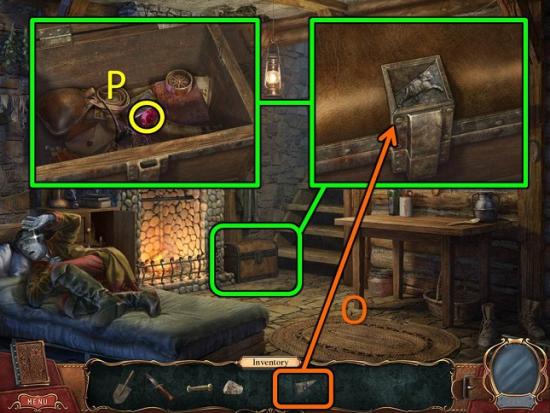
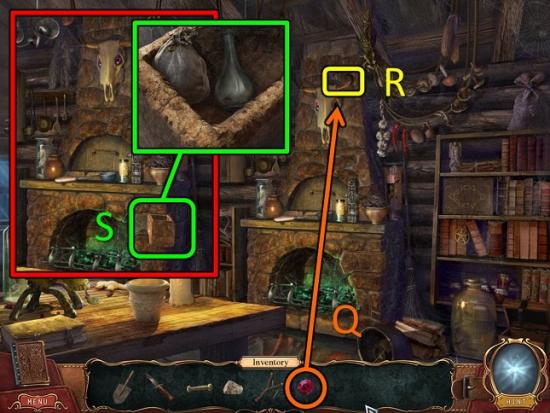
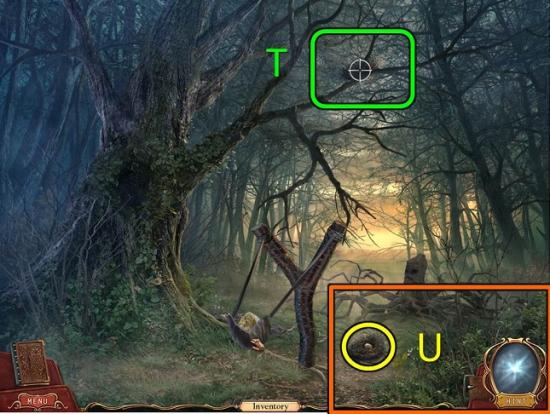
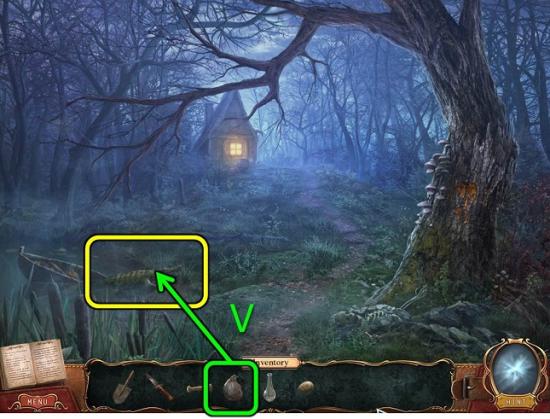
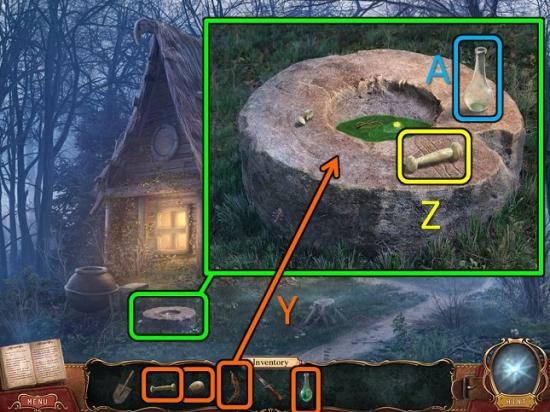
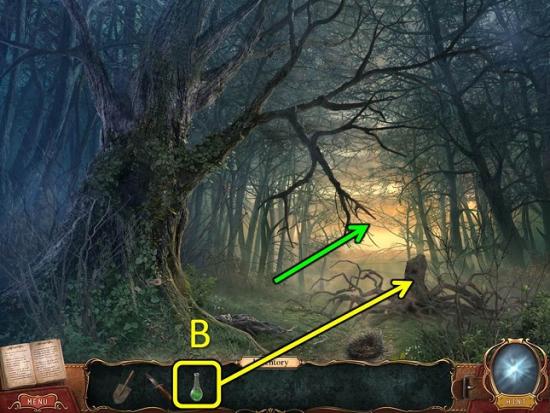
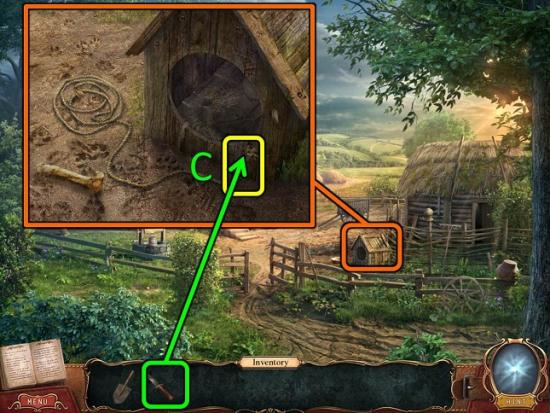
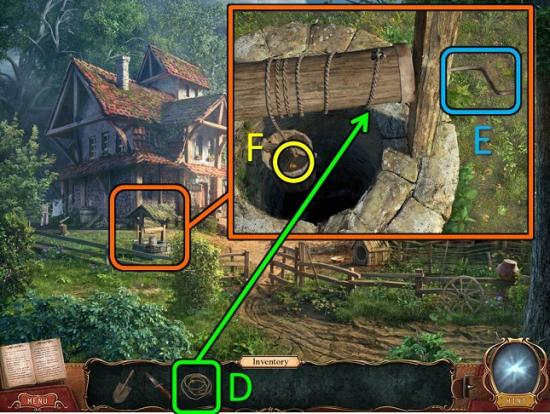
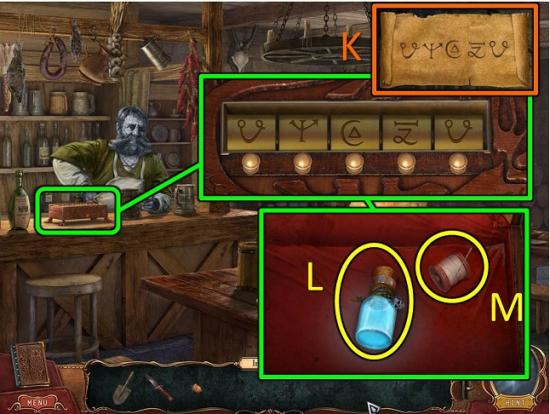
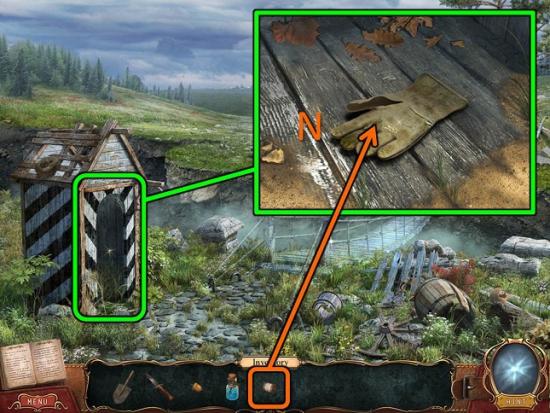
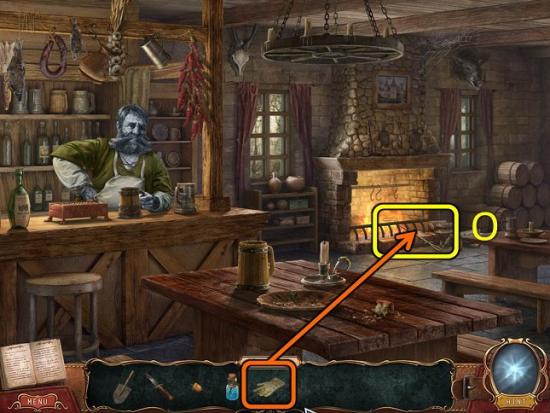
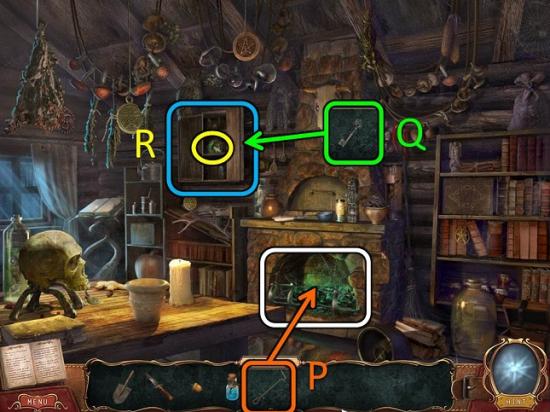
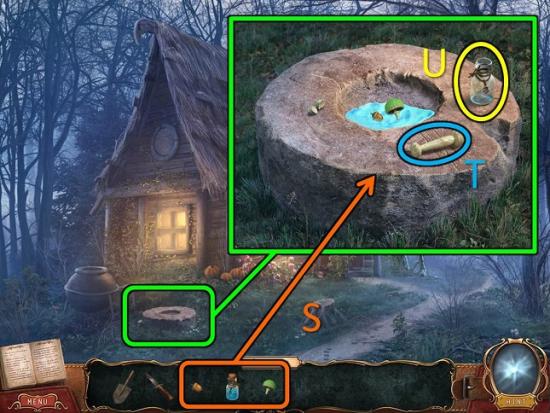
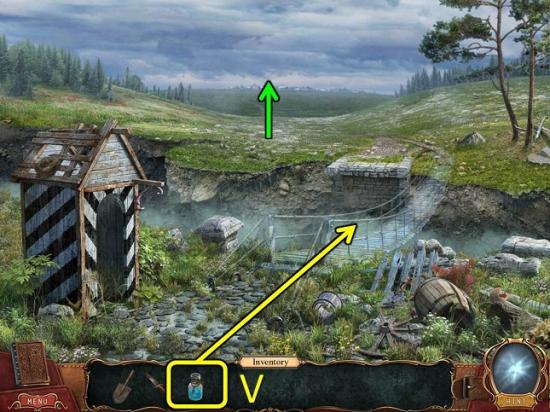
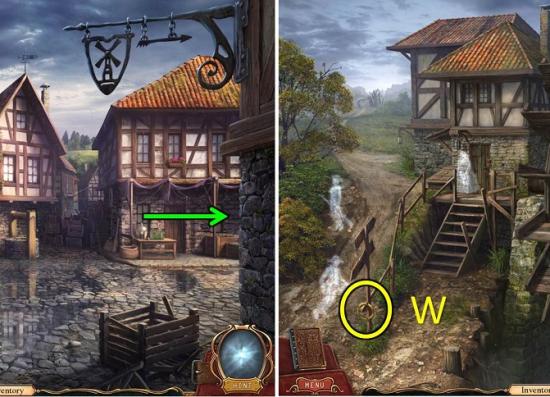
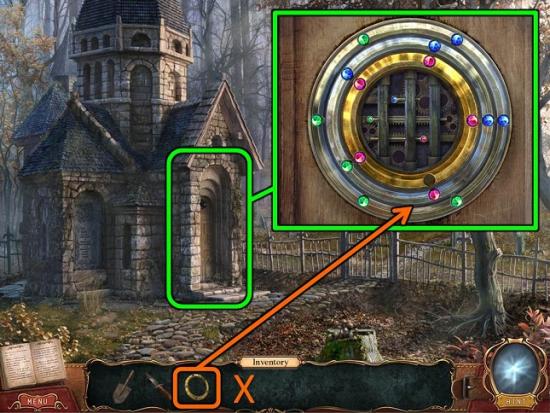
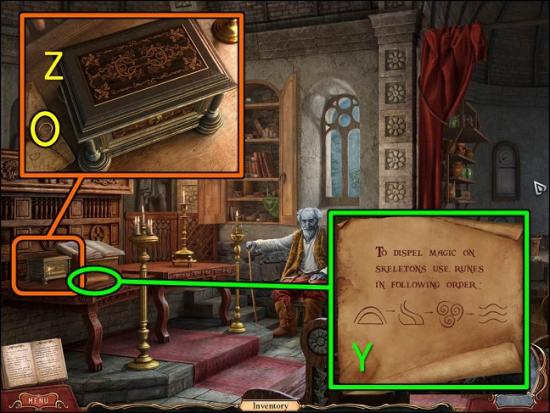
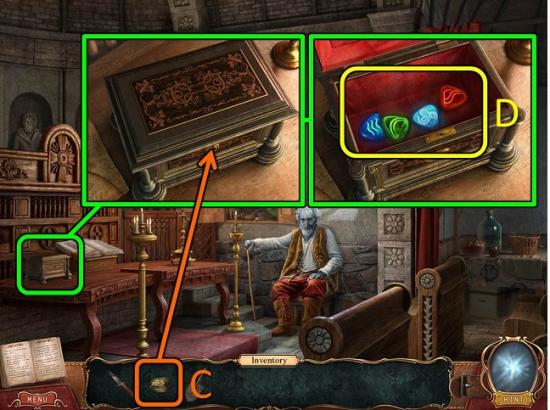
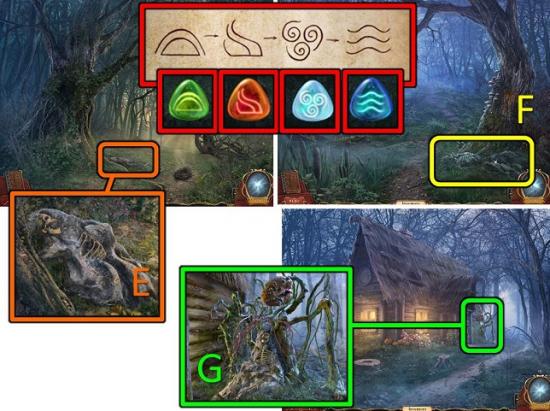
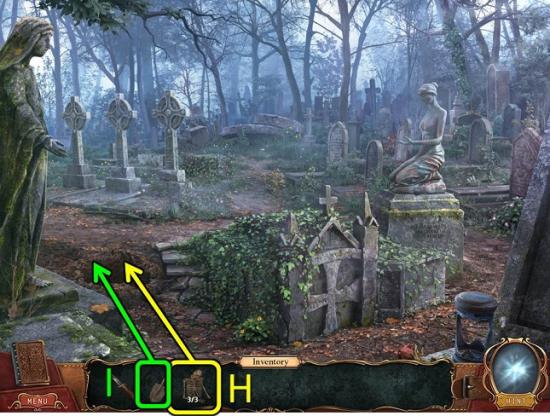
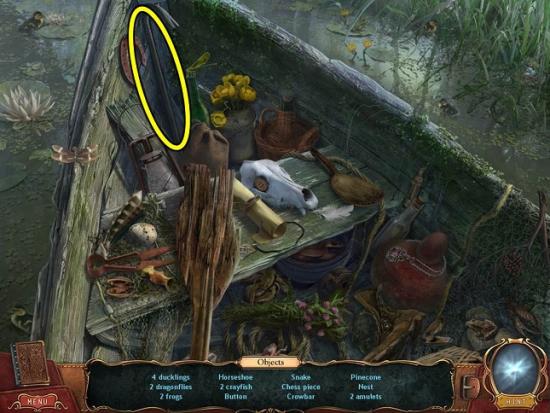
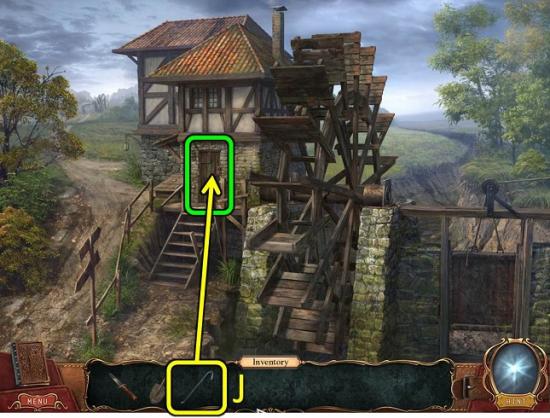
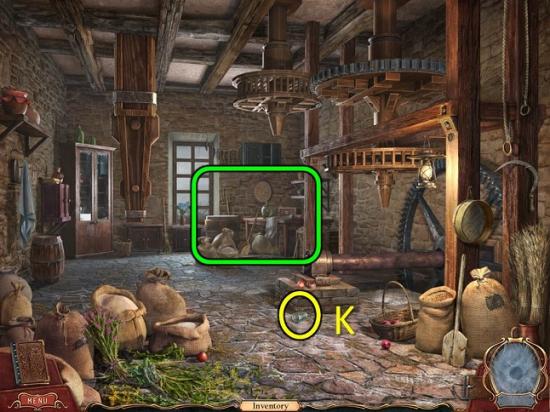
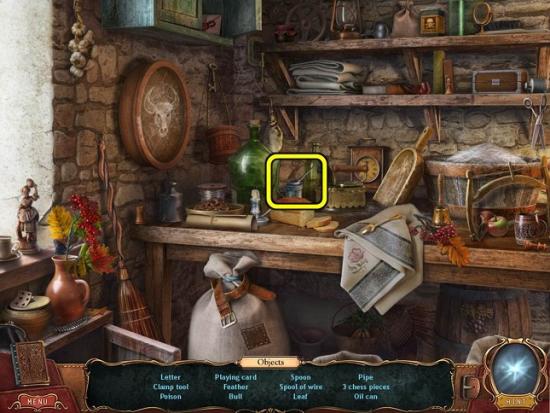
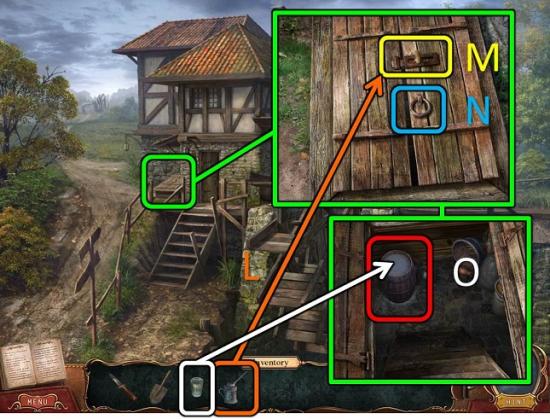
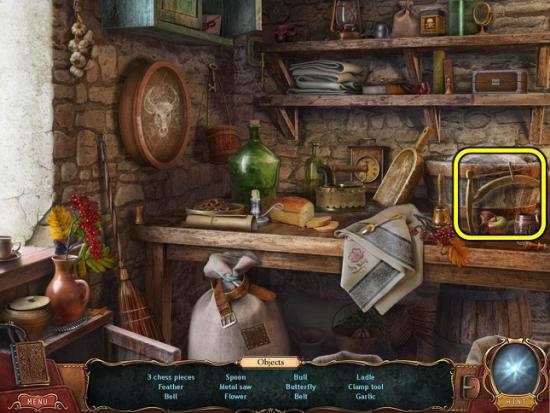
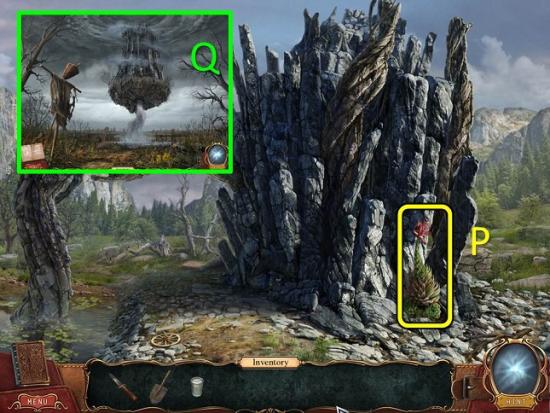
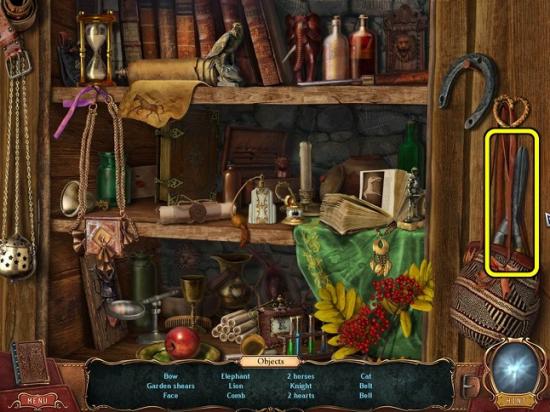
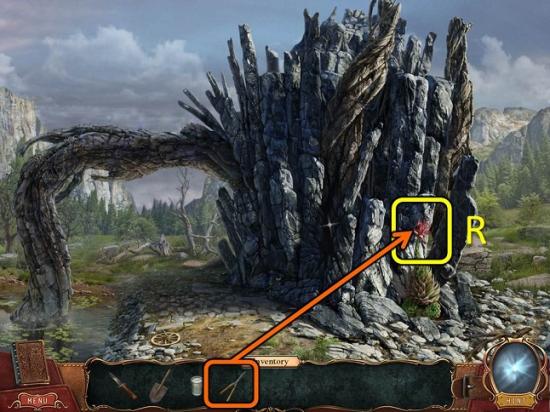
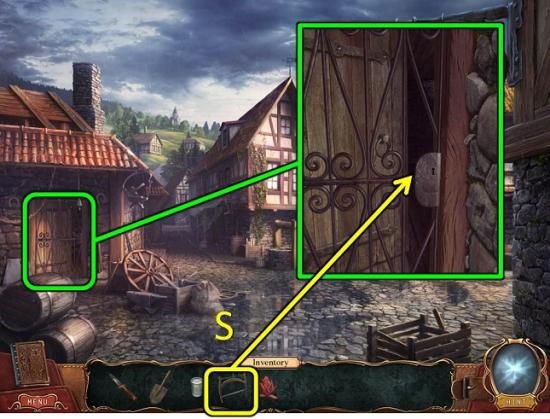
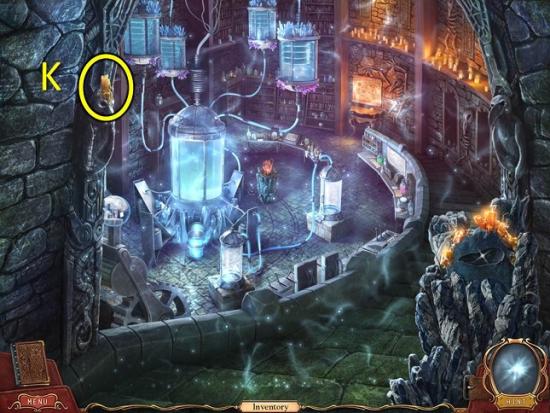
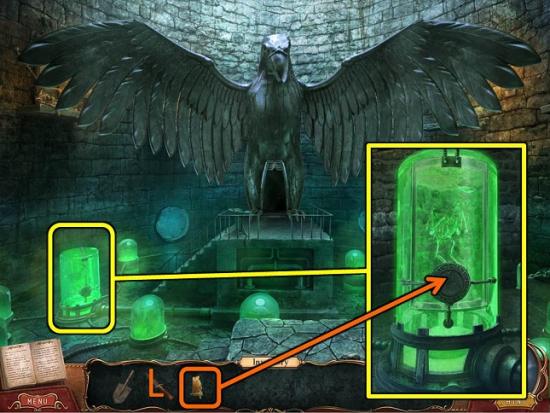
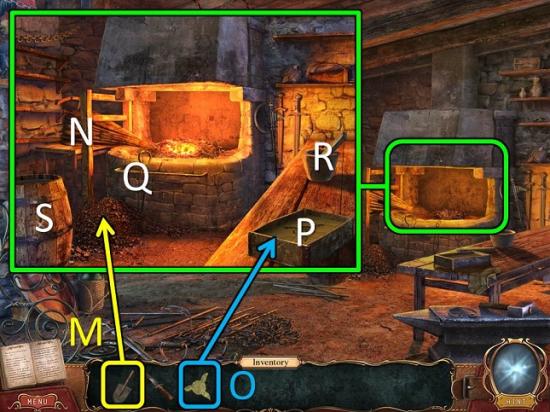
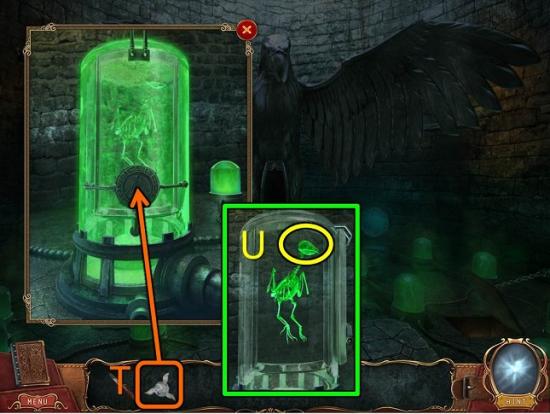
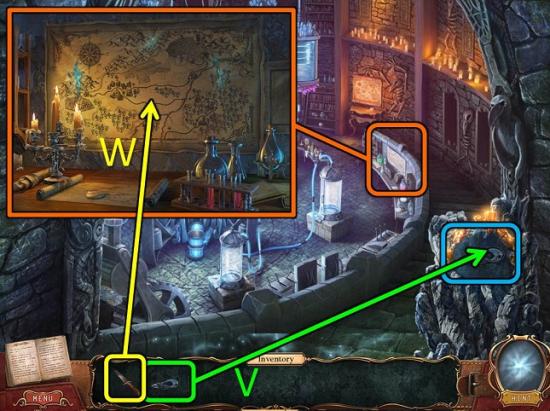
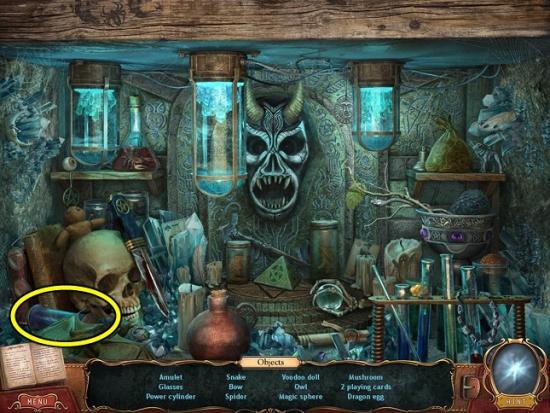
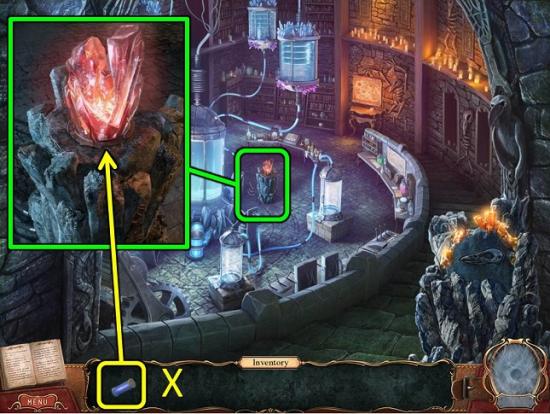
Welcometo the A Wizard’s Curse walkthrough on Gamezebo. A Wizard’s Curse is a Hidden Object Adventure game created by Hullabu. Can the alchemist find the wizard and break his curse? Gamezebo’s walkthrough will provide you with detailed images, tips, information, and hints on how to play your best game.
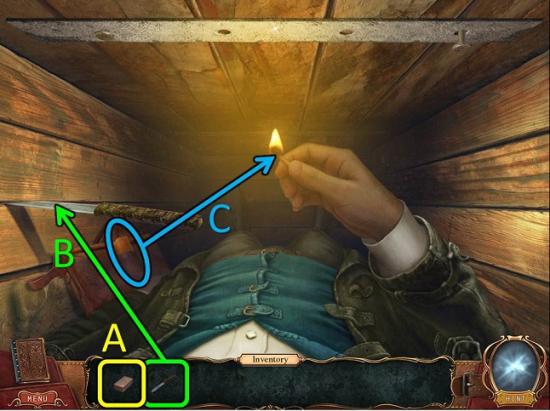
Welcometo the A Wizard’s Curse walkthrough on Gamezebo. A Wizard’s Curse is a Hidden Object Adventure game created by Hullabu. Can the alchemist find the wizard and break his curse? Gamezebo’s walkthrough will provide you with detailed images, tips, information, and hints on how to play your best game.
Difficulty Modes
Cursors
Journal
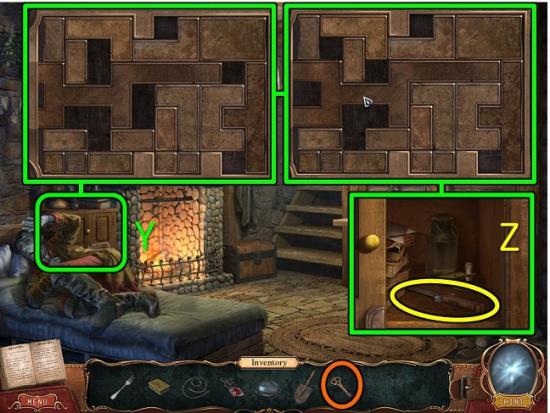
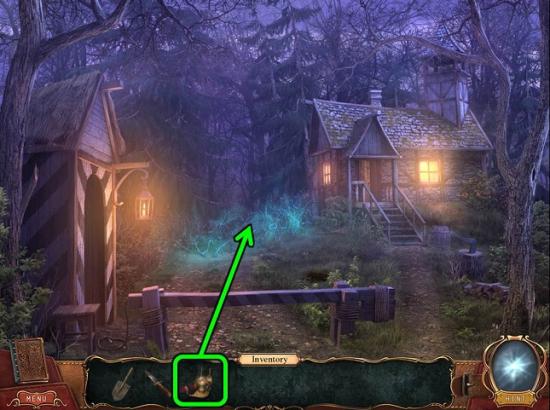
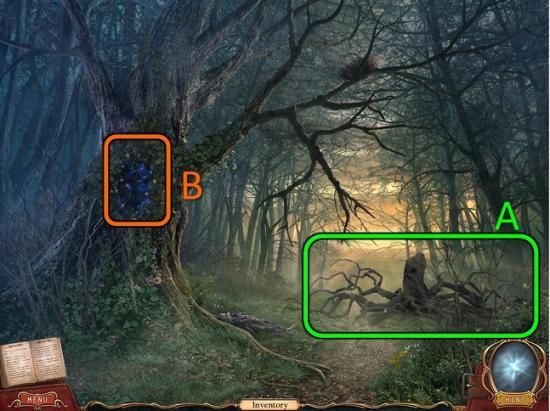
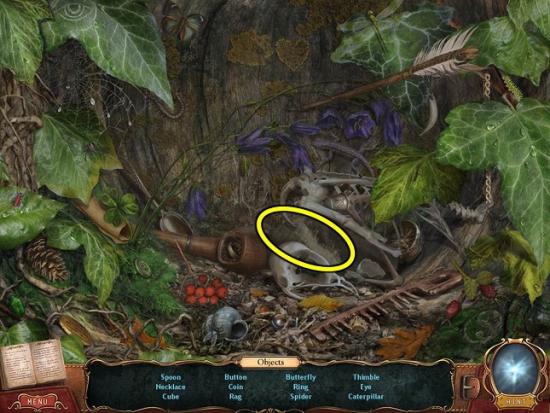
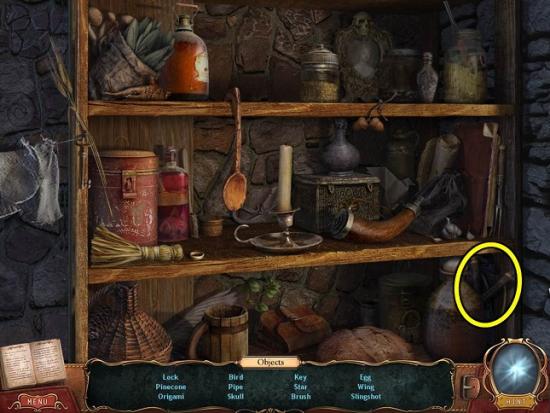
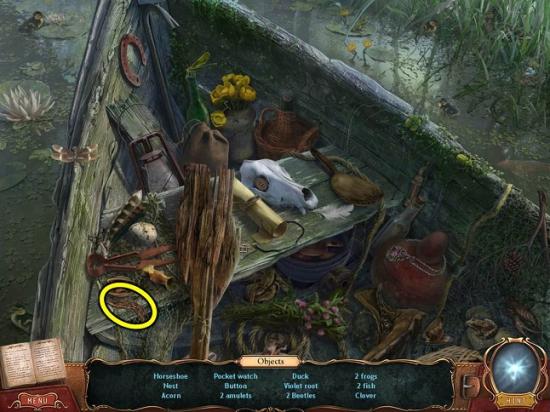
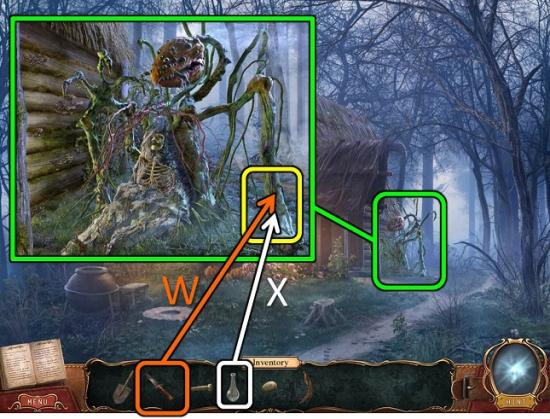
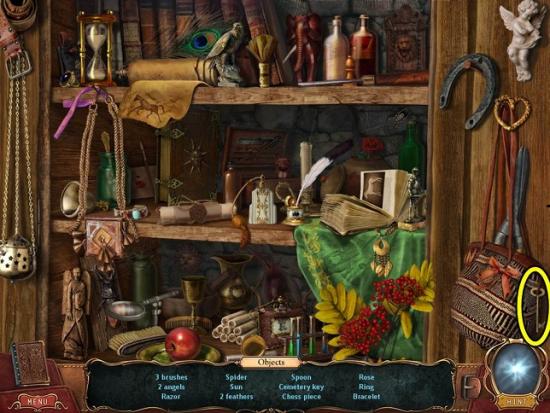
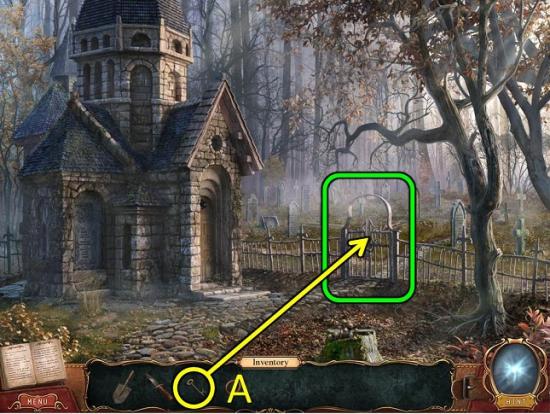
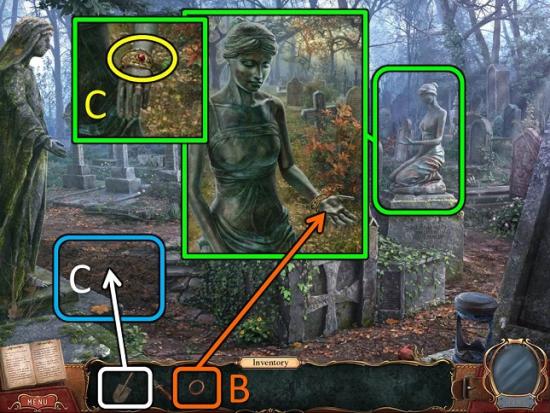
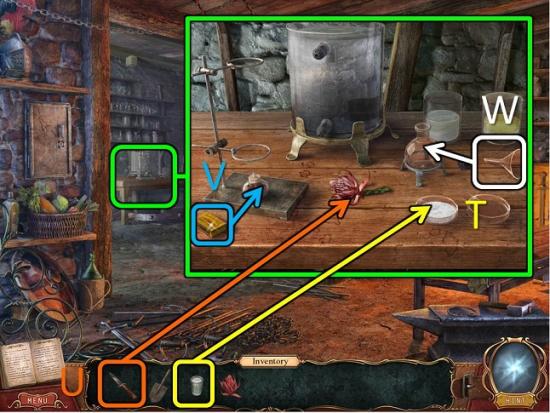
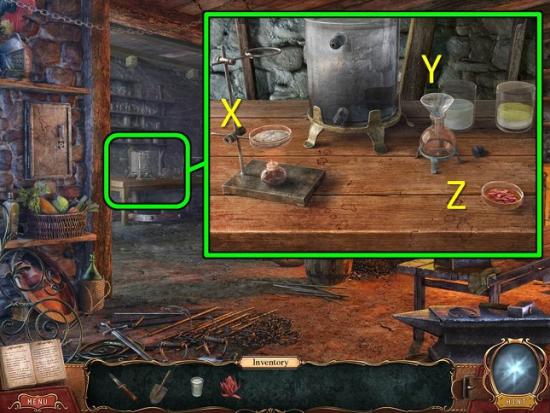
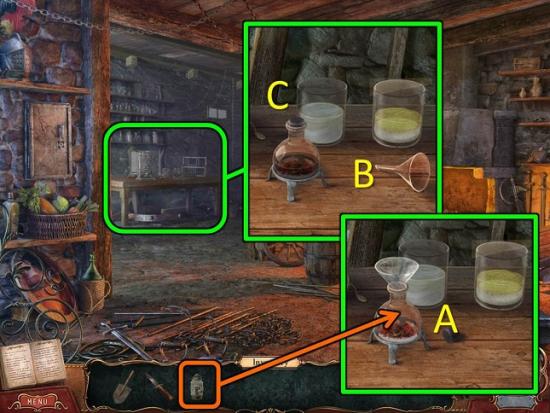
Puzzles and Hidden Object Scenes


Congratulations!
You have completed Gamezebo’s walkthrough for A Wizard’s Curse. Be sure to check back often for game updates, staff and user reviews, user tips, forum comments and much more here at Gamezebo.
