- Wondering how to get Monopoly GO! free rolls? Well, you’ve come to the right place. In this guide, we provide you with a bunch of tips and tricks to get some free rolls for the hit new mobile game. We’ll …
Best Roblox Horror Games to Play Right Now – Updated Weekly
By Adele Wilson
Our Best Roblox Horror Games guide features the scariest and most creative experiences to play right now on the platform!The BEST Roblox Games of The Week – Games You Need To Play!
By Sho Roberts
Our feature shares our pick for the Best Roblox Games of the week! With our feature, we guarantee you'll find something new to play!Type Soul Clan Rarity Guide – All Legendary And Common Clans Listed!
By Nathan Ball
Wondering what your odds of rolling a particular Clan are? Wonder no more, with my handy Type Soul Clan Rarity guide.
Tengami Developer Diary #2
Hi! Welcome to the 2nd entry of our Tengami developer diary. My name is Phil Tossell and I am one of the co-creators of Tengami. Since our first diary entry we have had a bit of good news, as we finally became authorized Wii U developers. This means that in addition to iOS, PC and Mac, Tengami will also make its way to the Wii U in early 2014.
Hi! Welcome to the 2nd entry of our Tengami developer diary. My name is Phil Tossell and I am one of the co-creators of Tengami. Since our first diary entry we have had a bit of good news, as we finally became authorized Wii U developers. This means that in addition to iOS, PC and Mac, Tengami will also make its way to the Wii U in early 2014.
In the first part of our diary, Jennifer gave an introduction to our game Tengami and to the team making it. In this diary I am going to write about how we build Tengami‘s unique pop-up book world.
Popping up
Every scene in Tengami‘s world is constructed as an entirely authentic and working pop-up. Even parts of the world that you don’t see fold can fold if they are required to. This folding world defines how the game both looks and plays.
The journey to creating this pop-up world has been a long and challenging one that’s taken us over two years up until now. Along the way we’ve had to learn how to make real pop-ups from scratch and then figure out how to translate real pop-ups into the digital world in an efficient way.
It turns out that in their simplest of forms, pop-ups are fairly straightforward. It’s through the combination of simple building blocks, together with lots of imagination, that astonishingly complex pop-ups can be built.
Meet the folds
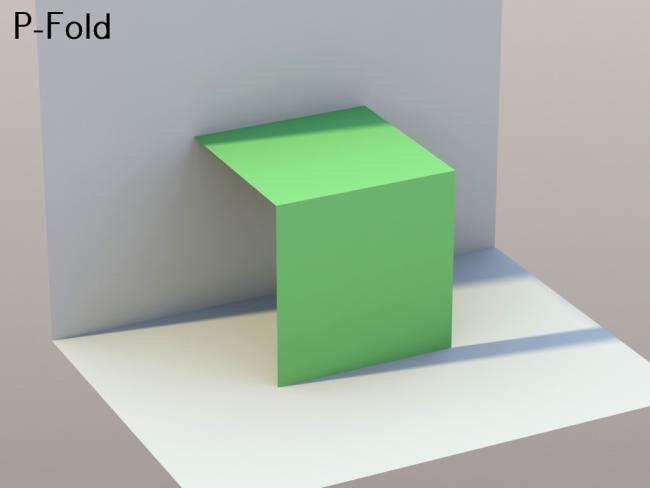
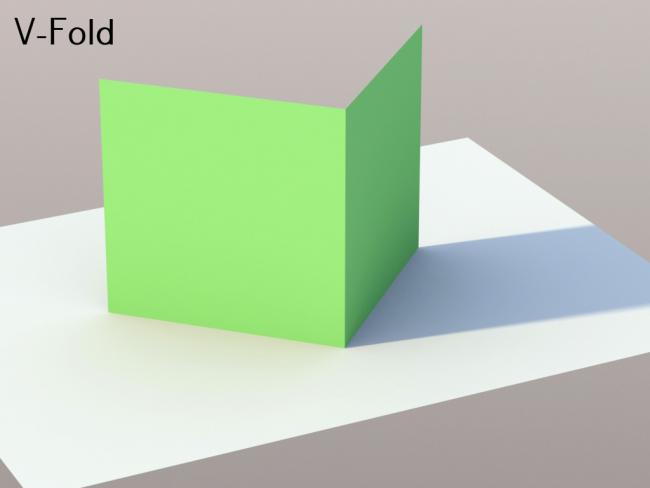
There are two basic fold types that all pop-ups are built from. These are called the parallel fold and the v fold. The reason for the names should be obvious from the images below.
These two folds fold in different ways that lead to distinct folding motions and construction restrictions. Normally when building a pop-up you must opt to base it primarily on one or the other mechanism.

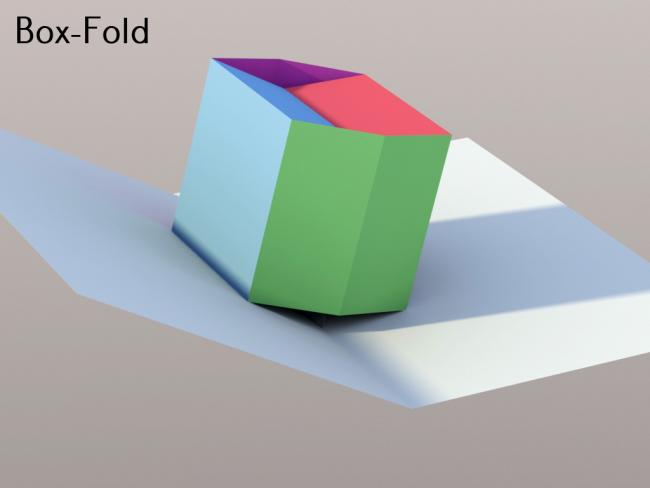
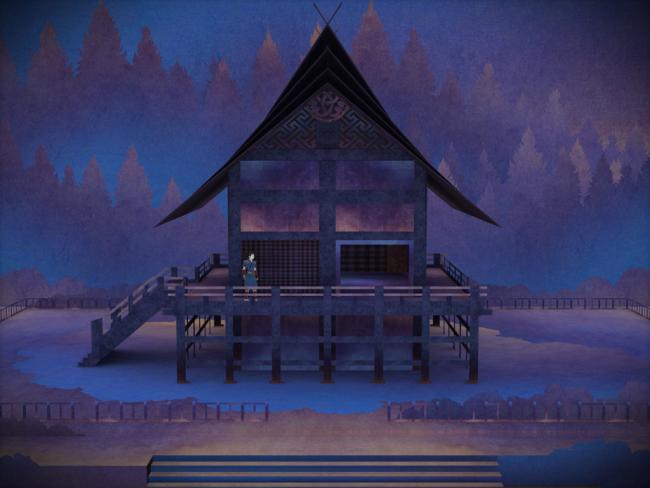
From these two folds you can build almost anything, but it’s helpful to define some more complex building shapes that get used over and over again. An example of a more complex shape is the box fold shown below. The box fold is extremely useful and forms the basis for many architectural style pop-ups such as the shrine below. While it looks complex it’s actually just made up of five parallel folds (shown in different colours in the image). It would be tedious to have to build a box from parallel folds every time it was needed, so we have a toolbox of these more common shapes.
The paper kit
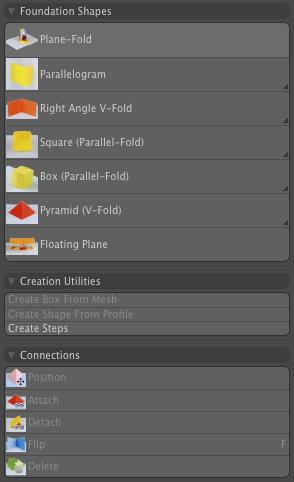
We use a modeling tool called modo to build all of our pop-ups. To do this, we created a suite of plug-ins and scripts that we rather blandly call “the paper kit.” The paper kit works in a similar way to Lego. It provides a collection of shapes that can be connected to together to make a pop-up. The image below shows the toolbox that the paper kit provides for creating shapes and connecting them together. There are rules about how folds can connect which are enforced by the paper kit to ensure only valid pop-ups can be built.
Building a pop-up
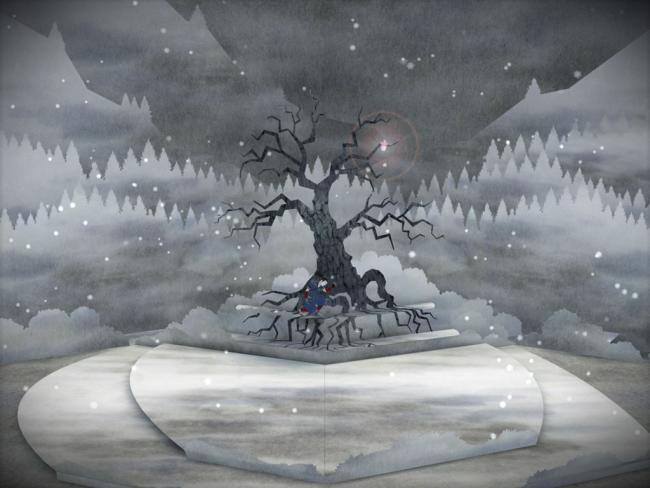
To give you a feel for the process involved in building a pop-up, I’m going to walk through the construction of the first scene that the player encounters when playing the game. This scene is of a lone tree in the forest and has special significance to the narrative of the game. It is based on the v fold primarily. So you know what we’re building, here’s an image of the finished scene from the game.
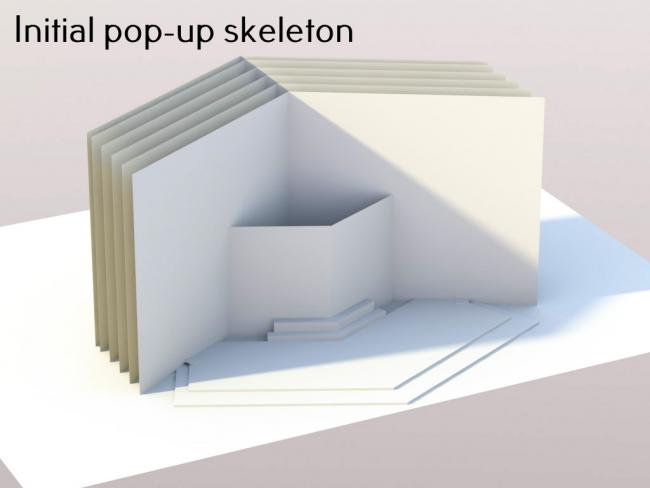
To begin with, we construct the pop-up skeleton using the paper kit. We call it the skeleton because it only provides the basic shape and structure of the scene. Much editing is required to the skeleton to create something visually appealing. This step is perhaps the most important and most tricky as you have to be able to visualize what the final scene should look like. Normally it’s an iterative process.
Jennifer will build an initial version of the skeleton. She then gives this to Ryo to look at to see where we might need to make some changes from an art perspective. Jennifer and Ryo then discuss the layout and go back and forth making changes until they’re happy with the basic shape. Another important thing to check is that the scene folds totally inside the base card. Although the images shown here are in the open state, the scene does fold from the very first skeleton version. The image below shows the initial skeleton for the tree scene. As you can see it looks nothing like the final scene.
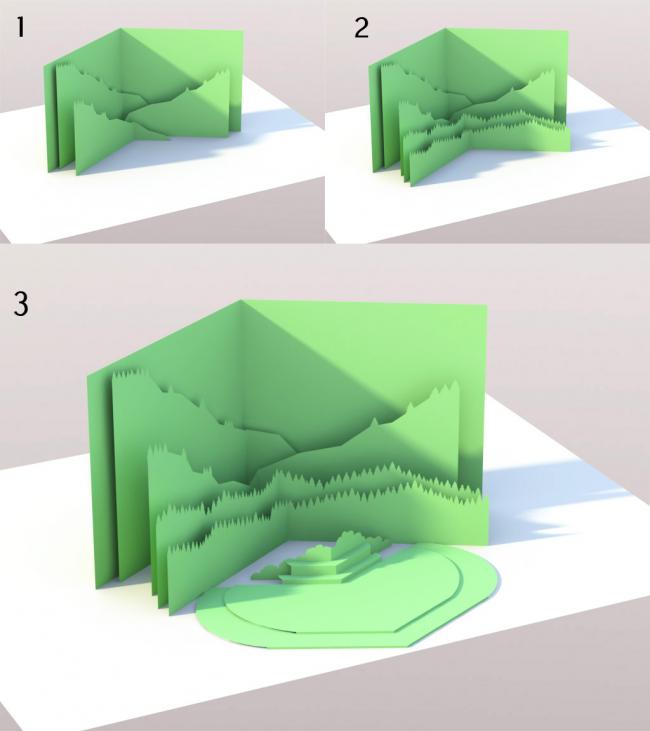
Once the skeleton has been finalized we can start on the second part that is cutting. We call it cutting because it’s exactly the same as you would do if you had paper and scissors.
The geometry of the skeleton is cut into the shapes that we want. Again this requires a fair amount of experimentation, so we usually keep the uncut version of the scene around in case we need to go back to it at some point. The image below shows the scene in various stages of cutting. First the mountains in the background are cut, then the mid-ground trees and then the foreground elements.
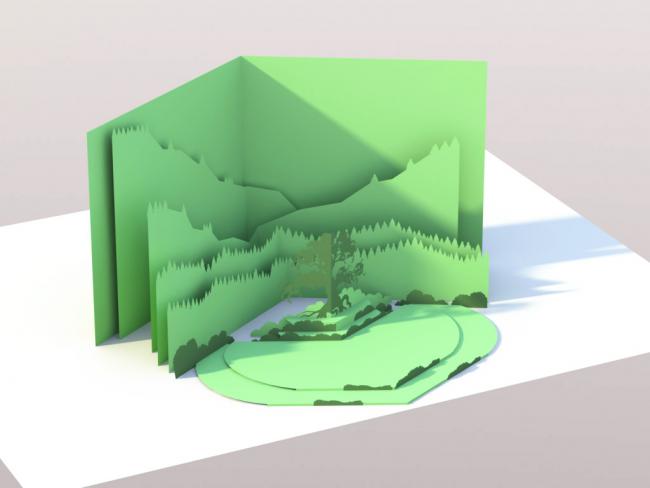
After cutting has been completed we can apply decoration to the scene. Decorations are additional layers that can be added on to existing folds. These can be added anywhere, as long as they are added in exactly the same plane as an underlying fold. It’s possible to create a layered effect with decoration by slightly offsetting each piece of decoration.
Sometimes it is hard to decide whether to cut or whether to decorate, as with many cases both can achieve the same thing. Usually it just comes down to experience and knowing what is best for a given situation. One advantage with decoration is that we have a library of common decoration such as grass, bushes and rocks that can be easily reused. The image below shows the scene with decoration added. The decoration is shown in a darker green so you can see more clearly
With the decoration complete the scene is ready to be textured and lit. I’ll talk more about how we texture and light the pop-ups in a future blog post. A lot of time was spent on devising lighting and texturing that shows the pop-ups at their best.
I hope this has been interesting and gives a good insight into the process we use to make Tengami‘s pop-up world. Until next time!
More articles...
Monopoly GO! Free Rolls – Links For Free Dice
By Glen Fox
Wondering how to get Monopoly GO! free rolls? Well, you’ve come to the right place. In this guide, we provide you with a bunch of tips and tricks to get some free rolls for the hit new mobile game. We’ll …Best Roblox Horror Games to Play Right Now – Updated Weekly
By Adele Wilson
Our Best Roblox Horror Games guide features the scariest and most creative experiences to play right now on the platform!The BEST Roblox Games of The Week – Games You Need To Play!
By Sho Roberts
Our feature shares our pick for the Best Roblox Games of the week! With our feature, we guarantee you'll find something new to play!Type Soul Clan Rarity Guide – All Legendary And Common Clans Listed!
By Nathan Ball
Wondering what your odds of rolling a particular Clan are? Wonder no more, with my handy Type Soul Clan Rarity guide.


 “
“