![Digimon UP Tier List [Supports, Buddies, and Partners]](/wp-content/uploads/2026/07/digimon-up-tier-list.jpg "Digimon UP Tier List [Supports, Buddies, and Partners]")
Digimon UP Tier List [Supports, Buddies, and Partners]
These Digimon will get you UP the leaderboard.

![Haze Seas Boss Drops [Chances, Locations, and How to Spawn]](/wp-content/uploads/2026/07/haze-seas-boss-drops.jpg "Haze Seas Boss Drops [Chances, Locations, and How to Spawn]")

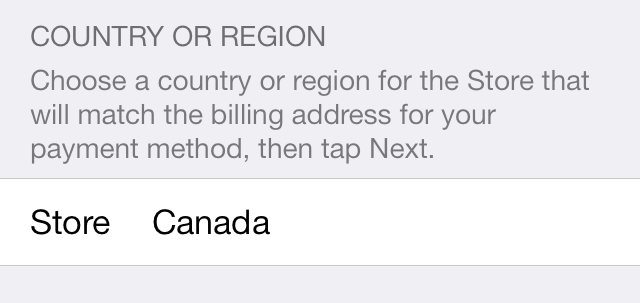
iPhone and iPad games sometimes launch early in specific regions – usually for those lucky ragamuffins living Canada, New Zealand or Australia. Many online-centric mobile games dance the staggered release routine to stress test servers and catch various other problems before launching in countries like the ol’ U.S. of A.
Not to fret, dear readers. Much like subsidized health insurance, you too can experience the same wonders as Canada just by setting up a spare Apple ID on your iDevice of choice with these few simple steps. These instructions will work on any free-to-play game in any country you may need, though Canada seems the region of choice for most developers.

And that’s all there is to it! Once you’ve downloaded the game you can sign back in to your real account and still brag to all your friends about your ultra-rare, international import. Have fun!
