- Wondering how to get Monopoly GO! free rolls? Well, you’ve come to the right place. In this guide, we provide you with a bunch of tips and tricks to get some free rolls for the hit new mobile game. We’ll …
Best Roblox Horror Games to Play Right Now – Updated Weekly
By Adele Wilson
Our Best Roblox Horror Games guide features the scariest and most creative experiences to play right now on the platform!The BEST Roblox Games of The Week – Games You Need To Play!
By Sho Roberts
Our feature shares our pick for the Best Roblox Games of the week! With our feature, we guarantee you'll find something new to play!All Grades in Type Soul – Each Race Explained
By Adele Wilson
Our All Grades in Type Soul guide lists every grade in the game for all races, including how to increase your grade quickly!
Return to Mysterious Island 2 Walkthrough
Welcome to our strategy guide for Return to Mysterious Island 2. Table of Contents:General Tips and OverviewItem CombinationsWalkthroughGENERAL TIPS AND OVERVIEWMain menuNew game: Start a new game by selecting one of five profiles. The profile is used to save and load games. Switch between profiles by left clicking them. You can see a summary of the previous game by selecting the summary photo in the top window.Load game: Switch between the profiles to see any games that have been saved. Select…
a:1:i:0;a:2:s:13:”section_title”;s:41:”Return to Mysterious Island 2 Walkthrough”;s:12:”section_body”;s:89484:”
Welcome to our strategy guide for Return to Mysterious Island 2.
Table of Contents:
General Tips and Overview
Item Combinations
Walkthrough
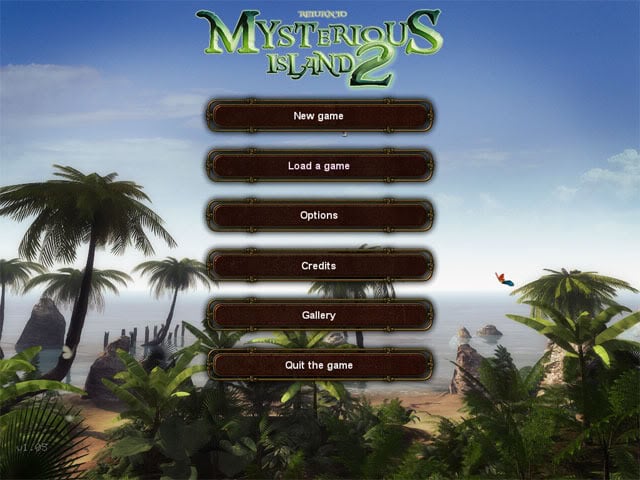
Main menu

New game: Start a new game by selecting one of five profiles. The profile is used to save and load games. Switch between profiles by left clicking them. You can see a summary of the previous game by selecting the summary photo in the top window.
Load game: Switch between the profiles to see any games that have been saved. Select the saved game and then click the load button to load it.
Options: Configure subtitles, rotation speed, object information, brightness, overall volume, music volume, sound effects volume and voice volume.
Credits: View the list of individuals involved in the creation of this game. Press the spacebar to return to the main menu.
Gallery: View all of the animations that have been unlocked by playing the game.
Quit the game: Select yes to return to Windows or no to return to the main menu.
Controls
While playing the game as either Mina or Jep, move the mouse to look around the locations. When the cursor moves over a hotspot it will change to an icon. Left click the mouse to interact with a hotspot. Right click the mouse to bring up the game menu. Both the game menu and the icons are described in more detail below.
Game menu
The game menu is accessed by right clicking the mouse while playing the game. The buttons on the left side of the screen from top to bottom are:
Menu: Return to the main menu of the game.
Inventory: View and interact with any items that have been collected. See the inventory section below for a more detailed explanation of this section.
Documents: View any documents that have been found in the game.
Goals: View the current objective and any previous objectives.
Shortcuts: The shortcut option becomes available at a certain point in the game so that you can travel quickly between locations.
Dialogues: View current and previous conversations.
Puttering about: View any item combinations that have been completed.
Inventory
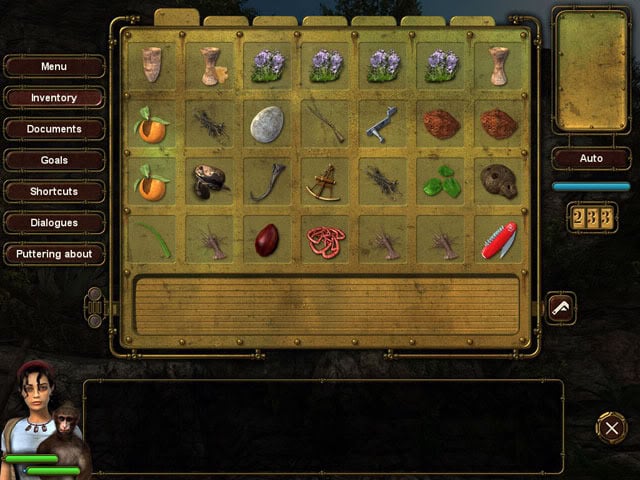
The inventory window consists of seven pages that can be switched between by selecting the tabs at the top of the window. All objects that are collected are automatically added to the transit area of the inventory window. From here, you can either organise the items by placing them into a page on the inventory by yourself or press the auto button to store them automatically. Some objects can be combined by selecting the item using it on another item in the inventory. Sometimes three or even four items can be used in order to make one new object. Refer to the item combinations at the bottom of this section for more information.
Some objects in the inventory will have a small white box at the bottom-right corner of the image, which means that the object can be disassembled. To do this, select the object with the white box and then select the disassemble icon at the bottom-right corner of the inventory window.
Below the auto button at the right side a blue bar is displayed. This is the pride bar, which will stay at the maximum level unless easy mode is selected on some of the mini-games. The counter below the pride bar is the coping score, which increases with most positive actions that are made in the game.
A picture of Jep and Mina is shown at the bottom-left corner of the inventory window and a health gauge is also displayed. At some points in the game you may need to eat food or wear different items in order to raise the health gauge.
Icons

Neutral: Standard icon displayed when no action can be performed.

Go: Move forward toward a different area.

Look: Examine an object to see more information.

Use: Perform an action on an object.

Blocked Use: The object cannot be used when this icon is displayed.

Take: Adds the object to the transit zone of the inventory.

Talk: Communicate with a character.

Zoom: See a close-up of an object.

Horizontal scroll: Hold down the left mouse button on an oject where this icon is displayed and then move the mouse left or right.

Vertical scroll: Hold down the left mouse button on an oject where this icon is displayed and then move the mouse left or right.
Mini-games
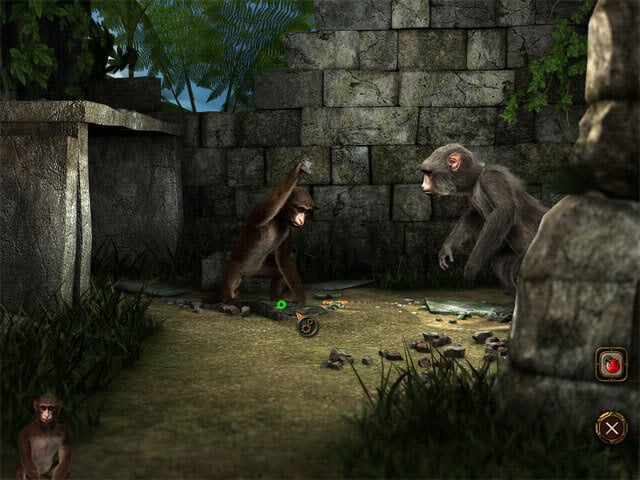
There are a few mini-games scattered throughout the main game which range from actions such as fishing in the lake to collecting termites on a stick. The mini-games are all set at a reasonable difficulty, although the mini-game can be made easier by selecting the easy difficulty button that appears. Doing this will lower the pride score however, which in turn has a an effect on the coping score. Both the pride and the coping scores can be seen on the inventory menu.
Flexibility in puzzles and restoring gauges
Many sections of the game allow you to be quite flexible with how you solve certain puzzles. For example, you need to build a fire at one point in the game and there are many inventory items that can be used to make this happen.
The game is designed in a way that it makes it difficult to get stuck by using the wrong item, so feel free to experiment by using different items than I suggest in the walkthrough as you progress through the game. Some goals in the game suggest restoring Mina or Jep’s energy gauge to green by eating food, or to raise a character’s friendship bar to green. There are many possible items that can be used to do this, so again experiment to find different items to use.
ITEM COMBINATIONS
The following objects can be made by combining different inventory items. Note that some objects here can be created using a number of different items.
Blowgun (Reed stalk + wild peas)
Bouquet of varied flowers (Austral thyme + tahitian gardenia)
Cake batter (Water + flour + maple syrup + raw egg)
Can of green paint (Can of dried out green paint + jerry can of gasoline)
Colored gas (Colored gas + Bottle)
Cord (Multiblade knife + Spool of string)
Cork (Multiblade knife + broken stoneware bottle)
Diving mask (Mask + hydrated lime)
Enameled vase to be fired (Vase + turquoise paintbrush)
Fire ready to burn (Sextant sight + dried twigs + large broken branch)
Fishing pole (6 foot long pole + red cork + cord + hook)
Fishing pole with lure (Fishing pole + worms)
Hydrated lime (quicklime + water)
Insulator (Crystal holder + crystal)
Laid rope (Cord + cord + cord)
Level (Sextant sight + cord + weight)
Paintbrush (Multiblade knife + cliff reeds + reed stalk)
Perfume (Perfume + vase)
Pierced seahells (Multiblade knife + shellfish)
Ready-tc-cook tart (Cake batter + trulca)
Red cork (Cork + red paint)
Red paint (Red pigments + alcohol)
Repaired fuse (Blown fuse + Steel wire)
Sand (Water + wheat mixed with sand + wheat + wheat)
Seashell necklace (Cord + pierced seashells)
Seasoned salad (Water spinach + palm oil)
Turquoise liquid (Turquoise liquid + vase)
Turquoise paintbrush (Paintbrush + Turquoise liquid)
Vitrifiable mixture (Sand + Quicklime + Soda ash + Charcoal)
White paint (Hydrated lime + palm oil + chalk)
Save Mina
The game starts in the flooded helicopter, where you initially play as Jep the monkey. Move the mouse to look around the plane:
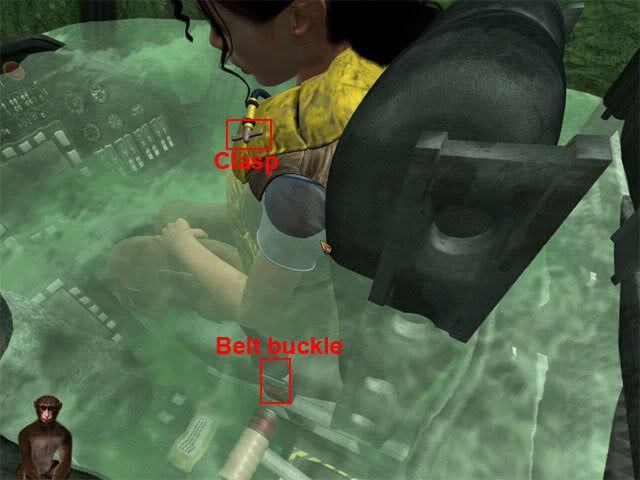
Use the clasp above Nina’s left shoulder to inflate her lifebelt. Use the belt buckle to unfasten the seatbelt. Move the mouse cursor to the window behind Mina and it will change to a moving forward cursor. Move the cursor to the window behind Mina to see the go cursor become activated. Go through the window to exit the plane. An animation is shown where Jep saves Mina from the plane and pulls her out of the lake. Talk to Mina: She tells Jep to bring to go and find a bandage for her injured leg.
Care for Mina so her energy gauge rises from red to orange
Caress Mina to raise Mina’s energy bar by ten points. Click the X at the bottom-right corner of the screen to exit the dialogue. Quarter turn right and move forward twice to the steps at the bottom of the windmill. Turn slightly left and take the large broken branch on the ground:
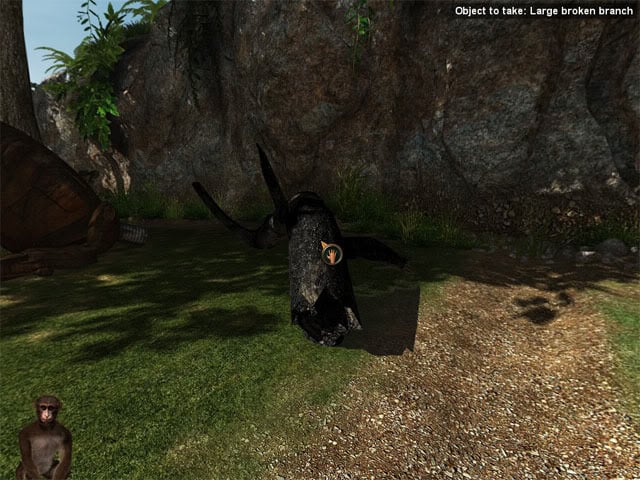
A monkey named Slugger is also in this area, but ignore him for now. Go up the steps to see the windmill. Turn slightly left and select the zoom icon on the chest to see the two items that it contains. Take the hook and the dirty rag. Go back down the stairs and move forward twice to return to Mina.
Right click and select the inventory button. Nothing is in the inventory yet as any items that Jep has found have been placed in the transit zone, but click the Auto button below the transit zone window and all of the items will be placed into the inventory. Select the dirty rag, right click to close the inventory window and then select the lake to make the clean rag. Use the clean rag on Mina and select the give icon to raise Mina’s energy bar to orange.
Fill Jep’s energy bar up to green
Right click and select the goals button to see a hint for the current goal. The suggestion is to try and find some food. Quarter turn right from Mina and move forward once to the windmill junction. Half turn left and take the leaf of a tree under the wooden structure:
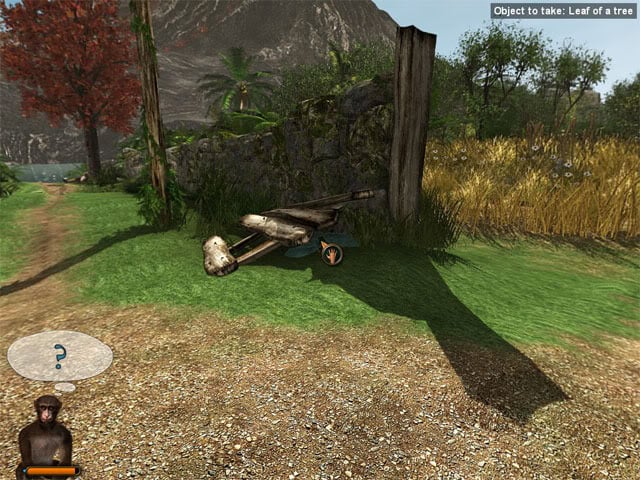
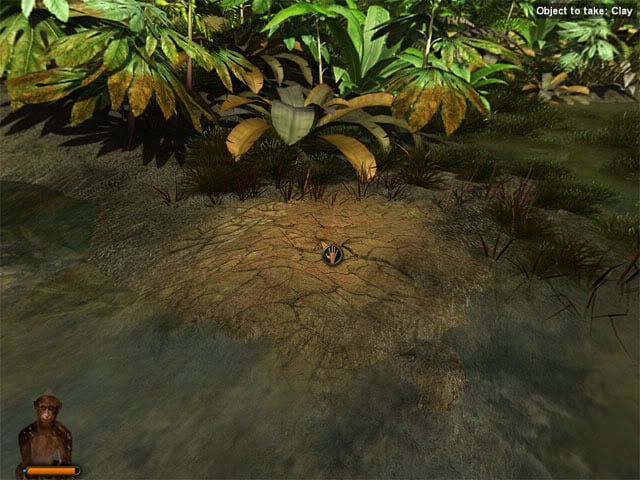
Turn slightly right and move forward to the scarecrow junction. Turn slightly right and Jep will be frightened by what he thinks is a snake. Take the slough of the snake, then half turn right and take the oranges on the grass. Turn slightly right and go forward to the swamp. There are currently some blue fruits in the middle of the swamp which Jep can’t reach at the moment, but we’ll return here later on to get them. For now, quarter turn right, look down and take the stick in the water. Quarter turn right and take the raw eggs from the nest, then quarter turn right again and take some clay:
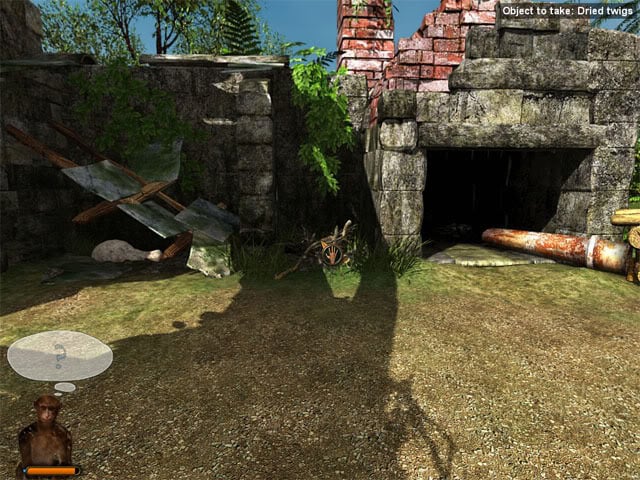
Quarter turn left after collecting the clay and go forward to to the scarecrow junction. Continue forward to the ruined building and the kiln. Take the dried twigs on the ground at the left side of the kiln:
Select the white crucible below the fallen roof of the building to see two objects on the ground. Take the ocarina and the worms. Quarter turn left and move forward into the building to see Amber breaking some fruit open with a stone. Talk to Amber and then select the beg icon to begin the mini-game.

The aim here is to break open the fruit using a stone. Click once to raise the stone, click a second time to stop the stone and then click a third time to strike the fruit. Raise the stone too low and the nut won’t break, or too high and the fruit will shatter. Raise the rock to a point just above Jep’s head and then strike the nut when the circle is green to break it open successfully. Do this ten times to add ten seeds to the inventory. Easy mode can be used by selecting the icon above the X at the bottom-right corner of the screen, but doing this will lower the pride score.
Quarter turn left from Amber and use the water in the rock to clean Jep as he got muddy in the swamp. Feed Jep seeds until he says that he has had enough. Feed a raw egg to Jep to raise his energy bar to green. Return to Mina and talk to her to hear the sound of a motor.
Find the source of the motor sound that Mina and Jep heard
Return to the windmill crossroad and Jep will automatically look right toward a pillar of smoke in the distance. Go forward twice toward the smoke to see a flying robot. Turn around and Mina will scream. Before leaving this area, half turn left and take the tinder under the root of the tree:
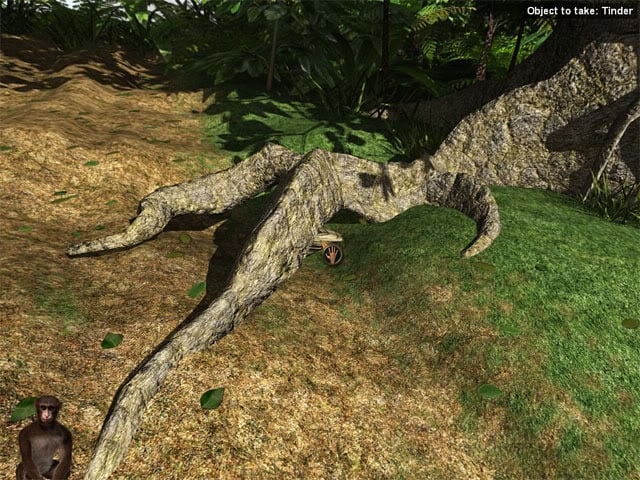
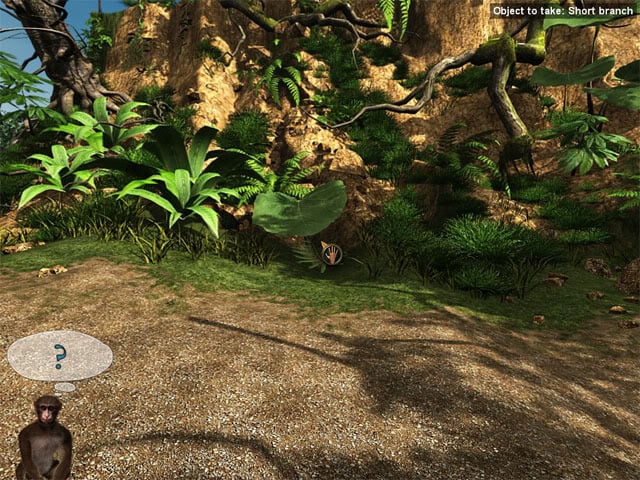
Half turn left from the root of the tree and move forward once, then quarter turn right and move forward to see a question mark above Jep’s picture. Quarter turn right and take the short branch below the leaf:
Discover what happened to Mina
Return to the lake where Mina used to be to see bloody footprints on the ground. Go to the steps below the windmill to hear Mina whispering to him to be careful. Look down and take the soiled bandage on the ground at the bottom of the steps. Look up and climb up the tree to jump over to the windmill. Talk to Mina to hear her explain about her narrow escape with the jaguar. She tells Jep to find an antiseptic for the wound on her leg.
Care for Mina to bring her energy gauge back to orange and get her to leave the mill
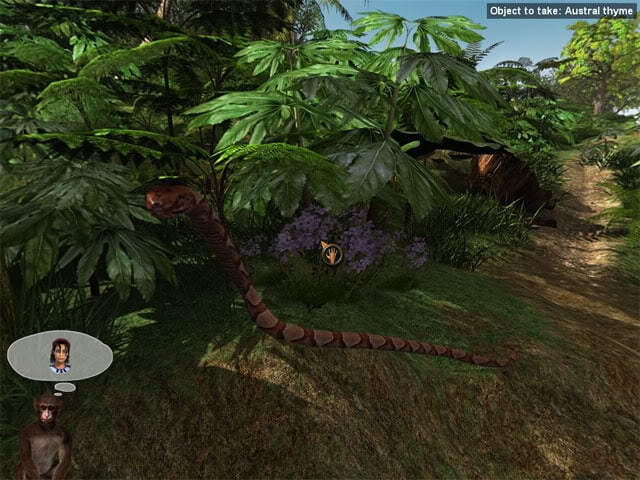
Climb out the window to return to the bottom of the tree. Go forward to the windmill junction, quarter turn left and go forward to the anthill junction, then quarter turn right and go forward to the broken bridge. Quarter turn right and try to take the austral thyme to see a snake appear. Select the ocarina from the inventory and then left click to start playing it. Select one of Jep’s fingers to temporarily hypnotise the snake. Right click twice to put away the ocarina and then select the austral thyme before the snake comes out of his trance:
Return to the windmill and climb up the tree. Give the austral thyme to Mina: She suggests finding carnivorous ants to stitch her wound. Climb out the window of the windmill to return to the bottom of the steps. Quarter turn right and take the blade of grass and the rifle. Examine the dead porcupine and then use the blade of grass on it to start a mini-game.
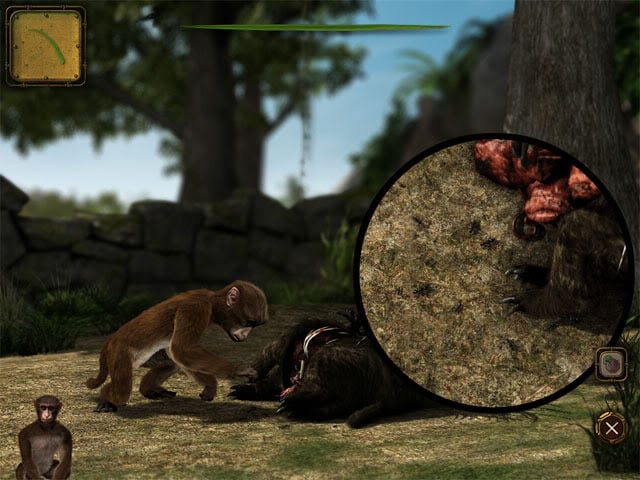
Select the ants as they run around. You know when you have caught one as it disappears from the close-up view and appears on the blade of grass at the top of the screen. The ants move around quickly, but each one follows its own circuit which is exactly the same each time. If you find that the ants are running around too quickly to catch, you can select the easy mode button near the bottom-right corner of the screen to slow down the speed of the ants, although this will cause a few pride points to be lost. Catch all ten of the ants and then return to the windmill. Give the ants to Mina to start another mini-game.
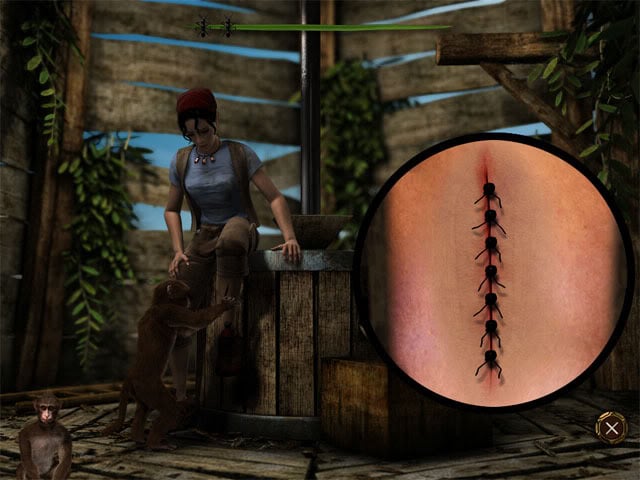
Select Mina’s leg to see the wound. Select one of the ants from the blade of grass at the top of the screen and use it on the top of the cut. Quickly select the ant again so that its mandibles stay stuck in the flesh. Select another ant, place it below the previous ant and then select it again. Do the same thing for the other five ants until the cut has been stitched.
Mina now needs a clean bandage. Climb out the window and return to the lake. Use the soiled bandage in the lake to get the clean rag. Return to Mina and give her the clean rag: She tells Jep to find a way to get rid of the jaguar outside.
Exit the windmill, move forward to the windmill crossroad, then quarter turn right and move forward to the scarecrow crossroad. Quarter turn left and move forward to the swamp to get muddy again. Return to the scarecrow crossroad, quarter turn left and look up to see a hornet’s nest in the tree. Climb up the tree and use the bamboo stick from the swamp on the hornet’s nest to hold it on the end of the stick (Jep needs to have got muddy in the swamp before doing this, otherwise the hornets will fly out of the nest and sting him).
Climb down from the tree and climb up the steps to the base of the windmill to throw the hornet’s nest at the jaguar. Take the stick and the hornet larvae on the ground that were left over from the attack. Half turn left and move forward twice to enter the workshop. Quarter turn left and use the water to clean Jep. Return to the windmill and talk to Mina, who congratulates Jep on getting rid of the jaguar. Climb onto Mina’s shoulder to start playing as Mina. Try climbing down the ladder to see the robot fly past the window of the windmill.
Find the robot seen through the mill window
Climb down the ladder. Quarter turn left and go down the steps. Go forward to the windmill junction, then quarter turn left and move forward toward the steam to see the crashed robot, which tells Mina that the island is in danger. Mina realises she is going to have to repair the robot to get more information.
Repair the broken robot and interrogate it
Look at the small circular panel on the robot to see a close-up:
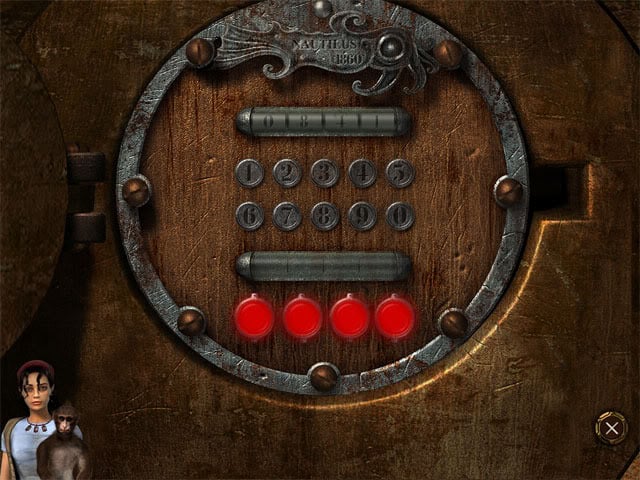
The number 1860 can be seen at the top of the panel below the name Nautilus, and below this is a randomly generated set of numbers on a dial. Think of the number 1860 as being divided into values so that 1 represents the value 1, 8 represents the value 2, 6 represents the value 3 and 0 represents the value 4. The aim here here is to enter the correct values of the number 1860 as they are shown on the dial.
For example, the correct input for the number 6039 would be 3400. This is because 6 is the third value of 1860, 0 is the fourth value of 1860, 3 is not in 1860 so is represented by a 0, and 9 is also not in 1860 so is represented by a 0. As another example, 5187 would be represented by 0120, 0841 would be represented by 4201, and so on. After entering the correct numbers, the four buttons will become green at the bottom of the panel. Mina now has to repair the circuits of the robot.
Return to the lake where Mina was sitting near the start of the game and try to enter it to hear Jep make a noise. Select the Play Mina option to leave Jep on the grass. Go forward into the lake to dive down to the helicopter. If you run out of air at any time, just return to the lake and the air gauge will be full again. Quarter turn left and take the fresh water mussels. Quarter turn right and take the frayed steel cable near the front of the helicopter:
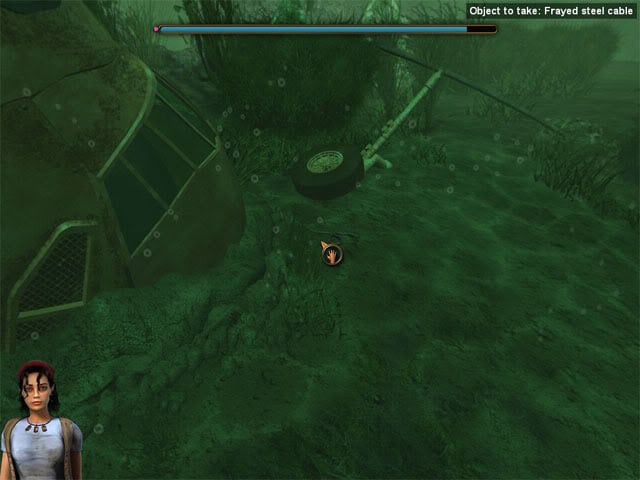
Go through the open window to enter the helicopter. Quarter turn right, look down and take the plastic envelope from the pilot to see other items drop out. Take the multiblade knife and the spool of string to see three crawfish start walking around on the pilot’s back. Take the three crawfish. Take the handle in front of the passenger’s seat. Either leave the helicopter or wait for the air gauge to run out to return to the surface.
Quarter turn left, select Jep and then select the icon to take Jep on the shoulder. Return to the crashed robot junction. Look at the panel on the robot and use the multiblade knife on the seven screws of the panel to see the circuits. Take the burnt components. Exit the view of the panel. Go forward along the path at the right side of the robot and continue forward three more screens to the beach:
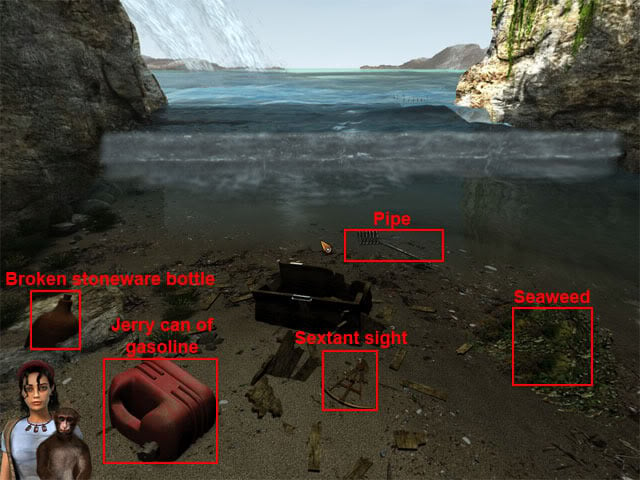
Take the broken stoneware bottle, jerry can of gasoline, sextant sight, pipe, seaweed. Turn slightly right from the seaweed and take the and wheat mixed with sand. Examine the panel on the robot. Use the multiblade knife on the seven screws of the panel. Take the parts of the circuit and then exit the view of the panel. Go back up the slope and the steps to see the jaguar pacing around up above.
Make the jaguar run away
Half turn left and go back down the steps. Look at the trap on the wall to see that a circuit has burned out. Use the multiblade knife on the two screws at the left side of the panel. Take the burned circuit parts. Select the parts of the circuit from the inventory and then exit the inventory to see them displayed at the bottom of the screen.
The aim now is to put three circuits in the correct slots on the circuit board. The number of lights surrounding each slot is used as a guide for which circuit part should be placed. Taking the top slot for example, there is one light above, three lights on the left, three lights on the right and two lights below. Look at the parts of the circuit to see that the part that has same configuration is the part that is fourth from the left on the bottom row. Place this part on the top slot to see that all lights on the circuit part are lit. Place the other two circuit parts in the same way. The correct configuration is shown below:
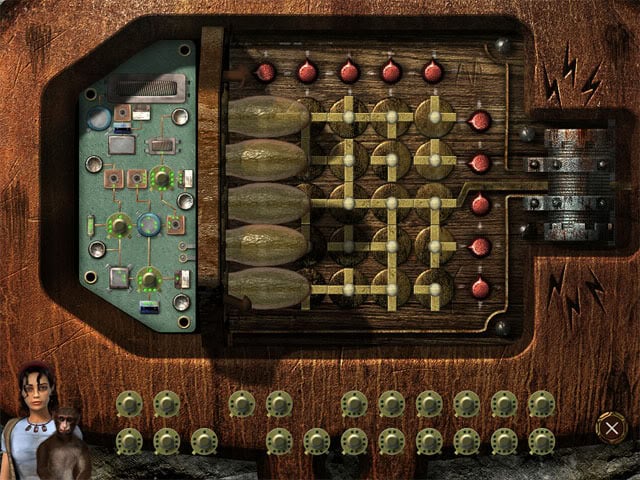
Close the panel to see the big green lights on the front are now lit. Select one of the buttons on the panel to start the laser and scare away the jaguar.
Repair the broken robot and interrogate it (continued)
Look at the cannon again, open the panel and take the three circuit parts. Exit the view of the cannon and move forward three times to return to the crashed robot junction. Look at the panel and select the parts of the circuit to see them displayed at the bottom of the screen again. This is the same method as used on the cannon, but now every circuit part has to be placed on the board. Don’t worry if any of the circuit parts you use burn out, as these are ones that will not have to be used on the panel. The correct configuration is shown below:
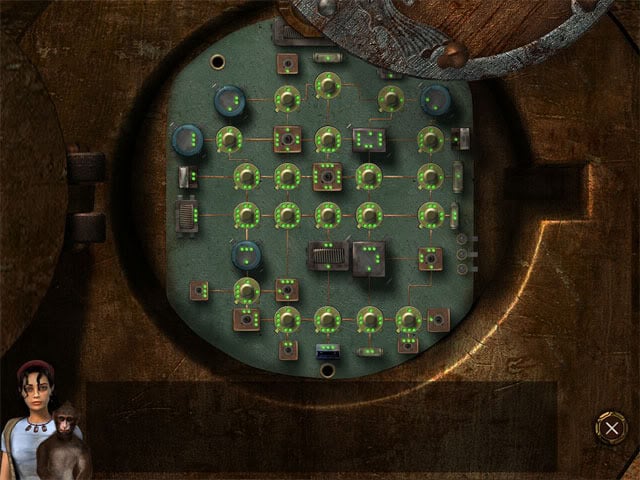
After placing the circuits in the correct positions, the robot gives his report and then prints out a map of the Mysterious Island. Take the map and it will be added to the documents section. The robot tells Mina to look for a passage at an altitude of 340 feet. Take the illegible sheet of paper.
Explore the island to find a route to the geothermal motor
Return to the scarecrow junction to see that a new path has appeared. Continue forward to the mud flats. Try to go down into mud. Mina says that her leg could get infected, so select Play Jep and then go down to the mud. Look up and use the bamboo stick on the branch above to knock two soiled fruits down to the water. Take the soiled fruit.
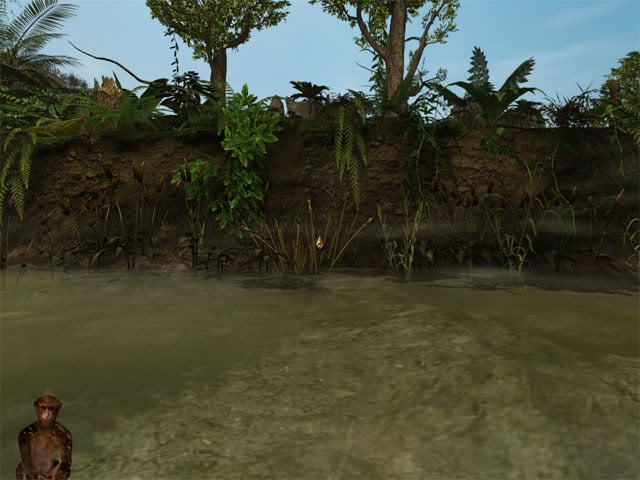
Jep will die if he steps into a deep section of the swamp, so use the bamboo stick on the swamp to test for a shallow section. Move forward and then use the bamboo stick to test for the next shallow section. Keep doing this to cross over to the other side. The correct movements from the start are forward, quarter turn left and forward, quarter turn right and forward. See the pictures below for the correct path to take:
Forward:
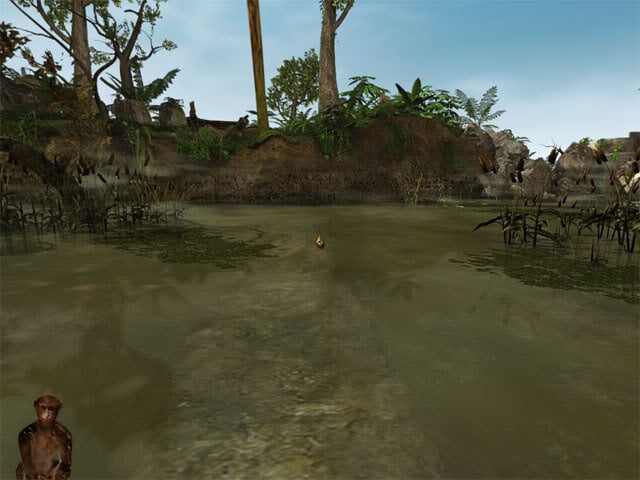
Quarter turn left and forward:
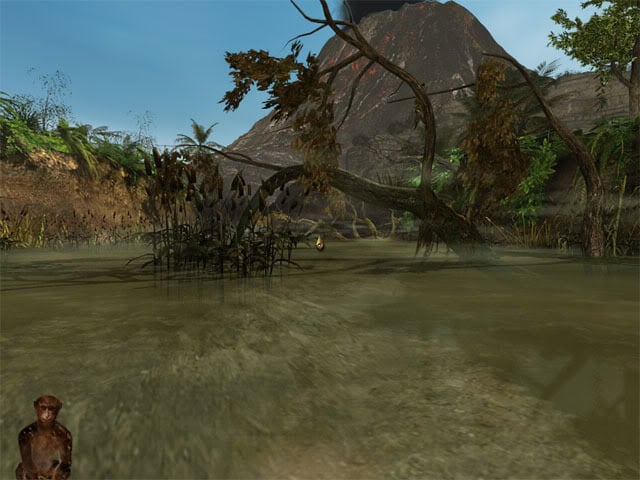
Quarter turn right and forward:
Help Mina get to the other side of the mud flats
After safely making it to the other side of the mud flats, quarter turn right and move forward. Try to push the leaning post: Jep needs his energy gauge to be at green in order to tip the post over.
Raise Jep’s energy gauge to green
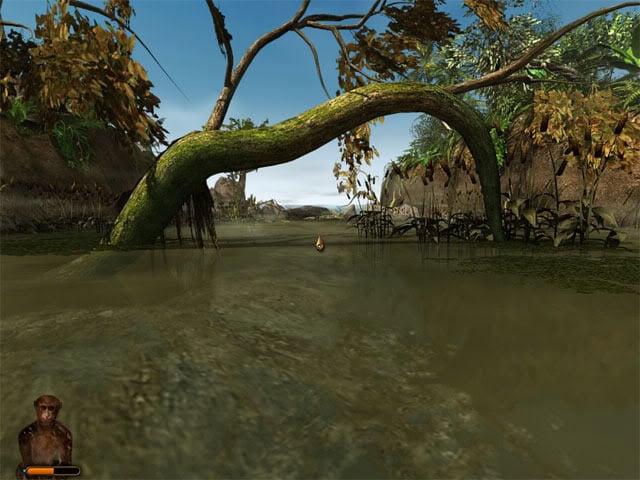
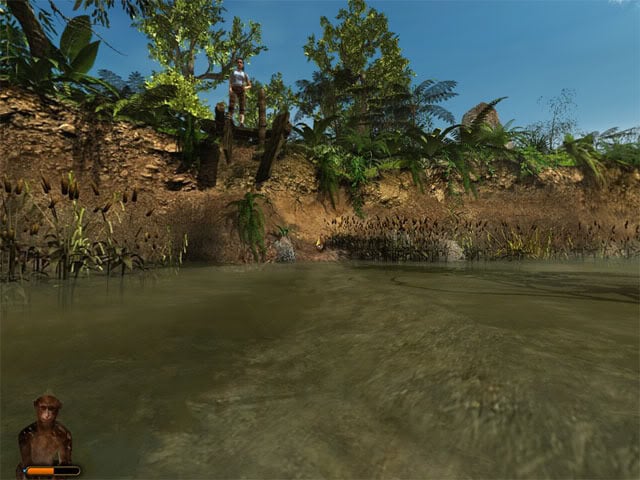
Quarter turn right and move forward, then quarter turn left and go back down to the mud. Cross back over the mud flats to Mina. The correct path is easier to find this time as Jep stirred the mud up when he passed through earlier and a muddy trail can be seen. See the pictures below for the correct path to take:
Quarter turn left and forward:
Quarter turn right and forward:
Climb up the slope to return to Mina. The first aim in raising energy is to caress Mina, but Jep is currently too dirty from the mud flats. Facing Mina, move forward once, quarter turn left and move forward, then quarter turn left and move forward again to the workshop. Quarter turn left and use the water to clean Jep. Return to Mina. Select Mina and then select the caress icon for 25 energy points.
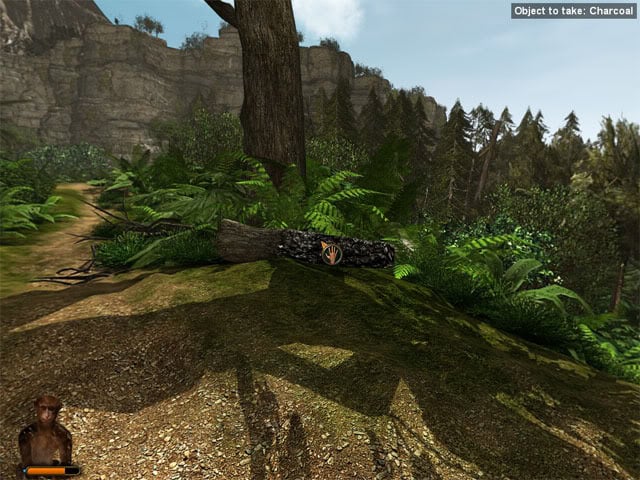
Return to the other side of the mud flats. Quarter turn right and move forward to the leaning post, then quarter turn left and go forward to the signpost crossroad. Turn slightly left and take the charcoal:
Turn slightly left and go forward one screen toward the cliff. Half turn left and take the bunch of oil palm fruits. Quarter turn left and take the Tahitian Gardenia. Return to the signpost crossroad. Quarter turn left and move forward to see a lemurid run under the bush on the right. Quarter turn right to face the leaves that the lemurid ran under. Open the inventory and use the short branch on Jep to make a short pointed stick. Quarter turn right and use the short pointed stick on the hotspot below the leaves to get the lemurid:
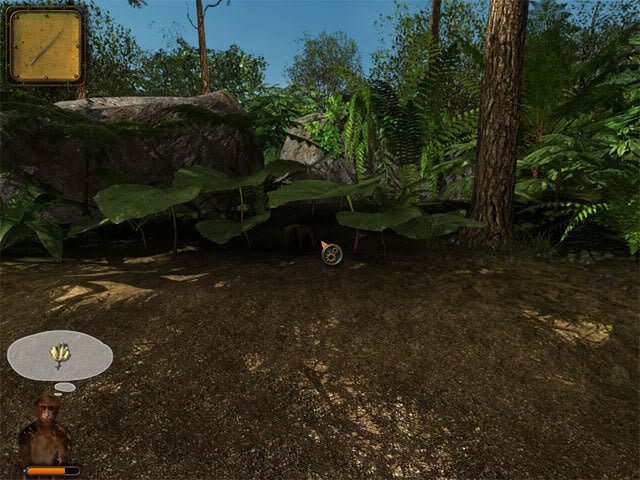
Half turn right and look up to see a honeycomb on the tree above. Jep should still be dirty from the mud flats, so he will be safe from the bees. Take the honeycomb. Look down and take the water spinach at the back of the small pool. Use the pool to clean Jep. Use both soiled fruits in the pool to get the blue desserts. Return to the leaning post near the mud flats. You should now have enough items to make Jep’s energy gauge green. Many of the following items can be eaten or worn to raise Jep’s energy gauge, but some can be quite handy later on so should be saved. I would recommend giving Jep the following items:
Ants (+0.5)
Crawfish (+2)
Orange (+5)
Austral Thyme (+5)
Tahetian Gardenia (+5)
Blue desserts (+6)
Lemurid (+5)
This should be more than enough to make Jep’s energy gauge green. If the energy gauge still seems to be down in the orange, you may not had Jep caress Mina on the other side of the bridge for 25 points. Once Jep’s energy bar is green, push the leaning post so that Mina can cross over to the other side of the mud flats.
Explore the island to find a route to the geothermal motor (continued)
Go forward to the signpost crossroad, quarter turn right and go forward to the large kiln. Right click now to see that the shortcut button is activated. Select this to see that you currently have the choice to make a shortcut to two possible locations, although many more locations are added as you progress through the game.
There is no need to travel anywhere at the moment though, so exit the menu to return to the large kiln. Turn slightly right and try to go up the stairs: Mina says that the stairway has collapsed. Play Jep and go upstairs to see a bird on the rim of the chimney:
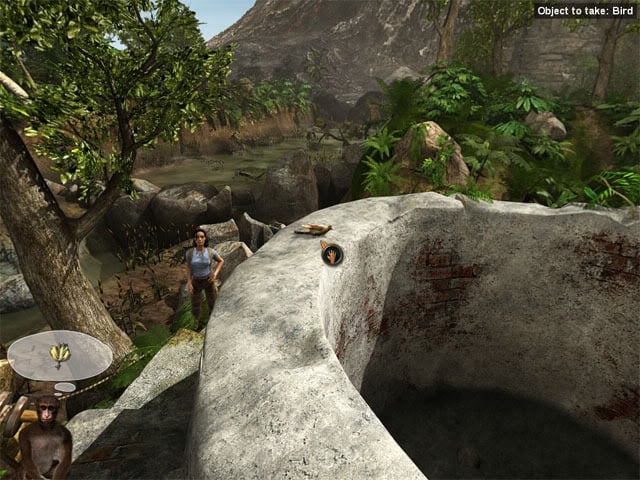
Take the bird, look up and put it back in the nest with its mother. Climb back down the stairs and select Mina, then climb onto her shoulder. Half turn right and look at the stone marker on the floor to see that the altitude at this point is 325 feet. The robot mentioned that the secret passage is located at an altitude of 340 feet, so 15 feet needs to be added to this marker. Return to the signpost junction, quarter turn right and go forward twice to the sawmill.
Quarter turn right, look down and move the slab on the ground at the right side of the table. A monkey appears and tries to steal items from Kate. Click on the monkey’s hand to stop him from stealing an item. You will have to switch between the first two inventory pages by clicking the tabs at the top of the inventory window to find the monkey.
After stopping the monkey stealing one item, put that item back in the empty slot and then find the monkey’s hand again. The monkey will give up after five attempts. Don’t worry if any items were stolen as you will have the chance of recovering them later on.
Open the chest that was revealed when the slab was moved and look at the journal to add the book of challenges to the documents section. Exit the documents window to see five other items in the chest. Take the red pigments, grindstone, weight, rusty axe and chalk. Select the X to close the view of the chest. Turn slightly left and take the nail on the saw blade:
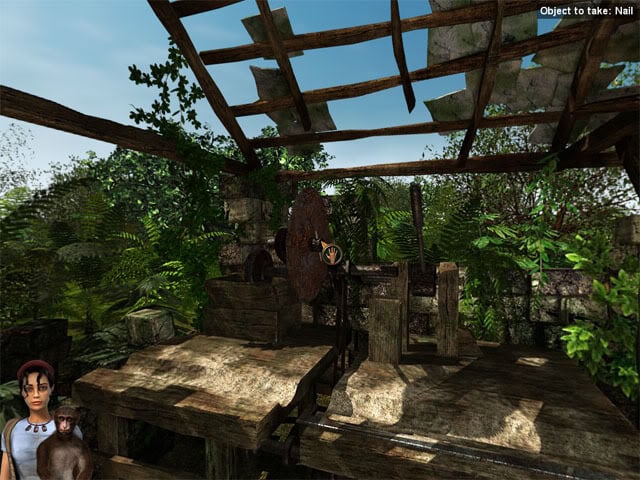
Take the rusty saw blade and replace it with the grindstone from the chest. Use the nail on the grindstone to fix it in place. Use the pedal on the ground to start the grindstone spinning. Use the rusty axe on the spinning grindstone to sharpen it. Half turn left and go forward to the cliff. Quarter turn left and use the sharpened axe on the trees. Look down and take three of the 21-foot long poles.
If you try to take more of the poles Mina says she has enough for now, but you can always return here later on if you need any more. Quarter turn right and use one of the 21-foot pole on the brambles. Try to go forward over the pole to hear Mina says she doesn’t want to slip. Select Play Jep. As Jep, cross over to the other side of the pole. Look up and use a 21-foot pole on the Trulca berries above the plant to knock them down:
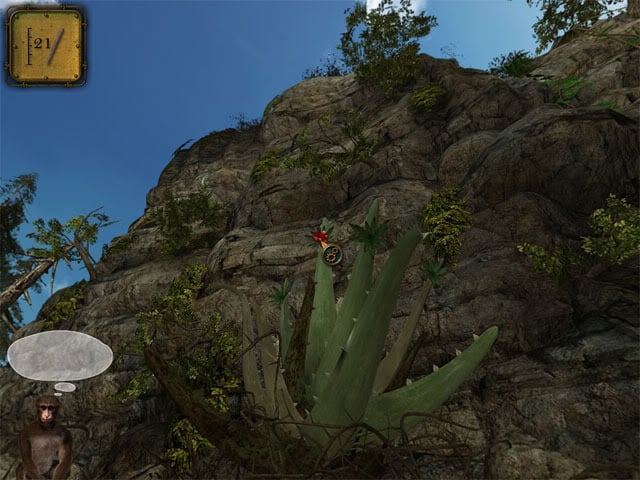
Take the Trulca berries on the ground. Return to Mina and climb onto her shoulder. Return to the sawmill. Press the pedal to spin the grindstone. Use the rusty saw blade on the grindstone to sharpen it. Use the pedal again to stop the grindstone from spinning. Take the nail and the grindstone. Use the sharpened saw blade and the nail on the saw. Use the 21-foot long pole on the slot on the workbench.
Move the cursor to the lever at the right side of the saw blade to see the measurements for how the pole will be cut. Remember that the secret passage is at 340 feet, and the marker by the large kiln was at 325 feet, so we need a 15-foot pole to be placed on the marker. Move the pole right, then move the mouse cursor to the lever again. It should say "21 foot long pole => 6 foot long pole + 15 foot long pole". Use the pedal to spin the saw blade and then use the lever to cut the pole:
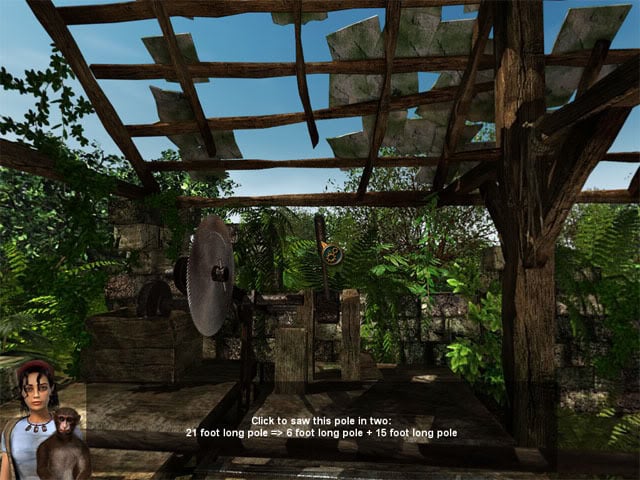
Travel to the large kiln and use the 15-foot pole on the stone marker. The top of the pole is now at 340 feet, the same height as the secret passage mentioned by the robot. Go forward to the signpost crossroads and then half turn left to see the pole by the large kiln. Open the documents window and look for the page which mentions plotting altitude using a device. The notes mention that the items used were a simple square and a plumb line, although a sight would have made the device easier to use.
Combine the multiblade knife with the spool of string to make a cord. Combine the sextant sight, cord and weight to make a level. Select the level and then exit the inventory to see Kate’s view through the sight. Hold the left mouse button down and move the mouse up and down to look vertically, or release the mouse button and move the mouse left or right to look horizontally. Move the sight to the top of the pole near the large kiln:
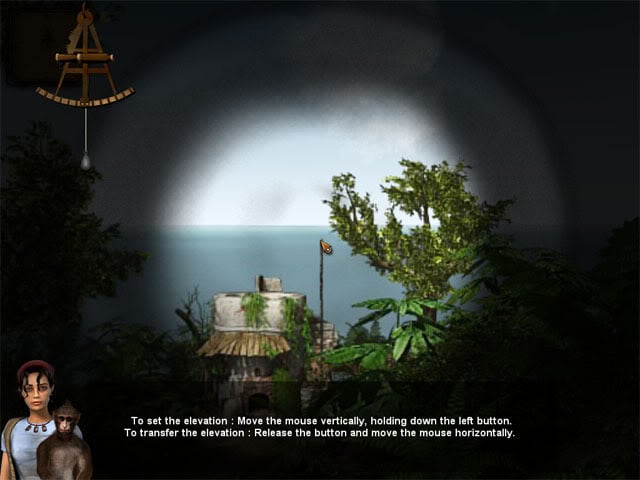
Move left at this height to see a bird on top of a tree near the cliff:
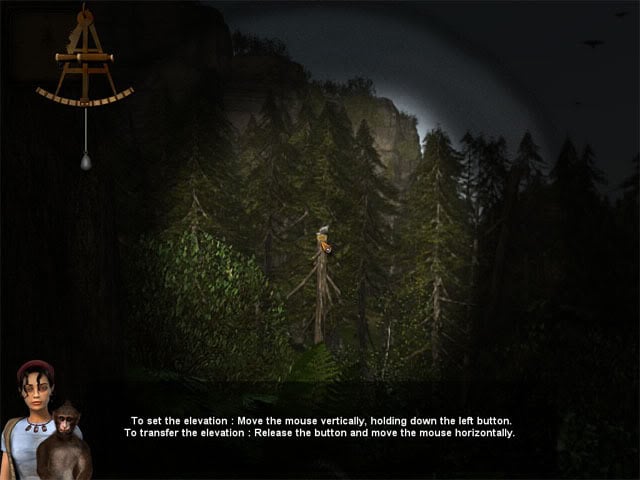
We now know that the bird on top of the tree is also at a height of 340 feet. Exit the view of the sight. Go to sawmill and select the level again. Move left and up slightly to see the bird on top of the tree. Move the cursor to the same height as the bird, then move right to the bush at the same heigh on the cliff. Wait as second and Mina will notice that the bush moves:
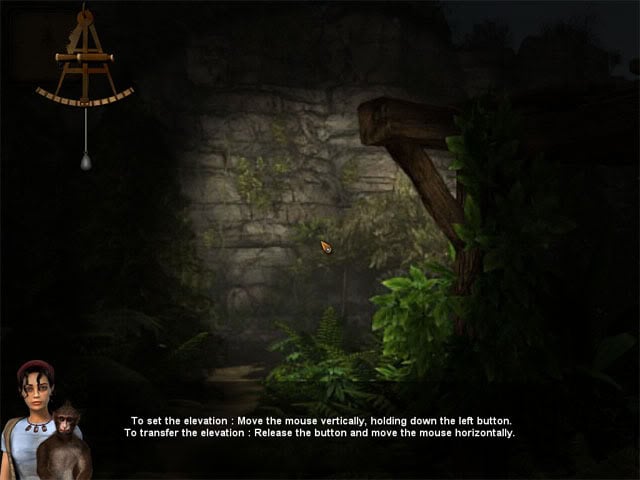
Exit the sight and move forward to the cliff to see a tunnel behind the bushes. Try to climb into the tunnel: Mina says that she needs to get her strength back before she enters the tunnel.
Fill Mina’s energy bar up to green
Use the shortcut button to travel to the lakeside. Half turn left and go forward to the windmill junction, quarter turn left and go forward to the scarecrow junction, quarter turn right and go forward to the kiln and then quarter turn left and go forward to the workshop. The workshop will now be added to the shortcut menu. Once at the workshop, quarter turn right and use some clay on the wooden wheel.
Examine the wooden wheel and then take some clay to put it on the wheel. Use the small pool of water to wet Mina’s hands. Select the wooden wheel to spin it, then select a section of the clay to shape it. When the wheel stops spinning, take the pottery to be fired from the wheel. There are six possible pottery shapes that can be created, so make two pieces of pottery out of each shape.
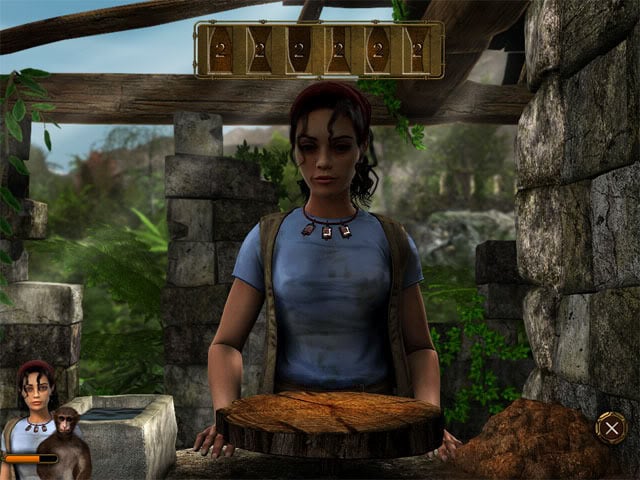
Eventually, you should have twelve pieces of pottery to be fired. Exit the view of the wooden wheel. Quarter turn right and move forward to exit the workshop, then quarter turn left and to see the kiln. Open the inventory, select the level and then select the disassemble/empty button at the bottom-right corner of the inventory window to take apart the level.
The aim now is to make a fire so that the tarts mentioned in the documents can be made. There are many ways of making a fire, but one way is to combine the sextant sight with the dried twigs and the large broken branch. Put the fire ready to burn in the kiln and then pull the string at the end of the bellows to make the fire stronger:

Use the pottery to be fired in the kiln and take it out when it glows a lighter colour to get the vase. If you leave the pottery in the fire too long, it will break and you will need to mould the clay again in order to create the shape. Bake the other eleven pieces of pottery in the same way to end up with twelve vases. Half turn right from the kiln and go forward twice to the swamp. Enter the swamp as Jep and use the 21 foot long pole on the branch to move it closer:
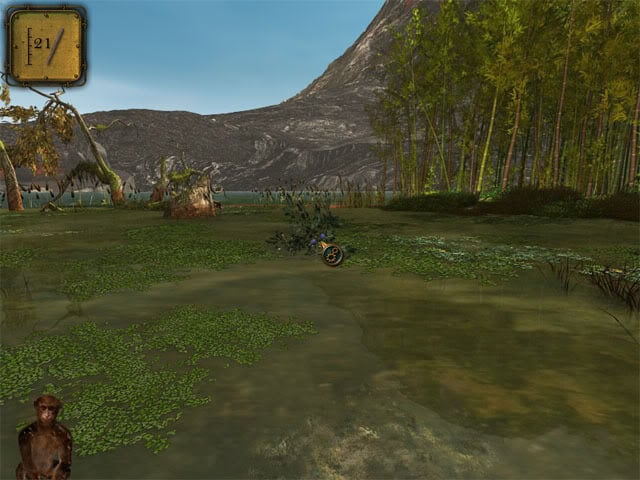
Take the soiled fruit. Travel to the workshop and use both soiled fruits in the water to wash them. Use the water to clean Jep. Return to Mina and climb onto her shoulder. Travel to the lakeside, quarter turn right and fill two vases with maple syrup from the tree. Quarter turn left and fill five vases with water from the lake.
Travel to the kiln outside the workshop and use the maple syrup on the fire to get sugar. Enter the windmill and combine a vase of water with the wheat mixed with sand to get wheat. Use the wheat on the top bucket to see flour pour out into the container:
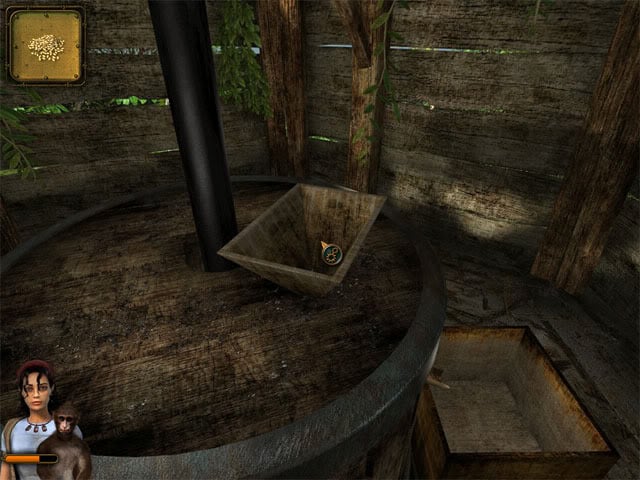
Use a vase to collect the flour from the container. Combine the water, flour, maple syrup and raw egg to make the cake batter. Combine the cake batter with a blue dessert, Trulca grape or orange to get a ready-to-cook tart. Return to the kiln outside the workshop and use the ready-to-cook tart on the kiln fire to get the tart. Use the tart on Mina to restore her energy bar to green.
Before leaving for the inlet, it’s worth spending a bit of time getting some other items that can be useful later on. If Jep didn’t already eat one of the oil palm fruits earlier, give an oil palm fruit to Mina to get some oil palm kernels. Enter the windmill and use the oil palm kernels in the top bucket to see palm oil pour out into the crate. Use a vase to collect the palm oil from the crate. Combine the palm oil with the water spinach to get the seasoned salad.
Travel to the sawmill and quarter turn left to see a still. You should still have a vase of water left over from earlier (if not, return to the lake and fill one up), so use the vase of water in the barrel at the right side of the still:
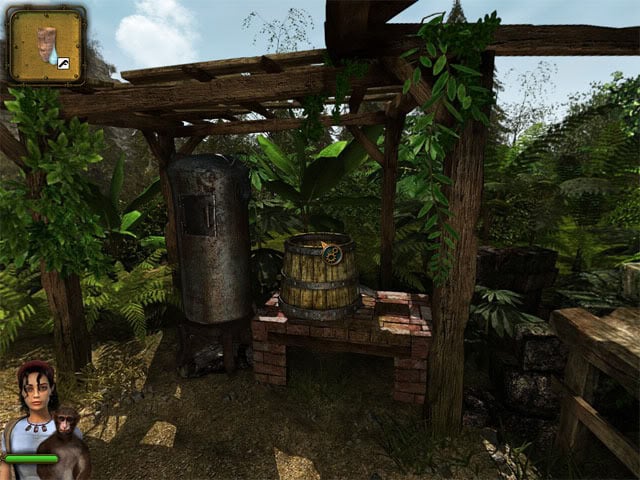
Use the pipe from the beach on the barrel to connect it to the still. Again, there are many ways of making a fire but one way here is to combine the sextant sight with the illegible sheet of paper and 21-foot pole. Use the fire ready to burn below the still. Open the hatch on the still and use a blue dessert, orange or Trulca grape on the hatch to make alcohol pour out of the pipe into the container at the right side of the barrel. Fill a vase with alcohol. Open the hatch again and use an Austral Thyme or a Tahetian Gardenia in the still. Use a vase to collect the perfume.
Travel to the lakeside. Combine the red pigments with the alcohol to make red paint. Combine the multiblade knife with the broken stoneware bottle to get the cork. Combine the cork with the red paint to get the red cork. Combine the 6-foot long pole with the red cork, cord and hook to make a fishing pole. Combine the fishing pole with the worms to make the fishing pole with lure. Use the fishing pole with lure on the lake to star the fishing mini-game. Select the lake to cast the line. Wait for a fish to bite and then select the lake again to display the fish gauge:
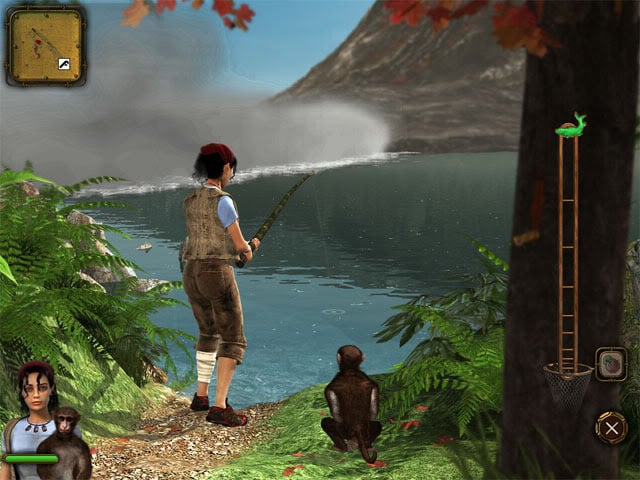
Hold down the left mouse button when the fish is green, and release the left mouse button when the fish is red. The aim is to gradually move the fish down the gauge when it is green until it lands in the net at the bottom of the gauge. When you are ready to continue, return to the kiln outside the workshop and use the crawfish, fish and fresh water mussels on the fire to cook them. You should now have enough additional items for later on, so travel to the sawmill, half turn left and go forward to the cliff. Look up and enter the tunnel behind the bush to arrive at the inlet.
Explore the island to find a route to the geothermal motor (continued)
Look right to see the monkey approach Mina to try and steal something again. As before, select the monkey’s hand to stop him from stealing. This time however, the monkey has to steal something after the fifth attempt at fending him off before he leaves Mina alone. Keep selecting the monkey’s hand until it reaches for something that you don’t mind losing, such as the austral thyme. Climb down the cliff to see Mina’s boat. Quarter turn right to see a termite nest. If you need a little more energy, use the short pointed stick on the termite nest to start a mini-game:
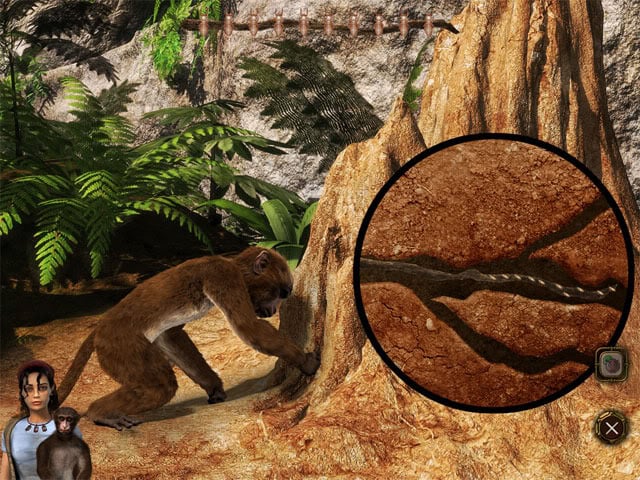
Select a hole in the termite nest to see a close-up. Hold the left mouse button down on the stick and move it back to the entrance of the hole trying not to bump into the sides. If you lose any termites, just click on the hole to try again. When you’ve had enough of the termite mini-game, take the cliff reeds at the right side of the termite nest.
Quarter turn right and take the wild peas. Quarter turn right and go forward to the beach. Quarter turn left and go forward to the rock. Take the can of green paint and the shellfish. Half turn left and move forward to see a monkey throw something from the top of the cliff. Look down to the right and take the empty coconut shell that was thrown. Turn slightly right and dig in the glowing sand:
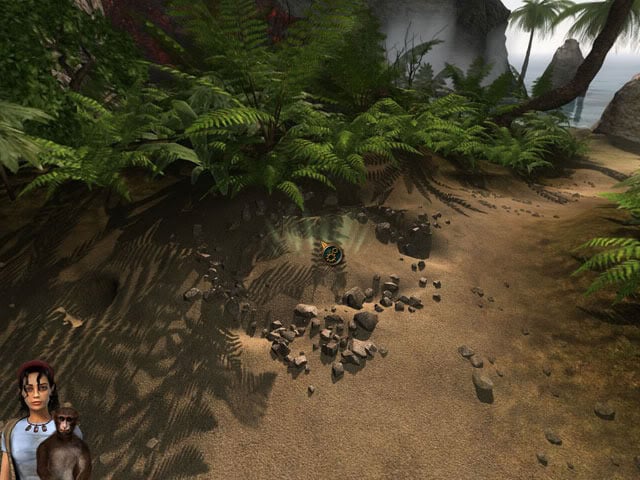
Mina uncovers a crystal with engraved marks on top. Zoom into the crystal and use some clay on the engraved marks to get a plaque of 6 unfired clay tokens. Exit the view of the crystal. Turn slightly right and go forward to the rock on the beach. Quarter turn left, look up and send Jep up the palm tree. Quarter turn left at the top of the palm tree to see a cliff ledge. Wait for the cursor to move into the green zone on the jump bar and then move forward to jump over to the cliff ledge:
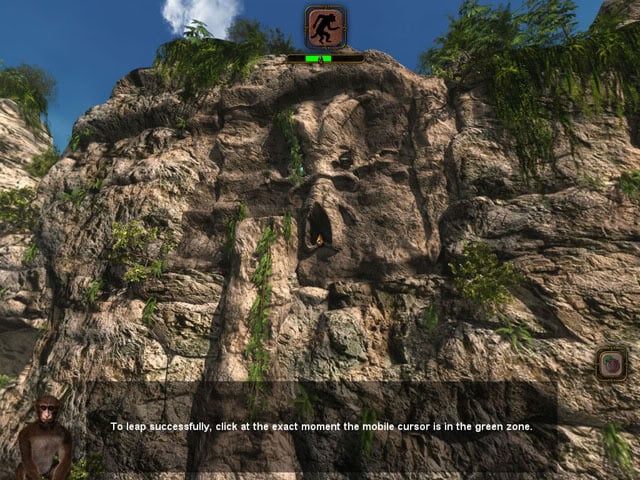
After jumping over to the cliff ledge, quarter turn right, look up and move the vine to hear an alien voice speaking words that can’t be understood at the moment. Zoom into the crystal that was revealed by moving the vine to see a close-up. Use the clay on the engraved marks to get a plaque of 9 unfired clay tokens. Return to Mina and climb onto her shoulder. Travel to the kiln outside the workshop.
Use the plaque of 6 unfired clay tokens on the fire, taking out the 6 terra cotta tokens as soon as they start to glow. Put the plaque of 9 unfired clay tokens in the fire as well and take out the 9 terra cotta tokens. Travel back to the inlet.
Climb down from the cliff and move forward to the beach. Quarter turn right and look down to see an object in the sand. Move the sand from the top of the object and then zoom into it for a closer look. Select the 6 terra cotta tokens in the inventory and then exit the inventory to see them displayed at the bottom of the screen. Do the same thing with the 9 terra cotta tokens to display them at the bottom of the screen as well. Notice the engravings on the six tokens on the top row.
There are three simple engravings and three complicated engravings which feature more lines. Place the three simple engraved tokens on the top row of the grid and the three more complicated engraved tokens on the left column of the grid. It doesn’t matter what order you place these six tokens in, as long as the simple engravings are on top and the complicated engravings are on the side. One way to place the six tiles is shown below:
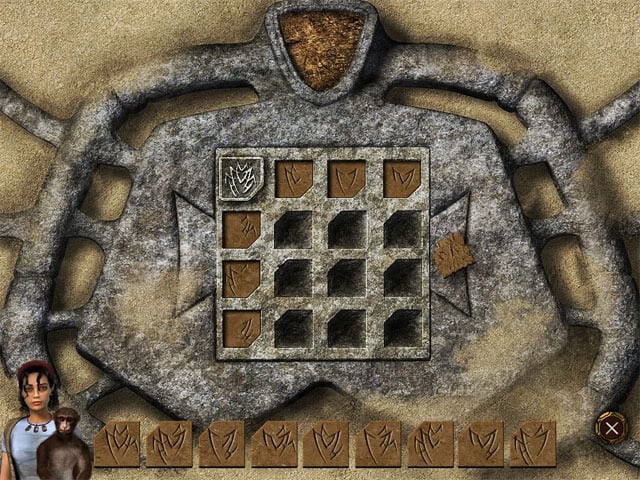
The aim now is to imagine a line that is drawn from one of the pieces on the left and one of the pieces on the top. Where the line intersects, a piece should be placed that adds the two shapes on the tokens together. A token that adds the left token on the top row and the top token on the left column is shown below:
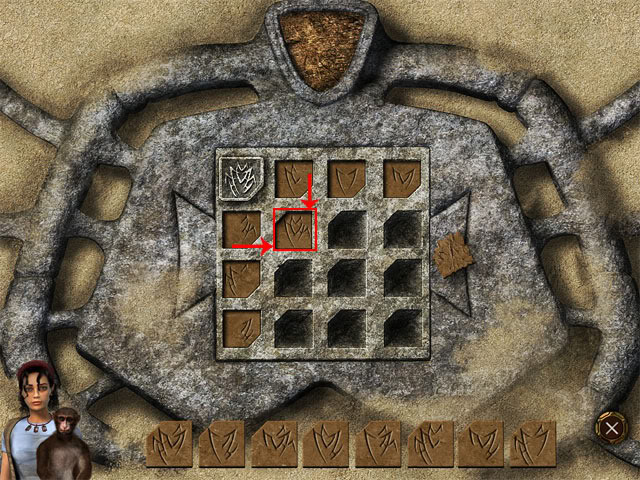
Complete the rest of the puzzle in the same way by adding the correct tokens to the intersecting lines. One way of completing the puzzle is shown below:
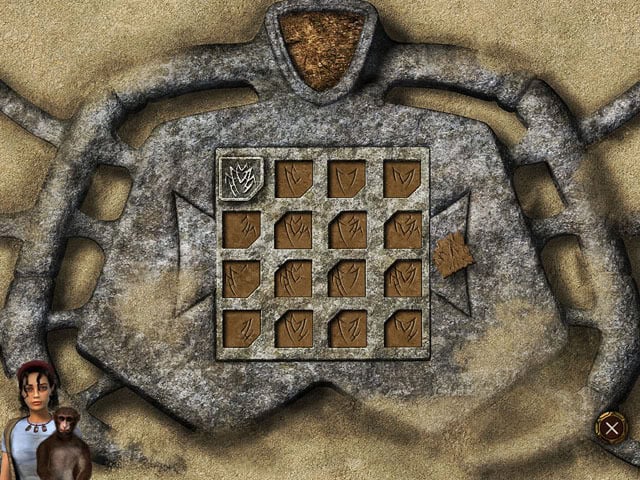
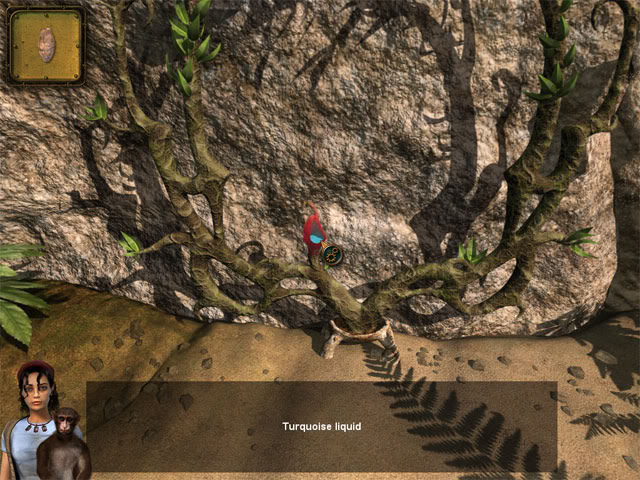
Take the young sprout after completing the puzzle. Half turn right and move forward to the cliff. Use the young sprout on the basin filled with the potting soil to hear the alien voice talk again. Use a vase of water on the plant to make the plant grow. Use a vase on the turquoise liquid near the bottom of the plant:
Quarter turn left and go forward one screen. Quarter turn right, look up and climb back up the ledge. Quarter turn left and move forward as Jep to see Leonard. Give the turquoise liquid to Leonard and notice that he paints a symbol on the wall. Move forward past Leonard while he is admiring his artwork. Quarter turn right and use the short pointed stick to get the lizard in the crack in the rock:
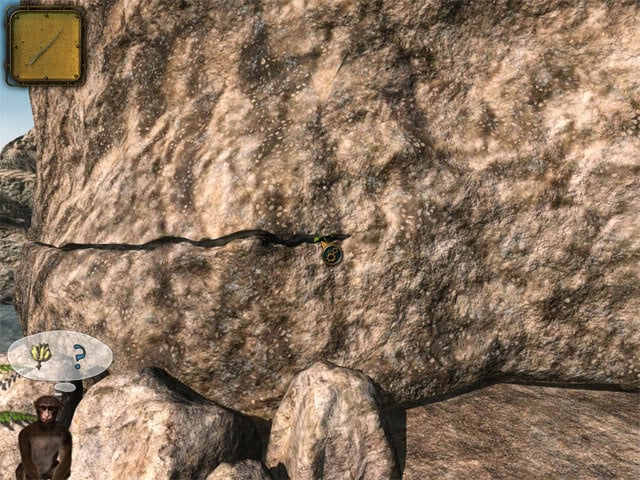
You can also recover the item that Leonard stole earlier, but he needs to be scared off before doing this. Quarter turn right and move forward, then either use the can of dried out green paint or the slough of the snake on Leonard. Select the frighten with an object icon to scare him off. Turn slightly left and move forward to the area where you just found the lizard. Quarter turn left and jump across to the top of the palm tree when the gauge is in the green:

After landing on top of the palm tree, look down and zoom into the leaf to recover the item that Leonard stole earlier on. Go to Mina and climb on her shoulder. Go to the beach and return to the plant which grew from the potting soil by the cliff. Select the cliff face in the middle of the plant to see a close-up.
Combine the multiblade knife with the cliff reeds to make a paintbrush. Combine the paintbrush with the turquoise liquid to get the turquoise paintbrush. Draw the same symbol on the wall that Leonard drew. If you drew the symbol correctly, a button will extend from the rock:
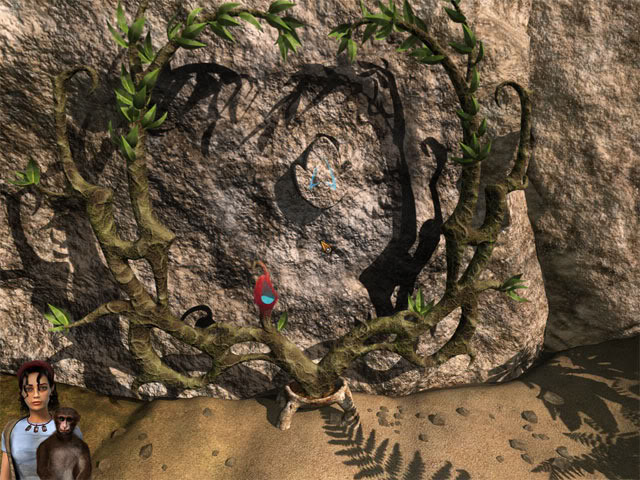
Press the button to enter the temple.
Cross the pit guarded by the monkeys
Once inside the temple, the monkeys will appear on the ledges to prevent Mina from going any further into the temple. Notice that the friendship gauges below the monkeys are currently low. Combine the reed stalk and the wild peas to make a blowgun.
Use the blowgun to attack Slugger and the sentinel. Don’t attack any of the other monkeys, as Jep will need to befriend these monkeys shortly. After a while, Mina and Jep go outside. Mina asks Jep to make friends with the monkeys by raising their friendship gauge to green.
Befriending Mama
Climb onto Mina’s shoulder. Travel to the lakeside. Half turn left and go forward to the windmill junction. Quarter turn right and go forward to the robot junction. Quarter turn right and go forward to the destroyed bridge to see a monkey on the other side. Combine the multiblade knife with the spool of string three times to make three cords.
Combine the three cords together to make a laid rope. Try to cross over the bridge, then play as Jep and cross over the bridge. Turn slightly right and go up to the wall to see the baby monkey. Use the laid rope on the baby monkey to save him:
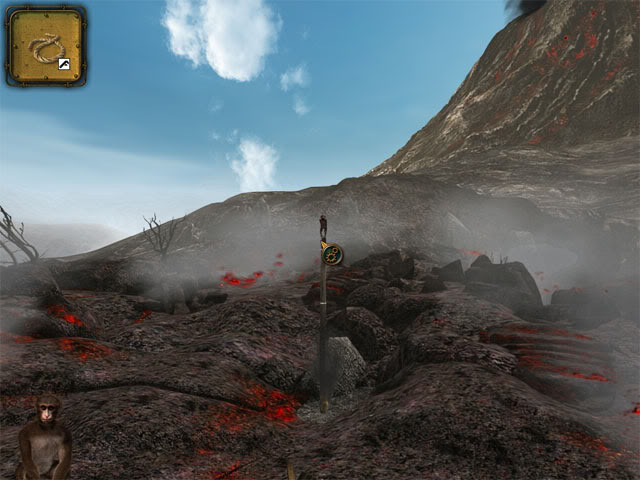
Go down from the wall and give the baby monkey to Mama. Cross back over the bridge and climb on Mina’s shoulder.
Befriending Leonard
Travel to the large kiln. Combine the sextant sight, dried twigs and 21-foot long pole (if you have run out of 21-foot poles by this point, return to the cliff near the sawmill to get another one). Use the fire ready to burn in the kiln. One of the documents window mentions how to create a fine quality paint. Combine the can of dried out green paint with the jerry can of gasoline to make a can of green paint. Go upstairs as Jep to the use the shellfish on the chimney to see quicklime pour out:
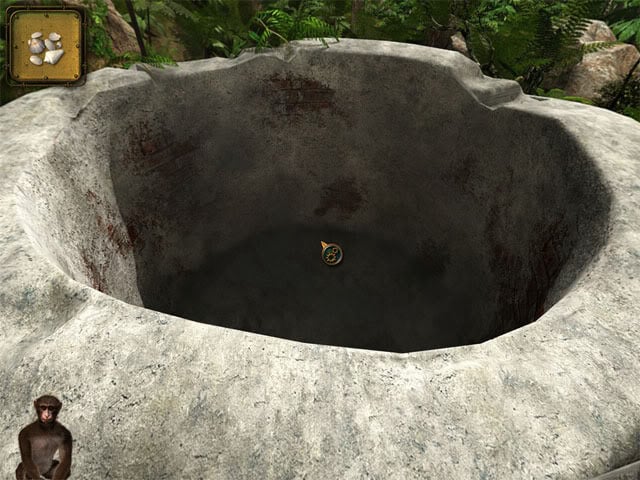
Go down the stairs and climb onto Mina’s shoulder. Use a vase to collect the quicklime. Combine the vase of quicklime with a vase of water to make hydrated lime. Combine the palm oil with the hydrated lime and chalk to make white paint.
Travel to the inlet, quarter turn right and move forward as Jep. Give the green paint to Leonard. If he is still angry from earlier, select the X button to see Leonard draw on the wall, then talk to Leonard and select the pacify icon to make him calm. Give the white paint and the red paint to Leonard. Select the ocarina from the inventory. Left click to start playing it and then right click to stop. Leonard will whistle a melody. Start playing the ocarina and then select the correct fingers to play the same melody that Leonard just whistled:
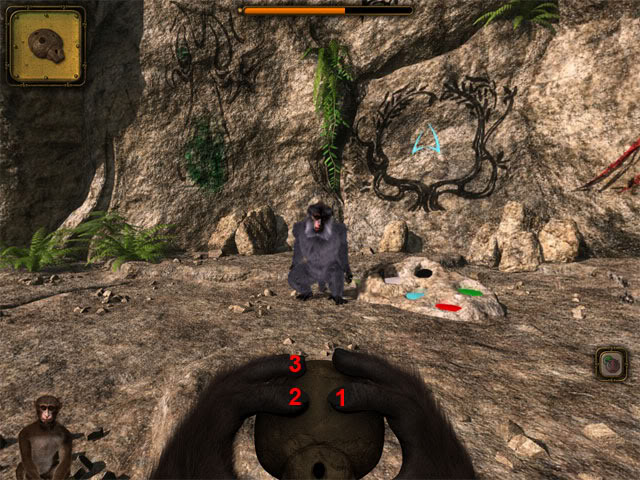
Select the ocarina again, start playing it and then right click to put it away. Leonard will whistle a second melody, so play this on the ocarina as well:

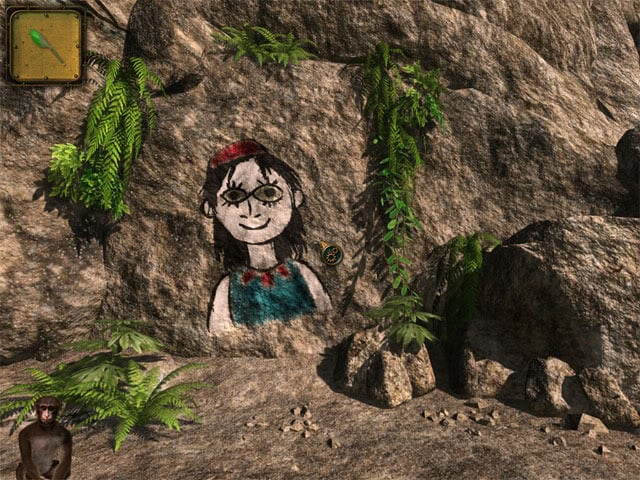
Groom Leonard and then give food to him until his friendship gauge is green. Before leaving Leonard, use the paintbrush in one of the paints near him, then quarter turn right and use it on the blank section of the cliff to paint a picture. Turn back to the left, use the paintbrush on a different colour paint, then quarter turn right and use it on the same section of wall again. Do this with the other three paints to paint a picture of Mina on the wall:
Return to Mina and climb on her shoulder.
Befriending Amber
Travel to the sawmill, half turn left and go forward to the cliff. Open the inventory and disassemble the fishing pole with lure and the fishing pole to recover the items that were used to make it. Cross over the brambles as Jep and then climb up the cliff. Quarter turn left to see Slugger and Amber. Slugger won’t let Jep pass at the moment, so we need some way of scaring him off. Use the slough of a snake or the can of green paint on Slugger and then select the frighten with object icon to scare him away.
Quarter turn right and look down to see a broken bone on the ground. Use the hook on the broken bone to get marrow. Look in the hole and take the Tahitian Gardenia and enameled vase. Go to Mina and climb on her shoulder. Travel to the workshop and use the wooden wheel. Use some clay on the wheel and then use the water to wet the clay. Spin the wheel and make two of every kind of shape again. Take the pottery to be fired. Go to the kiln outside the workshop and put the pottery to be fired in the kiln, taking each one out when it glows.
Combine the paintbrush with the turquoise liquid to get the turquoise paintbrush. Combine all of the empty vases with the turquoise paintbrush. Use all of the enameled vases to be fired on the kiln, taking each one out when it glows. You should end up with twelve enameled vases.
Travel to the sawmill, half turn left and go forward to the cliff. Before crossing the brambles again, Mina can combine some items for Jep to give to Amber. Combine the multiblade knife with the seashells to make the pierced seashells. Combine the multiblade knife with the spool of string to make a cord. Combine the pierced seashells with the cord to make a seashell necklace. Combine the Austral Thyme with the Tahitian Gardenia to make a bouquet of varied flowers. Cross over the brambles as Jep and climb up the cliff.
Use the slough of a snake or the can of green paint on Slugger and then select the frighten with object icon to scare him away again. Select the ocarina from the inventory. Left click to start playing it and then right click to stop. Amber will whistle a melody. Start playing the ocarina and then select the correct fingers to play the same melody that Amber just whistled:

Select the ocarina again, start playing it and then right click to put it away. Amber will whistle a second melody, so play this on the ocarina as well:
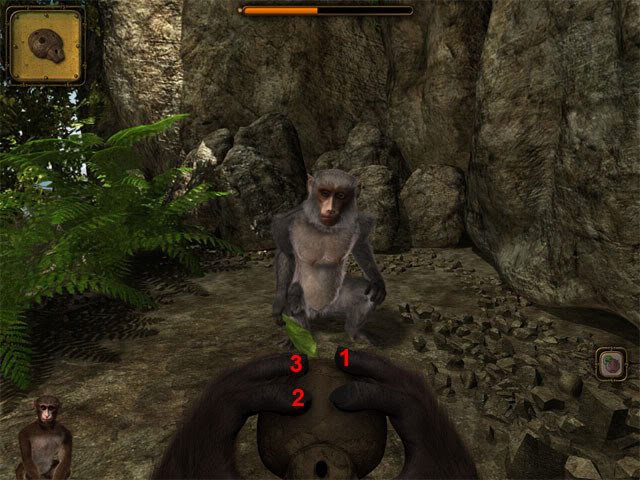
Give Amber six different shaped enameled vases, the seashell necklace, the bouquet of varied flowers, an Austral Thyme and a Tahitian Gardenia to make her friendship gauge go green. If you don’t have all of these items, give her as many of the items as you have and then give her food until the gauge goes green.
Return to Mina and climb on her shoulder. Travel to the inlet and return to the temple to see that three of the monkeys now have their friendship bars at green. Use the blowgun on Slugger and his picture will flash red. Quickly use the blowgun on the sentinel as well and they will run away. Go downstairs.
Explore the underground galleries and halls
Look at the markings on the doors and notice that one blue enameled vase is already on there. The thicker lines refer to the wide section of the vase and the thinner lines refer to the thinner section of the vase. Using the markings to help, place the blue enameled vases on the correct positions above the doors:
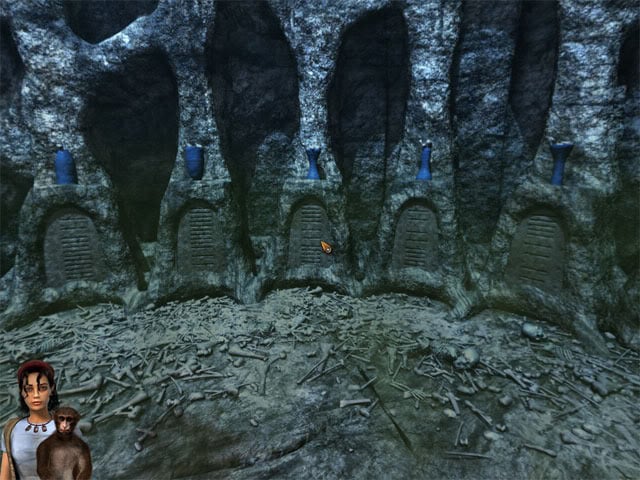
After correctly placing the vases, the alien voice will be heard followed by a melody. Select the ocarina from the inventory. Left click to start playing it and then play the same melody that was just heard:
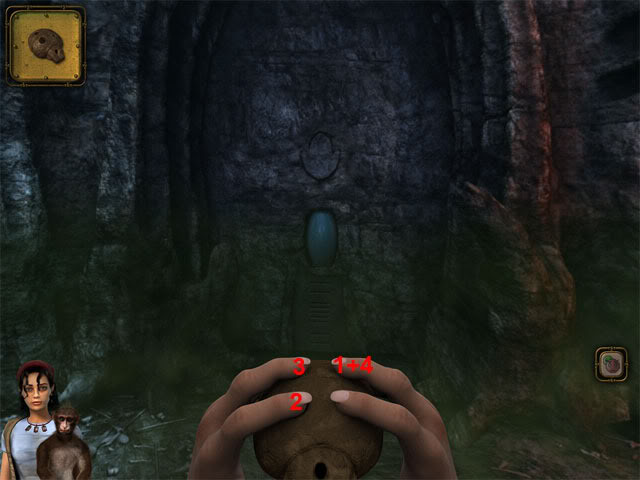
Select the symbol above the door to go through the portal. Go downstairs and quarter turn left to see the voice machine. Look down and press the blue button to hear a jumble of different voices. Press the blue button again to stop it. Move the mouse cursor over the blue cones in the pipes to see that the number of samples put in right place = 0/11.
The aim here is to place all of the cones in the correct pipes so that the voice plays in the correct order. The image below shows the correct positions the cones should be placed in. The red numbers refers to the cones while the green numbers refer to the pipes that the cones should be placed in. For example, the cone numbered 1 should go in the pipe numbered 1, and so on until all of the cones have been placed:
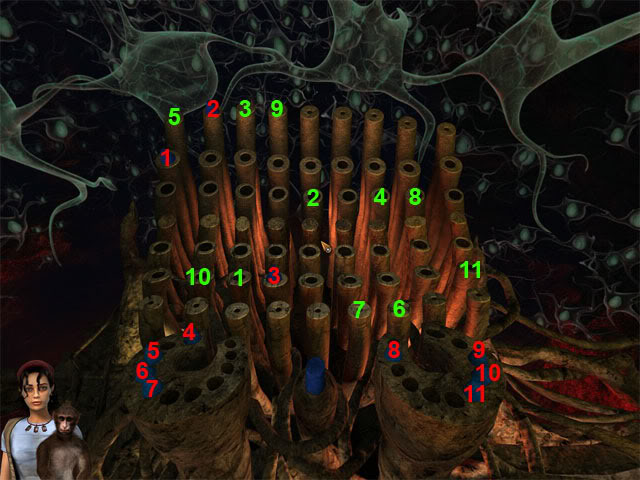
To solve the puzzle without the help of the image above will require some trial and error. Start with the cone on the left column of pipes and move it down to the pipe below. Press the blue button and listen to hear if the voice is recognisable. If the voice is too high or too low, move the cone down one more pipe.
There is no need to move the cone to the left or right yet. Once the voice says a recognisable series of words, move the mouse cursor over the cone and check to see if the sample has been put in the right place. If it hasn’t been put in the right place, move the cone one pipe to the right and check again with the cursor. Keep doing this with the cone until it is added to the correct pipe.
Now do the same thing with all of the other cones, first checking by placing it on the far left row of pipes and pressing the blue button to make sure the voice is heard correctly, then moving the cone right until the status line says that the cone is in the correct place. Once all eleven cones have been put in the correct place, press the blue button to complete the puzzle. The correct cones should be in the following positions:
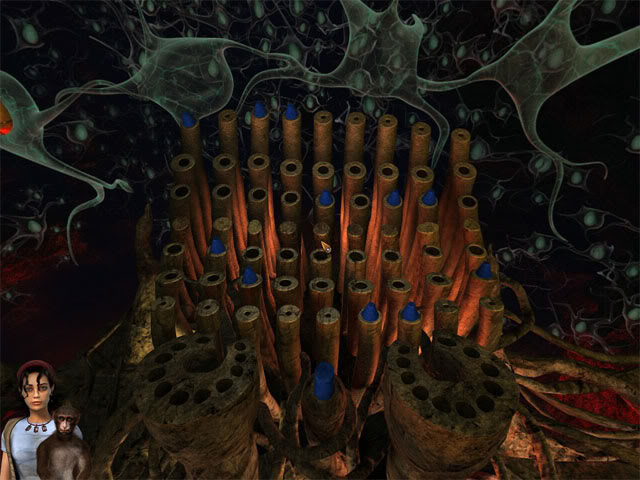
The voice of the alien can now be understood, so look at some of the ovoids above the language machine to hear the thoughts of characters who have been or currently are on the island. Quarter turn right and try to go forward through the door: The voice mentions that all visitors must leave their identity print, and two more ovoids then appear.
Look at the left ovoid above the language machine: Memories flood Mina’s mind. Take the right organic ovoid to see green gas appear on the island. Open the inventory and use the organic ovoid on Jep to make the adulterated ovoid. Use the adulterated ovoid on the slot where it was taken from to open the door. Quarter turn right from the language machine and go forward through the doorway.
Repair the geothermal motor
Go down the stairs, quarter turn left and go forward to the door marked with the N. Quarter turn right and take the twisted crystal holder in the puddle on the floor:
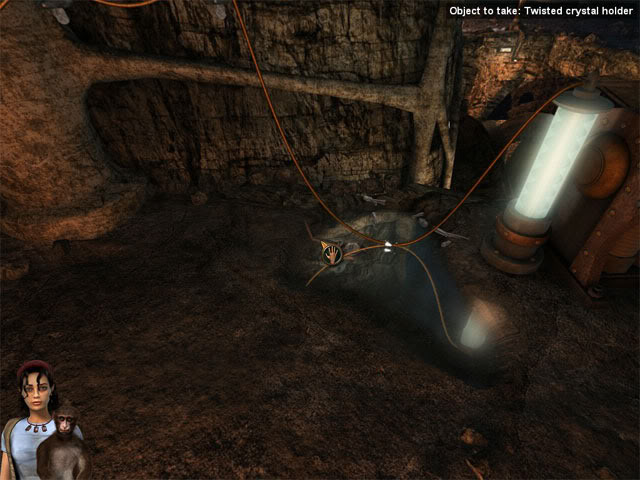
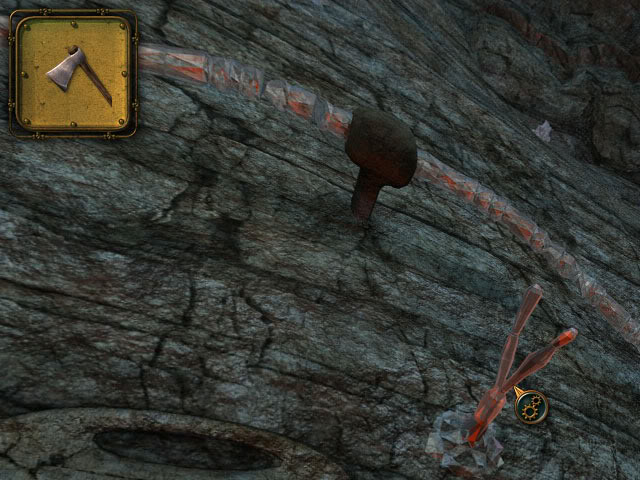
Quarter turn right and go forward, then quarter turn left and go forward across the bridge. Continue forward to the door and press the alien symbol button on the door to enter the volcano pipe. Quarter turn right and move forward to the rim of the volcano. Quarter turn right and move forward along the ledge. Quarter turn right and look up to see a crystal on the wall. Use the sharpened axe on the crystal to take it:
Travel to the large kiln. Use the twisted crystal holder on the fire. Take the tongs at the left side of the kiln and use them to get the hot twisted crystal holder from the fire. Turn slightly left and select the rock to hold the hot twisted crystal holder.
Take the hammer from the left side of the kiln and use it on the end of the hot twisted crystal holder to straighten it. Replace the hammer on the peg. Right click to select the tongs and then use them in the water at the left side of the rock. Take the crystal holder from the water. Right click to replace the tongs. Travel to the motor.
Go down the stairs, quarter turn left and go forward to the N door. Quarter turn right to see the electric cable in the water. Combine the crystal holder with the crystal to make the insulator. Use the insulator on the electric cable in the water, then use the electric cable on the slot on the wall above the puddle:
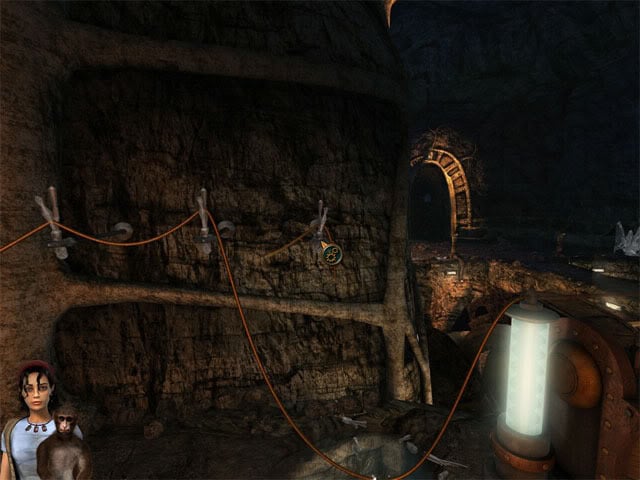
Cross back over the bridge, quarter turn left and go forward to the control panel. Look down to hear the alien voice speak. When the alien voice says a number, press the appropriate button. Press the correct button five times to open the panel: The voice mentions that a catastrophe is imminent.
Start up the geothermal motor again, then find the optimal tuning for stabilizing the volcano
Press the button to open the control panel. Try moving two of the levers to the green section to be told there is insufficient power as an object is blocking the flow of the water. Return to the door with the N at the other side of the room and open it to enter Nemo’s base. Move forward, quarter turn right and go down the stairs to see various devices on the desk. Quarter turn right and take the adulterated ovoid in the container:
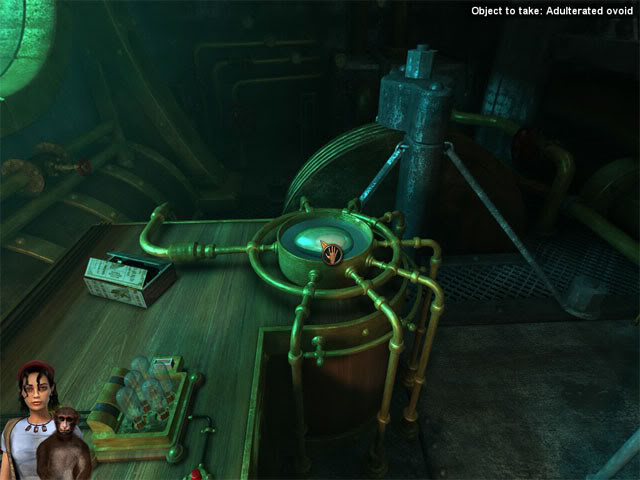
Travel to the motor, half turn right and go through the tunnel to return to the voice machine. Turn slightly right and take the metallic ovoid from the slot to set off an alarm. Use the adulterated ovoid in the slot, then look at the adulterated ovoid to hear Nemo speak about various topics. Return to Nemo’s base.
Move forward twice to the other end of the walkway and take the mask. Turn slightly right and look at the book by Pasteur and the Origin of the Species on the desk. Quarter turn left and look down at the floor to see a hatch. Use the palm oil on the hinge of the hatch:
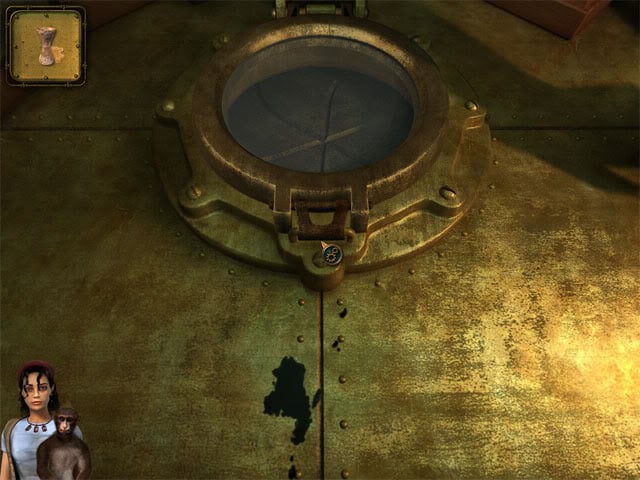
Open the hatch to see the airlock. Combine the mask with the hydrated lime to make the diving mask. Go down the airlock as Mina. Use the diving mask on Mina. Turn the red wheel to enter the lake. Go forward to the helicopter. Quarter turn left and go forward. Half turn right, look down and move the wheel on the ground. Take the steel hook. Return to the helicopter. Use the handle on the winch:
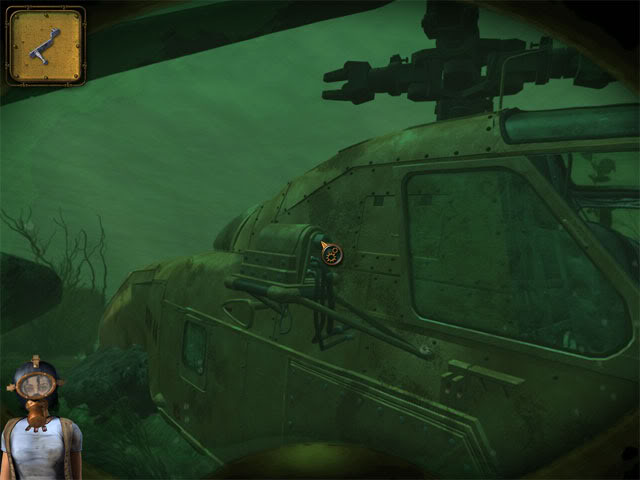
Use the steel hook on the loop below the winch:
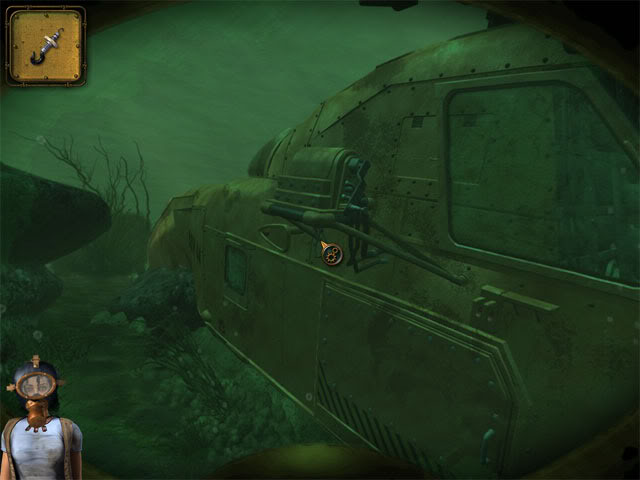
Select the top of the hook to attach it to the helicopter door. Turn the handle to open the door to the cargo hold. Enter the cargo hold and take the nitrogen bottle, uninflated float and net. Exit the helicopter and go forward. Quarter turn left to see that the rock is covering the metal gate. Use the net on the rock. Use the inflated float on the net. Use the nitrogen bottle on the uninflated float. Select the top of the nitrogen bottle to move the rock from the top of the gate. Return to the Nemo’s base.
Look down and turn the wheel to see a combination lock. Look up at the hatch to see Jep. Select Jep and then select the left picture frame to see him turn it over. Look at the left picture to see that the markings on the picture frame look similar to the shapes on the combination lock. Notice that the patterns of the shapes on the picture frame repeat after every two sets, giving six shapes in all. Use these six shapes on the combination lock:

The hatch will open after the correct combination has been entered. Go up the hatch to return to Nemo’s base. Take Jep on the shoulder. Travel to the motor and return to the control panel to see that something is blocking the steam. Press the button at the bottom of the control panel to drain the water from the volcano pipe. Press the symbol on the door to enter the volcano pipe.
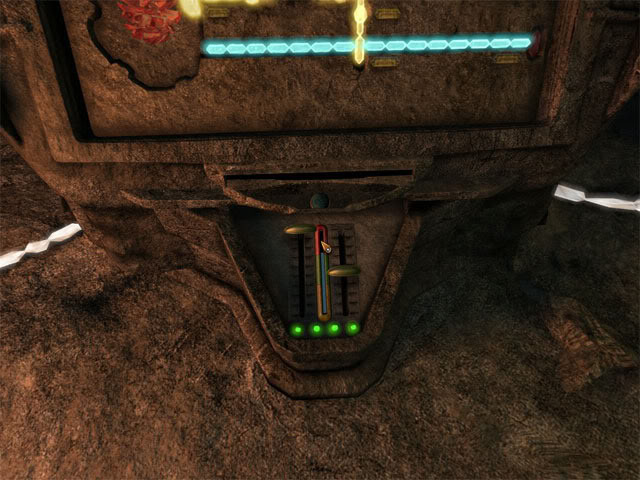
Quarter turn right and go forward to the volcano rim. Quarter turn right and go forward along the ledge. Quarter turn right and send Jep through the hole. Go forward and use the empty coconut shell on hole. Return to Mina and climb on her shoulder. Exit the volcano pipe and return to the control panel. Press the button at the bottom of the panel. Move the left gauge to the top, then move the right gauge to the middle and wait for the four green lights to appear in order to start the motor:
Go out and meet the rescuers
Cross over the bridge and return to the room with the voice machine to see a cutscene where the green cloud is causing plants to die all over the island. Exit the temple to see Slugger run through the door and turn off the motor.
Neutralize Slugger, the troublemaking monkey, and put the geothermal motor back into operation
Return to the voice machine and take the new organic ovoid that has appeared. Quarter turn right and use the organic ovoid on the blood on the floor to get the adulterated ovoid. Quarter turn left and use the adulterated ovoid in the slot on the wall. Select the ovoid and then look at it to hear Slugger’s thoughts.
Enter the motor room and approach the door with the symbol to see Slugger in the turbine. Approach the door and select the symbol to enter the volcano pipe. Quarter turn right and go forward to the volcano rim. Quarter turn right and go forward along the ledge. Quarter turn right and have Jep enter the hole.
Fill Jep’s energy bar to green so he has the courage to take on Slugger
Jep’s energy gauge needs to be green before he can enter the hole, so you may need to Caress Mina and then eat food to raise Jep’s energy bar to green. Enter the hole.
Neutralize Slugger, the troublemaking monkey, and put the geothermal motor back into operation (continued)
Catch the five spherical capacitors that are thrown by Slugger and he will collapse. Move forward one screen and select Slugger to drag him out of the turbine. Mina and Jep return to the panel in the motor room. Press the numbers on the buttons that the alien voice speaks to open the panel. Press the button again to adjust the motor. Jep becomes ill and Mina takes him back to Nemo’s base.
Try everything to cure Jep
Half turn left and go forward, then quarter turn left and go downstairs to the mixer. Take the shards of violet glass on the desk. Use the five spherical capacitors on the slot. Take the blown fuse at the right side of the slot:
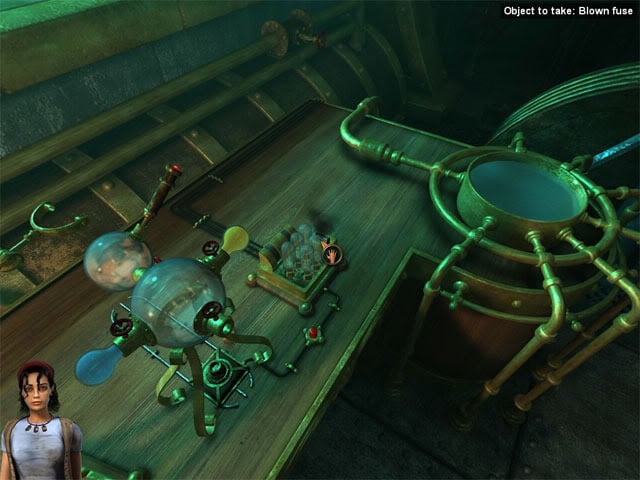
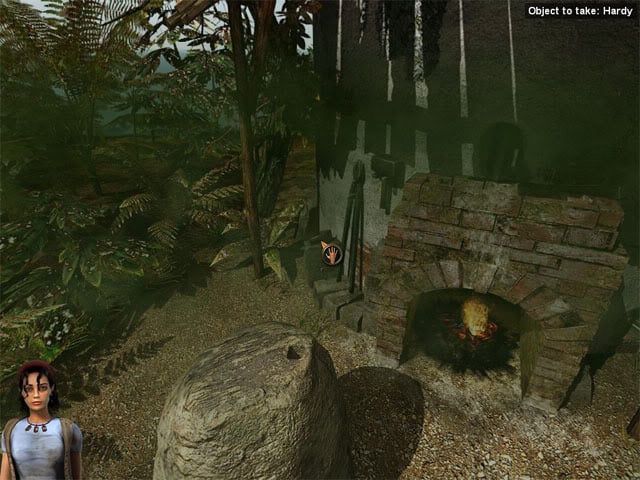
Disassemble the frayed steel cable in the inventory to get two steel wires. Combine a steel wire on the blown fuse to make the repaired fuse. Use the repaired fuse on the slot. Travel to the large kiln. Half turn left and go forward to the signpost junction. Look down and take the empty coconut shell and the eyepiece. Return to the large kiln. Take the hardy at the left side of the tongs:
Use the hardy on the rock: Mina says that the hardy is dull. Travel to the sawmill and take the nail and the saw blade. Put the grindstone back on the saw and then put the nail on the grindstone. Use pedal on the floor and then use the hardy on the grindstone to sharpen it. Travel to the large kiln.
Put the sharpened hardy back at the left side of the tongs. Use the rifle on the fire. Take the tongs at the left side of the kiln and use them to take out the rifle. Put the hot rifle on the rock and then use the sharpened hardy on the rifle.
Use the hammer on the the rifle twice and then right click to replace the hammer. Right click to move the tongs and use the hot tube on the water. Right click to replace the tongs and then take the steel tube from the water. Travel to the kiln outside the workshop. Take the crucible on the ground to put it in the kiln. Use the shards of violet glass on crucible:
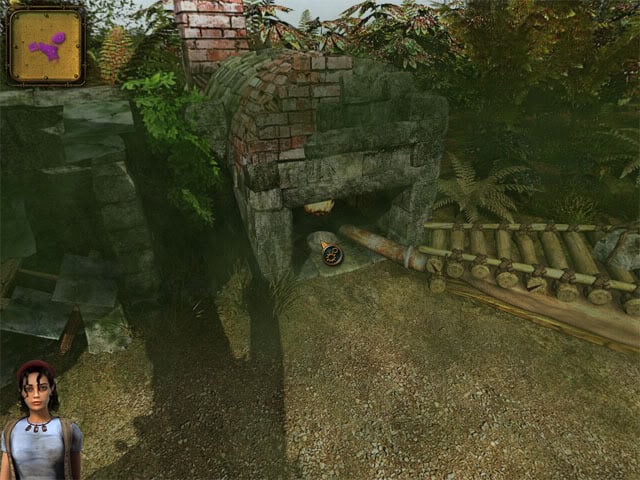
Pull the string at the back of the bellows. Use the steel tube on the hot violet vitreous paste to get the violet bottle. Use the seaweed on the kiln to get soda ash. Use hydrated lime on the kiln to get quicklime. Combine sand, quicklime, soda ash and charcoal to make vitrifiable mixture.
Use the vitrifiable mixture in the crucible. Pull the string at the back of the bellows. Use the steel pipe on the hot vitreous paste to make a bottle. Travel to the motor room. Half turn right and move forward to the language machine room. Quarter turn left to the face to see magenta gas. Use the bottle on the magenta gas. Travel to Nemo’s base.
Move forward, quarter turn right and go downstairs. Use the coloured gas in the bottle on the mixer:
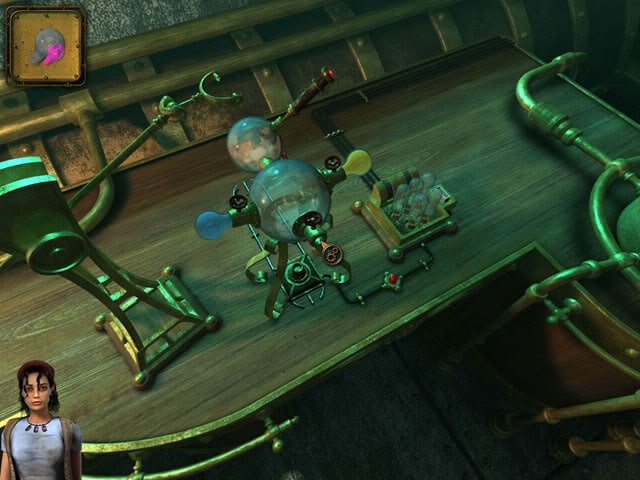
Use the eyepiece on the device above the mixer:
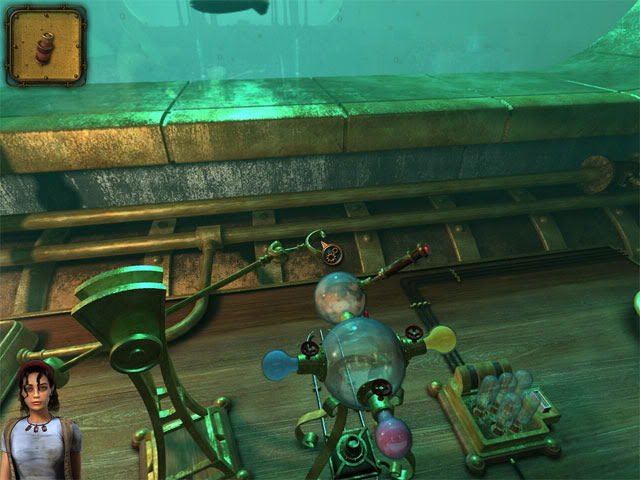
Put the violet bottle under the mixer:
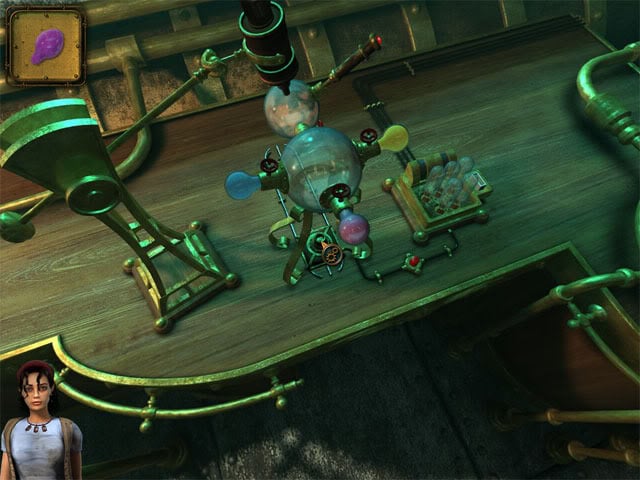
Take the empty sampler:
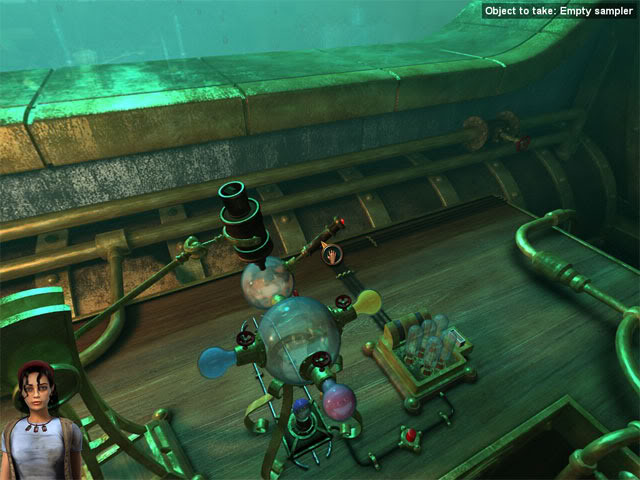
Go to Jep and use the empty sampler on him to get Jep’s cellular sample. Return to Nemo’s base and use Jep’s cellular sample on the mixer:
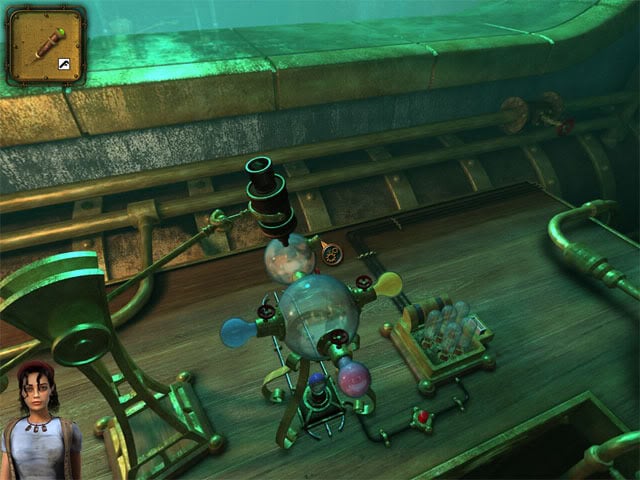
Turn the tap of the magenta gas tank. Look through the eyepiece and then turn the red wheel to find the gas that neutralises the green gas. Go to the other side of the base and take Jep on the shoulder. You now have two possible endings to the game.
To leave the island, exit the base and go to the other side of the temple to see the door to leading to the inlet, then use the symbol above the door. To stay on the island, go to the controls on Nemo’s base and slowly pull the shield lever down. After making the decision, you have the option to stay with the current decision or to make another choice.
“;
More articles...
Monopoly GO! Free Rolls – Links For Free Dice
By Glen Fox
Wondering how to get Monopoly GO! free rolls? Well, you’ve come to the right place. In this guide, we provide you with a bunch of tips and tricks to get some free rolls for the hit new mobile game. We’ll …Best Roblox Horror Games to Play Right Now – Updated Weekly
By Adele Wilson
Our Best Roblox Horror Games guide features the scariest and most creative experiences to play right now on the platform!The BEST Roblox Games of The Week – Games You Need To Play!
By Sho Roberts
Our feature shares our pick for the Best Roblox Games of the week! With our feature, we guarantee you'll find something new to play!All Grades in Type Soul – Each Race Explained
By Adele Wilson
Our All Grades in Type Soul guide lists every grade in the game for all races, including how to increase your grade quickly!


