- Wondering how to get Monopoly GO! free rolls? Well, you’ve come to the right place. In this guide, we provide you with a bunch of tips and tricks to get some free rolls for the hit new mobile game. We’ll …
Best Roblox Horror Games to Play Right Now – Updated Weekly
By Adele Wilson
Our Best Roblox Horror Games guide features the scariest and most creative experiences to play right now on the platform!The BEST Roblox Games of The Week – Games You Need To Play!
By Sho Roberts
Our feature shares our pick for the Best Roblox Games of the week! With our feature, we guarantee you'll find something new to play!Demon Piece Races – All Race Buffs
By Adele Wilson
Our Demon Piece Races guide details all of the buffs, rarities, and characteristics for each race in the One Piece Roblox game.
Doors of the Mind: Inner Mysteries Walkthrough
Welcome to the Doors of the Mind: Inner Mysteries walkthrough on Gamezebo. Doors of the Mind: Inner Mysteries is a hidden object adventure game. This walkthrough includes tips and tricks, helpful hints, and a strategy guide to how to complete Doors of the Mind: Inner Mysteries.
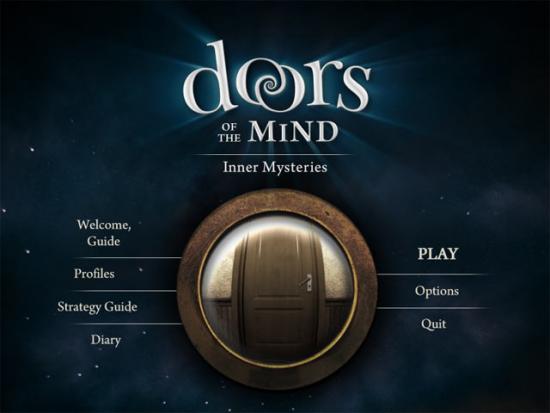
General Information
Welcome to the Doors of the Mind: Inner Mysteries walkthrough on Gamezebo. Doors of the Mind: Inner Mysteries is a hidden object adventure game. This walkthrough includes tips and tricks, helpful hints, and a strategy guide to how to complete Doors of the Mind: Inner Mysteries.
Main Menu

- The Profiles button displays a window where character profiles can be created, deleted or renamed. Press the OK button to return to the main menu.
- The Strategy Guide button links to the Big Fish Games web page for this game.
- The Diary is unlocked after the first part of the game has been completed. Notes are added to the diary as you progress through the game.
- The Play button starts the game with the currently selected profile.
- The Options button displays a window where sound volume and music volume can be changed. There are also options to switch to full screen mode, mute all sounds and disable custom cursors.
- The Quit button exits the game is Yes is selected or returns to the main menu if No is selected.
Types of Locations
- Normal locations have exits through doorways to other types of locations in the game, and often there are inventory items that can be picked up and used on other objects before further progress can be made. The default cursor is the blue arrow. Other cursors include the eye to examine things closely and the hand to pick up objects. Items that are picked up are added to the inventory window at the bottom of the screen. Select the inventory item by clicking on it and then select the appropriate object on the screen to use the item.
- Hidden object locations either show images of objects in the inventory that need to be found, or a list of named objects to search for and find. Move the mouse cursor over the object and click to remove the object from the list. Pressing the hint button shows the location of a hidden object, but one minute must pass before another hint can be used. Clicking in the wrong location four times causes the screen to become blurry for one second. When the screen is blurry, no other objects can be selected.
- Find the difference locations display two similar screens with ten slight differences, which could be a new object in one of the screens or an object which has been changed in some way. Select the difference to remove it. The hint button can be pressed to reveal a difference, but then one minute must pass before another hint can be used.
- Find the destination locations show a list of inventory items at the bottom of the screen, and the aim is to place the item in the correct destination. For example, a card would be placed on top of the stack of cards. Left click the inventory item to select it and then left click the destination to place it. A drop the item button replaces the hint button in these locations. To use it, select an item from the inventory and then select the button to reveal the destination for the item. The button can be used again after one minute has passed.
- Mini-games are puzzles which appear frequently throughout the game. The mini-games have tasks such as equalising the weight of scales or correctly turning the dials on a safe. The skip button at the bottom-right corner of the screen will become active after one minute, and this can be pressed to bypass the mini-game.
Walkthrough – Day 1: The Opening Session
Day 1: The Opening Session
The game starts in the entryway of Hazel’s childhood home. Find the 10 items shown in the inventory:
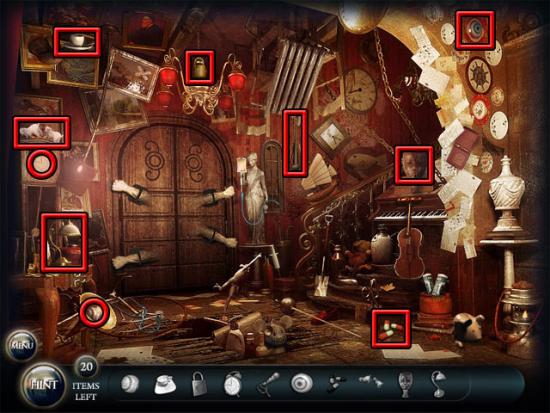
Find the next 10 items shown in the inventory:
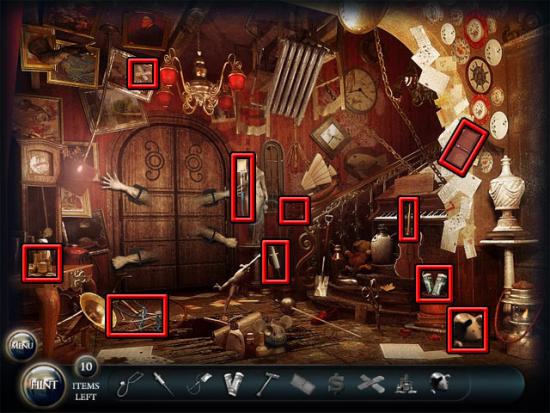
The door opens and Hazel steps through into a hallway where there are three doors. Open the left door to enter the dining room. Find the 10 differences:
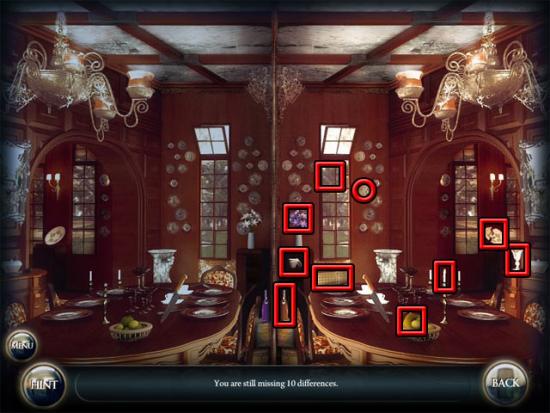
After 10 differences have been found, the right side of the screen will go darker. Select the balance:
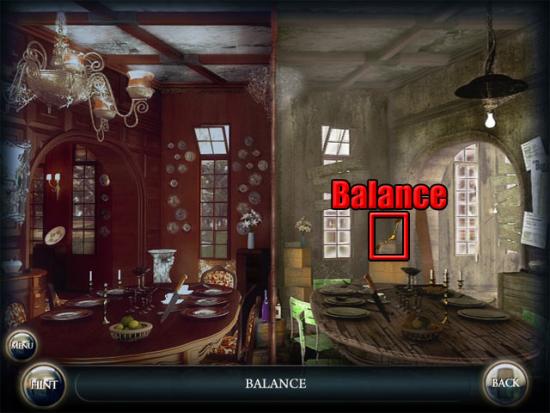
The balance will be added to the inventory and Hazel will return to the hallway. Open the right door to enter the bedroom. Note that all objects in the room must eventually be found, but you can only select the objects which are currently displayed on the list. Find the objects on the list:
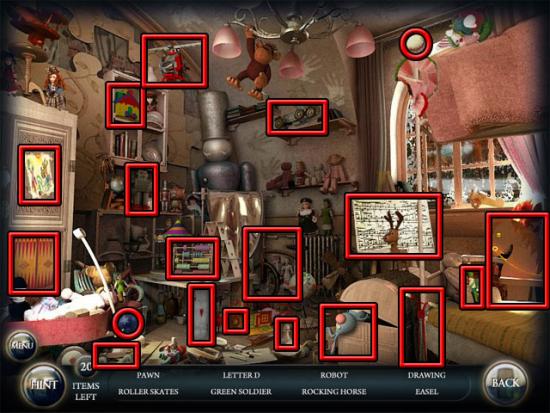
After 19 objects have been found, select the carousel:
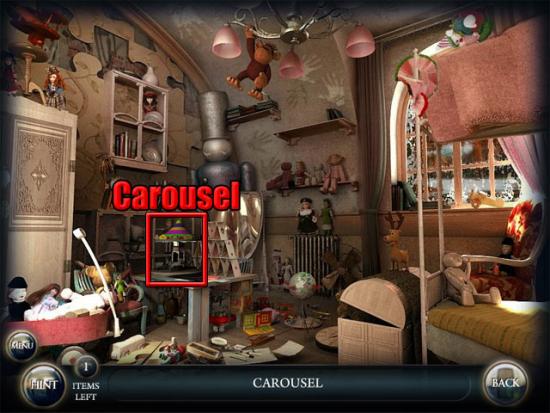
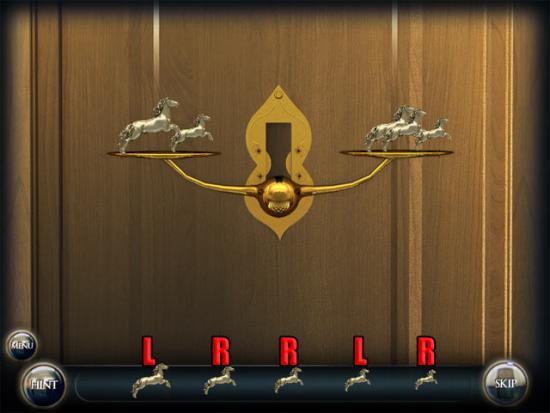
The carousel will be added to the inventory and Hazel will return to the hallway. Use the balance and the carousel on the middle door. Put the horses on the scales as shown below:
Hazel steps through the doorway into her parent’s bedroom. Find the 15 objects on the list:
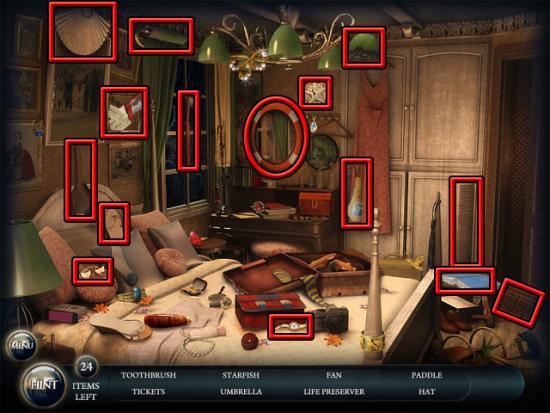
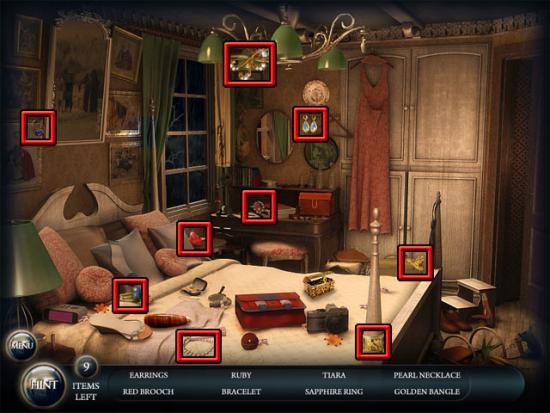
Find the next 9 objects on the list:
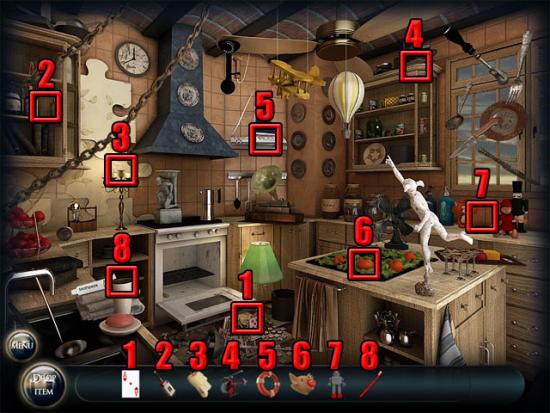
Hazel hears a noise and travels to the kitchen. Put the items in the following places:
Hazel wakes up from the trance and returns to the real house. The following hotspots are available:
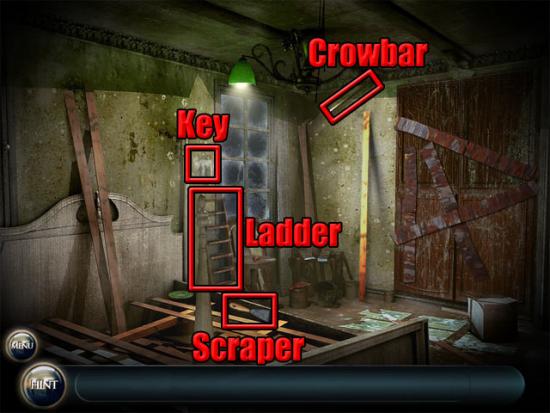
Take the ladder and the scraper. Use the ladder on the crowbar and then select the crowbar to take it. Select the crowbar from the inventory and then click the door four times to remove all of the boards. Examine the key on the wall to see a close-up of the key. Use the scraper on the key:
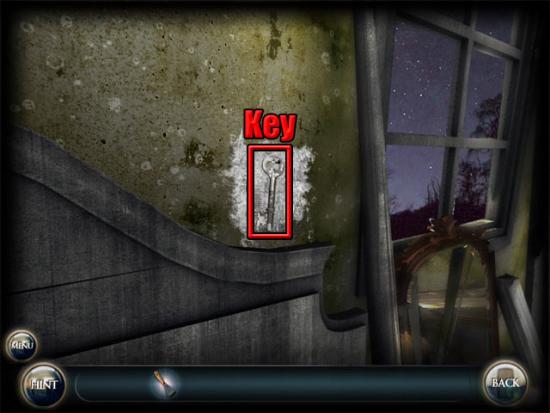
The key will be added to the inventory. Use the key on the closet lock. Examine the safe:
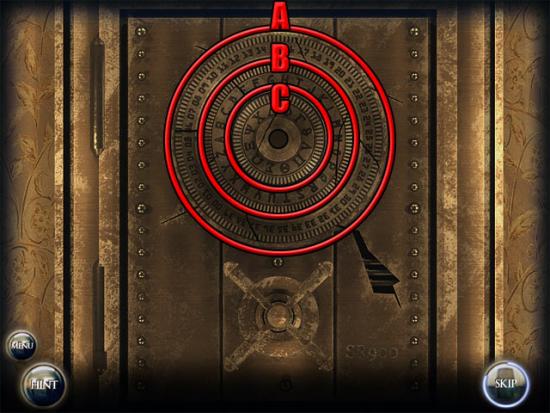
Move dial A seven times, dial B five times and dial C once to open the safe. Examine the book:
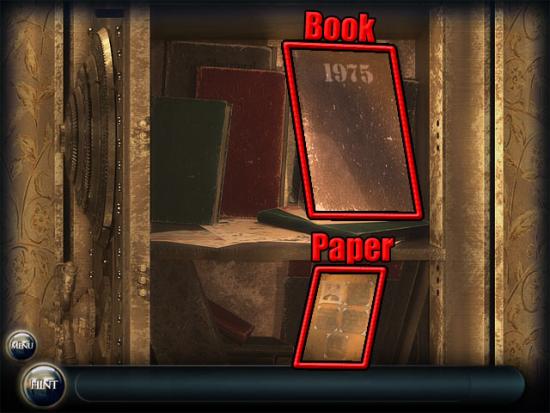
Hazel realises that her parents were selling their belongings to pay their debts. Examine the paper to see a picture of Hazel’s grandfather Tobias Helmer. The diary can now be selected from the main menu. Press the blue continue button at the bottom of the screen to complete day 1.
Day 2: The Certificate
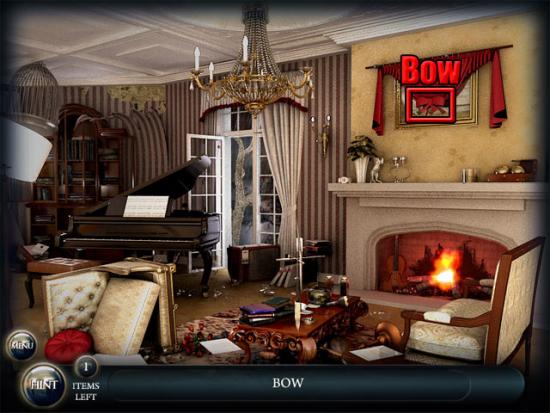
The second day starts in the living room. Find the objects on the list:
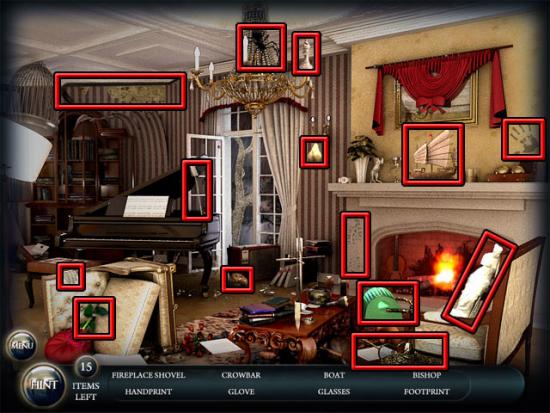
After 14 objects have been found, select the bow:
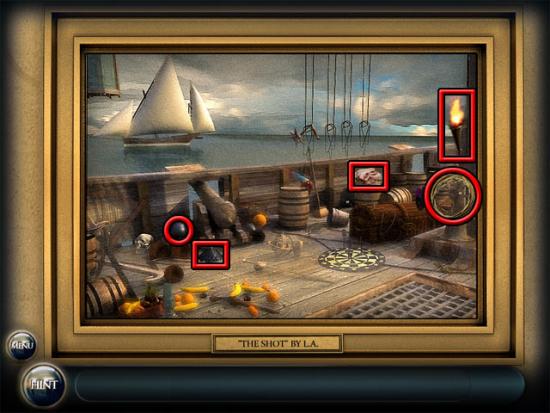
Examine the painting on the wall to see a close-up view. Find five items in the painting:
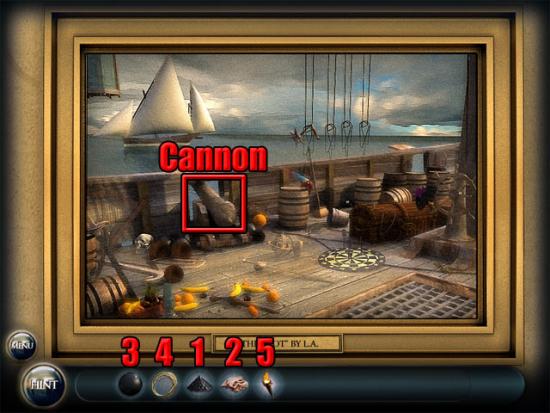
Use the items on the cannon in the following order:
Hazel enters a hall where there are two doors. Go through the left doorway to enter the attic. Find the objects on the list:
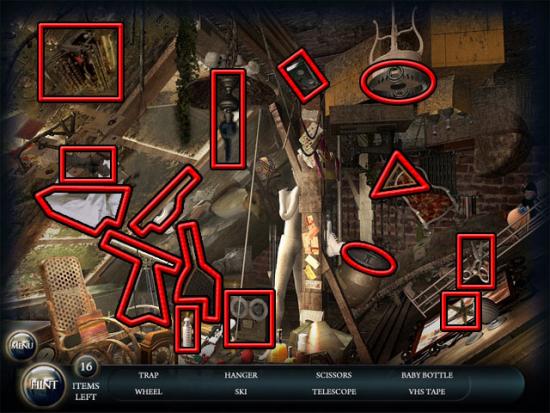
After 15 objects have been found, select the hat:
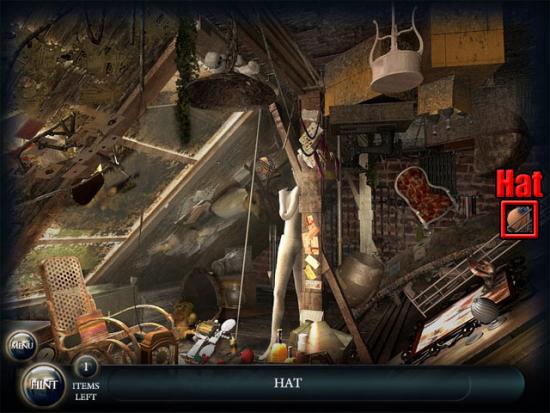
Hazel returns to the hall where the lock has been removed from the right door. Open the right door to enter the garden. Find the objects on the list:
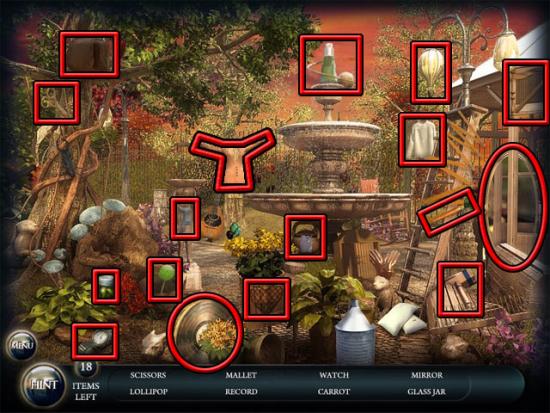
After 17 objects have been found, select the gloves:
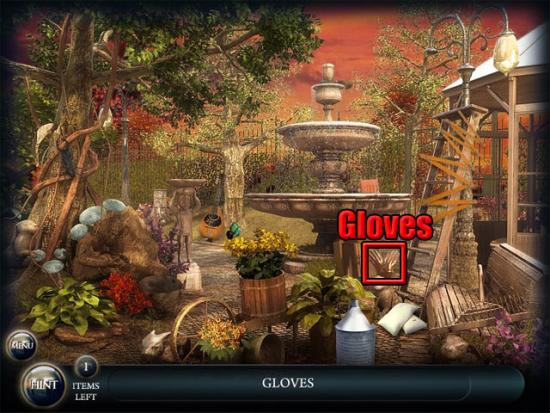
Hazel returns to the hall. Go through the left doorway to return to the attic. Put the items in the following places:
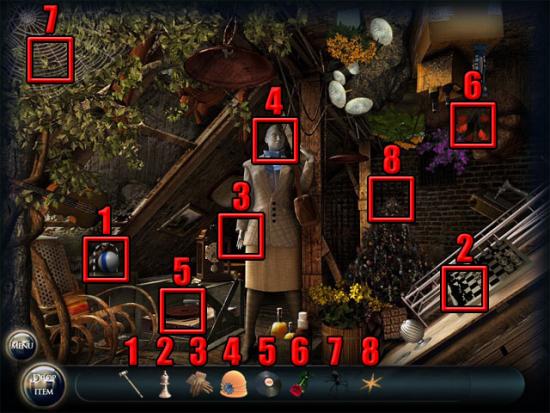
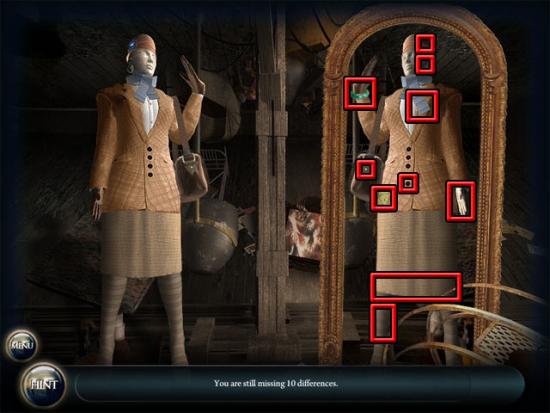
Find the 10 differences in the mirror:
Hazel wakes up from the trance and returns to the garden outside the real house. Take the following objects:
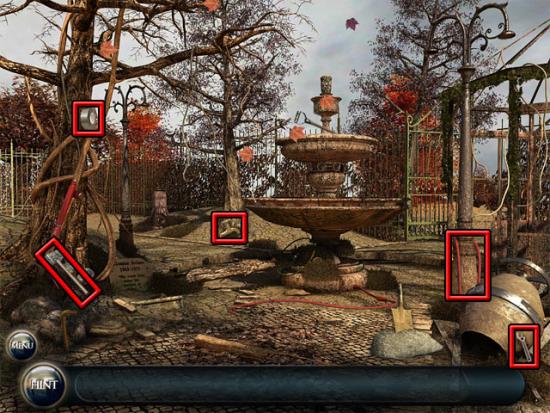
Use the tap on the pipe:
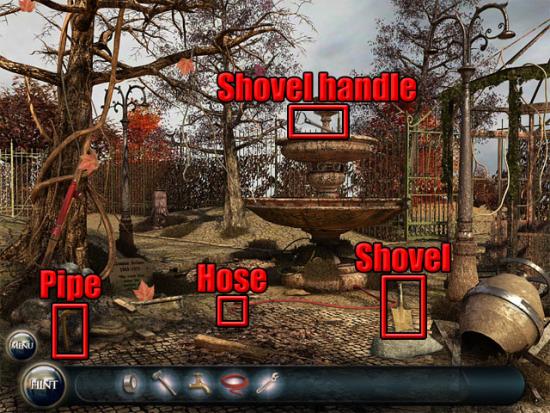
Use the hammer on the rock below the shovel to break the rock. Take the shovel. Use the hose on the tap. Use the tape on the broken section of the hose. Use the wrench on the tap and the shovel handle will drop down to the lower section of the fountain. Take the shovel handle:
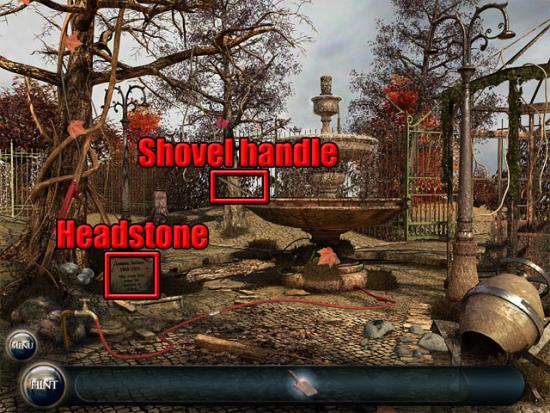
Examine the headstone. Use the shovel on the box:
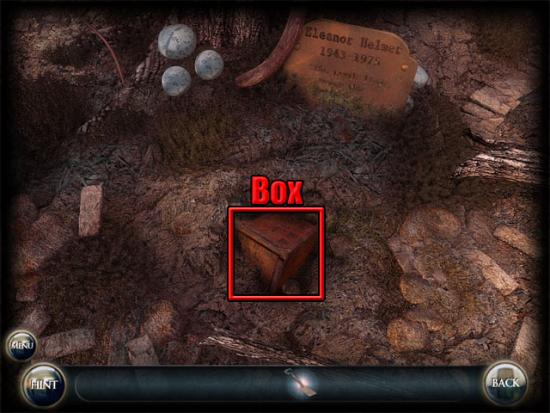
Open the box and take the piece of paper to see a picture of Hazel’s mother. Select the picture to see the certificate of death. Select the certificate to complete the second day.
Day 3: The Love Letters
The third day starts in the hallway. Open the left door to enter the playroom. Find the objects on the list:
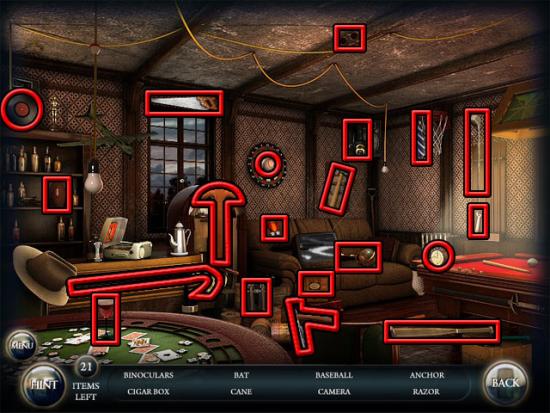
After 20 objects have been found, select the gun:
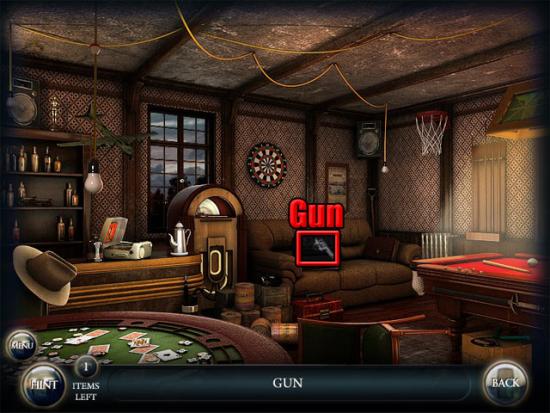
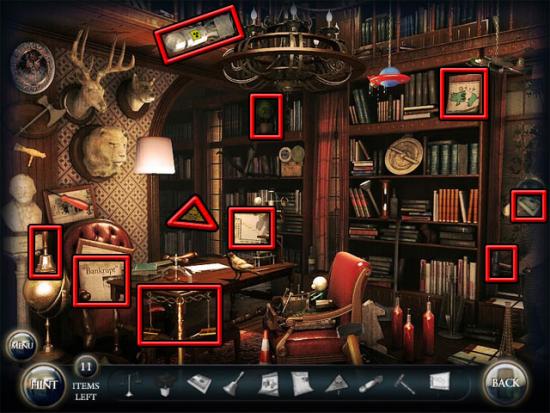
Hazel will return to the hallway. Open the right door to enter Hazel’s father’s office. Find the 10 items shown in the inventory:
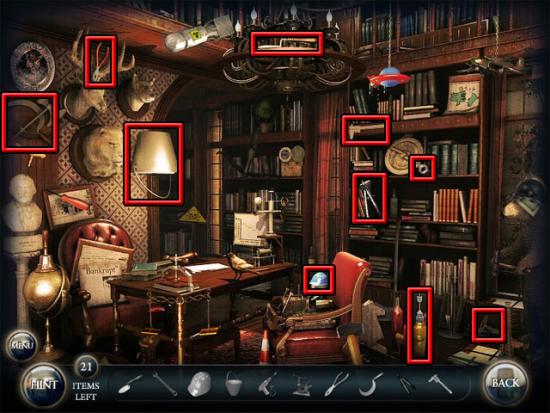
Find the next 10 items shown in the inventory:
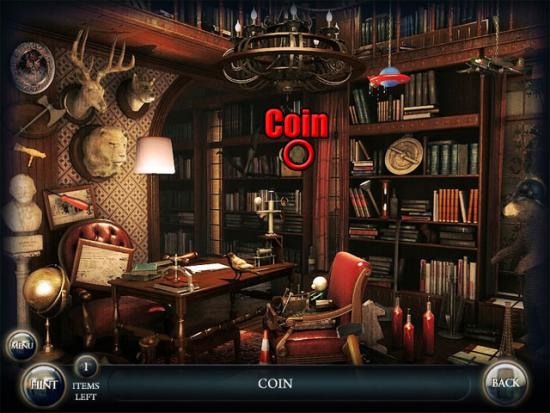
Select the coin:
Hazel will return to the hallway. Select the middle door. Insert the chamber in the cylinder and the coin in the slot:
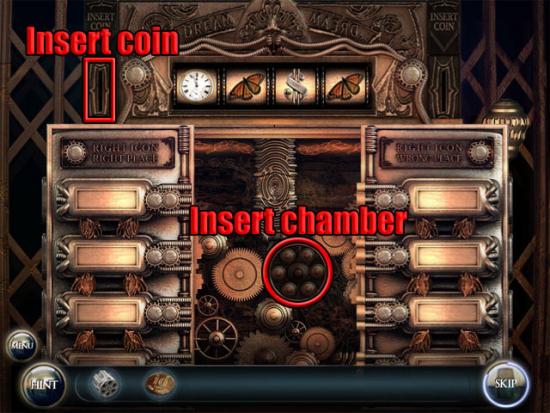
n this mini-game is to pull the lever when the four correct symbols are shown in the correct slots. You have eight attempts to complete this mini-game before the mini-game starts again. The green number shows how many symbols are in the correct slot and the red numbers shows that the symbol is correct but that it is in the wrong slot. The mini-game is random each time that it is played. After completing the mini-game, Hazel enters the basement. Find the objects on the list:
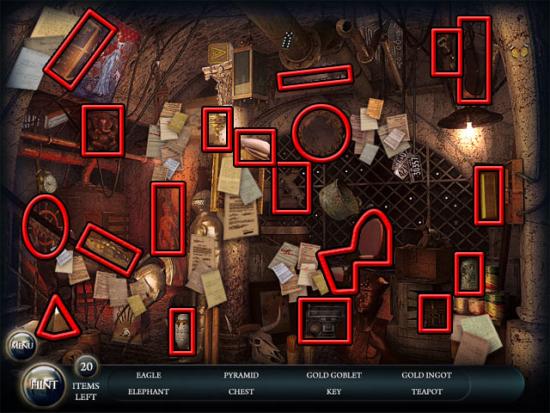
After finding 19 objects, select the bills book:
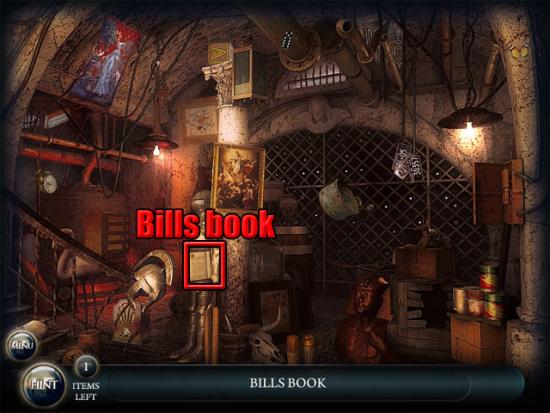
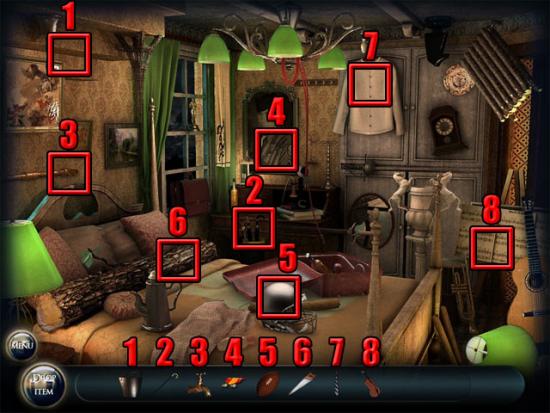
Select the book and Hazel will realise that her family were about to sell all of their jewels. Hazel travels to the bedroom. Put the items in the following places, leaving the bucket until after the tap has been placed:
Examine the paper on the broken table:
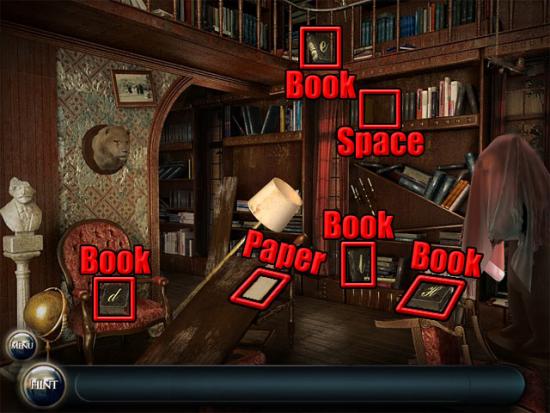
The word HELD is shown on the paper. Take the four books and then examine the space on the bookshelf. Put the books on the shelf in the following order:
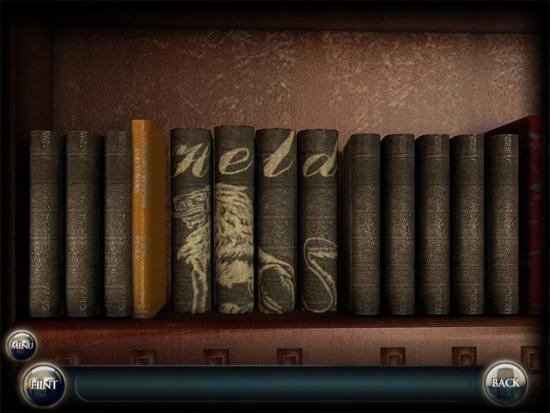
Select the lion’s head on the wall:
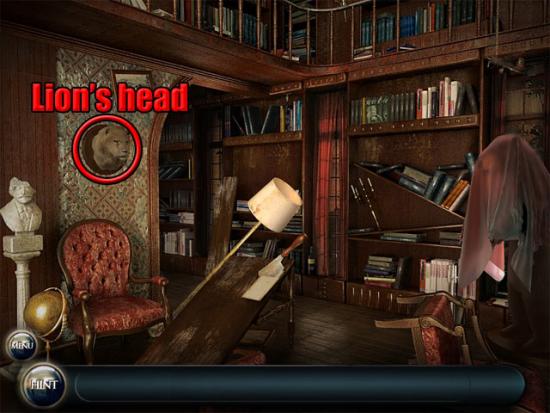
A hole in the wall is revealed behind the lion’s head. Select the hole to find a piece of paper. Examine the picture of Hazel’s father and then examine the letter to complete the third day.
Day 4: The Cancelled Sale
The fourth day starts in the hallway. Open the left door to go outside. Find the hidden objects on the list:
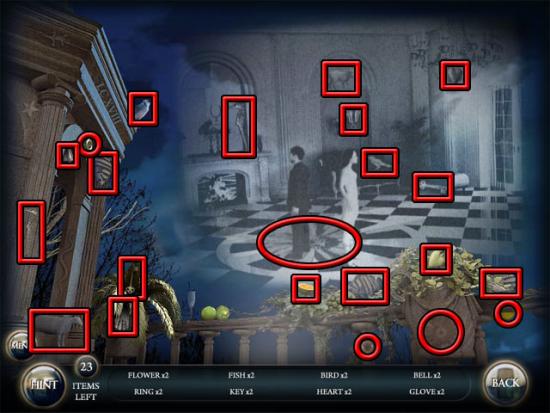
After 22 items have been found, select the film:
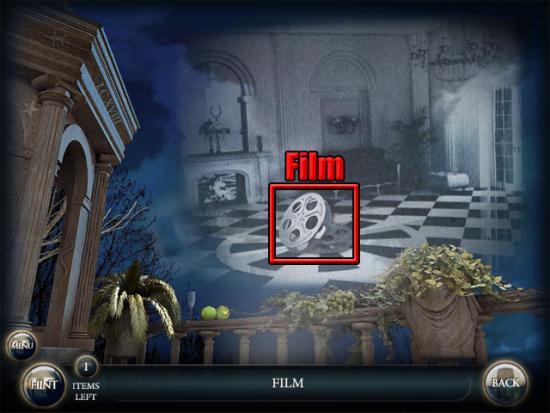
Hazel returns to the hallway. Open the right door to enter Hazel’s old bedroom. Find the hidden objects on the list:
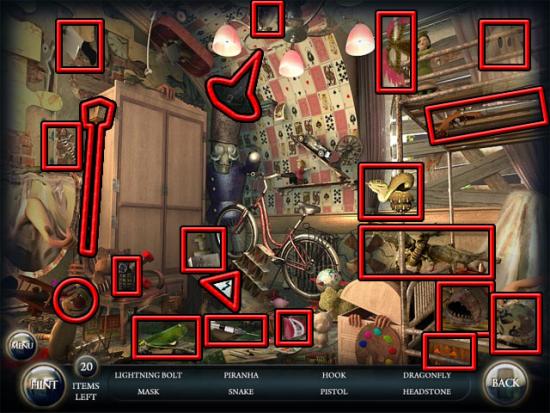
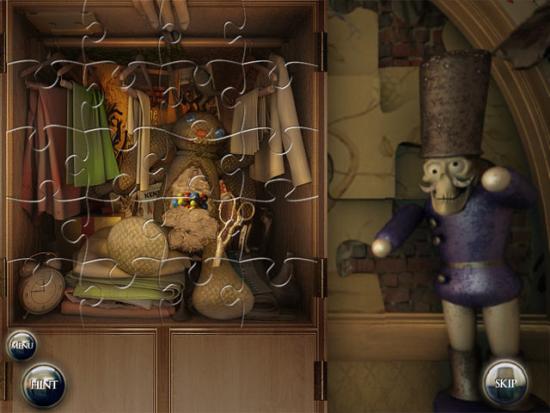
After 20 items have been found, select the wardrobe to see a jigsaw puzzle. Three corner pieces have already been put in the correct place. Select the pieces from the right side of the screen and put them in the correct places on the jigsaw. The pieces will lock in place and can no longer be moved after they have been put in the correct place. The completed jigsaw is shown below:
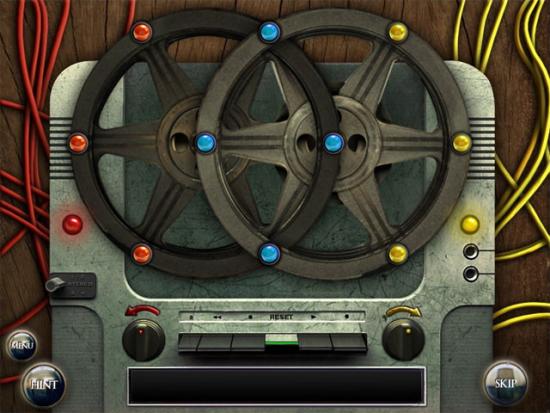
Hazel returns to the hallway. Use the film and the marbles on the middle door. The aim in this mini-game is to turn the dials so that the red marbles are on the left, the blue marbles are on the right and the yellow marbles are in the middle:
After completing the mini-game, Hazel will enter the next room. Find the objects on the list:
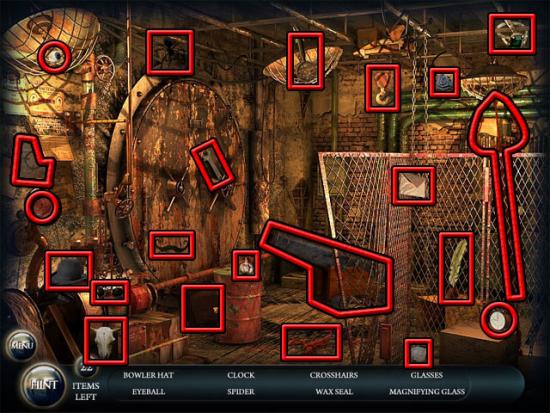
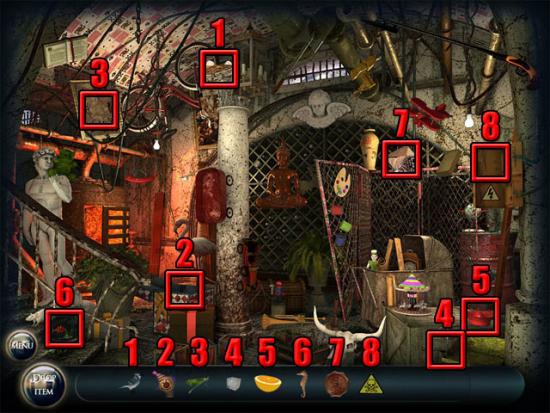
After 22 items have been found, Hazel will enter the next room. Put the items in the following places, leaving the ice cube until after the lemon has been placed:
Hazel returns to her childhood home. The following hotspots are available:
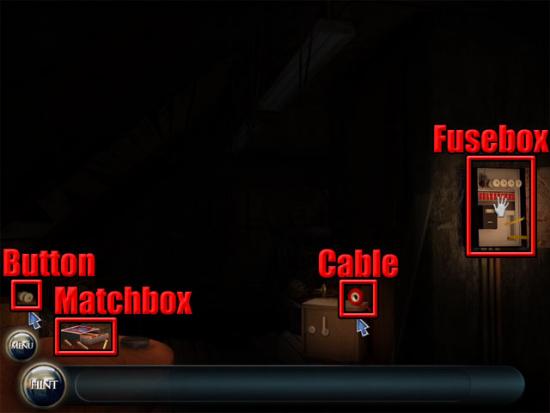
Select the matchbox to take a match. Take the button and the cable. Use the button and the cable on the broken wire on the fusebox to light the room. Open the safe:
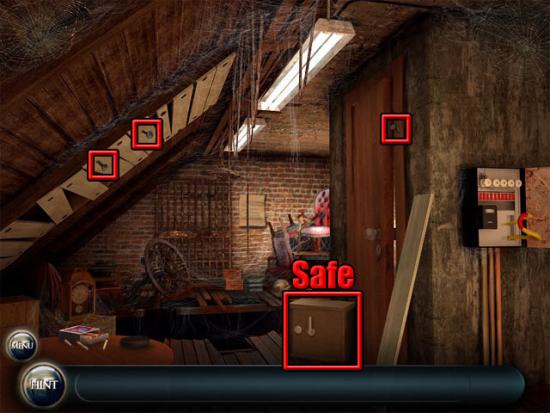
Take the hammer from the safe. Use the hammer on the nails. Take the planks:
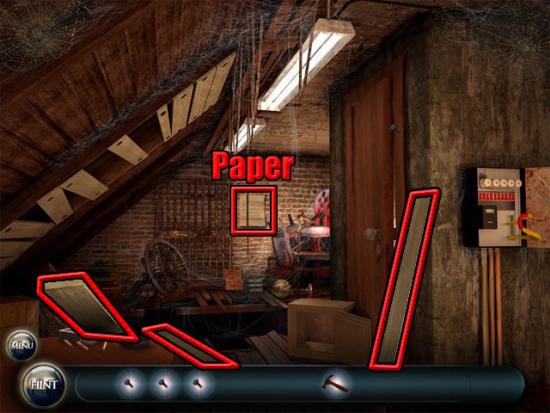
Use the planks on the hole in the floor. Use the nails on the planks and then use the hammer on the nails. Examine the paper on the wall. Select the picture of Hazel’s grandmother and then select the letter to complete the fourth day.
Day 5: The Last Representation
The fifth day starts in the games room. Put the items in the following places, leaving the raven until after the key has been used to unlock the cage:
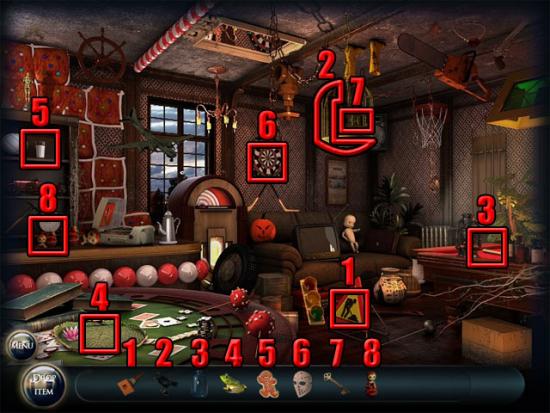
Open the left door to enter the room. Find the objects on the list:
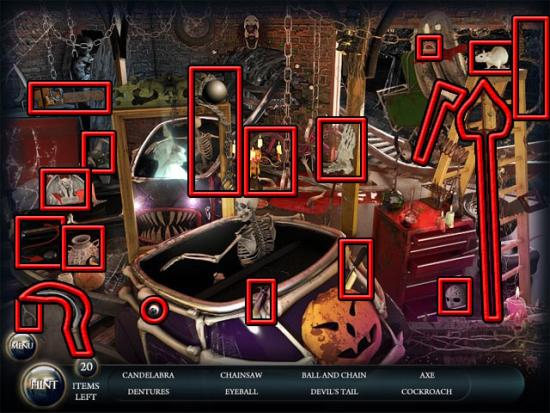
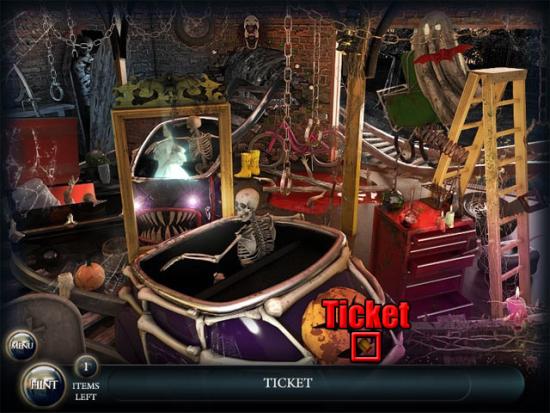
After 19 items have been found, select the ticket:
Hazel returns to the hallway. Open the right door to enter the kitchen. Find the objects on the list:
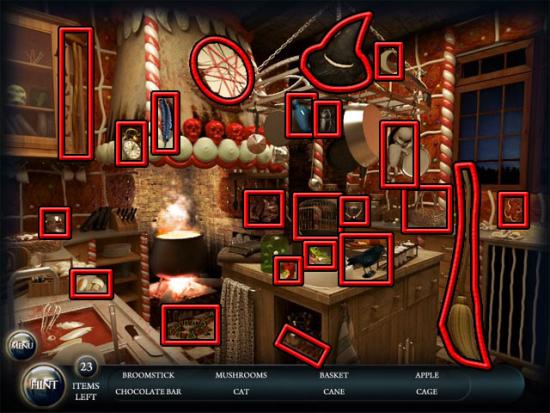
After 22 items have been found, select the peppermint candy:
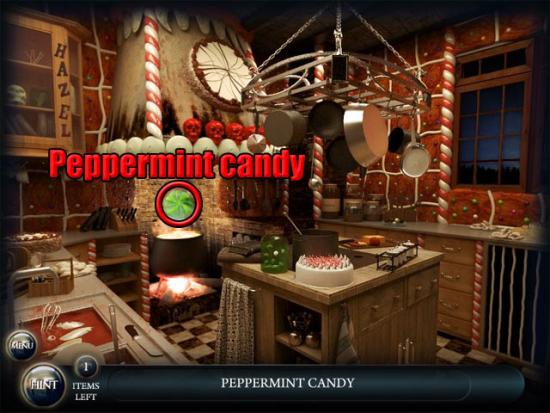
Hazel returns to the hallway. Use the peppermint candy on the panel in the middle of the room to start a mini-game. Press the buttons to rotate the maze. The aim in the mini-game is to rotate the maze so that the peppermint drops through the gaps to the middle of the maze:
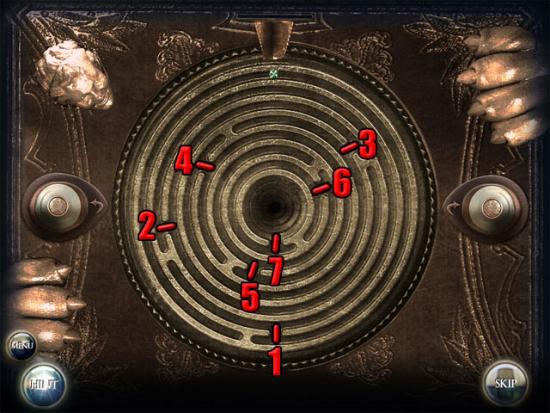
Hazel arrives at the crime scene. Find the objects on the list:
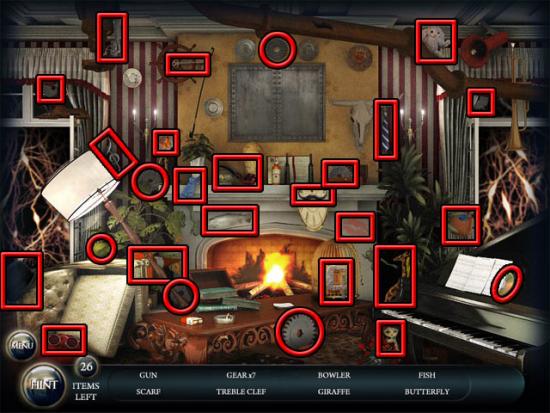
After finding all of the objects, examine the mechanism on the wall to play the gear mini-game. Put the gears in the correct places so that none overlap:

Press the red button to see a cutscene. After the cutscene, Hazel returns to the real house:
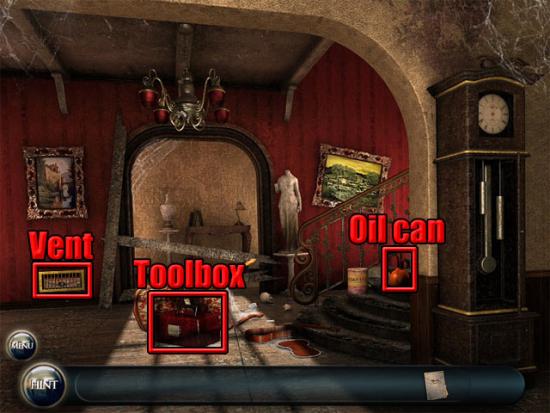
Take the oil can and use it on the toolbox. Take the screwdriver from the toolbox. Examine the vent to see a close-up. Use the screwdriver on the four screws to remove the cover. Examine the lock on the briefcase. The piece of paper in the inventory shows the numbers 9, 2, 5 and 1 on the photographs. Enter 9251 on the lock to open the briefcase:
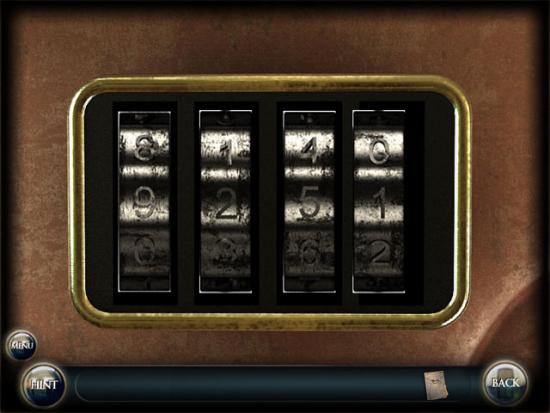
Take the clock hands and the key from the briefcase:
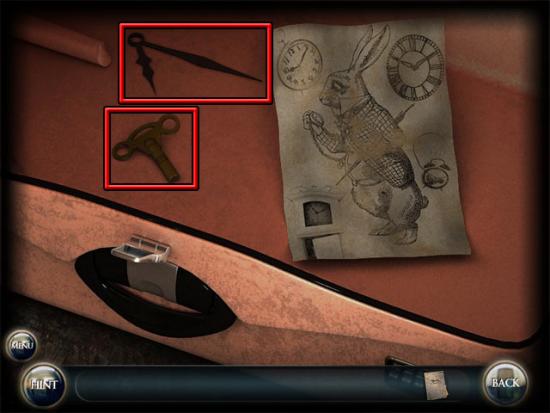
Note that the time on the piece of paper is 10:10. Back away from the view of the suitcase. Examine the clock face:
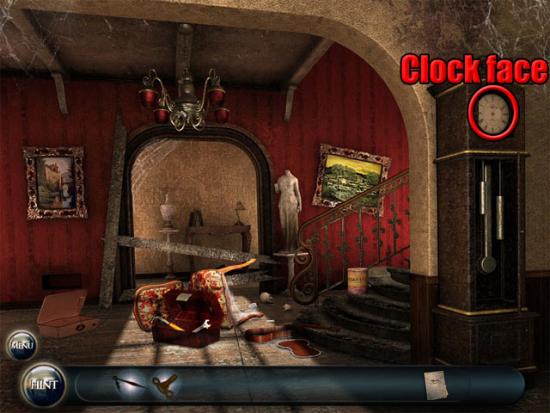
Use the key in the keyhole and the clock hands on the clock face. Drag the clock hands to the following position:
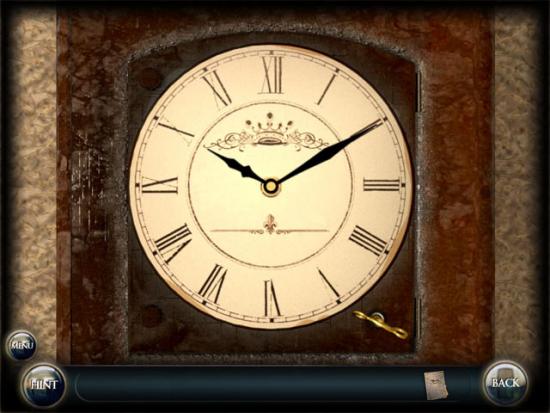
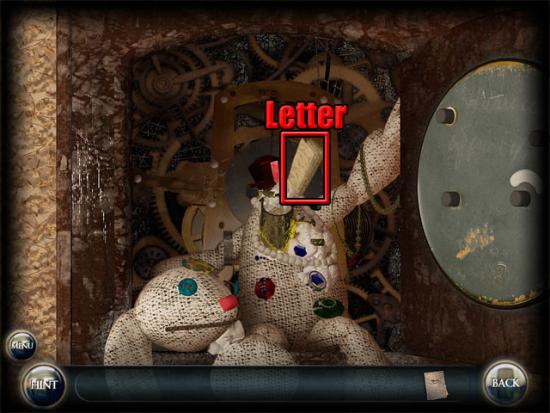
Turn the key four times and the clock face will open. Select the rabbit toy and then select the letter to complete the game:
More articles...
Monopoly GO! Free Rolls – Links For Free Dice
By Glen Fox
Wondering how to get Monopoly GO! free rolls? Well, you’ve come to the right place. In this guide, we provide you with a bunch of tips and tricks to get some free rolls for the hit new mobile game. We’ll …Best Roblox Horror Games to Play Right Now – Updated Weekly
By Adele Wilson
Our Best Roblox Horror Games guide features the scariest and most creative experiences to play right now on the platform!The BEST Roblox Games of The Week – Games You Need To Play!
By Sho Roberts
Our feature shares our pick for the Best Roblox Games of the week! With our feature, we guarantee you'll find something new to play!Demon Piece Races – All Race Buffs
By Adele Wilson
Our Demon Piece Races guide details all of the buffs, rarities, and characteristics for each race in the One Piece Roblox game.


