- Wondering how to get Monopoly GO! free rolls? Well, you’ve come to the right place. In this guide, we provide you with a bunch of tips and tricks to get some free rolls for the hit new mobile game. We’ll …
Best Roblox Horror Games to Play Right Now – Updated Weekly
By Adele Wilson
Our Best Roblox Horror Games guide features the scariest and most creative experiences to play right now on the platform!The BEST Roblox Games of The Week – Games You Need To Play!
By Sho Roberts
Our feature shares our pick for the Best Roblox Games of the week! With our feature, we guarantee you'll find something new to play!All Grades in Type Soul – Each Race Explained
By Adele Wilson
Our All Grades in Type Soul guide lists every grade in the game for all races, including how to increase your grade quickly!
Detective Grimoire Walkthrough
Detective Grimoire is apoint-and-click mystery developed by SFB Games. In this game, you take on the role of Detective Grimoire as he attempts to solve a murder in a remote tourist attraction by exploring the swamp, discovering clues, and interrogating suspects. Gamezebo’s walkthrough will provide you with detailed images, tips, information, and hints on how to play your best game.
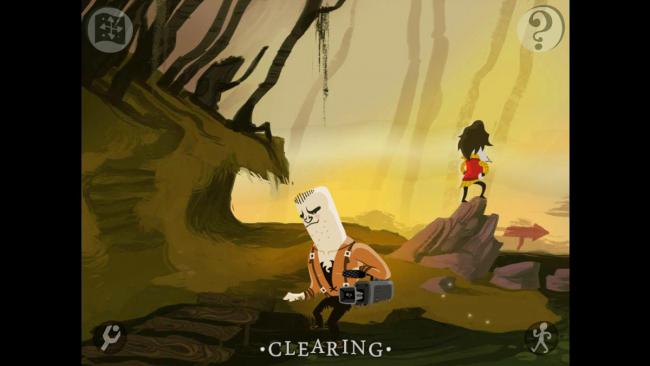
Game Introduction – Detective Grimoire
Detective Grimoire is apoint-and-click mystery developed by SFB Games. In this game, you take on the role of Detective Grimoire as he attempts to solve a murder in a remote tourist attraction by exploring the swamp, discovering clues, and interrogating suspects. Gamezebo’s walkthrough will provide you with detailed images, tips, information, and hints on how to play your best game.
General Tips
Interacting with the World
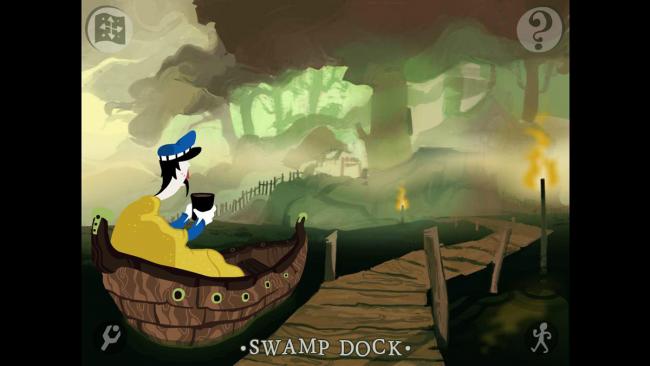
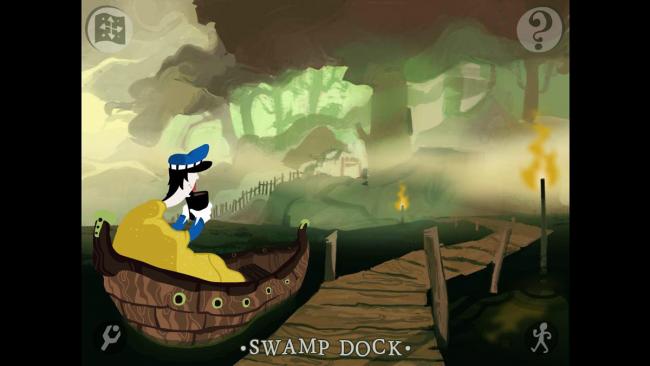
- The majority of Detective Grimoire takes place either in environmental scenes or in conversations with characters. While exploring the environment, you will be in first-person view as Grimoire; in the image above, you (Grimoire) are standing on the Swamp Dock next to Officer James.
- Within these scenes, you can do a variety of things: clicking anywhere will examine or interact with what you’ve clicked on. For instance, clicking the water will examine it while clicking on Officer James will talk to him and begin a conversation.
- Note: Your mouse does not change to indicate an interactive object. Everything is examinable, but not everything is important to your adventure.
- Clicking the wrench icon in the lower-left corner will open the options menu. From here you can adjust music and sound volume, turn hints on or off, or exit to the main menu.
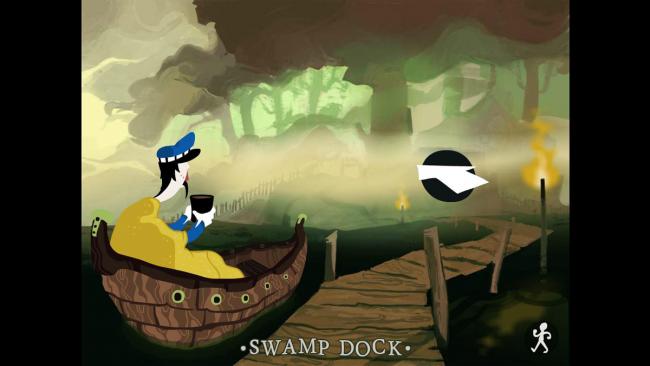
- Clicking the person icon in the lower-right corner will activate “move” and cause arrows to appear on the scene’s exits. Clicking any of these arrows will make Grimoire move to their adjacent scene. To exit “move,” click the move icon again or click anywhere in the scene that is not an arrow.
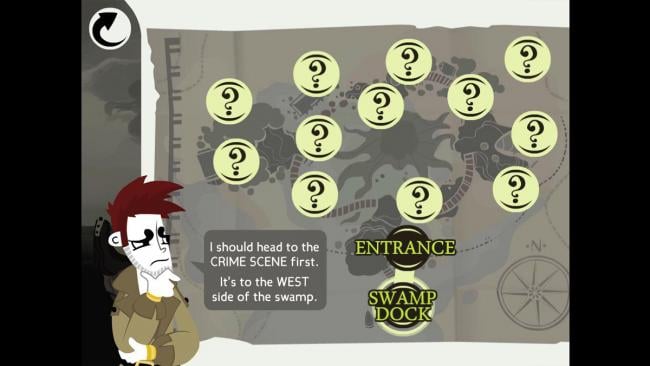
- Clicking the map icon in the upper-left corner will open the fast travel map. This allows you to see areas of the swamp you’ve discovered, and also to immediately travel to them at any time by clicking on their name.
- Note: You won’t have a map icon until you receive the map (which happens very early in the game).
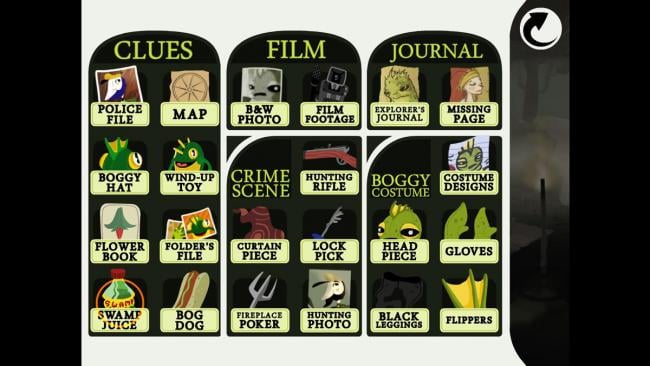
- Clicking the question mark icon in the upper-right corner will open your Case File. This contains all of the items and information you’ve collected so far, separated into three primary categories. For more info, see “Case File” below.
- Detective Grimoire is a point-and-click adventure game, but much of its interaction has been streamlined. While you will find and collect items, there is no inventory to manage or need to combine objects.
The Case File
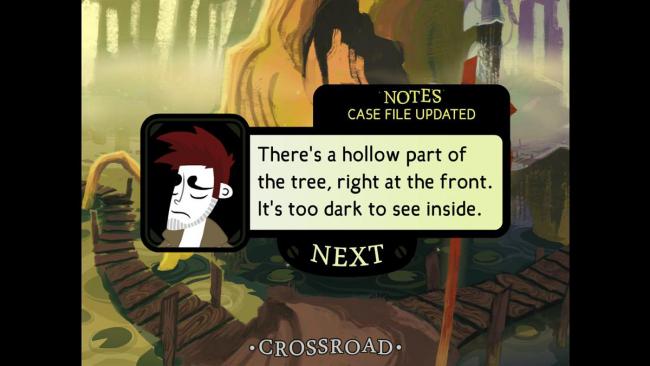
- The Case File houses all of the items and information you have collected during the game. Any time an important piece of evidence is discovered, it will be marked on Grimoire’s monologue. In the image above, the tree was examined and it has been added to the “Notes” section of the Case File.
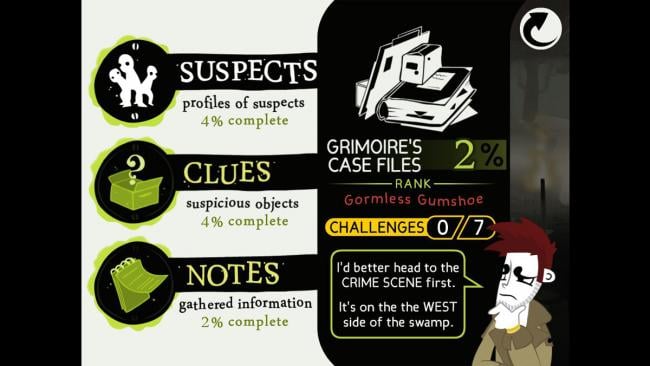
- The Case File contains three types of evidence: Suspects, Clues, and Notes. The main Case File menu also lists your completion percentage for each type of evidence, your overall Case File completion, which “Challenge Topics” you have completed, and a hint from Grimoire on what to do or where to go next.
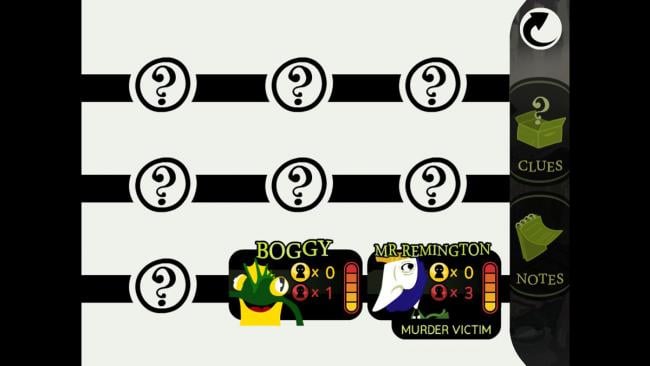
- Suspects: Any time you meet a new person, they will be added to the Suspects menu. Learning more information about them will fill out the details on their personal pages, which can be reviewed at any time by clicking on their profile card. Every suspect has eight pieces of information that can be learned / discovered about them.
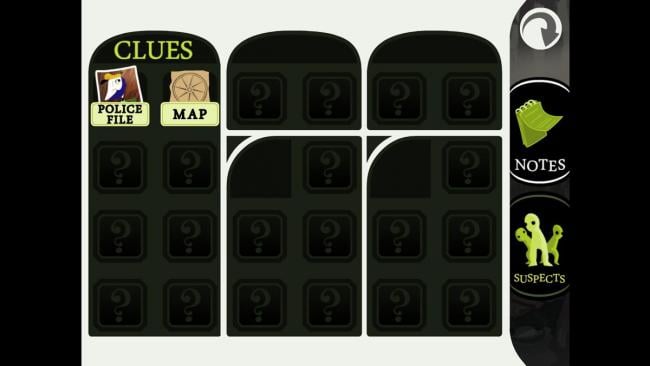
- Clues: Any time you find a suspicious or important object, it will be added to your Clues menu. Clicking on a clue will provide a larger—or additional—image(s) of it, as well as the information you know about the object.
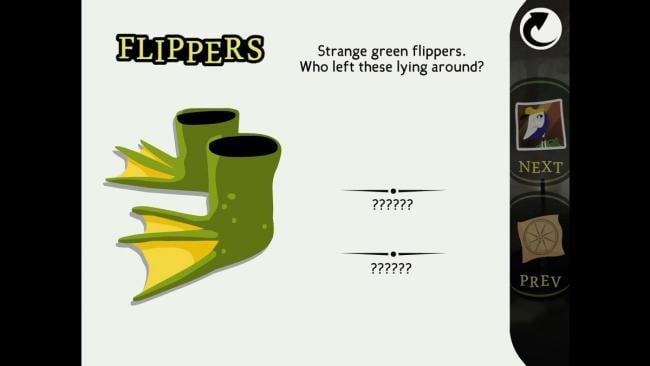
- Each clue’s number of details vary, but undiscovered details will be marked with “??????” until you uncover them. Details might be uncovered when examining the item at first, or after finding a clarifying item or speaking to a suspect.
- In the image above, there are still two undiscovered details about the FLIPPERS.
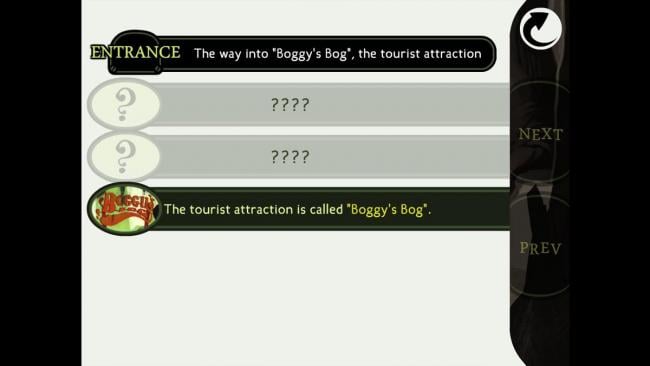
- Notes: The Notes section contains information you’ve discovered about a specific location on the map. Notes will always be collected by clicking around the scene in question. So, to find all three Notes for the “Entrance,” you’ll need to find three important areas within the scene itself.
Interrogating Suspects and Gathering Your Thoughts

- There are two interactive scenes you’ll come across frequently in Detective Grimoire: suspect interrogations and Grimoire’s thought-gathering.
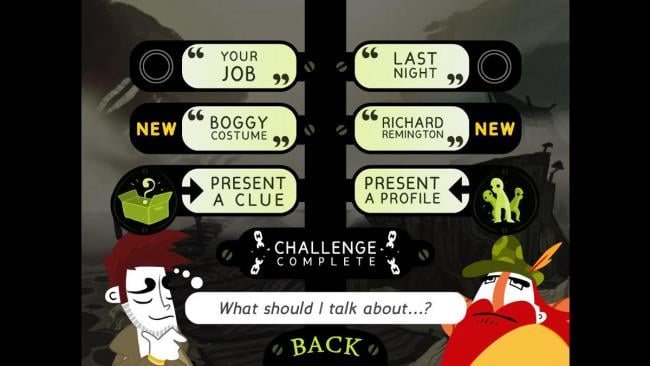
- The above image shows Grimoire interrogating a suspect. He currently has two topics of discussion available to talk about, and he can also “Present a clue” or “Present a profile.”
- Choosing either of the discussion topics will get the suspect to give you information. Selecting to “Present a clue” or “Present a profile” will let you show the suspect any item or person you have already discovered. They may have helpful information to provide—or they may not, but showing suspects items they’re unfamiliar with has no negative consequences.
- There are two additional topics of discussion marked by “????”. These will open up as the story progresses. There is also an area marked by a locked chain. This is the “Challenge Topic,” which unlocks for each suspect under special circumstances.
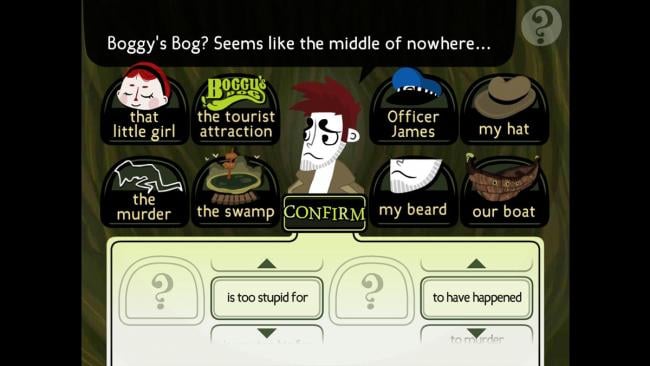
- The image above shows Grimoire collecting his thoughts on Boggy’s Bog. These are fail-proof challenges that require you to put two ideas—such as “the swamp” and “the murder”—into a sentence with the correct phrasing.
- You can drag the ideas into the blank slots and then click the arrows to change the phrase that connects them to form a unique sentence. Only one sentence will be correct, but you can retry indefinitely until you get it right.
Hints and Tips
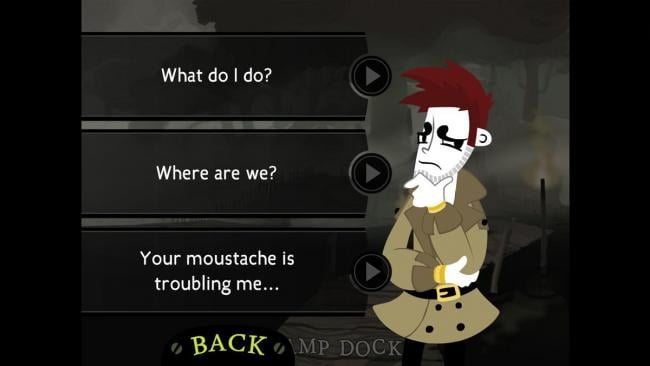
- If you’re stuck or feel like there’s nothing new to do, try speaking to suspects again. Show them any clues or profiles you have not yet—you might be surprised about who knows whom.
- If you’ve already shown a suspect a clue or profile, it will be grayed out when speaking to them. You’ll never have to show an item to a person more than once.
- Click around and explore freely. Sometimes even if an item isn’t important enough to add to your Case File, it may provide some interesting details or a helpful hint.
- Trust Grimoire. Not only does he keep track of what you need to do next via the Case File menu, but he also has a good hunch for interrogations—if he doesn’t say “Feels like I’m done talking to them” at the bottom of the interrogation menu, then there’s something left that the suspect can provide.
- You don’t have to find every detail in the game to finish it, but it’s more fun to do so! This walkthrough covers completing the game and earning 100% on your Case Files at the same time.
Chapter One: A Swamp Full of Secrets
Overview: Richard Remington, owner of tourist attraction “Boggy’s Bog,” was found murdered. He had three marks on his neck and slime around his body, strongly hinting at the creature “Boggy” as a suspect. Grimoire wonders how he can arrest a culprit who may not even actually exist…
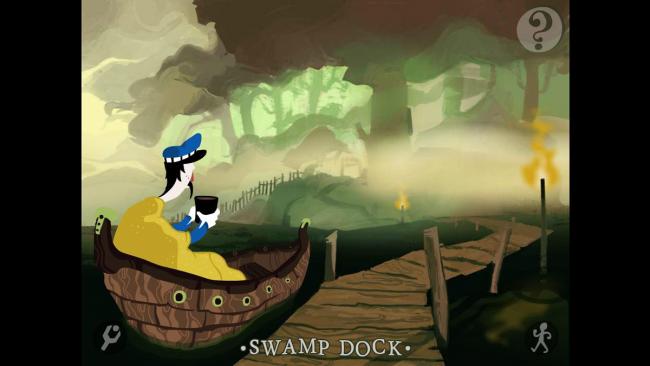
- After a cutscene with Officer James in which you row to the bog, Grimoire emerges on a wooden dock.
- You can talk to Officer James (by clicking on him) to ask for basic advice, like how to interact with the world.
- Click the move button in the bottom right corner of the screen and then select the arrow that appears.
- Grimoire will move past the docks to the park’s gate.
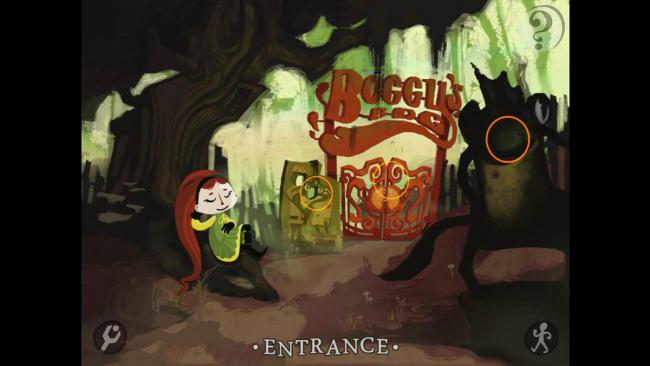
- Click on the redheaded girl to speak to her. She’ll tease Grimoire about not remembering her.
- Select any of the three dialogue choices. The girl will give you a map of the swamp and then disappear.
- The map allows you to fast-travel to any area you’ve previously visited even if you’re nowhere near it. Simply open the map via the icon in the upper left corner and then select the area you wish to visit.
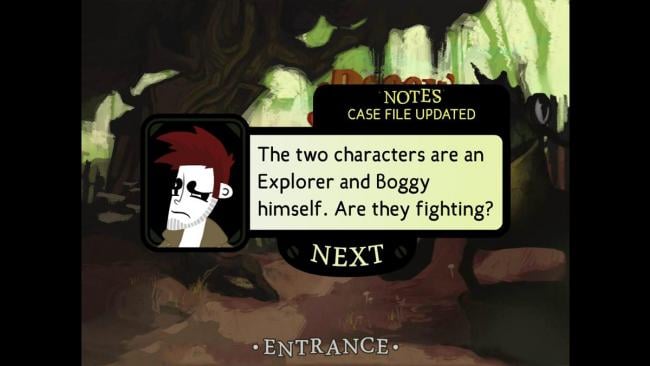
- Examine the green wooden cutout. Grimoire notes that it’s Boggy and an Explorer fighting.
- Examine the statue of Boggy.
- Examine the orange gate. This will complete the Entrance’s Notes in your Case File.
- Click the move button and select the arrow over the gate. The gate is locked; you’ll enter a mini-game puzzle.
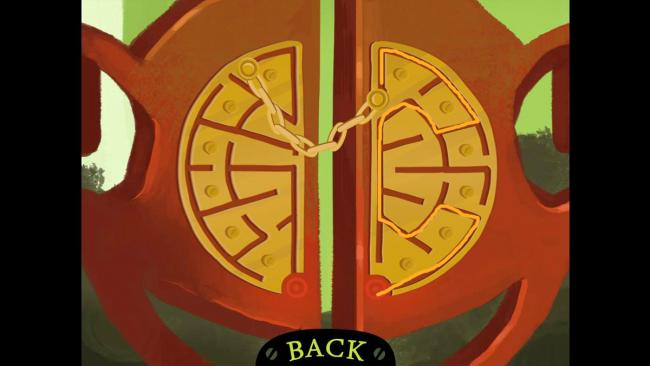
- You have to slide one of the latches out of the door, towards the bottom of the gate.
- Technically either latch should be able to be slid—however, we encountered an issue with the left-hand latch not registering as completing the puzzle. If you have this issue, back out and try the right-hand latch instead.
- To complete the puzzle, you just have to follow the mazelike path out towards the bottom.
- When Grimoire enters the park, he decides to formulate his thoughts.

- Click on one of Grimoire’s thoughts and drag it to either of the empty slots in the table.
- Click on the arrows of the phrases to change which phrase appears. Two thoughts and two phrases will create a complete thought. For instance: “Officer James is too stupid for my beard to have murdered someone.”
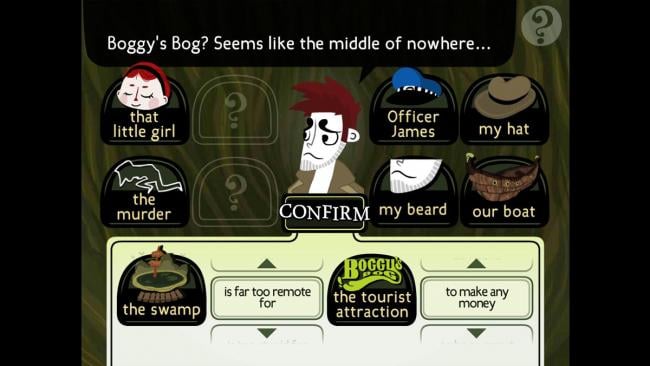
- The correct phrase Grimoire is trying to think of is: “The swamp is far too remote for Boggy’s Bog the tourist attraction to make any money.”
- Once you’ve created the idea above, click Confirm. If you enter the wrong thoughts or phrases, Grimoire will comment that they’re not quite right (or close, etc.) and you’ll have to try again.
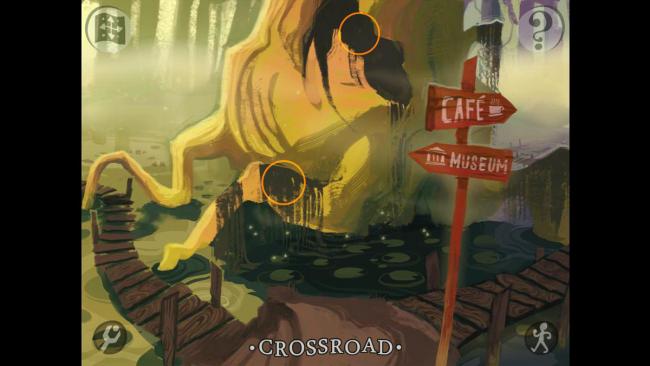
- Examine the hollow part of the tree near the top-center of the screen.
- Examine the base of the tree, like its root that’s covered with weeds. This completes the Case File Notes on the Crossroads.
- Click the move button and select the arrow to the left leading towards the museum.
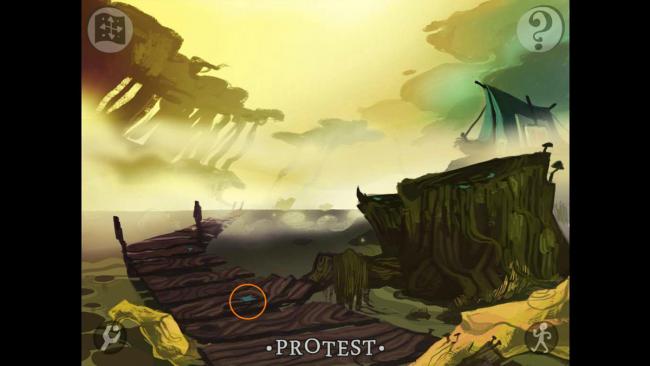
- Examine the blue flower petals on the boardwalk.
- Click the move button and continue heading down the boardwalk.
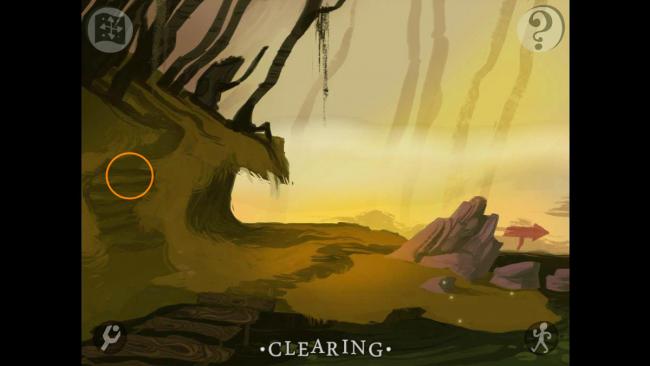
- Examine the dark path leading up the hill on the left-hand side of the scene. This completes the Case File Notes on the Clearing.
- Click the move button and head up the western path you just examined.
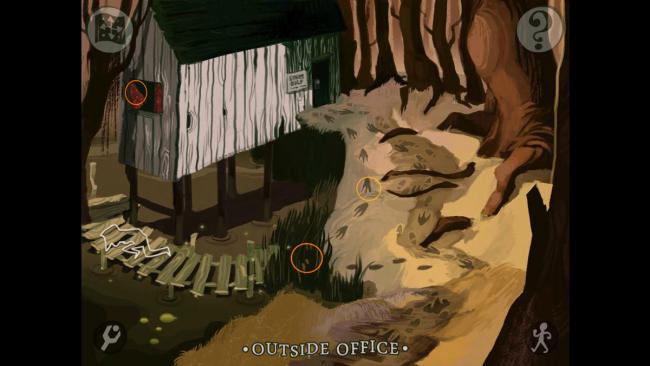
- You’ll be outside the office.
- Examine the red curtain in the window.
- Examine the footprints leading away from the door.
- Examine the reeds near the boardwalk. You’ll enter a close-up view.
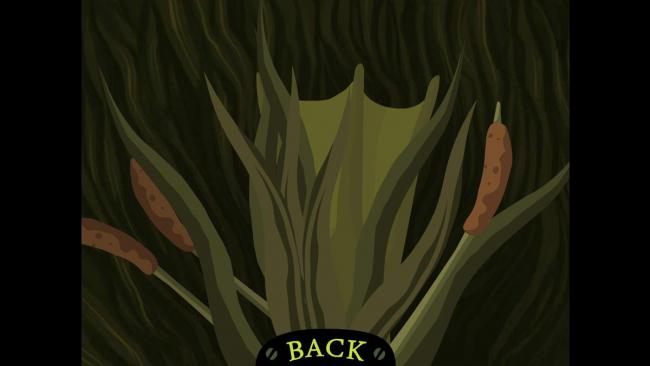
- Grimoire needs to move some of the reeds out of the way. Click and drag the reeds one-by-one to the left or right until the lighter green object underneath is revealed.
- It’s a green flipper. Back out of the mini-game. This completes the Case File Notes on Outside Office.
- Examine the door to the office. Grimoire can’t get inside yet. Click the move icon and go back to the Clearing.

- There are now two people sitting in the Clearing. Grimoire decides to interrogate them. Click on either suspect; we’ll start with the cameraman in the orange shirt.
- This is Bobby Burle. The interrogation begins with Grimoire being asked a question. Select any of the three answers, and then Grimoire begins the interrogation.
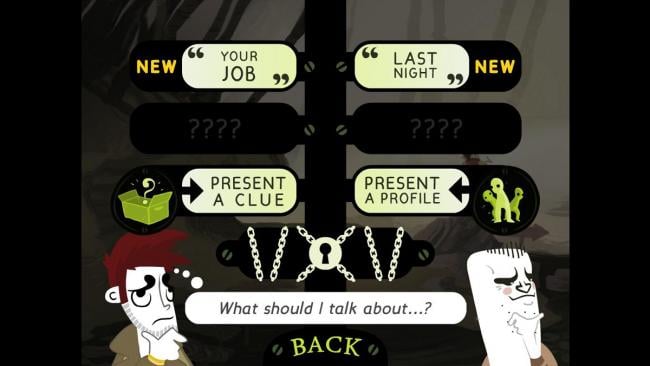
- Ask about “Your job.” Burle tells Grimoire he works with Vincent Van de Peer and they received permission to film in the swamp as of a week ago.
- Ask about “Last night.” Burle says he was at the café and so was Remington; Remington left looking ill.
- Exit the conversation with Burle.
- Speak to the man looking out over the water. This is Vincent Van de Peer, movie director.
- Select any of the answers to respond to Van de Peer. Grimoire will then gather his thoughts.
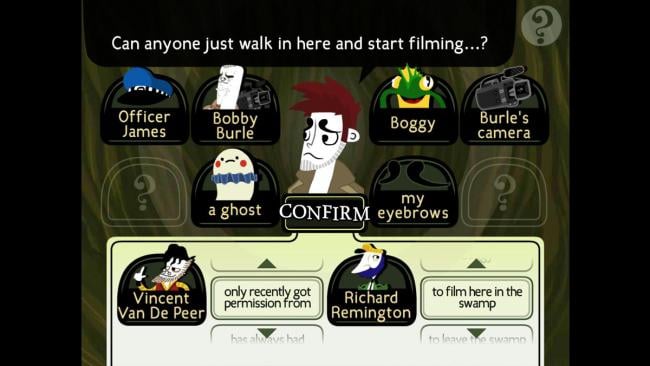
- The correct statement is “Vincent Van de Peer only recently got permission from Richard Remington to film here in the swamp.” Select confirm.
- This unlocks the Challenge Topic for Van de Peer regarding his filming status.
- Select confirm and then speak to Van de Peer again.
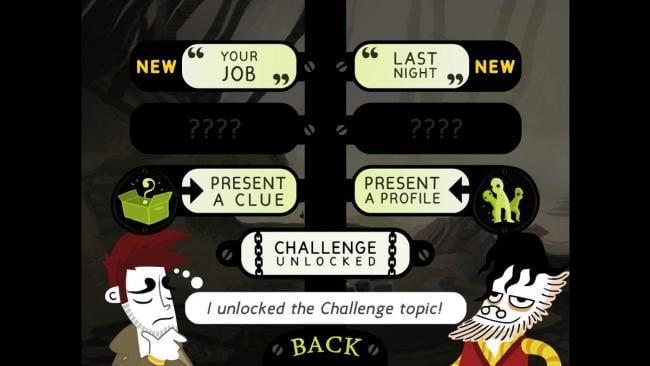
- Ask about “Your job.” Van de Peer is making a film about Boggy the swamp creature. He also mentions Burle has another “hobby.”
- Ask about “Last night.” Van de Peer admits he was filming last night but Burle was nowhere to be found. He also mentions some odd sounds were picked up on his audio track.
- Grimoire needs to gather his thoughts on the cameraman.
- The correct statement is “Vincent Van de Peer told me that Bobby Burle was nowhere to be found last night.” This unlocks the Challenge Topic for Burle.
- Back in the conversation with Van de Peer, ask about the Challenge Topic by clicking the “Challenge Unlocked” tab.
- Grimoire mentions that this wasn’t the first time Van de Peer had tried to film in the swamp. He tries to deny it.
- Respond with “Remington has denied you the filming permission in the past.”
- Van de Peer comments that this type of thing happens all the time. Grimoire needs to figure out why Remington changed his mind, and decides to do so by drawing a picture in his notebook.
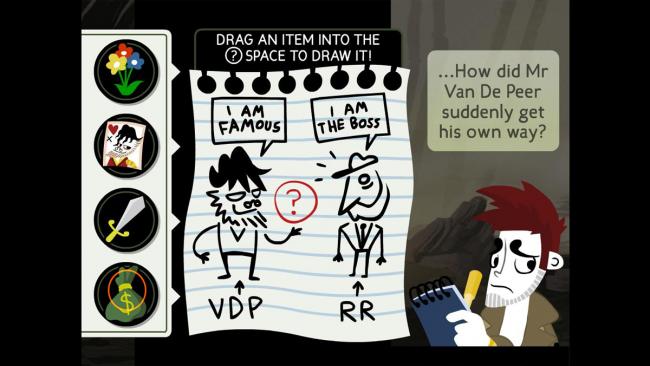
- You need to finish the picture. What item would Van de Peer have used to get his way?
- Drag the bag of money into the red question mark space. Grimoire accuses Van de Peer of bribing Remington.
- Select “Present a clue” and mention the film footage. Van de Peer says he’ll try filming again tonight.
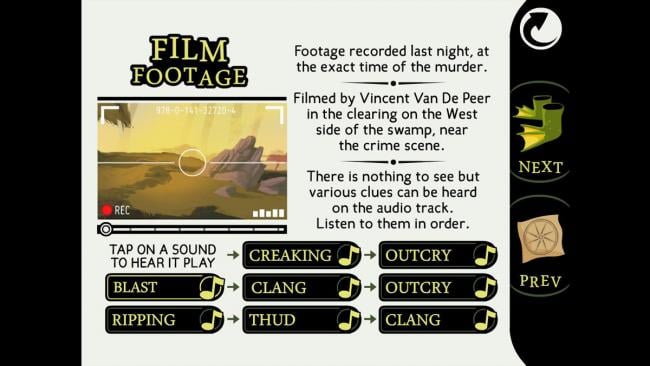
- Exit the conversation and you’ll receive the FILM FOOTAGE as a clue. Listen to the audio tracks in order (follow the arrows) to receive an idea of what went down during the murder.
- Exit the clues page and speak to Burle again.
- Select the Challenge Topic. Grimoire asks Burle why he was nowhere to be found. Burle says he was wandering around the swamp, camera-less.
- Grimoire responds to this—select “You left it with Van de Peer, and he used it instead.”
- Grimoire is surprised he just walked around. Burle says he has ways to pass the time.
- Respond with “Van de Peer said you had a hobby on the side!” Burle admits he was taking black and white photography last night and shows Grimoire his undeveloped photograph.
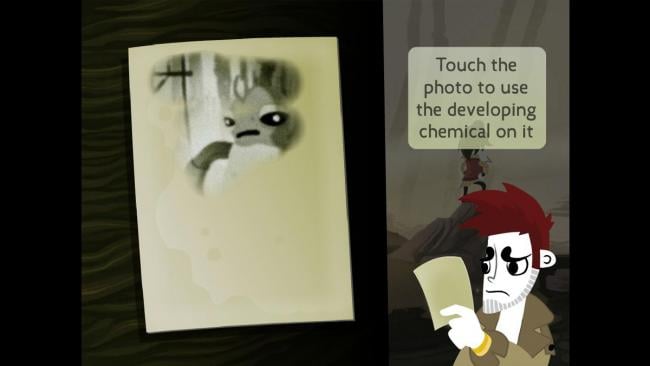
- Click and drag across the picture to develop it and reveal what looks like Boggy standing in the swamp. (Once enough of the picture has been developed the rest will finish automatically and be added as a clue.)
- Exit the conversation with Burle. We’re done in the Clearing for now.
- Click the move button and head south back to the Protest.
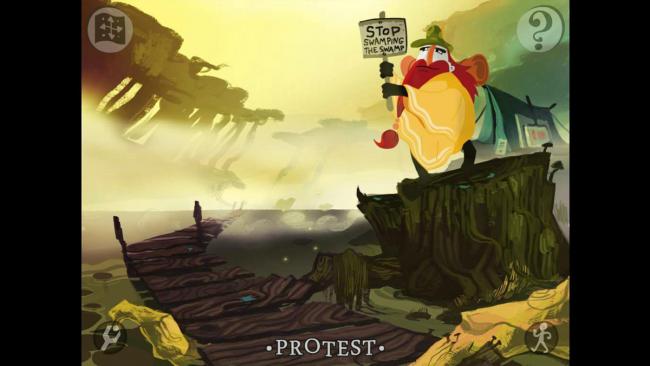
- The name of this area makes more sense now, as there is a bearded man picketing near the swamp.
- Speak to this man. He is Edward Everstone, aka “Echo.”
- Select any of Grimoire’s responses to why they call him “Echo” and the interrogation begins.
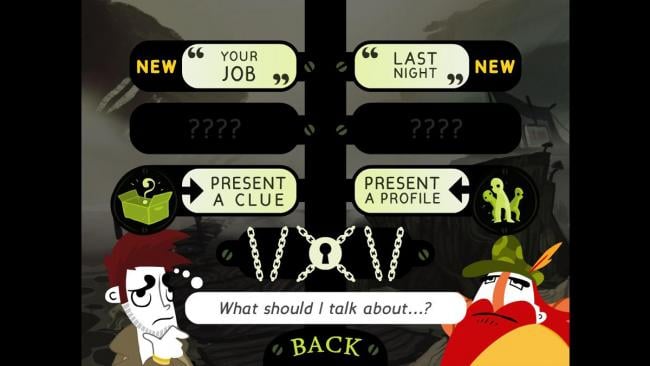
- Ask about “Your job.” Echo is a protestor standing up for animal rights, namely, Boggy’s rights.
- Ask about “Last night.” Echo says he did hear some strange sounds, but there are always strange sounds at night in a swamp.
- If you choose to “Present a profile” and show Echo either Boggy or Mr. Remington, he has a few comments, but nothing pertaining to the case.
- Exit the conversation with Echo.
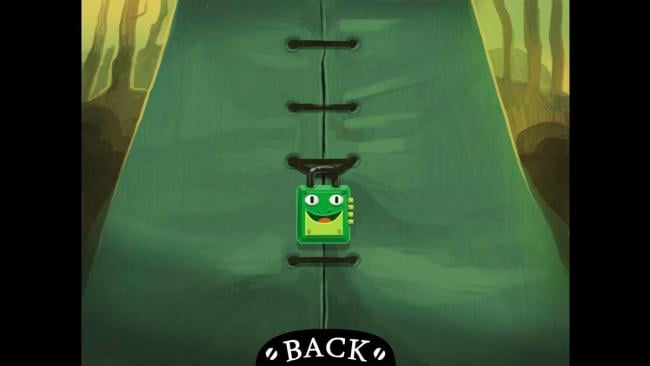
- Examine the blue tent just behind Echo. You’ll enter a close-up of the tent’s front.
- Examine the Boggy-themed padlock. If you had the right code, you could open it. Exit for now.
- We can’t do anything else here for now, so click the move button and move south to the Crossroad.
- Click the move button again and move east toward the café, entering the Gift Shop.
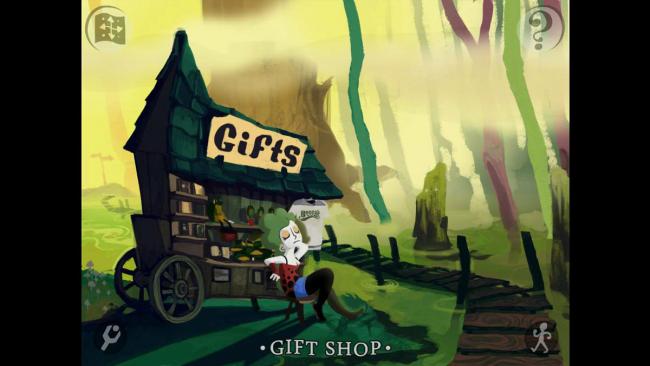
- There’s a bored-looking woman sitting here. Speak to her and select any of Grimoire’s answers to where he was yesterday. She is Sally; the interrogation begins.
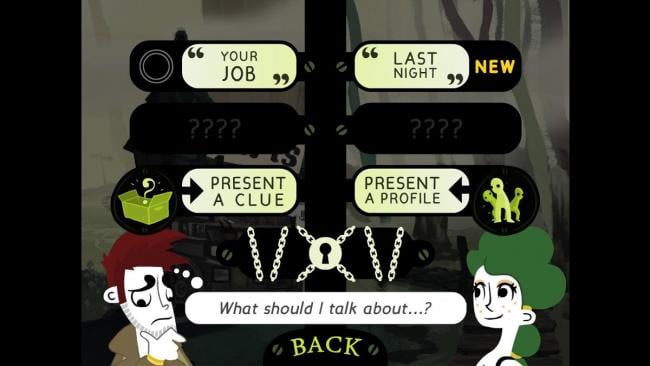
- Ask about “Your job.” Sally complains that she always has to bring a spare set of clothes to the swamp as it’s impossible to leave without being covered in dirt.
- Ask about “Last night.” Sally complains that someone “played a prank” by dipping her spare black leggings in swamp slime.
- Ask to “Present a clue.” Show Sally the B&W PHOTO. She comments that the creature’s legs are reflected in the water in the picture (so they aren’t as long as Grimoire first thought).
- Ask to “Present a profile.” Select Echo. Sally says she has a good view of him from her shop but he spends a lot of time in his tent.
- Grimoire ponders “There might be something I can ask Echo about…”
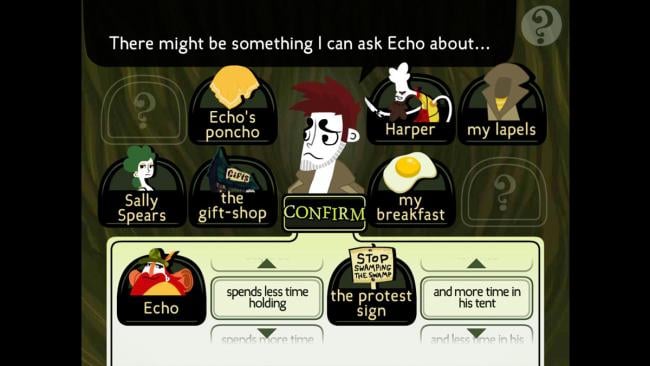
- The correct phrase is “Echo spends less time holding the protest sign and more time in his tent.” This unlocks the Challenge Topic for Echo.
- Exit the conversation with Sally.
- Examine her gift shop wagon. You’ll enter a close-up of the merchandise.
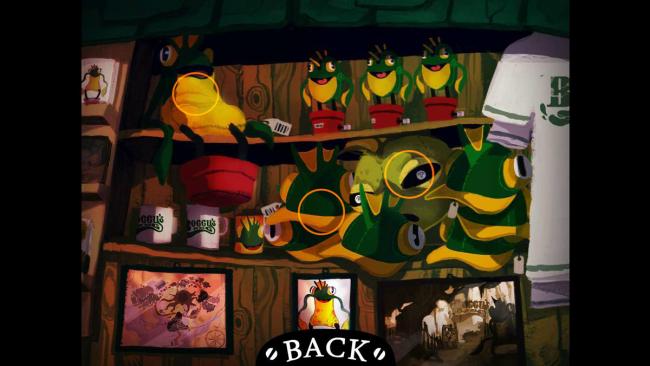
- Examine the Boggy plush doll on the top shelf.
- Examine the Boggy hats.
- Examine the lighter green Boggy head in the middle of the Boggy hats. Grimoire notices it doesn’t seem to belong and also has a bit of red fabric stuck inside.
- Exit the gift wagon. Your Case File Notes for the Gift Shop are now complete.
- Let’s go speak to Echo again. Open the map and go to the Protest.
- Speak to Echo and select the Challenge Topic.
- Echo offers to tell Grimoire what he’s been doing in his tent if Grimoire can guess it. You’ll enter the notebook drawing screen. You need to select the icon that represents why Echo’s been in his tent more.
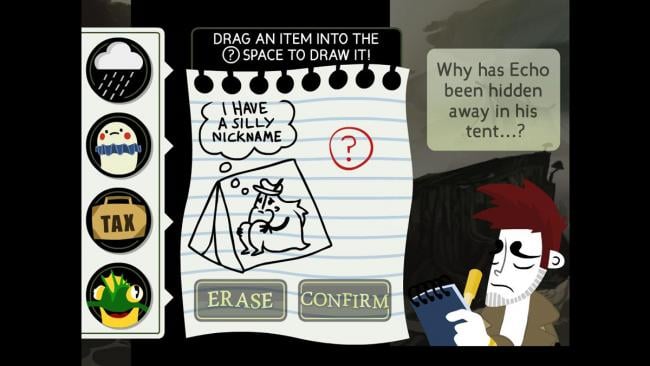
- There’s no correct answer at this time, so select any of the icons. Grimoire learns nothing new for now.
- Return to the Gift Shop. Click the move button and head north. You’ll be at the Café.
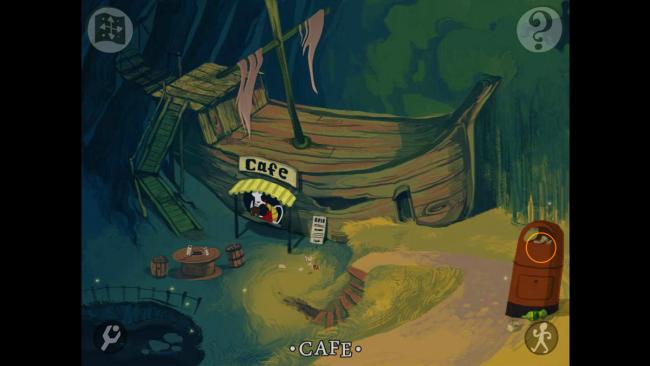
- Examine the red trashcan. You’ll enter a close-up.
- Click and drag the individual trash items around to move them out of the way. Once you’ve uncovered a drawing of Boggy, click on it.
- Exit the trashcan. Grimoire needs to collect his thoughts on “Are we really talking about a swamp creature, here…?”
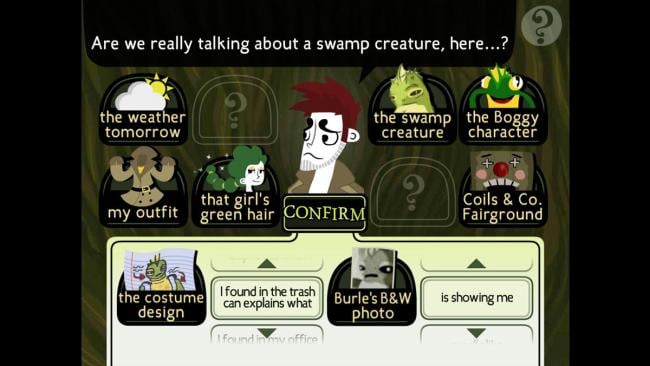
- The correct phrase is “The costume design I found in the trashcan explains what B&W Photo is showing me.”
- Grimoire realizes the photo is of someone in a costume and that he needs to find both the person in the costume and the costume itself. Chapter Two begins.
Chapter Two: A Deadly Disguise
Overview: Having discovered the designs for the Boggy costume, Grimoire realizes that his culprit is most likely a person dressed as the mythical creature. But who? And why?
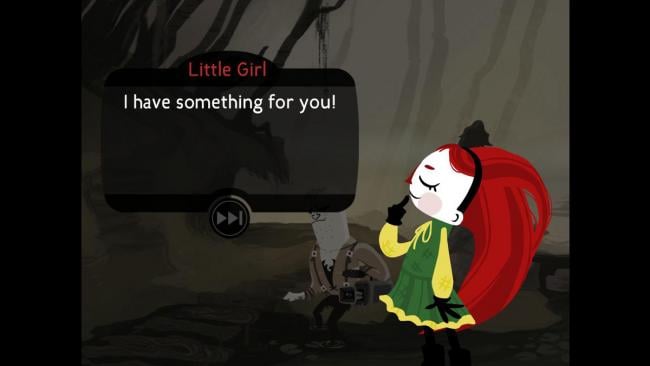
- The young girl from the park entrance appears and gives you a key to Remington’s office door, then vanishes again.
- Let’s keep exploring the Café for now.

- Examine the door on the right-hand side of the Café ship.
- Examine the top of the Café ship (not the stairs). This completes your Case File Notes for the Café.
- Speak to the man in the Café. This is Harper. Answer with any of Grimoire’s responses to the swamp being his greatest challenge, and the interrogation begins.
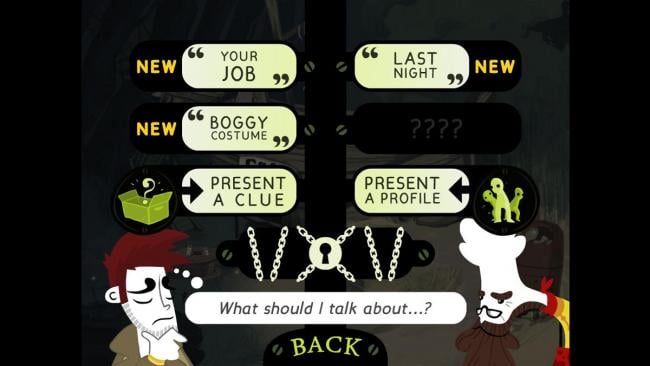
- Note: Now that we’re in Chapter Two, “Boggy Costume” has been added as a question.
- Ask about “Your job.” Harper comments that Remington loved Bog-Dogs but his supply is currently contaminated by a strange green dust. He also gives Grimoire some Swamp Juice.
- Grimoire ponders “Did something strange happen at the Café yesterday?”
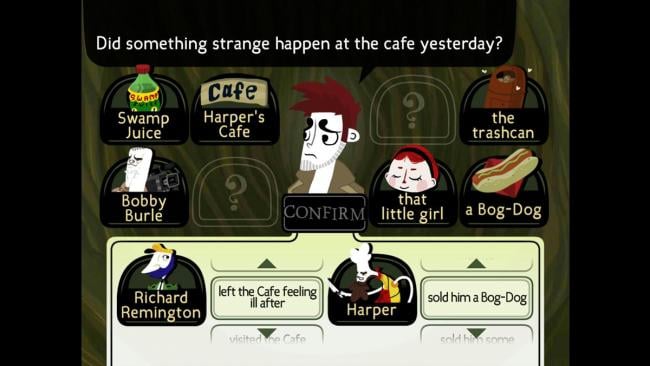
- The correct phrase is “Remington left the café feeling ill after Harper sold him a Bog-Dog.” This unlocks the Challenge Topic with Harper.
- Ask about “Last night.” Harper comments that he locks up the store room at night but not the table, chairs, or trashcan.
- Ask about “Boggy costume.”
- Ask to “Present a profile.” Select Echo. Harper comments that he’s been spending more time in his tent lately and he also asks what everyone likes to eat.
- Select the Challenge Topic. Grimoire mentions Remington got ill last night after eating at the Café.
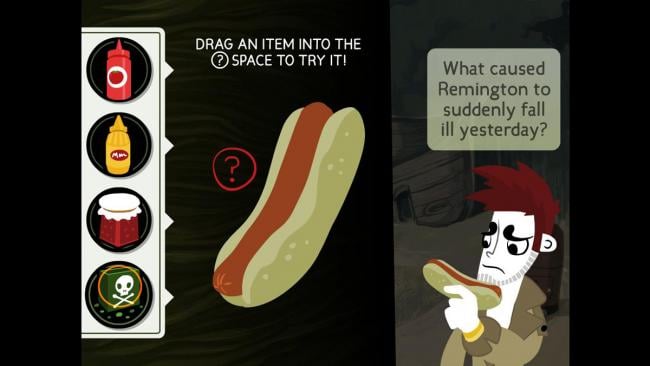
- Grimoire needs to select what made Remington ill. Drag the green poison onto the dog.
- When prodded, select “The store room was broken into with a lock pick…” Harper acknowledges that this is possible, especially since lots of Swamp Juice has gone missing.
- We’re done at the Café. Let’s go back to Remington’s office via the map.
- Click on the office door to enter a mini-game. The door has two keyholes and Grimoire needs to figure out which keys to use.
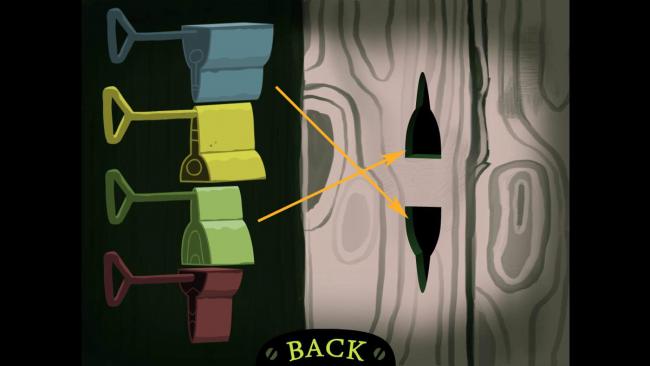
- Place the green key in the upper lock and the blue key in the lower lock. You’ll now be inside the office.
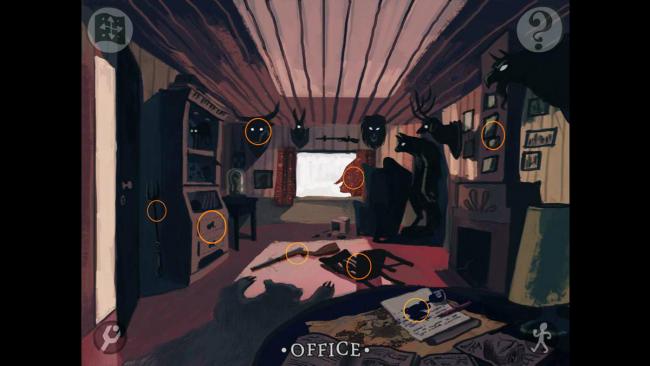
- Examine the wooden cabinet to the left.
- Examine the fireplace poker just left of the wooden cabinet.
- Examine the animal heads above the window.
- Examine the turned-over chair on the floor.
- Examine the torn curtain in the window.
- Examine the hunting rifle on the floor near the chair.
- Examine the pictures over the fireplace. One of them is torn; you’ll enter a close-up.
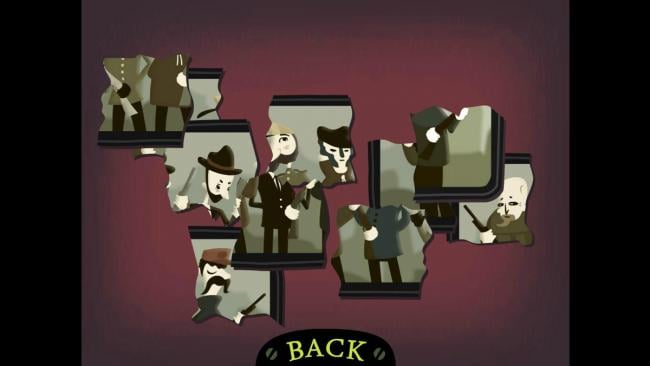
- You need to put the picture back together like a jigsaw puzzle. There are only two rows of pieces; try placing the framed corners first.
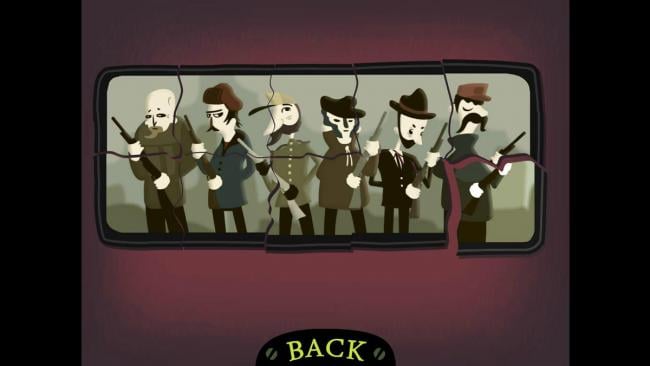
- The finished picture is of a younger Remington with some hunting buddies.
- Examine the spilled ink on the table. You’ll enter another close-up.
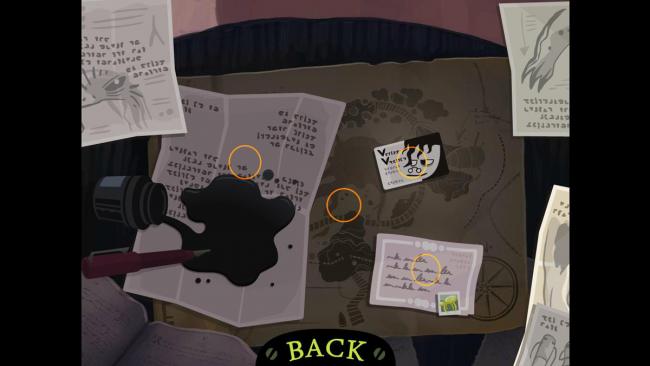
- Click and drag the papers to the left or right.
- Examine the Van de Peer business card.
- Examine the letter with an image attached below the business card.
- Examine the letter with ink on it.
- Examine the map underneath the letter. Exit the table.
- Once you’ve found everything in the Office, Grimoire needs to collect his thoughts on “Have I uncovered an important secret in here?”
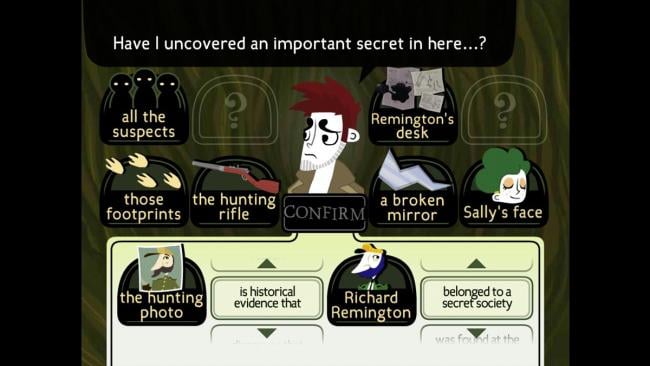
- The correct phrase is “The hunting photo is evidence that Richard Remington belonged to a secret society.” Grimoire is beginning to question Remington’s motives for starting a park in the swamp.
- Chapter Three begins.
Chapter Three: Richard Remington’s Real Reasons
Overview: The plot thickens as some of Remington’s secrets begin to come to light. While Grimoire knows most of the details of the grisly murder, he doesn’t quite have the full picture of Remington’s purpose in the swamp or who actually did him in.
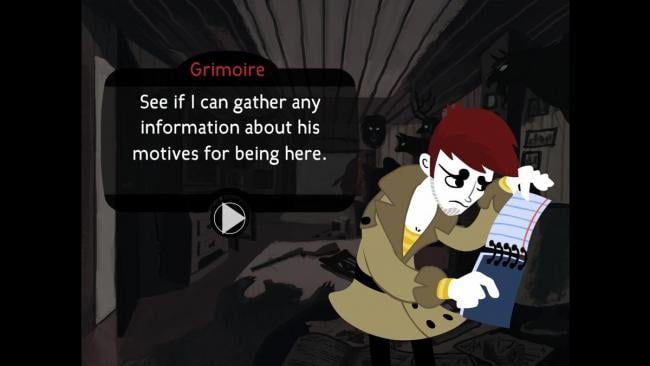
- Exit Remington’s office.
- Click the move button and enter the Clearing where Burle and Van de Peer are waiting.
- Speak to Van de Peer. You can now ask him about both “Boggy Costume” and “Richard Remington.”
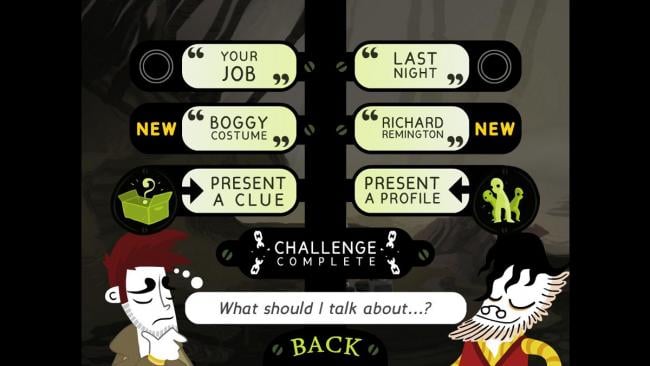
- Ask about “Boggy costume.” Van de Peer denies making the costume as he would never mess with such tomfoolery.
- Ask about “Richard Remington.” Van de Peer praises Remington’s business savvy.
- Exit the conversation with Van de Peer and speak to Burle.
- Ask about “Boggy costume.” Burle believes they’re just a child’s drawings.
- Ask about “Richard Remington.” Burle believes Remington had some secrets no one knew about.
- Ask to “Present a clue.” Show Burle the BOG-DOG. He confirms Remington was eating one before he got sick.
- Exit the conversation.
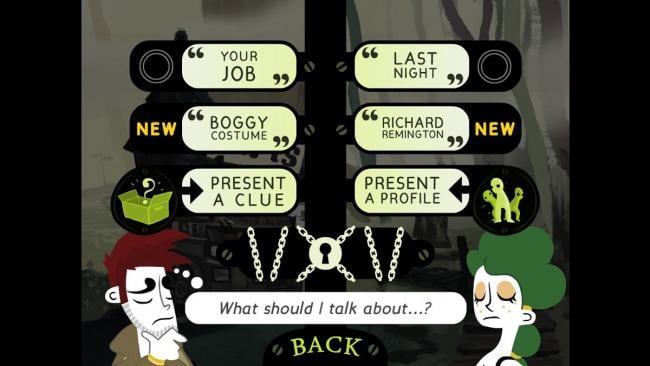
- Return to the Gift Shop and speak with Sally again.
- Ask about “Boggy costume.” Sally says she’d never wear something that covers her up entirely.
- Ask about “Richard Remington.” Sally says she didn’t know him well, but he seemed preoccupied most of the time.
- Ask to “Present a clue.” Show Sally the BOGGY HAT.
- Ask to “Present a clue” again. Show Sally the Boggy HEAD PIECE.
- Exit the conversation. Return to the Café and speak to Harper.
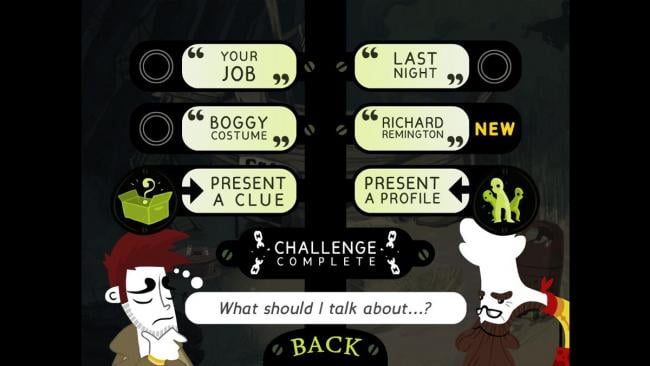
- Ask about “Richard Remington.” Harper also comments that Remington had some secrets and hobbies he had no knowledge of.
- Ask to “Present a clue.” Show him Remington’s HUNTING RIFLE. Harper comments it’s been fired recently.
- Ask to “Present a clue.” Show him Remington’s HUNTING PHOTO.
- Ask to “Present a clue.” Show him FIREPLACE POKER. He mentions it’s covered in slime.
- Exit the conversation. Click the move button and head west. You’ll be on the Bridge.
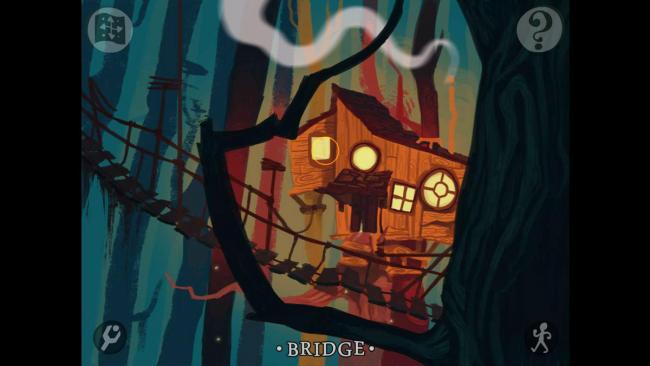
- Examine the house windows. This completes the Case File Notes for the Bridge.
- Click the move button and select the arrow leading into the house. You’ll enter a mini-game.
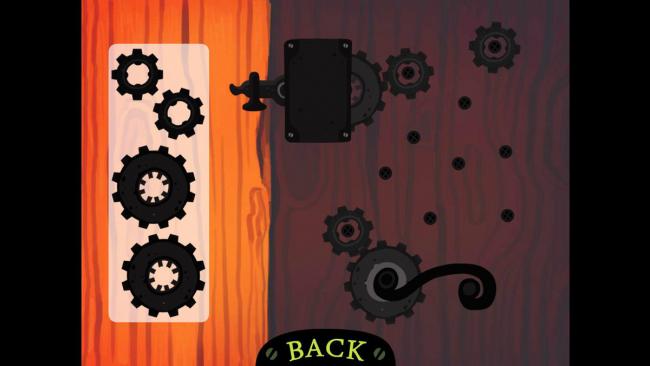
- The latch on the door is broken. You need to connect the cogs so it can open.
- The cogs already on the door won’t move, so you have four cogs to work with.
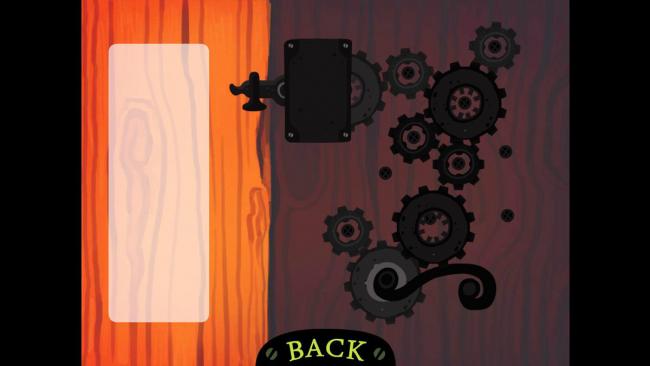
- Place the cogs as displayed above, and then pull the door handle to open the door to the Tree House.
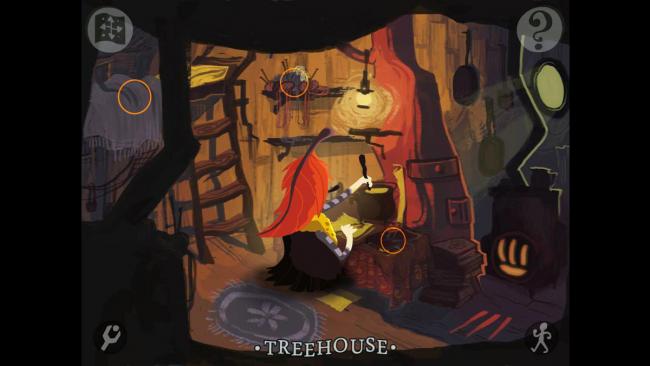
- Examine the pile of yarn on the shelf above the person.
- Examine the blanket on the left-hand side of the screen.
- Examine the book on the table near the person’s right hand. This completes the Case File Notes for the Tree House.
- Speak to the person. This is Lady Weybridge. Select any of Grimoire’s response to her first question and the interrogation begins.
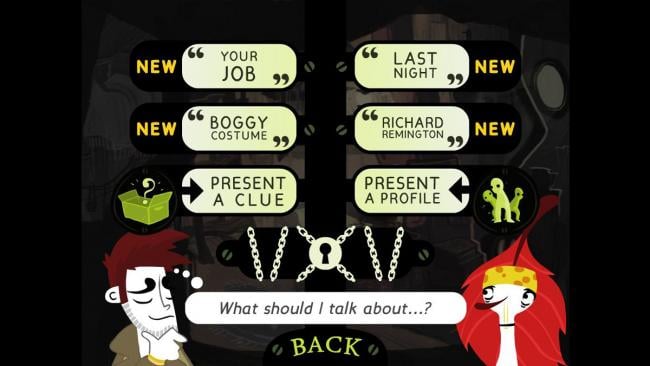
- Ask about “Your job.” Weybridge is a chemist who’s lived in the Tree House for sixty years.
- Ask about “Last night.” Weybridge was at home alone last night.
- Ask about “Boggy costume.” Weybridge comments the costume is poorly designed and that she once offered Remington some homemade fabric as a peace offering.
- Ask about “Richard Remington.” Weybridge comments that hunters have come to the swamp numerous times in the past.
- Ask to “Present a clue.” Show her the HUNTING PHOTO. Weybridge says one of the men has hunted in the swamp even after it became a protected area.
- Ask to “Present a clue.” Show her the SWAMP JUICE. You’ll enter a close-up.
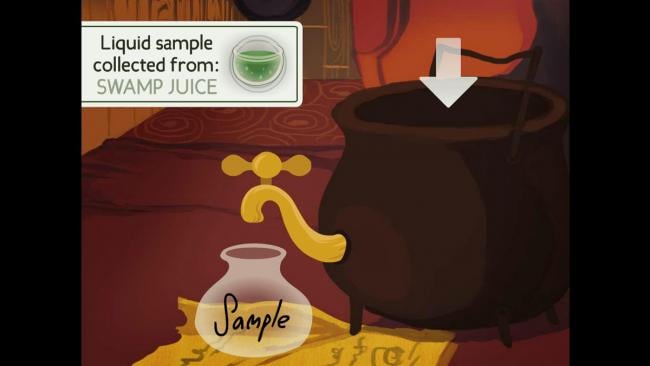
- Drag the green Swamp Juice into the cauldron and click the faucet.
- Then you need to match the color of the ingredients to the juice (green).
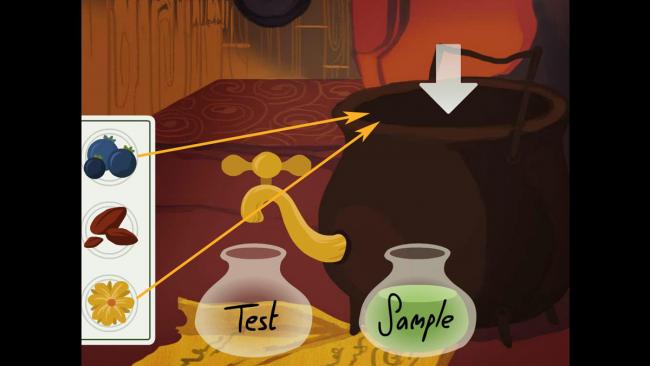
- Drag the blueberries and yellow flower into the cauldron and click the faucet.
- Ask to “Present a clue.” Select the FIREPLACE POKER. This also has liquid on it.
- Drag the liquid to the cauldron and click the faucet. This one is also green.
- Drag the blueberries and yellow flower to the cauldron again and click the faucet.
- Ask to “Present a clue” one more time. Select BLACK LEGGINGS.
- Follow the same procedure: drag the sample, then the blueberries and yellow flower.
- Grimoire ponders “There’s something about that green slime…”
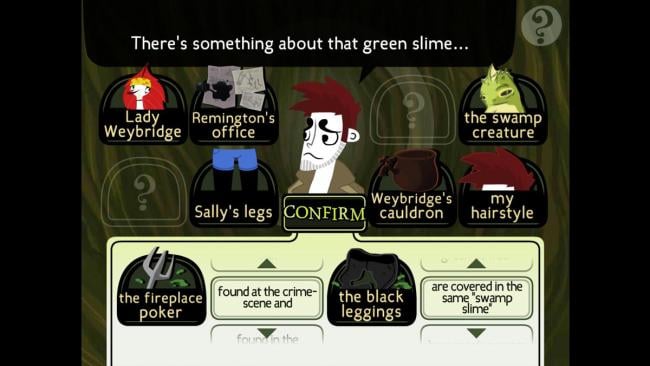
- The correct phrase is “The fireplace poker found at the crime scene and the black leggings are covered in the same ‘swamp slime.'” This unlocks Sally’s Challenge Topic.
- Exit the conversation with Weybridge and leave the Tree House.
- At the Bridge, head west. You’ll enter the Woods. The redheaded girl is sitting here.
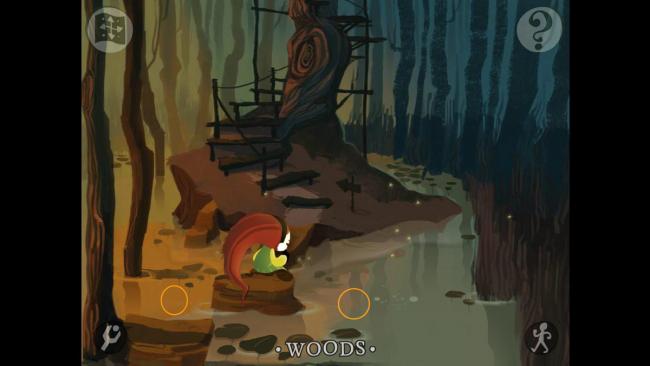
- Examine the water on the left side of the little girl.
- Examine the water on the right side of the little girl. You’ll enter a close-up.
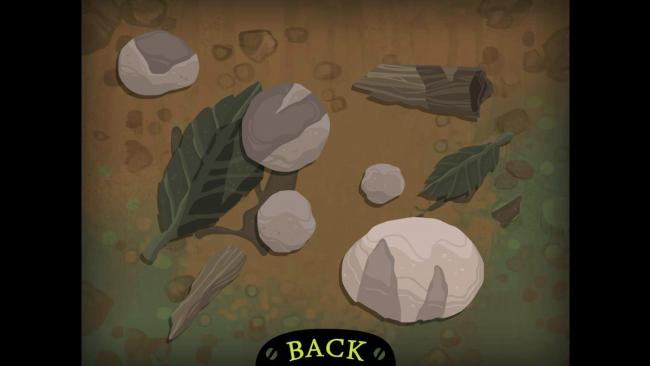
- There are some marks on the ground as well as on the rocks, leaf, and log. You need to move them around to complete an image, like a jigsaw puzzle.
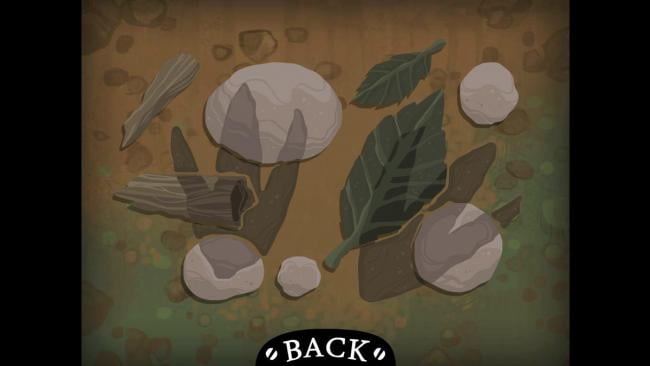
- Put the pieces together as shown above to form two footprints. This completes the Case File Notes for the Woods.
- Speak to the little girl. Select any of Grimoire’s responses to her. She vanishes shortly thereafter.
- Click the move button and head south. You’ll be on the Path in front of the museum.
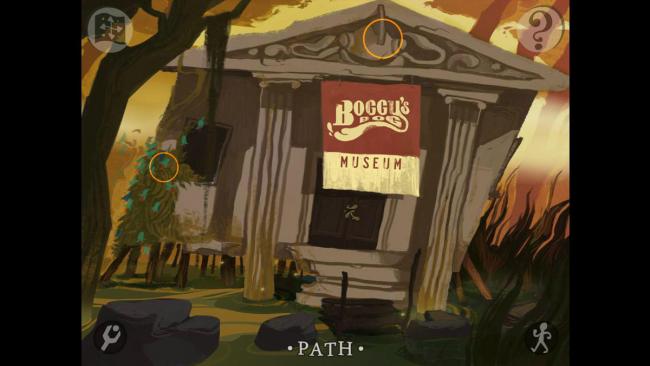
- Examine the blue and red flower bush on the left side of the scene.
- Examine the museum building (not the sign). This completes the Case File Notes for the Path.
- Click the move button and head into the museum via the door.
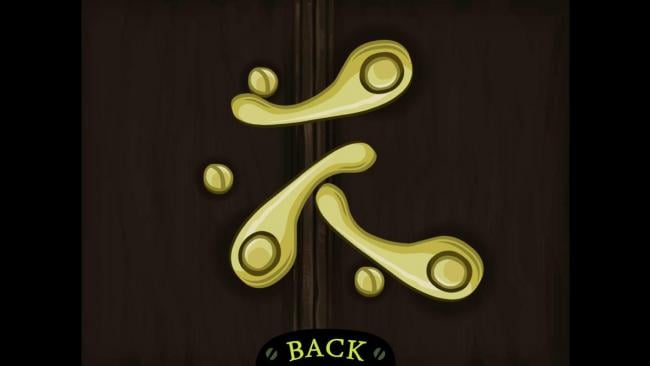
- You’ll enter a mini-game. You need to rotate the brass handles around to form a gap in the middle.
- Move the middle handle up and the right handle to the right.
- Move the middle handle back down and the top handle down and around in a counter-clockwise circle.
- Move the middle handle to the left and the door will open. You’ll be in the museum.
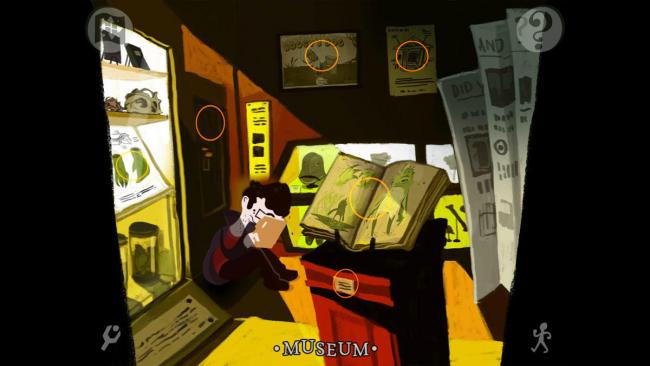
- Examine the book in the center of the room.
- Examine the placard just below the book.
- Examine the yellow poster of the museum on the back wall.
- Examine the door on the left-hand side of the room near the boy.
- Examine the third shelf on the left-hand side, which contains green claws. You’ll enter a close-up.
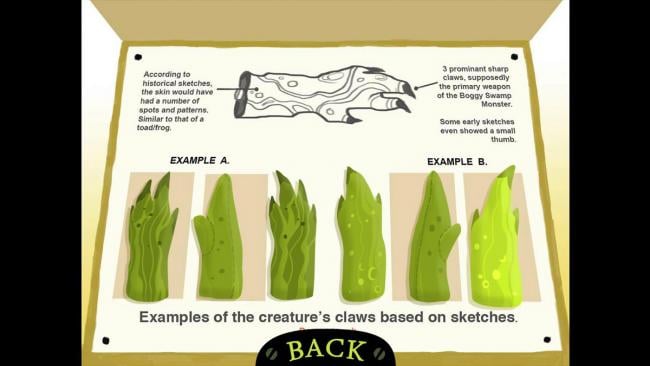
- You need to arrange the claws into pairs.
- Move the dark-spotted glove with fingernails to Example A and the yellow-spotted glove with fingernails to Example B.
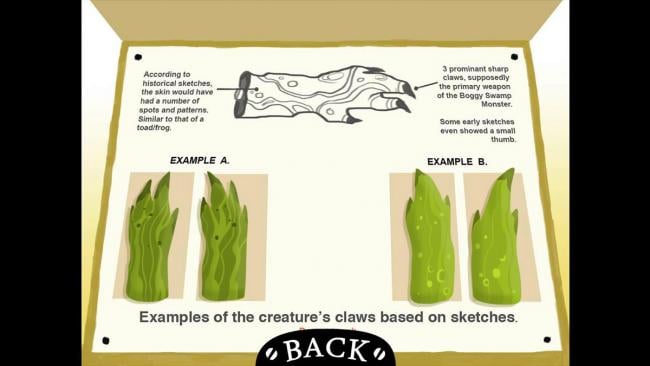
- Grimoire will take the extra set of gloves. Exit the exhibit.
- Examine the “Boggy’s Bog” poster on the back wall. You’ll enter a close-up.
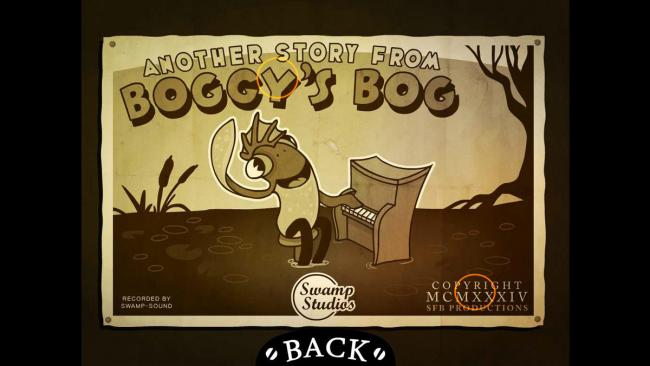
- Examine the copyright on the bottom-right corner.
- Examine the title “Another story from Boggy’s Bog.” This completes the Case File Notes for the Museum.
- Speak to the boy in the corner. He is “Agent” Folder. Select any of Grimoire’s responses and the interrogation begins.
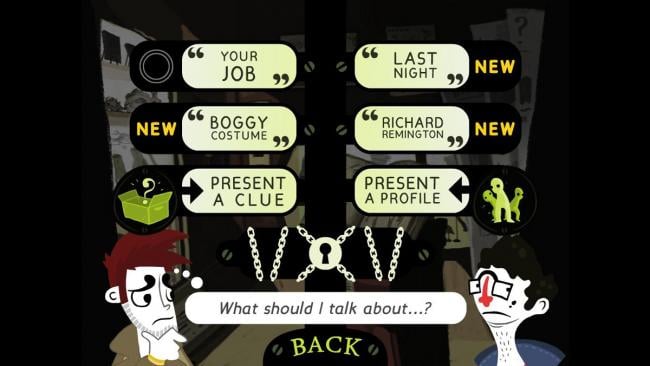
- Ask about “Your job.” Folder claims to come to the museum day and night to research Boggy.
- Ask about “Last night.” Folder admits to breaking into the museum via lockpick but says he lost his better lockpick recently.
- Ask about “Boggy costume.” Folder says the costume is a poor mixture of the cartoon character and mythical being.
- Ask about “Richard Remington.” Folder says the museum was not part of Remington’s tourist attraction.
- Ask to “Present a clue.” Show Folder the BOGGY HAT. He says it does not resemble the real Boggy.
- Ask to “Present a clue.” Show Folder the GLOVES. He says it’s missing claws the real creature has.
- Ask to “Present a clue.” Show Folder the FLIPPERS. He says no one knows what the real Boggy’s feet look like.
- Ask to “Present a clue.” Show Folder the HUNTING PHOTO. This doesn’t affect your case files, but it does elicit an eerie response.
- Ask to “Present a profile.” Ask about Echo. Folder says he was asking about Boggy’s appearance.
- Exit the conversation with Folder.
- He mentioned losing his lockpick in one of the darker corners of the swamp. Return to the Outside Office.
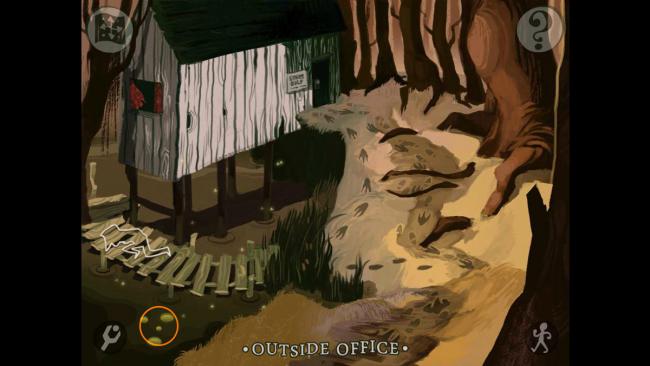
- Click on the water in the bottom-left corner. You’ll enter a close-up.
- There’s a lockpick trapped in a maze of weeds. You need to follow the path of the weed wrapped around the lockpick back to the number at the top.
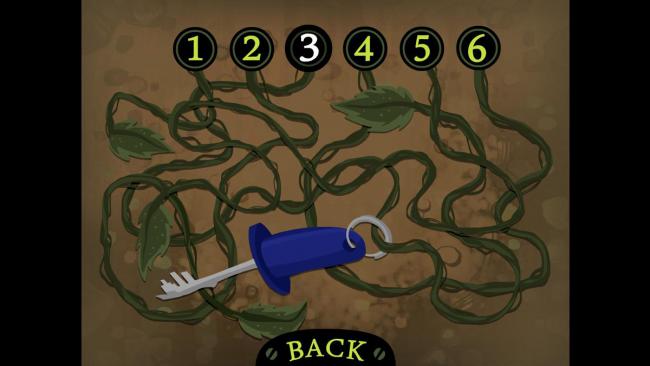
- The correct number is 3. You’ll retrieve the lockpick.
- Let’s go talk to Sally—use your map to return to the Gift Shop.
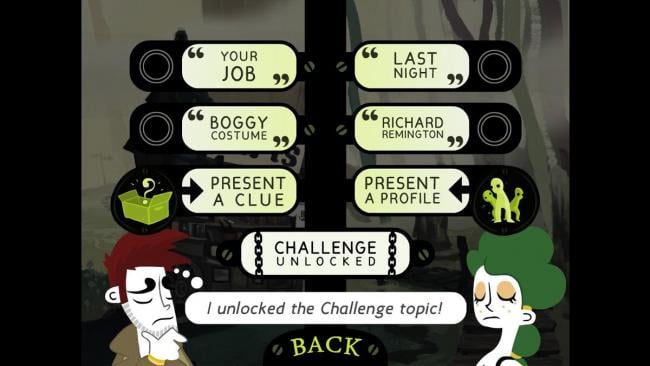
- Select Sally’s Challenge Topic. Grimoire brings up her black leggings which are covered in the same slime as the murder weapon.
- When Sally asks what your angle is, select “Your black leggings were part of the murderer’s costume.”
- When Sally asks what you notice about the leggings, select “They’re loose and stretched.”
- Sally gives you a wind-up toy souvenir. Click and hold on its knob to wind it up and then let go.
- Select “Present a clue” and show the LOCKPICK to Sally.
- Grimoire ponders, “I need to ‘pick’ my questions carefully…”
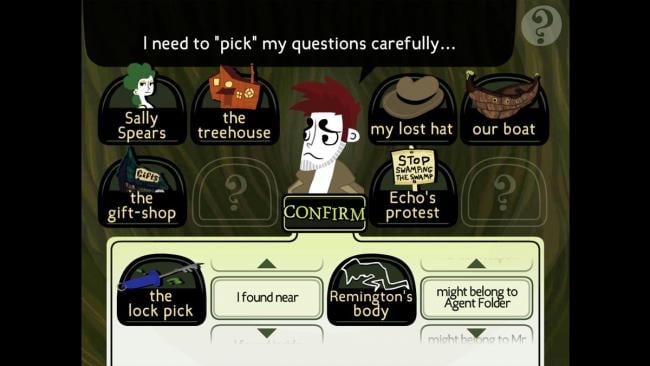
- The correct phrase is “The lockpick I found near Remington’s body might belong to Agent Folder.” This unlocks Folder’s Challenge Topic.
- Exit the conversation with Sally.
- Let’s return to Lady Weybridge. Open your map and go to the Tree House.
- Speak to Weybridge. Select “Present a clue” and show her the GLOVES.
- This enters the liquid test again. Place the slime into the cauldron and then put the blueberries and yellow flower in. It’s the same slime as before.
- Select “Present a clue” and show her the LOCKPICK.
- This enters the same liquid test that is also solved with blueberries and the yellow flower.
- Select “Present a clue” and show her the EXPLORER’S JOURNAL.
- Grimoire ponders “I’m supposed to ‘look to the past,’ right…?”
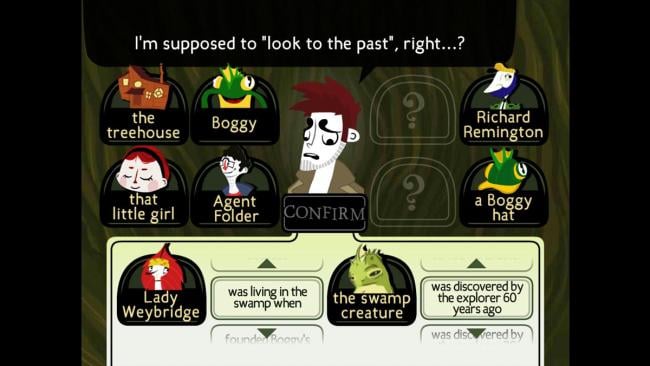
- The correct phrase is “Lady Weybridge was living in the swamp when the swamp creature was discovered by the explorer 60 years ago.” This unlocks Lady Weybridge’s Challenge Topic.
- Select Weybridge’s Challenge Topic. Select “You were living in the swamp when the explorer visited 60 years ago…”
- Select “There’s a page missing from the journal. I think you know where it is…”
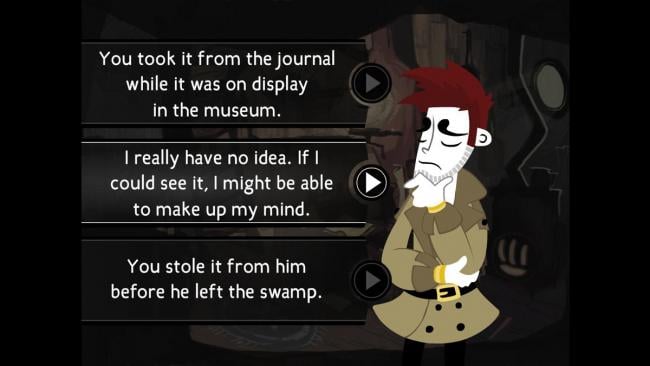
- Select “I really have no idea. If I could see it, I might be able to make up my mind…”
- You’ll receive the missing page from the journal, which shows a drawing of a young Lady Weybridge. You’ll enter a close-up of the drawing.
- Click and drag the page to the left or right to flip it over. There are footprints drawn on the back.
- Exit the conversation. Let’s go talk to Echo again. Open your map and return to the Protest.
- Speak to Echo. Select “Boggy costume.” Echo admits to being a huge fan of the Boggy cartoons.
- Select “Richard Remington.” Echo says Remington was an expert at ignoring him.
- Ask to “Present a clue.” Show Echo the FIREPLACE POKER. He comments that Remington was attacked by something with claws, wasn’t he?
- Ask to “Present a clue.” Show Echo the HUNTING PHOTO. He responds rather mysteriously, saying the photo is very important.
- Ask to “Present a clue.” Show Echo the EXPLORER’S JOURNAL. He again comments on his love of Boggy the cartoon character.
- Ask to “Present a profile.” Show Echo Agent Folder. He comments that they get along well.
- Ask to “Present a profile.” Show Echo Harper. He mentions that maybe Harper—and everyone—will leave after all of this.
- Exit the conversation.
- Examine Echo’s tent. We’ve seen a few numbers throughout the game, but knowing Echo’s fondness for the Boggy cartoon show, what might his combination be?
- It’s the copyright date found on the Boggy cartoon poster in the Museum, 1934.
- Examine the padlock and input 1934.
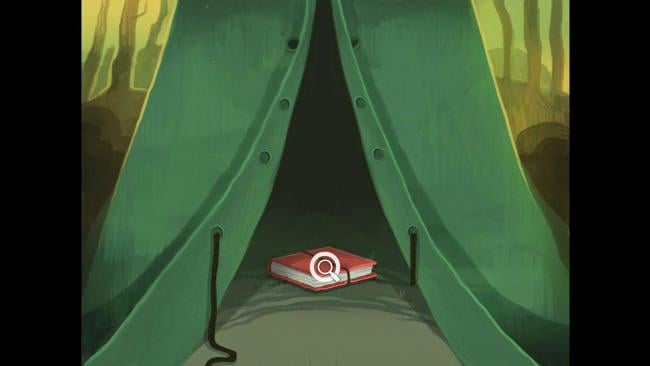
- The tent will open and reveal a red book. Examine the book.
- Return to the Crossroads. The little girl is here now.
- Speak to the little girl. She begs you not to take Boggy away. Choose any of the answers.
- She’ll thank you for not taking Boggy away and vanish again.
- Let’s go see Folder again. Open your map and return to the Museum.
- Speak to Folder. Select “Present a clue” and show Folder the WIND-UP TOY. He comments Boggy’s feet are usually hidden by that bucket.
- Select Folder’s Challenge Topic.
- You’ll need to select a clue to show him. Select the LOCKPICK.
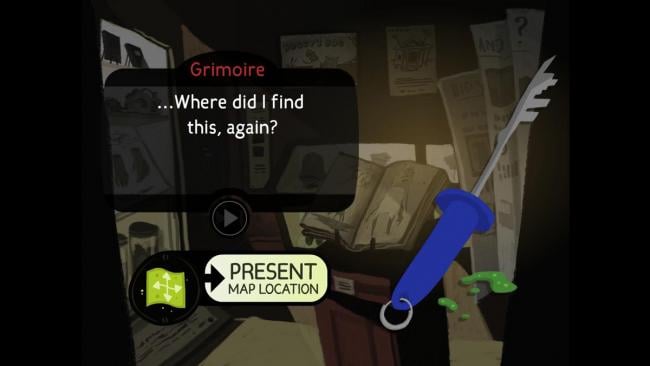
- You’ll then need to select where you found it. Select the Outside Office.
- Then select “You already admitted to owning a lockpick and using it [to] open locked doors…”
- Then select “You lost your lockpick in the swamp and had to buy a new one…”
- Chapter Three ends.
Chapter 4: The Beginning of the End
Overview: Having explored the swamp completely and discovered all the possible clues, Grimoire returns to Officer James to discuss the case and put all of the pieces of evidence together.
- At this point, you should have 100% of your Suspects, Clues, and Notes filled out in the Case File.
- Return to Officer James by opening the map and selecting Swamp Dock.
- Speak to Officer James. Select “I didn’t find him.”
- Then select “I don’t need to.”
- Note: This begins the ending sequence of the game. If you wish to go back and explore more, you can choose “back” at the chapter screen. After finishing the game, reloading your save file will bring you back to this point so you can still explore freely.
Final Chapter: Boggy’s Criminal Record
Overview: Grimoire proves to Officer James that Boggy is not the culprit.
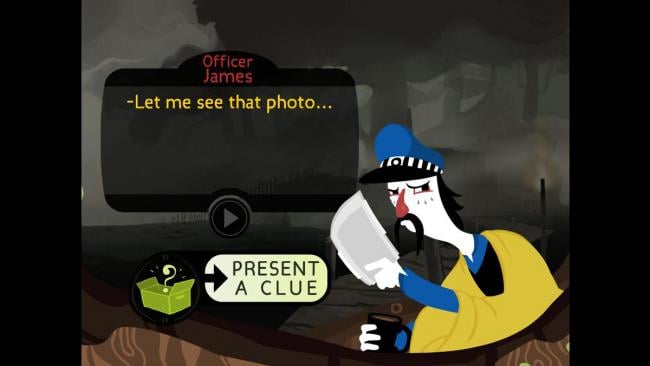
- Officer James will interrogate Grimoire about what he’s learned. He asks to see photographic evidence of Boggy from last night, “Let me see that photo…”
- Show him B&W PHOTO.
- He asks “If that’s not Boggy, what is it?”
- Show him COSTUME DESIGN.
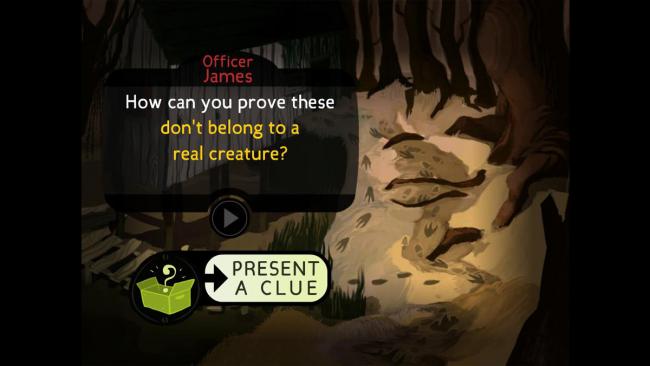
- He asks about the footprints at the scene of the crime, “How can you prove these don’t belong to a real creature?”
- Show him MISSING PAGE.
- Officer James asks “How do you explain the three wounds on the victim’s chest?”
- Show him FIREPLACE POKER.
- Officer James comments on the slime and Grimoire says “But that slime…it’s not exactly what you think.”
- To support this, show him SWAMP JUICE.
- Grimoire then brings up the poisoned hot dog. To explain why Remington was poisoned, select “To make sure Remington got ill and had to return to his office.”
Final Chapter: The Murder
Overview: Grimoire lays out the exact events of the murder and solves the final, missing clue.
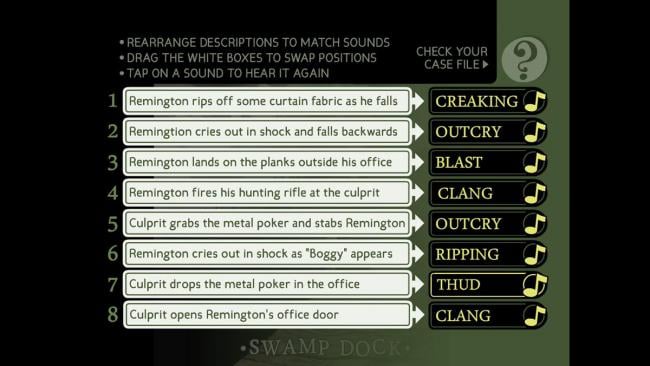
- The discussion continues. Officer James asks about the audio clues you received from Van de Peer. You’ll enter a mini-game.
- You need to rearrange the descriptions so they are lined up with the appropriate sound. You can click on an audio track to hear it again. To move the descriptions, just click and drag them up or down. They’ll automatically swap places as you drag.
- The correct order is: 1. Culprit opens Remington’s office door, 2. Remington cries out in shock as “Boggy” appears, 3. Remington fires his hunting rifle at the culprit, 4. Culprit grabs the metal poker and stabs Remington, 5. Remington cries out in shock and falls backwards, 6. Remington rips off some curtain fabric as he falls, 7. Remington lands on the planks outside his office, 8. Culprit drops the metal poker in the office.
- Officer James then asks about the torn curtain fabric: “Why wasn’t it found at the crime scene? What happened to it?”
- Show him HEAD PIECE.
- Officer James then asks what about the culprit? Wasn’t he shot? How did he escape?
- You’ll enter drawing mode to answer this.
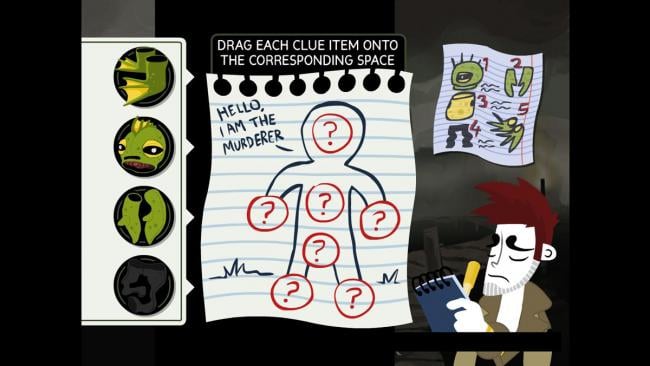
- You need to drag the pieces of the Boggy costume onto their appropriate location on the drawing.
- Put the head piece on the head, the claws on either arm (they’ll split), the leggings on the legs, and the flippers on the feet, leaving one question mark on the stomach.
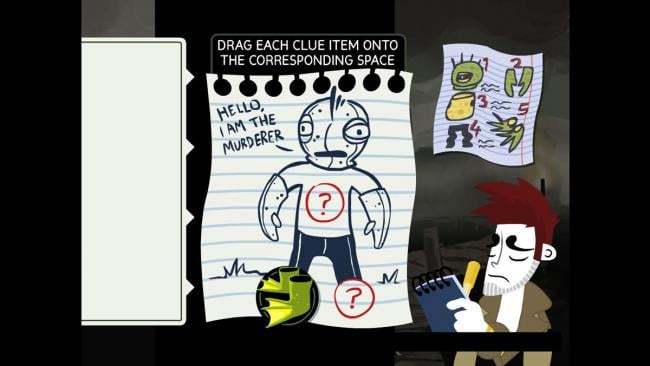
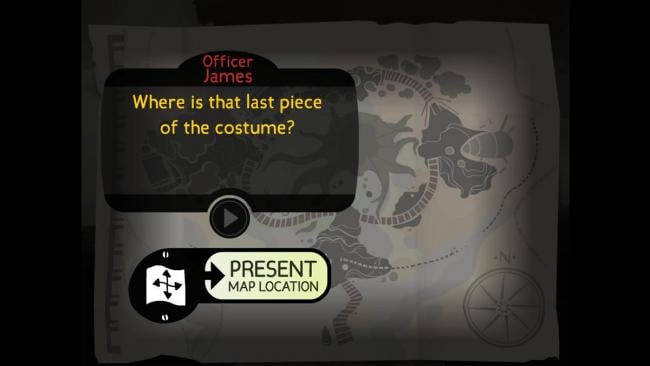
- Grimoire never found the torso piece. Officer James asks “Where is that last piece of the costume?”
- Select the Protest.
Final Chapter: Epilogue
- Grimoire and Officer James confront Echo. James asks why would Remington point a gun at Boggy, a scientific specimen and tourist attraction?
- Grimoire ponders it doesn’t make sense, “Not unless…you’re in on the secret.”
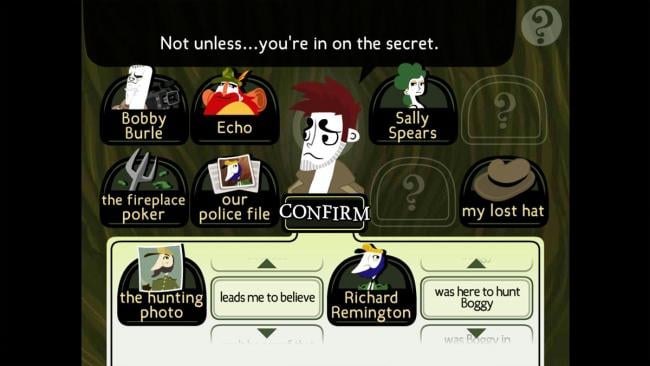
- The correct phrase is “The hunting photo leads me to believe Richard Remington was here to hunt Boggy.”
- Echo admits to the crime and claims that his plan was to get the whole park shut down.
- Choose any of Grimoire’s responses.
- Choose any of his next set of responses.
- Watch the conclusion…although Grimoire’s work isn’t quite finished, this game is!
Tricky Spots
- This section will contain spoiler-free tips on specific areas you may be stuck on if not following the walkthrough. Try these hints first before reading the walkthrough.
- “I failed someone’s Challenge Topic.” – There’s only one Challenge Topic you can “fail,” and it’s set up this way on purpose. If you choose the wrong answer for a Challenge Topic, you can always retry the Challenge until you get it right again.
- “I’m missing one Clue from my list of items.” – While this could be any number of clues, the easiest one to overlook is Folder’s lockpick. He mentions it during a longer conversation and it’s located in an entirely different location. If you don’t have the lockpick, try searching watery areas of the swamp.
- “I’m missing a Note on Remington’s Office.” – Two of the Notes in the Office are very similar. Be sure to explore all the objects you see here, even if some of them seem the same.
- “My Crime Scene and Boggy Costume Clues are blank.” – These are just stand-ins for larger items that can’t actually fit into a single slot. They appear in your Clues once you discover them and will remain “blank” the entire game; this is normal.
- “I can’t get into Echo’s tent.” – Echo’s tent is locked with a padlock that requires a 4-digit combination. This combination does exist in the game, but it’s very easy to overlook. After you’ve covered all conversation topics with Echo, think about what he loves and where something related to that exists…the walkthrough contains the exact combination if you prefer.
Congratulations!
You have completed Gamezebo’s walkthrough for Detective Grimoire. Be sure to check back often for game updates, staff and user reviews, user tips, forums comments and much more here at Gamezebo!
More articles...
Monopoly GO! Free Rolls – Links For Free Dice
By Glen Fox
Wondering how to get Monopoly GO! free rolls? Well, you’ve come to the right place. In this guide, we provide you with a bunch of tips and tricks to get some free rolls for the hit new mobile game. We’ll …Best Roblox Horror Games to Play Right Now – Updated Weekly
By Adele Wilson
Our Best Roblox Horror Games guide features the scariest and most creative experiences to play right now on the platform!The BEST Roblox Games of The Week – Games You Need To Play!
By Sho Roberts
Our feature shares our pick for the Best Roblox Games of the week! With our feature, we guarantee you'll find something new to play!All Grades in Type Soul – Each Race Explained
By Adele Wilson
Our All Grades in Type Soul guide lists every grade in the game for all races, including how to increase your grade quickly!


 “
“