- Wondering how to get Monopoly GO! free rolls? Well, you’ve come to the right place. In this guide, we provide you with a bunch of tips and tricks to get some free rolls for the hit new mobile game. We’ll …
Best Roblox Horror Games to Play Right Now – Updated Weekly
By Adele Wilson
Our Best Roblox Horror Games guide features the scariest and most creative experiences to play right now on the platform!The BEST Roblox Games of The Week – Games You Need To Play!
By Sho Roberts
Our feature shares our pick for the Best Roblox Games of the week! With our feature, we guarantee you'll find something new to play!Type Soul Clan Rarity Guide – All Legendary And Common Clans Listed!
By Nathan Ball
Wondering what your odds of rolling a particular Clan are? Wonder no more, with my handy Type Soul Clan Rarity guide.
Layton Brothers: Mystery Room Walkthrough
Layton Brothers: Mystery Room is a point-and-click detective game by Level-5. In this game, you will take on the role of Lucy Baker as she investigates crime scenes and solves murders through acquisition of evidence and answering of questions. Gamezebo’s walkthrough will provide you with detailed images, tips, information, and hints on how to play your best game.
Game Introduction – Layton Brothers: Mystery Room
Layton Brothers: Mystery Room is a point-and-click detective game by Level-5. In this game, you will take on the role of Lucy Baker as she investigates crime scenes and solves murders through acquisition of evidence and answering of questions. Gamezebo’s walkthrough will provide you with detailed images, tips, information, and hints on how to play your best game.
The Basics
Movement and Exploration

- Tap and slide with one finger left or right to rotate the view within the crime scene reconstruction, allowing you to face an entirely different direction.
- Tap and slide with two fingers to move the viewpoint around to reach areas outside your immediate vicinity.
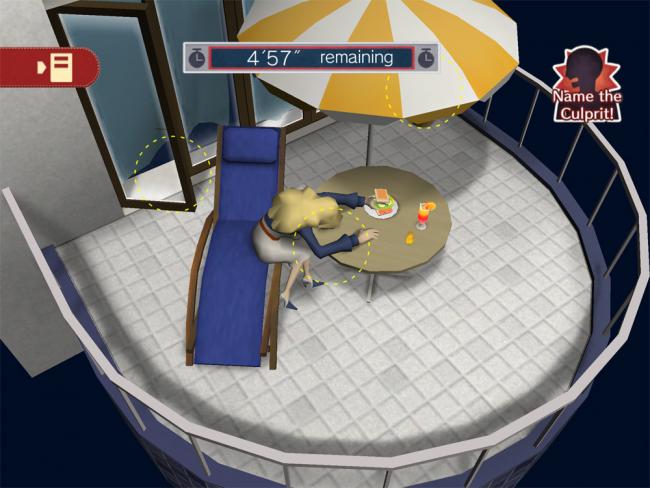
- Points of interest are highlighted by a dotted line; you can zoom in on these by tapping within the dotted area.
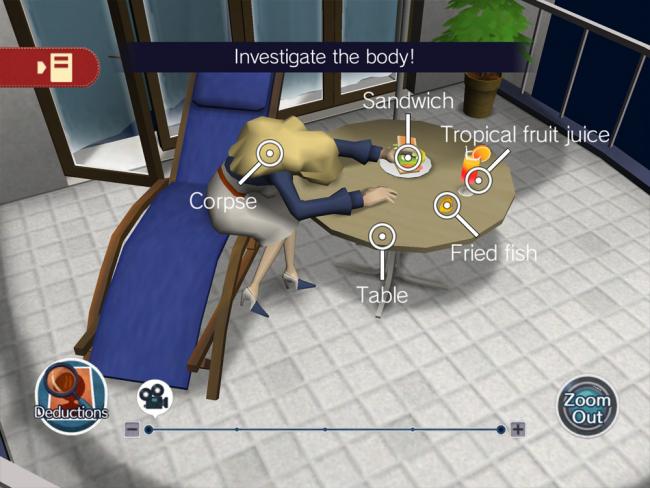
- When inside a close-up of a dotted area, you can use the camera icon to zoom in and out by sliding right and left, respectively. Zooming in will often display items too small or hidden to see from the initial viewpoint.
- The Zoom Out button returns you to the overall crime scene where you can pick another dotted area of interest.
- Objects that can be investigated within the close-up view are highlighted with a white circle and their name. Tapping on these will enter them into evidence.
- Note: even within the 5-minute investigation period, time pauses when you select the Menu or examine an area of interest, so don’t feel rushed when reading clues.
Reviewing Evidence
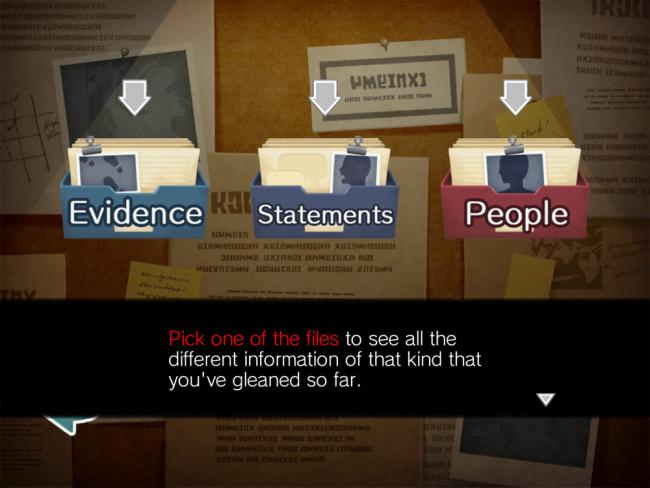
- You can review collected evidence and case files at any time during a case.
- From the crime scene reconstruction or deductions menu, tap on the red notebook icon in the upper-left corner.
- From questioning or interrogation sessions, tap on “Check Files” in the upper right corner.
- There are three types of files listed: Evidence, Statements, and People.
- Evidence will display all of the evidence Lucy has collected thus far, listed on individual note cards with brief descriptions. Evidence that has been updated after additional investigation will be displayed on a gold card.
- Statements lists the statements given by each suspect or relevant person to a case. You usually begin a case with multiple statements that will be updated as more information is gathered.
- People displays the people relevant to a case, including suspects and victims, and the data known about them.
Solving Deductions
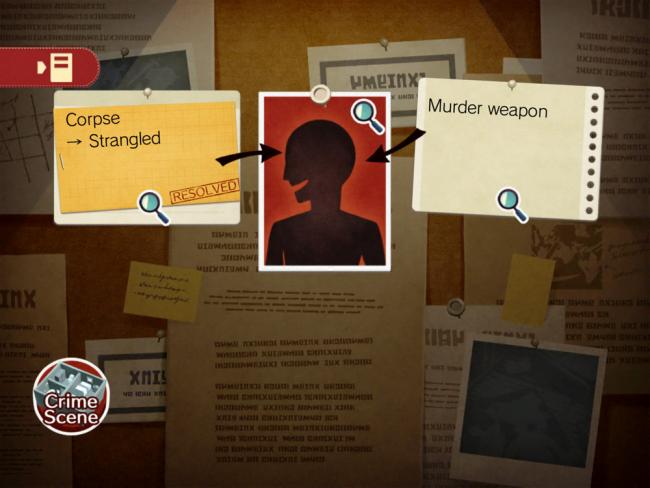
- Your primary goal in every case is to resolve a series of deductions that remain unanswered. Deductions vary from finding out the cause of murder to actually figuring out who is the killer.
- Deductions appear as memo cards on a bulletin board backdrop. There is usually a blank portrait in the center which indicates you do not have a clear suspect yet.
- As deductions are resolved, new ones will open up and require Lucy to investigate the crime scene further.
- Once all deductions have been solved, you’ll tap on the portrait to select your suspect and then begin interrogating him.
- When you think you’ve solved the crime, select “Name the Culprit.”
Order of Events
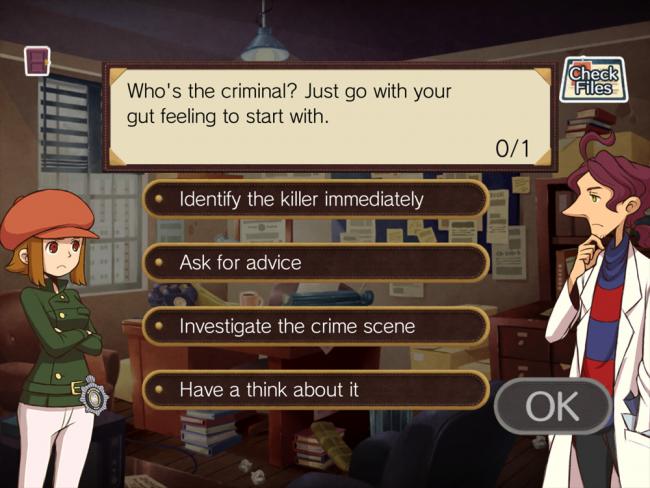
- At the beginning of most cases, Alfendi will ask you to select a suspect based on your gut. You can then choose one of four answers: Identify the killer immediately, Ask for advice, Investigate the crime scene, or Have a think about it.
- Identify the killer immediately: select a suspect and Alfendi will comment with his own idea of who the killer is. You’ll speak with this suspect and then go to the deductions menu.
- Ask for advice: Alfendi offers suggestions on how to pick a suspect and where to investigate. You’re then given the same four options to choose from.
- Investigate the crime scene: Lucy receives 5 minutes to investigate the crime scene freely before naming a culprit, hearing Alfendi’s guess, and interrogating that suspect.
- Have a think about it: Alfendi will offer his guess as to the culprit and the suspect will be brought in for questioning, after which you’ll begin working through deductions.
- Since the 5 minute “Investigate the crime scene” period is optional and provides no benefit to solving the case, this walkthrough will begin with the deduction section of every crime.
Unfailable Cases
- Note: Layton Brothers: Mystery Room provides a fairly laid-back approach to crime-solving. Even if you select an incorrect piece of evidence or answer to a question, Layton will merely hint that you are off track and give you another chance—indefinitely, until you get it right.
- Later cases provide a slightly stricter punishment to grossly incorrect choices—you may be forced to re-answer some questions, but there is ultimately no failure state. So investigate freely!
File No. 001: The Hand Sandwich
Overview: A young woman, Sandy Aldwich, is murdered on her hotel terrace and found with her hand inside a fish sandwich. Lucy and Alfendi must investigate the crime scene and uncover the culprit from among three suspects.
- Open File No. 000: “Freshly Baker.”
- This is merely an introduction to the game / case and will introduce you to the main character, Deputy Constable Baker, the Commissioner, and Alfendi Layton.
- After the cutscenes and dialogue are over, open File No. 001: “The Hand Sandwich.”
- Lucy will introduce herself to Alfendi Layton and they’ll begin working on their first murder case.
- Read all the evidence provided by Layton regarding the murder and its three suspects.
- When Layton finishes speaking, select “Check Files” to review the available info.
- Layton points out the most intriguing aspect of the case is why Aldwich’s hand ended up in her sandwich.
- Layton introduces Lucy to the crime scene reconstruction. You’ll have five minutes to review the scene for evidence. Feel free to do so, but we’ll skip straight to “Name the culprit” since nothing you uncover is important right now.
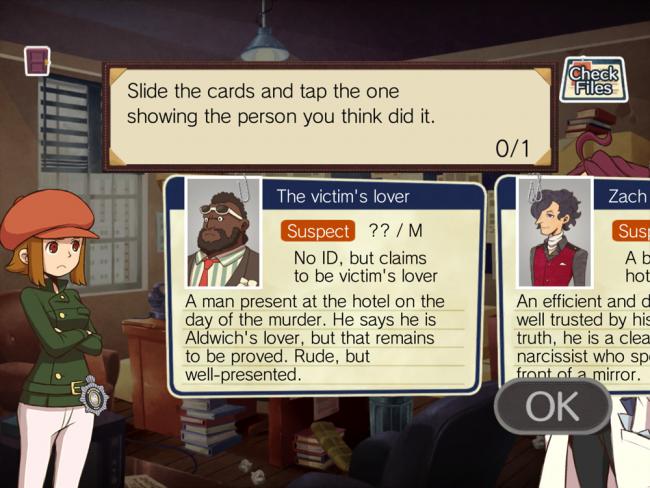
- There is more evidence Lucy and Alfendi will discuss, so this is only a guess. Select the victim’s lover for now.
- After a cutscene discussion with the lover and bellboy, Alfendi and Lucy will begin solving deductions that remain outstanding.
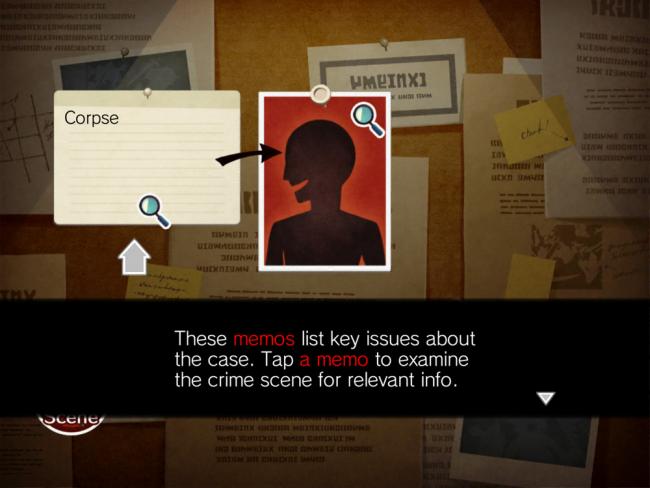
- Tap the deduction card that says “Corpse.”
- Tap on Sandy’s body.
- Tap on Body. Lucy and Alfendi will comment.
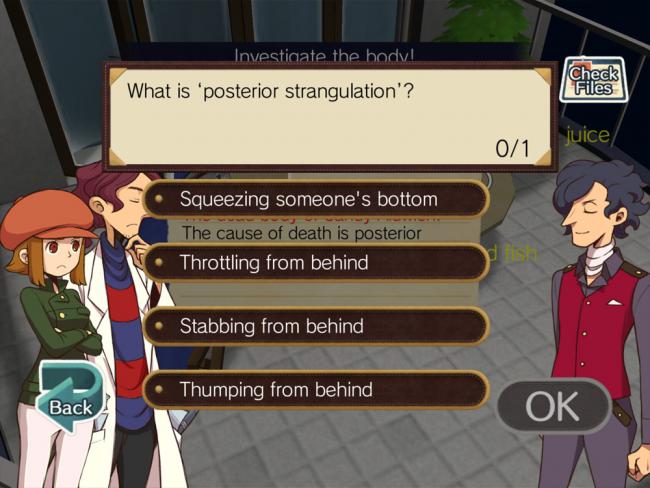
- You’ll be asked “What is ‘posterior strangulation?'”
- Select “Throttling from behind.” You’ll be returned to the deduction screen.
- Select the deduction “Murder weapon.”
- Tap on the plant in the corner. Zoom in again until you see the Tie.
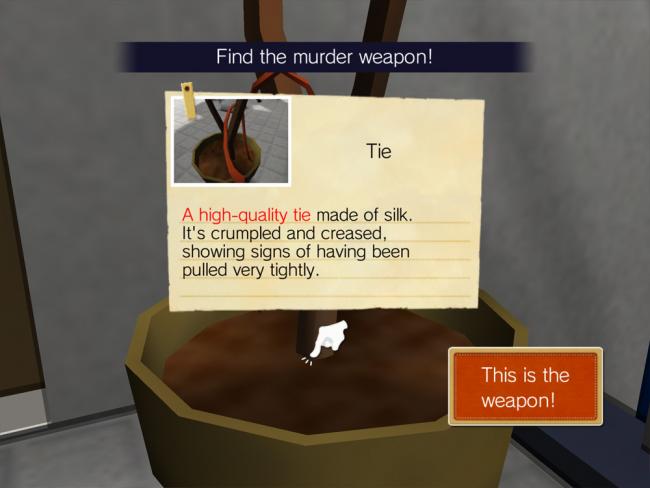
- Tap on the Tie and select “This is the weapon!” The bellboy will confirm it’s the lover’s cravat.
- Back in the memo screen, select “Hand sandwich.”
- Tap on Sandy’s body.
- Tap on Sandwich. Alfendi will adjust the sandwich’s visibility.
- Tap on the NEW area next to Sandy’s body.
- Use the camera icon to zoom all the way into the sandwich and reveal extra details.
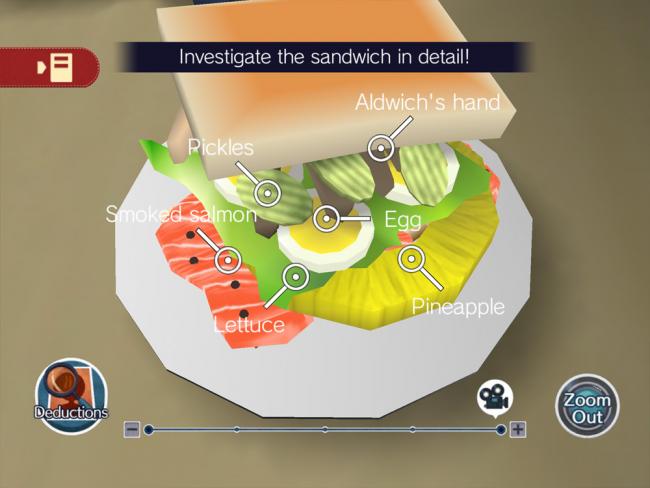
- Tap on each of the areas in any order: Lettuce, Pickles, Smoked salmon, Eggs, Pineapple, Aldwich’s hand.
- Another cutscene begins. Alfendi asks “What was Aldwich trying to convey with her dying message?”
- Select “The killer’s name.”
- Alfendi will then ask “What do you need to look at to read Aldwich’s dying message?”
- Select “The sandwich filling order.” The bellboy comments on what the fillings spell out.
- Alfendi will ask “Who does the victim’s dying message name as the culprit?”
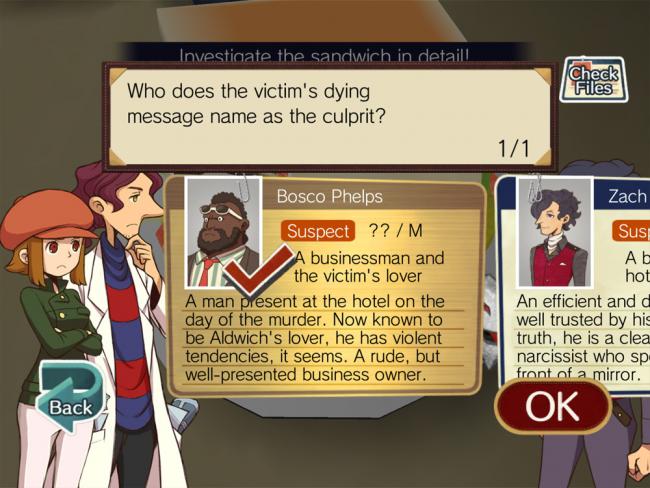
- Select Bosco Phelps and select OK.
- Back at the memo screen, Alfendi will ask you to confirm who you think killed Aldwich.
- Select Bosco Phelps again and select OK.
- Alfendi comments that we’ve been misled by the bellboy and asks again.
- Select Zach Carriére and select OK.
- You’ll receive a new deduction for “Dying message.” Tap on this.
- Alfendi asks Lucy to find proof that Carriére set up Phelps. You now have access to the “Check Relevant Files” option which only shows important data for the task at hand.
- Top on the dotted area where the sandwich is.
- Tap on Sandy’s body and zoom in under the table until you see the Receipt.
- Tap on Receipt and select “Here’s the proof!”
- Alfendi will ask “What’s important about the room service receipt?”
- Select “The spelling of the name.”
- After a discussion and update of statement cards, you’ll receive a final deduction: “Carriére’s mistake.” Select this.
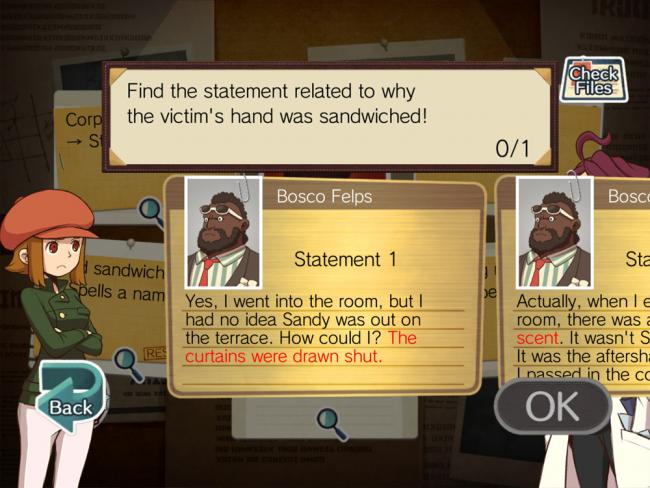
- Alfendi asks you to review the statements made and find the statement related to why the victim’s hand was sandwiched.
- Select “Bosco Felp’s Statement 2,” about the bellboy’s aftershave.
- With that statement, you’ll reach 100% certainty of the killer’s identity.
- Tap on Carriére’s portrait on the memo board to begin the interrogation.
- For question “Who’s the criminal?” select Zach Carriére and tap OK.
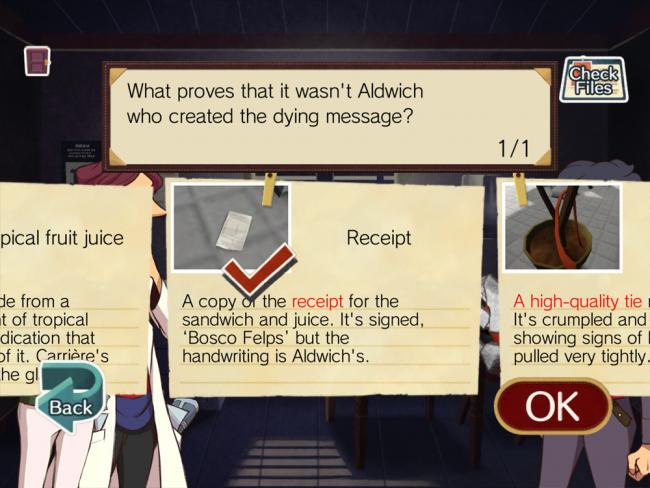
- For question “What proves that it wasn’t Aldwich who created the dying message?” select Receipt and tap OK.
- For question “What evidence shows the dying message wasn’t left in haste?” select Fried Fish and tap OK.
- For question “What’s the real reason the victim’s hand was put in the sandwich?” select “To disguise a smell” and tap OK.
- For question “Where is the wound that Carriére is hiding? Select “On his neck” and tap OK.
- The final accusations are given and Carriére’s guilt is proven—case closed!
File No. 002: The Bungled Burglary
Overview: A man has been murdered in his home while his wife was in the shower. A suspect is in custody, but the evidence isn’t adding up.
- Open File No. 002 from the case menu.
- Alfendi will fill you in on the details and the three suspects:
- When asked “Who’s the criminal? Just go with your gut feeling to start with,” answer as you like. To move straight to deductions, select a culprit.
- Select Goldie Potsby-Mahn and tap OK.
- After a cutscene with Goldie, you’ll be sent to the deduction screen.
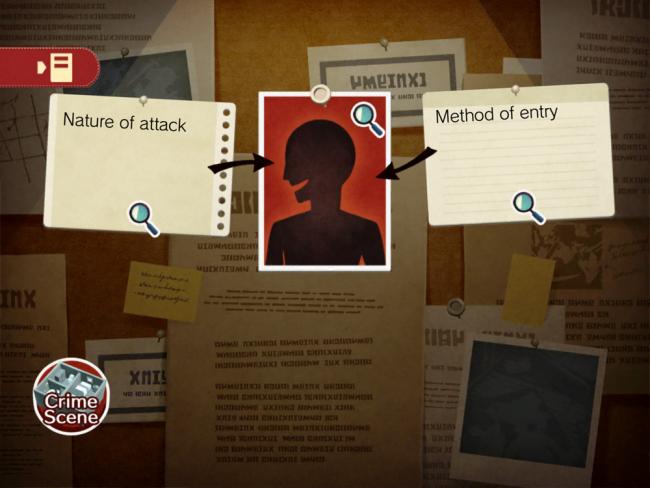
- Select “Nature of attack.” You’ll enter the crime scene reconstruction.
- Tap on Mr. Potsby’s dead body, and then tap on Corpse.
- You’ll notice he was stabbed to death. Lucy needs to find the murder weapon.
- Tap on the Broken Glass next to the body.
- Alfendi will note that the present glass has already been expunged and a series of questions begins.
- To question “What were the circumstances of the stabbing?” select “Totally out of the blue.”
- This resolves the “Nature of the attack” deduction and returns you to the deduction screen.
- Select “Method of entry” next.
- You need to find “Where else could someone get in?”
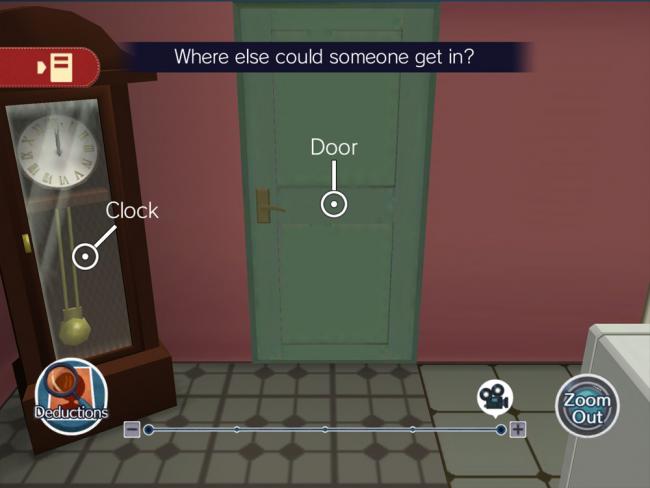
- Tap on the green door and zoom all the way in, then tap on Door.
- Select “This is the way in!”
- After a dialogue with Goldie your directive becomes “Investigate the window!”
- Zoom out to the overall scene and tap on the dead body.
- Tap on Window.
- To question “Was the window smashed from inside or out?” select “From outside on the balcony.” Goldie points out that there is evidence on the balcony.
- Tap on the curtain to enter the balcony.
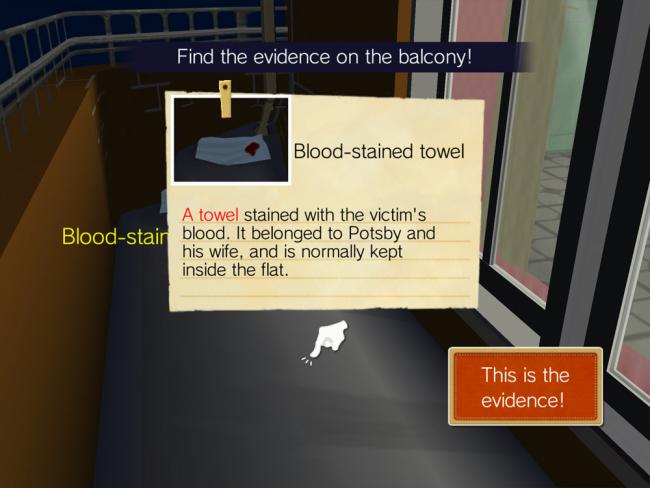
- Use the camera icon to zoom in, then tap on Blood-Stained Towel and select “This is the evidence!”
- Goldie’s statement about the locked balcony and hearing her husband scream is updated. This resolves the second deduction.
- Alfendi and Lucy deliberate and two new deductions are added that must be cleared up.
- Select “Decisive evidence.”
- You’re asked “What evidence belies her statement?”
- Tap on the body and zoom in.
- Tap on Broken Glass.
- When asked “Which statement contradicts what this evidence proves?” select Goldie’s “Statement 1.”
- This resolves the third deduction. Select “The murder weapon.”
- You’re tasked with hunting out the murder weapon.
- Tap on the green door, then zoom in and tap on Clock. New evidence appears near the clock.
- Tap on the NEW area on the clock.
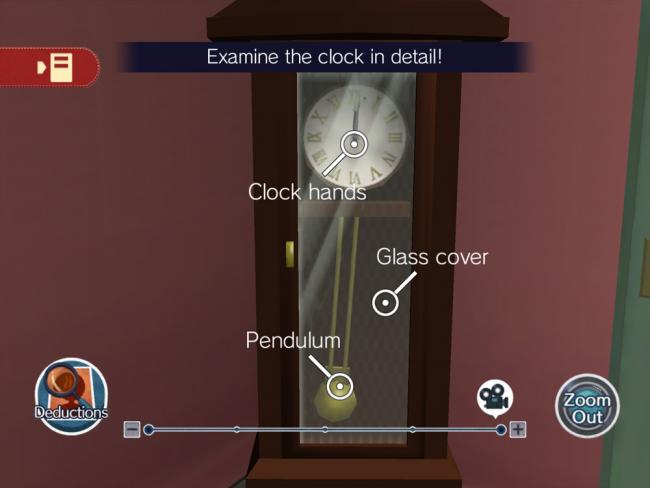
- Use the camera icon to zoom all the way in.
- Tap on Clock Hands to enter “hands of the clock” into evidence.
- Tap on Glass Cover to enter “glass cover” into evidence.
- Tap on Pendulum to enter “pendulum” into evidence.
- After viewing all three pieces of evidence, Alfendi will ask “Which part of the clock was used as the murder weapon?”
- Select “Clock hands” and tap OK. This resolves the final deduction.
- Tap on Goldie’s portrait to begin interrogating her.
- When asked “Was the victim stabbed from the front, back or side?” select “From the back.”
- To question “What suggests the victim couldn’t have been dozing when attacked?” select “The window was smashed.”
- To question “What evidence proves that Potsby-Mahn’s statement is a lie?” select “Broken glass.”
- To question “What does the broken glass show?” select “The timing of the stabbing.”
- To question “Who’s the culprit?” select Goldie Potsby-Mahn.
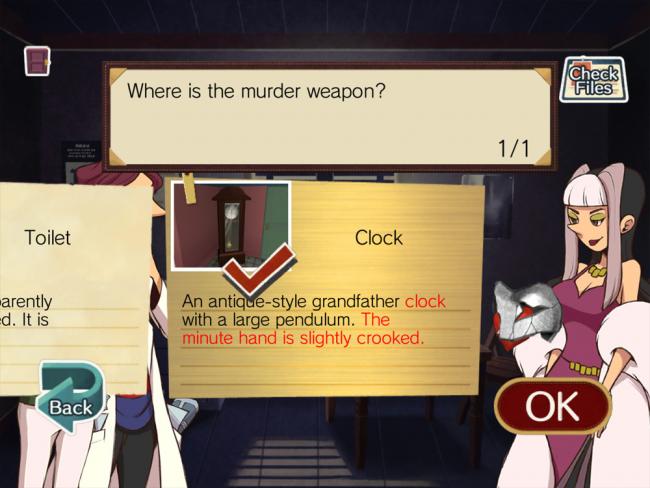
- To question “Where is the murder weapon?” select “Clock.”
- To question “Where did the murder weapon disappear to?” select “Cooking pot.”
- To question “What is the now non-existent murder weapon?” select “A knife made of ice.”
- To question “What was used to mould the knife of ice?” select “Scrap of card.”
- Alfendi and Lucy finish interrogating Goldie and solve the case!
File No. 003: A Murder Staged
Overview: A famous actress is murdered on stage just after the curtains drop. Two actors and a stagehand are the suspects, but there are more players at hand than first believed.
- After the introduction to the case, select “Have a think on it” to receive Alfendi’s guess: Strapping is his prime suspect.
- Strapping will arrive to offer his opinion: that Bray Clegg, the stagehand, is the murderer.
- In the deductions menu, there are two unsolved mysteries: select “Blaise’s wound” first.
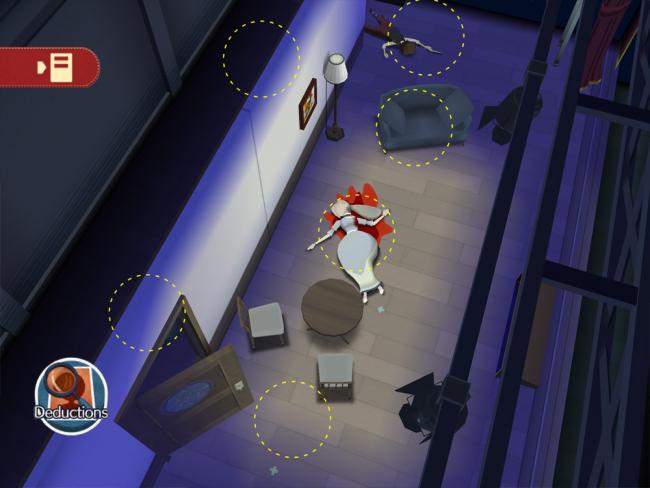
- Tap on Blaise’s bloodstained body.
- Use the camera icon to zoom all the way in.
- Tap on Corpse.
- Alfendi asks you to find the bullet hole made by the bullet’s trajectory. Zoom out.
- Tap on the blue couch.
- Use the camera icon to zoom all the way in.
- Tap on Bullet Hole.
- You now need to find where the shot came from. Zoom out.
- Tap on the floor between the door and chairs.
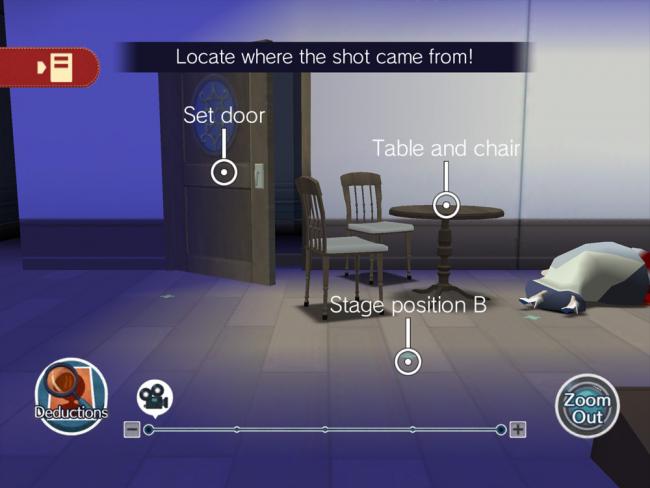
- Tap on Stage Position B and select “It was fired from here!”
- To the question “What proves this is the location from which the killer took the shot?” select “The body and bullet hole placing.”
- After another discussion with Strapping you’re returned to the deductions menu.
- Select “Clegg’s gun.”
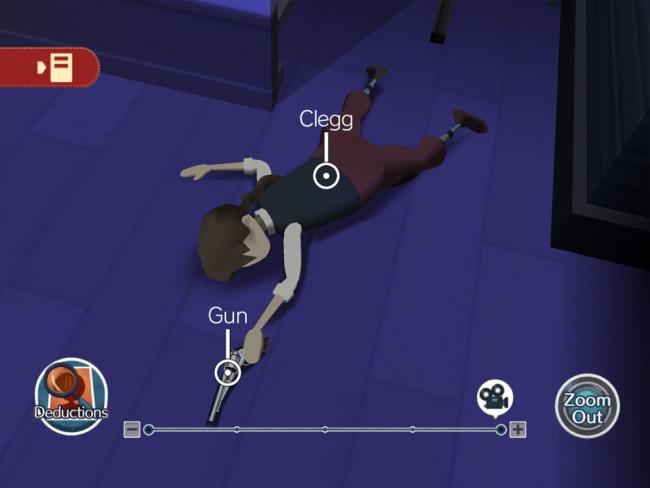
- Tap on Clegg’s body.
- Use the camera icon to zoom all the way in and tap on Gun. Select “This is the murder weapon!”
- You’re asked to find what rogue was holding the gun.
- Tap on Clegg.
- To the question “What’s odd about Clegg knocking himself out to avert suspicion?” select “He was still holding the gun.”
- You’ll be returned to the deductions screen. Select “Death threat.”
- Tap on Blaise’s body and use the camera icon to zoom all the way in.
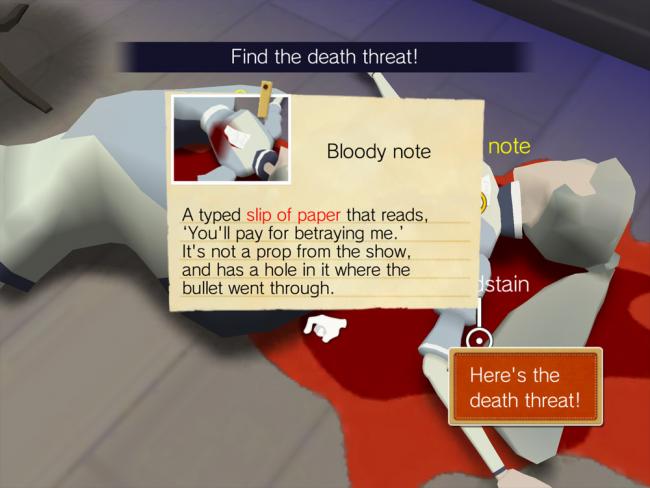
- Tap on Bloody Note and select “Here’s the death threat!”
- After a final discussion with Strapping you’ll receive a new deduction to solve.
- Select “Murder in the dark.”
- Alfendi asks “When was Blaise killed?” Select “During the performance.”
- You now need to prove Blaise died mid-performance.
- Tap on the white wall above the door, leading to the replica gun box behind the stage.
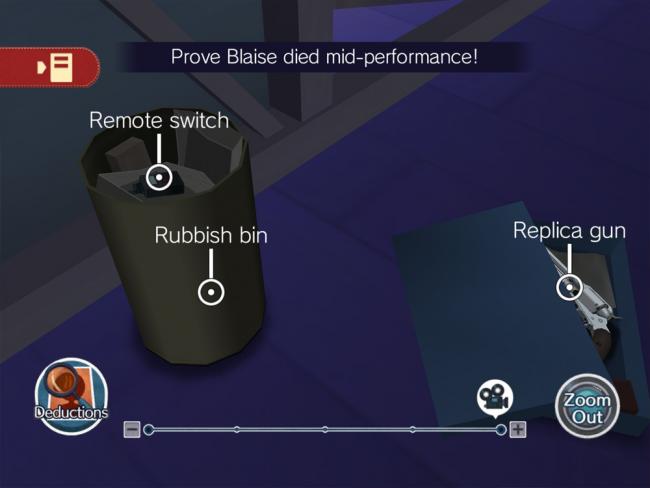
- Use the camera icon to zoom in and tap on Remote Switch.
- To the question “What does the remote control being in the rubbish bin signify?” select “It wasn’t used.”
- Two more deductions now need to be resolved. Select “Scream in the dark.”
- Alfendi asks “Who was it that screamed in the darkness?” Select Destiny Knox and tap OK.
- To the question “Which statement suggests Strapping passed a secret message to Knox?” select Bray Clegg’s “Statement 1.”
- This resolves the scream issue. Select “Shot in the dark.”
- You need to find evidence of a second shot.
- Tap on the white wall leading to the replica gun box behind the stage.
- Tap on Replica Gun and select “This is the evidence!”
- Alfendi asks you to prove Strapping moved around in the dark.
- Zoom out and move up to the floor near the ladder behind stage.
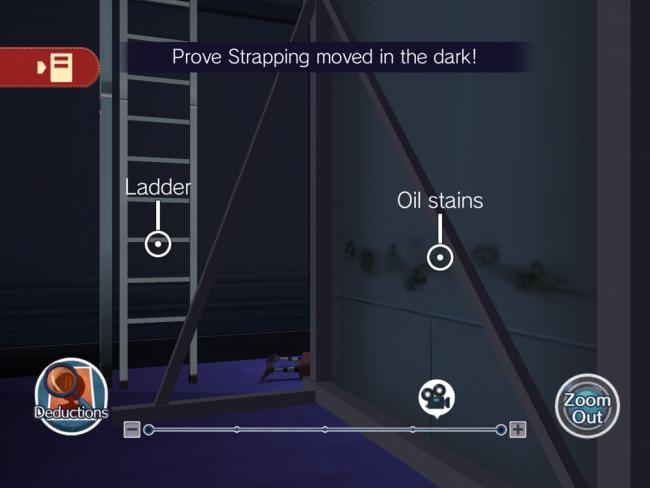
- Tap on the floor to enter a close-up of backstage.
- Use the camera icon to zoom all the way in.
- Tap on Oil Stains and select “This is the evidence!”
- With all deductions solved, it’s time to call Strapping in. Click on his portrait.
- To question “Who’s the criminal?” select Roscoe Strapping and click OK.
- To question “Why would it have been impossible to kill Blaise with a single shot?” select “It was pitch black on stage.”
- To question “Why is Strapping the only possible culprit?” select “He shot the gun in the show.”
- To question “Whose scream did everyone hear in the darkness?” select Destiny Knox and click OK.
- To question “What irrefutable evidence proves that Strapping shot Blaise?” select Remote Switch and click OK.
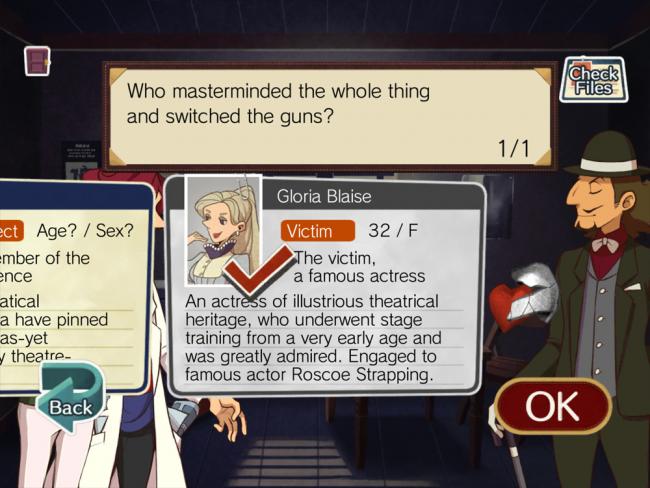
- To question “Who masterminded the whole thing and switched guns?” select Gloria Blaise and hit OK.
- To question “Which piece of evidence reveals the true mastermind behind the case?” select Remote Switch and hit OK.
- To question “What message did Blaise leave for Strapping?” select Death Threat and hit OK.
Lucy and Alfendi finish explaining the events of the murder and the case is solved!
File No. 004: The Walking Corpse
Overview: An archeologist turns up dead in a locked hut while his protégé slept outside. The locals claim it was the work of a demon, but Alfendi and Lucy are sure the murderer is quite human.
- Alfendi’s prime suspect in this case is Careta.
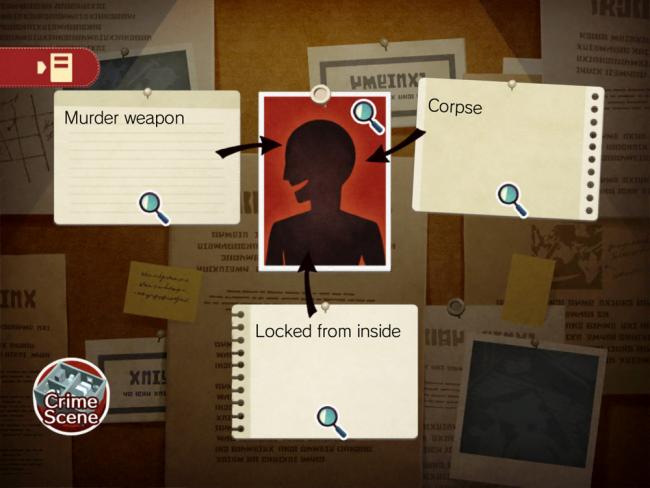
- You’ll begin with three deductions: select “Murder weapon” first.
- Tap on the dead body.
- Use the camera icon to zoom all the way in and tap on the Axe. Select “This is the murder weapon!”
- You now need to find where the weapon came from.
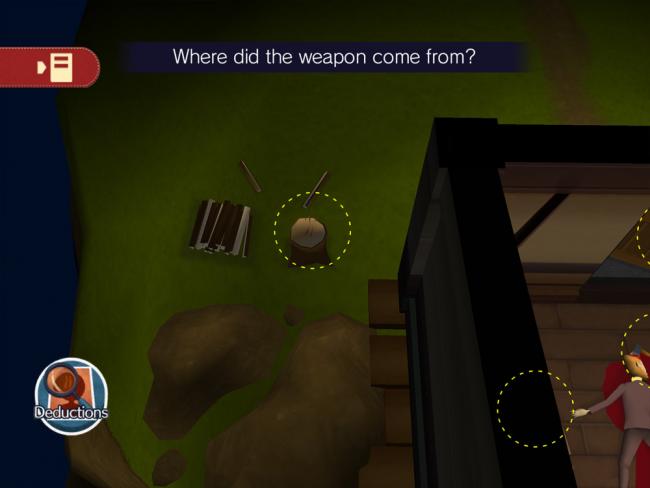
- Tap on the area just outside where the wood pile is. (If you slide to the left, it’s easier to see.)
- Tap on Chopping Block and select “Here’s the weapon!”
- This solves the first deduction. Select “Corpse” next.
- Tap on the dead body.
- Use the camera to zoom all the way in and tap on Corpse.
- You now need to find what proves the body moved.
- Use the camera icon to zoom back out.
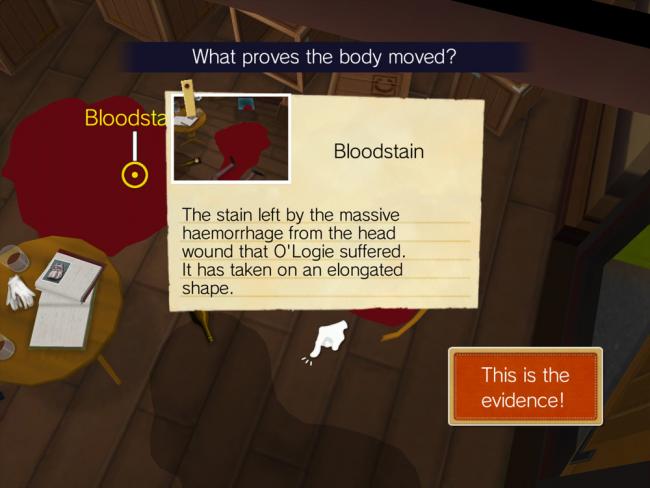
- Tap on Bloodstain and select “This is the evidence!”
- This resolves the second deduction. Select “Locked from inside” from the deductions menu.
- Tap on the wall at the bottom of the screen.
- Tap on Window.
- You need to investigate the door next. Zoom out.
- Tap on the door above the dead body.
- Tap Door. Alfendi and Lucy confirm the door was locked prior to being kicked in.
- Zoom out and tap on the dead body again.
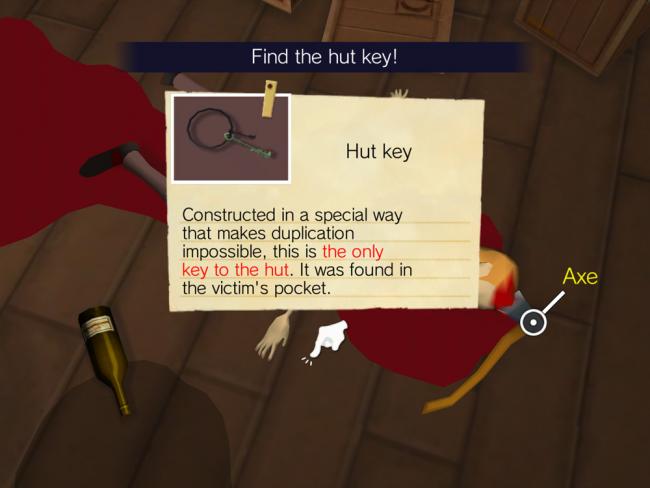
- Use the camera icon to zoom all the way in and tap on Hut Key.
- You now need to find what’s unusual about the door.
- Zoom out again, tap on the door area so you’re outside the hut.
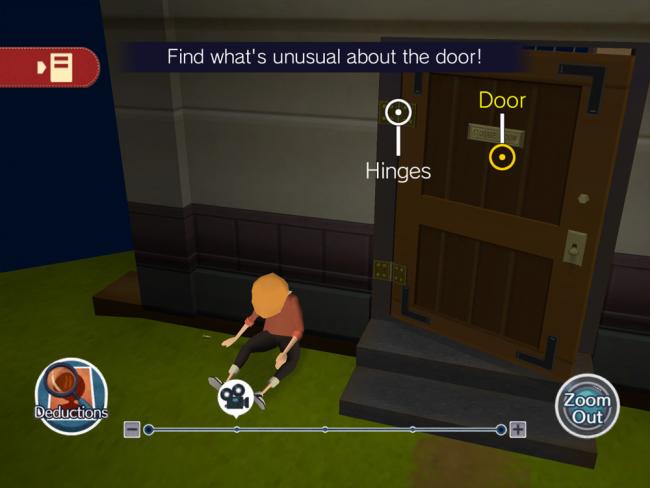
- Use the camera icon to zoom in 1/4th of the way, to the first zoom notch.
- Tap on Hinges.
- To question “What’s the problem with the hinges being on the outside of the door?” select “The door could be removed.”
- You need to find the missing hinge screw.
- Use the camera icon to zoom all the way in.
- Tap on Screw to resolve this deduction.
- Select “Motive” from the deductions screen.
- You need to find what reveals the killer’s motive.
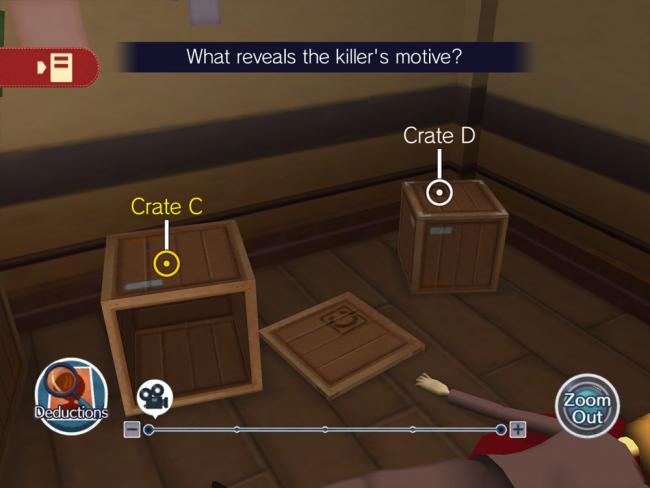
- Tap on the open crate to the left of the dead body.
- Tap on Crate C and select “This is the evidence!”
- To question “What exposes crate C’s contents?” zoom out, and then tap on the table.
- Use the camera icon to zoom all the way in and tap on Written Notes. Select “This is the evidence!”
- Select the next deduction: “The killer is…?”
- To question “What’s strange about the intercom?” select “The prints have been wiped off.”
- To question “What is it about the crime scene that doesn’t fit with Careta’s statement?” select “Three crates were opened.”
- To question “Who is the criminal?” select Chico Careta and click OK.
- To question “The crates and ? reveal the motive?” tap on the table.
- Tap on Written Notes and select “This is the evidence!”
- Careta will be freed temporarily while Alfendi and Lucy solve two more deductions.
- Select “Walking corpse.”
- You need to find proof that the walking corpse was an illusion.
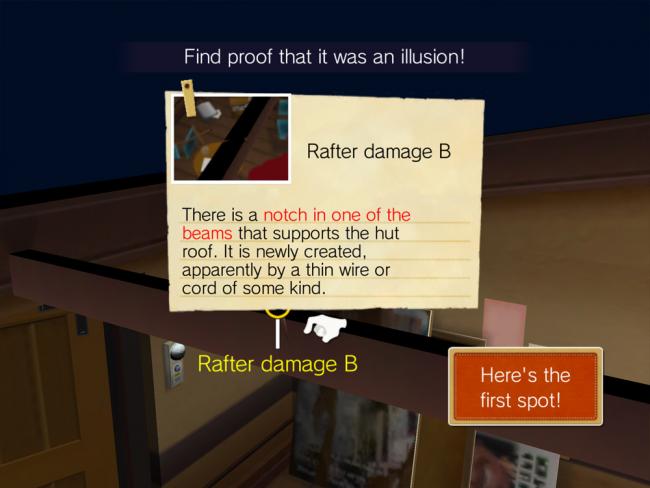
- Slide (with two fingers) upward towards the door to reveal a small clickable area in the upper right corner. Tap on this area.
- Tap on Rafter Damage B and select “Here’s the first spot!”
- To find the second hoisting spot, use the camera icon to zoom all the way in and tap on Rafter Damage A. Select “Here’s the second spot!”
- To question “What gouged out the notches in the rafters?” select Fishing Tackle and select OK.
- To question “What was the fishing line attached to?” select Corpse and hit OK.
- To question “What did the killer do with the dead body and the fishing line?” select “Made the body move.”
- This solves the fourth deduction. Select “Murderer vanished.”
- To question “How did Careta arrange it so that the hut was locked from the inside?” select “He hid himself inside the hut.”
- You now need to find proof that Careta hid in the hut after the murder.
- Tap on the floor near the door.
- Tap on Local Liquor.
- You need to find what made the stain take its shape.
- Tap on Signs next to the liquor stain.
- To question “What was the sign propped up against?” select “Coat Hook.”
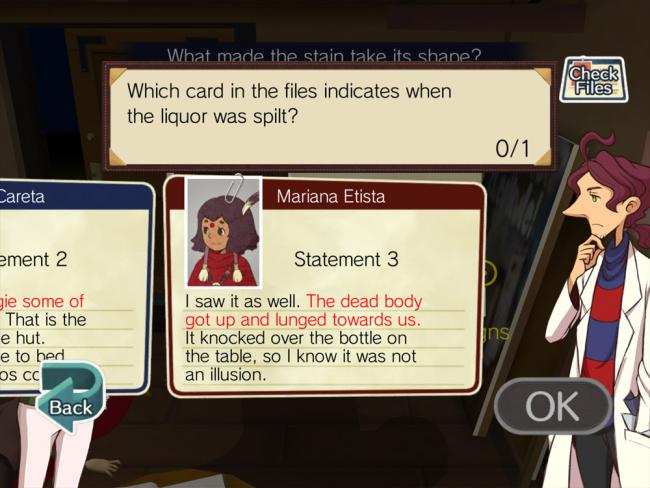
- To question “Which card in the file indicates when the liquor was spilt?” select Mariana Etista’s “Statement 3” which references the bottle being knocked over.
- This solves the final deduction.
- Tap on Careta’s portrait to begin the interrogation.
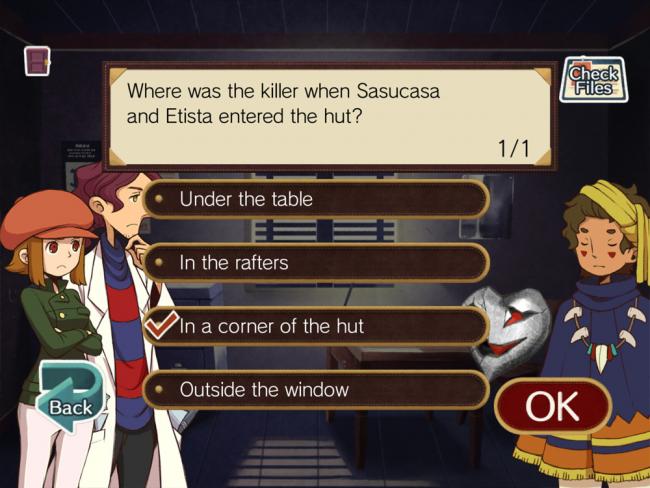
- To question “Where was the killer when Sasucasa and Etista entered the hut?” select “In a corner of the hut.”
- To question “What was the thing that prevented Sasucasa noticing the killer?” select “Signs.”
- To question “Pick the statement and evidence that prove Careta hid behind a sign” select “Local liquor” and then “Mariana Etista Statement 3.”
- To question “What did the killer use to make the corpse move?” select “Fishing tackle.”
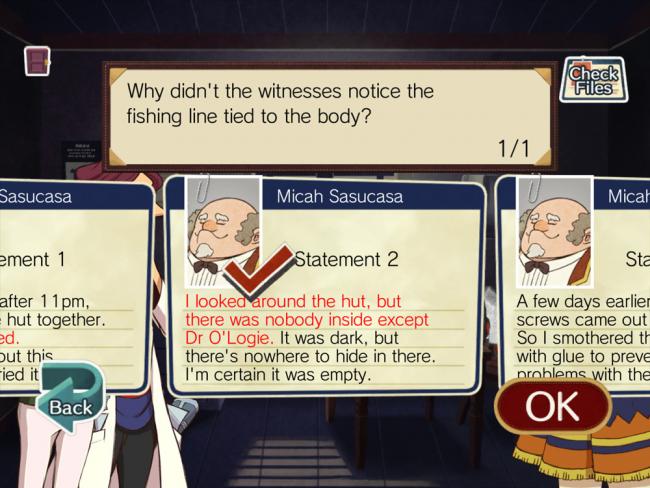
- To question “Why didn’t the witnesses notice the fishing line tied to the body?” select “Micah Sasucasa Statement 2.”
- To question “What evidence shows that fishing line was used to make the body move?” select “Rafter damage A.”
- To question “From where did the killer tug on the ends of the fishing line?” select “A corner of the hut.”
- To question “Who was the voice of the demon?” select “Mariana Etista.”
- The final accusations and clarifications are made, and the case is solved!
File No. 005: The DJ’s Swansong
Overview: Radio DJ Dread collapses on-air, seemingly poisoned during his own broadcast. Lucy and Alfendi must locate the killer from among four suspects, but another mystery pops up during the case.
- Alfendi suspects Dolly Hollerday for this crime.
- After meeting with Dolly, you’ll be given three deductions to follow up on.
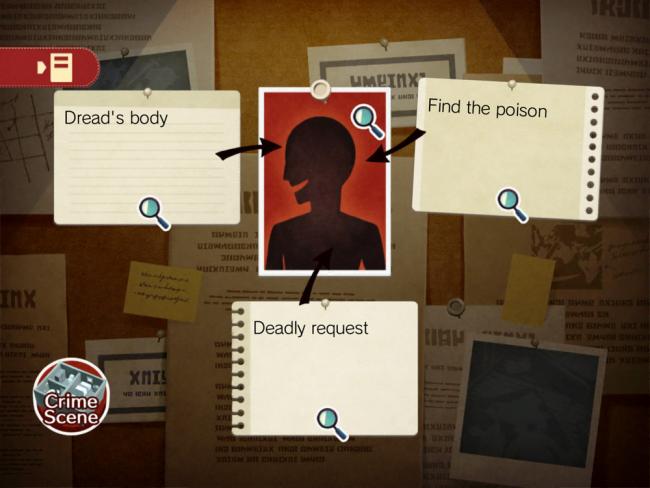
- Select “Dread’s body” first.
- Tap on the dead body.
- Tap on Corpse to enter “the body” into evidence.
- Dolly asks what’s the funny item near the body. Use the camera icon to zoom all the way in.
- Tap on Wig and select “This is sus!”
- This resolves the first deduction. Select “Find the poison” next.
- Tap on the puddle next to Dread’s body.
- Tap on Spilt Tea to enter it into evidence, then select “The poison’s here!”
- You now need to investigate the broken teacup.
- Use the camera icon to zoom all the way into the puddle area.
- Tap on Broken Cup to enter it into evidence.
- Alfendi asks “What’s strange about the broken cup?” Select “The fingerprints on it.”
- This solves the poison deduction. Select “Deadly request.”
- Tap on the pile of papers on the table left of the dead body.
- Use the camera icon to zoom all the way in.
- Tap on Request Sheet to enter it into evidence.
- You need to investigate the fax machine next.
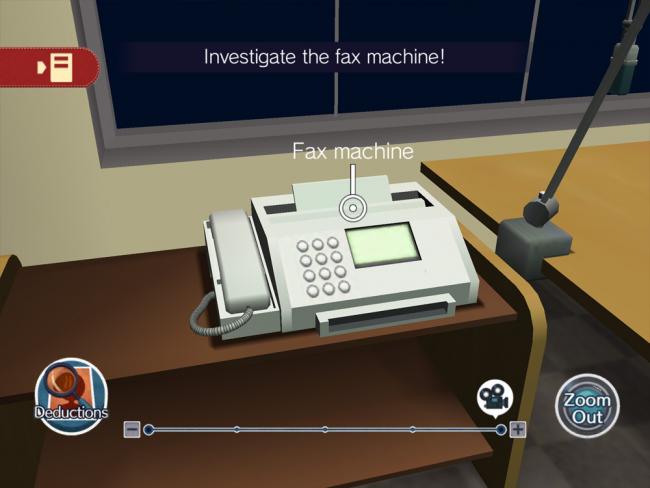
- Zoom out and tap on the fax machine to the far left of the body.
- Use the camera icon to zoom all the way in, and then tap on Fax Machine to enter it into evidence.
- This solves the third deduction; Alfendi and Lucy begin reviewing the evidence.
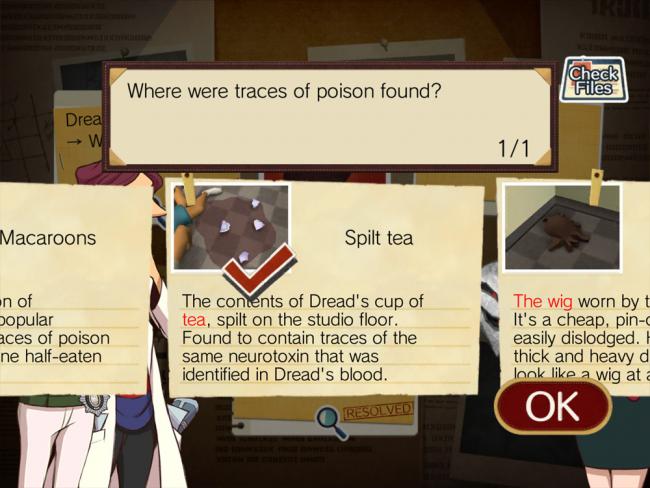
- To question “Where were traces of the poison found?” select “Spilt tea.”
- To question “What doesn’t add up between the crime scene and the statement?” select “Dolly Hollerday Statement 2” and then “Wig.”
- Sniffer calls with new evidence: the tea lady did kill Dread, but her dead body was just discovered!
- Lucy and Alfendi decide to investigate this death, even though their original case has been closed.
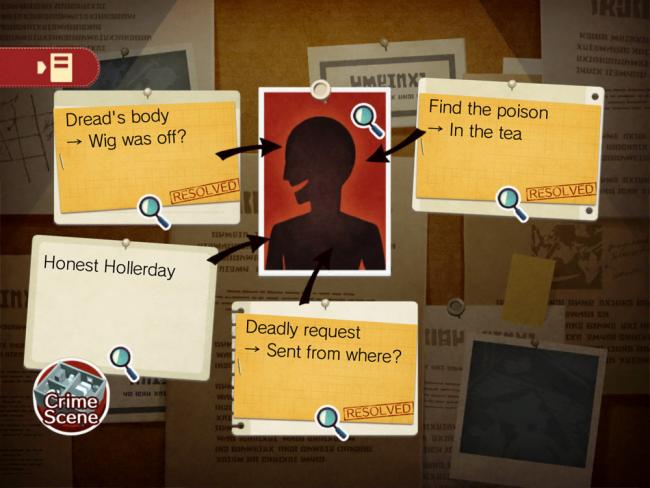
- Select the new deduction, “Honest Hollerday.”
- You need to find what’s at odds with the recording from the radio show.
- Tap on the puddle near Dread’s body.
- Use the camera icon to zoom in and tap on Broken Cup.
- Next, select “The sound of Dread collapsing.” This resolves Hollerday’s contradictions.
- Select the deduction “Dread’s death.”
- You need to find proof of Dread faking his death.
- Tap on Dread’s body.
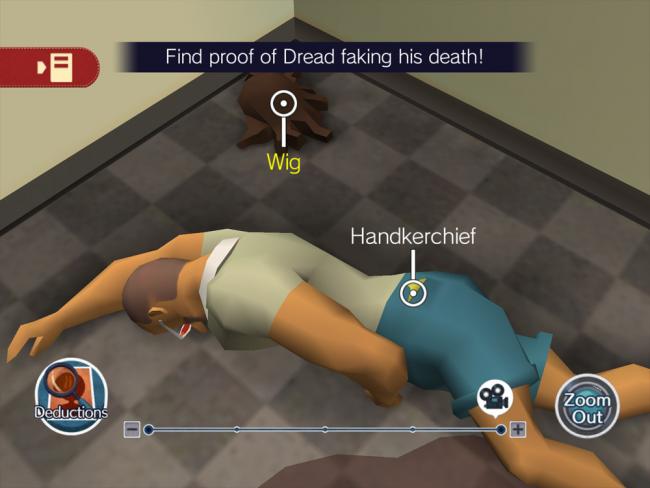
- Use the camera icon to zoom all the way in.
- Tap on Handkerchief and select “Here’s the proof!”
- This helps confirm Dread’s actual death; Alfendi and Lucy begin to look into the tea lady’s demise.
- Select the new deduction, “Brewer’s death.”
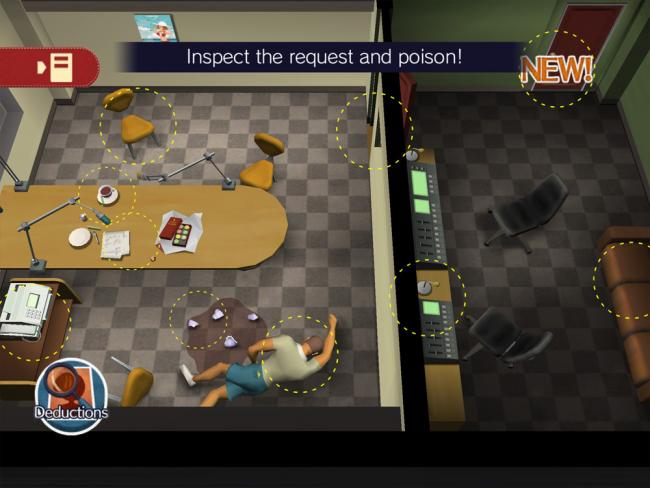
- There’s a new area available in the studio; click on the NEW door to enter the other crime scene.
- Tap on Song Request.
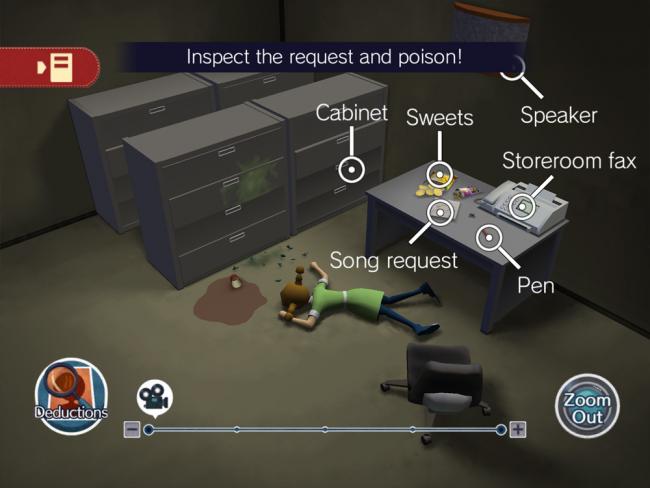
- Use the camera icon to zoom all the way in; tap on Tiny Glass Shards.
- You’re tasked with finding proof that Brewer’s death was murder.
- Tap on Note and select “Here’s the proof!”
- To question “Which piece of evidence relates heavily to ‘Farrods – sale’?” select “Radio show.”
- To question “What does Brewer’s note to herself reveal?” select “She didn’t see death coming.”
- To question “Was Brewer an accomplice in the murder of Dread?” select “She wasn’t an accomplice.”
- To question “Who’s the real killer?” select “Mike de Bonair.”
- Tap on de Bonair’s portrait to begin questioning him.
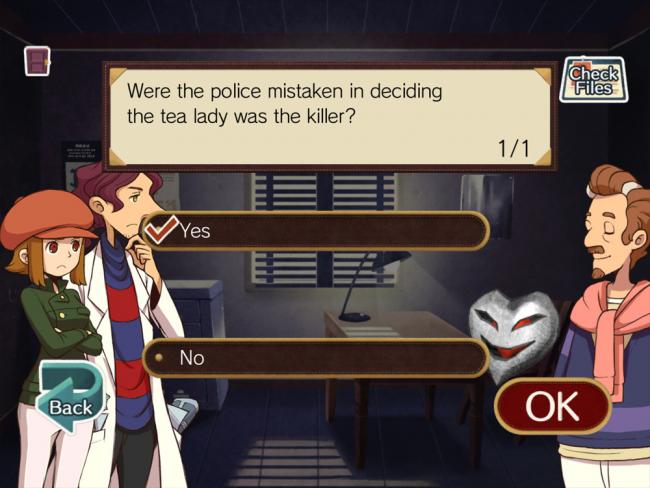
- To question “Were the police mistaken in deciding the tea lady was the killer?” select “Yes.”
- To question “In what was the poison that killed Dread?” select “Spilt tea.”
- To question “Who brought the tea to the scene of the crime?” select “Anice Brewer.”
- To question “When was the poison put in the tea?” select “After the show was interrupted.”
- To question “Which statement belies his claim that he saw Dread’s wig fall off?” select “Dolly Hollerday Statement 2.”
- To question “Which statement belies his claim that he saw Dread drink the tea?” select “Dolly Hollerday Statement 1.”
- To question “Which evidence supports the claim that Dread didn’t drink his tea?” select “Broken cup.”
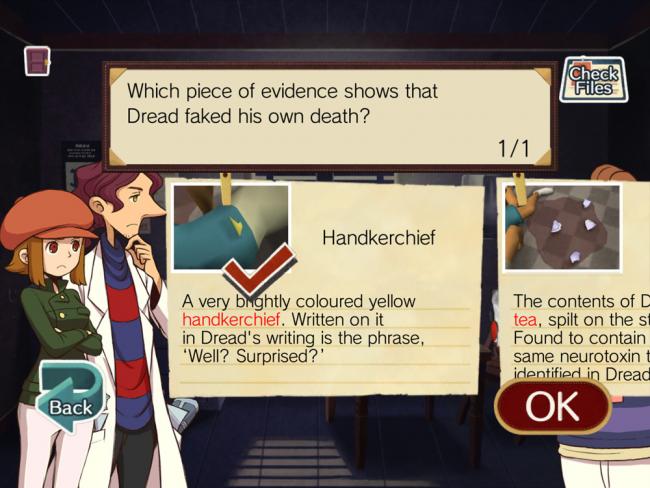
- To question “Which piece of evidence shows that Dread faked his own death?” select “Handkerchief.”
- To question “Which piece of evidence shows that Brewer didn’t commit suicide?” select “Note.”
- After a sudden turn of events, one final question comes into play: “Which piece of evidence shows that de Bonair is guilty?” Select “The perfume bottle of poison.”
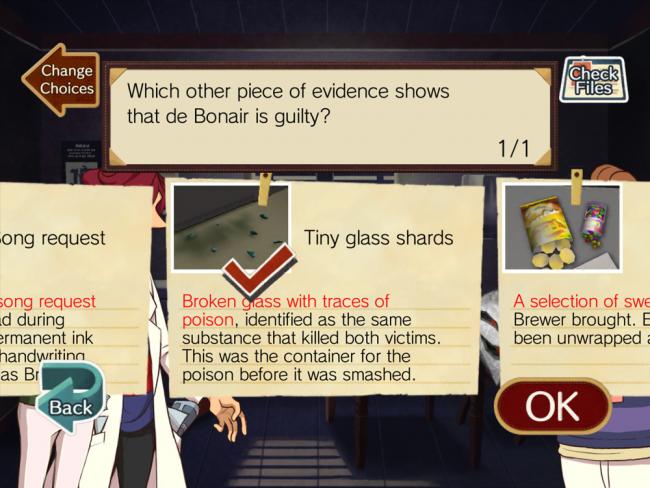
- Next, select “Tiny glass shards.”
- Lucy and Alfendi finish cornering de Bonair and solve the case!
File No. 006: Kiss Goodbye
Overview: Four mobsters are found dead in a locked room, with each death imitating instances of the infamous Jigsaw Puzzle Killings. Without an initial suspect, Lucy and Alfendi must rely on evidence to track down the culprit.
- There are no suspects to begin with, so Alfendi has no advice. You’ll go straight to the deductions screen after the introduction.
- Let’s start with “The four bodies.”
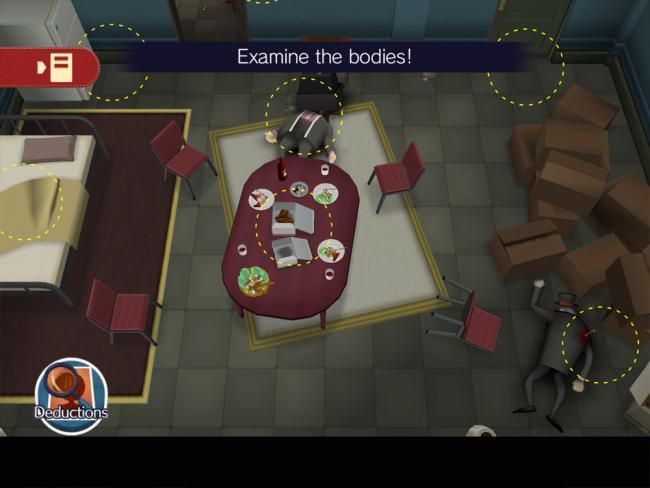
- There are four bodies to examine. Tap on the body just above the table, with a TV on his head.
- Tap on Boyle’s Corpse. Alfendi says this duplicates the second Jigsaw Puzzle murder.
- Zoom out and tap on the body on the right side of the screen, just below the pile of boxes.
- Tap on Sassina’s Corpse. Alfendi says this duplicates the first Jigsaw Puzzle murder.
- Zoom out and slide (with two fingers) up and to the left, through the open doorway.
- Tap on the body in a brown suit in front of the desk.
- Tap on Agonni’s Corpse. Alfendi compares this to the fourth Jigsaw Puzzle murder.
- Tap on the fridge just outside the room.
- Tap on Refrigerator. Fassi’s body falls out.
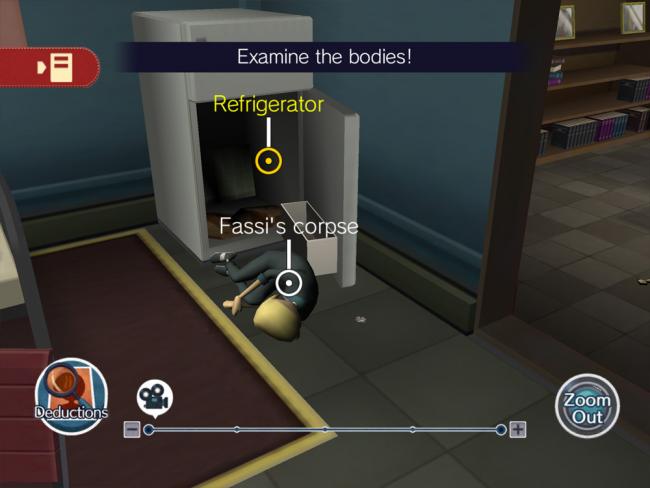
- Tap on Fassi’s Corpse. Alfendi compares this to the third Jigsaw Puzzle murder.
- To the question “Which victim’s death doesn’t follow the pattern of a previous case?” select “Agonni’s corpse.”
- This solves the first deduction. Select “The locked room” from the deduction menu.
- Tape on Sassina’s body near the boxes.
- Use the camera icon to zoom all the way in, and then tap on Beads in the corner.
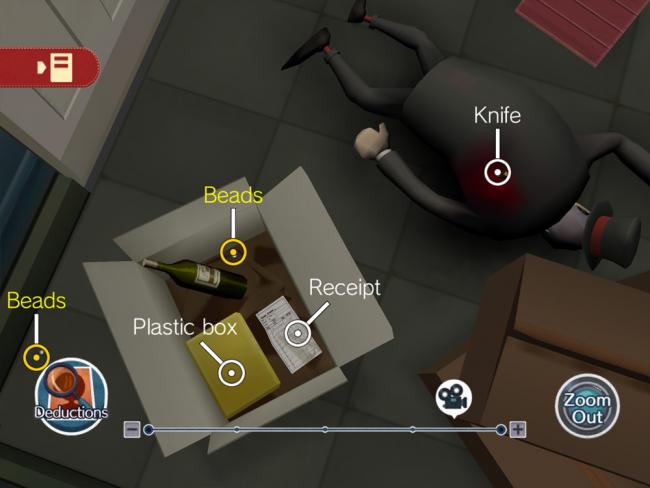
- Tap on Plastic Box. Alfendi notes they’re looking for the delivery boy and “The missing witness” is added to your deductions.
- Zoom out and tap on the table in the middle of the room.
- Tap on Paper Cups. “The soporific” is added to your deductions.
- Open the Deductions menu and select “The soporific.”
- Tap on the table.
- Tap on Paper Cups. Alfendi asks “Who didn’t have any of the soporific?”
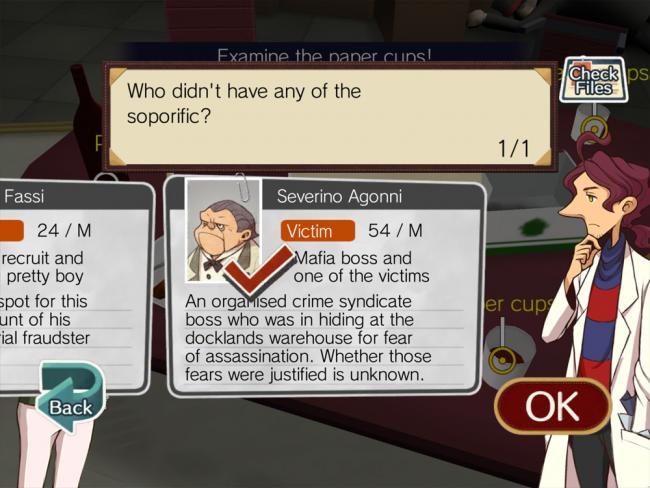
- Select “Severino Agonni.”
- Alfendi asks “Who’s the culprit?”
- Select “Severino Agonni.”
- To question “What evidence points to Agonni being the culprit?” select “Paper cups.”
- Deduction “The locked room” is now replaced with “Murder or suicide.”
- Select “Murder or suicide.”
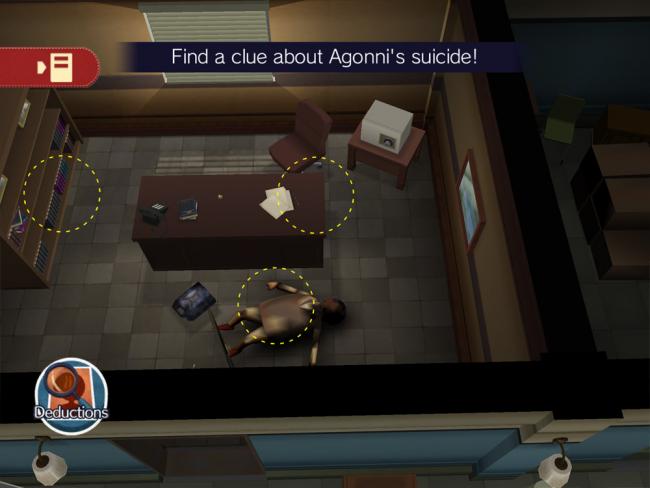
- Slide up to Agonni’s body. Use the camera icon to zoom all the way in.
- Tap Tail End of Rope and select “This proves it was suicide.”
- To question “Agonni used a rope and what else to hang himself?” select “Desk.”
- To question “What did Agonni use to destroy the rope from which he hung himself?” select “Lighter.”
- To question “What was used to kill Agonni?” select “Tail end of rope.”
- A new deduction, “The inconsistency,” opens up. Select this.
- You need to find evidence contradictory to the original Jigsaw Puzzle killings.
- Tap on Sassina’s corpse near the cardboard boxes.
- Tap on Puzzle Piece.
- After noticing the strange location of the puzzle piece, the missing witness arrives. New deduction “Arrest me!” appears.
- Select “Arrest me!” Uttar the delivery boy admits to killing all four men.
- To question “What statement seems to contradict the facts?” select “Uttar Mistry Statement 3.”
- You need to then point out the specific evidence from the scene that contradicts that statement.
- Tap on the table and use the camera icon to zoom all the way in.
- Tap on Wine Bottle Cap.
- Lucy and Alfendi question Uttar and clarify that he did not drug the gangsters.
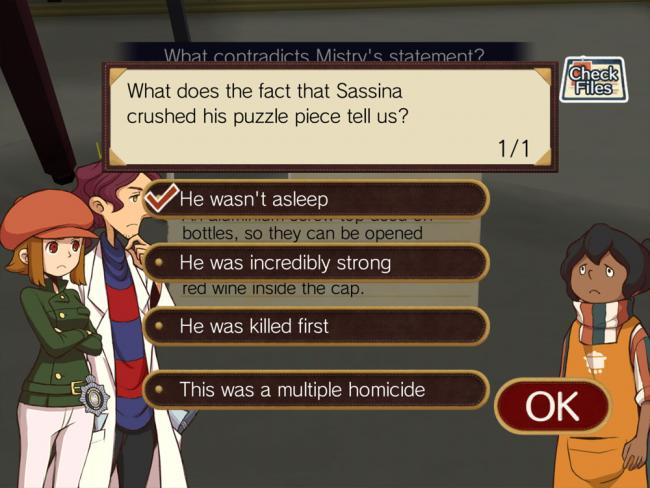
- To question “What does the fact that Sassina crushed his puzzle piece tell us?” select “He wasn’t asleep.”
- You’re then asked to find signs of a woman at the scene.
- Slide down to Sassina’s body near the boxes. Tap on his body.
- Use the camera icon to zoom all the way in.
- Tap on Beads in the box and select “This is the evidence!”
- Back at the deduction screen, tap on Uttar’s portrait to interrogate him further.
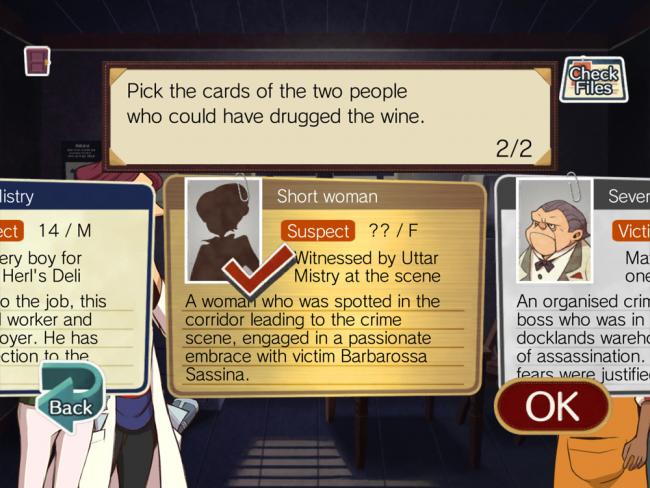
- To question “Pick the cards of the two people who could have drugged the wine,” select “Short woman” and “Barbarossa Sassina.”
- To question “What evidence at the scene shows that Sassina called someone?” select “Telephone.”
- To question “Who stabbed Sassina?” select “Short woman.”
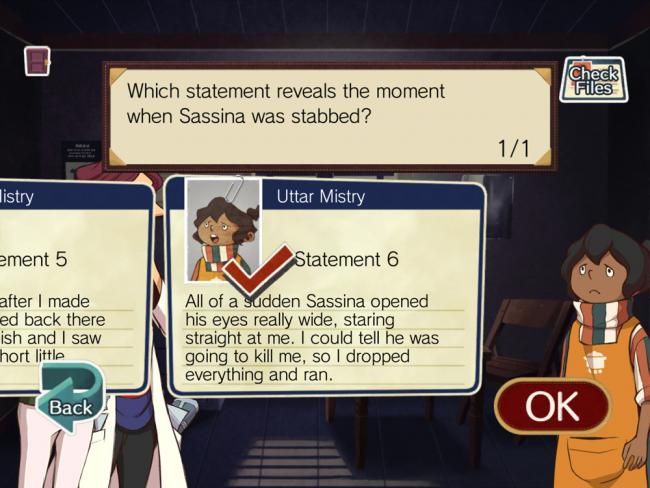
- To question “Which statement reveals the moment when Sassina was stabbed?” select “Uttar Mistry Statement 6.”
- To question “Which clue reveals how the soporific was administered to Sassina?” select “Uttar Mistry Statement 5.”
- To question “Who was responsible for leaving the door locked from the inside?” select “Barbarossa Sassina.”
- To question “Why did Sassina lock the door?” select “To escape the woman.”
- To question “Who causes Sassina to flee back inside?” select “Uttar Mistry.”
- The final pieces of the puzzle have been put into place and the case is solved!
File No. 007: The Mystery Rooms
Overview: An agent friend of Alfendi’s has tracked down Etista from Case No. 004 to a cellar filled with secret rooms. Lucy and Alfendi will have to find Etista’s hiding spot and face the girl in person.
- You have one goal/deduction upon starting this unique case: “Where’s the secret room?”
- Tap on the bookshelf.
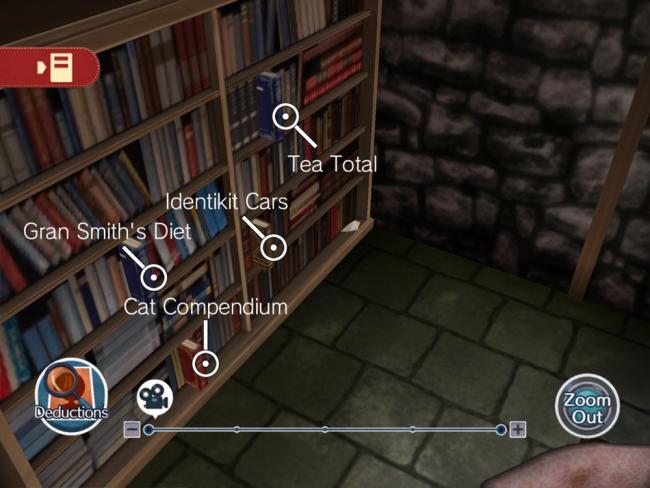
- Tap on any of the books, such as Gran Smith’s Diet. It appears there’s a correct order to pushing the books in.
- Use the camera icon to zoom all the way in.
- Tap on Old Note to learn “Bovine comes before swine.”
- Zoom out and tap on the coffee table.
- Use the camera icon to zoom in about halfway.
- Tap on Pointed Note to learn “Hornless is the beast that leads the way.”
- Tap on Music Box to add a new deduction to your list: “What will make the music box play?”
- Zoom out and tap on the shelf in the lower-right corner of the room.
- Tap on Cabinet to add another deduction to your list: “Where’s the cabinet key?”
- Slide (with two fingers) to the bottom-right of the screen, to a small bedroom.
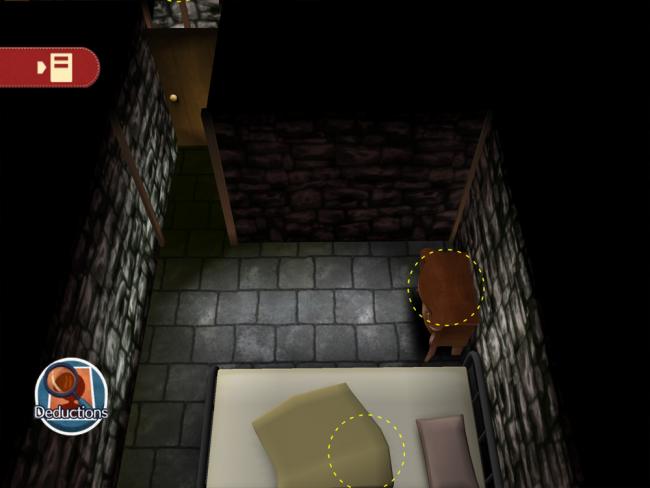
- Tap on the nightstand.
- Tap on Upper Drawer to open the drawer.
- Use the camera icon to zoom in all the way and tap on Tweezers. These will be added into evidence and picked up.
- Tap on Lower Drawer to open the drawer.
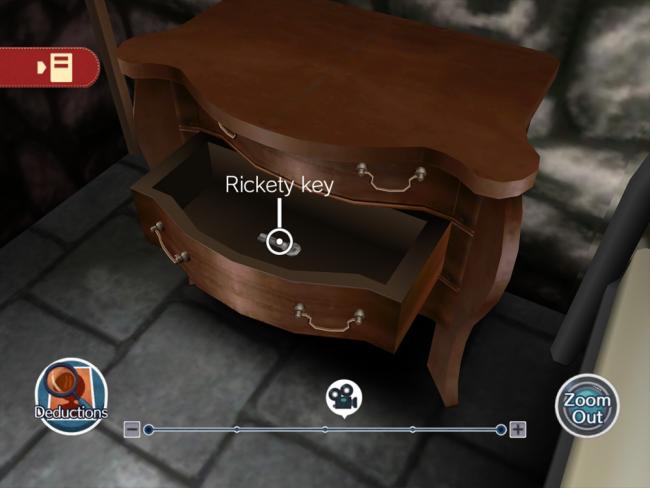
- Use the camera icon to zoom all the way in and tap on Rickety Key. This will be added into evidence and picked up.
- Tap on the bed and use the camera icon to zoom all the way in.
- Tap on Crumpled Note to learn “Swine follows after canine.”
- Slide up towards the hallway. Tap on the door in the right-hand wall.
- Tap on Bathroom Door to add another deduction to the list: “What unlocks the bathroom door?”
- Tap on Note on Door to learn “WC from three o’clock.”
- Tap on the clock just north of the bathroom/water closet.
- Use the camera icon to zoom all the way in.
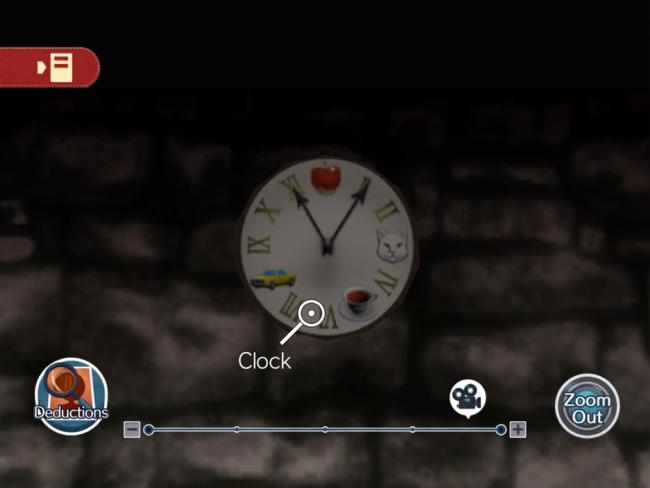
- Tap on Clock. Note there is a cat’s face at 3 and an apple at 12.
- Return to the cabinet in the lower-right corner of the main room. Tap on Cabinet.
- To question “Which key fits the cabinet?” select “Rickety key.”
- The key breaks in the lock.
- To question “What might you use to extract the broken-off piece of key?” select “Tweezers.”
- Zoom out and tap on the coffee table area.
- Use the camera icon to zoom in all the way, and then tap on Music Box.
- To question “What might work as a winder for the music box?” select “Broken key.”
- Lucy opens the Music Box, solving the deduction “What will make the music box play?”
- Tap on the table again and use the camera icon to zoom in.
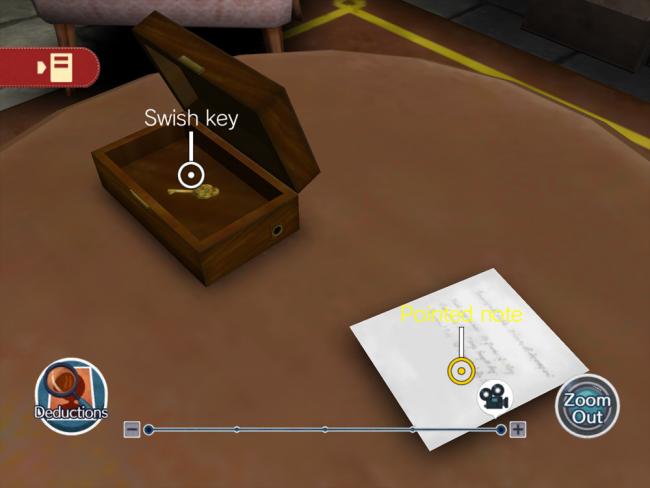
- Tap on Swish Key.
- Zoom out and tap on the cabinet again.
- To question “What else might work as a key?” select “Swish key.”
- The cabinet is now open, revealing a NEW area that can be explored.
- Tap on the cabinet again.
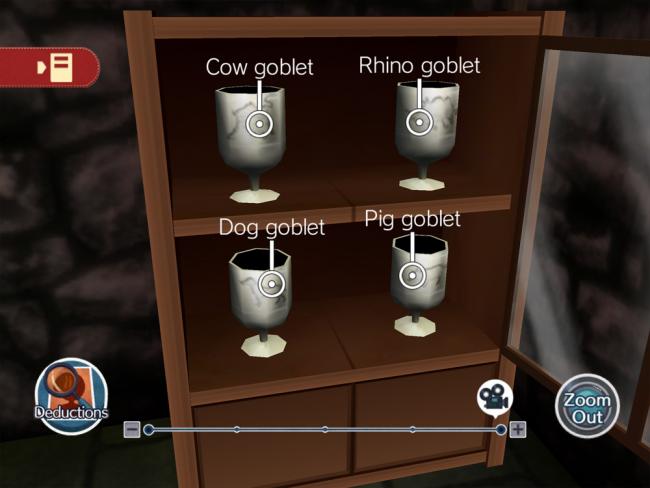
- Use the camera icon to zoom all the way in, revealing four goblets.
- Tap on each goblet to take it into evidence: Cow Goblet, Rhino Goblet, Dog Goblet, Pig Goblet.
- Return to the bookshelf and tap on it to see the protruding books again.
- Tap on each book and select “Push it in!” in order, starting with “3 o’clock” on the clock’s face.
- The correct order for the books is: Cat Compendium, Tea Total, Identikit Cars, and Gran Smith’s Diet.
- The bathroom door is now open.
- Slide over to the bathroom in the hallway, where two NEW areas have opened up.
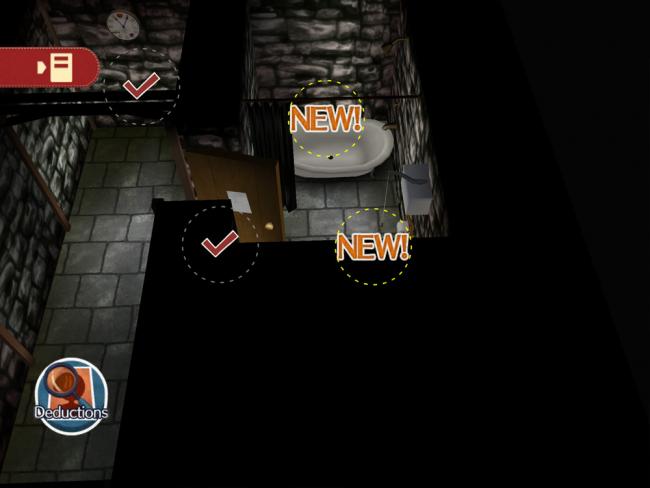
- Tap on the toilet area.
- Use the camera icon to zoom all the way in.
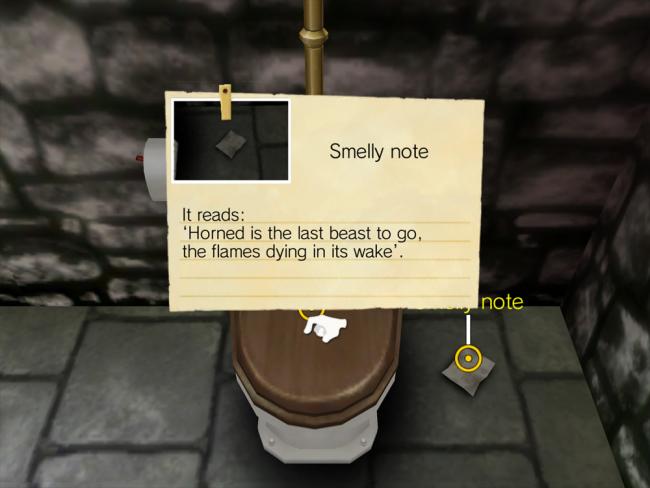
- Tap on Smelly Note to learn “Horned is the last beast to go, the flames dying in its wake.”
- Tap on the bathtub.
- Tap on Tap; Alfendi asks if Lucy wants to fill something with water.
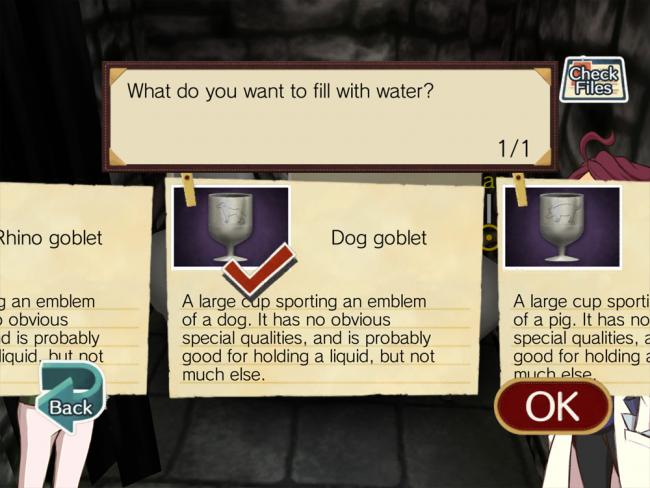
- Select each of the four goblets in your inventory and select OK in turn (you’ll have to fill each one individually). The order does not matter.
- After all four goblets are filled with water, return to the main room and tap on the fireplace.
- Use the camera icon to zoom all the way in and tap on Fireplace.
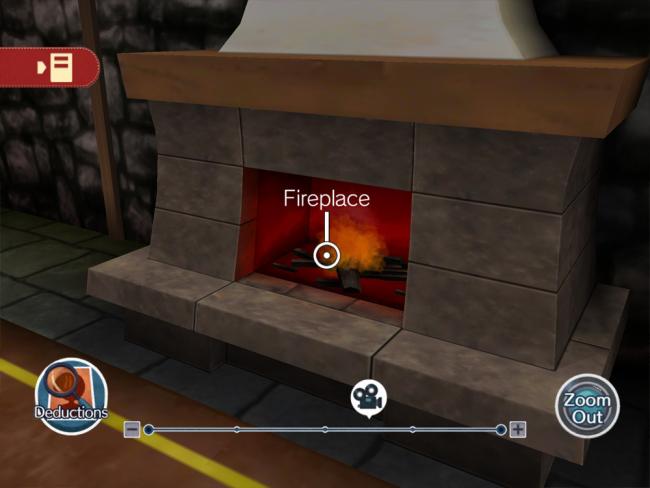
- Remembering that “Swine follows after canine,” “Bovine comes before swine,” and “Hornless is the beast that leads the way,” and “Horned is the last beast to go, the flames dying in its wake…”
- …select the goblets to pour on the fire in this order: Dog Goblet, Cow Goblet, Pig Goblet, Rhino Goblet.
- The secret entrance will open.
- Lucy and Alfendi will meet Etista, and Lucy learns another detail about the Prof. Case solved!
File No. 008: Ham and Cheese
Overview: Upon arriving at Forbodium Castle, Lucy is cornered by Diane and asked to solve a case from a past crime. Lucy must figure out the truth about Pig’s murder in order to leave the room she’s trapped within.
- Lucy begins this case alone, in a reconstructed room with a set of crime scene photos.
- Her first three deductions are: “No statements?” “Who’s the culprit?” and “Murder weapon?”
- Let’s start with “Murder weapon?” Lucy needs to find the cause of death first.
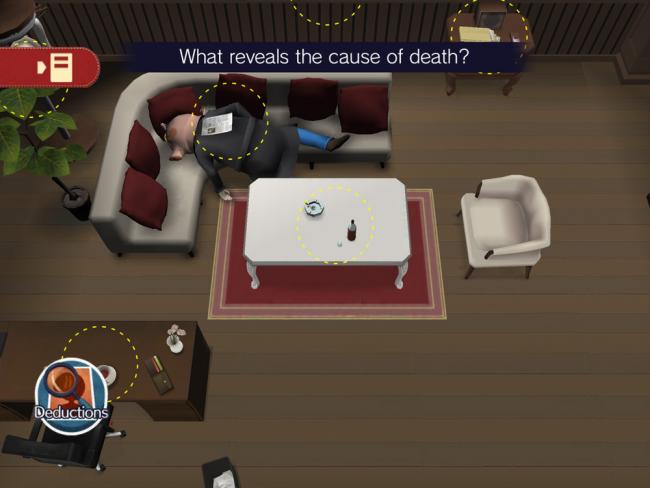
- Tap on Pig’s body.
- Tap on Forensics Report 1 and select “Here’s the proof!”
- Lucy needs to find the murder weapon that was used to whack Pig.
- Zoom out and tap on the table next to Pig.
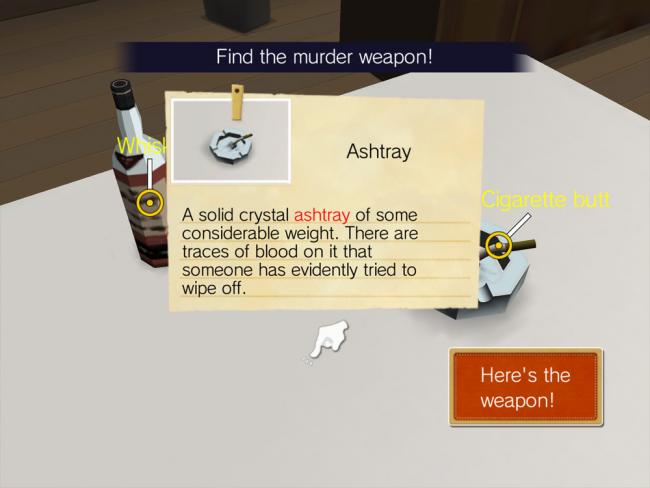
- Tap on Ashtray and select “Here’s the weapon!” The “Murder weapon?” deduction has been solved.
- Select “No statements?” next.
- Tap on the desk.
- Tap on Wallet.
- Use the camera icon to zoom about halfway in and tap on Drawer to open it.
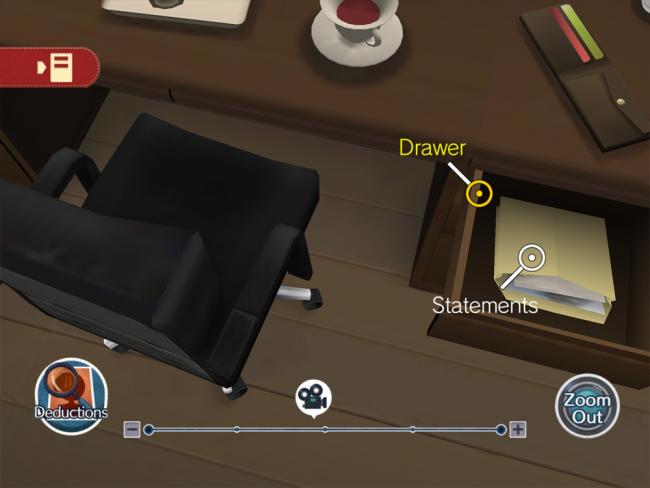
- Tap on Statements to enter them into evidence.
- Lucy will read through the statements one by one.
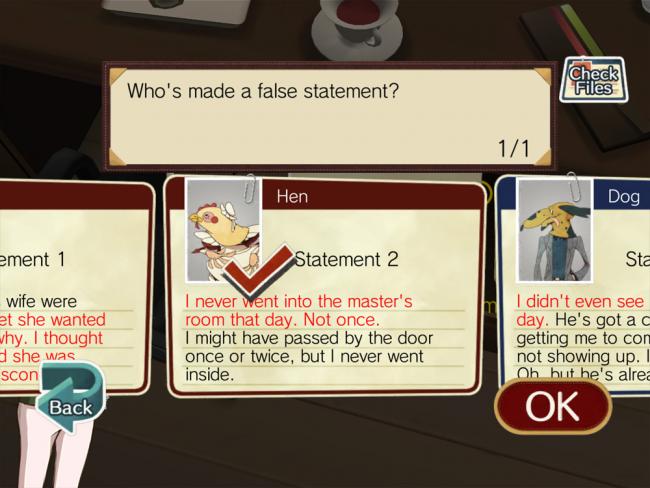
- To question “Who’s made a false statement?” select “Hen Statement 2.” This solves the “No statements?” deduction.
- Select “Who’s the culprit?”
- Tap the table with the loudspeaker where you first spoke to Diane.
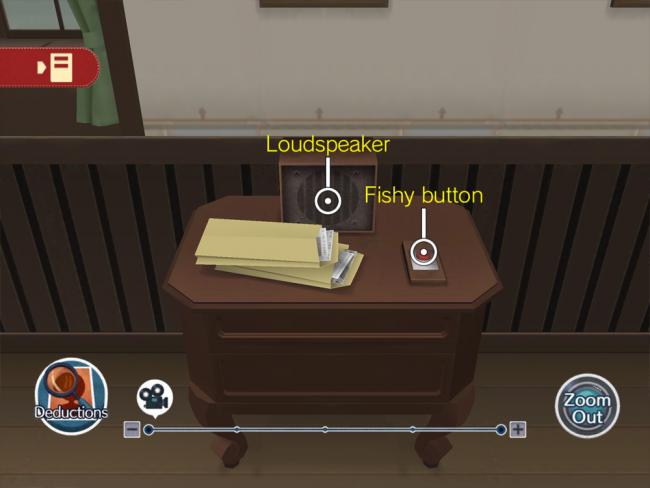
- Tap the Fishy Button and select “Press the button.” Lucy learns the button is used to call Diane when she’s figured out the culprit; Fishy Button becomes Buzzer.
- Tap on Buzzer and select “Press the button.” Lucy automatically claims Hen is the culprit.
- Diane dresses up as Hen for the interrogation.
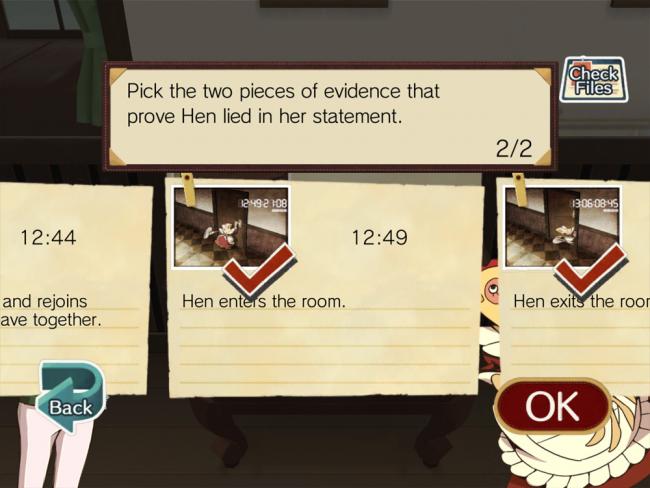
- To question “Pick the two pieces of evidence that prove Hen lied in her statement,” select “Hen enters the room” and “Hen exits the room.”
- To question “Which piece of evidence shows Hen’s motive for killing Pig?” select “Wallet.”
- After this line of questioning, Diane confirms Hen did not kill Pig. You receive a new deduction, “Is Hen innocent?”
- Select “Is Hen innocent?”
- You need to find what proves that Hen isn’t the killer.
- Tap on the table near Pig’s body.
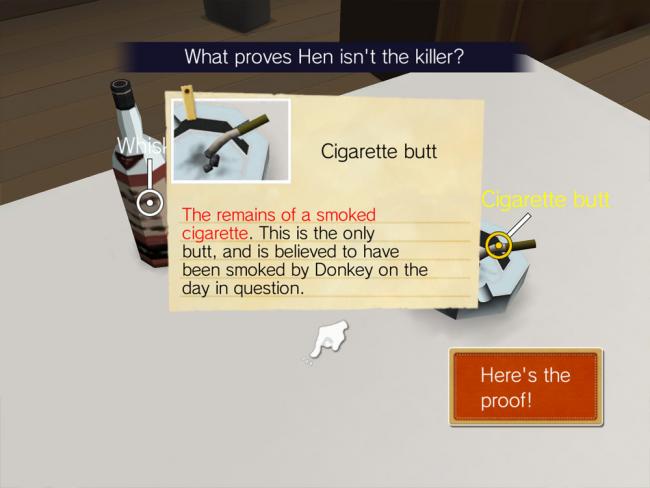
- Use the camera icon to zoom in and tap on Cigarette Butt.
- To question “What is the latest possible time the killer could have struck Pig?” select “12:42 Donkey and Dog exit the room.”
- Select the final deduction, “Who’s the culprit?”
- Tap on the plant area to the left of Pig.
- Tap on Hatstand to enter it into evidence.
- Zoom out. Return to the loudspeaker table and press the Buzzer.
- To question “Who killed Pig?” select “Dog.”
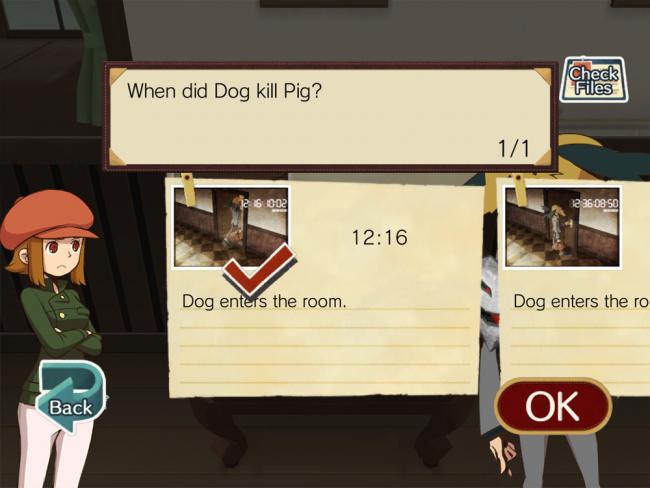
- To question “When did Dog kill Pig?” select “12:16 Dog enters room.”
- To question “What did Dog do with the body?” select “Hid it.”
- To question “Where was the victim’s body hidden?” select “Hatstand.”
- To question “Which statement gives a clue as to where the body was hidden?” select “Donkey Statement 2.”
- To question “What did Dog have the opportunity to do that Donkey did not?” select “Move the body onto the sofa.”
Lucy finishes interrogating Dog and uncovers the truth. Diane opens the door and this case is solved!
File No. 009: Good Cop, Bad Cop
Overview: The strange events at Forbodium Castle continue, inspired by what happened here four years ago. Lucy finally locates Alfendi, but there are now two murders that must be solved.
- You begin this case where File No. 008 left off: Lucy is wandering Forbodium Castle, looking for Alfendi.
- Tap on the door area to enter a corridor.
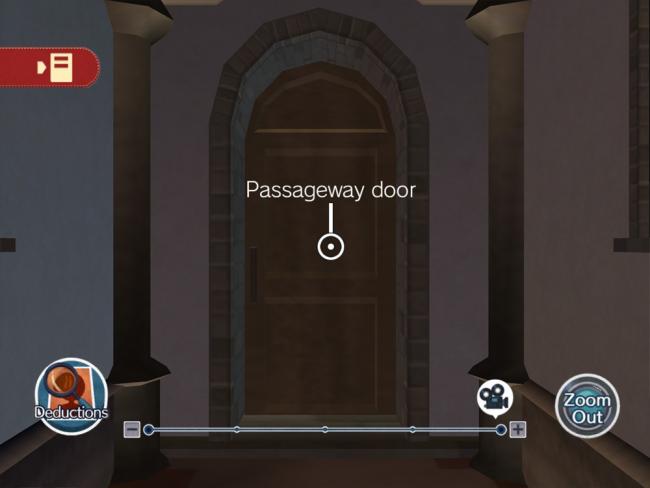
- Use the camera icon to zoom all the way in and tap on Passageway Door.
- Lucy will make her way through the tower to Alfendi after hearing a gunshot.
- Hilda catches up to the two of you and asks “Who killed Diane?”
- Select “Alfendi Layton.” Hilda won’t accept the other answers.
- After a discussion about the prior events at Forbodium Castle, Lucy is tasked with figuring out what really happened four years ago and tonight—who killed both Keelan and Diane.
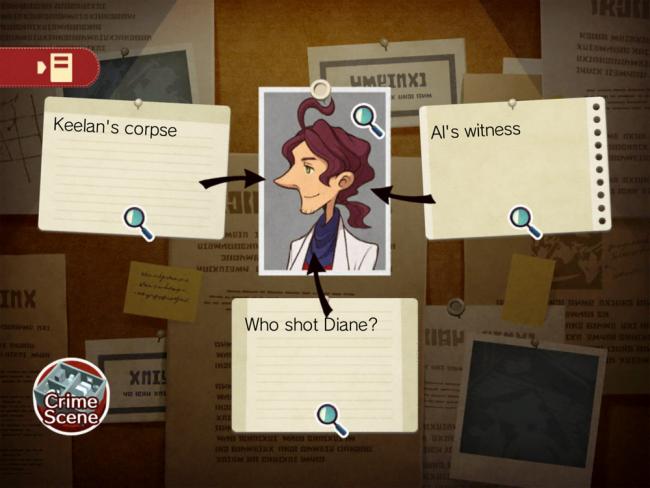
- Three deductions open up: “Keelan’s corpse,” “Who shot Diane?” and “Al’s witness.”
- Let’s start with “Keelan’s corpse.”
- Slide to the left and tap on the corpse farthest from the tower’s stairwell.
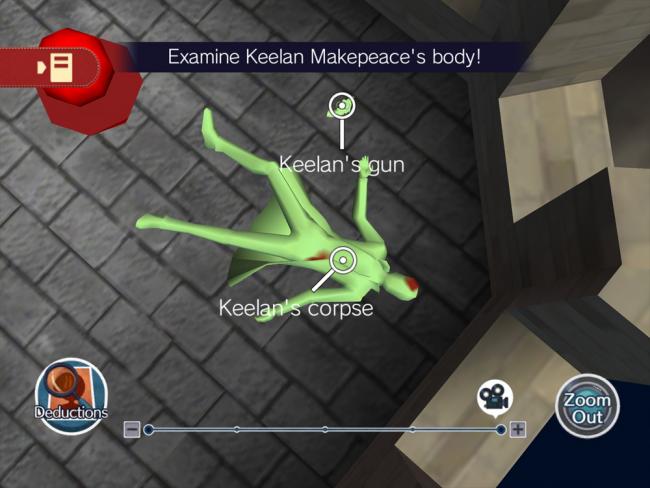
- Use the camera icon to zoom all the way in; tap on Keelan’s Corpse.
- You’re then tasked with finding the gun that killed Makepeace.
- Zoom out and tap on Alfendi’s body near the stairs.
- Use the camera icon to zoom in and tap on Al’s Gun. Select “Here’s the weapon!”
- To question “Which statement doesn’t tie up with Keelan Makepeace’s body?” select “Hilda Pertinax Statement 2.”
- This resolves the first deduction. Select “Al’s witness” next.
- Move to Alfendi’s body near the stairs.
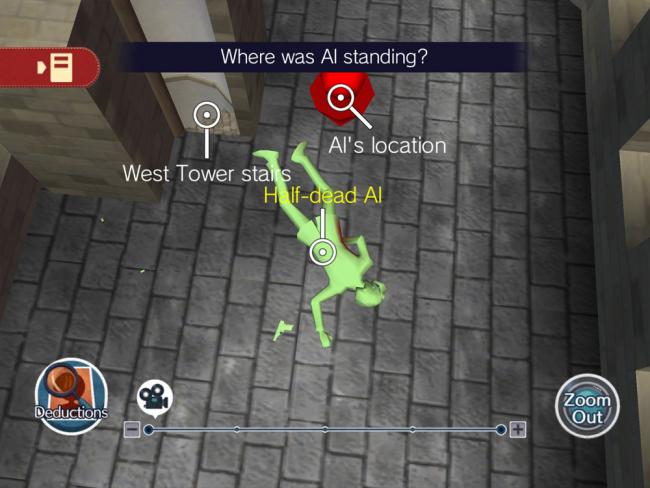
- Tap on Half-Dead Al.
- You need to pinpoint where Al was standing.
- Tap on the red marker, Al’s Location and select “Al was here!”
- To question “Which statement doesn’t tie up with where Al was standing?” select “Hilda Pertinax Statement 1.”
- This resolves “Al’s witness.” Select “Who shot Diane?”
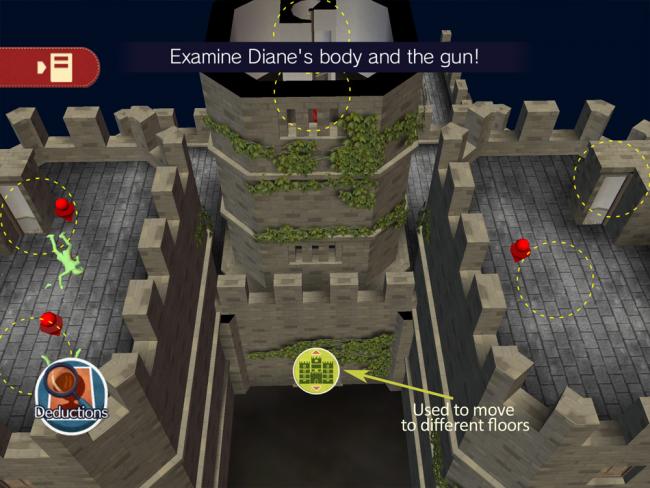
- The castle has multiple floors and towers. Use the green tower icon to move down a floor.
- Tap the orange tap that correlates to the fourth floor, where Diane was killed.
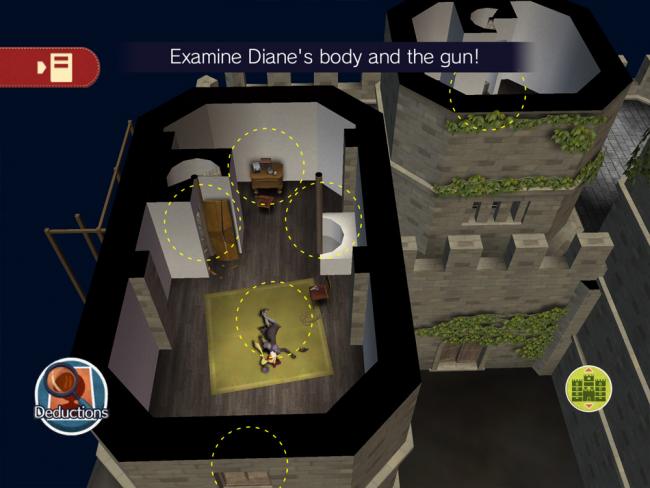
- Slide to the left and tap on Diane’s body.
- Tap Diane’s Corpse.
- Use the camera icon to zoom all the way in.
- Tap on Diane’s Gun.
- Tap on Unidentified Gun.
- Alfendi comments he’s figured out where the shot was fired from. Zoom out from this close-up.
- Tap the stairs to the north-west of Diane’s body.
- Tap Stairs to Rooftop and select “It was shot from here.” This resolves deduction “Who shot Diane?” for now.
- Two new deductions open up. Select “Hilda’s untruth.”
- To question “Why is there an inconsistency in Hilda’s statement?” select “Makepeace wasn’t shot.”
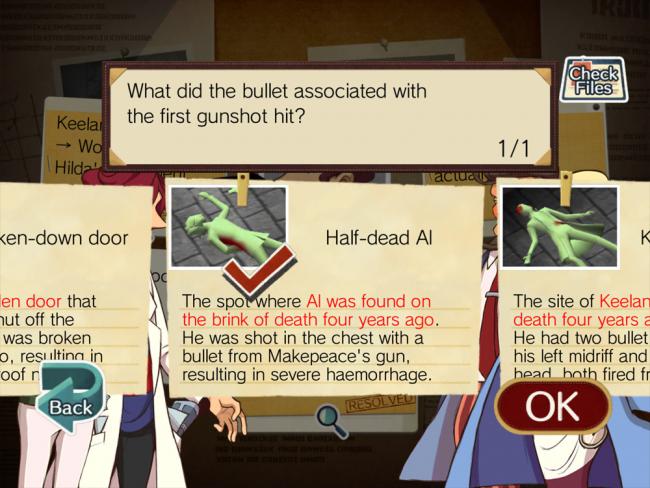
- To question “What did the bullet associated with the first gunshot hit?” select “Half-dead Al.”
- To question “If Al was shot with the first bullet, which statement can’t be true?” select “Justin Lawson Statement 2.”
- To question “What proof is there that Justin and Makepeace were partners in crime?” select “Case report” (the one with missing files).
- Alfendi accuses Justin of working with and murdering Makepeace. This deduction is resolved.
- Select “West Tower rooftop.”
- You need to find a secret way to the West Tower roof.
- This mystery is not solvable yet—tap on any item and select “This is the evidence!”
- Alfendi reverts to normal and admits he is the killer, after all. Hilda explains the situation further…and Lucy becomes even more determined to solve the mystery.
- A new deduction opens up: “The final mystery.” Select this.
- You can now explore the castle again and investigate objects even if they don’t have a marker.
- On the fifth floor of the central tower, tap on the ivy on the outside wall.
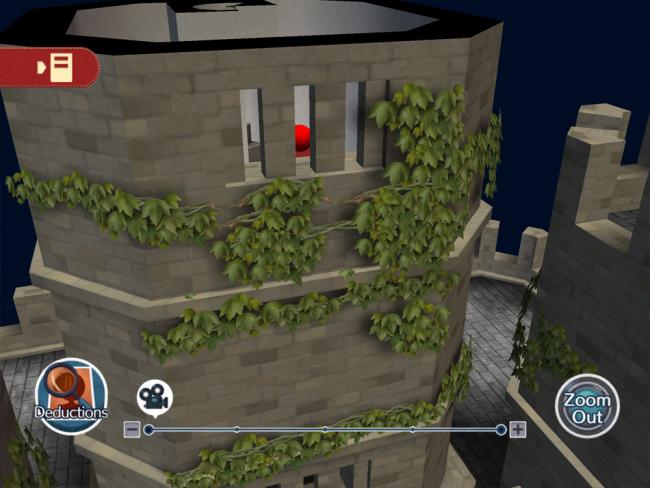
- In the close-up, tap on the area of ivy that is broken to add Broken Ivy into evidence.
- Tap on Alfendi’s portrait in the deductions menu.
- To question “Who was the mastermind behind the serial killings of four years ago?” select “Justin Lawson.”
- The deduction portrait will change to Justin. Tap on him.
- To question “Who fired the first shot at Forbodium Castle four years ago?” select “Keelan Makepeace.”
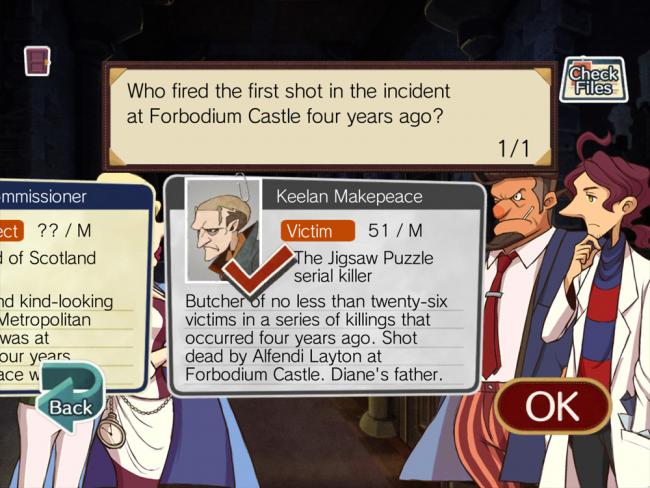
- To question “Who did Makepeace shoot with the first shot fired four years ago?” select “Alfendi Layton.”
- To question “Who fired the two shots on the West Tower rooftop?” select “Justin Lawson.”
- To question “Who was hit by the two shots fired on the West Tower rooftop?” select “Keelan Makepeace.”
- To question “Which evidence shows Justin is guilty?” select “Broken ivy.”
- To question “What’s the crucial point that gives Justin away?” select “Where the ivy was growing.”
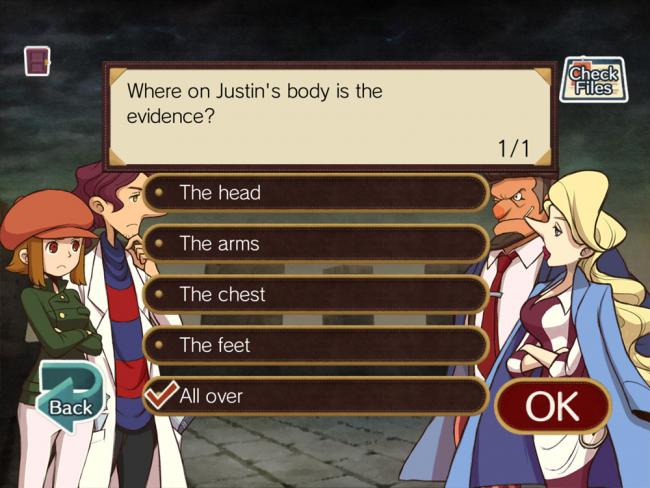
- To question “Where on Justin’s body is the evidence?” select “All over.”
- After a final round of accusations and proof, Justin admits to both crimes. The case (and game) is solved!
Congratulations!
You have completed Gamezebo’s walkthrough for Layton Brothers: Mystery Room. Be sure to check back often for game updates, staff and user reviews, user tips, forums comments and much more here at Gamezebo!
More articles...
Monopoly GO! Free Rolls – Links For Free Dice
By Glen Fox
Wondering how to get Monopoly GO! free rolls? Well, you’ve come to the right place. In this guide, we provide you with a bunch of tips and tricks to get some free rolls for the hit new mobile game. We’ll …Best Roblox Horror Games to Play Right Now – Updated Weekly
By Adele Wilson
Our Best Roblox Horror Games guide features the scariest and most creative experiences to play right now on the platform!The BEST Roblox Games of The Week – Games You Need To Play!
By Sho Roberts
Our feature shares our pick for the Best Roblox Games of the week! With our feature, we guarantee you'll find something new to play!Type Soul Clan Rarity Guide – All Legendary And Common Clans Listed!
By Nathan Ball
Wondering what your odds of rolling a particular Clan are? Wonder no more, with my handy Type Soul Clan Rarity guide.


