- Wondering how to get Monopoly GO! free rolls? Well, you’ve come to the right place. In this guide, we provide you with a bunch of tips and tricks to get some free rolls for the hit new mobile game. We’ll …
Best Roblox Horror Games to Play Right Now – Updated Weekly
By Adele Wilson
Our Best Roblox Horror Games guide features the scariest and most creative experiences to play right now on the platform!The BEST Roblox Games of The Week – Games You Need To Play!
By Sho Roberts
Our feature shares our pick for the Best Roblox Games of the week! With our feature, we guarantee you'll find something new to play!Type Soul Clan Rarity Guide – All Legendary And Common Clans Listed!
By Nathan Ball
Wondering what your odds of rolling a particular Clan are? Wonder no more, with my handy Type Soul Clan Rarity guide.
Nancy Drew: Treasure in the Royal Tower Walkthrough
Welcome to Gamezebo's walkthrough for Nancy Drew: Treasure in the Royal Tower. When you first start the game, you'll be shown your standard menu of selecting a new game, loading an existing save game, and configuring the game's settings. Start a new game and the next screen will ask you to choose your difficulty. If you're new to the Nancy Drew games, you may want to take a look at the Tutorial as the game plays a bit differently compared to other adventure games. …
a:1:i:0;a:2:s:13:”section_title”;s:51:”Nancy Drew: Treasure in the Royal Tower Walkthrough”;s:12:”section_body”;s:38065:”
Welcome to Gamezebo’s walkthrough for Nancy Drew: Treasure in the Royal Tower.
When you first start the game, you’ll be shown your standard menu of selecting a new game, loading an existing save game, and configuring the game’s settings.
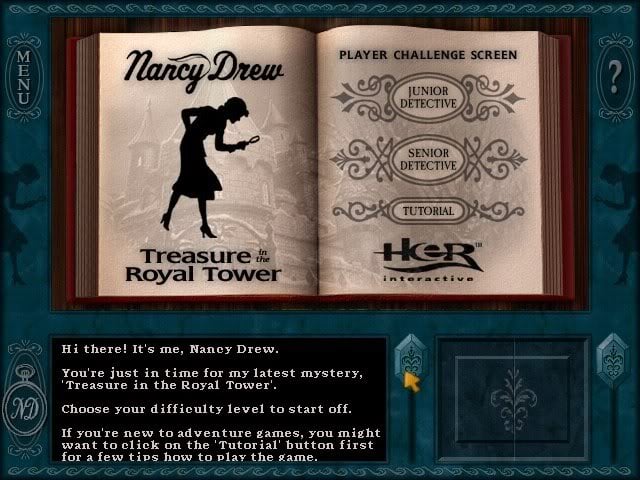
Start a new game and the next screen will ask you to choose your difficulty. If you’re new to the Nancy Drew games, you may want to take a look at the Tutorial as the game plays a bit differently compared to other adventure games.

The Junior Detective difficulty will allow you to play through the game with easier puzzles, but if you’re looking for a challenge, select the Senior Detective difficulty. This guide will utilize the Senior Detective difficulty to get the most out of the game.
As the game opens, you’ll find Nancy reading a letter that she has written to her friend, George Fayne. The letter also serves to set up the setting for the game, which takes place inside a castle owned by Christi Lane, a friend of Nancy’s father. Nancy’s currently on a ski vacation there, but her plans were nixed after a blizzard blew through town not too long after she arrived.
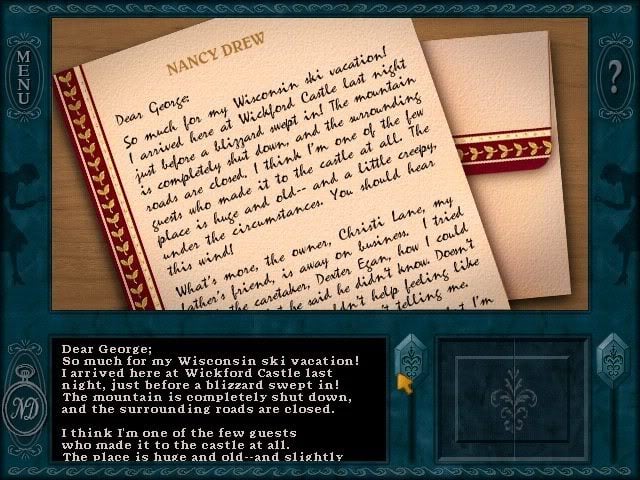
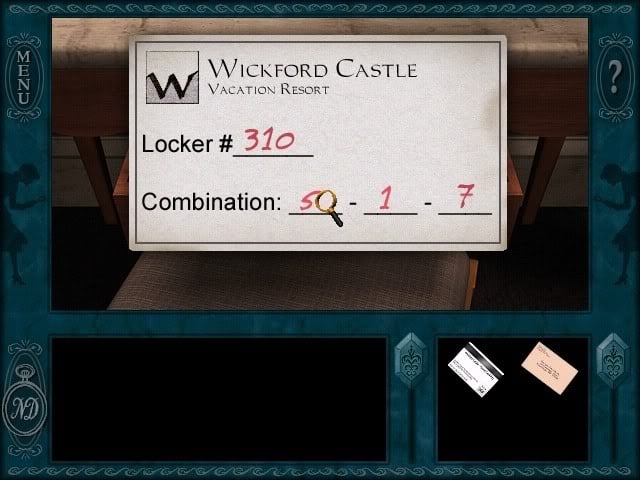
After Nancy has finished reading her letter, all she needs now in order to mail it is a stamp. Before we start to look for one, let’s take the opportunity to check out her temporary digs. In front of her is the desk where she was writing the letter. You’ll find Nancy’s room key sitting on the corner of the desk, which she should probably take with her before she has to leave the room. Open the drawer in front of the desk and pick up the card inside to find Nancy’s locker number along with the combination.
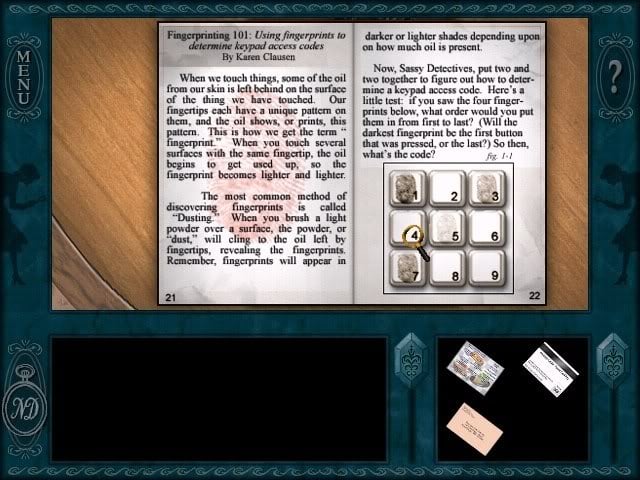
Turn around and walk over to Nancy’s dresser. Pick up the menu from inside the top drawer and then walk over to the table on the other side of the room. You’ll spot a magazine lying on the table, and when Nancy opens it, it takes her to a page that explains the process of fingerprinting.
Afterwards, walk over to the night stand near Nancy’s bed and check the phone for messages by pressing the Voice Mail button. It already has two messages on it, although both of them contain nothing but phone clicks like someone hung up as soon as the voice mail picked up. That seems oddly strange, don’t you think?
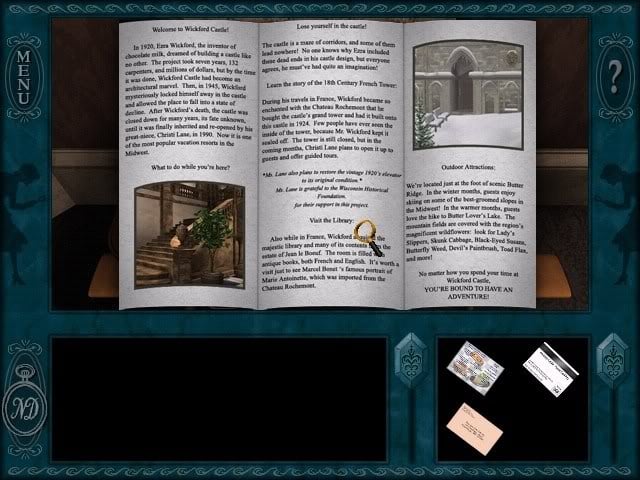
You may have noticed a hissing sound in the background as you explored the room. Trace the sound back to the radiator and Nancy will comment that it sounds like it’s broken. One last thing we need to do before we head out of the room, and that’s to check to see what Nancy brought with her in her suitcase. It’s situated near the dresser and when you open it, you’ll find a brochure for Wickford Castle, the castle in which Nancy is currently staying.
Leave the room and as you look around, you’ll realize just how easy it can be to get lost in a place like this. Turn right and follow the hallway down until you see an adjoining corridor connecting the two sides of the hotel together to meet at the central staircase. Walk down the corridor and head down the stairs.
Speak with the hotel manager that is situated near the staircase to learn that his name is Dexter Egan. Talk to him about everything that’s going on and he’ll explain that someone vandalized the “libary” and that a woman named Professor Hotchkiss is upset because her room is robbed. She refuses to talk to Dexter, but he figures if Nancy will agree to take her ski boots up to her, maybe she’ll calm down and she can talk to her.
After you’re finished talking with Dexter, turn left and head into the nearby lounge and you’ll be introduced to a woman named Lisa. Talk to her to realize she knows a lot about the Wickford Castle and once you’re finished, enter the hallway near her and follow it to the left to find a spiral staircase. The upper portion is dark right now, so instead head down the stairs.
Follow the corridor as it bends until you see a sign on the wall that says “Ski Rental”. Head down the hallway towards the ski rental and check Nancy’s pocket watch by clicking on the watch in the lower left corner of the screen. If you made it before 12 pm, then the ski rental will be open and you can talk to Jacques about getting the professor’s boots. If the ski rental is closed, we’ll just have to come back later. However, walk over to the closed door and pick up the paintbrush from the ledge.
Turn right and enter the locker room to check out Nancy’s locker. You’ll find it after turning right and looking at the lockers along the right wall near the entry way. Try to open locker #310 using the combination 517. You’ll need to turn the dial to the right until it shows 5 at the top, and then press the black button above it. Turn the dial to the left until it shows 1 and press the button again and then turn the dial to the right until it shows 7 and press the button once more.
The locker will refuse to open, leading Nancy to believe that the lock must be broken. If you can still talk to Jacques, tell him that the locker is busted. If the ski rental is closed, walk back up to Nancy’s room and pass the time until the ski rental is open again at 2 pm.
Once you’re able to inform Jacques about the locker, he will say that combination was actually for locker #311. Open the other locker using the same method as last time to discover that it’s in use by someone else. Open up the bag hanging in the locker and check out the various IDs and passports to realize that it’s Lisa’s locker and that she’s a reporter. You’ll also see a letter near the front of the bag that’s been written in Spanish, which means Lisa wasn’t completely honest with Nancy when she said that she couldn’t speak Spanish very well.
Close the locker and ride the elevator across from the rental office up to the second floor. The professor’s room is #214, and once you’ve found it, knock on the door and deliver the boots. The professor will ask Nancy to leave them by the door. Look down and place the boots on the floor and then look up and walk away. You’ll hear the sound of her door opening and closing as the professor retrieves her boots.
Return to the elevator and ride it down to the first floor. Along the way, the elevator will stop between the first and second floors and leave Nancy with no obvious ways of escaping. Turn around so that you’re facing the back of the elevator and look up to spot the emergency hatch. Open it and climb up on top of the elevator car. You’ll see a ladder across from you, but there’s a better way of escaping than that.
Turn around to see a wooden crate. Climb on top of it and look up to see the door leading into the second floor. Climb out of the elevator shaft and head downstairs to the first floor. Report the problem with the elevator to Dexter, but he doesn’t believe it’s actually broken. After talking to him about Professor Hotchkiss, he says that she received her boots, but now he wants Nancy to fix the lighting for the upper part of the spiral staircase.
The circuit breaker needed to turn the lighting back on is located in the basement, at the intersection of the hallway leading to the ski rental area. Once you are there, open the panel to the right and you’ll see several switches.
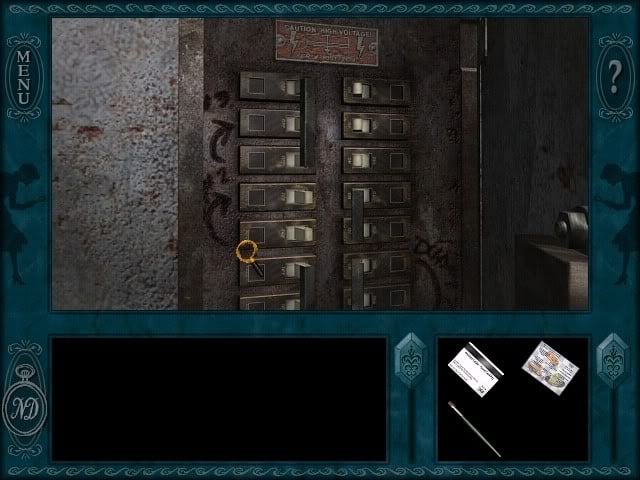
As you can see, the three switches in the upper right corner are all turned off. Turn them back on and then close the panel. Reset the elevator by pulling the red lever on the box to the left of the circuit panel.
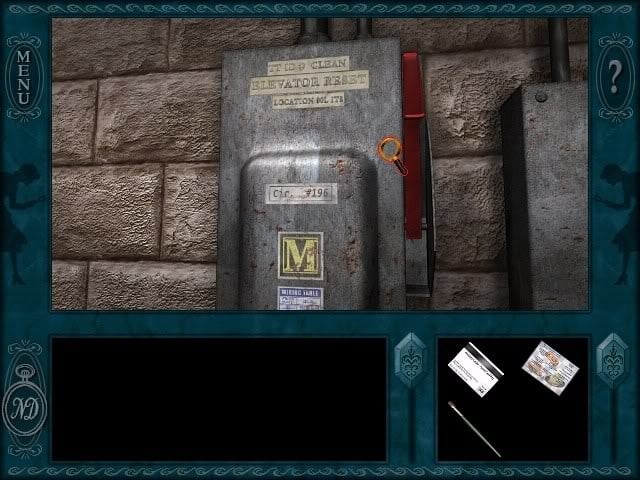
With the lighting fixed and the elevator reset, report back to Dexter and tell him about Nancy’s success. Dexter has one last task for Nancy to complete before he’ll actually fix her radiator, and that is to find out what the professor wants for dinner.
Head up to her room and she’ll say that she has a strong craving for couscous. When you tell Dexter about her order, he says that she has to choose something from the hotel’s menu. If you don’t already have the menu, it can be found in the top drawer of Nancy’s dresser.
Return to the professor’s room one more time and slide the menu under her door. She’ll order fifty drumsticks from the menu and Nancy can relay the information to Dexter. He tells her to tell Jacques to defrost the bag of chicken legs that are in the freezer. If the ski rental area is open, you can go ahead and tell Jacques to defrost the chicken. If it’s closed, return to Nancy’s room and set the alarm clock to pass the time to a point when the ski rental office is open.
After giving Jacques the order, return to Nancy’s room to realize that the radiator has been fixed and it seems that Dexter left his oil can behind. Take it with you and head back downstairs to the lounge. Ask Lisa about her many identities and she’ll tell Nancy that as a photojournalist, she doesn’t have time to play by the rules so alternative identities are a bit of a necessity for her. Ask her about any secret entrances in the mansion and while she doesn’t know of any, she would love for Nancy to tell her about them should she happen to find any.
Use the alarm clock to pass the time until it is 8 pm if necessary, then ride the elevator down to the basement. Climb out of the elevator through the emergency hatch and Nancy will hear some strange noises coming from below. Turn around and look down the side of the elevator car and Nancy will figure that there’s something important waiting for her down there.
Climb up the metal ladder until you see a grate with its cover missing. Climb into the ventilation shaft and follow it as it curves until you reach the end that leads into the library. Climb down out of the shaft, but as soon as you do, Nancy will hear someone coming. Quickly climb back into the ventilation shaft and watch as Dexter enters the room to look for something. After he leaves, it’ll be safe to climb out and snoop around in the library.
Walk down the stairs and look at the desk that Dexter was rummaging through to find an atlas inside the drawer. Note that Wisconsin’s longitude is 90°W and if you run your mouse cursor over the pile of dust on top of the desk, it indicates that an action can be performed on it. Use the paint brush to gather up some dust and walk over to the alarm panel to dust the buttons to discover the code to disarm the alarm, which 3*72.
To the right of the entrance is a globe which when further examined, has a needle indicating the longitudinal coordinates for different locations. Turn the needle so that it is pointing at 90° and turn the knob above it to find a piece of paper with the numbers -15, 10, and -5 written on it.
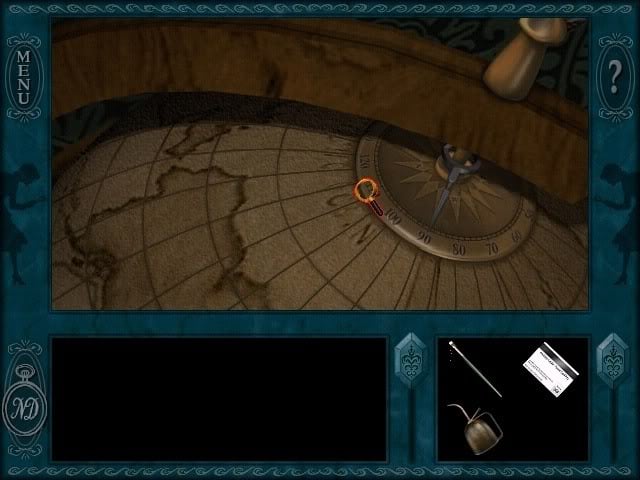
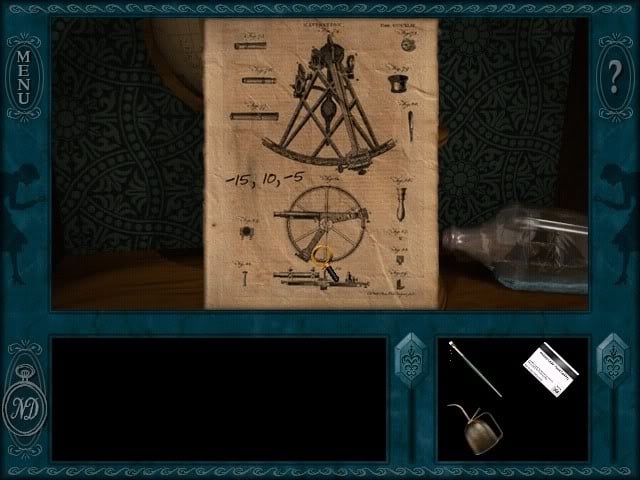
The paper is actually the clue you need in order to figure out the compass puzzle that’s hidden behind the panel above the fireplace. Move your cursor towards the left side of the panel once the compass has been uncovered and slide the pointer until it’s over the -15. Move your cursor towards the right side of the panel and slide the pointer to the 10 and then slide it again to the -5 and make sure to push the green button near the top every time you change the pointer.
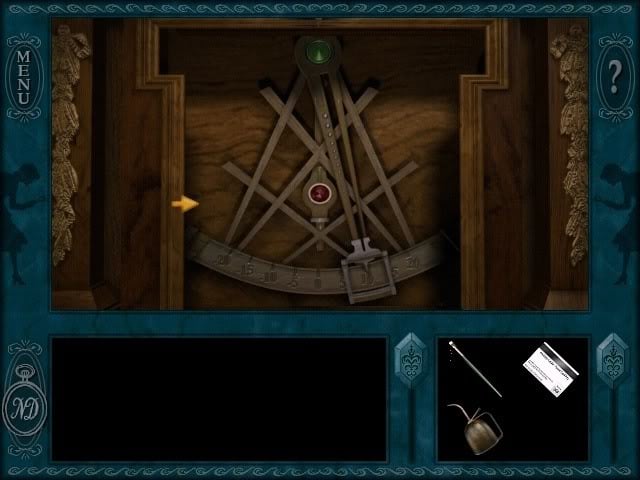
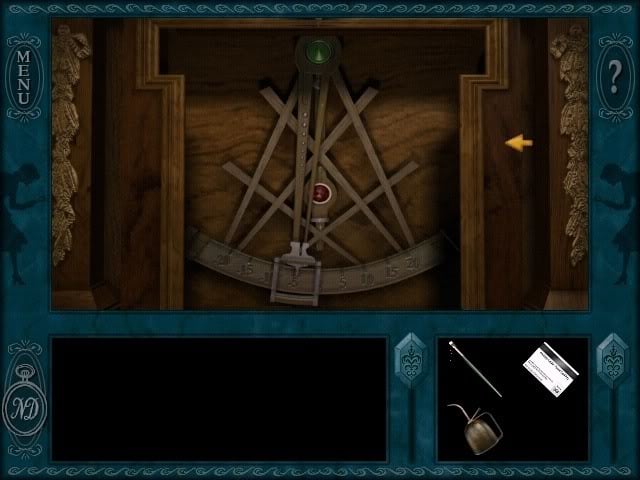
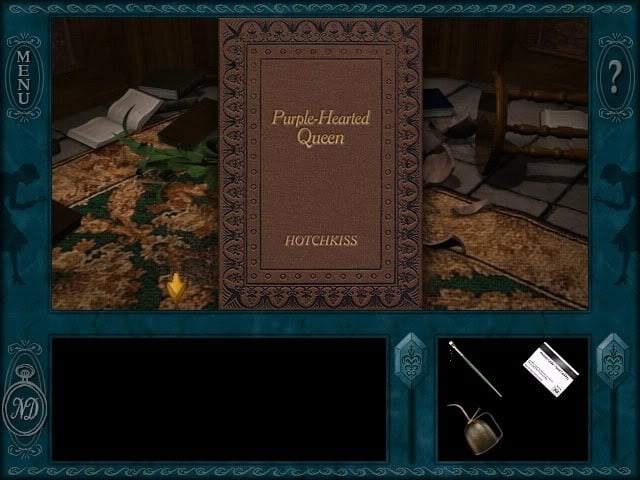
Once you’ve solved the puzzle, you’ll hear a creaky sound coming from above you, indicating that a hidden room has opened on the floor above you. Before we investigate, you’ll need to find a couple of books and read them as they’re needed to trigger a couple of future events. One book is on the floor near the globe, entitled “Purple-Hearted Queen” by Professor Hotchkiss.
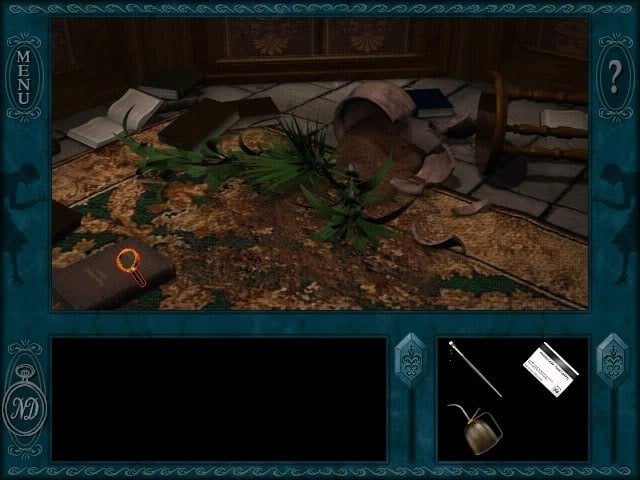
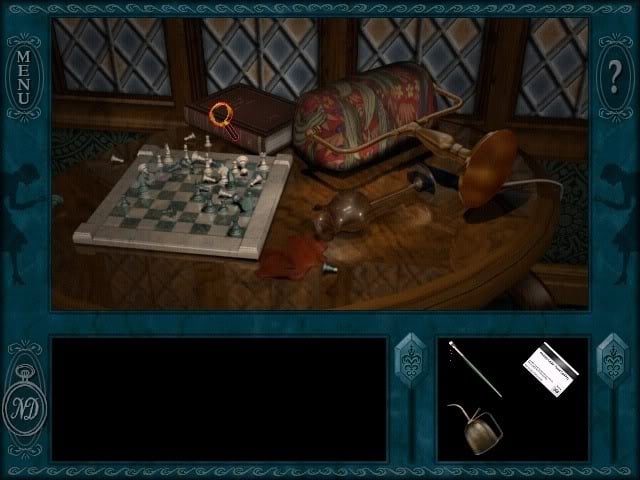
The other book is on the table near the staircase and once you’re done thumbing through it, walk upstairs and you’ll spot the hidden room as you turn left from the top of the stairs.
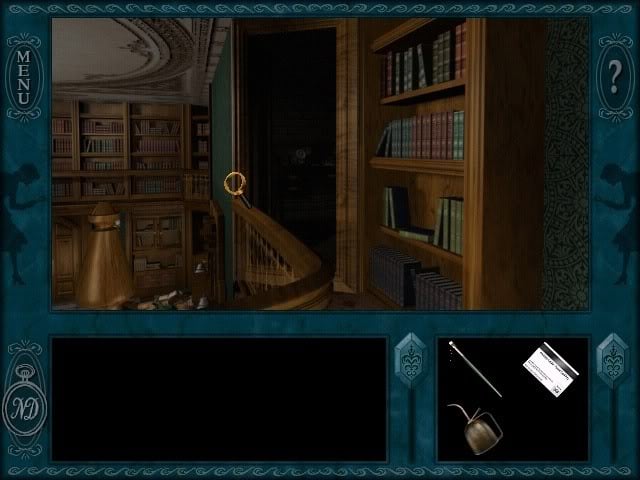
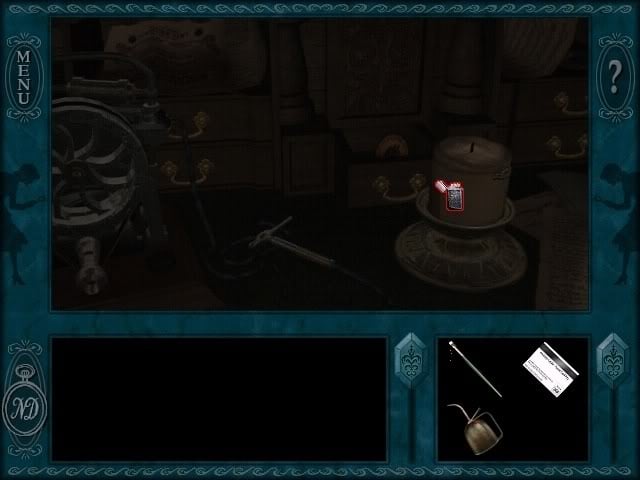
Take a peek at the desk and pick up the lighter so you can use it to light the candle next to it. Now that the room has some illumination, you’ll find that a key has been hidden inside the candle after some of it has melted away. Take the key and then read the letter that was left lying near the candle.
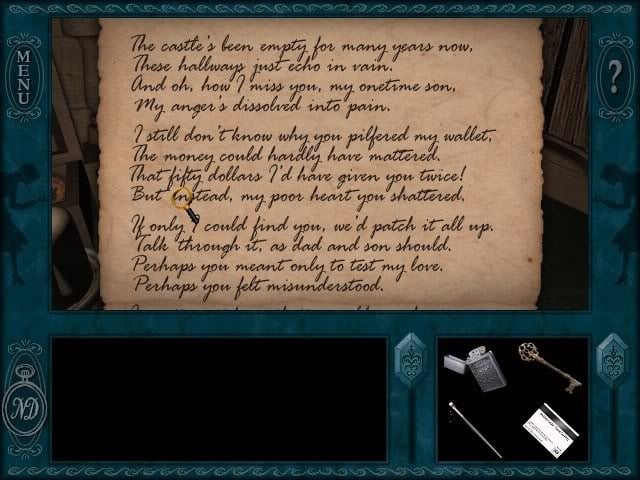
Once you’ve finished reading the letter, turn around and read the books on the opposite desk to see that they’re books filled with memories of how Dexter started out as a good child but grew up to be just another delinquent.
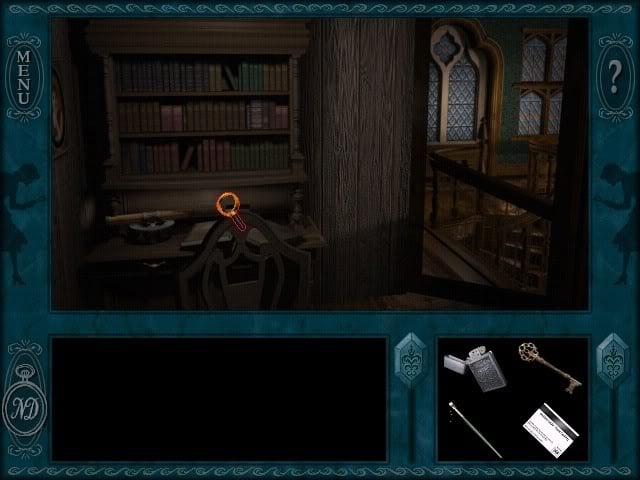
We’re finished with the library for the time being, so feel free to leave through the doors without fear of being caught. Ride the elevator back up to Nancy’s room and pass the time until it is 8 pm as now we’re going to find out what was causing the entire racket in the elevator shaft.
Before we head into the shaft, however, we’re going to need to grab Dexter’s key to the library. He’s not at his post, so walk behind his desk and grab the key from the drawer.
With the key in hand, head to the elevator and call it down to the first floor if it isn’t there now. Use the key to unlock the library, but the alarm will go off as soon as the doors open. Quickly disarm the alarm using the code 3*72 and then head upstairs to the second floor. Crawl into the ventilation shaft and follow it around to where it leads into the elevator shaft.
Once you hear the strange sounds again, turn around to spot a lever that controls the door to a hidden access corridor. The lever’s stuck, but you can lube it up with the oil can to get it working again.
Follow the stairs down into the corridor and turn left to see a door with several locks on it. The combination changes each time the door is used, so I can’t provide a solution. It is trial-and-error so try each lock until you find the correct one and repeat with the other locks until you find the combination that opens the door.
Once Nancy is through the door, it’ll slam shut behind her. Turn left at the intersection and follow the passage around until you spy Jacques sawing away at a barred door. He’ll be surprised to see Nancy, but t there is an explanation for it if you follow these conversation choices:
“Don’t you think I should be asking YOU that question?”
“What’s your fiancée…”
“A secret compartment?”
“What happened to the medallion?”
“So, how do you know all this?”
“What did he think the journal contained that was so important?”
“But how do you think the medallion fits in?”
“I don’t know, Jacques…”
“Well, as long as you tell Christi…”
Jacques will reveal his story to Nancy and give her the combination to his locker, which is 2665. Before leaving the room, grab the spear tip from the suit of armor near the barred door at which Jacques was sawing away. Return into the hallway and head up the long staircase to a door that lets Nancy out into the first floor hallway.
Return to the ski rental area and find Jacques’ locker, which has a blue plaque on it. Use his combination to open the locker and before looking at the blue medallion, look at the letter from his fiancé, and then look at the diamond chart as well as the immigration letter. As soon as Nancy examines the medallion, however, she’s knocked out and then awakes later in her room to find that her phone is ringing.
It’s Jacques checking up on Nancy to see how she’s doing after she had been knocked unconscious by an unknown assailant.
“I don’t know what really happened.”
“It was the last thing I saw…”
“I’m afraid I am serious…”
Jacques is understandably disappointed at this sudden turn of events, but we’ll manage somehow. Check Nancy’s voicemail to hear a message from Dexter, who was also concerned with Nancy’s well-being.
Head down into the lobby and speak with Dexter. Be honest with him when he asks about the red dirt on Nancy’s shoes and he’ll be understanding about what Nancy tells him as he was just as curious as she was when he was a kid. Be sure to ask him about the secret garden and he’ll tell her how to get there and he’ll also mention something about a key being in the shed.
The storm has finally let up, but as Dexter told Nancy, it’s still bitter cold outside. Leave the castle through the locker room and move quickly as you head across the snow covered ground to the shed. You can’t spend too much time outside of the castle (or in the shed for that matter) before Nancy dies from exposure.
After you enter the shed, walk down the stairs and head over to the work bench located at the left side of the building. Take the key hanging from the peg board to the right where the screwdrivers are located. You can also find some instructions for the ski lift machine as well as a newspaper clipping on the left side of the work bench.
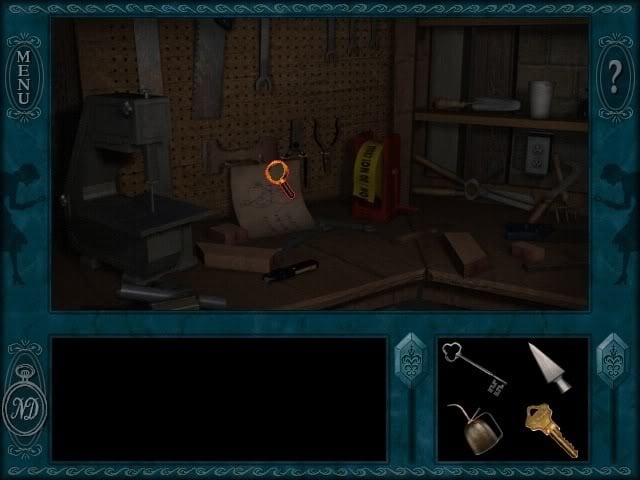
Leave the shed and return to the castle before it’s too late. We’ll need to make one more trek outside to find the secret garden. Exit the castle and from the doorway, take three steps forward and click on the arrow that appears when you move the cursor near the sign.
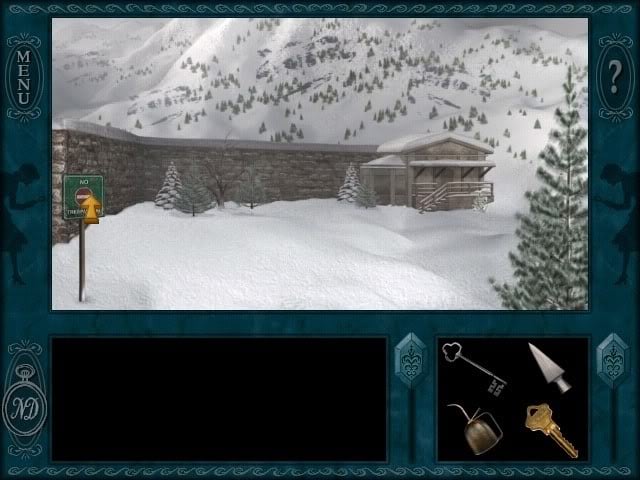
You’ll find the door leading to the secret garden covered in ivy. Clear the ivy from the door and open the gate. Inside the garden, walk forward and turn left until you’ve reached the sundial. Turn it so that the arrow is facing to the left, and then turn left to see a statue sitting inside the niche. Pull the lever on the back of the statue’s head to reveal an ornate box at its base.
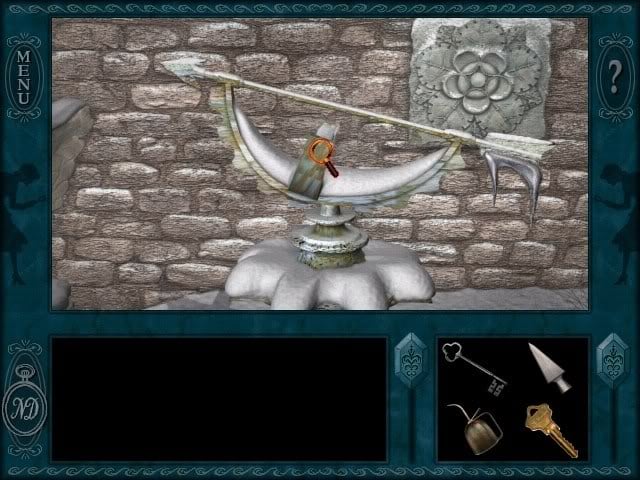
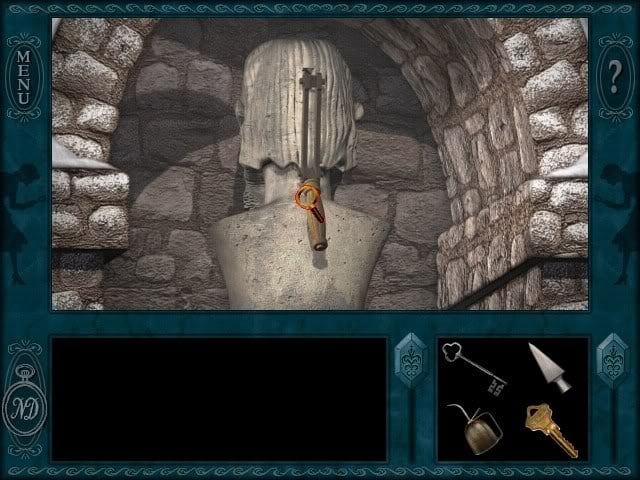
Open the box to find the red medallion. Take it and then quickly make your way back to the castle before Nancy freezes to death. Walk into the lounge area and speak with Lisa. She’ll say that she saw Dexter carrying some sort of green-colored ornament out to the shed. Leave the castle through the locker room again and when you try to open the door, you’ll find that it’s locked!
Make your way into the shed and walk over to the ski lift machine that’s just before the work bench area. You’ll have to use the clue from the note you found earlier about the ski lift machine to power it on. Pull the middle lever once and the right one twice.
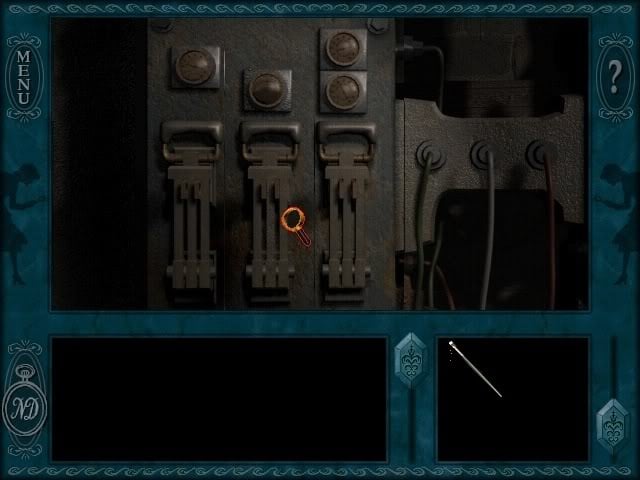
The ski lift should come to life, and Dexter will come running into the shed and bring Nancy back into the castle. Now that Nancy is nice and warm again, head up to the professor’s room and speak with her. She needs Nancy to answer a question for her, the answer to which can be found in the books on the shelf in the lounge area.
Once you have the answer to the question, write it on the scrap paper that the professor slides under the door. Once you’ve correctly answered the question, she’ll tell Nancy to meet her in the lounge between 3 – 5:59 am. Return to Nancy’s room and set the alarm for 3 am.
Head down into the lounge to find the professor sitting in the left side of the room. Talk to her about Marie Antoinette and once you’re done talking about everything with her, she’ll hand over a copy of her room key and allow Nancy to snoop around until she begins her researching at 6 am.
Return to the professor’s room and use her room key to gain entrance. Check out her writing table and read the notes situated to the right of the typewriter. Turn around and open the briefcase near the couch to find a letter addressed to her from her friend.
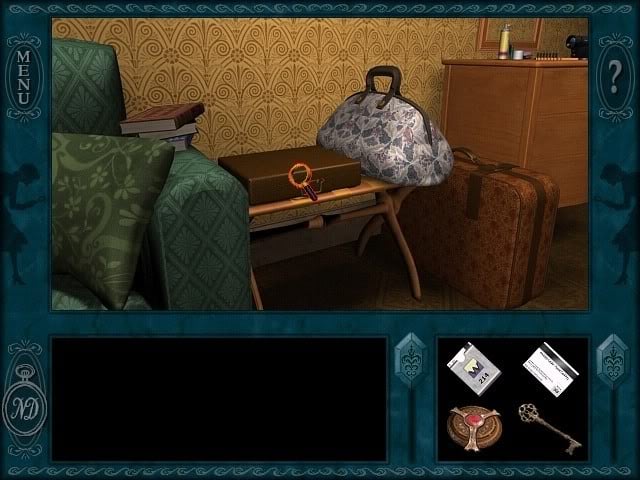
When you move the pillow on the couch, you’ll uncover the blue medallion!
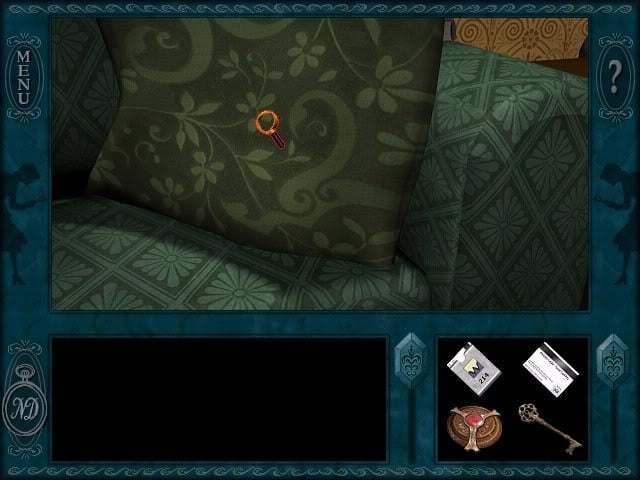
Take it and then take a look at the video camera on her dresser. Play back the video, only to have the battery die when the professor sees something unexpected. Remove the battery and put it on the charger. You’ll have to wait a while for the battery to fully charge, so in the meantime, return to Nancy’s room and pass the time until it is 8 am.
Once Nancy awakens, return to the shed and look at the machinery to the right of the ski lift machine. You’ll find the green medallion hiding within, and it appears that a nasty rat is protecting it. After the rat has left, retrieve the medallion and then return to Nancy’s room and pass the time until 3 am.
Re-enter the professor’s room and put the fully charged battery into the video camera. Play the rest of the video until the battery dies again and you’ll have seen what you needed to see. There’s apparently a peep hole in the circular room at the end of the second floor hallway.
Leave the professor’s room, turn right and head down to the end of the hallway to find the circular room that you saw in the video. When you have a close-up view of the peep hole, place each medallion in the slot and look through each one to see different symbols appear as you look through each medallion and note their locations. It’s time to finally check out the Queen’s Tower.
Ride the elevator down to the first floor. Make your way to the elevator shaft by way of the library vent after you’ve disarmed the alarm and head down into the hidden passage. Go through the steps of unlocking the locked door and return to the room where you saw Jacques sawing away at the door.
Use the skeleton key you took from the shed to open the wrought iron door and step on through. Across from where you’re standing, you’ll see a set of stepping stones that Nancy can cross once they’re rotated into the right position. In order to rotate them, you’ll need to solve the chain puzzle on the right wall with the clue as to the correct positions of the chains on the left wall.
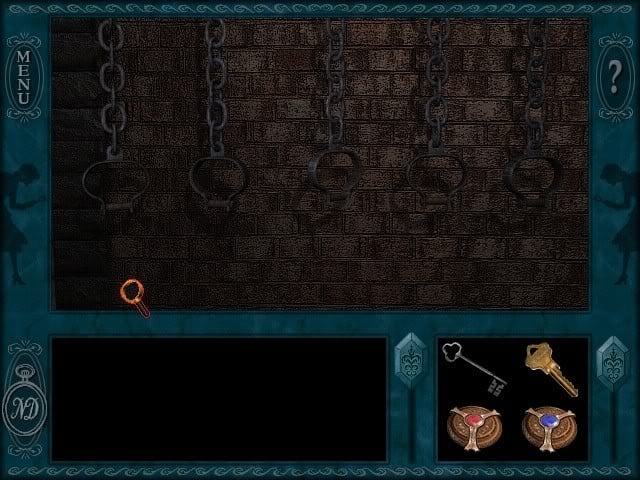
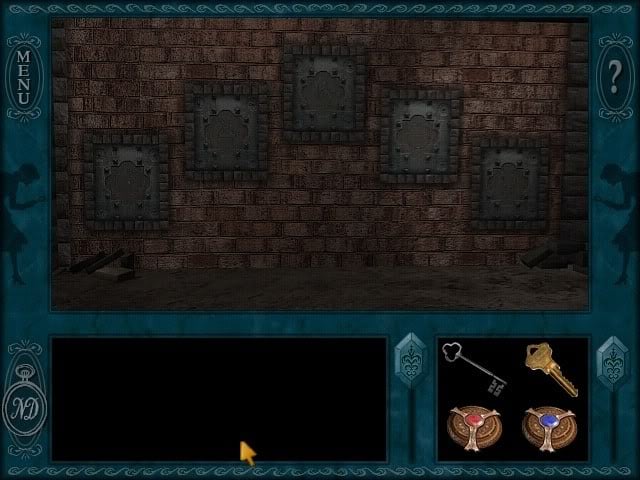
The problem with the chains is that each chain, with the exception of the fourth one, controls another chain as well. If the positions of the chains are anything like the ones I had, the solution is to pull the fifth chain twice, the third chain once, the second chain twice, the first chain once, and the fourth chain twice.
If that solution doesn’t work, then you’re on your own. It’s all about trial-and-error, as most of the puzzles in this game seem to be. Once you’ve successfully solved the chain puzzle, the stepping stones will rotate into place so that Nancy can cross them.
As you head to the other side of the stones, turn left at the intersection and follow the long passage until you reach a chessboard. The chessboard puzzle is a little more difficult as the pieces will slide across the board until it hits another piece or a wall. You’ll need to move each piece to its home square, which may not always be easy.
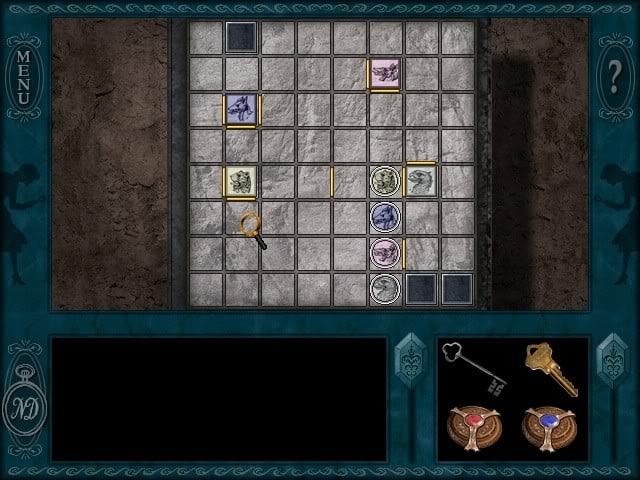
Since I’m playing the game on the Senior Detective difficulty, a good idea would be to start with the yellowish piece that has the tiger on it and follow these steps:
Sending the Tiger Home:
1) Move the cobra piece (the third piece down) to the left so that it ends up hitting the left wall.
2) Move the eagle piece up one space so that it hits the blue wolf piece and then move it left so that it hits the cobra piece. Move it up one more spot and it’ll hit the wall below the tiger’s home square.
3) Move the wolf piece left.
4) Move the tiger piece up, left, down, and left again and it’ll return home.
Returning the Wolf to the Den:
1) Move the cobra piece up.
2) Move the eagle piece down, right, up, left, and up again.
3) Move the wolf piece up and then right.
4) Move the eagle piece down, left, and up.
5) Move the wolf piece left and down to return it to its den.
Putting the Cobra back in the Snake Pit:
1) Move the eagle right and up.
2) Move the cobra down, right, up, right, up, left, and down to put it back into the snake pit.
Finishing the Puzzle with the Eagle in its Nest:
1) Move the eagle right, down, left, and up to complete the puzzle.
Once the puzzle has been solved, a set of stairs will be revealed that will lead up to the top of the tower. Open the door and walk forward several steps and take a look at the wall.
The gold leaf puzzle is a little tricky to solve, but it’s supposed to look like a picture of entangled feathers. There’s no real solution that I can give you, but I can give you a hint: Do the borders first.
Each puzzle piece can be rotated if needed and once you have it solved, it’ll go from looking like this:
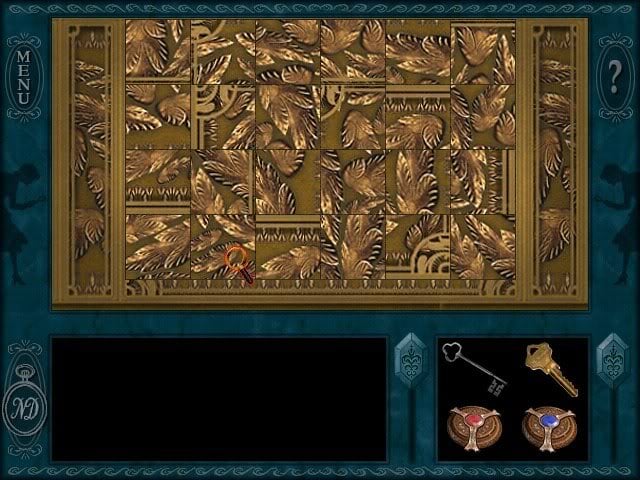
To looking like this:
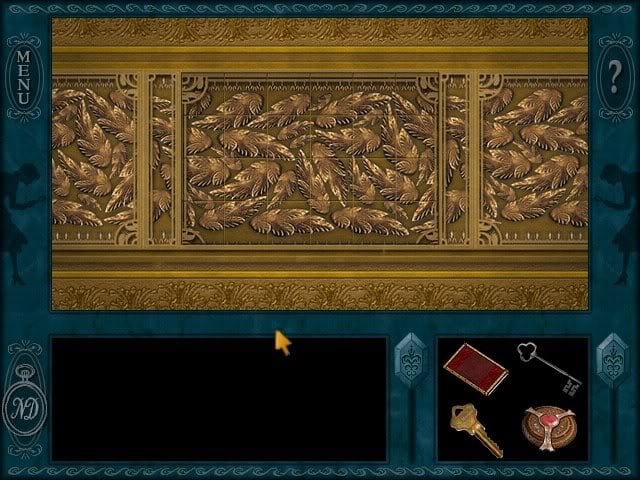
Just take your time and eventually everything will work out in the end. A secret compartment will open to reveal a journal. Return to Nancy’s room and set the alarm to 3 am so that she can meet with the professor in the lounge. Show her the journal and she’ll take it so that she can translate it. It’ll be ready the next day, so once again go to Nancy’s room and set the alarm to 3 am.
Talk to the professor and she’ll tell Nancy that she not only was able to translate the journal, but she also included a decoder with it too. Head up to the professor’s room and check out the writing table to see the book situated next to the typewriter with her translation tucked inside. Read it and then look at the decoder page seated on the other side of the typewriter.
Return to the castle tower using the method that we utilized the last time, and yes, you will have to solve the chain puzzle again but as long as you remember the solution from last time, it’ll be a piece of cake. You won’t have to worry about the chessboard puzzle again though so you can just head back up to the top of the tower once you’re across the stepping stones.
Look at the design on the floor to see that the medallions can be placed into each socket. The red medallion goes in the upper left socket, the blue one goes into the upper right socket, and the green one goes into the bottom socket. You’re still missing the last piece to the puzzle, which will fit the square slot in the middle.
Look at the portrait of Marie Antoinette on the wall and you’ll notice that you can interact with the purple rose she’s holding. Use the spear tip to pry away the tiles to uncover a square-shaped key. Take the key and use it in the square slot in the middle of the medallions to uncover a pedestal holding a diamond.
Just when you thought it was safe, the vandal and thief named Lisa Ostrum shows up. She wants the diamond so she can be rich and live the life of luxury that involves tropical locales and cabana boys. She blinds Nancy with some potent pepper spray, and rather than being the smart thief and quickly making her escape, she allows Nancy to question her about everything that’s happened during the case.
After they’re done talking, Lisa will grab the diamond and try to make her escape. Before she gets too far, however, head out the door and push the square button on the left wall to retract a section of the stairs, trapping Lisa in a cell beneath them to solve the case of the Treasure in the Royal Tower.
“;
More articles...
Monopoly GO! Free Rolls – Links For Free Dice
By Glen Fox
Wondering how to get Monopoly GO! free rolls? Well, you’ve come to the right place. In this guide, we provide you with a bunch of tips and tricks to get some free rolls for the hit new mobile game. We’ll …Best Roblox Horror Games to Play Right Now – Updated Weekly
By Adele Wilson
Our Best Roblox Horror Games guide features the scariest and most creative experiences to play right now on the platform!The BEST Roblox Games of The Week – Games You Need To Play!
By Sho Roberts
Our feature shares our pick for the Best Roblox Games of the week! With our feature, we guarantee you'll find something new to play!Type Soul Clan Rarity Guide – All Legendary And Common Clans Listed!
By Nathan Ball
Wondering what your odds of rolling a particular Clan are? Wonder no more, with my handy Type Soul Clan Rarity guide.


