- Wondering how to get Monopoly GO! free rolls? Well, you’ve come to the right place. In this guide, we provide you with a bunch of tips and tricks to get some free rolls for the hit new mobile game. We’ll …
Best Roblox Horror Games to Play Right Now – Updated Weekly
By Adele Wilson
Our Best Roblox Horror Games guide features the scariest and most creative experiences to play right now on the platform!The BEST Roblox Games of The Week – Games You Need To Play!
By Sho Roberts
Our feature shares our pick for the Best Roblox Games of the week! With our feature, we guarantee you'll find something new to play!All Grades in Type Soul – Each Race Explained
By Adele Wilson
Our All Grades in Type Soul guide lists every grade in the game for all races, including how to increase your grade quickly!
Mystery Case Files: Dire Grove Walkthrough
Welcome to Gamezebo's walkthrough for Mystery Case Files: Dire Grove. Navigation General Tips Chapter 1: Welcome to Dire Grove Chapter 2: Dire Grove Hotel Chapter 3: Accessing the Manager's Office Chapter 4: He's the Fisherman Chapter 5: Going Into Town Chapter 6: She's the Hunter Chapter 7: He's the Blacksmith Chapter 8: She's the Farmer Chapter 9: Restore Power to the Hotel Chapter 10: Accessing the Ruins Chapter 11: The Fifth Element Bonus: List of Achievements Bonus:…
a:1:i:0;a:2:s:13:”section_title”;s:42:”Mystery Case Files: Dire Grove Walkthrough”;s:12:”section_body”;s:112838:”
Welcome to Gamezebo’s walkthrough for Mystery Case Files: Dire Grove.
Navigation
- General Tips
- Chapter 1: Welcome to Dire Grove
- Chapter 2: Dire Grove Hotel
- Chapter 3: Accessing the Manager’s Office
- Chapter 4: He’s the Fisherman
- Chapter 5: Going Into Town
- Chapter 6: She’s the Hunter
- Chapter 7: He’s the Blacksmith
- Chapter 8: She’s the Farmer
- Chapter 9: Restore Power to the Hotel
- Chapter 10: Accessing the Ruins
- Chapter 11: The Fifth Element
- Bonus: List of Achievements
- Bonus: Tape Transcripts
- Bonus: Morphing Objects
General Tips
Hints- Hints will recharge after a short amount of time, and are unlimited. However, hints can only be used in actual hidden object scenes. If you need help on the game itself, it’s best to refer to your Notebook.
The Notebook– This will keep track of your progress and your finds. Valuable clues and bits of information will also be stored here, so if you’re stuck, this is a great place to look.
Puzzles– Every puzzle can be skipped with no penalty. The only exception is the final "Relic Puzzle", which cannot.
The Crime Computer- Here you can use and view Tapes that you’ve picked up throughout the game. They’ll tell you the story first-hand, and may also provide valuable help in another way… Tapes may be reviewed anytime, and may not be found in numerical order when playing.
Inventory Items– These are bolded throughout the guide to make them easier to find. When an item is no longer useful, it will automatically be discarded.
Clicking Penalties– If you click too often or too fast in a particular area, you will temporarily freeze, and the mouse will become sluggish and slippery for a short period of time.
Gameplay- The gameplay of Mystery Case Files: Dire Grove is non-linear, meaning that many things can be done in various orders. This guide has been organized to reflect the most efficient line of gameplay.
Walkthrough
Chapter 1: Welcome to Dire Grove
Outside
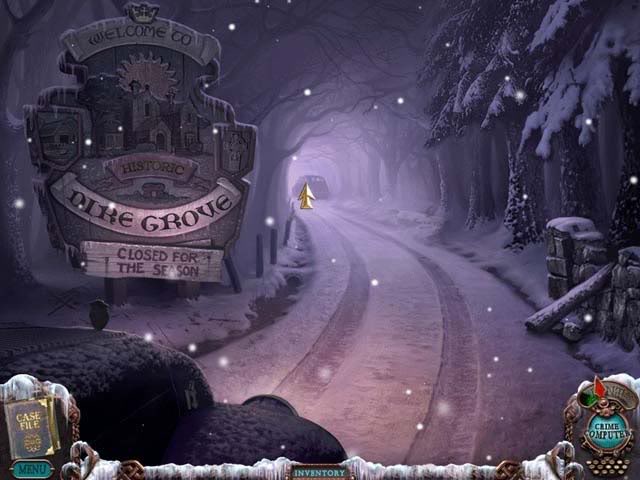
- Proceed forward up the road from where you car has broken down, and towards the vehicle in the distance.

- Enter the car sitting in the road. Notice the license plate "JXH2M6".
Inside the Car
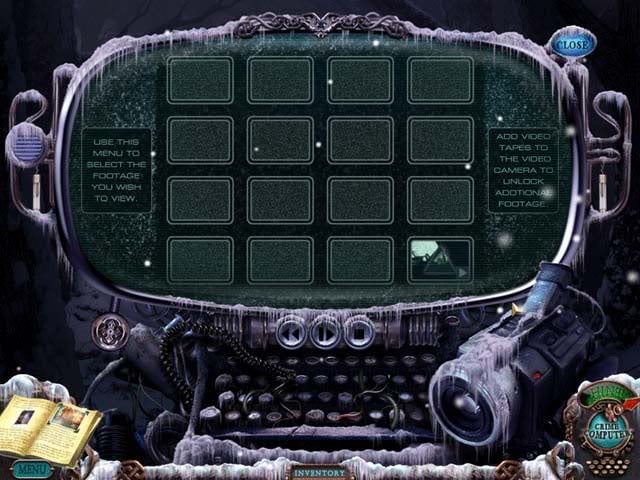
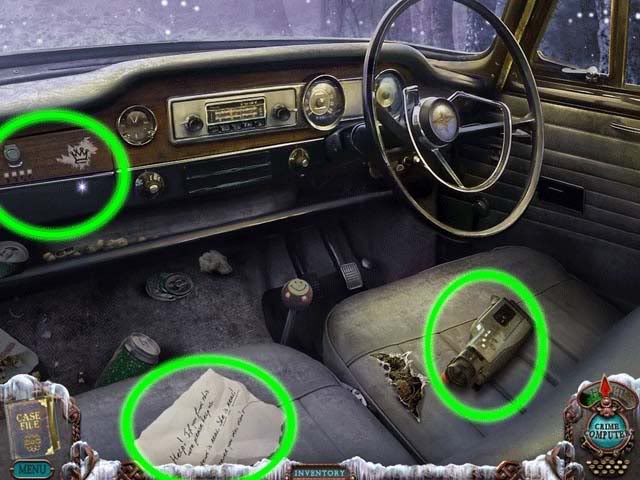
- Inside the car, pick up the note to read a haunting scribble. Pick up the Video Camera to discover an eerie tape, which you can view on your Crime Computer (located in the lower right-hand corner of the screen). Click on the Crime Computer to open a new window, and drag the Video Camera from your inventory onto the computer screen to view the tape. You can exit when finished.
- Once you’ve done these things (circled in green), click on the Glovebox, which is also circled in green below.
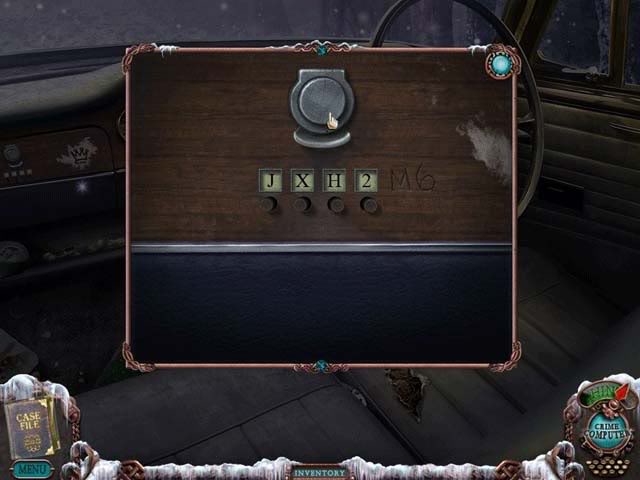
- Find the combination to the Glovebox to open it. M6 is scratched on it at the end. Don’t be misled thinking the solution is located on the optional nearby Radio, which also has an "M6": the solution is the car’s license plate number: JXH2(M6).
- Click the Trunk Key inside the Glovebox to add it to your inventory, then exit the car.
Outside
- Outside of the car, click on the trunk. Use the Trunk Key on the trunk lock to open it.
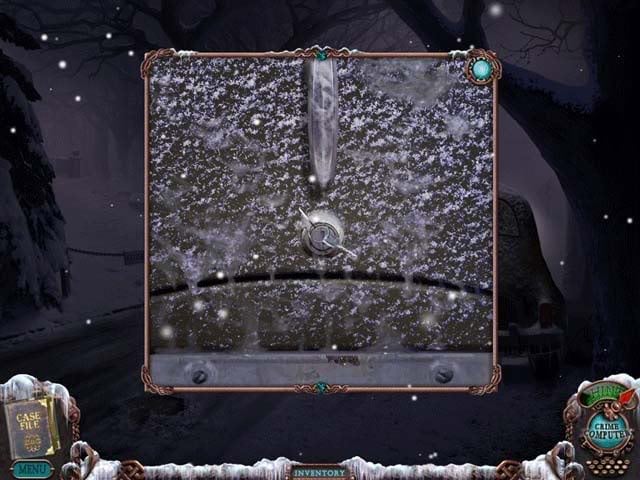
- Click on the sparkling inside of the trunk to enter a hidden object area.
Hidden Object Area: Trunk
- Find the objects listed at the bottom of the screen. Objects are randomized, but one will be added to your inventory upon completing the area. This inventory object is circled in red.
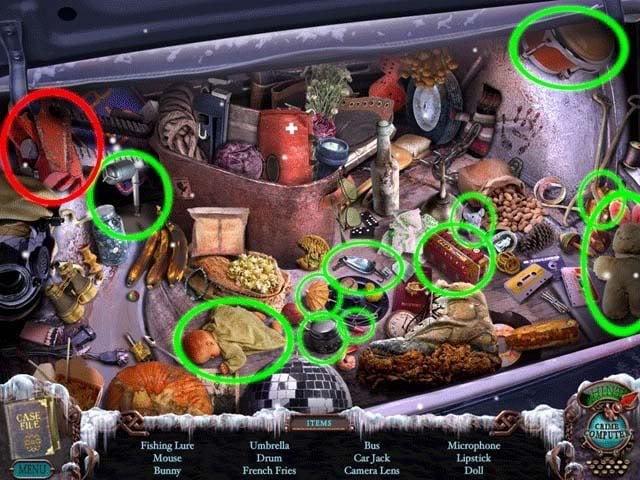
- Upon completing the area, the Carjack will be added to your inventory.
Outside
- Outside the car again, take the path to the left past the "Closed" sign. Follow the footprints forward through the woods until you see the Dire Grove Hotel.
- Pick up the Tape sitting in the snow on the left. Play it on your Crime Computer now or save it for later: your choice.
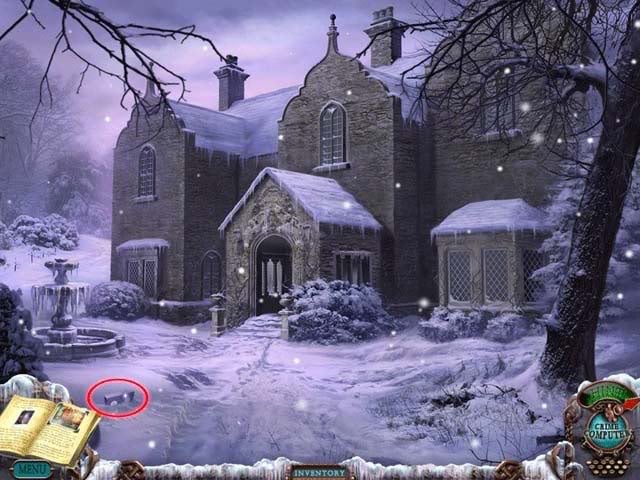
- Proceed forward to the entrance of the Hotel.
- You can click on the items circled in green for a closer look: one is an I.D. card that belongs to the girl you saw in the tape, and the other is a barometer. The barometer is useless for now, but you’ll be returning here later.
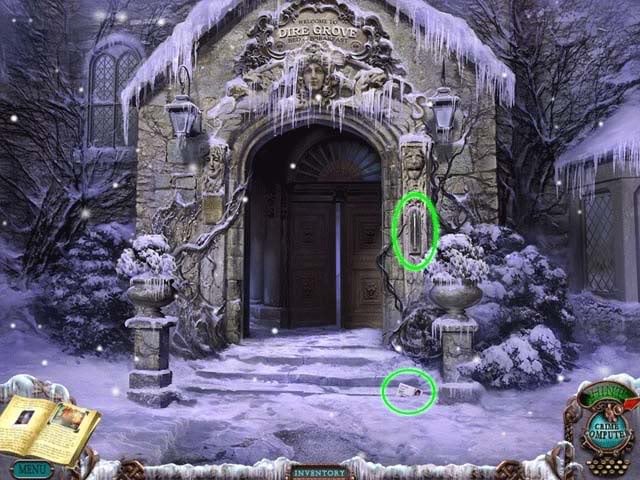
- Enter the Dire Grove Hotel.
Chapter 2: Dire Grove Hotel
Lobby
- Upon entering the Hotel, you’ll immediately notice the sparkles surrounding the check-in desk. Click on that area to enter a hidden object area.
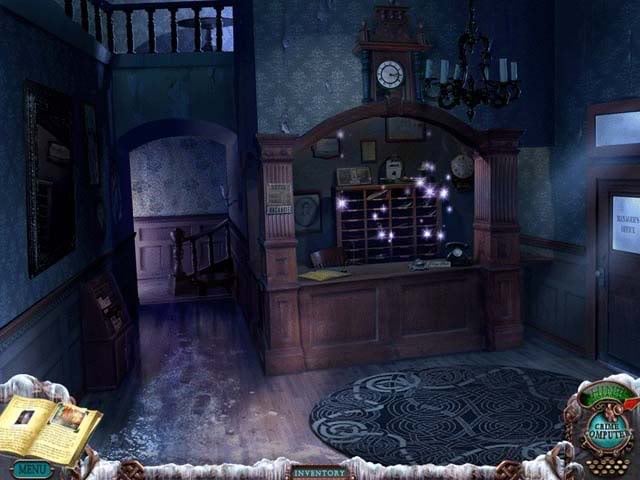
Hidden Object Area: Check-in Desk
- Find the objects listed at the bottom of the screen. Objects are randomized, but one will be added to your inventory upon completing the area. This inventory object is circled in red.
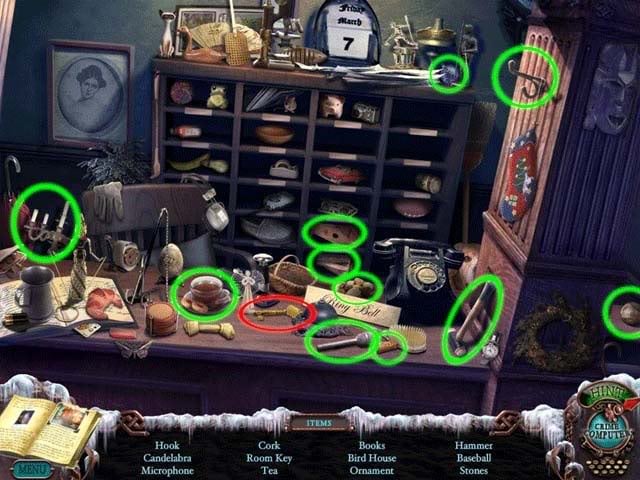
- Upon completing the area, the Room Key will be added to your inventory.
Lobby
- It’s optional that you can check out the Guest Book at the check-in desk or pamphlets located on the left of the room, but it’s not mandatory.
- Proceed through the hallway to the left of the desk. You can choose to go left or right: it really doesn’t matter since it’s all one room, so we’ll go left first for the sake of the guide.
Main Room (Left)
- Circled in green below, there are two items in particular you can view up-close. One is a newspaper clipping talking about an old relic, and the other is a computer that shows strange images.
<DG11.gif>
- Click on the sparkling area on the left over the backpack on the left to enter a hidden object area.
Hidden Object Area: Main Room
- Find the objects listed at the bottom of the screen. Objects are randomized, but one will be added to your inventory upon completing the area. This inventory object is circled in red.
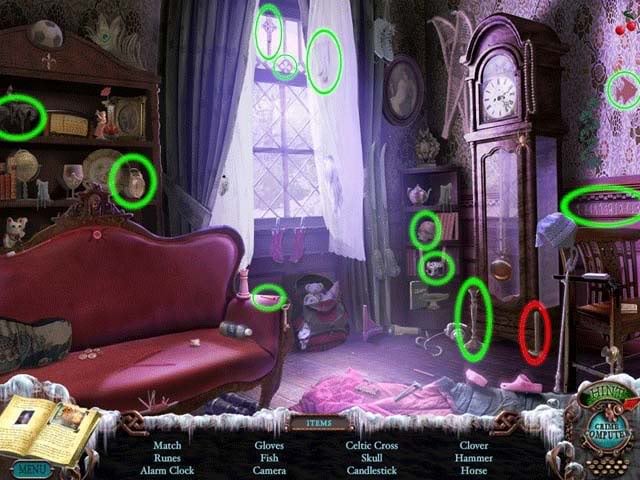
- Upon completing the area, the Hammer will be added to your inventory.
Main Room (Right)
- There’s nothing to actually pick up in the right part of the Main Room, but there are objects that can be viewed for closer inspection, which are circled below.
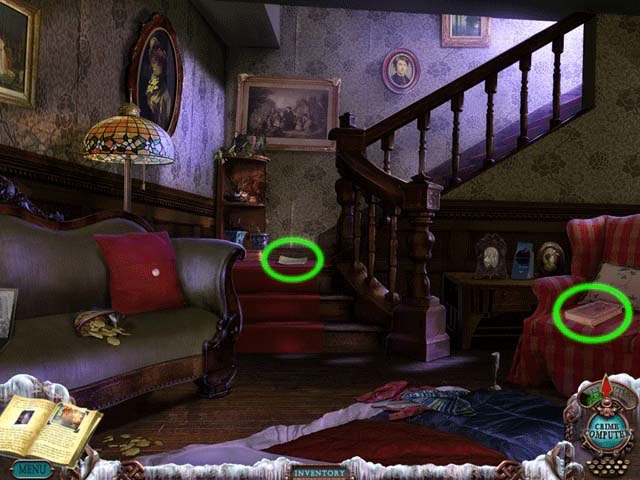
- One object is simply a book on mysteries of the ancient celts. The other is a note that drops useful hints you’ll need for later in the game.
- Proceed up the stairs.
Upstairs
- Click on the sparkling area above the table between the two doors to enter a hidden object area.
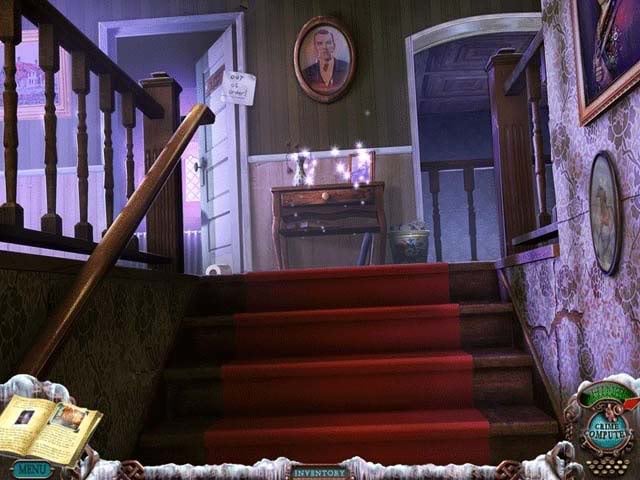
Hidden Object Area: Upstairs Table
- Find the objects listed at the bottom of the screen. Objects are randomized, but one will be added to your inventory upon completing the area. This inventory object is circled in red.
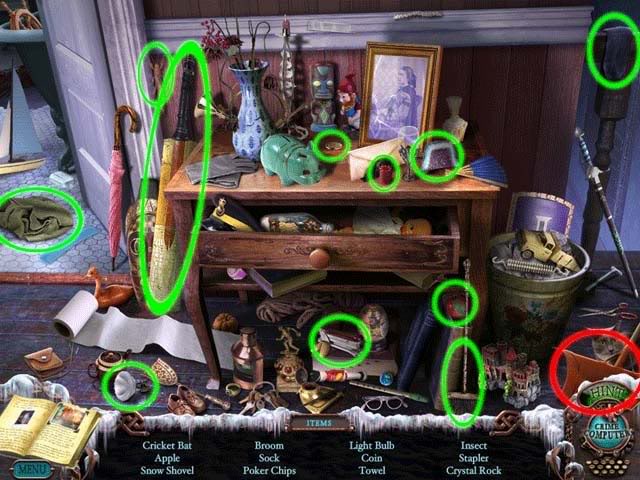
- Upon completing the area, the Snow Shovel will be added to your inventory.
Upstairs
- Once the hidden object area is complete, proceed to the right to enter the Hallway.
Hallway
- To the right, outside the door with the ship’s wheel on it, is a Tape. Click on it to add it to your inventory.
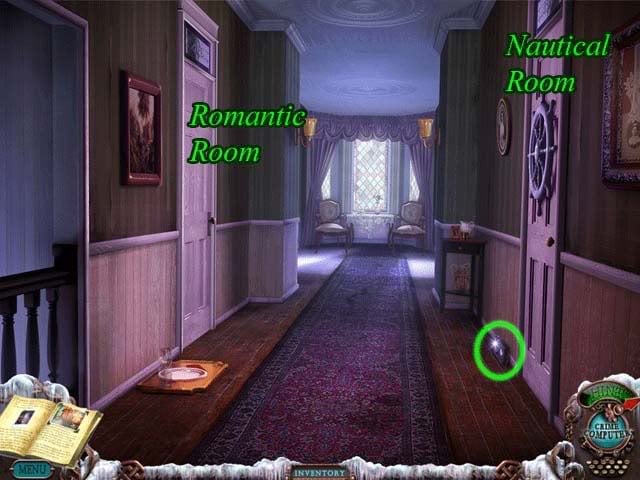
- Click on the door of the room to the left with the meal tray sitting outside: it’s not locked. Enter.
Romantic Room
- The bed in the far back of the room is sparkling. Click on it to enter a hidden object area.
Hidden Object Area: Romantic Room
- Find the objects listed at the bottom of the screen. Objects are randomized, but one will be added to your inventory upon completing the area. This inventory object is circled in red.
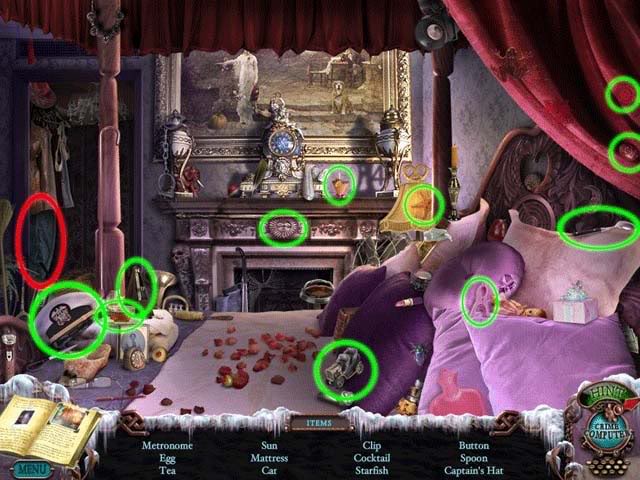
- Upon completing the area, the Mattress will be added to your inventory.
Hallway
- Use the Room Key from your inventory on the door with the ship’s wheel on it located on the right, outside the Romantic Room. Enter the Nautical Room.
Nautical Room
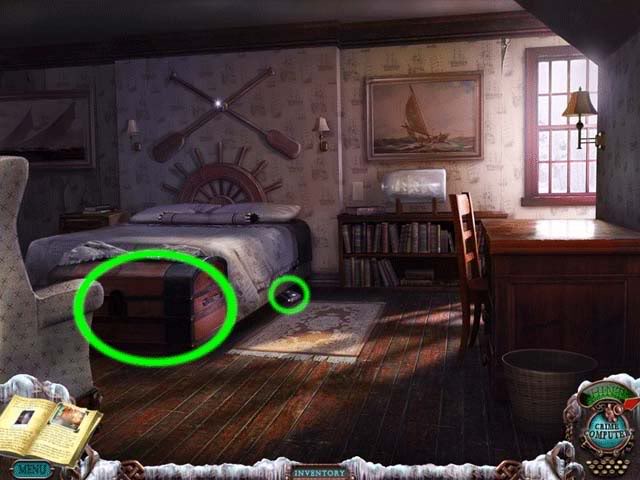
- Pick up the Tape lying on the floor under the bed, then click on the Chest at the foot of the bed.
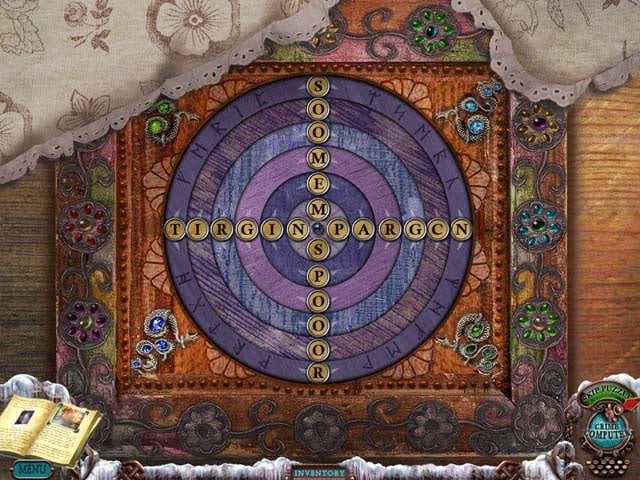
- On the Chest is a puzzle rotation wheel. Click on each ring to rotate the letters. The goal is to spell a word on each of the four sections of the puzzle. If a word appears spelled backwards/upside-down, rotate each ring once to right the words. Solutions are random, but here are a few possibilities:
FOLLOW, RIPPED, DENTED, PARROT
ADORES, GREASY, FOLLOW, LADDER
ADORES, FOLLOW, MORGUE, PROVEN
PROVEN, HINTED, FEVERS, PARROT
The puzzle may be skipped.
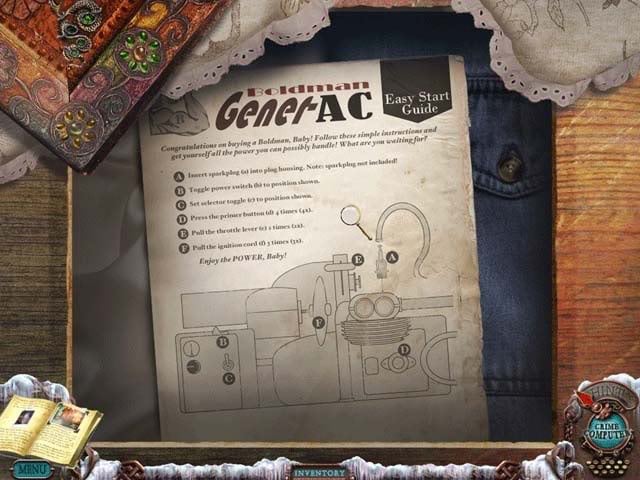
- Your reward for completing the puzzle is a directions sheet for getting the generator back up and running.
- Return back to the Lobby.
Lobby
- Click on the sparkling area over the check-in desk to once again enter a hidden object area.
Hidden Object Area: Check-in Desk
- Find the objects listed at the bottom of the screen. Objects are randomized, but one will be added to your inventory upon completing the area. This inventory object is circled in red.
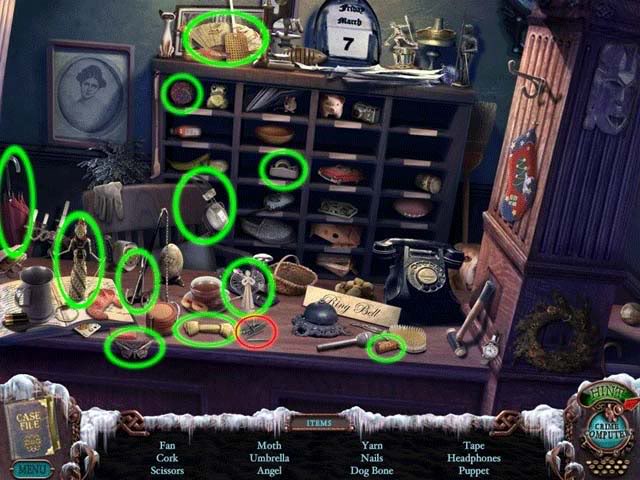
- Upon completing the area, the Nails will be added to your inventory.
- Exit the Dire Grove Hotel and go back outside.
Outside
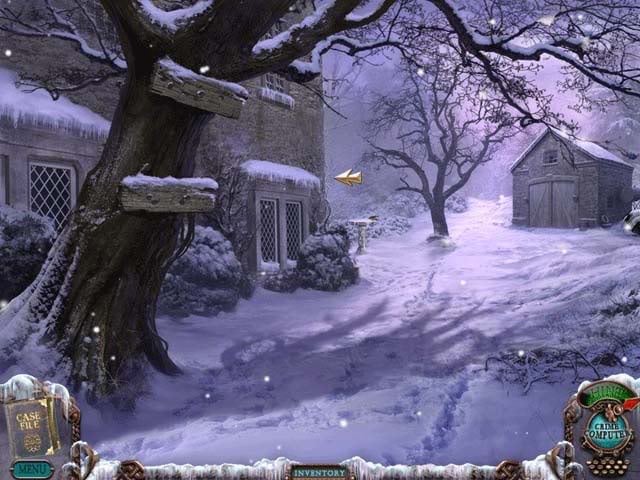
- Exit back from the hotel until you can see the fountain on the left. From that view, proceed right.
- There’s a tree here with a piece of paper caught in the branches, but we’ll have to return here later. Proceed left around back to the generator.
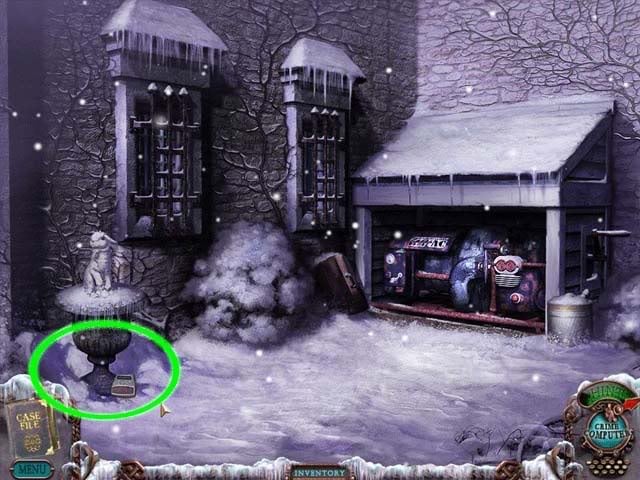
- Use the Snow Shovel on the base of the Fountain until you reveal the Garage Opener. Click it to add it to your inventory.
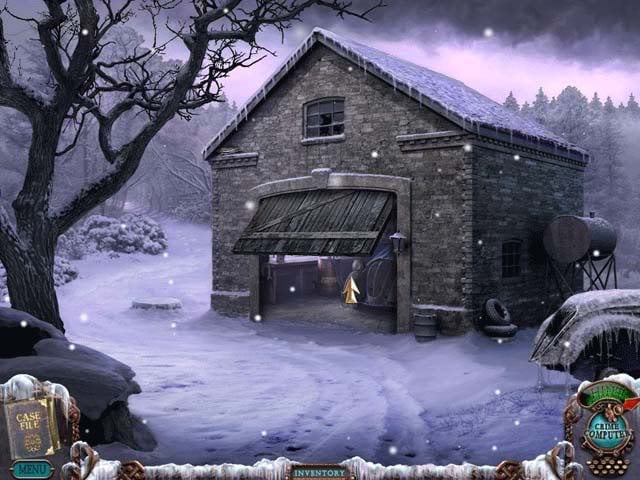
- Go back to the previous area with the tree, then proceed forward towards the Garage.
- Use the Garage Opener on the Garage to open it, and proceed inside.
Garage
- Inside the Garage, click on the sparkling area to enter a hidden object area.
Hidden Object Area: Garage
- Find the objects listed at the bottom of the screen. Objects are randomized, but one will be added to your inventory upon completing the area. This inventory object is circled in red.
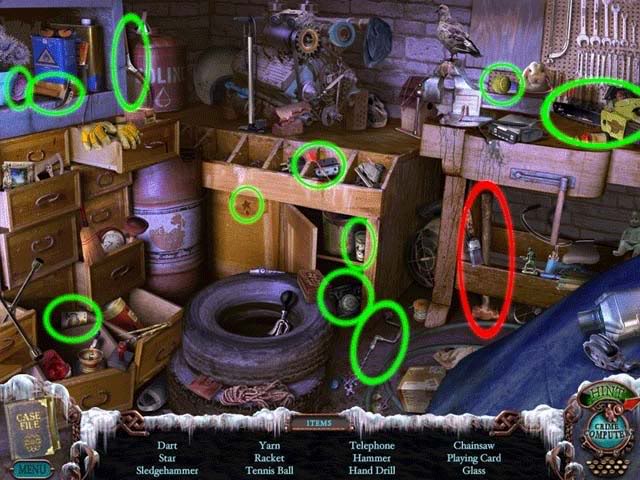
- Upon completing the area, the Sledgehammer will be added to your inventory.
Garage
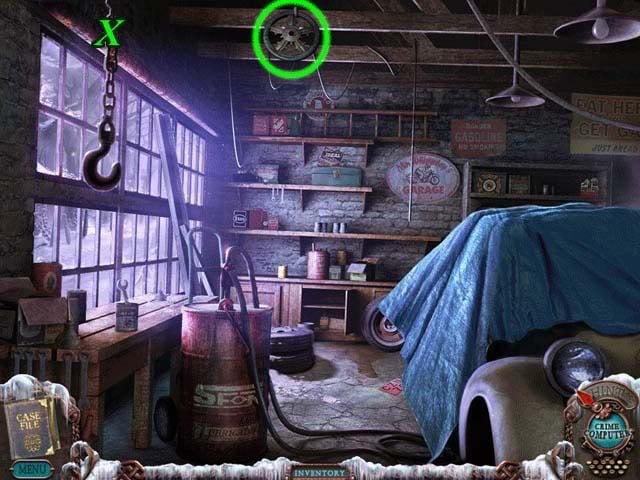
- Upon completing the hidden object area, knock down the Valve hanging on the rafter and circled in green. To do this, click on the area of the green X on the hook to have it swing up and knock it down. Click on the knocked down Valve to add it to your inventory.
Chapter 3: Accessing the Manager’s Office
Stairway
- Enter the Hotel again and proceed up the stairs. This time, instead of proceeding into the Hallway, enter the Bathroom on the left.
Bathroom
- Use the Sledgehammer on the cracked portion of the floor to break it open and create an opening to the Manager’s Office.
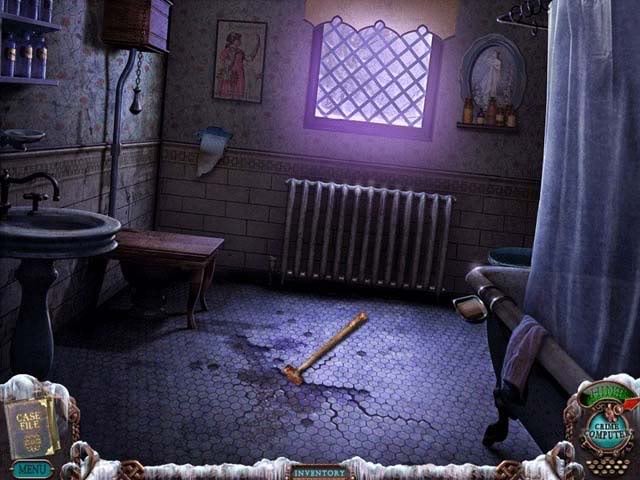
- Once the hole has been made, water will burst from one of the pipes. Time to find a way to stop the water flow. Proceed back to the Garage outside.
Garage
- Click on the sparkling area inside the Garage to enter another hidden object area.
Hidden Object Area: Garage
- Find the objects listed at the bottom of the screen. Objects are randomized, but one will be added to your inventory upon completing the area. This inventory object is circled in red.
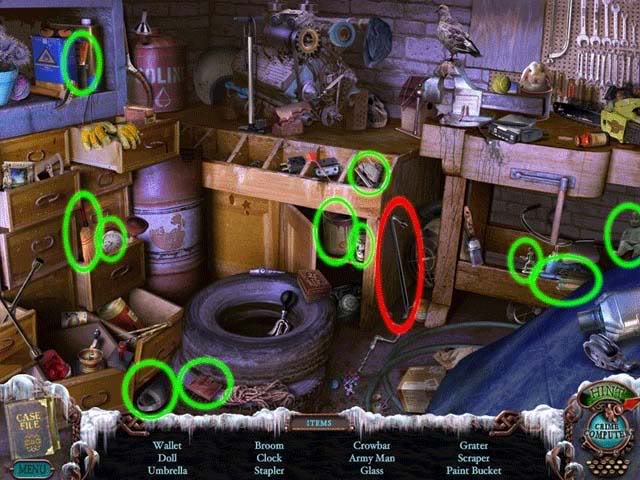
- Upon completing the area, the Crowbar will be added to your inventory.
- Proceed back outside.
Outside
- Outside the Garage, click on the steel cover on the ground for a closer look.
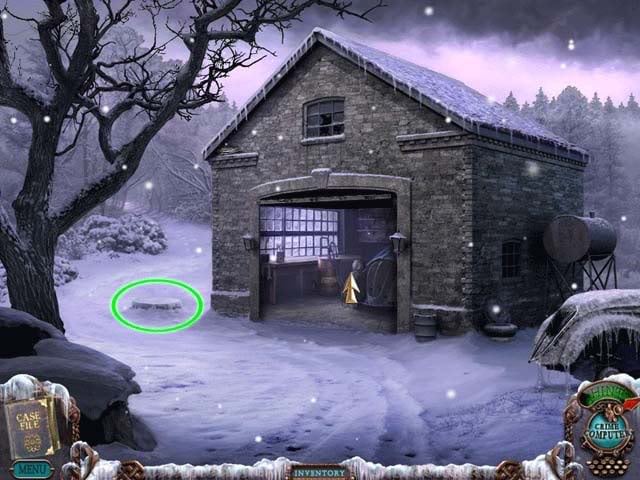
- Use the Crowbar on the steel cover to move it aside, then use the Valve on the pipes to shut the water off.
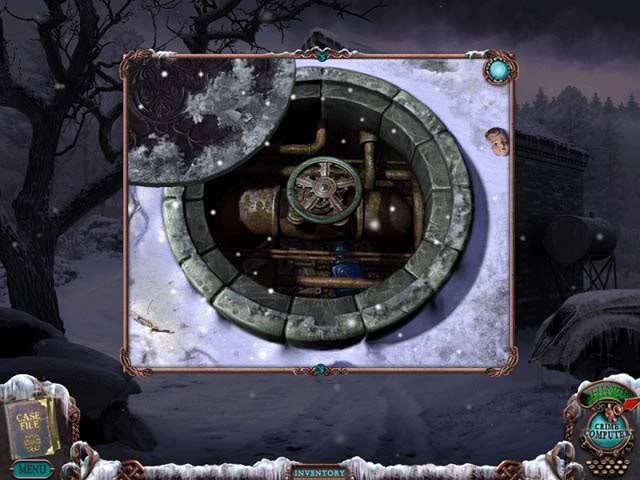
- Now that the water’s turned off, proceed back to the Bathroom inside the Hotel.
Bathroom
- The water’s shut off. Use the Mattress on the gap in the floor and click it a few times until it falls through, then proceed down through the hole into the Manager’s Office.
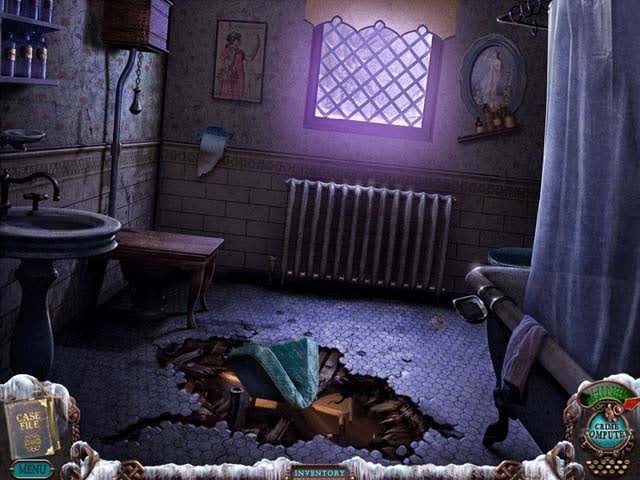
Manager’s Office
- Inside the Manager’s Office, click on the sparkling area over the desk to enter a hidden object area.
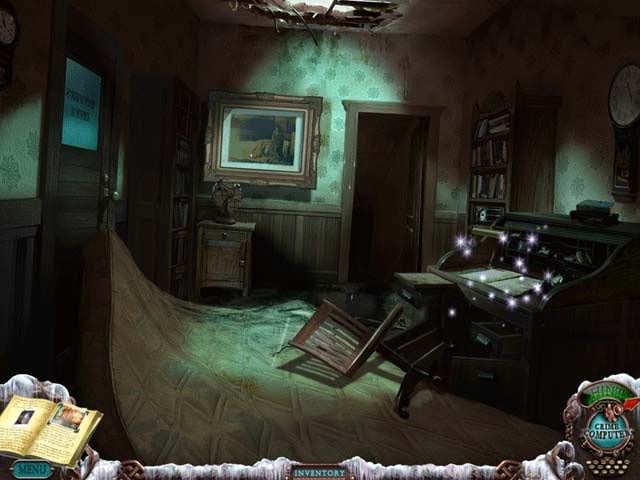
Hidden Object Area: Manager’s Office
- Find the objects listed at the bottom of the screen. Objects are randomized, but one will be added to your inventory upon completing the area. This inventory object is circled in red.
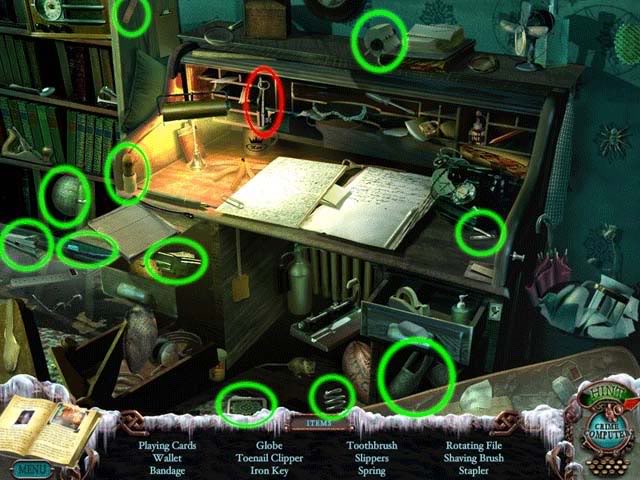
- Upon completing the area, the Iron Key will be added to your inventory.
- There’s nothing more to do in the Manager’s Office at this time. Exit and proceed to the Main Room (left).
Main Room (Left)
- Click on the sparkling area next to the fireplace to enter a hidden object area.
Hidden Object Area: Main Room (Left)
- Find the objects listed at the bottom of the screen. Objects are randomized, but one will be added to your inventory upon completing the area. This inventory object is circled in red.
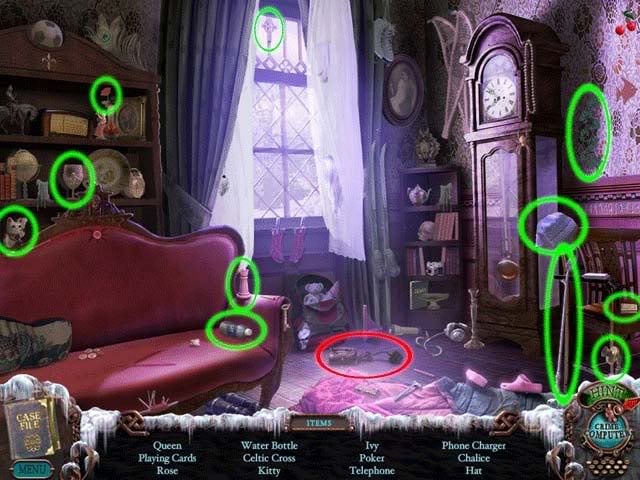
- Upon completing the area, the Phone Charger will be added to your inventory.
- Proceed upstairs to the Romantic Room.
Romantic Room
- Click on the bed at the far end of the room to enter another hidden object area.
Hidden Object Area: Romantic Room
- Find the objects listed at the bottom of the screen. Objects are randomized, but one will be added to your inventory upon completing the area. This inventory object is circled in red.
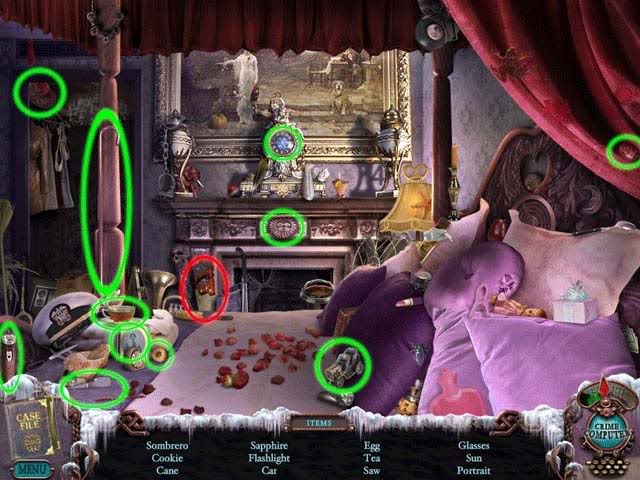
- Upon completing the area, the Saw will be added to your inventory.
- Now that you’ve completed this area, proceed back outside, to outside the Garage
Outside
- Standing outside the Garage again, proceed forward into the distance, to the left of the Garage.
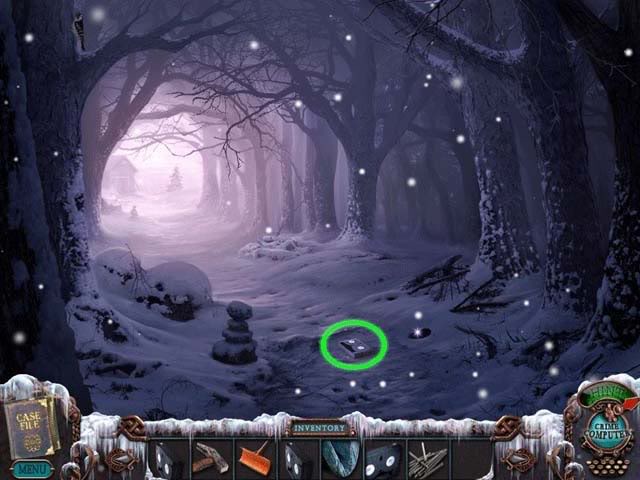
- There’s nothing to do in the next screen/wooded area except to examine a few things at your leisure. Be sure to pick up the Tape lying in the snow, shown and circled below before proceeding forward again.
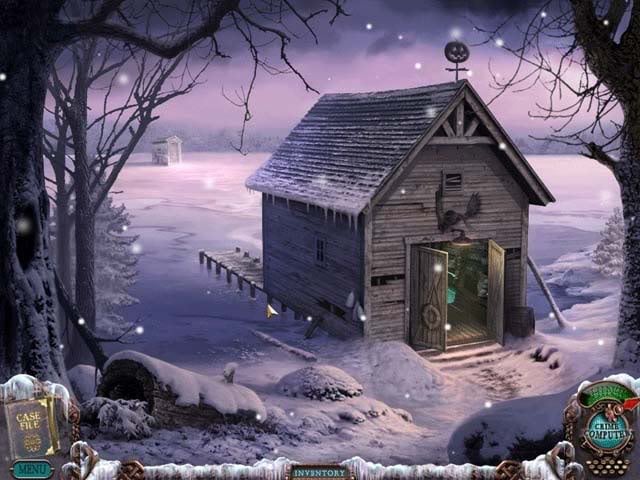
- Now outside the Boathouse, use the Iron Key from your inventory on the lock to open the Boathouse and proceed inside.
Chapter 4: He’s the Fisherman
Boathouse
- Click on the area sparkling on the right to enter a hidden object area.
Hidden Object Area: Boathouse
- Find the objects listed at the bottom of the screen. Objects are randomized, but one will be added to your inventory upon completing the area. This inventory object is circled in red.
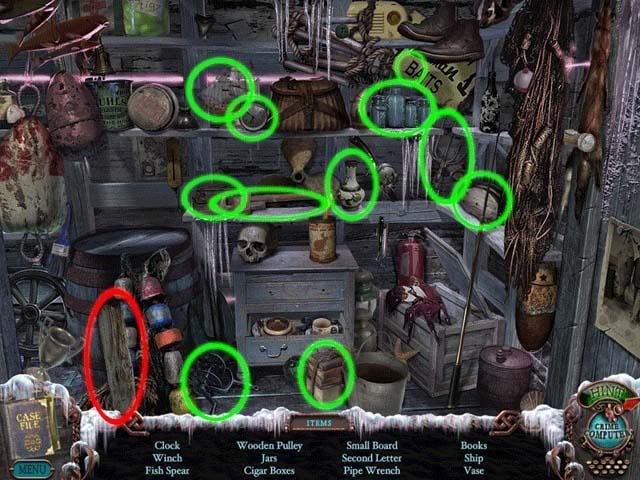
- Upon completing the area, the Small Board will be added to your inventory.
- Exit the Boathouse and proceed back to the Tree outside the Hotel.
Outside
- Use the Small Board, Nails, and Hammer on the tree in that order, then proceed up the steps.
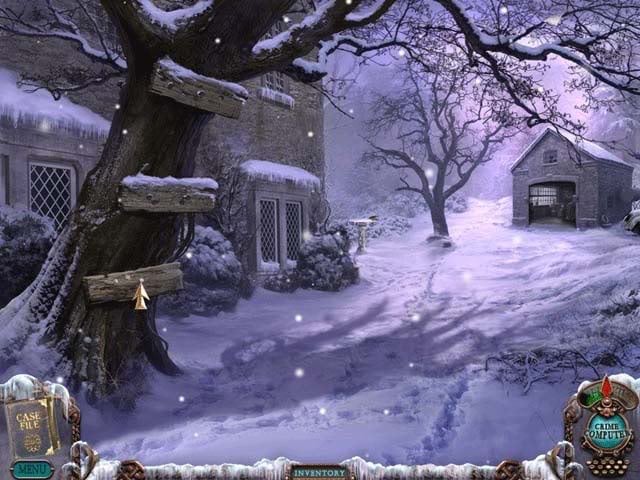
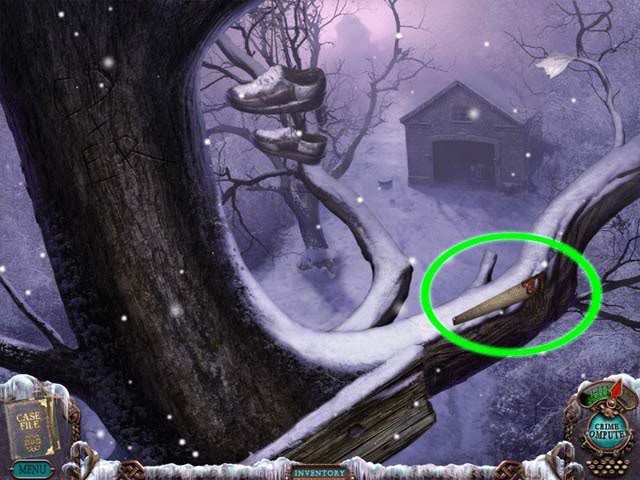
- Up in the tree now but still unable to reach the scrap of paper, use the Saw on the branch on the right until it falls.
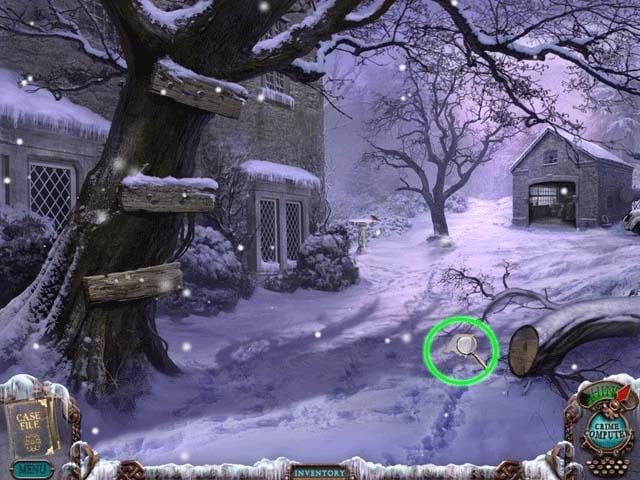
- Proceed back down the tree and pick up the Paper Scrap on the ground to add it to your inventory.
- Enter the Hotel again and proceed to the Manager’s Office.
Manager’s Office
- Click on the sparkling area over the desk to enter another hidden object area.
Hidden Object Area: Manager’s Office
- Find the objects listed at the bottom of the screen. Objects are randomized, but one will be added to your inventory upon completing the area. This inventory object is circled in red.
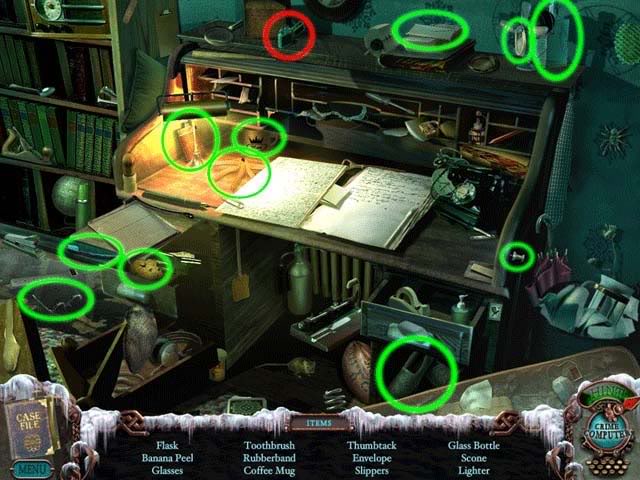
- Upon completing the area, the Lighter will be added to your inventory.
- Proceed up the stairs to the Hallway
Hallway
- Continue further down the Hallway until you encounter the end where two chairs sit near a window. Enter the open door on the left to enter the Library.
Library
- On the left is a bookcase with optional extra reading material, but it’s not mandatory. Instead click on the picture frame straight ahead.
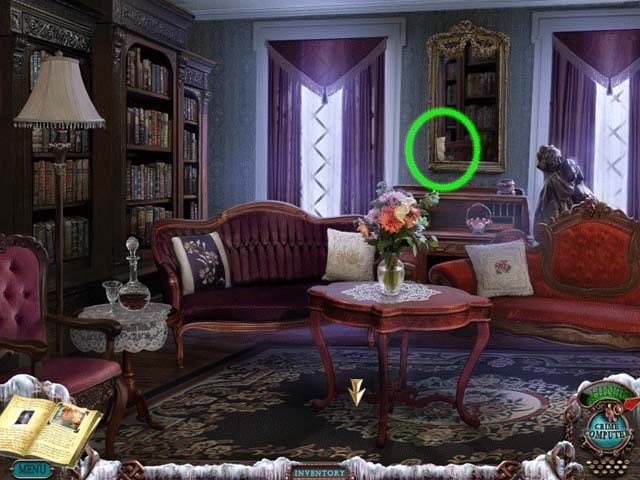
- In the close-up, use the Paper Scrap on the paper piece in the frame to piece together a combination. These combinations are random, so you may get a different number than the one in the screenshot.
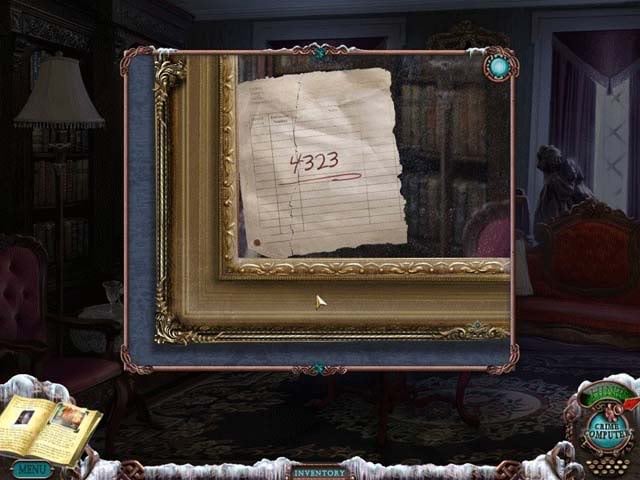
- Exit the library and proceed back down to the Manager’s Office.
Manager’s Office
- In the office, click on the painting on the back wall to knock it down and reveal a safe. Click on the safe for a closer view.
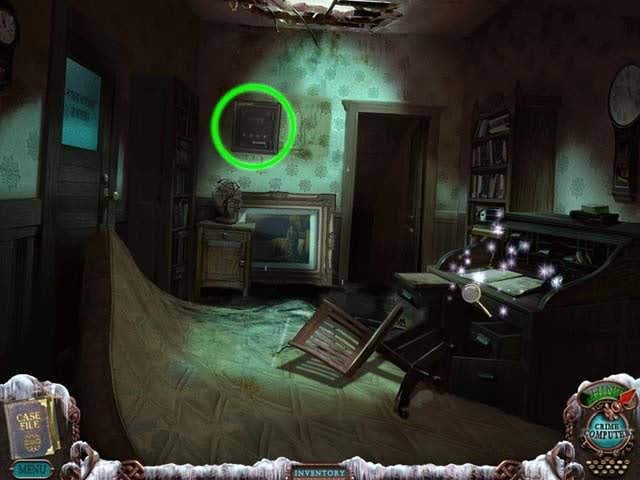
- Input the combination on the piece of paper to open the safe.
- Once the safe is open, click on the Key to add it to your inventory.
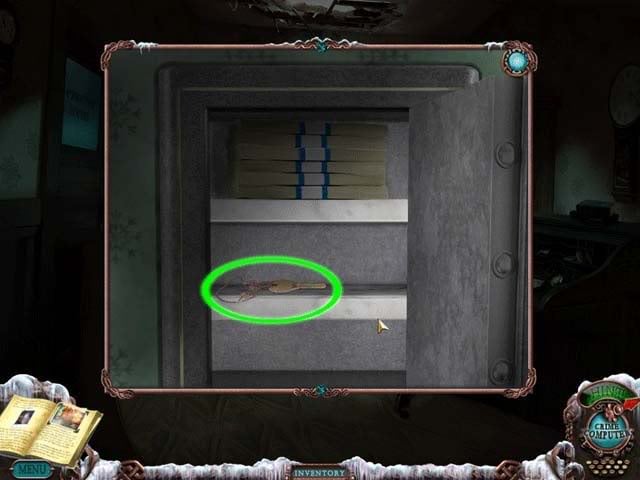
- Now go back outside and enter the Garage.
Garage
- Click on the toolbox on the shelf on the back wall to enter a close-up.
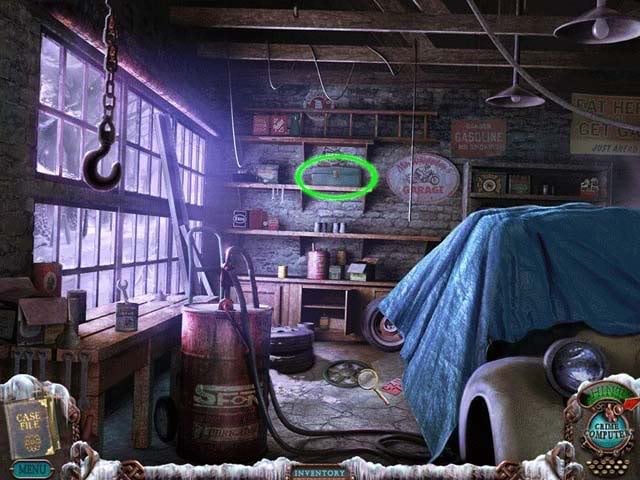
- Use the Key from your inventory on the toolbox and pick up the Wire Cutters inside to add them to your inventory.
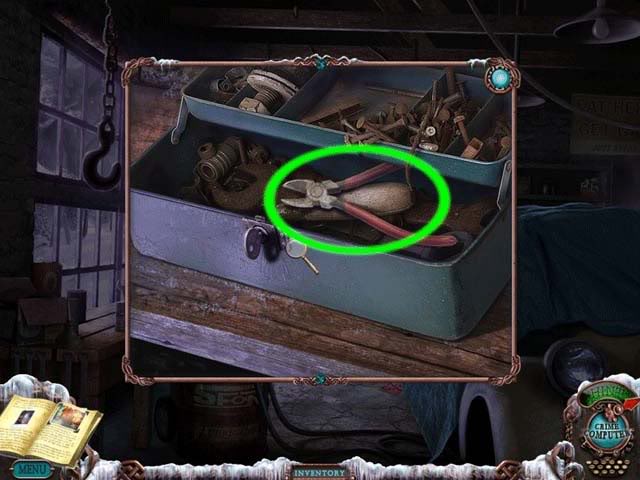
- Exit the Garage and go back inside the Hotel, up to the Nautical Room
Nautical Room
- Click on the power outlet underneath the painting straight in front of you, above the bookshelf for a close-up.
- Use the Phone Charger on the outlet.
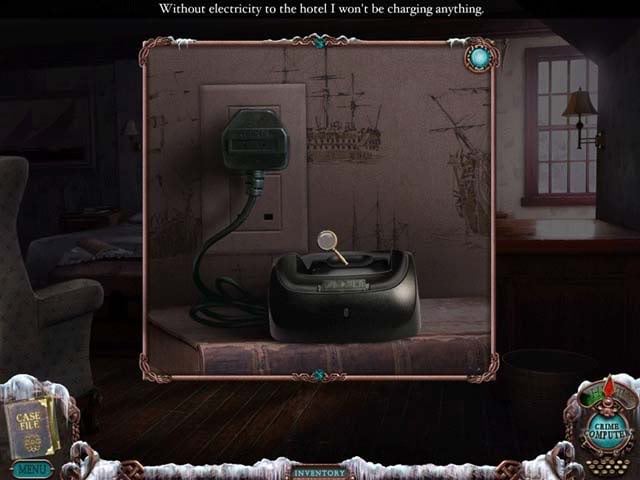
- Exit the close-up and click on the oars hanging over the bed for a close-up.
- Use the Wire Cutters on the rope to cut it, and add the Oars to your inventory.
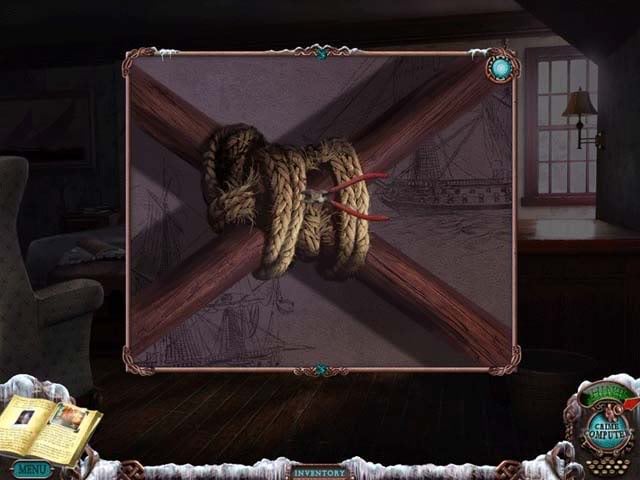
- Exit the Nautical Room and go back outside, heading down to the Boathouse.
Boathouse
- Click on the sparkling area on the right to enter a hidden object area.
Hidden Object Area: Boathouse
- Find the objects listed at the bottom of the screen. Objects are randomized, but one will be added to your inventory upon completing the area. This inventory object is circled in red.
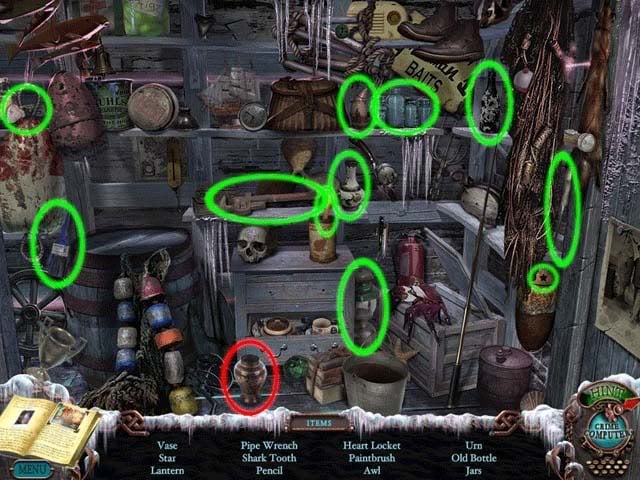
- Upon completing the area, the Urn will be added to your inventory.
Boathouse
- Use the Oars on the boat and exit through the doors out onto the lake.
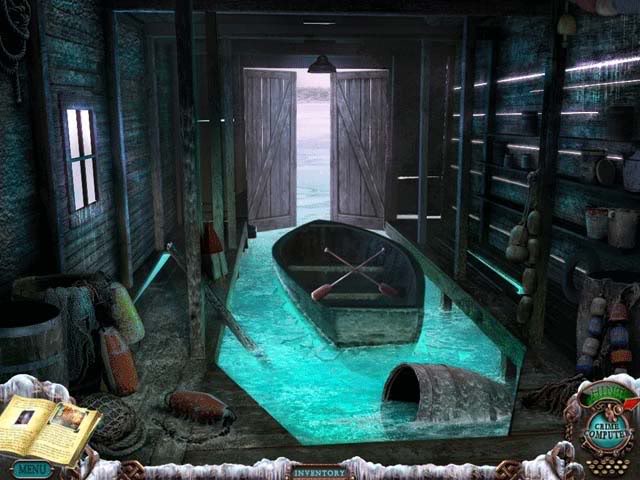
Frozen Lake
- Pick up the Room Key sitting on the ice to the left of the boat, then continue to the fishing shack.
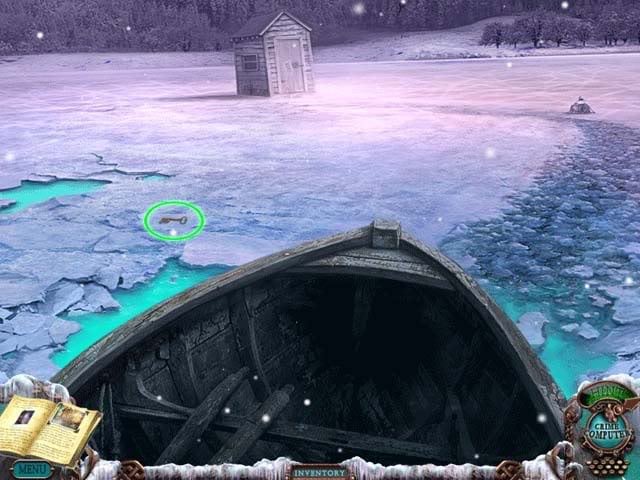
Fishing Shack
- Click on the closed door to open it and discover one of the students inside. Click on the relic in his lap to enter a puzzle area.
- Move the pieces on the relic so that they are in their proper positions. The solution is shown below:

- Once you’ve completed the puzzle, pick up the Fisherman’s Relic that appears.
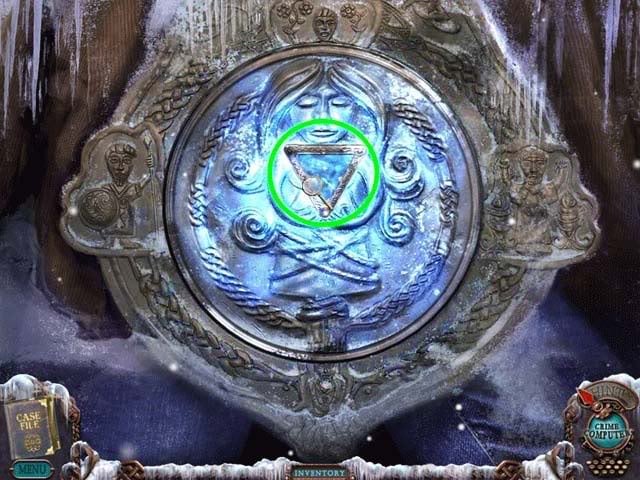
- The student will briefly awaken and chant "I am the Fisherman".
Chapter 5: Going Into Town
Hallway
- Backtrack to the Dire Grove Hotel and up to the second floor hallway. Proceed to the end of the hallway.
- Use the Room Key from your inventory on the locked door on the right to unlock it and enter the room.
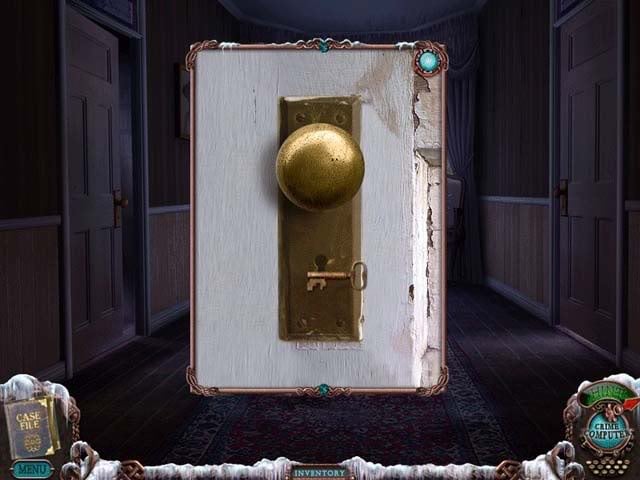
Alison’s Room
- The room you enter was the hotel room for the main student, Alison Sterling. Her suitcase is sitting on the bed, but you can’t open it just yet.
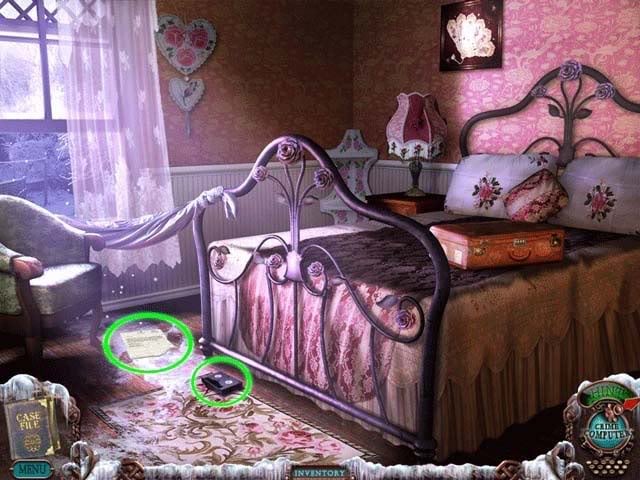
- On the floor circled in green above is another Tape, as well as an interesting note.
- There’s nothing more to do here in the meantime, so exit out the window.
Graveyard Entrance
- There’s a dumpster to the right here that’s sparkling: click on it to enter a hidden object area.
Hidden Object Area: Dumpster
- Find the objects listed at the bottom of the screen. Objects are randomized, but one will be added to your inventory upon completing the area. This inventory object is circled in red.
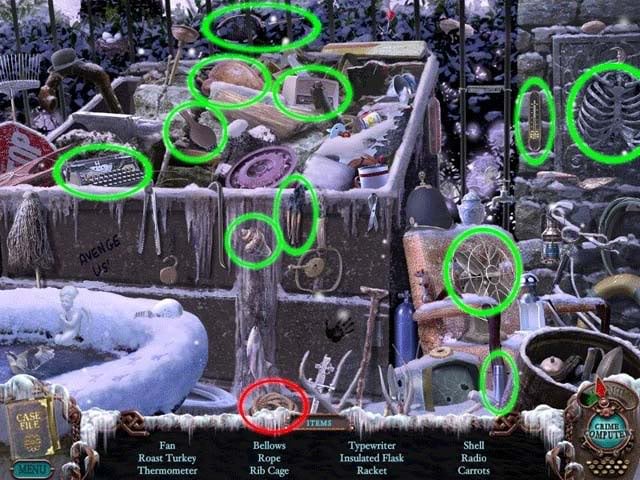
- Upon completing the area, the Rope will be added to your inventory.
- Return back inside the Dire Grove Hotel via the makeshift sheet rope hanging from Alison’s room window, then backtrack outside to the front of the Hotel, to where you can see the fountain.
Outside
- Proceed forward/left, past the fountain in front of the Hotel. You’ll arrive at an old covered bridge. Continue forward.
Crumbling Bridge
- Use the Rope from your inventory on the support beam hanging over the gap to continue forward to the other side.
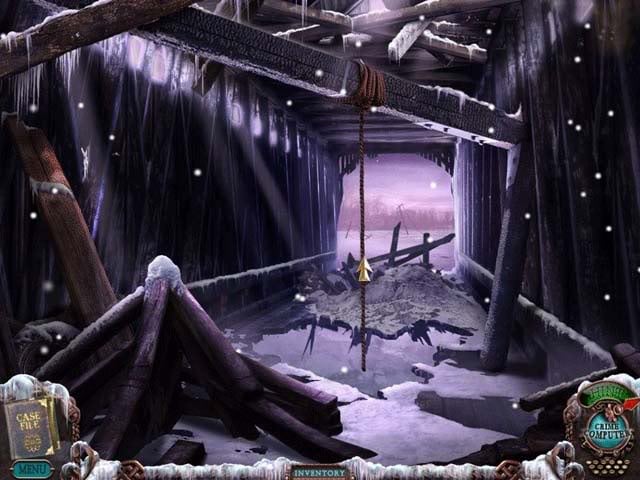
Crossroads
- You’ll come to a crossroads intersection, but you can’t proceed left due to a renegade power line shortage. There’s another Tape lying in the snow you can click to pick up. Continue forward towards the town center.
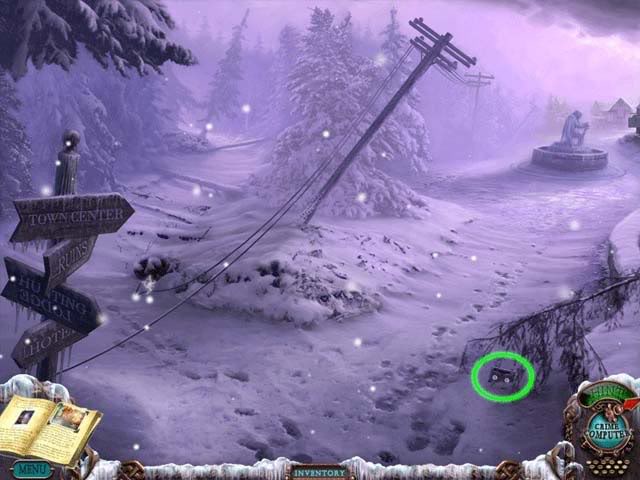
Town Center
- There’s a statue immediately in front of you. You can opt to read the plaque, but the statue itself holds no significance. Continue forward towards the shop.
- Now closer to the shop and with the statue no longer in the screen, enter it. There’s a vending machine outside, but that’s not for until later.
Ye Ole Mill Grocery
- Lying on the floor when you enter, you’ll notice another Tape to pick up. Once you’ve done that, you’ll notice a sparkling area on the left. Click on it to enter a hidden object area.
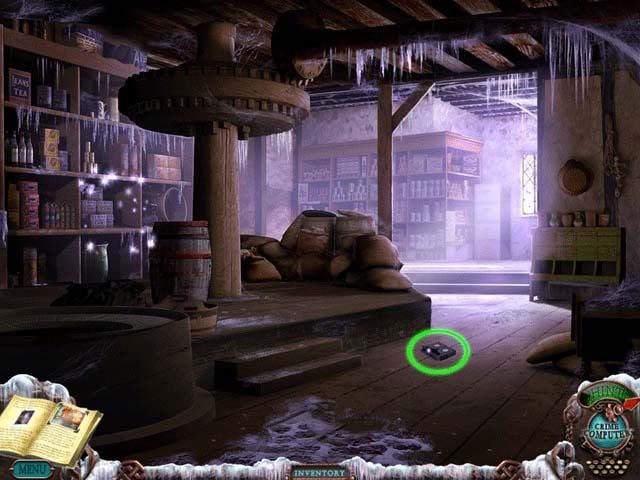
Hidden Object Area: Grocery Stock
- Find the objects listed at the bottom of the screen. Objects are randomized, but one will be added to your inventory upon completing the area. This inventory object is circled in red.

- Upon completing the area, the Ice Pick will be added to your inventory.
- Continue forward towards the back of the shop to the next area.
Store Rear
- This room’s privy to more than one secret. If you click on the rug in the middle of the floor, a secret hatch will be revealed, but you can’t open it right now.
- There’s also a microwave in this room, but you won’t be needing it just yet.
- Click on the cabinet under the microwave on the right to open it and take a closer look. Click on the Axe inside to add it to your inventory.
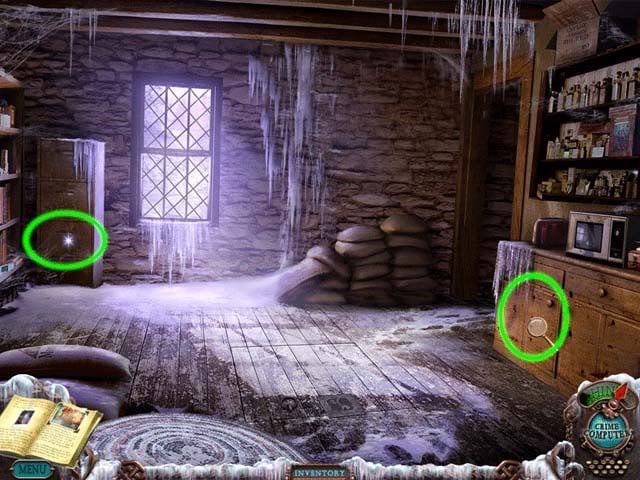
- On the left is a file cabinet. Click on the drawer circled to reveal an interesting diary entry left by the tender.
- Continue through the doorway in the top right corner of the room.
Store Basement
- Down here you’ll notice several holes, as well as a sparkling area over a large freezer. Click on it to enter another hidden object area.
Hidden Object Area: Freezer
- Find the objects listed at the bottom of the screen. Objects are randomized, but one will be added to your inventory upon completing the area. This inventory object is circled in red.
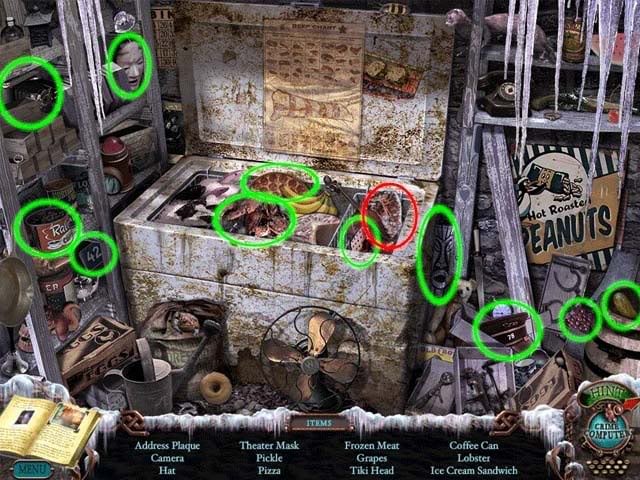
- Upon completing the area, the Frozen Meat will be added to your inventory.
Store Basement
- Click on the bar grate straight ahead for a closer view.
- There’s snowshoes behind the bars. Use the Carjack on the bars to lift them, clicking on the jack multiple times, then click on the Snowshoes to add them to your inventory.
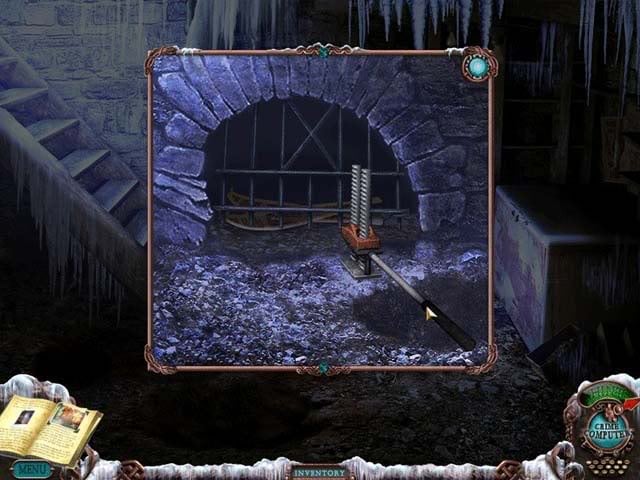
- Proceed back up the stairs to the rear of the store.
Store Rear
- Click on the microwave on the right for a closer view. Use the Frozen Meat from your inventory on the microwave to place it inside, then click on the door to close it.
- Press the green button to start the microwave. Once done, click on the door to open it and click on the Thawed Meat to add it to your inventory.
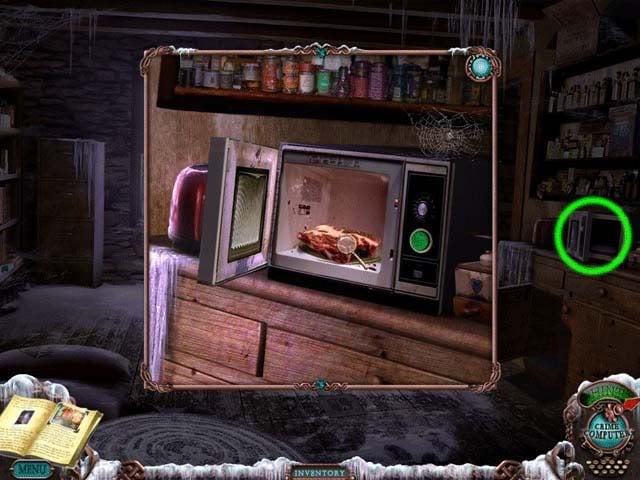
Chapter 6: She’s the Hunter
Outside
- Exit the Town Center and backtrack all the way to the wooded entrance to the Dire Grove Hotel (area between the Hotel and the Car).
- Use the Axe on the logs to chop them into firewood, then click on the pieces of Wood to add them to your inventory.
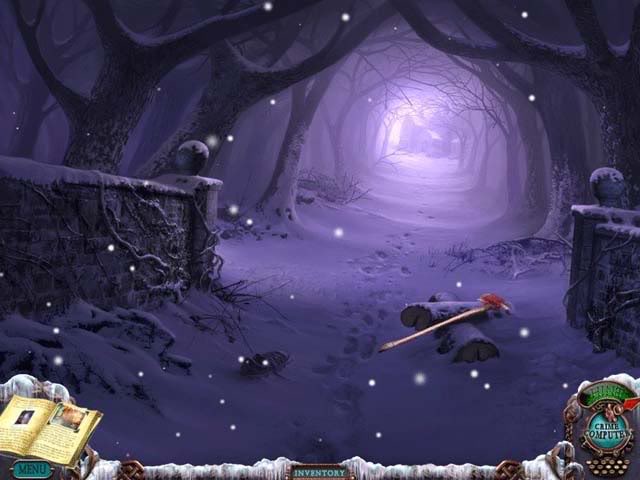
- Now enter and go through the hotel, up to Alison’s Room, and exit out the window.
Graveyard Entrance
- Click on the sparkling dumpster to enter another hidden object area again.
Hidden Object Area: Dumpster
- Find the objects listed at the bottom of the screen. Objects are randomized, but one will be added to your inventory upon completing the area. This inventory object is circled in red.
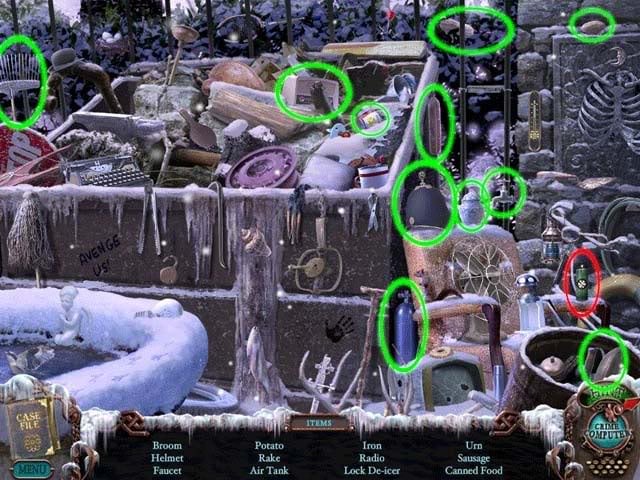
- Upon completing the area, the Lock De-icer will be added to your inventory.
- Continue through the gate and through the graveyard to a split road with a tree in the middle.
Tree-split Crossroads
- If you try to continue down either the left or right path, a hungry wolf will threaten you.
- Use the Thawed Meat from your inventory on the wolf hiding in the tree to calm him down and gain access to the roads.
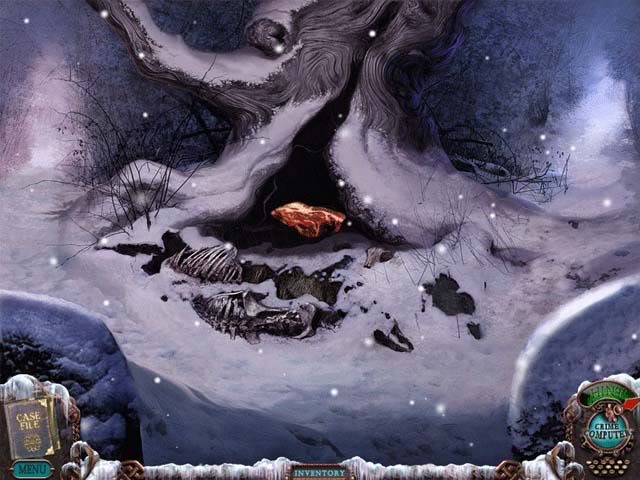
- Once the wolf has calmed down, proceed down the road on the left.
Riverbank
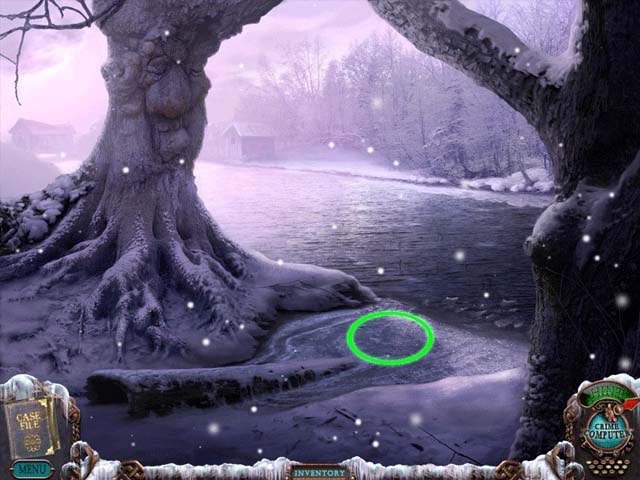
- There’s really only one thing to do here, though you can observe a few things in this area.
- Click on the area circled in green below to zoom in on the ice.
- Use the Ice Pick from your inventory on the ice to crack it. Keep clicking and using it to break the ice away and reveal a Feather. Click on it to add it to your inventory.
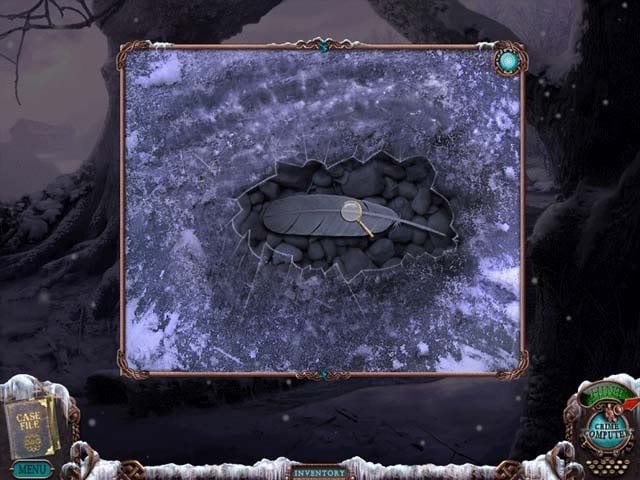
- Proceed back to the crossroads with the tree, and this time take the path on the right.
Outside the Hunting Lodge
- Click on the Tape lying in the snow to pick it up, then click on the lodge itself to enter.
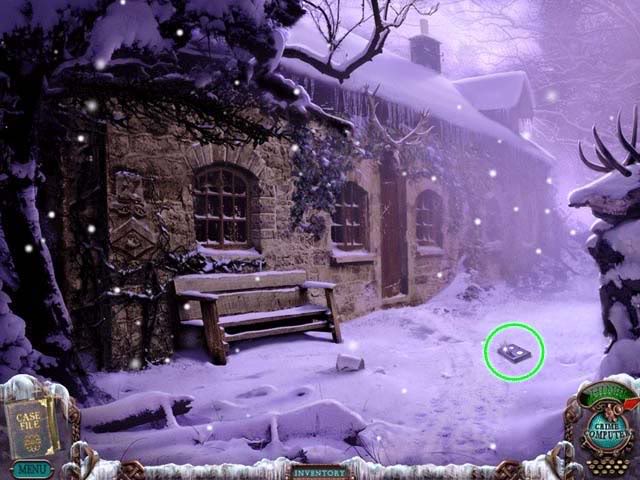
Hunting Lodge
- Click on the sparkling area over the fireplace to enter a hidden object area.
Hidden Object Area: Hunting Lodge
- Find the objects listed at the bottom of the screen. Objects are randomized, but one will be added to your inventory upon completing the area. This inventory object is circled in red.
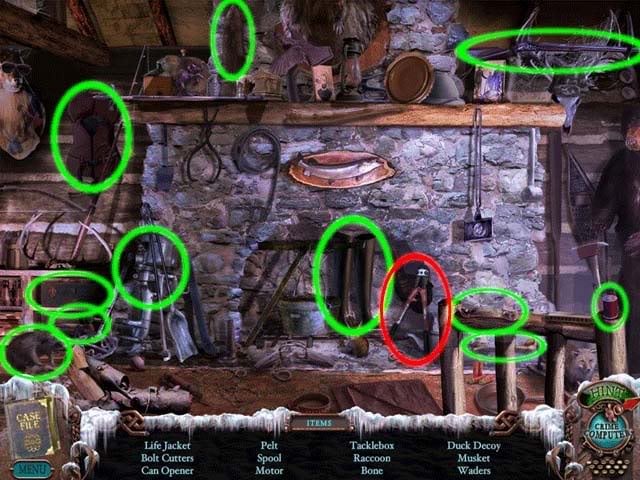
- Upon completing the area, the Bolt Cutters will be added to your inventory.
Hunting Lodge
- Click on the door on the far right side of the screen for a close-up view.
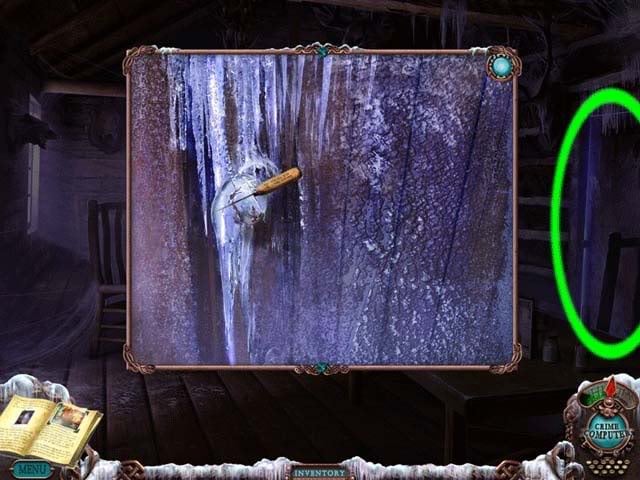
- Use the Ice Pick on the frozen knob to chip the ice away, then enter the room.
- Click on the girl sitting in the bathtub for a closer view, then click on the relic sitting on her chest to enter a puzzle.
- The goal of this puzzle is to align all the tokens on the relic so that they sit next to their symbol carved on the inside of the wheel. The easiest way to solve this puzzle is to align each symbol one after the other, then rotate them around the wheel to their correct positions. The solution is shown below.

- Solving the puzzle will reveal the Hunter’s Relic. Click on it to pick it up and add it to your inventory.
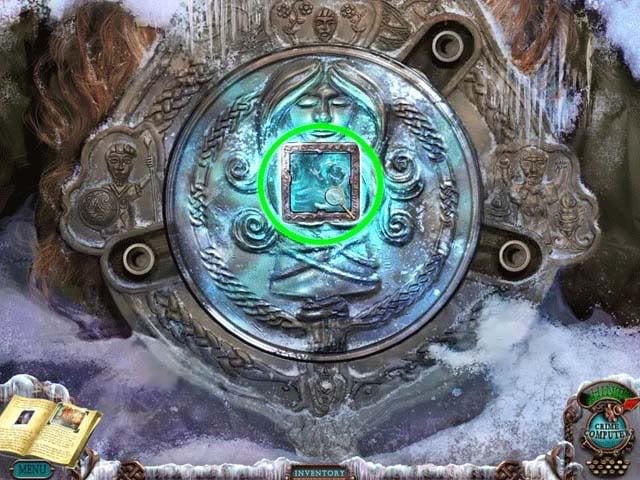
- Collecting the relic will cause the girl to briefly awaken and chant "I am the Hunter".
Chapter 7: He’s the Blacksmith
Town Center
- Exit the hunting lodge and proceed all the way back through the graveyard and hotel, back outside past the fountain, and over the old bridge back into the town center.
- When you’re standing in front of the statue, this time turn to the left to see the Dire Grove Historical Heritage Museum. Click on the door for a closer look.

- Use the Bolt Cutters on the padlock and chain keeping the door shut to open it. Proceed inside the Museum.
Museum Main Room
- Upon entering the Main Room, there’s several things you can do, but first pick up the Tape nearby.

- Proceed forward so that you’re looking at two dark display windows with a Fire Extinguisher in between them. You can click on the buttons beneath the display windows to see inside, but it’s nothing mandatory. Click on the extinguisher for a closer view.
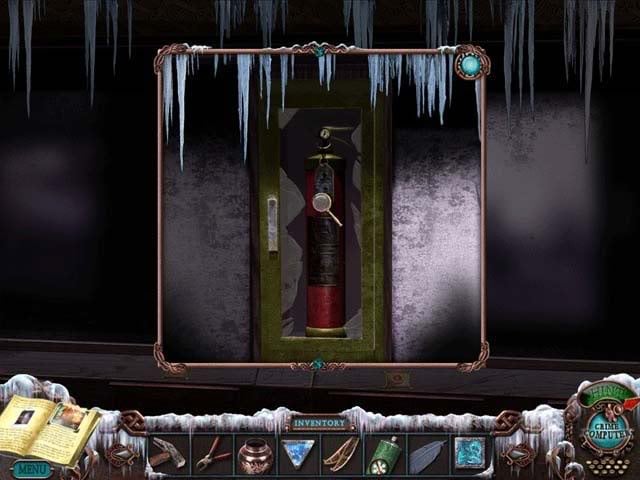
- Use the Hammer on the glass to break it, then click on the Fire Extinguisher to add it to your inventory. There’s nothing more to do in this area, but take note of the faint carving "3 Coins" scratched into the display wood.
- Exit the display case area back to the main area of the room.
- Go to the left and enter the gift shop.
Gift Shop
- Circled in green below, there’s a book you can click on in the gift shop that will allow insight into the Legend of Dire Grove.
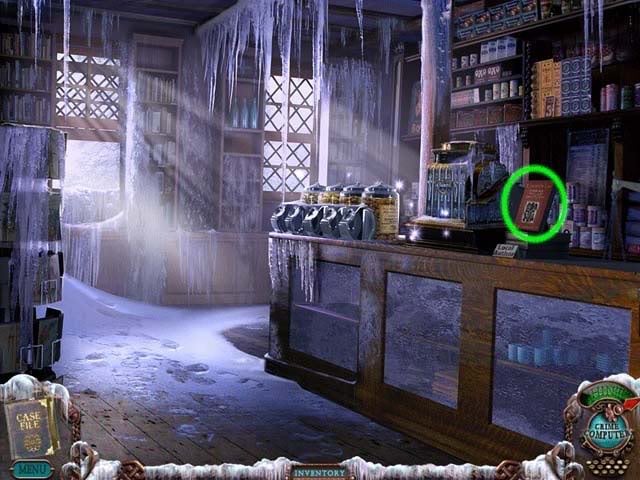
- Click on the sparkling area over the register to enter a hidden object area.
Hidden Object Area: Gift Shop
- Find the objects listed at the bottom of the screen. Objects are randomized, but one will be added to your inventory upon completing the area. This inventory object is circled in red.
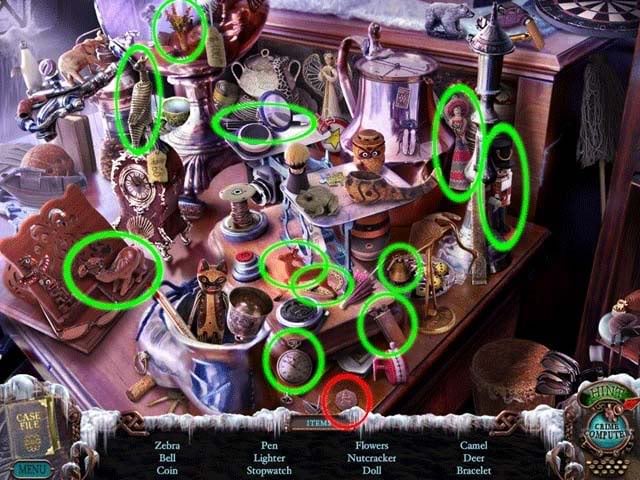
- Upon completing the area, the Coin will be added to your inventory.
- Exit the Gift Shop and go back to the main museum room area.
Museum Main Room
- Proceed forward until you’re standing in front of the staircase.
Museum Staircase
- There’s actually a few things you can do here, and you can do them in different orders, but for the sake of simplicity and the guide, we’ll save the locked room on the right for last. In the meantime, you can look at the display case on the left and notice the Relic inside has been stolen.
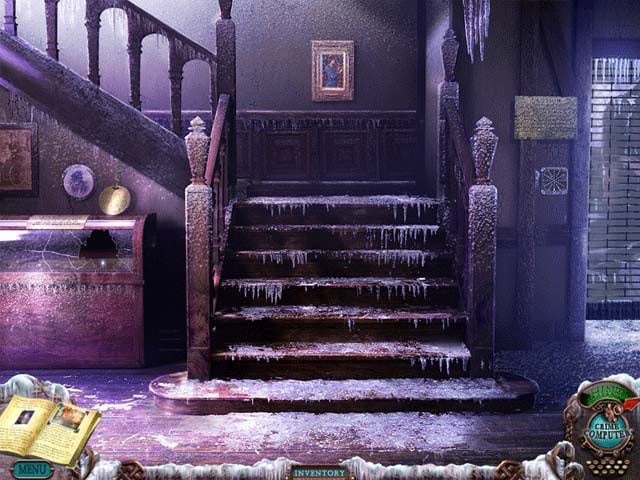
- Proceed up the stairs to the second floor.
Museum Second Floor
- Click on the sparkling area over the armor display case to enter a hidden object area.
Hidden Object Area: Second Floor Hall
- Find the objects listed at the bottom of the screen. Objects are randomized, but one will be added to your inventory upon completing the area. This inventory object is circled in red.
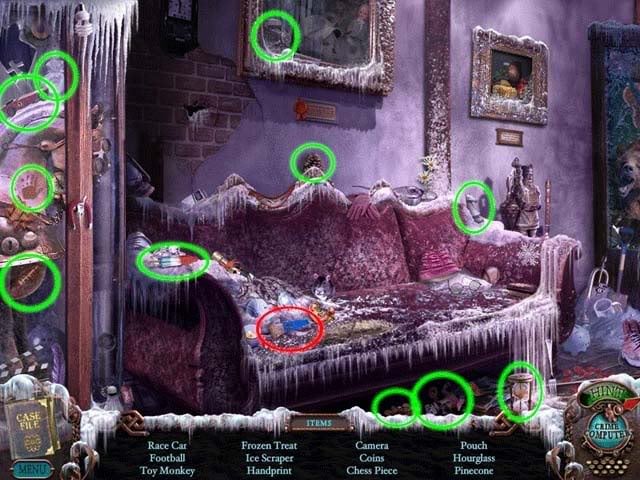
- Upon completing the area, the Ice Scraper will be added to your inventory.
- Proceed down the hall to the room at the far end.
Museum Office
- Again there are a few things to do in this room. Circled on the desk is a letter you may find interesting, and on the circled area of the floor you’ll find a mysterious picture note: a clue for a later side-quest (Note: This is exclusively for the special edition/extended version of the game and will not be added to your notebook. See the bonus sections of this guide for more information on it.).
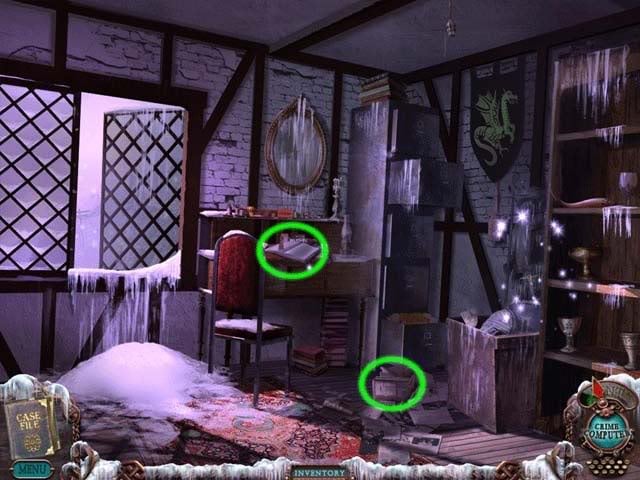
- Click on the sparkling area over the shelves on the right to enter a hidden object area.
Hidden Object Area: Museum Office
- Find the objects listed at the bottom of the screen. Objects are randomized, but one will be added to your inventory upon completing the area. This inventory object is circled in red.
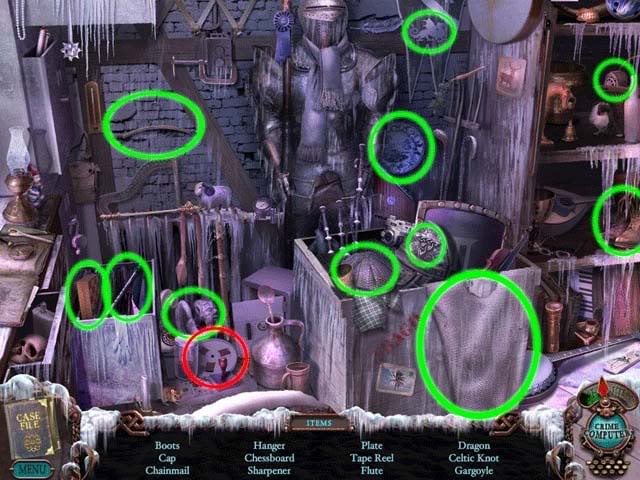
- Upon completing the area, the Film Reel will be added to your inventory.
Museum Office
- Once you’ve completed the hidden object area, proceed outside via the open window on the left side of the screen.
Window Ledge
- The ledge is slippery: use the Ice Scraper to clear a path to the electrical box, circled and shown below:
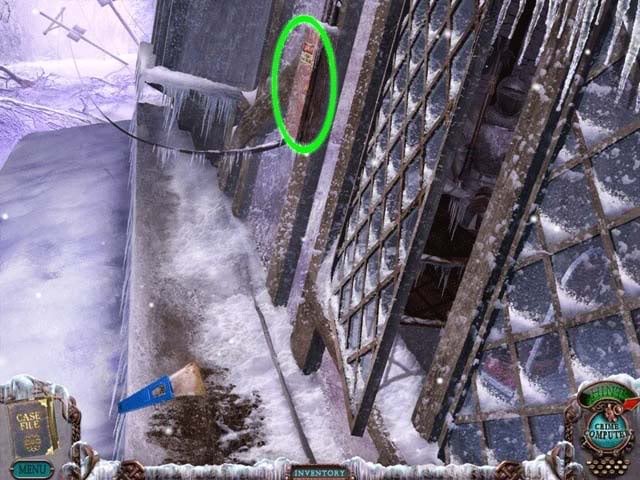
- Click on the electrical box for a closer view, and then click it again to open it.
- Rearrange the various tiles so that the electricity is shut off and they all correspond and match with each other. The solution is shown below:
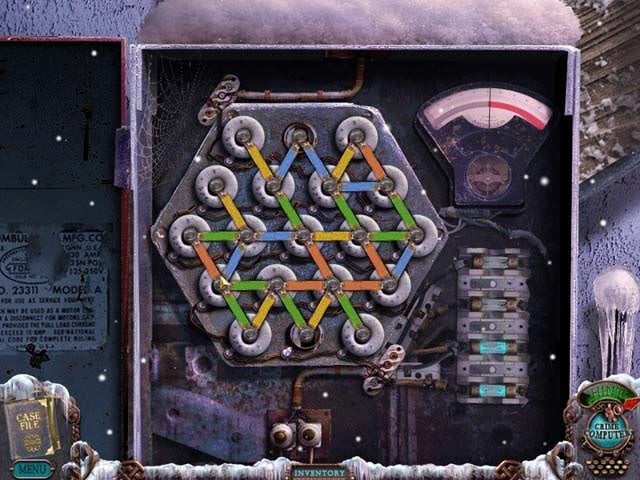
- Now you can finally get past that renegade power line at the crossroads before the town! Go back through the window and back inside the museum to the second floor hallway.
Museum Second Floor
- Click on the sparkling area over the armor case to enter another hidden object area again.
Hidden Object Area: Second Floor Hall
- Find the objects listed at the bottom of the screen. Objects are randomized, but one will be added to your inventory upon completing the area. This inventory object is circled in red.
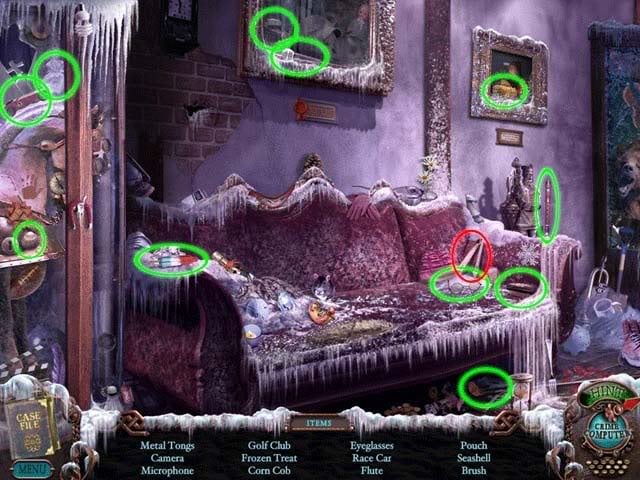
- Upon completing the area, the Metal Tongs will be added to your inventory.
- Go down the stairs to the Museum Staircase.
Museum Staircase
- Now it’s time to visit the mysterious locked room on the right. Click on the puzzle pad circled below to enter a puzzle that will unlock the door.
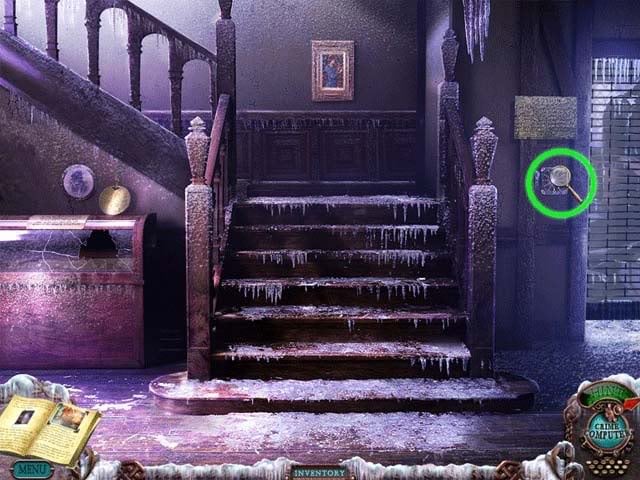
- The goal of this puzzle is to start at "A" and get to "Z". You have to click on the next letter alphabetically otherwise you will have to start over. You can only click on letters that follow the illuminated path outlines. The solution of which letters to click is shown below. All letters to be clicked are illuminated.
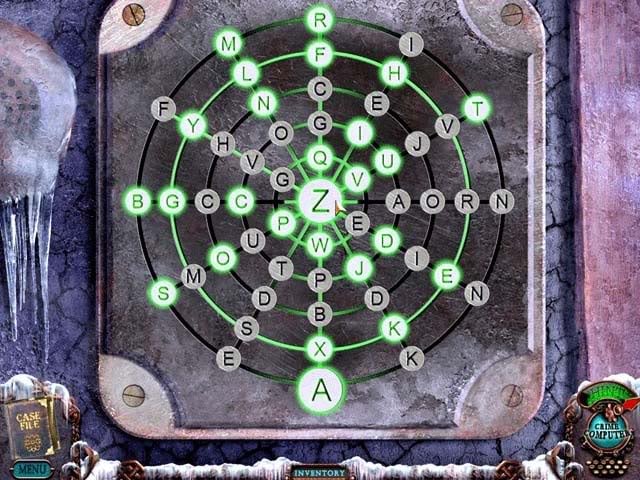
- Completing the puzzle successfully will allow you to gain access to the Blacksmith room.
Blacksmith Room
- There are many things you can look at in this room, but only a few things you can do. First, pick up the Tape lying on the floor.
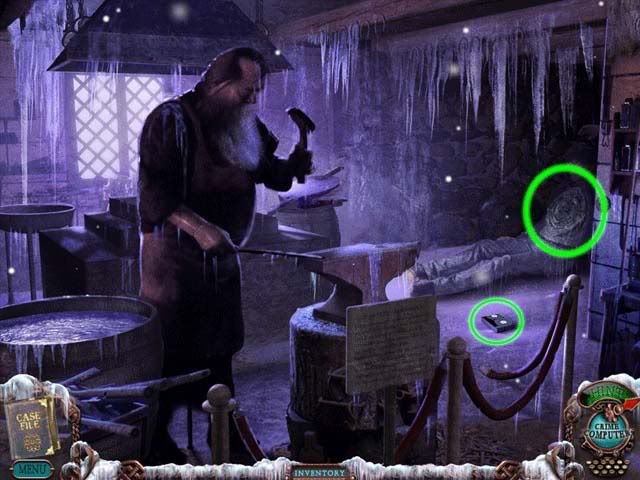
- Next, click on the student for a close-up view.
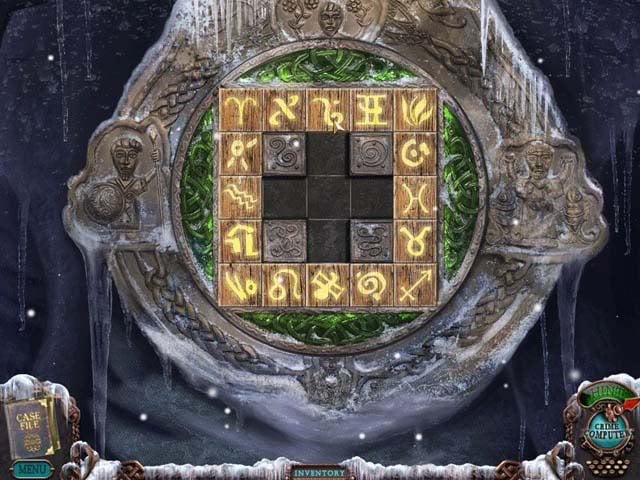
- Click on the relic on the student’s chest to enter a puzzle. The goal is to move all the tiles around so that they’re in their correct position. The stone tiles cannot be moved and act as barriers. When a tile is placed in the correct position, the symbol will glow. It’s not persé a difficult puzzle, but it will require a little patience. The solution is shown below:
- Once you’ve successfully completed the puzzle, pick up the Blacksmith’s Relic to add it to your inventory.
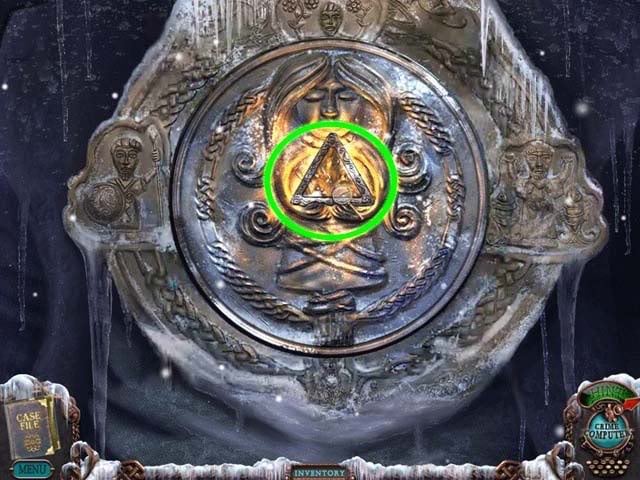
- After you’ve collected the relic, the student will briefly awaken and chant "I am the Blacksmith".
Chapter 8: She’s the Farmer
- Since we deactivated the power lines earlier, now we can access the left road at the crossroads. Proceed down the "Ruins" path.
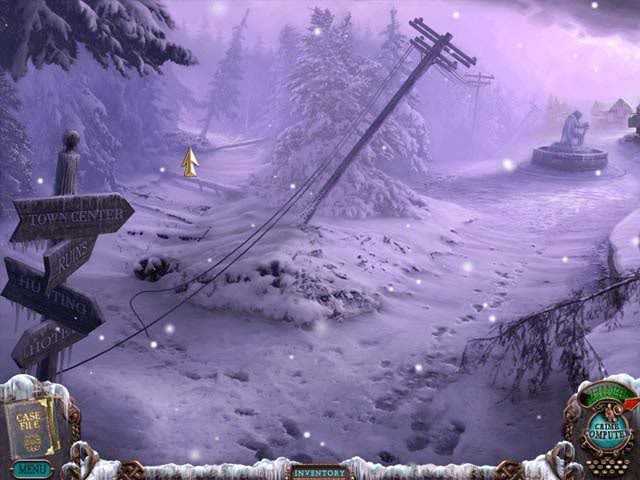
Farmstead Path
- Though there’s nothing to do here, make sure you pick up the Tape lying in the snow, shown and circled below, before headed further up the road.
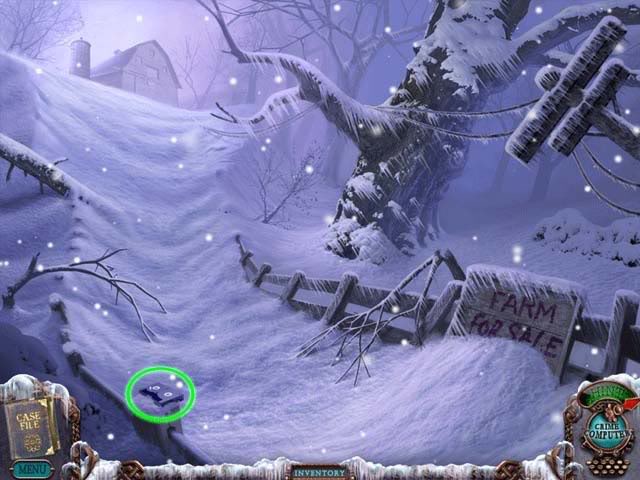
Barn
- There’s nothing to do in the immediate barn area when you first reach it, so keep going forward until you reach the cottage.
Cottage
- There’s a lawnmower outside with a useful item attached, but we’re not quite ready for that yet. Instead, enter the house.
- The whole inside of the house is crumbling. Click on the sparkling area on the right to enter a hidden object area.
Hidden Object Area: Cottage
- Find the objects listed at the bottom of the screen. Objects are randomized, but one will be added to your inventory upon completing the area. This inventory object is circled in red.
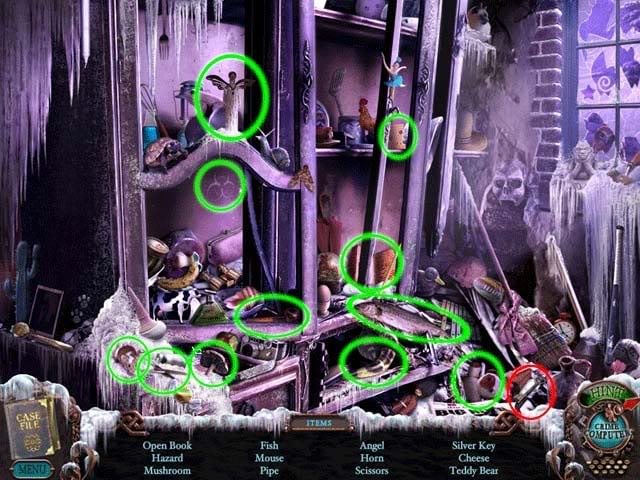
- Upon completing the area, the Silver Key will be added to your inventory.
- Exit the Cottage and go back to the barn.
Barn
- Click on the barn door for a close-up.
- Use the Lock De-icer on the lock, then the Silver Key to open the door and go inside.
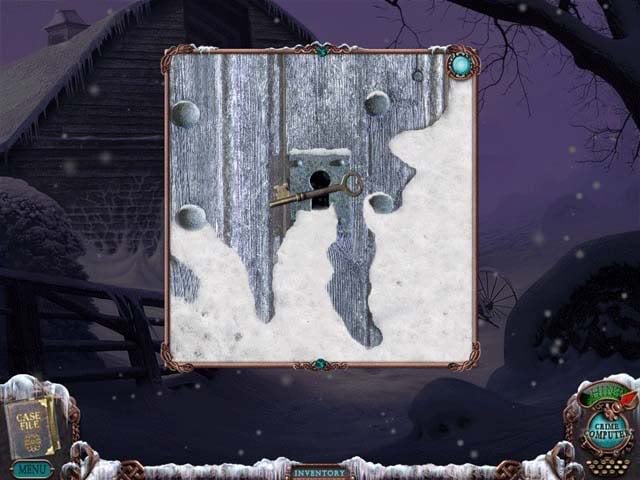
- Inside the barn, climb up the ladder to the loft. Once in the loft, click on the sparkling area to enter a hidden object area.
Hidden Object Area: Barn Loft
- Find the objects listed at the bottom of the screen. Objects are randomized, but one will be added to your inventory upon completing the area. This inventory object is circled in red.
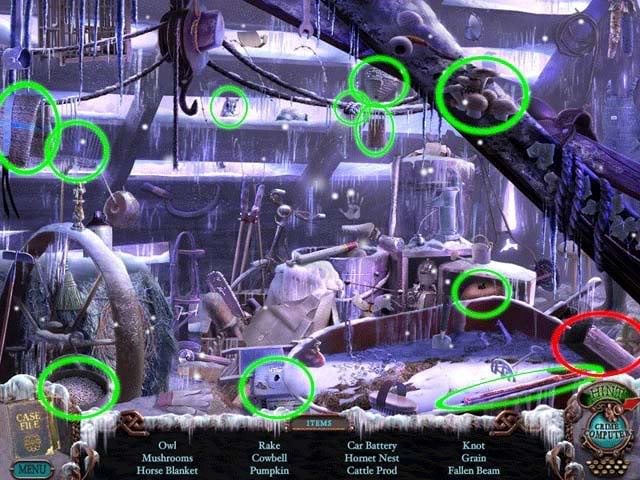
- Upon completing the area, the Fallen Beam will be added to your inventory.
Barn
- Go back down the ladder from the loft.
- Return to the cottage.
Cottage
- Enter the cottage and click on the reappeared sparkling area to enter a hidden object area again.
Hidden Object Area: Cottage
- Find the objects listed at the bottom of the screen. Objects are randomized, but one will be added to your inventory upon completing the area. This inventory object is circled in red.
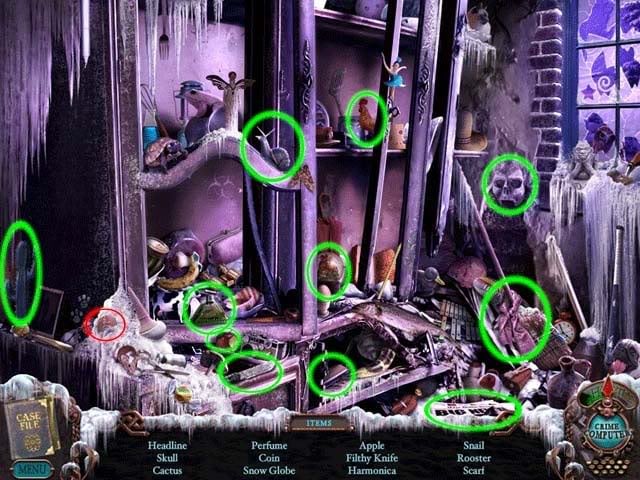
- Upon completing the area, the Coin (2) will be added to your inventory.
Cottage
- Use the Fallen Beam from your inventory on the large gap in the middle of the room. This will give you access to the far doorway. Once the beam has been placed, proceed into the next room.
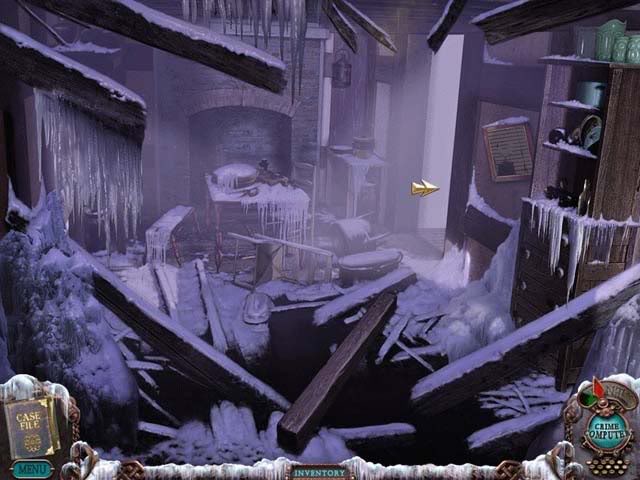
- In the next room, pick up the Tape lying on the floor first of all. Next, click on the drawer on the right side of the room, which is also circled to reveal the Wrench. Click it to add it to your inventory.
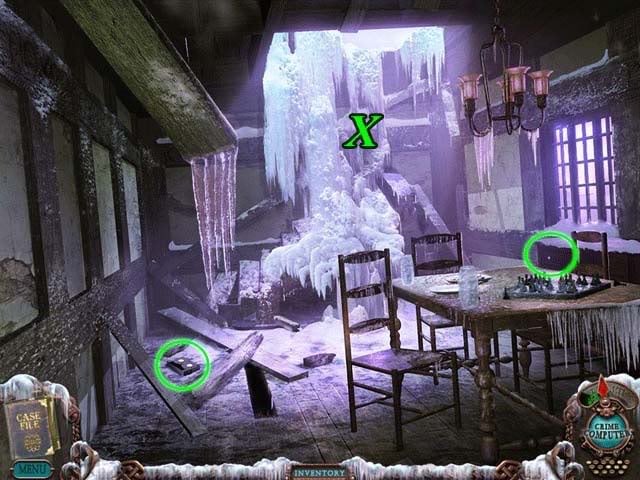
- Click on the snow blockage at the far end of the room. You’d be able to access the second floor if only you had a ladder. Go back to the Barn.
Barn
- Click on the Ladder to add it to your inventory and return to the back room of the cottage.
Cottage
- Use the Ladder from your inventory on the area marked with a large "X" in the screenshot. Proceed up to the attic.
- Click on Alice, who’s hanging from the ceiling for a close-up. Click on the relic on her chest to enter a mini-game.
- Click on the pieces of the puzzle to move them into their proper position: pieces will not move outside of their designated rings. The solution appears as follows:

- Successfully completing the puzzle will reveal the Farmer’s Relic. Click on it to add it to your inventory.
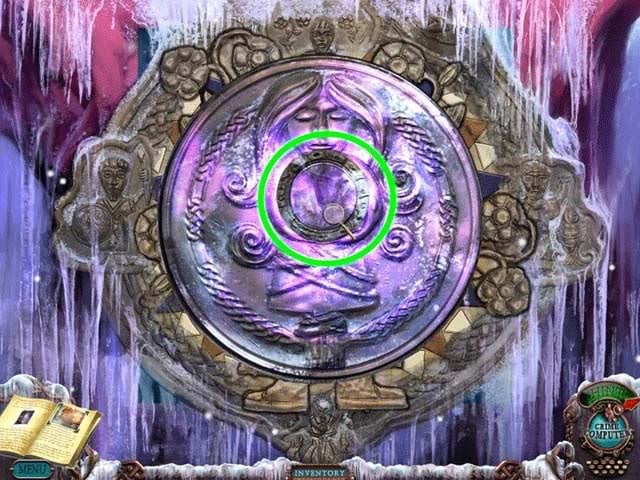
- Alice will briefly awaken, chanting "I am the Farmer".
Chapter 9: Restore Power to the Hotel
Cottage
- Exit the cottage, then click on the lawnmower outside, sitting just to the left of it, for a closer view.
- Use the Wrench on the Spark Plug to loosen it and add it to your inventory.
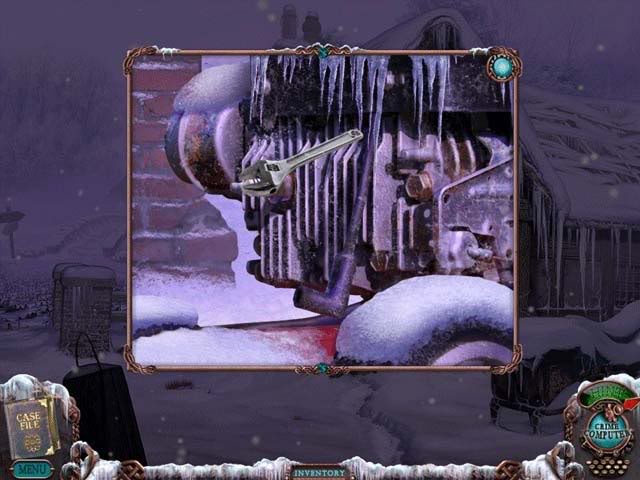
- Now back track all the way back to the Dire Grove Hotel. Go around back to access the generator (take a left at the Tree, and when the Garage is in view).
Outside
- Click on the generator for a close-up view.
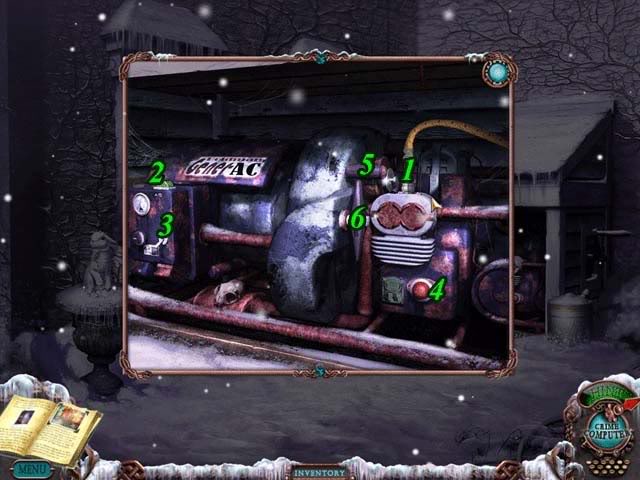
- Do the following things in the following order to get power running again. Refer to the screenshot above for reference:
1.Insert the Spark Plug from your inventory.
2.Toggle the power switch so that the end closest to you is lowered.
3.Set the selector toggle into the "up" position.
4.Press the primer button 4x
5.Pull the throttle lever 2x
6.Pull the ignition cord 3x
- This should get the power back up and running. If not, review the directions and try again. The original instruction sheet is shown here, and can also be reviewed in your notebook.
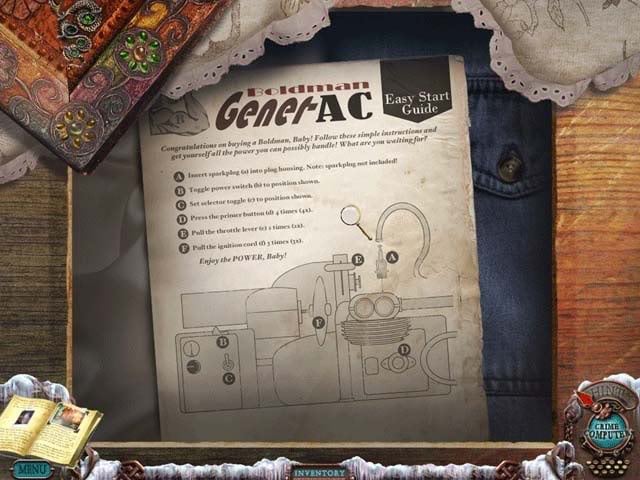
- Once the power is restored, you’ll be able to access the basement via the manager’s office. But before we do that, we’ll need to do a little errand-running. Enter the hotel and proceed up to Alice’s room. From there, exit through the window and enter the graveyard.
Graveyard
- Click on the bars on the right for a closer view: you’ll notice a coin just out of reach.
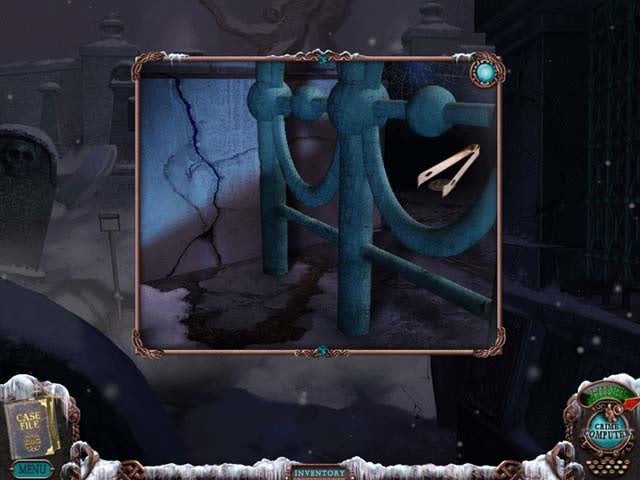
- Use the Metal Tongs on the Coin (3) to pick it up and add it to your inventory.
- Proceed through the graveyard to the tree where the wolf was, and take the right path to the hunting lodge and enter.
Hunting Lodge
- Click on the sparkling area over the fireplace to enter a hidden object area.
Hidden Object Area: Hunting Lodge
- Find the objects listed at the bottom of the screen. Objects are randomized, but one will be added to your inventory upon completing the area. This inventory object is circled in red.
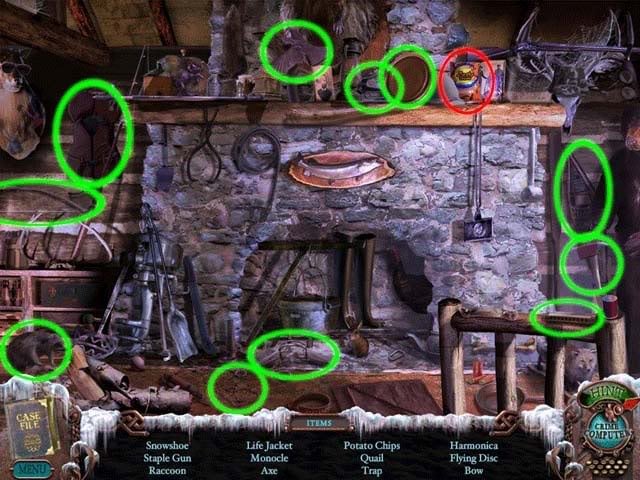
- Upon completing the area, the Potato Chips will be added to your inventory.
- Exit the hunting lodge and backtrack back through the graveyard, through the hotel, across the crumbling bridge, and back to the town center.
Town Center
- Proceed towards the Grocery Store.
- Click on the vending machine outside the store for a closer view.
- Use the Coins x3 on the vending machine (upper right-hand corner), then click on the knob circled below to add the Seeds to your inventory.
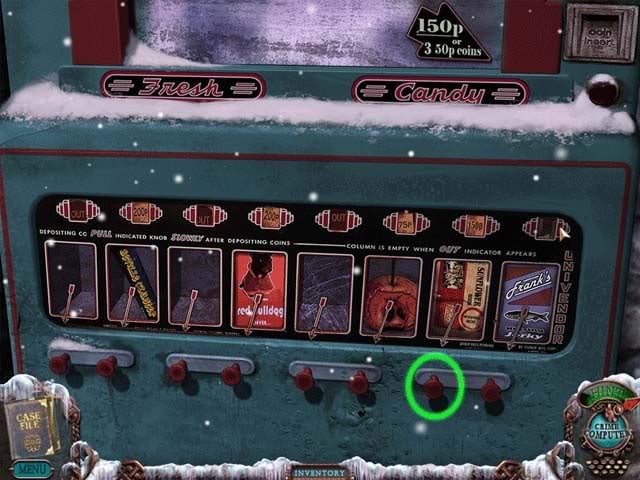
- Exit the close-up and enter the grocery store.
Ye Ole Mill Grocery
- Click on the sparkling area over the grocery shelves to enter a hidden object area.
Hidden Object Area: Grocery Store
- Find the objects listed at the bottom of the screen. Objects are randomized, but one will be added to your inventory upon completing the area. This inventory object is circled in red.
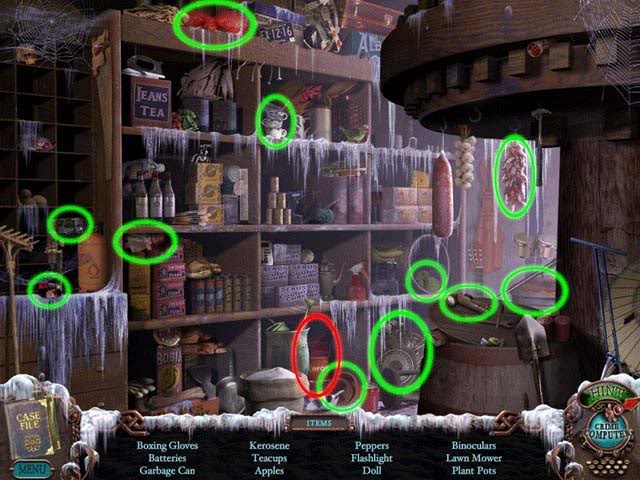
- Upon completing the area, the Kerosene will be added to your inventory.
- Continue towards the back of the store and enter the cellar.
Cellar
- Click on the sparkling area over the freezer on the right to enter another hidden object area.
Hidden Object Area: Freezer
- Find the objects listed at the bottom of the screen. Objects are randomized, but one will be added to your inventory upon completing the area. This inventory object is circled in red.
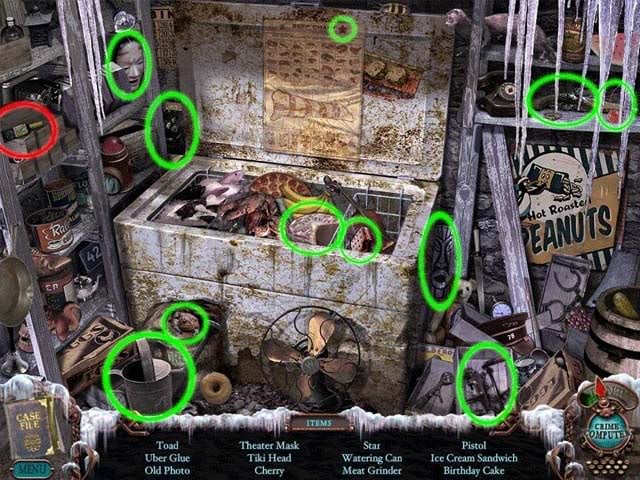
- Upon completing the area, the Über Glue will be added to your inventory.
- Return to the hunting lodge via the graveyard and the hotel.
Hunting Lodge
- Click on the lantern on the table for a closer view.
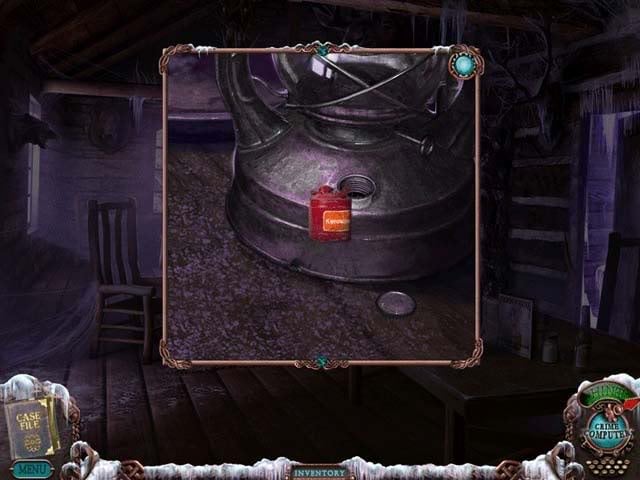
- Use the Kerosene on the Lantern to fill it and add it to your inventory.
- Backtrack across the crumbling bridge, down the "Ruins" path, past the farm and to the cottage.
Cottage
- Enter the cottage, walking across the beam and into the back room.
- Click on the gap in the boards, circled in green in the picture below, for a closer view.
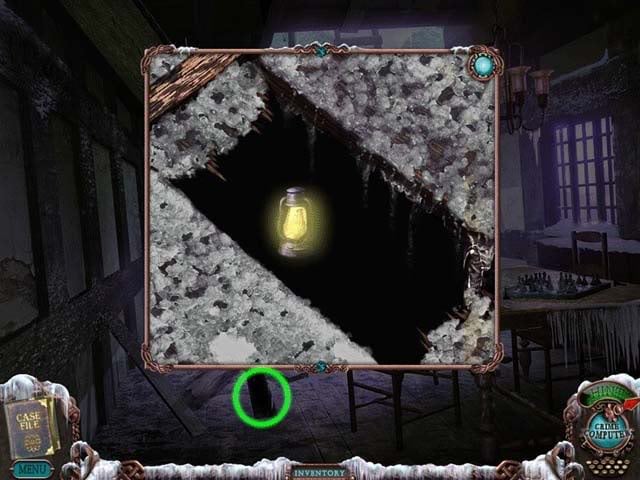
- Use the Lantern on the black space below the floorboards to reveal the Cell Phone. Click on it to add it to your inventory.
- Backtrack to the Hotel and enter it.
Manager’s Office
- Now since the lights are on, you can enter the basement.
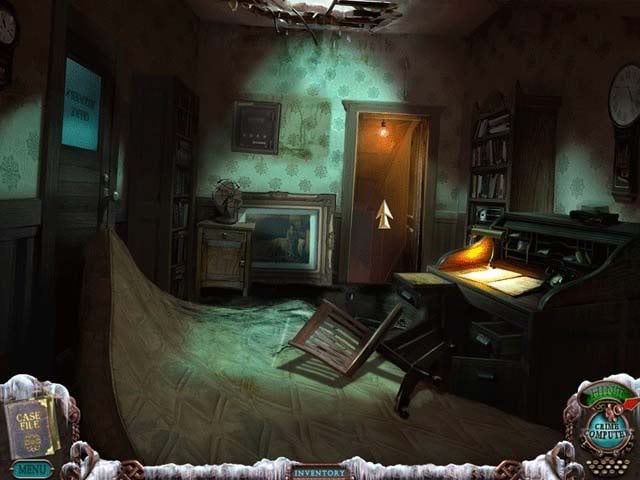
Basement
- Click on the sparkling bottles on the shelves on the left for a closer view. Click on the Salt to add it to your inventory.
- Click on the green hose for a closer view. Use the Wire Cutters on the hose to obtain Piece of Hose for your inventory.
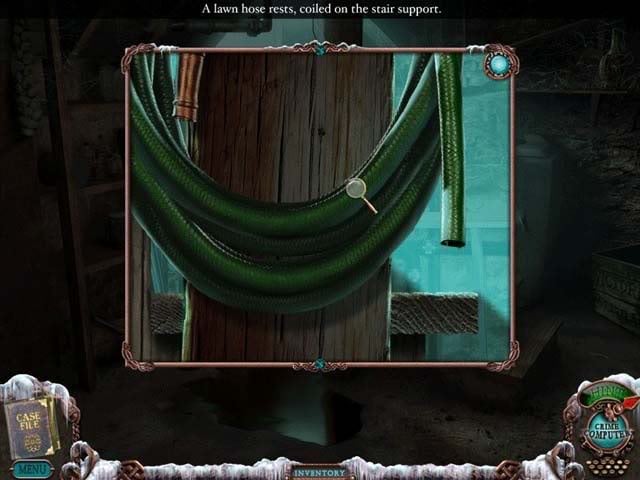
- Click on the acetylene torch under the shelves on the left for a closer view.
- Use the Über Glue on the hole in the hose, then use the Piece of Hose from your inventory on the super-glued area to repair it. Click on the Acetylene Torch to add it to your inventory.
Chapter 10: Accessing the Ruins
- Exit the basement and enter the hotel’s main room (left).
Main Room (Left)
- Click on the Fireplace for a closer view.
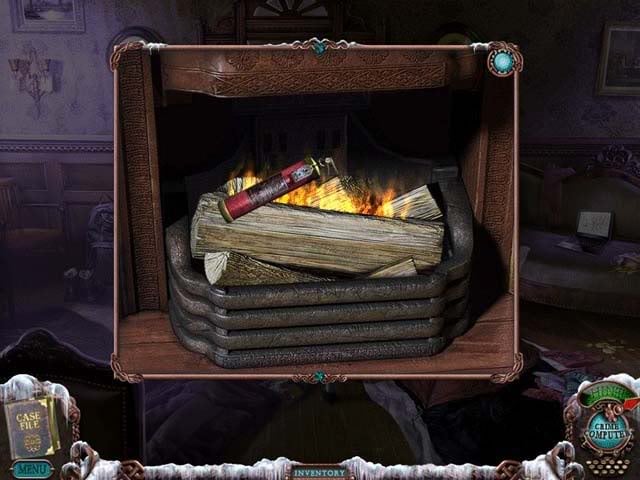
- Use the Wood and the Lighter on the fireplace to make a fire. Use the Fire Extinguisher on the fire to turn it to ashes.
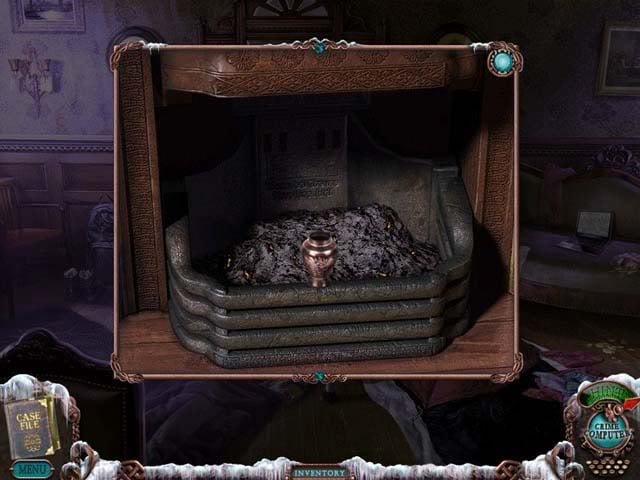
- Use the Urn on the fireplace to add the Ashes to your inventory.
- Proceed up the stairs to the Nautical Room
Nautical Room
- Click on the outlet/Phonecharger that you plugged into the wall earlier in the game for a close-up.
- Use the Cell Phone on the charger.
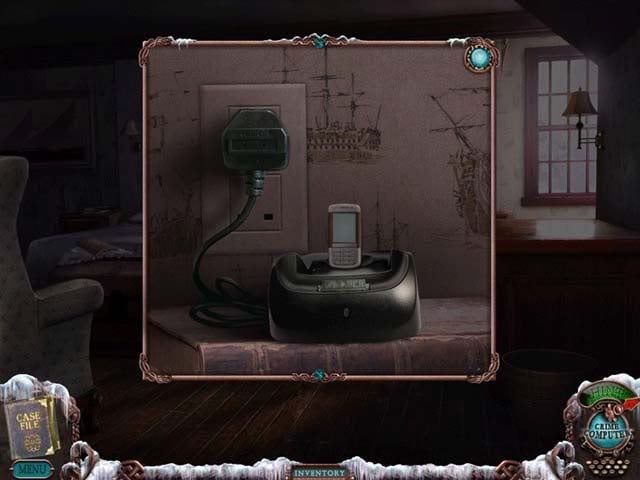
- Click on the Cell Phone to check the screen. A lock puzzle will appear.
- Move all the orange tiles to the bottom part of the screen and all the blue tiles to the top. You only have one space to work with. You can click a tile to move it one square, or you can click a tile behind a tile that borders the open square to have it leap-frog over. The solution is shown below:
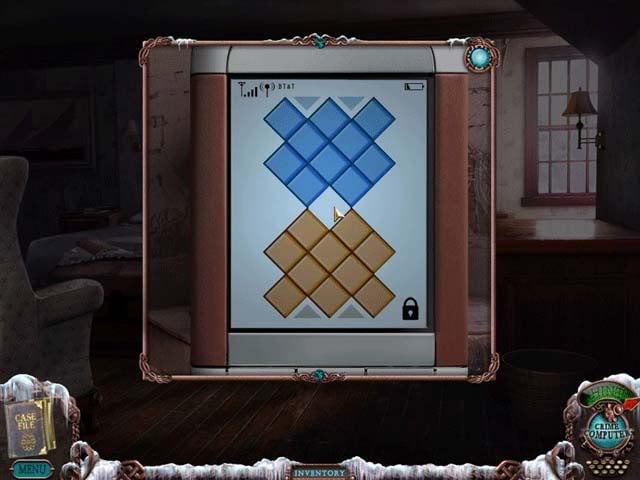
- Upon completing the puzzle, a message and the phone number of Alison will appear on the screen. Remember the last four digits. The digits are randomized according to the game. If you’ve been watching the Tapes you collect, you’ll know the combination to Alison’s suitcase consists of the last 4 digits of her phone number.
- Leave the Nautical Room and proceed down the hall to Alison’s Room
Alison’s Room
- Click on the suitcase lying on the bed for a closer view.
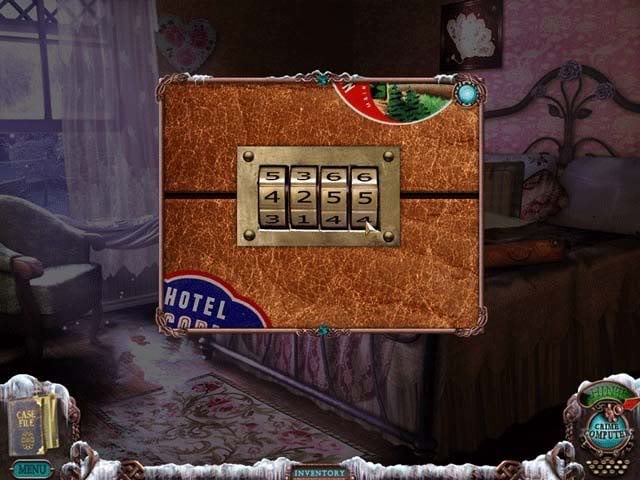
- Input the randomized 4 digit combination to open the suitcase.
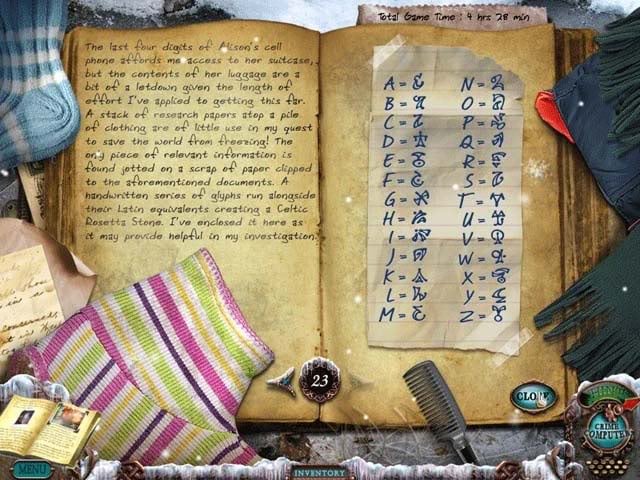
- Once the suitcase is open, click on it again to have a closer look. There’s nothing inside of interest, except a small piece of paper deciphering runes. The paper will be added to your notebook upon inspection.
- Leave the hotel and proceed past the cottage to a bridge covered in snow.
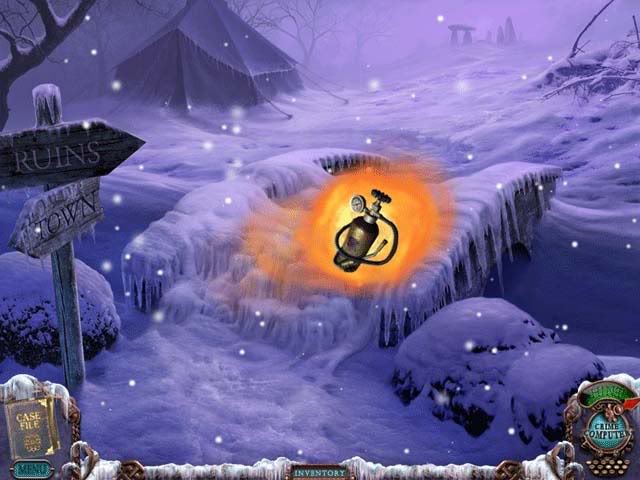
Ruins Bridge
- Use the Acetylene Torch on the heavy snow on the bridge to melt it and allow access to continue.
- Proceed forward and enter the archaeologists tent.
Archaeologists Tent
- Click on the sparkling area at the back of the tent to enter a hidden object area.
Hidden Object Area: Tent
- Find the objects listed at the bottom of the screen. Objects are randomized, but one will be added to your inventory upon completing the area. This inventory object is circled in red.
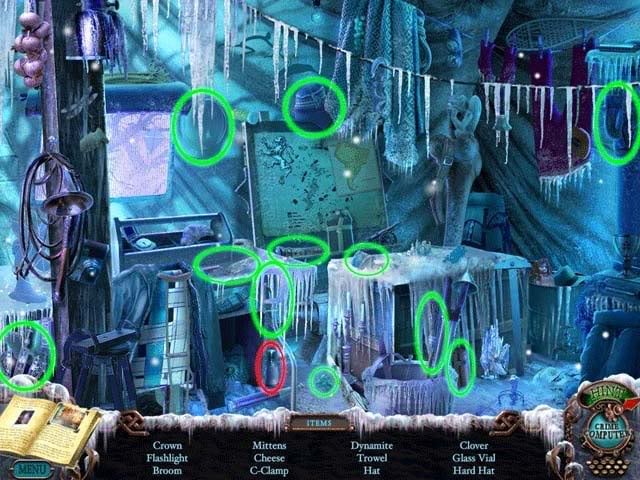
- Upon completing the area, the Glass Vial will be added to your inventory.
- Click on the tape player on the table on the right for a close-up view.
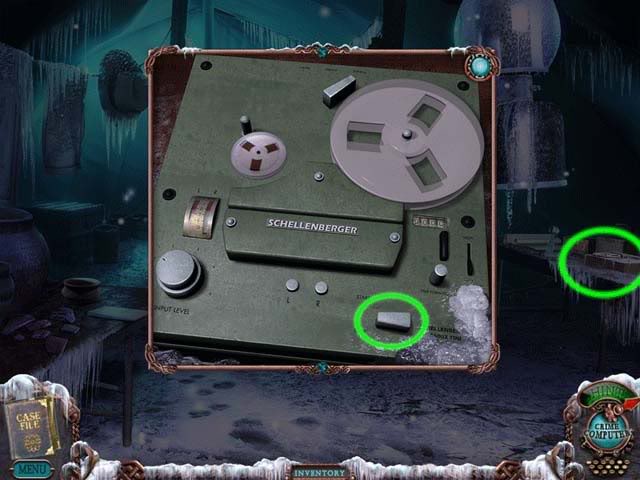
- Use the Tape Reel on the machine to add it, then click the button circled to listen to a recording from the archaeological team. The transcript will be added to your notebook.
- Return to the hotel entrance.
Dire Grove Hotel Entrance
- Click on the thermometer on the right post for a closer view.
- Use the Hammer on the thermometer to break it.
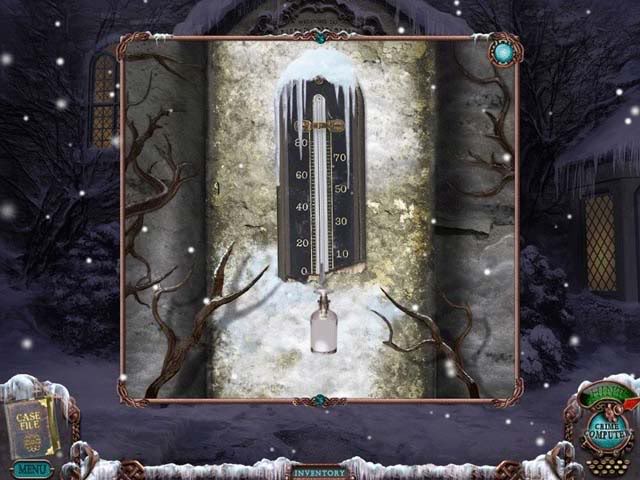
- Use the Glass Vial on the dripping liquid to collect Mercury-filled Vial.
- Return to the bridge before the ruins entrance.
Ruins Bridge
- Proceed forward 2x, past the tent and into the ruins.
Ruins
- Pick up the Tape lying in the snow.
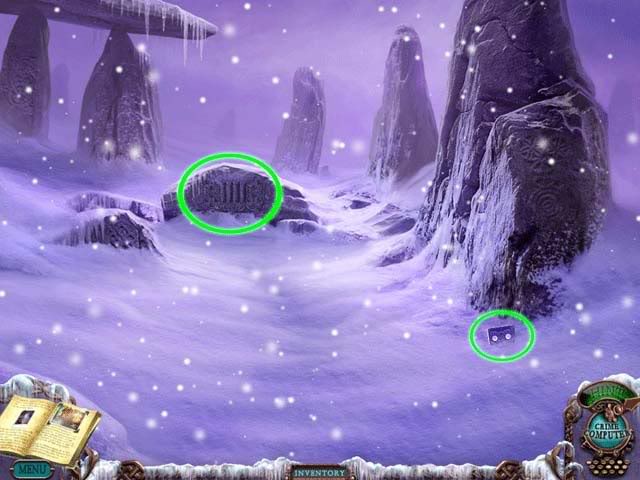
- Once you’ve picked up and viewed the Tape, proceed to the ruins to enter a puzzle.
- Arrange the stones attached to the ruins, in addition to the Relics in your inventory, in the correct order in the four columns. The solution hint is actually located in your Crime Computer, where the Tapes are divided into four columns, and a shape mimicing that of the relics will appear over its correct position.
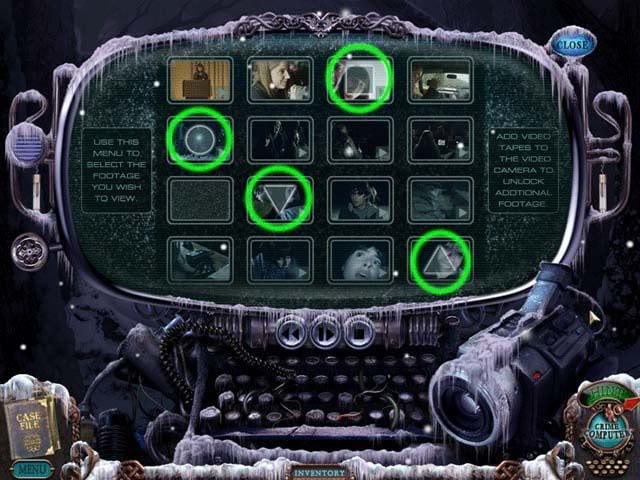
The puzzle solution looks like this:

- Upon completing the puzzle correctly, the ruins will open up, revealing a secret tunnel.
Chapter 11: The Fifth Element
Ruins
- Enter the Ruins
Inside the Ruins
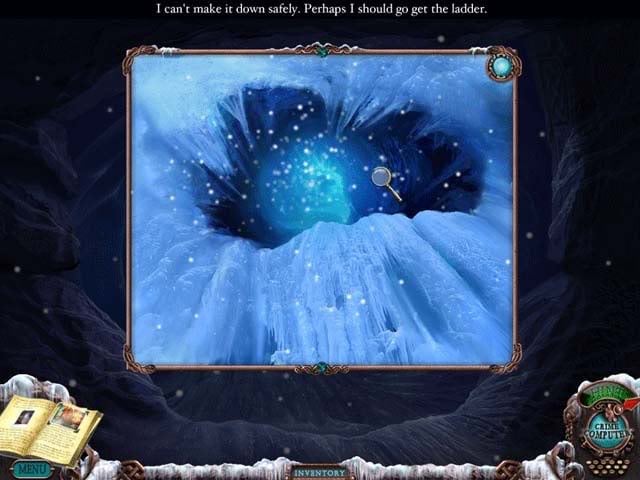
- Try to go further in the tunnel: this will result in a close-up. You won’t be able to continue without a ladder.
- Backtrack to the back room of the cottage.
Cottage
- Click on the area where the ladder was standing: it’s now missing, and it appears Alison has disappeared as well.

- Return to the ruins.
Inside the Ruins
- Return inside the ruins. This time you’ll see the ladder. Climb down to enter the tunnels.
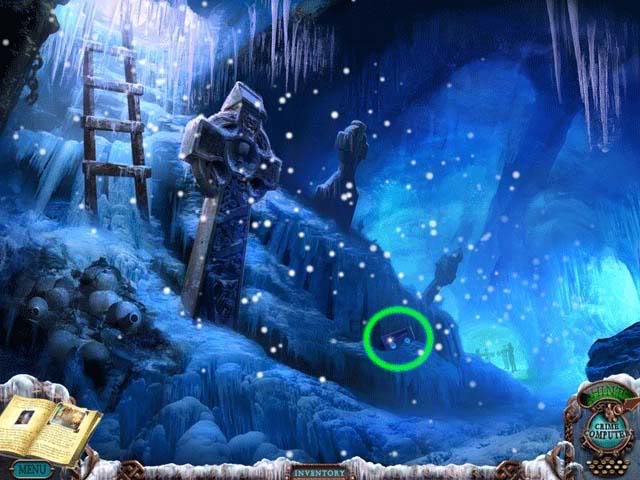
- Pick up the final Tape lying on the ground before continuing down the tunnel.
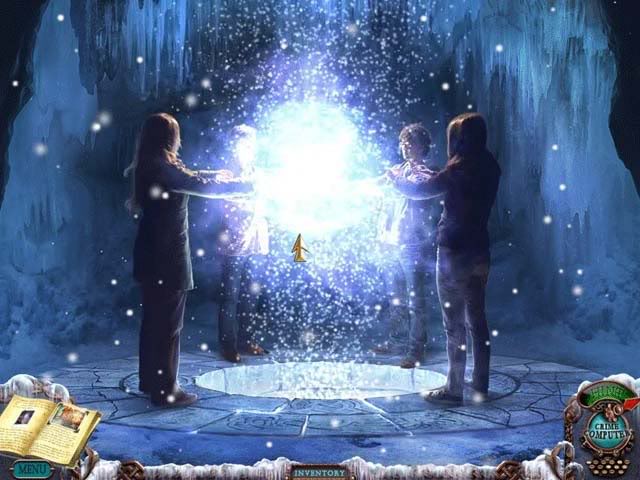
- At the end of the tunnel you’ll see the four students chanting. Enter the portal of light that appears between them.
The Portal Beyond
- You’ll find yourself in a room with the remains of the sacraficed maiden of olde. There are five small rooms you can enter, each reflecting an element. For the sake of the guide, the rooms will be covered from left to right, which is also the order of the actual elements you’ll encounter.
- Each room features a stone altar with a riddle that appears at the bottom. You’ll need to find the word the riddle refers to, and then spell it in Celtic characters. The characters and their matching English letters can be found in your Notebook.
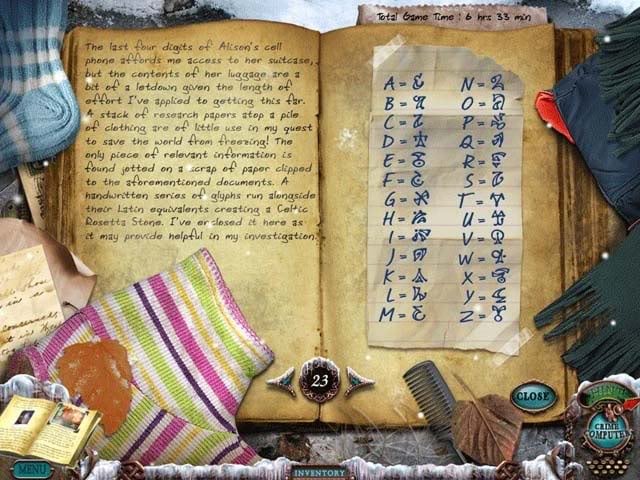
Once you solve the riddle and spell the correct word in Gaelic, you’ll need to place an item from your inventory into the indentation that appears on the altar. The solutions are shown below.
Room 1
- "I gather dust and make arrows fly true
before jotting it down in a letter to you."
Answer: Feather
- Place the Feather from your inventory into the slot that appears.
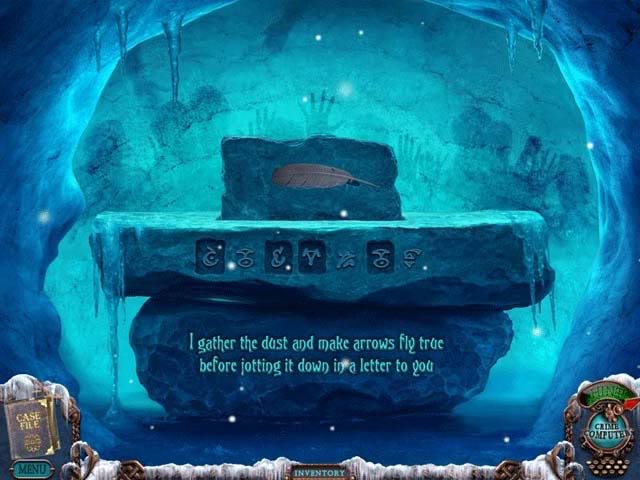
Room 2
- "A grain of hope and the reaper’s toil
My body sends life through the rock and soil."
Answer: Seeds
- Place the Sunflower Seeds from your inventory into the slot that appears.
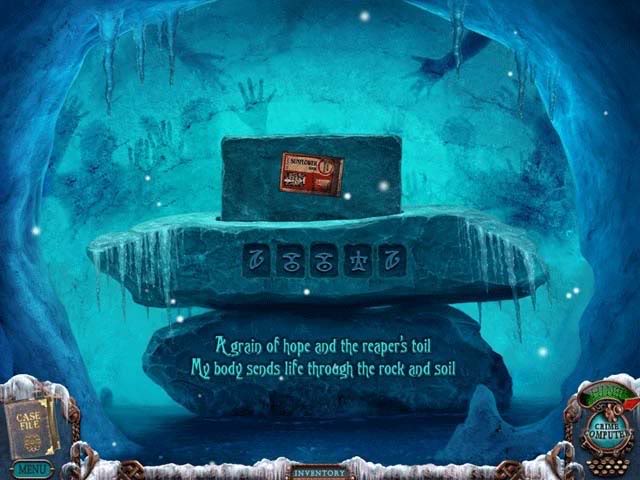
Room 3
- "I am what’s left when all water drys
From the sweat of your brown to the tears in your eyes."
Answer: Salt
- Place the Salt from your inventory into the slot that appears.
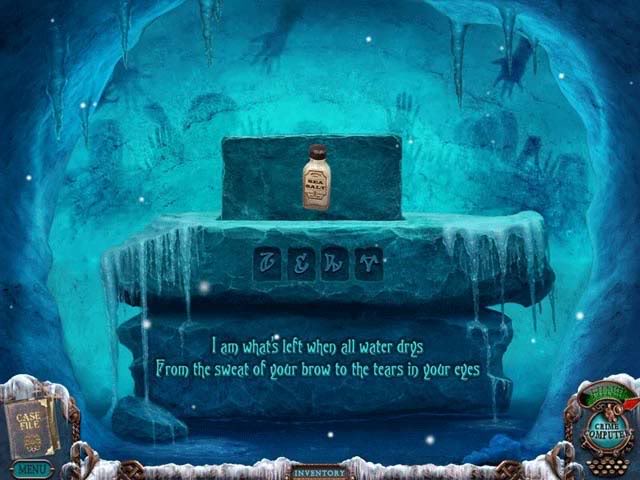
Room 4
- "All life’s variance of form, mass, and hue
Soon wither to me ‘neath the grate and the flue."
Answer: Ashes
- Place the Ashes from your inventory into the slot that appears.
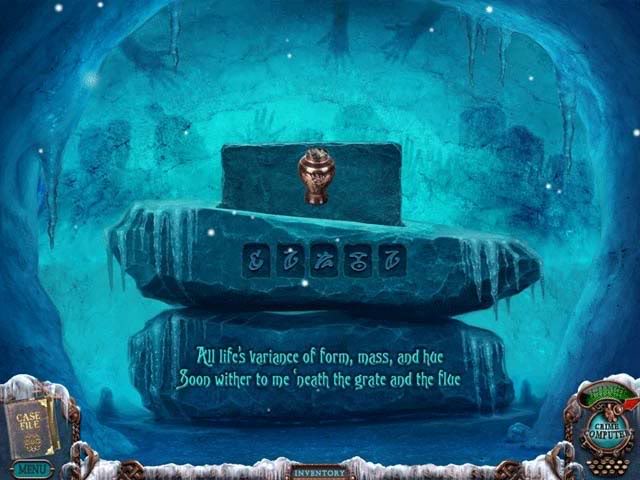
Room 5
- "Messenger god of trade and exchange
My size relies on the brightest star’s range."
Answer: Mercury
- Place the Mercury-filled Vial from your inventory into the slot that appears.
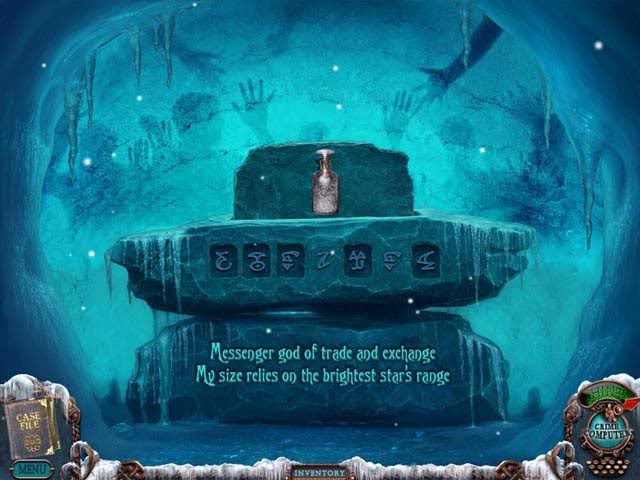
Now that all the elements have been restored including the fifth Silver Soul, sit back, watch, and enjoy the final cutscene. Congratulations, you’ve completed the game!
Bonus: List of Achievements
The following is a list of possible achievements you can complete during the course of the game:
- He’s the Fisherman- Locate the first student
- She’s the Hunter- Locate the second student
- He’s the Blacksmith- Locate the third student
- She’s the Farmer- Locate the fourth student
- Case Closed- Complete your investigation of the events at Dire Grove
- Eagle Eye- Finish all Hidden Object scenes without using a hint
- Look Ma, No Hands!- Solve all puzzles without skipping a single one
- Perfect Intuition- Finish all Hidden Object scenes without freezing
- A Little Chilly- Complete your investigation in less than 8 hours
- Find Felix One- Locate first Golden Felix
- Find Felix Two- Locate second Golden Felix
- Documentarian- Locate and view all tapes left behind by the students
- Change Is Good- Locate all 50 mysterious, morphing objects
- Tour the Office- Relax with a nice drive through the Big Fish Games office
Bonus: Tape Transcripts
Having sound difficulties or just feel like reading back over the diaglogue of the in-game tapes? Their transcripts can be found here:
Tape 1
Alison: The Celtic legend of Dire Grove has been passed down for centuries, from generation to generation. Considered by most a fairy tale, it was told by campfires or as a bedtime story. Again and again it was told, until like most ancient accounts, it bore less resemblence to any factual occurance and slowly became a superstition. And that is how it remains for over 2,000 years until today. However absurd it may sound, it is my contention that an artifact unearthed two days ago in the United Kinddom is evidence that the legend of Dire Grove is in fact very real. Judging by today’s turnout, I will assume I am the only one that understands this to be true.
Tape 2
Alison: I hate packing. It makes me nervous. I always think I’m gonna forget something.
Susan: OK, so you really think there’s truth to this legend?
Alison: Well, it is the source of my dissertation. This relic that they found is the missing link. You’re gonna believe me when we get to Dire Grove.
Susan: Got a big enough suitcase? Make sure you lock it, you don’t want anyone making off with your undies. Don’t forget the combination.
Alison: Oh, I set it to the last four digits of my phone number so it’s easy to remember. Oh, man. Do you think the boys are gonna behave?
Susan: It’s only for a couple of days, how much trouble can they get into? Besides, they can carry our stuff.
Alison: Speaking of stuff: flashlights.
Susan: Oh, check.
Alison: Sleeping bags?
Susan: Check.
Alison: Oh, it’s Matt. Should I tell the guys we just pick them up a couple hours before the flight?
Susan: Sounds good.
Alison: Done. Dire Grove, here we come!
Tape 3
Jack: We just took off on our way to Dire Grove, and don’t tell Susan I borrowed the camera! This is tricky.
Jack: So which wagon’s ours?Matt: The guy said number six.
Jack: There it is. What’s with all the paparazzi?
Alison: Hey, no messing around. This isn’t a pleasure cruise.
Tape 4
Susan: So, where to first?
Alison: The relic was found by a bed and breakfast, but it’s closed for the season. So, we’re gonna go camping. Can somebody find it on the map?
Jack: Sure.
Matt: So how long are we gonna be roughing it?
Alison: One or two days. The forecast said it’s in the 50’s, so it shouldn’t be that bad.
Susan: Hey Al, tell your fans a little bit about what you’re doing.
Alison: We are gonna go look at some ruins and then I’m gonna talk to the museum director about the relic that was found at Dire Grove.
Jack: Here is Dire Grove. Nothing too ominous about that, aye govenor?
Tape 5
Alison: Dire Grove, here it is. I think it’s just up that trail.
Matt: Why is it snowing?
Susan: It’s freezing, and we didn’t pack for this kind of weather.
Matt: Isn’t it supposed to be in the 50’s?
Alison: I don’t know. It’s exciting though, isn’t it? C’mon.
Jack: Looks like we’re in the right place.
Matt: "Dire Grove: closed for the season". Seems deserted.
Alison: C’mon you guys, this is gonna be fun.
Tape 6
Jack: Should we just break in?
Alison: I don’t know about that.
Matt: Is it even locked?
*whispering noises*
Tape 7
Matt: What are you doing?
Susan: Just leaving a note in the guest book.
Jack: "The legend is real". When are you going to fill us in on this legend anyway?
Tape 8
Matt: We can all this way. When are you going to tell us about this mysterious legend?
Alison: Well, it just so happens that I have my slides from my lecture right here. So, roughly 2,000 years ago on this very spot, lived an ancient civilization called the Celts. What is now Dire Grove was once the settlement of Gaelin.
Jack: Should we be taking notes?
Alison: Four counts: a hunter, a blacksmith, a farmer, and a fisherman: all gathered in Gaelin and successfully contacted their deceased ancestors by performing the ceremony with these four magical objects. Unfortunately, a gate was opened between the warm grainland of the living and the icy void of the dead. Not knowing how to close the gates, the Celts watched in horror as the icy land of the dead crept into their world. They realized if they didn’t know the ice, it would overtake the whole earth, so they had to close the gate. They abducted this young woman and thrust her, like a sacrifice, into the portal. It worked. The ice receeded, the earth was green and warm. The Celts collected those magic objects and hid them in difference places so that they would never be united again.
Matt: And what happened to the girl?
Alison: Well, some people call her the Banshee, other people call her the Ice Lady. Supposedly she waits for the discovery of the relics so that she can come back and turn the earth to ice, so that we may all feel her pain.
Susan: A few days ago, archaeologists unearthed a relic near Dire Grove that Alison–
Matt: You believe it’s one of the four devices used to open a gate to another world.
Alison: Right.
Tape 9
Matt: So if they found the first relic, do you think the other three are buried around here somewhere?
Alison: That’s my guess. The carvings that were found on the relic that was found represent the blacksmith: fire. The Celts place great reverence in the four natural elements of earth, air, fire, water. It just makes sense that the other relics would represent the other elements. Remember who opened the portal? Farmer: earth, fisherman: water…
Susan: So id the relics came together again, you’re saying the portal would reopen and release the soul of the woman trapped thousands of years ago?
Alison: Yes, but unfortunately it would also freeze the entire world in the process.
Jack: And there’d be no turning back.
Alison: I suppose. I mean, that’s how the story’s been told for thousands of years. Although, the Celts do believe in this mysterious fifth element, which would trump the other four.
Susan: What was it?
Alison: Roughly translated, it’s known as the "silver soul". There’s not a whole lot known about it. It’s thought to be highly magical by the Celtic elders, the Druids. Anyway, if an object representing the fifth element was in some way combined with the other four, it would lock the portal forever.
Matt: Let’s hope we don’t have to find out.
Tape 10
Jack: I can’t sleep I’m so cold. Are you freezing?
Susan: It’s gotta be twenty below in here. Looks like the fire’s out.
Alison: Where’s Matt?
Jack: His sleeping bag is cold. Maybe he went to the bathroom.
*whispering voices*
Alison: Matt? Matt?
Susan: Matt!
Alison: Hey Matt? Matt, come on, this isn’t funny.
Susan: I’m gonna go help her.
Tape 11
Alison: Matt? Hey Matt come on this isn’t funny.
Jack: I’m freezing.
Alison: Maybe we should look outside.
Jack: Hey, check it out. Footprints.
Alison: Matt!
Jack: Dude, where are you?
Alison: Matt, it’s too cold to be playing out here.
Jack: Look, more footprints.
Alison: Looks like somebody’s been digging holes.
Jack: More holes over here.
Alison: Matt? Matt… Matt…?
Jack: Dude, what are you digging for?
*gasps*
Tape 12
Alison: We need to go get help.
Susan: We can’t just leave him here!
Jack: I’ll go with her. Will you be OK?
Susan: Yeah, just hurry.
Jack: OK, I’ll get help. Just stay here, OK? Just watch him.
Alison: Jack, I’m really scared. I think he’s gone totally off.
Jack: Hey, it’s gonna be OK. I promise, OK? We’re gonna get out of this.
Alison: What’s wrong?
Jack: The car, it’s too cold or something, it won’t start!
Alison: C’mon c’mon…
Jack: I’m trying, I’m trying.
*whispering noise*
Jack: Did you hear that?
Alison: Hear what? You’re totally freaking me out, stop!
Jack: She’s calling my name.
Alison: Jack, look, you need to get the car started! Stop!
*Jack freaks out, Alison screams*
Tape 13
Alison: Susan! Susan– Where’s Matt?
Susan: He wouldn’t stop digging, and I got too cold. It’s getting worse out there. Where’s Ja–
Alison: Jack’s… gone.
Susan: What? To get help?
Alison: No, he freaked out and he ran into the woods. OK, we need to start a fire right now before we freeze to death.
Susan: No, we need to get help.
Alison: No, it’s too cold. We need to start a fire right now. What’s that?
Susan: I found them behind the desk while I was looking for matches. If we’re gonna stay here, that’s fine, but keep this with you.
Alison: Stop. I am worried about the guys too, but we have to start a fire. I don’t know what else to do. There’s something out there.
Tape 14
Susan (via walkie-talkie): Alison, can you hear me? Hello?
Alison: Susan? Where did you go?
Susan: I don’t… Help!
Alison: Come back to the room!
Susan: She’s got me. *screams*
Alison: This is a distress call to anyone who finds this tape. The legend is real. I came here with my friends Susan, Jack, and Matt, and she took all of them. I knew this was gonna happen. It’s getting really cold. I can feel the ice moving under…
Susan: Help!
Alison: Susan, are you there?
*whispering voices*
Alison: Susan? Ahh!
Tape 15
Alison: Susan, is that you? Susan? I’m scattering these tapes to increase our chances of being found. The legend is real. This is not a stunt. I’m a graduate student. My name’s Alison Sterling and I come from Strayer University. Susan? Is that you? Susan, is that you? Leave me alone, leave me alone! No!
Tape 16
Alison: C’mon, start! C’mon start, please! Oh no… *jibberish* I’m so worried. I dunno what to do. "If you find this note, please, the legend is real. She has re–" Whatever you do, don’t– *screams*
Bonus: Morphing Objects
Throughout the game is a series of 50 mysterious, morphing objects. They can be found and are also listed in no particular order. Their locations are shown below:
1.Upstairs Hallway: Bed and Breakfast (Pitcher)
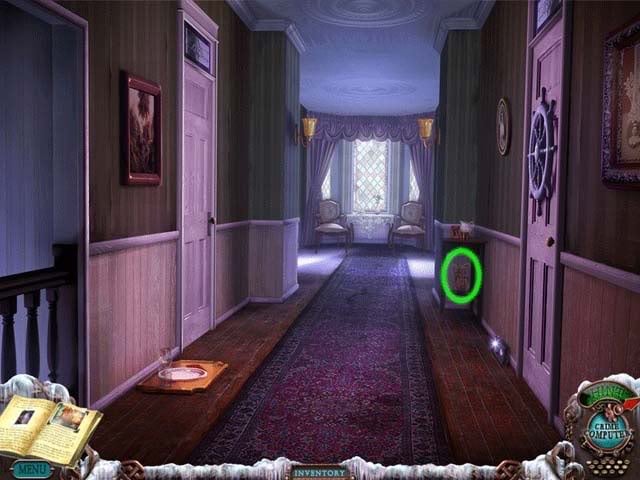
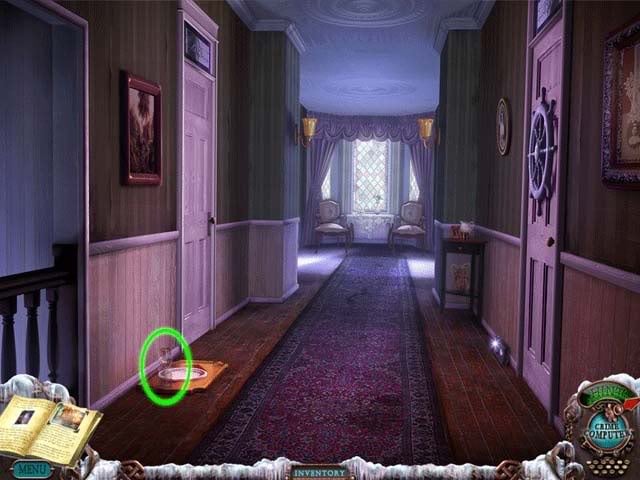
2.Upstairs Hallway: Bed and Breakfast (Glass)
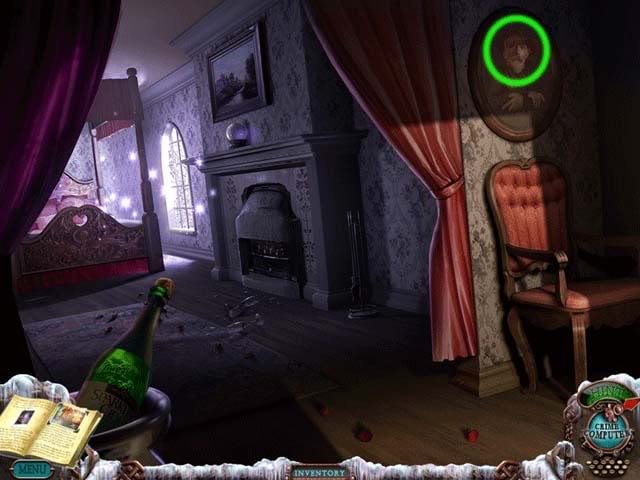
3.Romantic Room (Portrait Head)
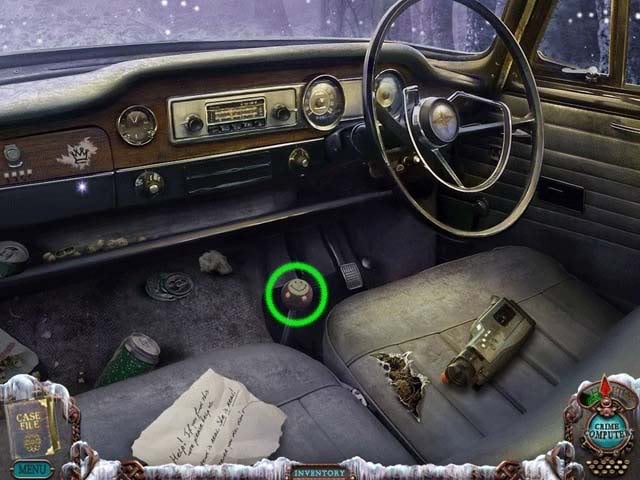
4.Inside the Car (Gear stick)
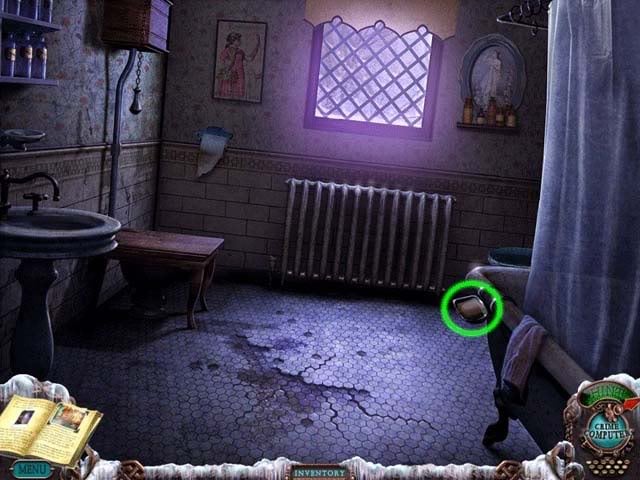
5.Bathroom (Soap)
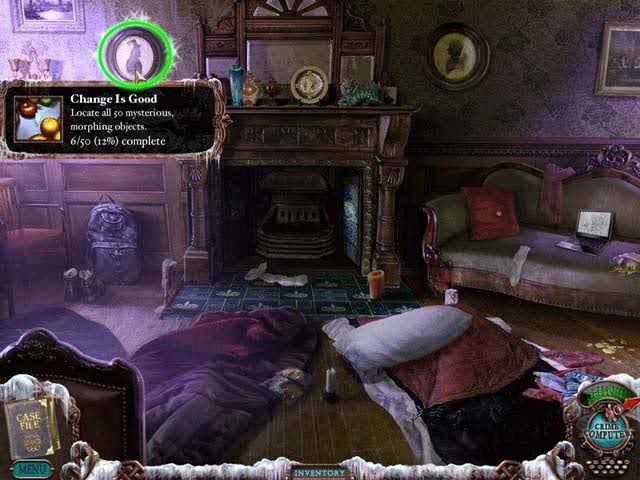
6.Main Room (Left Portrait)
7.Main Room (Small Picture)
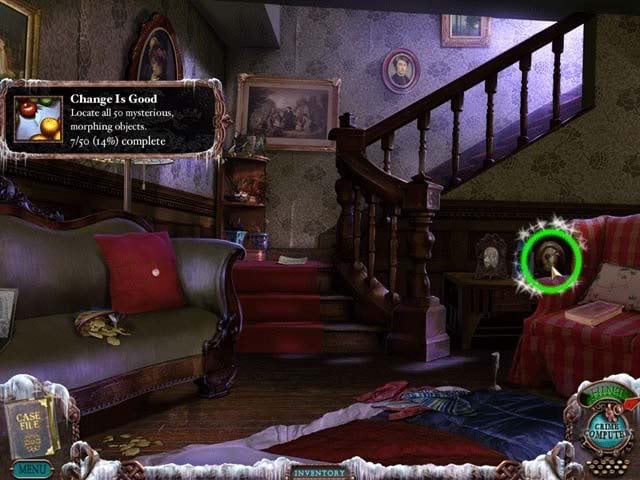
8.Hotel Stairway (Rightmost Painting)
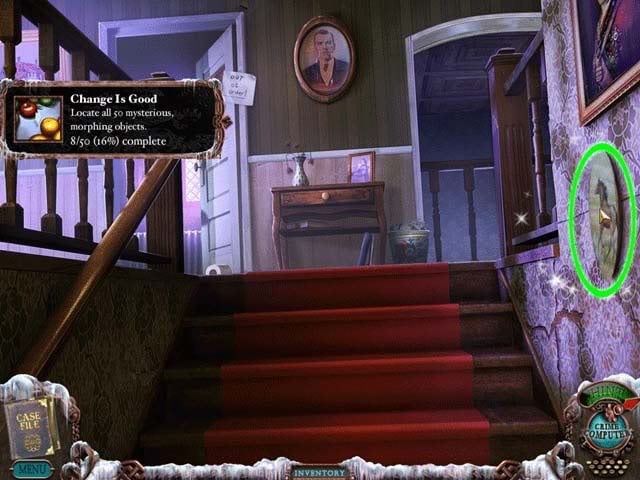
9.Nautical Room (Small Pile of Books)
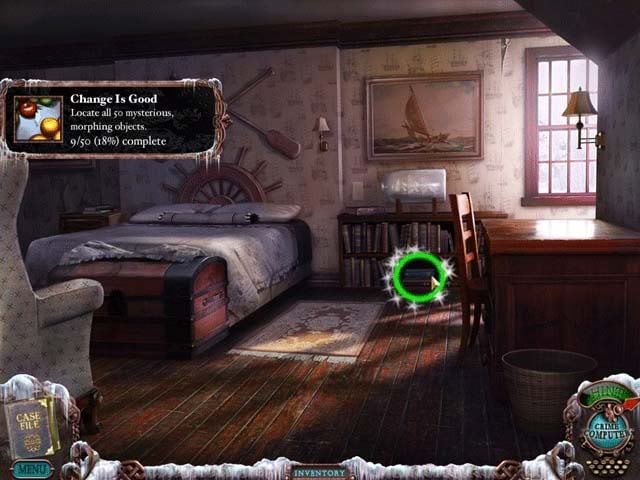
10.Hallway End (Leftmost Portrait)
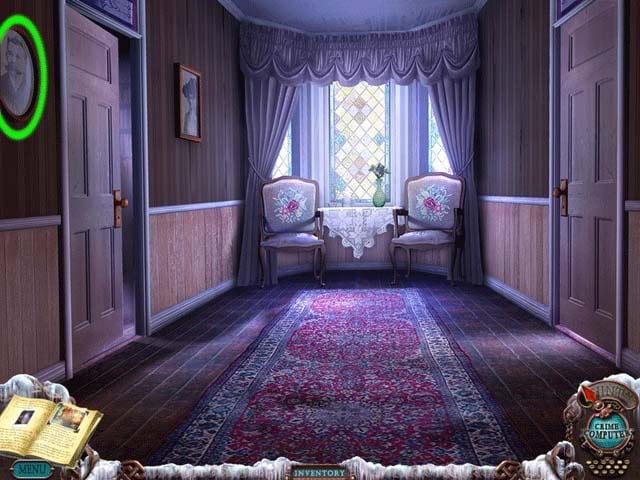
11.Library (Pillow Embroidery)
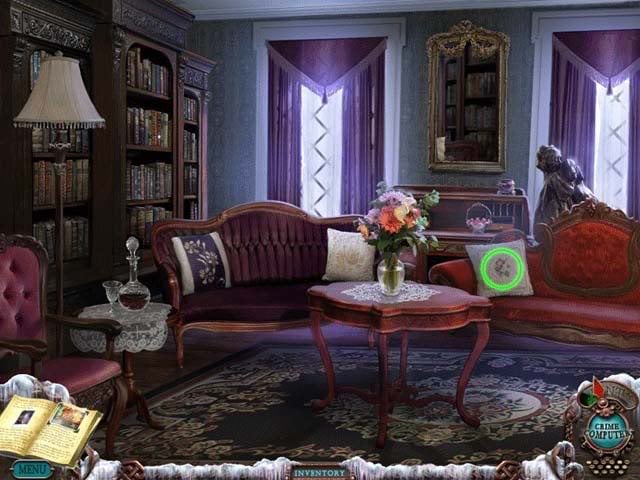
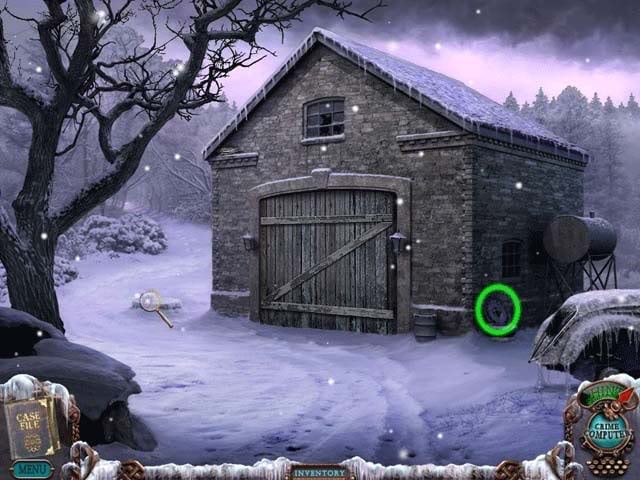
12.Hallway End (Vase)
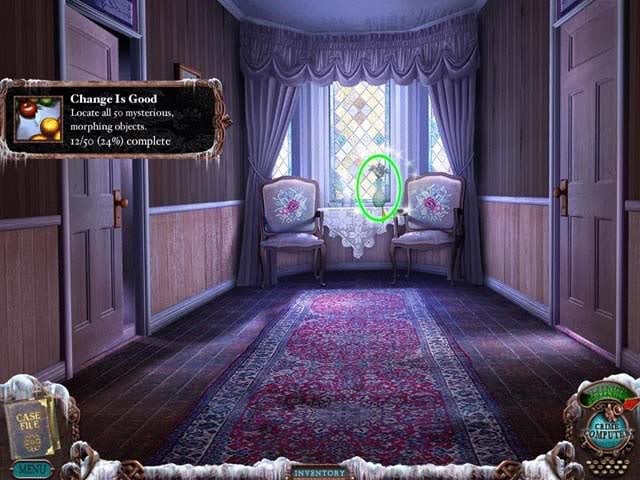
13.Outside Garage (Hubcap)
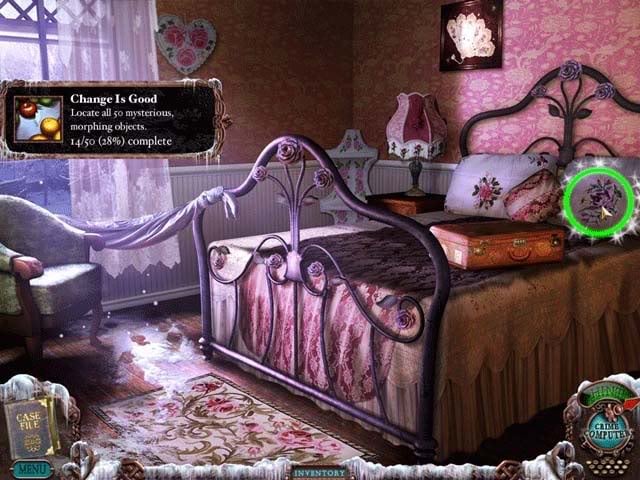
14.Alison’s Room (Pillow Embroidery)
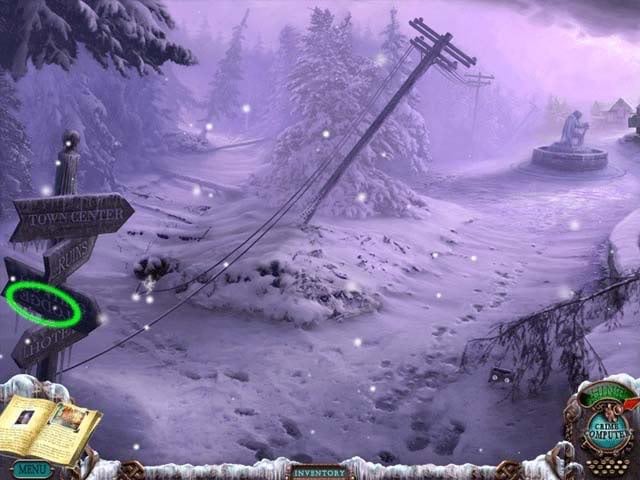
15.Crossroads to Town Center ("Lodge")
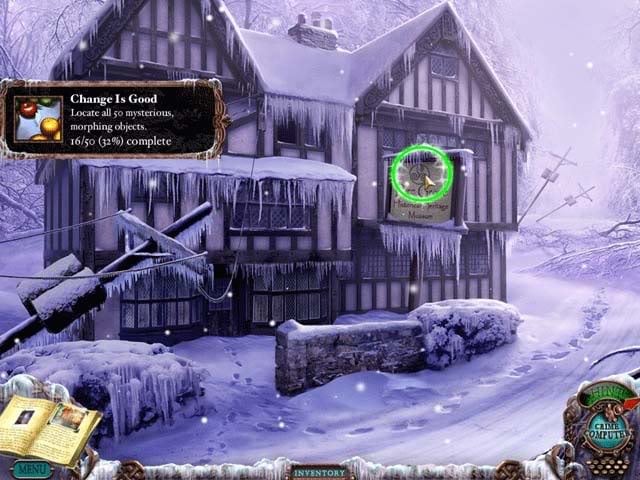
16.Outside the Museum (Museum Logo)
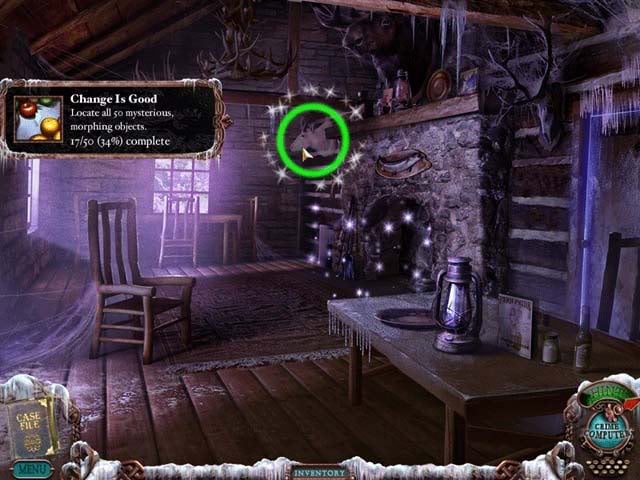
17.Hunting Lodge (Trophy Head)
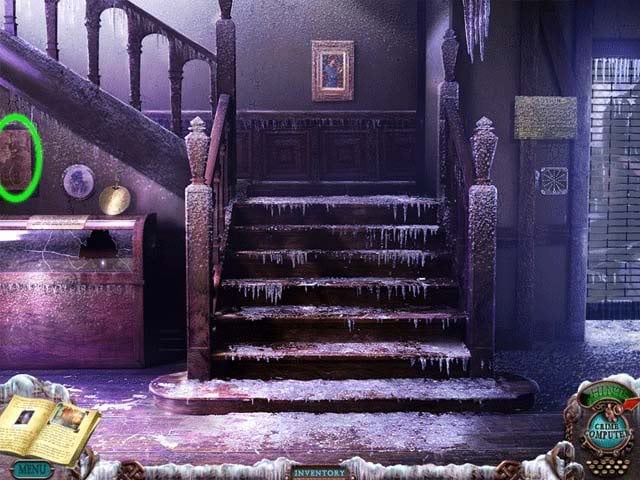
18.Museum Stairs (Photograph)
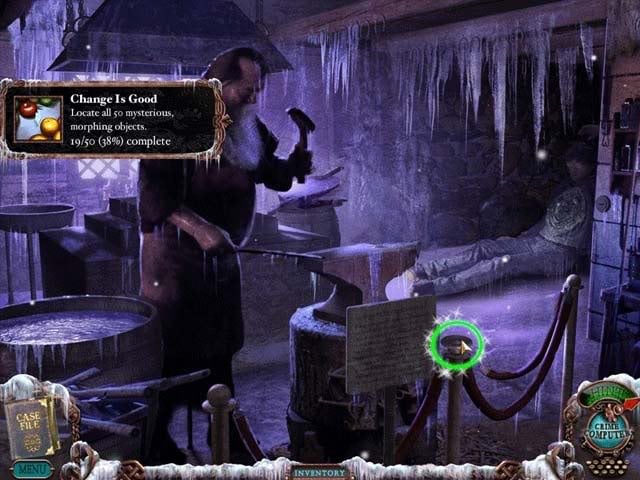
19.Blacksmith Room (Post Tip)
20.Cottage Attic (Cricket Bat)
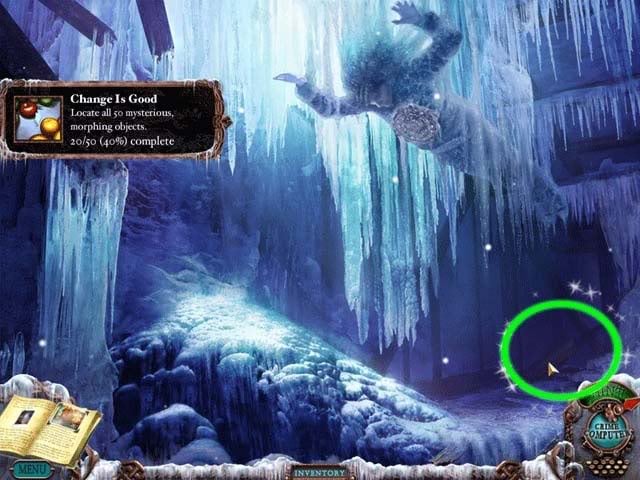
21.Graveyard ("Hart/Fart")
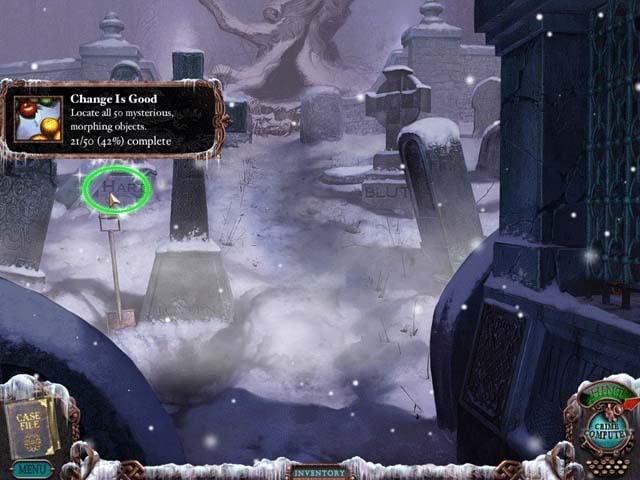
22.Museum Office (Oil Lamp)
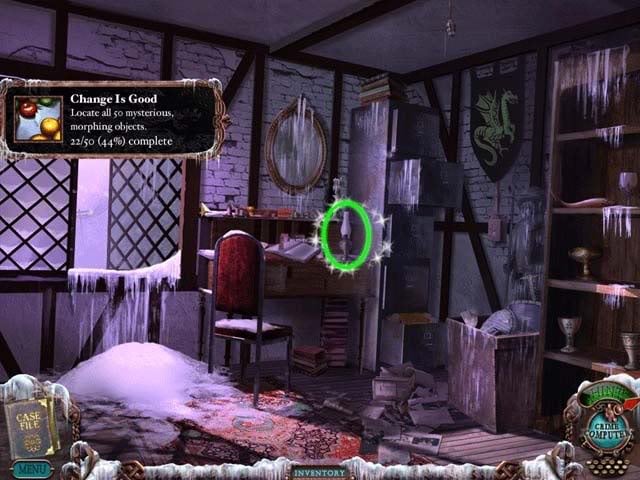
23.Cottage Back Room (Glass)
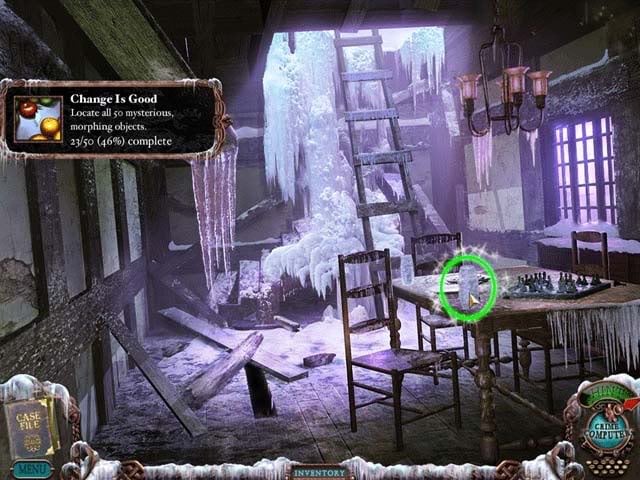
24.Cottage (Glass Pitcher)
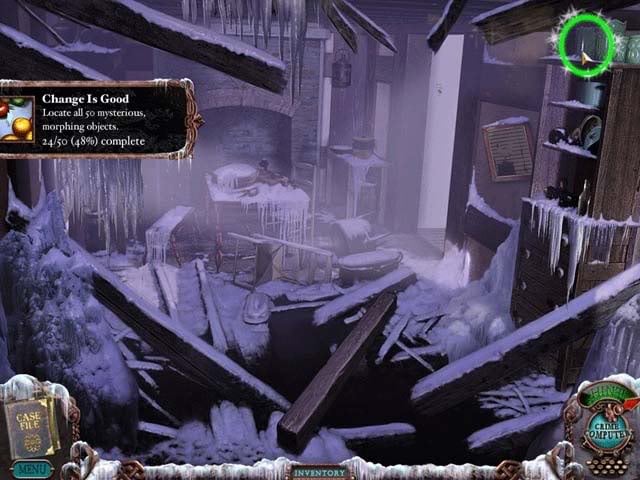
25.Outside Cottage (Chimney)
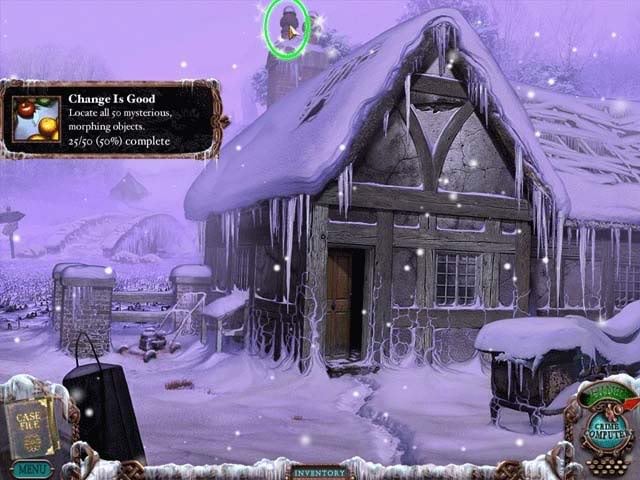
26.Outside Barn (Chimney)
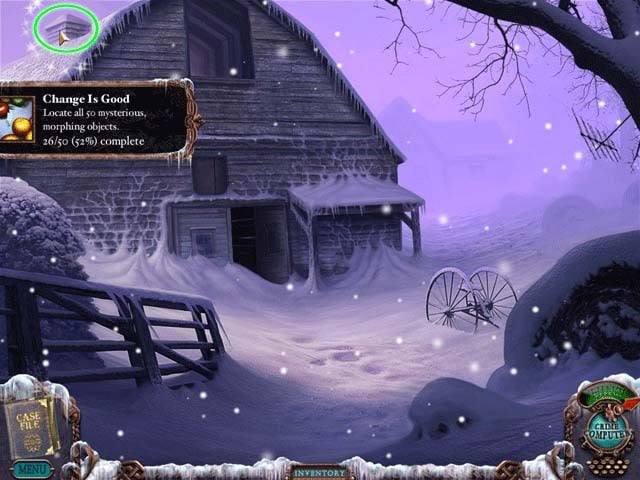
27.Grocery Store (Flour Sack)
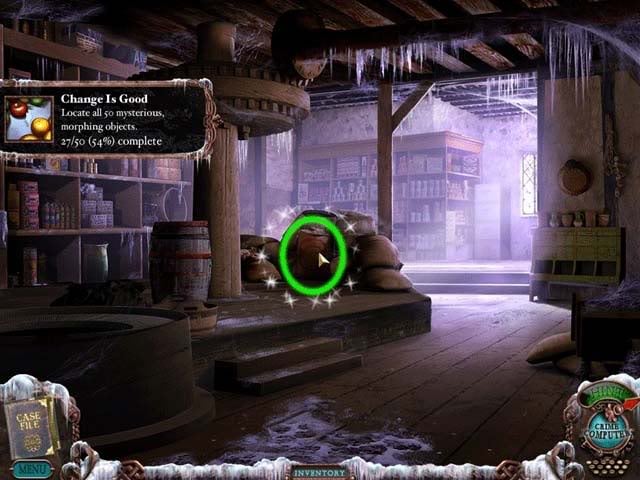
28.Museum Gallery (Statue Bust)
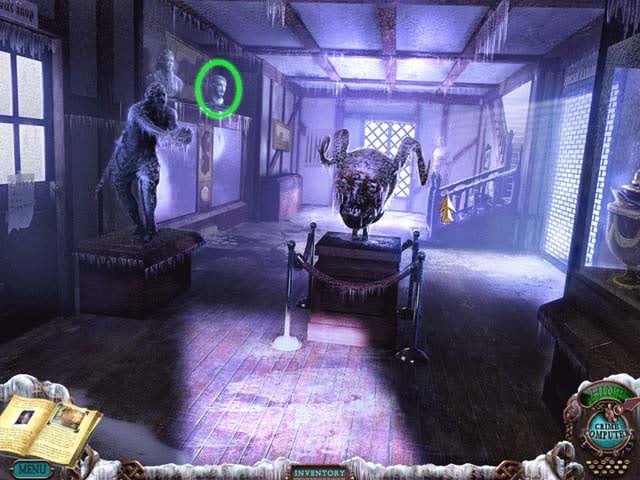
29.Manager’s Office (Satchel)
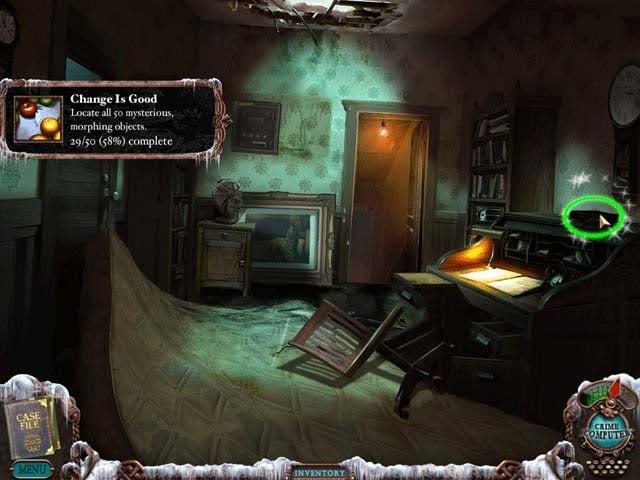
30.Archaeologist’s Tent (Bowl)
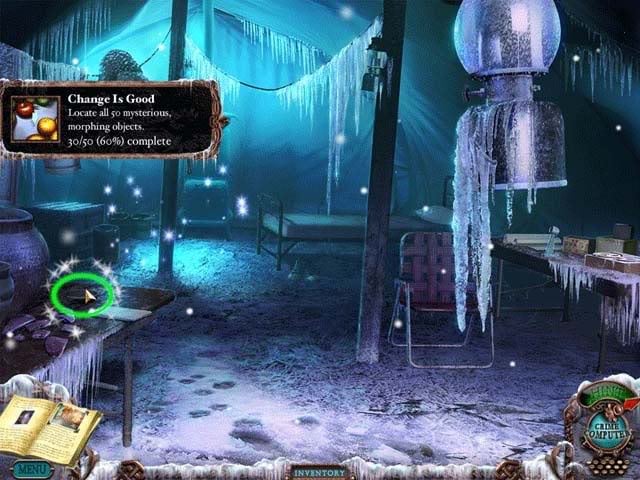
31.Grocery Store Cellar (Can on Shelf)
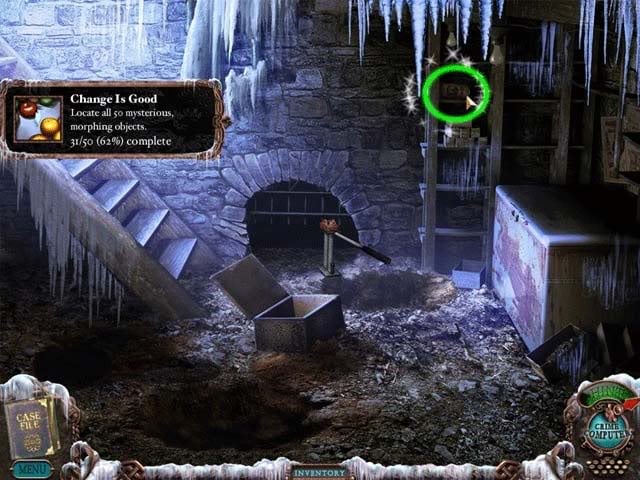
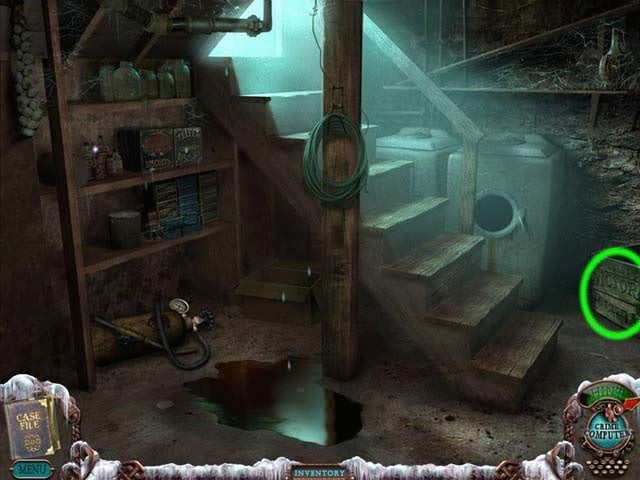
32.Hotel Basement (Box Label)
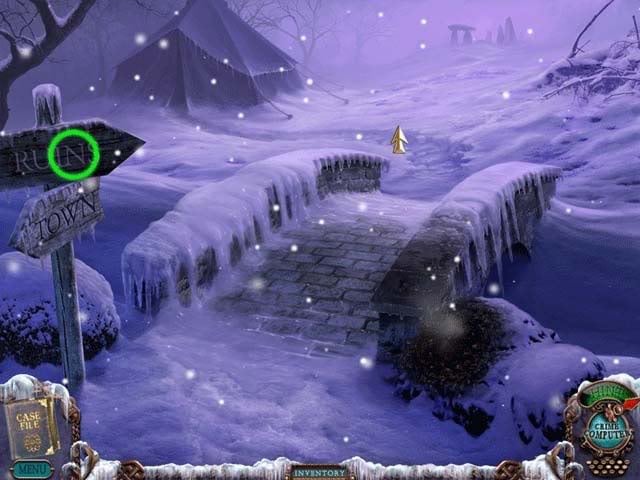
33.Ruins Bridge (Ruins Sign "N")
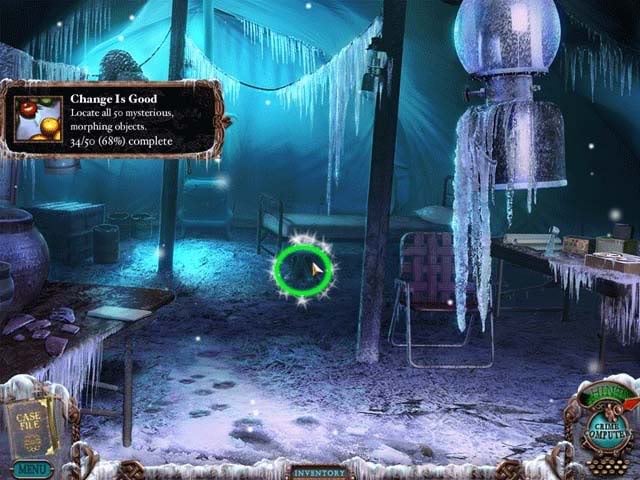
34.Archaeologist’s Tent (Shoes)
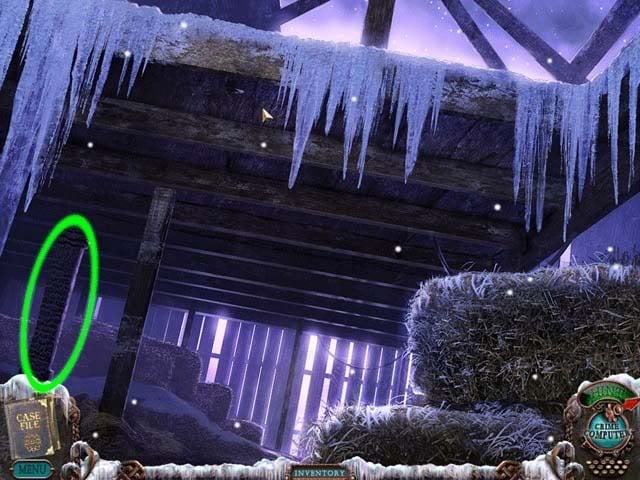
35.Barn (Support)
36.Lobby (Vent)
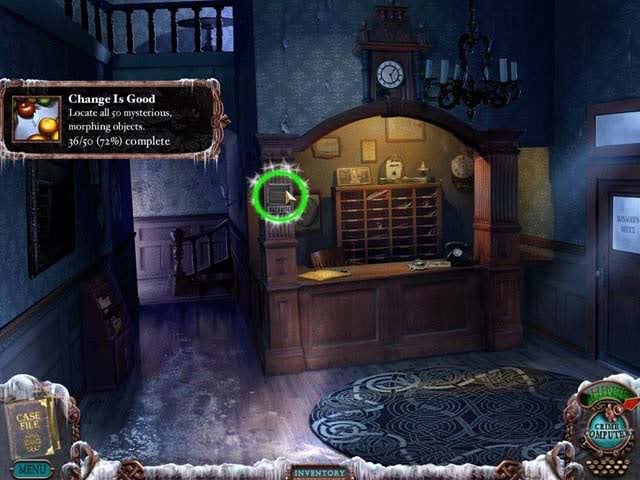
37.Garage ("Gasoline")

38.Outside Boat House (Antlers)
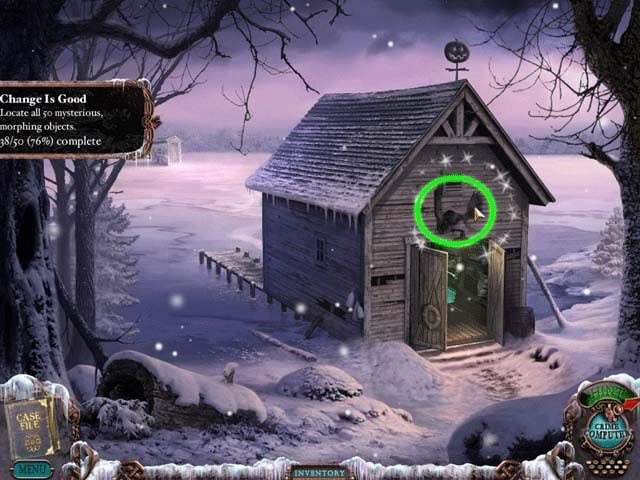
39.Outside Grocery Store (Sign Logo)
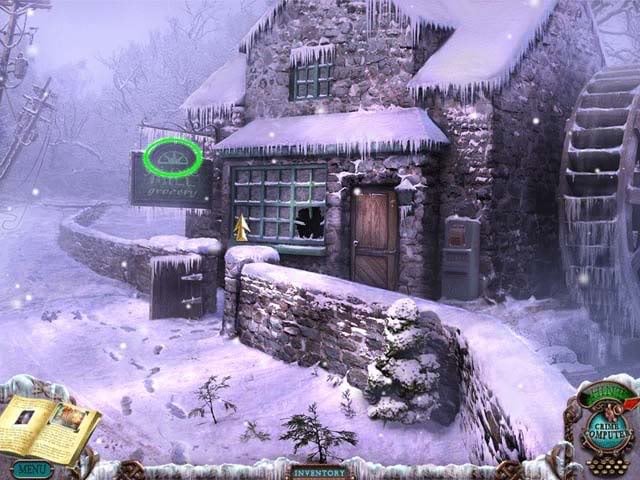
40.Outside Museum (Chimney)

41.Outside Archaeologist’s Tent (Rope Peg)
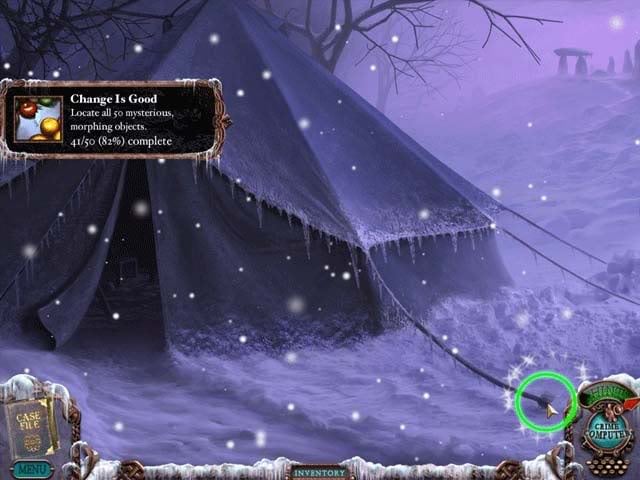
42.Outside Barn (Antenna)
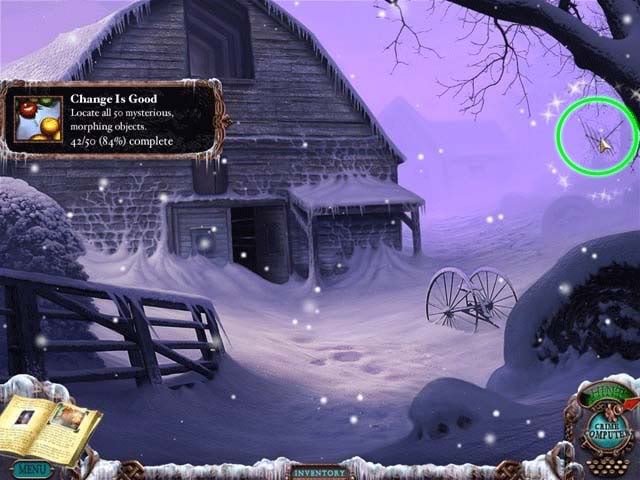
43.Outside Hotel (Chimney)
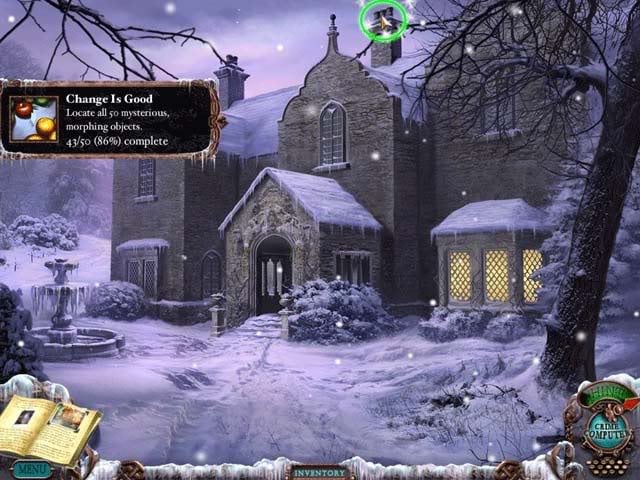
44.In Front of Hotel (Stone Face)

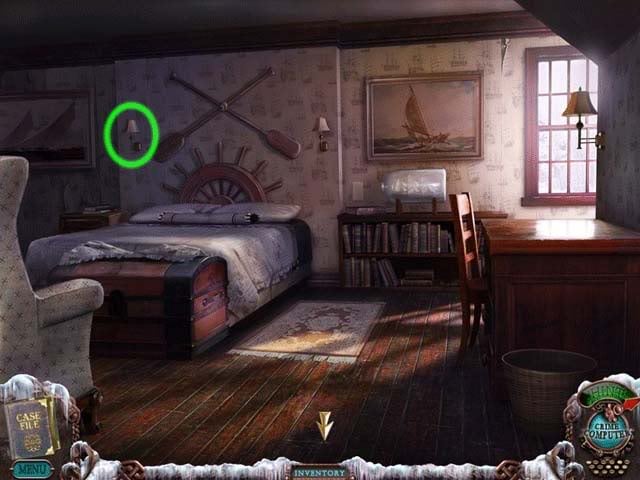
45.Nautical Room (Left Wall Lamp)
46.Gift Shop (Red Card)
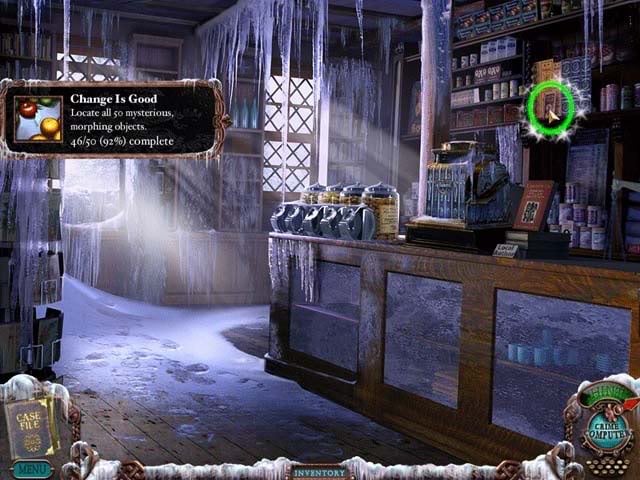
47.Covered Bridge (Sign)
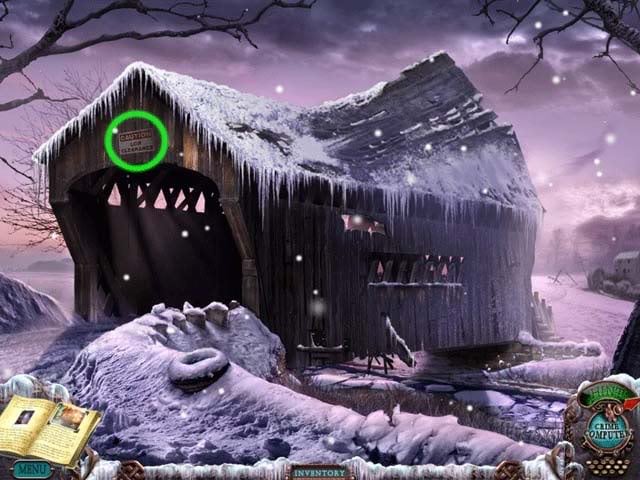
48.Outside Car (Signpost)
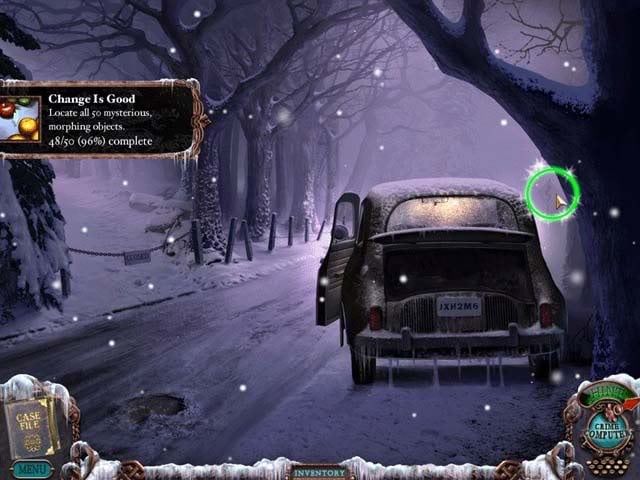
49.Museum Upstairs (Footprint)
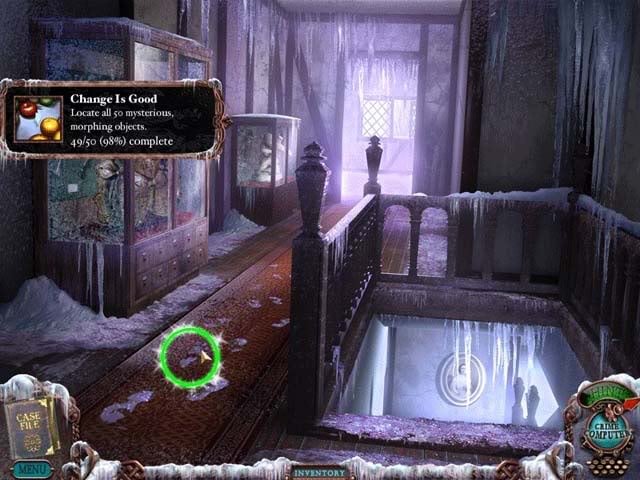
50.Icy Netherworld (Skull)

Bonus: Golden Felix Quest
As a special addition to the special edition version of the game, there is a whole additional area of gameplay. It’s covered below, taking off from where you left off in the guide above with the Potato Chips already in your inventory.
Graveyard
- Proceed forward to the crossroads.
Crossroads
- Use the Potato Chips on the hole in the tree where the wolf is hiding. Upon taking the snack, the wolf will disappear again and a new hidden object area will appear. Click on it to enter.
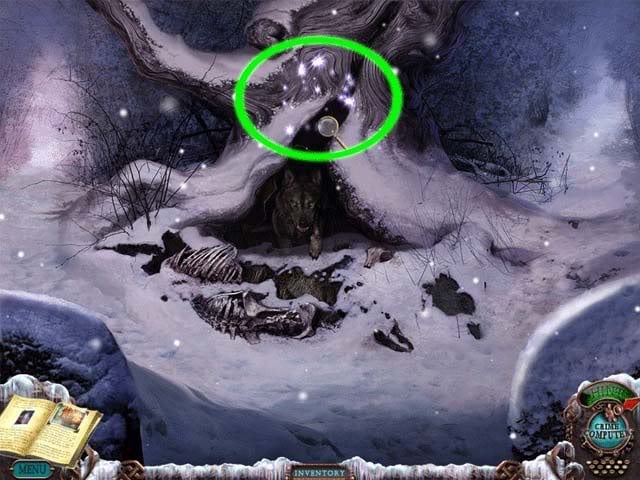
Hidden Object Area: Crossroads Tree
- Find the objects listed at the bottom of the screen. Objects are randomized, but one will be added to your inventory upon completing the area. This inventory object is circled in red.
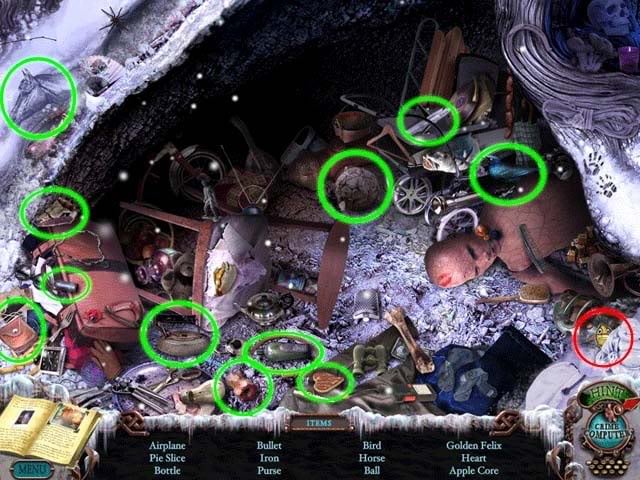
- Upon completing the area, the Golden Felix #1 will be added to your inventory.
- Backtrack to outside the front of the Hotel.
Outside
- Go outside the Hotel and around to the Generator.
- Use the Hammer on the Rabbit statue on the fountain 10 times. The head will break and fall off. Click on the Statue Head to add it to your inventory.
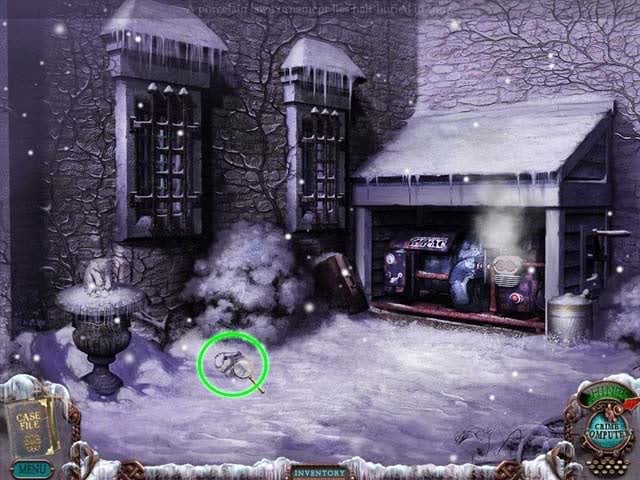
- Proceed to the Grocery Store.
Ye Ole Mill Grocery
- Go to the back store room area, and click on the microwave for a close-up. Click on the door to open it.
- Place the Statue Head inside the microwave.

- Click on the door to shut it, then click on the green button to turn the microwave on. Once it’s done, you’ll zoom out and a new hidden object area will appear. Click on it to enter.
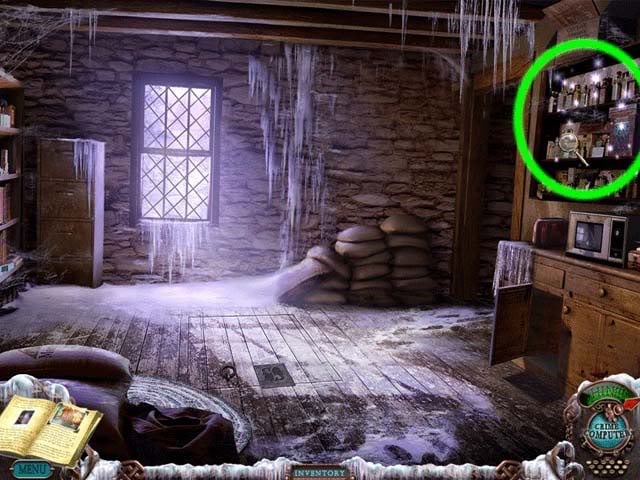
Hidden Object Area: Storeroom Shelf
- Find the objects listed at the bottom of the screen. Objects are randomized, but one will be added to your inventory upon completing the area. This inventory object is circled in red.
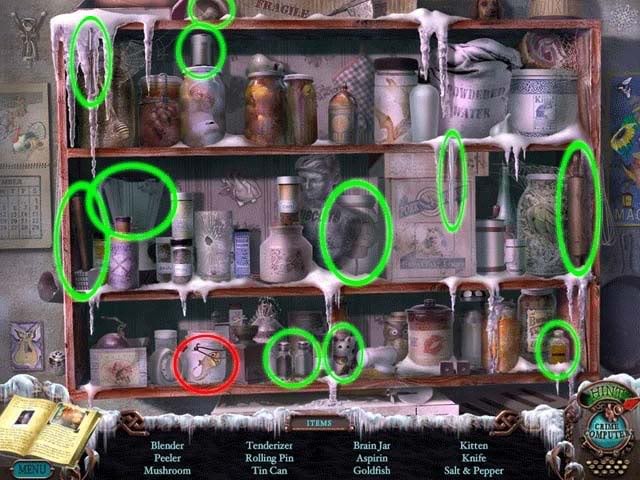
- Upon completing the area, the Golden Felix #2 will be added to your inventory.
Grocery Store Room
- Click on the hatch on the floor for a closer view. Use both Golden Felix #1 and Golden Felix #2 on the indentations to unlock and open the hatch.

- Enter down into the secret hatch area.
Secret Hatch
- Straight ahead is a large map. You can click on it to see where the Morphing Objects are hidden and which you still need to get and their corresponding locations.
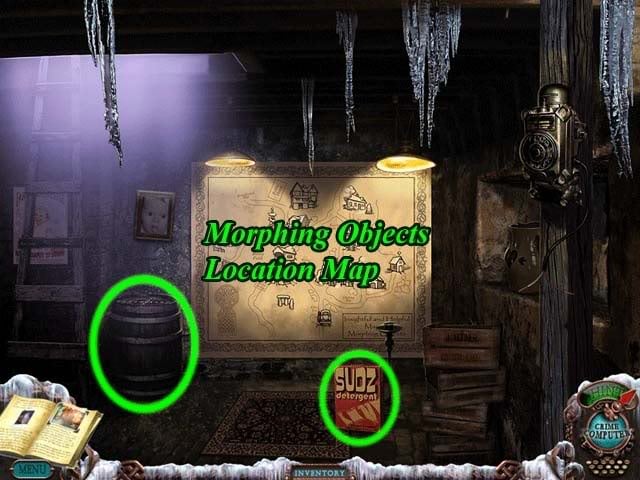
- Pick up the Detergent sitting on the floor.
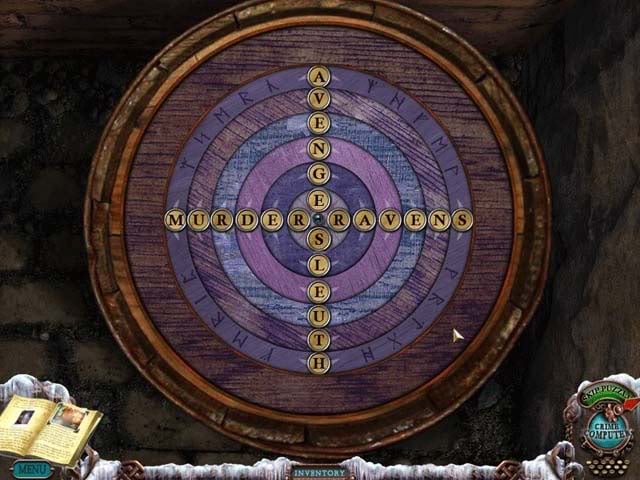
- Click on the barrel for a closer view.
- Rotate the letter panels so that four words are spelled out. Solutions are randomized. Refer to the screenshot below for one solution example: MURDER, RAVENS, AVENGE, SLEUTH.
- Once the barrel is open, click on the red diary to reveal an odd note.
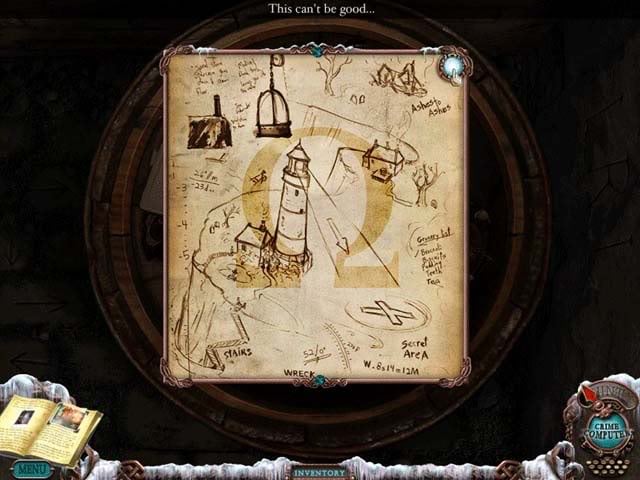
- Exit the area via the ladder on the left. Exit the grocery store and return to the manager’s office in the hotel.
Manager’s Office
- Proceed down to the basement.
Basement
- Click on the washing machine for a closer view. Click on the door to open it, then use the Detergent from your inventory on the inside. Close the door and click the button circled in green to start the washer.
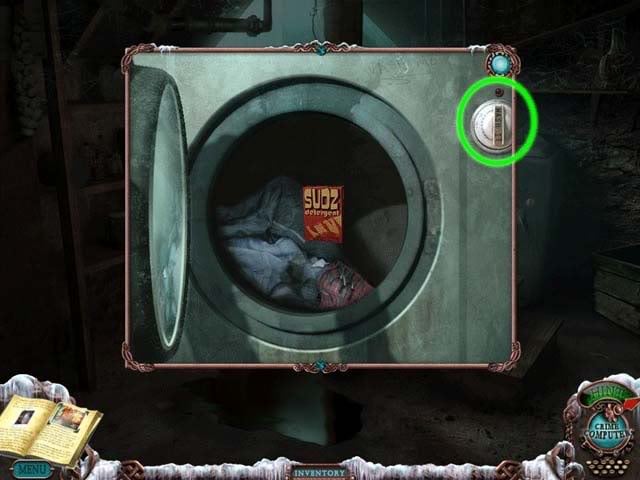
- Once the laundry has been done and a big mess made, a new hidden object area will appear. Click on it to enter.
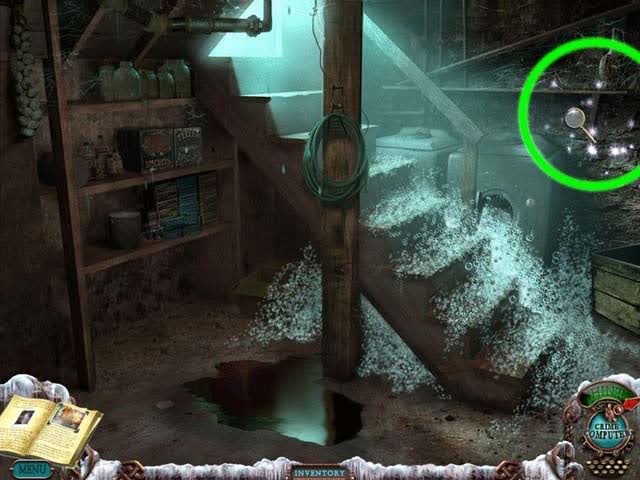
Hidden Object Area: Laundry
- Find the objects listed at the bottom of the screen. Objects are randomized, but one will be added to your inventory upon completing the area. This inventory object is circled in red.
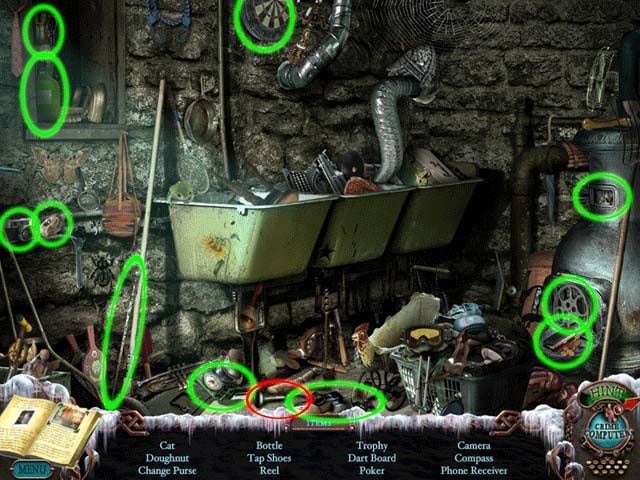
- Upon completing the area, the Phone Receiver will be added to your inventory.
- Return to the secret hatch in the grocery store.
Secret Hatch
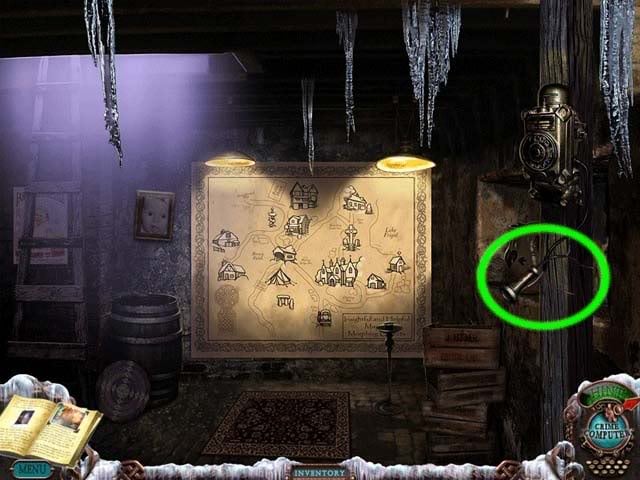
- Use the Phone Receiver from your inventory on the phone.
Special Note:
- Upon completing the game, a riddle-like puzzle will appear in the credits. The puzzle is listed below (as well as the answers to it):
President’s address (1600)
* the square root of 9 (3)
+ the number of yards in a mile (1760)
+ the year the King left the building (1977)
– PacMan ghosts (4)
+ decimal translation of the binary number 101011101011 (2795)
* Felix’s Address (333)
– California Police Penal Code for Murder (187)
+ Columbus sailed the ocean blue (1492)
* letters in Rachael Ray’s middle name ( 8 )
– height of the Space Needle in feet (605)
+ Shaq’s shoe size (23)
– Alison’s area code (206)
/ the atomic number of Silicon (14)
- Calculate these things, and you’ll arrive at the conclusion "215-6246". This is the phone number you’ll need to dial on the phone.
- Now here’s the tricky thing: you’ll have to replay the entire game to get back to the phone and dial that number. Once you do dial the number, however, the following message will ensue:
"Well, hello again detective, nice of you to drop by. I would have stuck around for a chat but the weather seems to have taken a turn for the worse. Feel free to make yourself at home, but I wouldn’t dally if I were you. The man with the inky (icky?) bird has been very busy in the dark. There is something he would like to show you. Clicky, clicky detective. I wouldn’t want to spoil the surprise."
- A teaser for the next installment of the series, perhaps? Speculate and enjoy.
“;
More articles...
Monopoly GO! Free Rolls – Links For Free Dice
By Glen Fox
Wondering how to get Monopoly GO! free rolls? Well, you’ve come to the right place. In this guide, we provide you with a bunch of tips and tricks to get some free rolls for the hit new mobile game. We’ll …Best Roblox Horror Games to Play Right Now – Updated Weekly
By Adele Wilson
Our Best Roblox Horror Games guide features the scariest and most creative experiences to play right now on the platform!The BEST Roblox Games of The Week – Games You Need To Play!
By Sho Roberts
Our feature shares our pick for the Best Roblox Games of the week! With our feature, we guarantee you'll find something new to play!All Grades in Type Soul – Each Race Explained
By Adele Wilson
Our All Grades in Type Soul guide lists every grade in the game for all races, including how to increase your grade quickly!


