- Wondering how to get Monopoly GO! free rolls? Well, you’ve come to the right place. In this guide, we provide you with a bunch of tips and tricks to get some free rolls for the hit new mobile game. We’ll …
Best Roblox Horror Games to Play Right Now – Updated Weekly
By Adele Wilson
Our Best Roblox Horror Games guide features the scariest and most creative experiences to play right now on the platform!The BEST Roblox Games of The Week – Games You Need To Play!
By Sho Roberts
Our feature shares our pick for the Best Roblox Games of the week! With our feature, we guarantee you'll find something new to play!All Grades in Type Soul – Each Race Explained
By Adele Wilson
Our All Grades in Type Soul guide lists every grade in the game for all races, including how to increase your grade quickly!
Annabel Tips Walkthrough
Check out our strategy guide for Annabel. A note about the screenshots: In Annabel you can walk to different spots in an area by pressing the arrow keys. In our screenshots we've given you a wide panoramic view of each area so you can see how the scenes are connected to each other. When you click on a screenshot in the guide, a larger version of it will open in a new window in your Web browser. To make the image larger, move your mouse cursor over it until it turns into a magnifying…
a:1:i:0;a:2:s:13:”section_title”;s:12:”Annabel Tips”;s:12:”section_body”;s:30140:”
Check out our strategy guide for Annabel.
A note about the screenshots:
In Annabel you can walk to different spots in an area by pressing the arrow keys. In our screenshots we’ve given you a wide panoramic view of each area so you can see how the scenes are connected to each other. When you click on a screenshot in the guide, a larger version of it will open in a new window in your Web browser.
To make the image larger, move your mouse cursor over it until it turns into a magnifying glass with a "+" sign, and click. You can scroll to see the entire screenshot by clicking on the scroll bar in the bottom of your browser window and moving it left or right.
GAMEPLAY TIPS
- Annabel is an adventure search-and-find game, so rather then having one single screen where you need to find an x amount of items, you will be searching around through different locations, to find the items you need.
- Also, finding items is not as straightforward as there being a text and you find it. You need to put together a certain item, with other items you can find lying around.
GENERAL TIPS
- Be creative. If for example you need to compile a rod from three components, look around and search for shapes that fit part of the item you need to put together.
- Think beyond. Often you will find items you need in previous locations, not only in your current set of screens.
- If you move over an object and see red sparkles, it means you can interact with that object. These sparkles will change according to your current objective, so once you come back to a location, check again.
- There is no limit to the use of hints. Once you have used a hint, the questionmark-button will slowly refill. Once it’s red again, you can use another hint.
- If you ever go back during a puzzle, you will see a logo on top of the screen from this puzzle. To return to the puzzle, click on this logo.
MINI-GAME TIPS
- Mini-games 11, 12 and 13 can sometimes be different.
- Mini-games 4, 7 and 10 are always different, so there is no sollution to give.
Pharao’s Palace-level tips
- Sometimes you will find items in a box. Once you have, you will not need to search in that box again, since each box holds only one usable item.
WALKTHROUGH
A note about the screenshots:
In Annabel you can walk to different spots in an area by pressing the arrow keys. In our screenshots we’ve given you a wide panoramic view of each area so you can see how the scenes are connected to each other. When you click on a screenshot in the guide, a larger version of it will open in a new window in your Web browser.
To make the image larger, move your mouse cursor over it until it turns into a magnifying glass with a "+" sign, and click. You can scroll to see the entire screenshot by clicking on the scroll bar in the bottom of your browser window and moving it left or right.
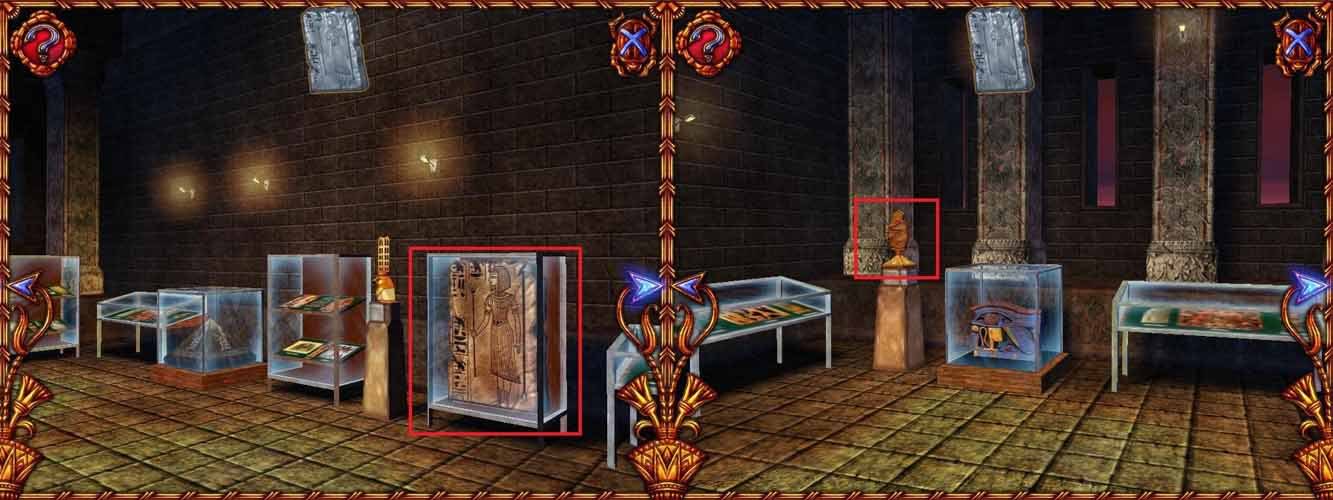
MUSEUM
Find two items.

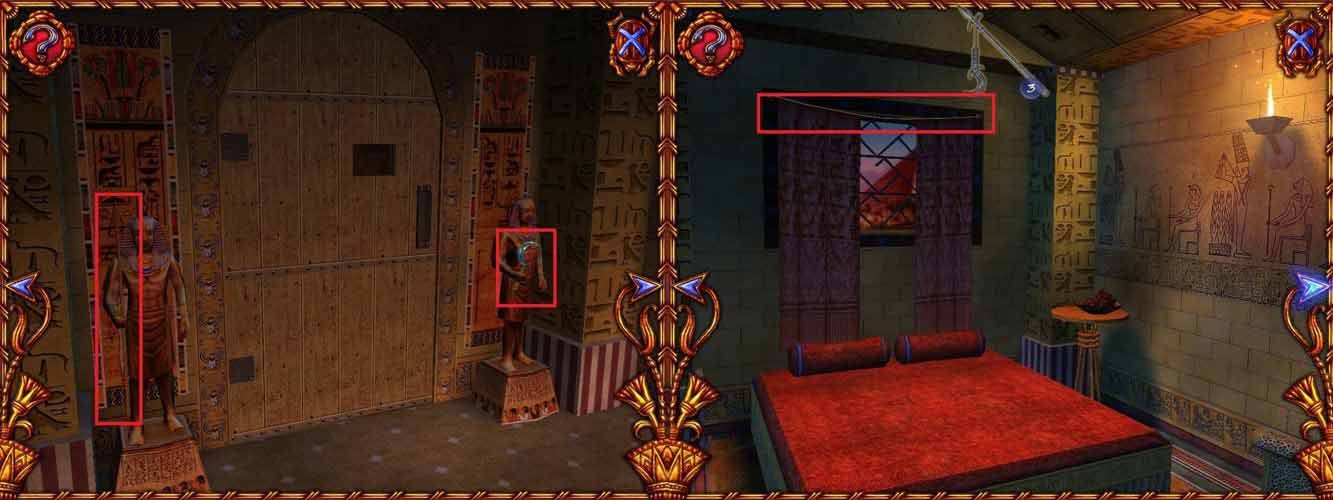
PHARAOH’S PALACE – Annabel’s room
First click on the door to find it locked.
Put together a rod, made out of 3 items.
PHARAOH’S PALACE – The guard
Look once to your left and click on the guard.
Go back, look once left and click on the lightbeam.
Go back into your room, and put together a sockpuppet, made out of 4 items.
![]()
After putting together the sock puppet, go back to the lightbeam, and click on it.
The shadow you make will scare the guard.
PHARAOH’S PALACE – The fountain
Talk to the girl standing next to the fountain.
Find all 10 beads, lying around.
Click on the closets in the fountain area to open them and find the last two beads.

When you have found all the beads, give them to the Isi, the crying girl.
PHARAOH’S PALACE – Find the keys
Trying to get out, you need to find the 5 keys lying around.

After finding all the keys, click on the gate behind the fountain to open it and go through.
PHARAOH’S PALACE – Find a pitcher
Go back to the fountain area, and talk to Isi. She has broken the pitcher you need to put out the fireplace, so you need to find all 10 broken pieces. Once you have found all the pieces, put them together to fix the pitcher.
![]()
MINIGAME 1 – Fix the broken pitcher
Move the pieces to the right place.
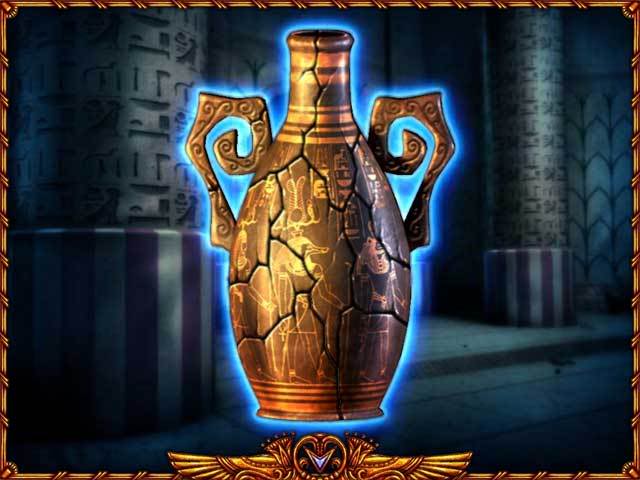
When the pitcher is fixed, go down to the fountain, and click on it to get some water.
Now go back up to the fireplace, and click on the fireplace to put it out.
Once the fireplace is out, click on it to go through the secret passage.
PHARAOH’S PALACE – Red roses
Once you come out of the secret passage, look to your right to see a big wall in the back. Click on it to go there, only to find out there’s a cobra blocking your path. You will need a flute to put the cobra to sleep.
Go back to the fountain area, and talk to the girl dressed in pink. She wants a bouquet of 15 red roses. When you try to pick the rose next to her though, you will be warned to use scissors to pick the roses. Go back up to the fireplace, and find the scissors there. Now find the 15 red roses.
![]()
Once you have put together the bouquet of roses, give them to the girl dressed in pink, and she will lend her your flute. Now go back through the secret passage and click on the cobra to play the flute and put it to sleep.
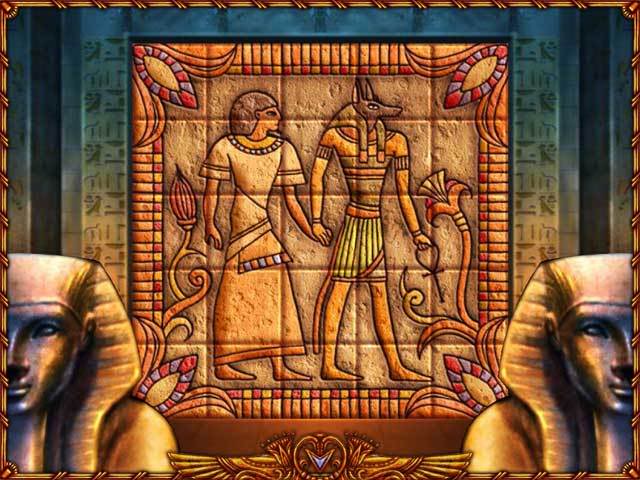
Now click on the big wall behind the cobra, and solve the puzzle to open the door.
MINIGAME 2 – Wall blocks
Move the blocks around to fix the picture.
Tip: Start with the corner stones, and then the edges.
SECRET PASSAGE – Find a light
In the new room you enter, click on the doors. When they open, you find that it’s too dark to continue, and you need to find a light. Look to your left, and click on one of the pedestals. You need to find 8 crystals, and place them in the pedestals.
The last crystal can be found in the box next to the doors.

Once you’ve found all the crystals, click on the pedestal to put them in there, and light up the next room. Click on the doors to go down to the next room.
SECRET PASSAGE – Swinging axes
When you go down into the next room, you’ll find that the passage through is blocked by swinging axes. When you look to your right, you will see a fresco that is missing pieces. Find all 10 missing pieces to find out how to get pas the swinging axes.
![]()
Once you’ve found all the missing pieces, go back to the fresco and insert them. This will stop the axes from swining, enabling you to go to the next room.
SECRET PASSAGE – Sarcophagus
Upon entering the next room, you will see a sarcophagus in front of you. Click on it to find that someone is locked in there. You need to find 6 magical stamps to free her.
The last stamp can be found in the box just behind you.
![]()
Open the sarcophagus and free the mummy of Thoth.
She will ask you to find her some olive oil.

Once you’ve found the olive oil, and something to dish it with, bring it back to Thoth.
SECRET PASSAGE – Amulet of Earth
Find the 4 pieces of the Amulet of Earth.

Once you’ve restored the Amulet of Earth, return it to Thoth and she will show you the door out.
Solve the puzzle to open it.
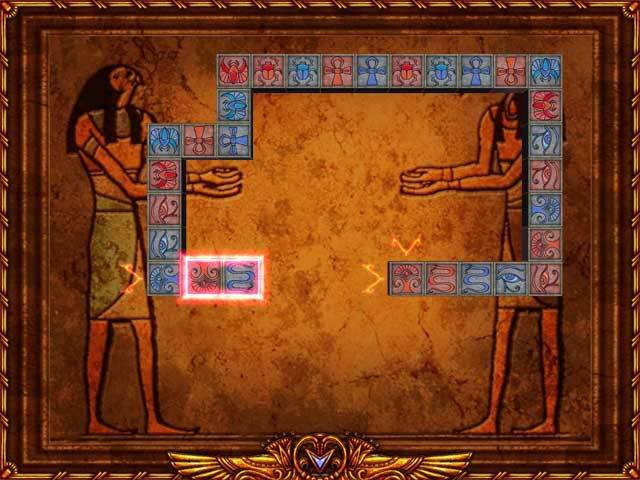
MINIGAME 3 – Domino
Connect the domino’s, with the same picture, but of a different color. There is not just one way to solve this puzzle. If you are stuck, remove one or two pieces and try again.
SECRET PASSAGE – Spike trap
In the next room, you will see a door, but when you try to click on it, spikes come out of the wall. Next to the door is a button, but you will need to find something to push the button with.
If you look to your right, you will see a statue that was holding a bow and arrow. Find the bow and arrow to press the button.

MINIGAME 4 – Memorize a sequence with sound
Once you’ve put the bow and arrow back in the statue’s hands, you will need to complete a memory-sequence puzzle. Once you solve this puzzle, the door will open.
SECRET PASSAGE – Missing bridge
In the next room, you will find that the bridge crossing a gap is missing. When you look to your left, you will see a box with keyholes. Find 5 keys to activate the box and extend the bridge.

After opening the box, you see that the mechanism is broken.
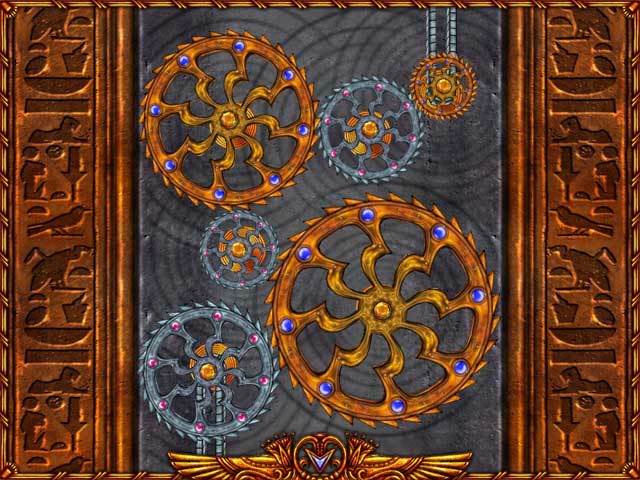
MINIGAME 5 – Gears
Put the gears in the right place to fix it.
Tip: Start with the biggest gold gear on the bottom right.
VILLAGE – Carpenter’s Hut
Look to your right, and you will notice a window up high. Find 5 pieces of a ladder.

Once you’ve placed the ladder, you need to find something to cut through the wooden bars.
Turn around, and look inside the box on the shelves, to find a saw.
Use it on the bars, and escape the hut.
VILLAGE – Rooftops
On the rooftop, you find the exit all boarded up.
Go back inside to find a tool to remove the nails.
Look to your left to find a box with a lock on it.
Now you must first find a key for this lock.
Turn around, and look under the door mat to find the key.
Open the box with the key, and take the pliers.
Go back up to the rooftop and remove all the nails from the boards.
VILLAGE – Fisherman
Go down the exit and look to your right to see an old man. Talk to him and he will ask you to retrieve his 10 fishing hooks.
![]()
VILLAGE – Amulet of Fire
Turn around and exit the fisherman’s hut. Go straight through into the next hut and find the 4 pieces of the Amulet of Fire. Two of these pieces can be found inside the open boxes in the hut.

MINIGAME 6 – Memorize a sequence
The last piece is found in the closed box on the floor. Open this by solving a memory-sequence puzzle.
After you’ve gotten the Amulet of Fire, return to the fisherman and talk to him.
Go up onto the roof tops and solve the fishnet puzzle.
MINIGAME 7 – Fishnet
Untangle the net, so none of the lines are crossed.
Tip: Mostly this is a bit of trial and error. Below is a video of one example that works, if you really can’t figure it out.
(CLICK HERE TO WATCH A VIDEO SOLUTION OF HOW TO SOLVE THE FISHNET MINIGAME.)
VILLAGE – Sleeping Potion Recipe
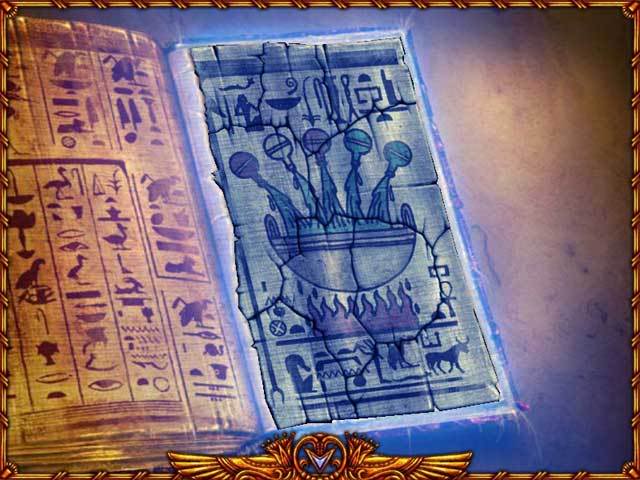
Talk to the fisherman again, and go back to the sorceress’ hut. Upon entering, check the book. It is missing 7 pieces of a page, which you will need to find. The last piece of the page is found in the box on the shelves.
![]()
After finding all the pieces, you have to put the pieces together to one page again.
MINIGAME 8 – Fix the book page
Move the pieces to the right place. Rotate a piece by clicking its center, before moving it.
Tip: The trick here is to rotate the pieces until at least one side is not slanted anymore, but straight, and then try and fit it into the book.
VILLAGE – Sleeping Potion Ingredients
Scattered around the sorceress’ hut are several potion bottles, which form the 10 ingredients for the sleeping potion. Find all of them. The last bottle is found in the box next to the door.
![]()
VILLAGE – Cooking the Sleeping Potion
Now that you have all the ingredients, click on the pot to put them in. Now you need to find 8 pieces of wood to start a fire.
![]()
Once you’ve gathered the firewood, put it under the pot to light a fire and prepair the potion.
VILLAGE – Pass the guards
Walk out the sorceress’ hut and look to your right. Click on the guards to throw the potion to them, which will put them to sleep.
SHIP – Find the map
Once you arrive onboard the ship, talk to the (drunk) captain.
He needs your help finding the 10 pieces of his map. The last piece of the map can be found in the box on the back of the ship.

MINIGAME 9 – Complete the map
After finding the last piece, rotate the pieces to complete the map.
SHIP – Find the navigational instruments
Now you need to find 3 navigational instruments. One instrument is found in the box on the back of the ship, and another in the cabinet in your quarters on the lower deck of the ship.

SHIP – Find the collapsable telescope
Lastly, the captain needs you to find the 5 pieces of his collapsable telescope. One piece is found in the box on the back of the ship, and another in the cabinet in your quarters.

SHIP – Stepladder
Too fat and too short, the captain needs a stepladder to reach the rudder.
Find it in your quarters.
SHIP – Amulet of Water
Once the ship has finally set sail, go down to the captain’s qiarters. Here you will meet Thoth again, who will tell you to get the 4 pieces of the Amulet of Water, which is found in the captain’s quarters. However, to get past the crocodile, you will first need to feed it 10 bones.
![]()
Now that you have 10 bones, go in the captain’s quarters and distract the crocodile. While it’s eating, you will have the time to find the 4 pieces of the Amulet of Water. One piece is found in the chest, and another under the pillow.

The final piece is found in the safe. To unlock the safe, you have to complete a puzzle.
MINIGAME 10 – Memory pairs
Classic memory: turn over two tiles and find matching pairs.
SHIP – Closed hatch
Next to the stairway, on the lower deck, there is a locked hatch.
You need to find 4 star-like keys to open it, which can all be found in the captain’s quarters. The last key is found in the box in the back. After finding all the keys, open the hatch and go down.

SHIP – Machine room
Look to your right, and you will see a machine. Click on the sign in front of it to start a puzzle.
MINIGAME 12 – Circuit board

Turn the pieces so that the light hits all gems.
4 extra solutions for the 1st circuit board:

5 extra solutions for the 2nd circuit board:

6 extra solutions for the 3rd circuit board:

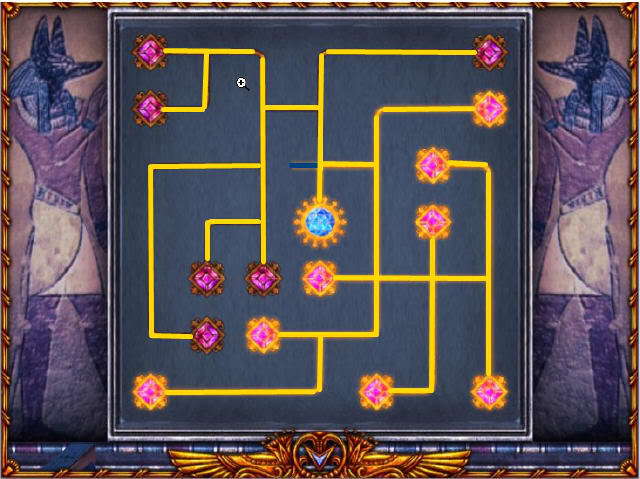
Sixth solution and screenshot courtesy of Margie B.
Strategy (thanks to Gamezebo user Elle)
1. Do not connect any of the small points directly to each other.
2. Some of the small points have only one possible connection. Get these out of the way first.
3. For the other points just go ahead and choose one of the connections. You may have to make changes later. This part is just trial and error.
4. Connect the middle section and see what lights up. Look for breaks in the overall connection and fix them. You may have to try more than one way of connecting the large point.
The key for me was looking for the small points that could only be connected in one way.
CLICK HERE TO WATCH A VIDEO SOLUTION FOR THE CIRCUIT BOARD MINI-GAME.
CLICK HERE FOR ANOTHER CIRCUIT BOARD VIDEO SOLUTION.
Priest’s palace – Pit
To get out of the pit, find 10 pieces of steps and put them up.

Priest’s palace – Flames
After getting out of the pit, look to your right and you will see your path blocked by two flames. You will need to find 10 valves to turn off the flames.
![]()
Once you have, go back to the flames and click on the door to start a puzzle.
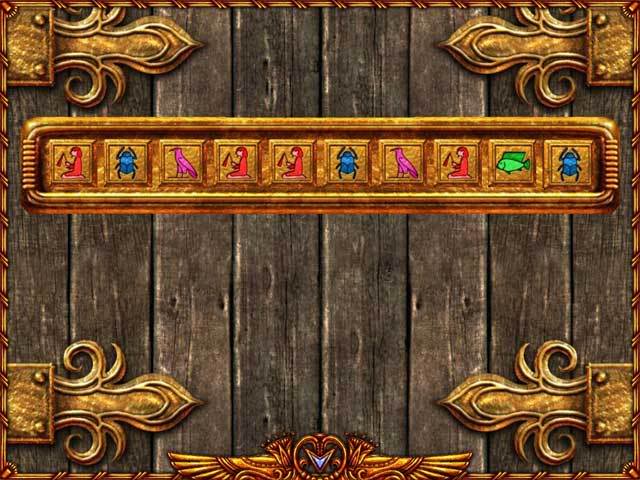
MINIGAME 13 – Correct order
Place the different colors in order until you guess the correct line-up.
PRIEST’S PALACE – Blades
Through the doors, you reach the room where the prince is held down, about to be killed by some blades. Look to your right, and click on the tiling on the door and solve the puzzle.
MINIGAME 14 – Mosaic
Swap neighboring pieces on the board to match the mosaic pictured.
Tip: Correct the mosaic one by one. First move one block to the correct color, and then the next one. Don’t try to move groups of colors at once.
PRIEST’S PALACE – Eyes
In the room on top of the stairs, look to your right and check the statues. You will need to find 8 eyes for these statues. One eye is found in the left box before the stairs, and another is found in the left pillar next to the stone tablet, up the stairs.
![]()
PRIEST’S PALACE – Mirrors
After putting the eyes in the statues, laserbeams will come out of their eyes, and go through an empty mirror frame. Find 5 pieces of the mirror to restore it.

Once the mirror is restored, the beams will reflect upon clog of the big statue, break it, and stop the spinning blades from killing your prince.
PRIEST’S PALACE – Pilar keys
Go back down to the alter, and click on the top of it to talk to the prince. Click on the little pyramid to the left and a pillar will rise. You will need to find 7 keys for it. One key is found in the right box before the stairs, and another is found in the right pillar next to the stone tablet, up the stairs.
![]()
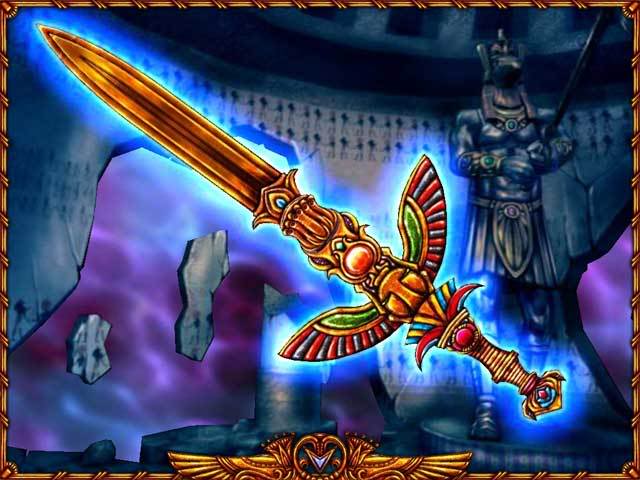
Once you’ve put the keys in the pillar, the alter with the prince will lower. To cut his chains, you will need to combine the amulets of earth, fire and water, and make a sword out of them. In order to do so, you need to solve a puzzle, in which you rotate the pieces to fit the sword.
MINIGAME 15 – Put together a sword
Move the pieces to the right place.
PRIEST’S PALACE – Talisman
When the priest arrives, he goes into battle with the prince. In order to help the prince, you will need to find the priest’s magical talisman. Look to you left, and go down the stairs. After the wall lowers, click on the sign that the statue is holding, to solve the next puzzle.
MINIGAME 16 – Matching columns
Move the third row to make matching columns of colors. The more columns you match, the faster the rows slide.
Tip: A challenging final puzzle. There are two basic strategies, depending on your skills.
1) You can simply line up the third row with the fourth, and wait until there is a match. However, you will be at risk of running out of time.
2) Try and plan ahead. The first row jumps one stone at a time, while the second row jumps two stones.
CONGRATULATIONS! YOU HAVE FINISHED THE GAME.
ENJOY THE ENDING.
VIA THE MAIN MENU, YOU CAN PLAY ALL THE MINI-GAMES AGAIN.
“;
More articles...
Monopoly GO! Free Rolls – Links For Free Dice
By Glen Fox
Wondering how to get Monopoly GO! free rolls? Well, you’ve come to the right place. In this guide, we provide you with a bunch of tips and tricks to get some free rolls for the hit new mobile game. We’ll …Best Roblox Horror Games to Play Right Now – Updated Weekly
By Adele Wilson
Our Best Roblox Horror Games guide features the scariest and most creative experiences to play right now on the platform!The BEST Roblox Games of The Week – Games You Need To Play!
By Sho Roberts
Our feature shares our pick for the Best Roblox Games of the week! With our feature, we guarantee you'll find something new to play!All Grades in Type Soul – Each Race Explained
By Adele Wilson
Our All Grades in Type Soul guide lists every grade in the game for all races, including how to increase your grade quickly!


