- Wondering how to get Monopoly GO! free rolls? Well, you’ve come to the right place. In this guide, we provide you with a bunch of tips and tricks to get some free rolls for the hit new mobile game. We’ll …
Best Roblox Horror Games to Play Right Now – Updated Weekly
By Adele Wilson
Our Best Roblox Horror Games guide features the scariest and most creative experiences to play right now on the platform!The BEST Roblox Games of The Week – Games You Need To Play!
By Sho Roberts
Our feature shares our pick for the Best Roblox Games of the week! With our feature, we guarantee you'll find something new to play!All Grades in Type Soul – Each Race Explained
By Adele Wilson
Our All Grades in Type Soul guide lists every grade in the game for all races, including how to increase your grade quickly!
Tales of Monkey Island: Chapter 5 – Rise of the Pirate God Walkthrough
Welcome to Gamezebo's walkthrough for Tales of Monkey Island: Chapter 5 – Rise of the Pirate God.General Tips Controls Hold down the left mouse button and then move the mouse in a direction to make Guybrush walk in that direction. In most areas you can also hold down the right mouse button while Guybrush is walking to make him run. Alternatively, the keyboard keys W, A, S and D can be used to make Guybrush walk, and the shift key can be held down at the same time to make him run. Singl…
a:1:i:0;a:2:s:13:”section_title”;s:70:”Tales of Monkey Island: Chapter 5 – Rise of the Pirate God Walkthrough”;s:12:”section_body”;s:36979:”
Welcome to Gamezebo’s walkthrough for Tales of Monkey Island: Chapter 5 – Rise of the Pirate God.
General Tips
Controls
- Hold down the left mouse button and then move the mouse in a direction to make Guybrush walk in that direction. In most areas you can also hold down the right mouse button while Guybrush is walking to make him run.
- Alternatively, the keyboard keys W, A, S and D can be used to make Guybrush walk, and the shift key can be held down at the same time to make him run.
- Single left click when the cursor is over a hotspot to interact with an object or character.
- Right click to skip a line of dialogue.
- Hold down the F4 key to identify all the hotspots in an area.
- Press the I key to open the inventory.
- Press the Escape key to return to the menu.
Saving and Loading
To save, press ESC to bring up the menu and then click Save & Load. Use the red arrows to scroll through to a blank saved game and then click the Save Game button. Saved games are given a location, date, time and description of what has happened in the adventure so far. To load, press ESC to bring up the menu and then click Save & Load. Use the red arrows to scroll through to a previously saved game and then click the Load Game button.
Inventory
Press the I key to bring up the inventory. Left click to select an item and it will be tagged onto the cursor. The item will glow green when it is moved over an object in the playing area that it can be used on. Some objects can also be combined by using them on another item in the inventory window. To combine objects, place an object in each of the circles at the left side of the inventory window and then press the plus sign between the circles to try and combine them. Objects can also be examined by selecting the magnifying glass at the top-left corner of the inventory window and then selecting the item.
Item List
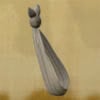
Blindfold

Found in the bar after Guybrush has regained his body. After finding the diet of the senses spell, the blindfold is one of the items that is used on La Esponja Grande at the crossroads center.
Bone
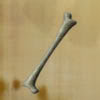
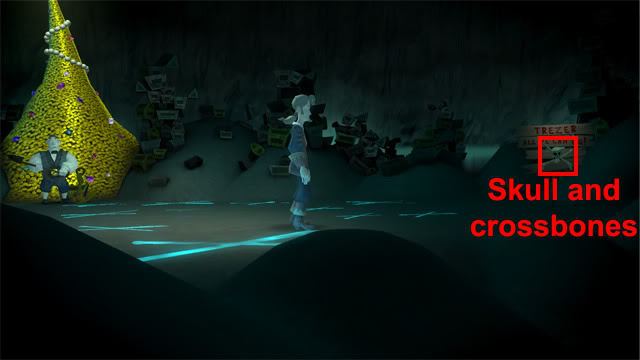
Found by selecting the skull and crossbones on the sign at the treasure hunt location. It is given to the dog near the tombstones at the gateway.
Bottle o’ Grog
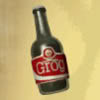
Found by using the pirate bucks on the money slot on the grog machine at the crossroads and then pressing the grog button. After LeChuck’s crossroads spell has been found, the bottle o’ grog is one of the items used on the crossroads center.
Bugeye’s Diary
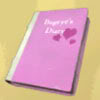
Found behind the loose brick in the left jail cell. It is read to discover how Bugeye escaped from the manatee.
Diet of the Senses Spell
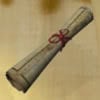
After Guybrush has found the feast of the senses menu, the diet of the senses spell is found by talking to Galeb about reversing the spell. It is examined to see the ingredients that are needed to shrink La Esponja Grande.
Dog
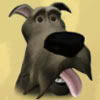
Found by giving the bone to the dog near the tombstones at the gateway. He is combined with LeChuck’s sock in the inventory. The dog is then used with the ground full of Xs at the treasure hunt location. The dog is found again at the crossroads center, where he helps Guybrush get LeChuck’s chest after LeChuck’s sock has been used on Galeb.
After LeChuck’s chest has been given to the thief at the thieves’ den, talk to the thief to distract him and then use the dog on the pile of totally unguarded scrolls. The dog is next found at the treasure hunt location, where he has buried the treasure under one of the Xs. The dog is then used on the ground full of Xs to find LeChuck’s crossroads spell. After LeChuck’s crossroads spell has been found, the dog is one of the items used on the crossroads center.
Elaine’s Ring
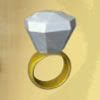
Available after arriving in the left jail cell. After Guybrush has been blasted by the cannon through the rip above LeChuck’s ship and the shred of life has been used on the rip, Elaine’s ring is used on the rip.
Feast for the Senses Menu
Available after arriving in the left jail cell. It is replaced with the diet of the senses spell after talking to Galeb about reversing the spell.
Fishnet
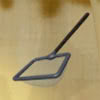
Found at the bottom of the ocean after Guybrush has regained his body. It is used to capture the tiny pyrite parrots after they fly to the top of the sign in the treasure hunt location.
Ghost Photo
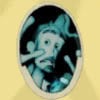
Found by giving the pirate bucks to Galeb at the crossroads center. It is used on the locket on Winslow’s raft.
Ghost Sword
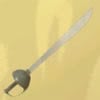
Found in the swordfighter’s head at the top of the mast in the swordfight location. It is used on Morgan to challenge her to a sword fight.
Gold Coins
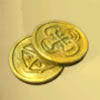
After the pirate buck has been used on the money slot on the grog machine at the gateway, the change button on the grog machine is pressed to get the gold coins. They are given to the ferryman at the gateway.
Grave Dirt
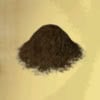
Available at the start of the game. It is used on the ferryman’s boat at the gateway to distract him.
Hook
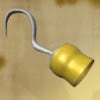
Available after arriving in the left jail cell. It is used on the chest in the jungle. It is used on the mainsail near the crow’s nest on LeChuck’s ship to make a rip in the sail. It is used on the rope leading down from the crow’s nest to land on the tower.
Jar of Tiny Pyrite Parrots
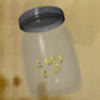
Made by combining the tiny pyrite parrots with the tip jar in the inventory. After finding the diet of the senses spell, the jar of tiny pyrite parrots is one of the items that is used on La Esponja Grande at the crossroads center.
Jeweled Anchor
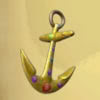
After asking the treasure hunter how the treasure hunt works, the jeweled anchor can be taken from the bottom of the pile of treasure. After LeChuck’s crossroads spell has been found, the jeweled anchor is one of the items used on the crossroads center.
LeChuck’s Buckle
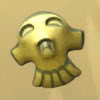
Found by using the seagull feather on the chest in the jungle. It is used on the thief at the thieves’ den so that the secret can be taken.
LeChuck’s Chest
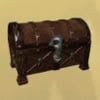
After the dog has been used on the ground full of Xs at the treasure hunt location, LeChuck’s chest is found by using the dog on Galeb at the crossroads center. It is given to the thief at the thieves’ den.
LeChuck’s Crossroads Spell
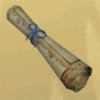
After the dog has stolen LeChuck’s spell from the thief at the thieves’ den, the dog is used on the ground full of Xs at the treasure hunt location to find LeChuck’s crossroads spell. It is examined to see the ingredients that are needed for the center of the crossroads.
LeChuck’s Sock
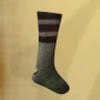
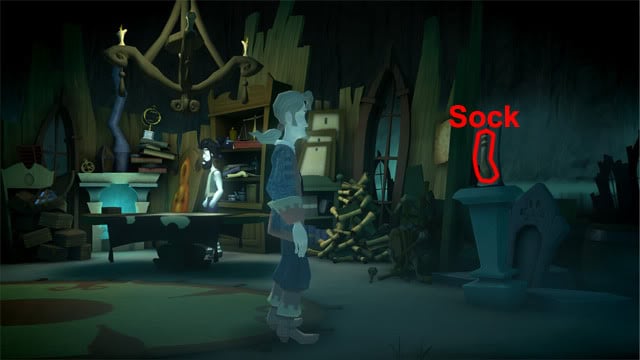
Found above the tombstone at the right side of the thieves’ den. It is combined with the dog in the inventory. After the dog has been used on the ground full of Xs at the treasure hunt location, LeChuck’s sock is used on Galeb at the crossroads center to get LeChuck’s chest.
Old Brute Deodorant
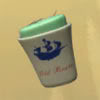
Found on Winslow’s raft after Guybrush has regained his body. After finding the diet of the senses spell, the old brute deodorant is one of the items that is used on La Esponja Grande at the crossroads center.
Pirate Buck
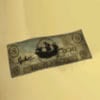
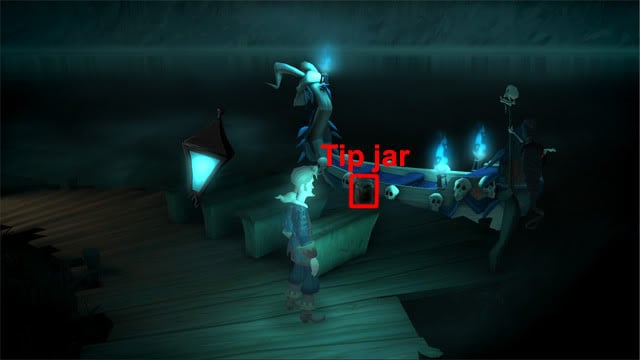
After the grave dirt has been used on the ferryman’s boat at the gateway, the pirate buck is found by selecting the tip jar on top of the turnstile. It is used on the money slot on the grog machine.
Pirate Bucks
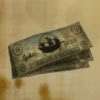
Found after Guybrush has taken the tip jar on the turnstile at the crossroads. They are used on the money slot on the grog machine at the crossroads. They are given to Galeb at the crossroads center to buy the ghost photo.
Ring of Keys
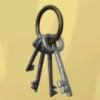
After telling Elaine to attack LeChuck on the deck of LeChuck’s ship, the ring of keys are found in the hand of the skeleton below the ship when Guybrush is being keelhauled by LeChuck. They are used on the locked gate on the deck of LeChuck’s ship.
Root Beer
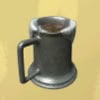
After the tin mug has been found in the jail cell, return to the bar as a ghost and scare Grindstump so that he throws a dart at the barrel above Guybrush’s body. When Guybrush returns to the bar in his body, he will now be holding the mug of root beer. It is used on the chewed gum in the right jail cell.
Seagull Feather
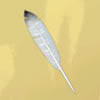
Found near the dead seagull in the jungle. It can be found after Guybrush has regained his body. After finding the diet of the senses spell, the seagull feather is one of the items that is used on La Esponja Grande at the crossroads center.
Secret
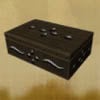
After finding the diet of the senses spell and also after using LeChuck’s buckle on the thief at the thieves’ den, the secret can be taken from the table at the thieves’ den. After finding the diet of the senses spell, the secret is one of the items that is used on La Esponja Grande at the crossroads center.
Shred of Life
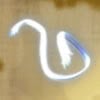
Available at the start of the game. After Guybrush has been blasted by the cannon through the rip above LeChuck’s ship, the shred of life is used on the rip.
Tin Mug
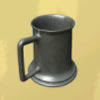
Found after arriving in the right jail cell. After the tin mug has been found in the jail cell, return to the bar as a ghost and scare Grindstump so that he throws a dart at the barrel above Guybrush’s body. When Guybrush returns to the bar in his body, the tin mug will be replaced in the inventory with the mug of root beer.
Tiny Pyrite Parrots
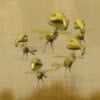
After selecting the ground full of Xs at the treasure hunt location, the tiny pyrite parrots will fly to the top of the sign. The fishnet is then used on the tiny pyrite parrots to capture them. They are combined with the tip jar in the inventory to make the jar of tiny pyrite parrots.
Tip Jar
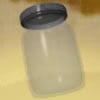
Found on the turnstile at the crossroads, the tip jar can be taken after Guybrush has given the gold coins to the ferryman. It is combined with the tiny pyrite parrots to make the jar of tiny pyrite parrots.
Well-Used Gum
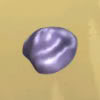
After finding the diet of the senses spell, the well-used gum is found by selecting the gum stalactite in the right jail cell. After finding the diet of the senses spell, the well-used gum is one of the items that is used on La Esponja Grande at the crossroads center.
Walkthrough
Gateway
The episode starts in the grave on top of the hill. Select the dirt twice to escape from the grave. Walk east toward the ferryman and use the dirt on the boat. When the ferryman turns around to start cleaning his boat, select the tip jar on top of the turnstile to take a pirate buck:
Run west and select the grog machine to examine it more closely. Use the pirate buck in the money slot and then press the change button to take the two gold coins. Give the gold coins to the ferryman and the boat will travel to the crossroads.
Crossroads Center
Galeb takes a photograph of Guybrush after he arrives at the crossroads and says he wants money before he hands it over. Talk to Galeb and say “I can’t stay here. Has anyone ever returned to the living world?”: He mentions a powerful voodoo spell that was locked away in a treasure chest. Enter the boat and select the treasure hunt location on the map.
Treasure Hunt
Select the skull and crossbones on the sign to take the bone:
Talk to the treasure hunter and say “Can you show me how the treasure hunt works?”. When the treasure hunter walks away to demonstrate, take the jeweled anchor at the bottom of the pile of gold. Enter the boat.
Gateway
Take the tip jar on top of the turnstile. Run west and examine the grog machine. Use the pirate bucks on the money slot and then select the grog button to take the bottle o’ grog. Run west to the fence and then south along the path to see the dog:
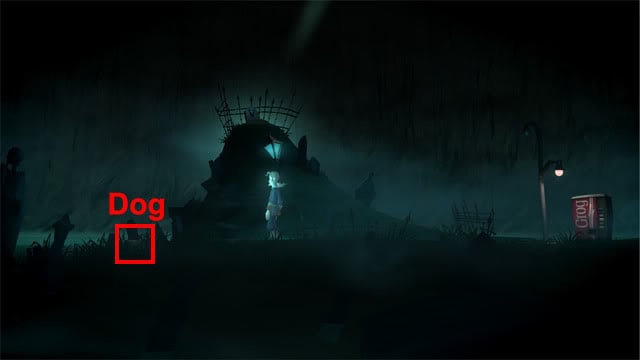
Give the bone to the dog and Guybrush will add him to the inventory. Run east and return to the boat.
Thieves’ Den
Run to the right side of the thieves’ den and take the sock above the tombstone:
Return to the boat.
Treasure Hunt
Combine the dog with LeChuck’s sock in the inventory and he will get the scent. Use the dog on the ground full of Xs and the dog will run away. Enter the boat.
Crossroads Center
Guybrush sees the dog run up to Galeb and start barking. Use LeChuck’s sock on Galeb and the dog will dig to find LeChuck’s chest. Enter the boat.
Thieves’ Den
Give LeChuck’s chest to the thief: He says that nothing was inside the chest, but then Guybrush sees him kicking something into the pile of scrolls. Talk to the thief and say “What are all these things?”: He turns around to let Guybrush steal something. While his back is turned, use the dog on the pile of scrolls:
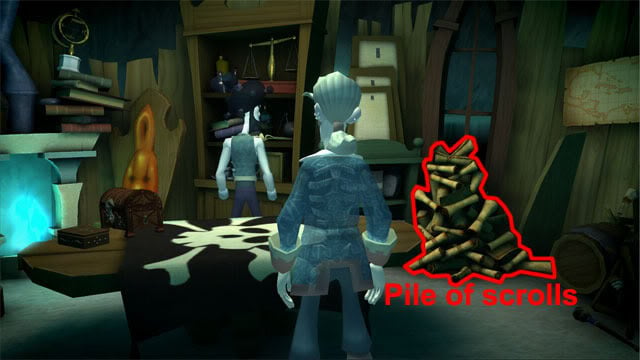
The dog dives into the pile of scrolls. Select the pile of peglegs at the right side of the scrolls and the thief will return Guybrush to his boat, removing the pegleg from Guybrush’s inventory on the way.
Treasure Hunt
Guybrush arrives at the treasure hunt location to see that the dog has buried the treasure somewhere. Use the dog on the ground full of Xs and he will dig up the treasure, which turns out to be LeChuck’s crossroads spell. Enter the boat.
Crossroads Center
Examine LeChuck’s crossroads spell in the inventory:
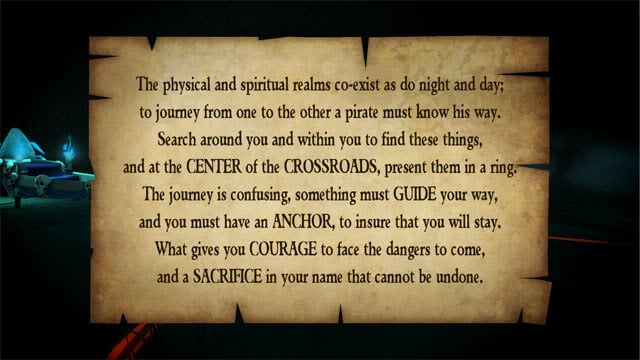
The spell mentions a guide, an anchor, courage and a sacrifice. Use the dog, the jeweled anchor and the bottle o’ grog on the crossroads center. Enter the boat.
Swordfight
Run up the stairs to the platform and then climb up the mast:
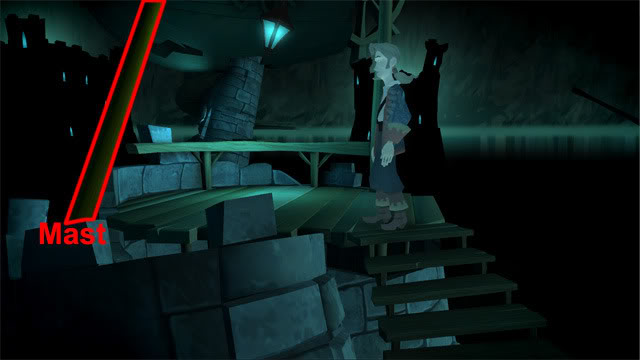
Guybrush sees Morgan LeFlay and a headless swordfighter at the top of the mast. Take the ghostly sword from the head of the swordfighter:
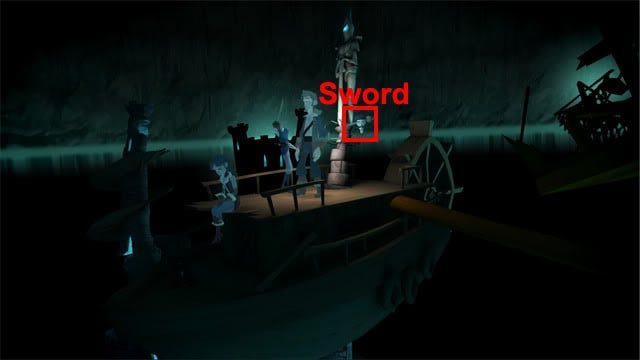
Use the ghost sword on Morgan to challenge her to a fight. The aim here is to insult the swordfighter while complimenting Morgan at the same time. The correct answers are shown below:
Morgan: “I died a failure. I used to dream that somebody would call me the greatest Pirate Hunter in the world.”
Swordfighter: “You make me want to puke.”
Answer: “I bet people say that about YOU all the time!”
Swordfighter: “I once owned a dog that was smarter than you.”
Morgan: “It’s hopeless. I can’t believe I once studied under the greatest swordsman in the Caribbean.”
Answer: “He must have taught you everything you know.”
Swordfighter: “I’m the most cunning pirate on the seven seas! Do you know what my IQ is, boy?”
Morgan: “Seriously, on a scale of one to ten, how terrible a person am I?”
Answer: “Negative One. If that.”
Morgan: “I’m useless. I can barely even lift my sword.”
Swordfighter: “There certainly is a foul smell comin’ from this fight!”
Answer: “See, in some ways you ARE stronger than me!”
Morgan: “My career as a pirate hunter was about as successful as my career as a marathon runner.”
Swordfighter: “Nobody’s ever drawn blood from me and nobody ever will.”
Answer: “You run THAT fast?”
Swordfighter: “Smaller men quiver at my unmistakably masculine swagger.”
Morgan: “The way I wave this sword around… it’s like I’m a little boy.”
Answer: “Believe me, you’re all woman.”
After choosing three correct answers, Morgan agrees to help Guybrush. Talk to Morgan and say “I found a spell!”: She will ask what ingredients are needed. Say “A ‘Sacrifice.'”: She tells Guybrush to focus on the other items first. Say “That’s enough, thanks.”. Say “I still need some kind of sacrifice.” to travel to the crossroads center.
Crossroads Center
Morgan agrees to use her reputation as the sacrifice that Guybrush needs. Guybrush falls through the rip and lands on LeChuck’s ship.
LeChuck’s Ship
A cutscene is shown where LeChuck throws La Esponja Grande into the rip. Keep talking to LeChuck until Elaine agrees to become LeChuck’s bride. Select the enchanted cutlass in the main mast:
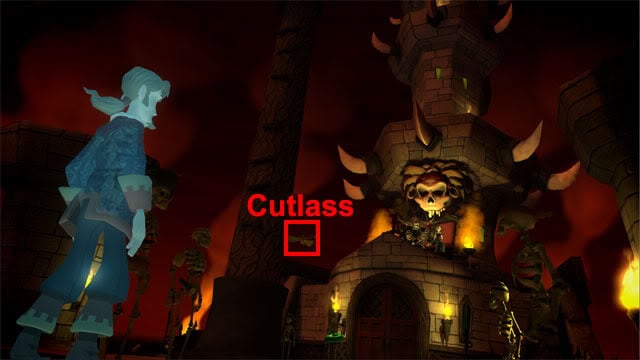
Elaine squirts Guybrush with voodoo root beer and he is returned to the crossroads.
Crossroads Center
Morgan tells Guybrush to find the voodoo lady’s locket. Enter the boat.
Gateway
Give the pirate bucks to Galeb to buy the spirit photo. Run south along the path and then select the rip to pass through to Winslow’s raft.
Winslow’s Raft
Select the ocean to dive down to the seabed.
Seabed
Run east to the cave entrance to talk to Anemone. Say “Can I get you to come out?”: The only person that she trusts is Winslow. Exit the conversation and return to the surface.
Winslow’s Raft
Talk to Winslow and say “Anemone could use a sign of affection.”: He writes a haiku to Anemone and drops it into the ocean. Return to the seabed.
Seabed
Run east to the cave entrance to talk to Anemone again. Say “Winslow dropped a note down to you!”. She swims past the seaweed, causing it to to bend more than usual. Select the clam and it will close. Wait for the locket to move above the clam:

When the locket is above the clam, move away from the clam and it will open. If you timed it correctly, an air bubble will catch the locket and it will float up to the surface. Guybrush returns to the surface.
Winslow’s Raft
Winslow puts a bottle of Old Brute deodorant down on the raft. Use the ghost photo on the locket:
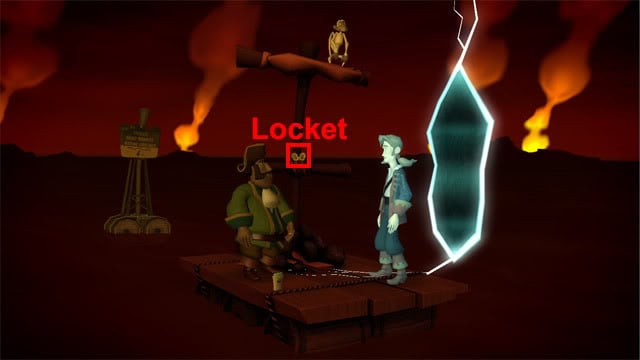
Talk to Winslow and say “Would you mind pushing the button on that locket?”. Guybrush returns to his body in Club 41.
Club 41
Guybrush is confronted by W.P. Grindstump and Bugeye. Say “I surrender!” and Grindstump will take Guybrush to the jail cell.
Jail Cell
Select the loose brick:
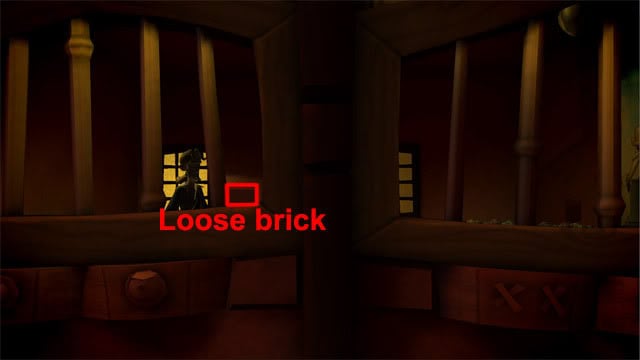
Guybrush finds Bugeye’s diary behind the loose brick. The diary mentions that Bugeye escaped from the manatee when the manatees were kissing. Wait in the cell for about a minute and Guybrush will return to Winslow’s raft.
Winslow’s Raft
Select the rip to return to the gateway.
Gateway
Run east and return to the boat.
Swordfight
Guybrush sees a group of crabs that start talking with the voice of the voodoo lady. Select any topics when talking to the voodoo lady and she will tell Guybrush to possess his body and to find some spirit gum. Run east up the stairs and go through the rip to enter Club 41.
Club 41
Talk to Bugeye and say “How did you get out of the Manatee?”. When Guybrush says he can guess, say “You slipped out on the tongue?” as the first guess and “Rode a mer-person to Flotsam?” as the second guess. When Bugeye asks if Guybrush is mocking him, select the stinky, tweaking, meanie expression:
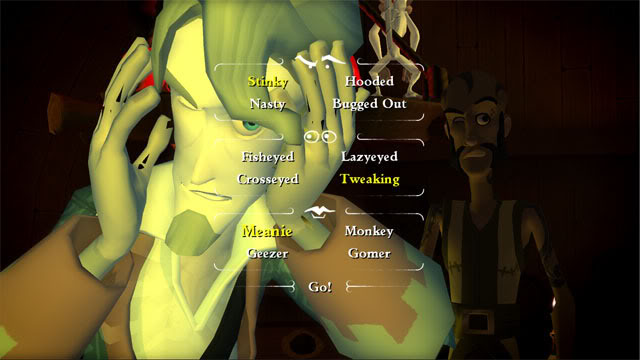
Select the go option and Bugeye will accidentally punch Grindstump. Enter the rip to return to the swordfight location.
Swordfight
Go down the stairs and enter the boat.
Gateway
Run to the left side of the gateway area and go through the rip.
Winslow’s Raft
Talk to Winslow and say “Would you mind pressing the button again?” to return to Club 41.
Club 41
When Grindstump confronts Guybrush, say “I surrender!” to be taken to the jail cell. As Bugeye is in the left cell, Guybrush is locked in the right cell.
Jail Cell
Take the mug in the cell window:
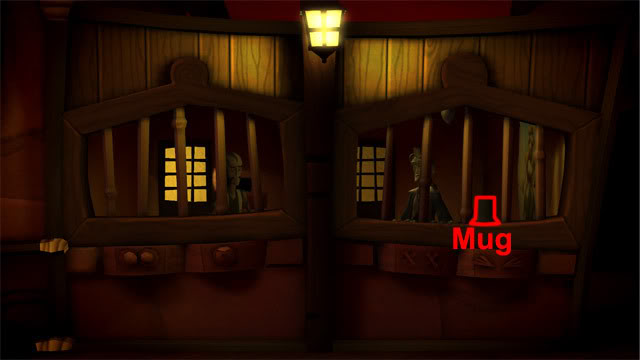
Keep waiting until Guybrush returns to Winslow’s raft.
Winslow’s Raft
Select the rip to return to the gateway.
Gateway
Run east and return to the boat.
Swordfight
Run up the stairs and go through the rip to return to Club 41.
Club 41
Guybrush’s body will now have the mug in its hand from the jail cell. Talk to Grindstump and say “BOOOO!!! I’m a scaaaaary ghost!”, then select any facial expression to distract Grindstump. The dart hits the barrel above Guybrush’s body and root beer pours into the mug. Enter the rip to return to the swordfight location.
Swordfight
Go down the stairs and enter the boat.
Gateway
Run to the left side of the gateway area and go through the rip.
Winslow’s Raft
Talk to Winslow and say “Would you mind pressing the button again?” to return to Club 41.
Club 41
When Grindstump confronts Guybrush, say “I surrender!” to be taken to the right jail cell again.
Jail Cell
Use the root beer on the chewed gum in the cell window:
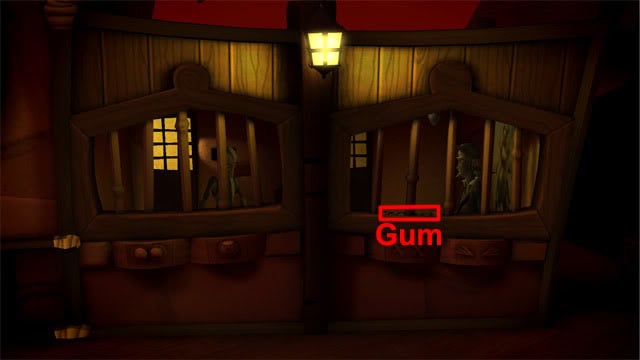
Guybrush eats the spirit gum and is now able to stay without being transported back to Winslow’s raft. Select the poster on the right wall of the cell to see a hole in the wall. Go through the gaping hole to board LeChuck’s ship. After the cutscene where Guybrush realises that La Esponja Grande must be made smaller, Guybrush returns to the crossroads center.
Crossroads Center
Enter the boat.
Gateway
Go through the rip at the left side of the area.
Winslow’s Raft
Take the bottle of Old Brute deodorant on the raft:
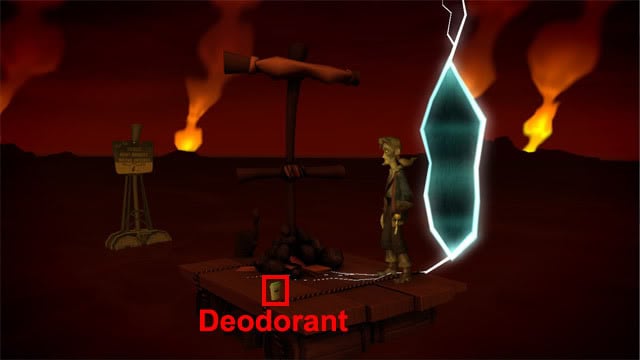
Select the ocean to dive down to the seabed.
Seabed
Take the fishnet in front of the bones:
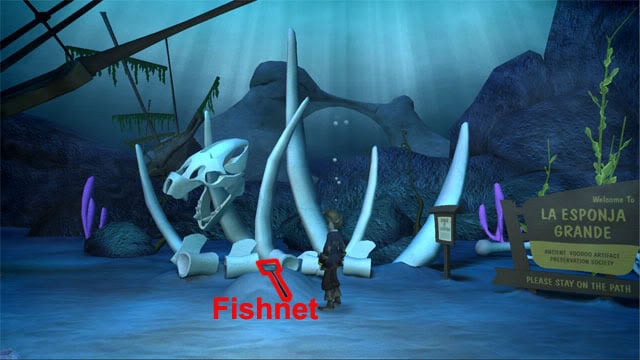
Return to the surface.
Winslow’s Raft
Go through the rift to return to the gateway.
Gateway
Talk to Galeb and say “Can you help me reverse this spell?” to receive the diet of the senses spell. Run to the right side of the area and enter the boat.
Treasure Hunt
Select the ground full of Xs to see the tiny pyrite parrots fly to the top of the sign. Use the fishnet on the tiny pyrite parrots to catch them. Combine the tiny pyrite parrots with the tip jar in the inventory to get the jar of tiny pyrite parrots. Go through the rip.
Jungle
The voodoo lady starts talking through the seagull when Guybrush arrives in the jungle. Exit the conversation and take the feather at the left side of the seagull:
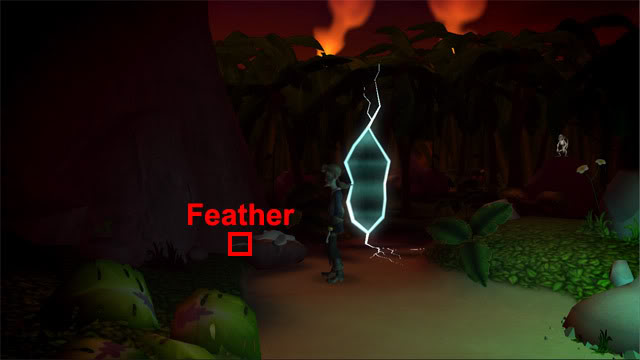
Use the hook on the chest to take LeChuck’s belt buckle. Enter the rip to return to the treasure hunt location.
Treasure Hunt
Run to the left side of the area and enter the boat.
Thieves’ Den
Use LeChuck’s buckle on the thief and then take the secret on the table:
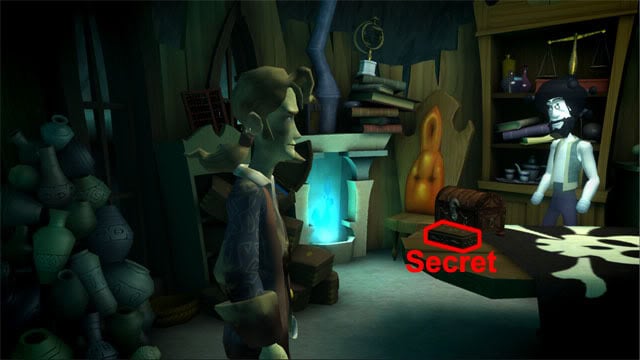
Enter the boat.
Swordfight
Run upstairs and go through the rip to enter Club 41.
Club 41
Take the blindfold at the right side of the bar:
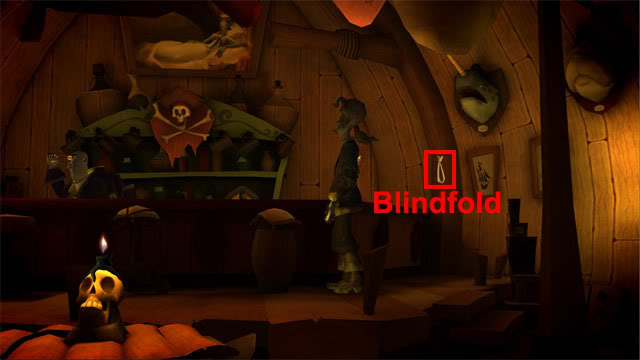
Talk to Grindstump and say “I surrender! Take me to jail!”.
Jail Cell
Select the gum stalactite at the top of the window:
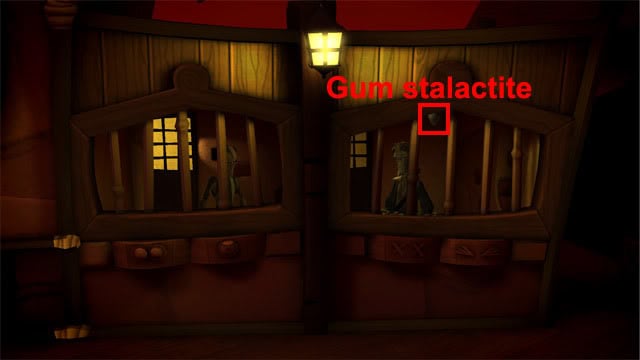
Select the gaping hole to return to Club 41.
Club 41
Select the rip to return to the swordfight area.
Swordfight
Go downstairs and enter the boat.
Crossroads Center
Examine the diet of the senses spell in the inventory:
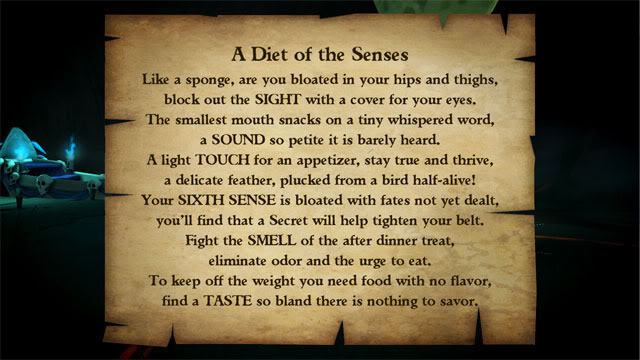
The spell mentions sight, sound, touch, sixth sense, smell and taste. Use the blindfold, jar of tiny pyrite parrots, seagull feather, secret, Old Brute deodorant and well-used gum on La Esponja Grande.
LeChuck’s Ship
After the lengthy cutscene, Guybrush lands on the crow’s nest. Use the hook on the mainsail to create a large rip in it. After Guybrush lands on the deck, talk to Elaine and say “Attack LeChuck!”. Wait for LeChuck to lower Guybrush under the ship. When Elaine attacks LeChuck, quickly select the ring of keys held by the right skeleton:
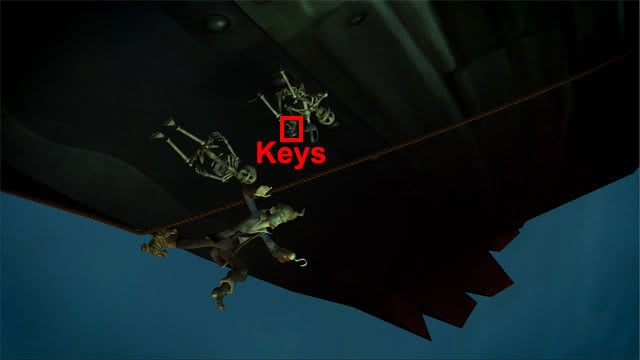
LeChuck next throws Guybrush into the cabin, which causes the door to break. Wait until LeChuck appears and launches Guybrush up to the crow’s nest again. Wait until LeChuck throws Guybrush down to the deck. Use the ring of keys on the locked gate:
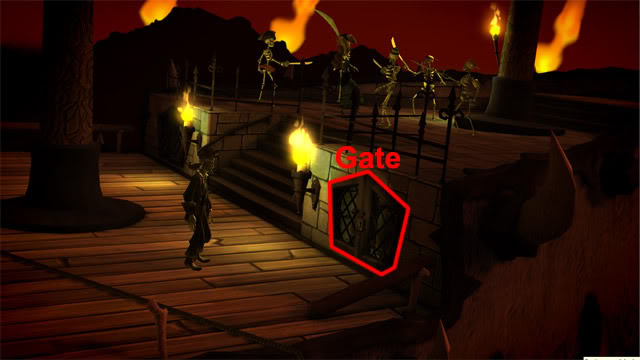
The gate opens and a barrel rolls toward the broken cabin door. Wait until LeChuck sends Guybrush under the boat again. Select the broken cabin door and then select the loose barrel:
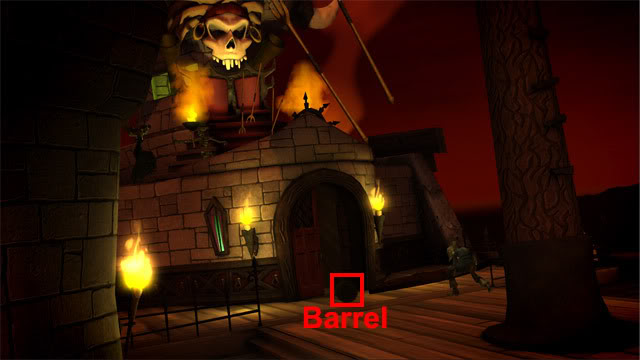
Wait until LeChuck launches Guybrush up to the crow’s nest. This time, use the hook on the rope to slide down to the tower. Wait until Guybrush returns to the deck, then talk to Elaine and say “Light the cannon again!”. Select the broken door. When LeChuck arrives, Guybrush will automatically step onto the broken door and is launched into the cannon. The cannon then shoots Guybrush back to the crossroads.
Crossroads Center
Use the shred of life on the rip and the rip will disappear. Use Elaine’s ring on the crossroads center to return to LeChuck’s ship.
LeChuck’s Ship
Select any topic when talking to Elaine to complete the episode.
“;
More articles...
Monopoly GO! Free Rolls – Links For Free Dice
By Glen Fox
Wondering how to get Monopoly GO! free rolls? Well, you’ve come to the right place. In this guide, we provide you with a bunch of tips and tricks to get some free rolls for the hit new mobile game. We’ll …Best Roblox Horror Games to Play Right Now – Updated Weekly
By Adele Wilson
Our Best Roblox Horror Games guide features the scariest and most creative experiences to play right now on the platform!The BEST Roblox Games of The Week – Games You Need To Play!
By Sho Roberts
Our feature shares our pick for the Best Roblox Games of the week! With our feature, we guarantee you'll find something new to play!All Grades in Type Soul – Each Race Explained
By Adele Wilson
Our All Grades in Type Soul guide lists every grade in the game for all races, including how to increase your grade quickly!


